How to Apply for a Canadian Visa from Nigeria: A Practical Guide
Before you even think about filling out a single form for a Canadian visa, you have to nail down the most important thing: which visa you're actually applying for. Are you planning to study, work, visit family, or move for good? Your goal dictates your path, and every application goes through the official Immigration, Refugees and Citizenship Canada (IRCC) online portal.
Finding Your Canadian Visa Path in Nigeria
The idea of moving to Canada from Nigeria can feel overwhelming, but it all boils down to one simple question: "Why am I going?" Your honest answer is the key that unlocks the right visa pathway.
Are you heading to the University of Toronto for a Master's program? Or maybe you’ve just landed that dream software developer job in Vancouver? Perhaps you just want to visit your aunt in Calgary for a few weeks to see the Stampede. Each of these plans requires a completely different type of visa.
The Canadian immigration system is incredibly precise. If you apply for a visitor visa but your true goal is to find work, you’re setting yourself up for a refusal. It’s absolutely critical to match your real intentions with the correct visa category right from the start. Getting this right saves you time, money, and the heartache of a rejected application.
Matching Your Goal to the Right Visa
For most Nigerians, the visa routes fall into a few main buckets. If education is your goal, you'll be looking at a Study Permit. If a Canadian employer has offered you a job, the Work Permit is your target. For short-term travel, like tourism or a family visit, you’ll need a Visitor Visa, which is also called a Temporary Resident Visa (TRV).
For those dreaming of making Canada their permanent home, the main routes are through programs like Express Entry or a Provincial Nominee Program (PNP). Knowing the difference between these is the foundation of any successful application. To get a bird's-eye view of the entire process, you can explore this detailed guide to relocate to Canada from Nigeria.
Let's be clear: competition is stiff. Nigeria is consistently one of the top countries for people coming to Canada, especially students. To give you some perspective, while Canada approved about 207,000 new study permits in 2024, projections for 2025 show that number dropping to around 153,000 because of new, stricter policies. This just goes to show how crucial it is to get your application right the first time. You can learn more about the Canadian study permit volume forecasts on ApplyBoard to understand the trends.
Key Takeaway: Your reason for going to Canada is everything. Don't try to find a shortcut by applying for what seems like the "easiest" visa. Apply for the correct one that truly reflects your plans. Visa officers are trained to spot inconsistencies, and honesty is always the best policy.
To help you see the options more clearly, here’s a quick breakdown of the most common pathways for Nigerians.
Choosing the Right Canadian Visa Path from Nigeria
| Visa Type | Primary Purpose | Best For Nigerians Who… |
|---|---|---|
| Study Permit | To study at a Designated Learning Institution (DLI) in Canada. | Have an admission letter from a Canadian college or university and can prove they have sufficient funds for tuition and living expenses. |
| Work Permit | To work for a specific Canadian employer for a limited time. | Have a valid job offer from a Canadian company, often requiring a Labour Market Impact Assessment (LMIA). |
| Visitor Visa (TRV) | For temporary stays like tourism, family visits, or short business trips. | Want to visit Canada for less than six months and can prove they have strong ties to Nigeria (like a job, family, or property) to ensure they will return. |
| Express Entry | To become a permanent resident based on skills and work experience. | Are skilled professionals under 40 with strong English/French skills, a high level of education, and relevant work experience. |
| Provincial Nominee Program (PNP) | To become a permanent resident by being nominated by a specific province. | Have skills and experience that are in demand in a particular Canadian province and intend to live and work there. |
Each path has its own specific requirements and processes, so choosing the right one from the beginning is the most important decision you'll make.
The image below is a screenshot of the official Government of Canada website. This is where your journey begins.
From this homepage, you can navigate to the exact immigration stream you need—whether you’re looking to visit, immigrate permanently, study, work, or even apply for citizenship down the line.
Building Your Nigerian Document Checklist

Once you've figured out your visa path, the real work begins: gathering your documents. Think of this as building the foundation of your application. If even one brick is missing or weak, the whole structure can come tumbling down. For us in Nigeria, this means going beyond a generic list and understanding the specific details visa officers are looking for.
A successful Canadian visa application from Nigeria really comes down to perfectly organised, believable, and complete paperwork. It’s not just about having the documents; it's about making sure they tell a clear and consistent story about who you are, why you want to go to Canada, and why you’ll respect the rules of your visa.
The Core Documents Everyone Needs
No matter what type of visa you’re applying for, some documents are simply non-negotiable. These are the absolute essentials, the backbone of your application package. Get these in order before you do anything else.
- International Passport: Your Nigerian passport needs to be valid for at least six months after your planned stay in Canada. Make sure it has at least two blank pages for the visa stamp.
- Passport Photographs: You'll need recent, high-quality photos that meet IRCC's very strict rules. We’re talking about a white background, a neutral expression, and specific dimensions. Don’t just pull an old photo out of a drawer; go to a professional photo studio in a place like Ikeja or Wuse that knows the Canadian specifications.
- Proof of Purpose: This is the "why" of your trip, and it changes depending on the visa. For students, it's your Letter of Acceptance (LOA) from a Designated Learning Institution (DLI). For workers, it’s the job offer letter and maybe a Labour Market Impact Assessment (LMIA). For visitors, it could be a detailed travel plan or an invitation letter from someone in Canada.
These are just the basics. The real challenge starts when you gather the supporting evidence that is unique to your situation here in Nigeria.
Proving Your Financial Capacity from Nigeria
Honestly, this is where many Nigerian applications get rejected. Just having the required amount of money in your bank account isn’t enough. You have to prove where it came from and show its history. A large chunk of money that suddenly appears in your account right before you apply is a massive red flag for any visa officer.
Your financial documents should paint a clear, transparent picture of your financial stability.
- Bank Statements: You need to provide statements for the last four to six months. They should show a consistent balance and regular activity, like your monthly salary coming in from your employer in Lagos, not a single lump sum that was just deposited.
- Sponsorship Letter: If a family member is sponsoring you, you must include a formal letter of sponsorship, their own bank statements, proof of their income (like payslips), and proof of your relationship (like a birth certificate).
- Evidence of Assets: This could be things like property deeds (your Certificate of Occupancy), car ownership documents, or proof of investments in Nigeria. These don't just show financial strength; they also help demonstrate strong ties to home.
Getting the financial part right is critical. For a deeper dive, our guide on how to present your proof of funds for a Canadian visa from Nigeria gives you detailed strategies and real-world examples.
Insider Tip: When submitting your bank statements, don't just show the closing balance. It's a good idea to highlight where your salary or business income comes in each month. Telling that story of how the funds built up over time is far more convincing than just showing a big number.
Gathering Nigerian-Specific Documents
Some documents involve dealing with Nigerian systems, and we all know that can take time. Start these processes as early as you can to avoid that last-minute panic.
Police Clearance Certificate: You'll need to get this from the Nigerian Police Force Criminal Investigation Department (CID) at Alagbon. Plan ahead for this, as it can easily take several weeks to process.
Academic Transcripts: If you're a student, requesting official transcripts from a Nigerian university can be a famously slow journey. Get in touch with your university's registry or alumni office the moment you get your admission offer.
And a quick note: if any of your documents are not in English or French, knowing how to effectively translate scanned PDF files is a must. Every single translated document has to be certified.
Finally, get organised. Scan every single document clearly and give the digital files sensible names (e.g., "Adekunle_Proof_of_Funds_Bank_Statement.pdf"). A well-organised application makes the visa officer's job easier and leaves a great first impression.
Getting to Grips with the IRCC Online Application Portal
So, you’ve got all your documents scanned, organised, and ready to go. Now for the main event: tackling the Immigration, Refugees and Citizenship Canada (IRCC) online portal. This is where your application really comes to life.
Let’s be honest, while this portal is the standard way to apply from Nigeria, it can feel a bit clunky at times. The key is to see it less as a simple online form and more like you're building a digital case file for the visa officer who will review it. Every piece of information you enter is a part of that case.
First Things First: Creating Your Secure IRCC Account
Your journey begins by setting up a secure account. This becomes your personal dashboard for this application and any others you might have down the line. You'll see two options to sign in: GCKey and Sign-In Partner. For nearly everyone applying from Nigeria, GCKey is the one you want.
- GCKey: This is simply a username and password you create directly on the Canadian government's system.
- Sign-In Partner: This option uses Canadian online banking details, so it's not relevant for most applicants in Nigeria.
A quick word of advice: when setting up your GCKey, be very deliberate with your security questions. Don't just pick something on the fly. Many applicants get locked out because they can't recall the exact answer to "What was your childhood nickname?" months later. Write these answers down and store them somewhere safe—losing access to your account is a headache you don't need.
This image gives a great overview of the key documents you'll be uploading once you're inside the portal.
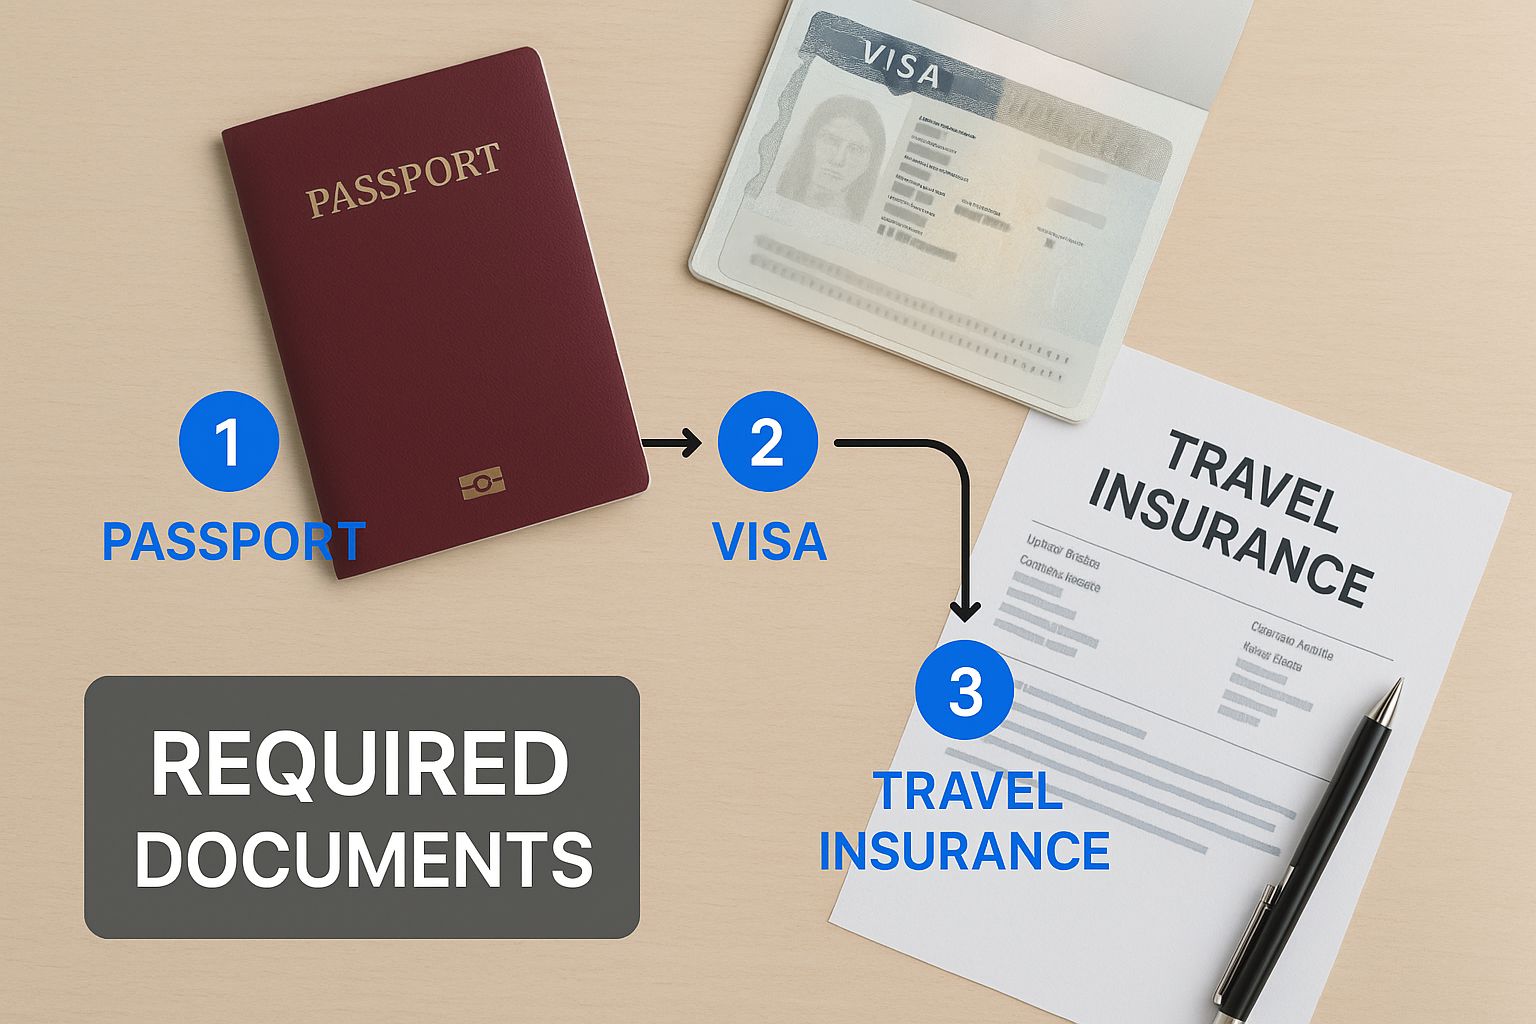
Having these files correctly named and ready to go is probably the best thing you can do to make the whole process smoother.
Filling Out the Digital Forms with Precision
Once you're logged in, the system will guide you through a questionnaire. Your answers here are critical because they generate a personalised document checklist and the specific forms you need to fill out.
This is where accuracy is everything. The system is designed to be logical, but it can't read between the lines. For instance, when it asks for your travel history, don't just put "United Kingdom." A much better answer is specific: "UK, July 2022, 2 weeks, Tourism." Vague answers just leave room for questions.
Another common stumbling block is the "Funds available for my stay" section. The number you type here must line up perfectly with the proof you provide in your financial documents. If your bank statements show ₦8 million in available funds, don't round up and enter ₦9 million on the form. A mismatch like that is a classic red flag.
Practical Tip: The IRCC portal is notorious for "timing out," especially if your internet connection in Nigeria isn't perfectly stable. I've seen it happen too many times. Get into the habit of saving your progress every 5-10 minutes. There’s nothing worse than writing a detailed explanation of your family ties, only for the page to refresh and wipe out all your hard work.
Uploading Your Documents and Hitting Submit
After you’ve filled in all the forms, you'll land on the document upload page. This is where all your prep work pays off. The portal gives you a specific slot for each document, such as "Proof of Financial Support," "Passport," and "Purpose of Travel."
To avoid frustrating upload errors, keep these technical points in mind:
- File Size: Keep each file under 4 MB. You might need to compress some PDFs, but double-check that they are still crystal clear and easy to read afterwards.
- File Format: The portal accepts a few formats (PDF, JPG, PNG, DOC/DOCX), but PDF is your safest and most professional bet for any document containing text.
- Correct Slots: This sounds obvious, but it happens. Make absolutely sure you're uploading the right document to the right place. Accidentally putting your employment letter in the "Passport" slot is an easy mistake that can get your application returned.
Once every document is uploaded and you've successfully paid the fees online, you'll be ready for the final click: "Submit." A moment later, you should receive an automated confirmation message in your IRCC account. That message is your official receipt. Save it, print it, and keep it safe—it's your proof that your application is officially in the system.
Understanding Visa Fees and Processing Times

Once you’ve wrestled with the IRCC portal, it's time to face two of the biggest hurdles in any visa application: the cost and the wait. Getting a realistic handle on how much money you'll need and how long the process might take is absolutely crucial.
Honestly, knowing these details upfront saves you from last-minute financial stress and helps you plan your life around a practical timeline. Let's break it down.
Breaking Down the Costs for Nigerian Applicants
First things first, the total cost isn't just one single fee. It’s a series of mandatory expenses that can really add up. Forgetting to budget for things like biometrics or a medical exam can throw your entire financial plan off course.
It's always smart to budget in both Canadian Dollars (CAD) and Nigerian Naira (NGN), especially since the exchange rate is always shifting. The figures below are estimates based on recent rates but can change, so make sure you double-check the official IRCC website for the latest numbers before you pay for anything.
Estimated Visa Application Costs from Nigeria (CAD & NGN)
Here’s a look at the typical fees you'll encounter during your application.
| Fee Type | Cost in CAD (Approx.) | Estimated Cost in NGN (Approx.) |
|---|---|---|
| Application Processing Fee | Varies (e.g., $100 for a visitor visa) | Varies (e.g., ~₦110,000) |
| Biometrics Fee | $85 per person / $170 for a family | ~₦93,500 / ~₦187,000 |
| Medical Examination | $100 – $150 | ~₦110,000 – ~₦165,000 |
| Police Clearance Certificate | Varies by state | Varies |
Keep in mind that you won't pay all these fees at once. The application and biometrics fees are typically paid online to IRCC when you submit your file. However, things like the medical exam are paid directly to the designated physician's clinic.
Decoding Canadian Visa Processing Times from Nigeria
"How long will it take?" I get this question all the time. The simple truth is: it depends. Processing times aren't set in stone. They fluctuate based on the visa category, the country you're applying from (in this case, Nigeria), and how swamped IRCC is at that moment.
Several factors can really influence how quickly your application moves through the system:
- Application Volume: It’s a numbers game. During peak periods, like right before the September school intake, the queue for study permits gets incredibly long, and wait times stretch out.
- Application Completeness: This one is on you. A well-organised application with every single required document is your best bet for a smooth ride. If an officer has to send you a request for missing information, you’ve just added weeks, maybe even months, to your wait time.
- IRCC Policy Updates: Immigration policies are constantly evolving, and these changes directly impact timelines. For 2025, Canada is aiming to welcome around 395,000 new permanent residents. The economic streams, which are very popular with skilled Nigerian professionals, account for nearly 59% of that target. However, on the student side, stricter criteria have caused a sharp drop in approvals in early 2025 compared to last year. You can read the full research about these economic immigration trends to see what it means for your application.
Expert Insight: Please, don't base your plans on a timeline you saw on a forum six months ago. Your best and only reliable source is the official IRCC processing time calculator. It gives you an estimate based on the most recent data for applications coming from Nigeria.
By setting a realistic budget and timeline from the very beginning, you transform a potentially chaotic waiting game into a well-managed project. It allows you to sort out your finances without nasty surprises and gives you a much clearer idea of when you might finally hear back.
What Happens After You Submit Your Application?
You’ve done it. You've gathered every last document, triple-checked the forms, and finally hit that ‘submit’ button. The initial wave of relief is quickly followed by a new feeling: the wait. This part of the journey can feel like a black box, but there’s a clear and structured process happening behind the scenes.
Your application is now in the hands of Immigration, Refugees and Citizenship Canada (IRCC), but your part isn’t quite over. They'll communicate with you through your online portal, and it’s absolutely vital you stay on top of any new messages or requests. The very first thing you should expect is the request for your biometrics.
Your Biometrics Appointment in Nigeria
Almost as soon as you submit your application and pay the fees, a Biometric Instruction Letter (BIL) will pop up in your IRCC account. This isn't optional—it's a mandatory step. You have exactly 30 days from the date on that letter to get your fingerprints and photo taken.
In Nigeria, you have to book this appointment at a specific Visa Application Centre (VAC). There are two locations:
- Lagos: Victoria Island
- Abuja: Central Business District
You can't just show up. You need to head over to the VFS Global website (they’re the official partner for the Canadian government in Nigeria) and schedule a time slot. Be warned: these appointments get snapped up incredibly fast. The minute you see that BIL, get online and book your spot. If you leave it to the last minute, you could easily miss your 30-day window.
On the day of your appointment, make sure you have your passport, the printed BIL, and your appointment confirmation letter.
Responding to IRCC Requests
Once your biometrics are in the system, your file officially enters the review queue. It's not uncommon for a visa officer to reach out for more information during this stage. Don’t panic; this is a normal part of the process and doesn’t mean something is wrong.
They might ask for things like:
- A Medical Examination: If you're applying for a long-term stay (over six months) or certain visa types, you'll be asked to see an IRCC-approved panel physician in Nigeria. You can't just visit your family doctor for this; it has to be one of their designated professionals.
- Additional Documents: An officer might need to see more recent bank statements, a letter from your employer with more specific details, or maybe just some clarification on your past travel. Whatever it is, send it over promptly and make sure it's exactly what they've asked for.
Crucial Advice: When IRCC requests more information, they give you a firm deadline. You must meet it. Failing to respond in time is one of the quickest ways to get a refusal for an incomplete application.
Tracking Your Application Status
The waiting game is never easy, but at least you’re not completely in the dark. Your main source of information will be your secure IRCC online account. This is where you’ll find any messages or see the status of your application change. It's a good idea to develop a solid understanding of visa application tracking to help you make sense of what each update actually means.
You’ll see different statuses like "background check in progress" or "eligibility review complete." While these updates give you a peek into the process, try not to read into every little change. The only update that truly matters is the final decision.
If you have a serious question that isn’t answered by the online portal, you can reach out via the IRCC web form. Use this channel wisely. Sending messages every day won’t make things go faster and might even slow things down. It’s best reserved for crucial updates, like a change in your personal situation (getting married, for instance) or if your application has gone well past the standard processing time.
After getting the good news that your Canadian visa is approved, the next big step is planning your actual move. This is a good time to start looking into professional long-distance relocation services to make the transition smoother. For now, patience and responsiveness are your best friends in this final stretch.
Got Questions? We've Got Answers for Nigerian Applicants
Even with a perfect plan, the Canadian visa process can feel like a maze. It’s totally normal to have questions buzzing around your head, especially ones specific to applying from Nigeria. Let’s clear up some of the most common uncertainties we see from Nigerian applicants.
What's the Top Reason for Canadian Visa Refusals for Nigerians?
Time and time again, we see two main culprits: weak proof of funds and not showing strong enough ties to Nigeria. It's a classic one-two punch that knocks out many applications.
Let’s talk money first. It's not just about the final balance in your account. A visa officer needs to see the story behind the money. Imagine your statement of account shows ₦15 million, but a huge chunk of that, say ₦12 million, landed just last week from a source you can't explain. That screams "borrowed funds" to an officer, and it’s a massive red flag. Your money needs a clear, legitimate history—think months of salary piling up, or documents showing you just sold a property.
Then there are "home ties." This is your proof that you have every reason to come back to Nigeria after your trip. Simply stating, "My family lives in Lagos" won't cut it. You need to show them the proof. This could be a letter from your long-term employer, your Certificate of Occupancy for a property you own, or your business registration documents. The goal is to convince the officer, beyond any doubt, that you have a life to return to and won't overstay your visa.
Should I Pay a Visa Agent in Nigeria to Handle My Application?
This is a really tricky one, and you need to tread carefully. While getting help is an option, the only people legally allowed to charge a fee for Canadian immigration advice are Regulated Canadian Immigration Consultants (RCICs) or licensed Canadian lawyers. You should always, always verify their credentials on the official College of Immigration and Citizenship Consultants (CICC) website.
Many local "agents" you'll find in Nigeria are not licensed. They might promise you the world, but using them is a huge gamble. If they submit dodgy documents or false information on your behalf—even if you have no idea they're doing it—you are the one who faces the consequences. We're talking about an instant refusal and potentially a five-year ban from applying to Canada.
A Word of Advice: You are 100% responsible for every single detail in your application. If you decide to hire someone, make sure they are a licensed professional. Honestly, it's often much safer to manage the application yourself, carefully following the official IRCC guidelines.
How Much Money Is Really Enough for a Nigerian Student's Proof of Funds?
IRCC is very clear on this, leaving no room for guesswork. You need to prove you have enough cash to cover your first year of tuition fees plus a specific amount for your living expenses. As of early 2024, that living expense figure for a single student (anywhere in Canada except Quebec) is CAD $20,635.
Let’s break it down with a real-world example. Say your first year's tuition at the University of Manitoba is CAD $18,000. Here's the calculation:
- Living Expenses: CAD $20,635
- Tuition: CAD $18,000
- Total Minimum You Must Show: CAD $38,635
A pro tip? Don't just show the bare minimum. Aim to have about 10-15% more than the required amount. It shows you have a buffer and makes your financial situation look much stronger. Also, this money needs to be liquid and accessible—not locked away in a fixed deposit you can't cash out quickly. And, as we said before, you must be able to prove where it came from.
My Application Was Refused. What Are My Options Now?
Seeing that refusal notice is heartbreaking, but it’s not always the end of your Canadian dream. The very first thing to do is read the refusal letter inside and out. It will outline the officer's official reasons for saying no.
For a deeper dive, you can file an Access to Information and Privacy (ATIP) request. This is a game-changer because it gets you the officer's personal notes on your file, revealing their exact thoughts and concerns.
Armed with this insight, you generally have two paths forward:
- Re-apply: This is what most people do. But—and this is critical—you can't just send in the same application again. You must directly fix the problems that led to the first refusal. If they said your family ties were weak, your new application needs stronger evidence, like birth certificates of your children in Nigeria or proof that you're the primary caregiver for your elderly parents.
- Seek Judicial Review: If you and an expert believe a legal mistake or a major procedural error was made, you can sometimes appeal the decision to the Federal Court of Canada. This is a serious legal step and definitely requires the help of a good immigration lawyer.
A refusal feels like a major setback, but if you take the time to understand what went wrong, you can come back with a much stronger, more convincing application.
Navigating the complexities of Canadian immigration requires accurate information and a solid plan. JapaChat is here to provide you with instant, AI-powered guidance tailored for your journey from Nigeria. Get clear answers to your visa questions and start planning your move with confidence. Sign up for free at https://japachat.com.
Leave a Reply