How to Apply for Canadian Visa from Nigeria
So, you're ready to start your journey to Canada from Nigeria. The very first thing you need to do is figure out which visa you're actually applying for. This might sound obvious, but it’s where many applications go wrong right from the start.
You’ll be applying online through the official Immigration, Refugees and Citizenship Canada (IRCC) portal. The process involves picking your visa type, gathering a specific list of documents, paying the necessary fees in Naira via your card, and then booking an appointment to give your biometrics here in Nigeria, either in Lagos or Abuja.
Getting to Grips with Your Canadian Visa Options
Before you even dream of filling out a form, take a step back. The single most important decision you'll make is choosing the right visa pathway for your trip. Picking the wrong category is a surefire way to get a rejection, so it's absolutely vital to get this right.
Canada has a visa for just about every purpose, and each one comes with its own rulebook. For Nigerians, the most popular routes are typically visitor visas, study permits, and work permits. Your reason for travelling will point you to the correct one.
Let's put this into a real-world context. Say you're a tech founder from Lagos heading to the Collision Conference in Toronto. You’d need a visitor visa, specifically under the business stream. On the other hand, if you just got your admission letter from Covenant University's partner school, the University of British Columbia, you're not a visitor—you need a study permit. The distinction is critical.
The Main Visa Categories for Nigerians
Let's break down the big three to help you find your lane. Understanding the nuances between them can save you a world of time and stress.
- Visitor Visa (Temporary Resident Visa – TRV): This is for short trips. Think tourism, visiting family in Brampton, attending a business conference, or even just passing through a Canadian airport. You can't work or study long-term on this visa.
- Study Permit: This is your ticket if you’ve been accepted to a Designated Learning Institution (DLI) in Canada. Whether it's for a diploma, a degree, or another formal course, this is the permit you need.
- Work Permit: Got a job offer from a Canadian company? This is your route. In most cases, your employer will need something called a Labour Market Impact Assessment (LMIA) to prove that a Canadian couldn't fill the position.
Choosing the right visa isn't just a formality. It’s about telling the visa officer a clear and believable story that aligns perfectly with the purpose of your chosen visa category. This is the foundation of a successful application.
Your main resource will be the official Canadian immigration website. Get familiar with it.

As you can see, the site is designed to point you in the right direction from the get-go, whether you plan to visit, immigrate, study, or work. Always start in the correct section.
Canadian Visa Types at a Glance for Nigerian Applicants
To make it even clearer, here's a quick comparison of the most common visa types people from Nigeria apply for. This should help you pinpoint which one fits your situation best.
| Visa Type | Primary Purpose | Best For (Nigerian Context) | Key Consideration |
|---|---|---|---|
| Visitor Visa (TRV) | Tourism, family visits, business meetings | Attending conferences, visiting relatives in Toronto, short business trips. | Proof of strong ties to Nigeria (job, family, property) is crucial to show you'll return. |
| Study Permit | Post-secondary education at a DLI | University/college students with an acceptance letter. | Requires proof of funds to cover tuition and living expenses for the first year. |
| Work Permit | To work for a specific Canadian employer | Professionals with a valid job offer, often in high-demand fields like tech or healthcare. | Usually requires a positive Labour Market Impact Assessment (LMIA) from the employer. |
| Super Visa | Extended visits for parents/grandparents | Parents or grandparents of Canadian citizens or permanent residents who want to stay longer. | Requires proof of medical insurance from a Canadian company and a letter of invitation. |
This table is a starting point. Always check the official IRCC website for the most detailed and up-to-date requirements for your specific situation.
So, Which Visa Has a Better Shot at Approval?
It's smart to know the numbers. Recent data from IRCC gives us a good picture of approval rates for Nigerian applicants. For instance, the approval rate for Nigerian study permit applicants has faced challenges, hovering around 20-25% in recent periods. Work permits generally have a higher success rate, but this is highly dependent on having a valid job offer and LMIA.
Meanwhile, visitor visas have varying success rates, often influenced by the strength of the applicant's ties to Nigeria. Applications clearly tied to a specific job or close family connections (like a Super Visa) tend to get a more favourable look.
For a deeper dive into moving to Canada, our comprehensive guide on how to relocate to Canada from Nigeria has you covered. Making the right choice at this stage is the bedrock of your entire application.
Your Essential Nigerian Document Checklist
Think of your visa application as building a case. Every single document you submit is a piece of evidence that tells the visa officer your story. A complete, clear, and compelling package is your strongest argument for getting that stamp of approval. Getting this part wrong is, frankly, one of the most common reasons for refusal, so let’s nail it from the get-go.
This isn't just about ticking boxes on a form. It's about providing high-quality proof that supports why you want to go and why you'll come back. Blurry photocopies, documents with conflicting information, or missing pages immediately create doubt in a visa officer's mind. Your goal is to make their job easy by presenting a professional and straightforward file.
Core Identity and Travel Documents
These are the absolute non-negotiables. They form the foundation of your application, and any slip-up here can bring the whole process to a screeching halt.
-
International Passport: This is your primary ID. First thing to check: is it valid for at least six months beyond the date you plan to leave Canada? You'll need to provide a clear scan of the bio-data page (the one with your photo) and every single page that has a visa or stamp from previous travels. If you’ve just renewed your passport, our guide on how to renew your Nigerian passport online might come in handy.
-
Passport Photographs: Canada is famously strict about this. The photos must be recent (taken within the last six months), set against a pure white background, and show a neutral facial expression. Seriously, don't use that great picture from your last birthday party. Go to a proper photo studio in Ikeja or Wuse and tell them you need it for a Canadian visa application; they'll know the exact specifications.
-
Proof of Financial Support: This is where many Nigerian applications, unfortunately, fall short. You need to prove you can comfortably fund your trip. Simply having a lump sum of money appear in your account right before applying looks suspicious. Visa officers want to see a stable financial history. You should provide at least six months of your Nigerian bank statements showing a consistent flow of income (like your salary) and savings. If someone else is sponsoring your trip, you'll need their bank statements, a formal letter of sponsorship, and proof of your relationship to them (e.g., a birth certificate).
Proving Your Ties to Nigeria
The visa officer’s main concern is: will you return to Nigeria after your visit? This is perhaps the most crucial part of a visitor visa application. Your task is to paint a vivid picture of your life, commitments, and responsibilities back home.
A classic mistake is focusing entirely on the exciting trip to Canada while forgetting to prove the solid reasons you have for coming back. Your ties to Nigeria are just as important as your reasons for visiting Canada.
To build a strong case, you'll need a combination of the following:
- Employment Letter: Get a letter from your employer in Nigeria, printed on official company letterhead. It must state your position, salary, start date, and—most importantly—confirm that your job will be waiting for you when you return.
- Property Documents: If you own land or a house in Nigeria, this is powerful proof. Include the Certificate of Occupancy (C of O) or Deed of Assignment. While not cash in the bank, these documents show significant assets and deep roots in the country.
- Family Ties: Show your connections. Provide birth certificates for your spouse and any children who are staying behind in Nigeria. If you're married, your marriage certificate is essential.
- Business Documents: For business owners, this is your equivalent of an employment letter. Include your CAC registration documents, recent tax clearance certificates, and your business bank statements.
The Letter of Explanation
This is your one chance to speak directly to the visa officer. Use this letter to connect all the dots and clarify anything that might seem confusing in your documents. For example, if you recently received a large sum of money as a gift from a relative, this is where you explain its source and attach a gift deed.
Keep your letter concise, professional, and completely honest. Clearly state the purpose of your trip, outline your itinerary, and briefly summarise how your documents demonstrate your financial capacity and your undeniable ties to Nigeria. A well-written, persuasive letter can truly be the deciding factor in a borderline case.
Tackling the IRCC Online Application Portal
Alright, with your documents sorted and ready to go, it’s time to face the main event: the online application. Everything happens on the Immigration, Refugees and Citizenship Canada (IRCC) portal, from filling out your forms to uploading all the proof you’ve gathered. It can look a bit overwhelming at first, I get it, but it's actually quite logical once you get the hang of it.
The good news is that the whole process is online. This is a huge plus because you avoid the snail's pace and nail-biting uncertainty that comes with sending paper applications all the way from Nigeria. The very first thing you'll need to do is create a secure IRCC account. Think of this as your personal command centre for this application and any others you might submit down the road.
Getting Your Secure IRCC Account Set Up
Treat your IRCC account like you would your online banking login—keep those details under lock and key. You’ll see two options for signing in: GCKey or a Sign-In Partner. For most applicants in Nigeria, the GCKey is the way to go.
- GCKey: This is simply a unique username and password that you create yourself. During setup, you'll be prompted to create several security questions. Don't rush this part. Choose questions and answers you'll definitely remember, as you'll need them every single time you log in. My advice? Write them down and keep them somewhere safe.
Once your account is active, the portal will walk you through a quick eligibility questionnaire. This tool is designed to figure out exactly which visa you need by asking about your nationality, age, why you want to visit, and your financial situation. It then generates a personalised document checklist just for you. Be completely honest and accurate here; your answers dictate the specific forms you'll need to complete.
Filling Out the Application Forms Correctly
After the questionnaire, you'll be directed to the online forms. This is the heart of your application. This is where you put down all your personal details, and you need to be meticulous. Take your time and double-check every single entry. A simple typo in your name or passport number can cause major headaches later.
From my experience, a few sections tend to trip up Nigerian applicants more than others:
- Address History: You need to be precise. If you lived at No. 5 Adeola Odeku Street, Victoria Island, Lagos, write it out in full. Don't use abbreviations and make sure there are no gaps in the timeline for the required period (which is usually the last 10 years).
- Family Information (IMM 5645): This is a big one. You must declare all your immediate family members—that means your spouse, parents, siblings, and children—whether they are travelling with you or not. Trying to hide this information is a massive red flag for any visa officer.
A great feature of the online portal is that it saves your progress automatically. You don't have to get it all done in one go. It’s far better to take a break and come back with fresh eyes than to rush through and make a silly mistake. Trust me, small errors on these forms can lead to very big delays.
The Smart Way to Upload Your Documents
This is where all your hard work organising your documents really pays off. The portal gives you a specific upload slot for each document on your checklist. Please, don't just upload files named "scan_001.pdf" or "document2.jpg." It just makes the visa officer's job harder, which is never a good thing.
Instead, get into the habit of using a clear and consistent naming convention. Something like this:
Adekunle_Passport.pdfAdekunle_BankStatement_GTB.pdfAdekunle_EmploymentLetter.pdf
This simple step shows you’re organised and makes your application much easier for them to process. Also, keep an eye on the file size limits. It's usually 4 MB per file. You might need to compress some of your PDFs, but always check that they are still perfectly clear and easy to read. A blurry document is just as bad as a missing one.
This infographic gives you a quick visual summary of the steps you'll follow inside the portal.
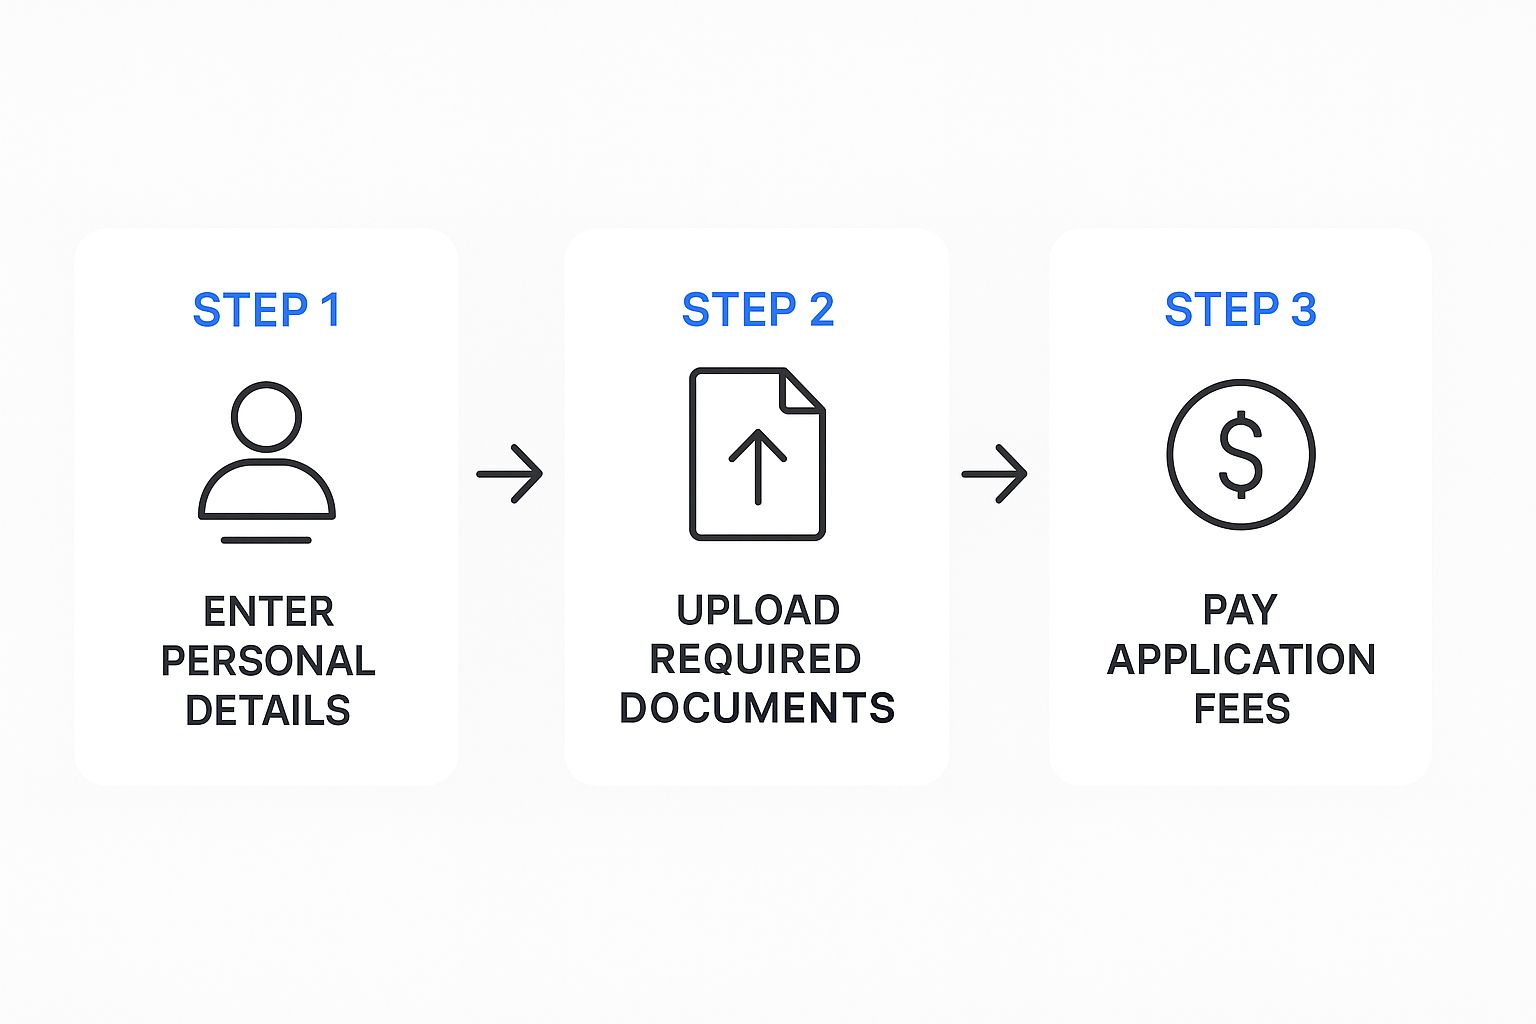
As you can see, the flow is straightforward: you enter your personal data, upload your supporting proof, and then make the payment. After you’ve carefully filled everything in and uploaded your neatly named files, the last hurdle is paying the application and biometrics fees. You can do this directly on the portal using a valid credit or debit card.
Mastering Proof of Funds and Biometrics
For so many Nigerians dreaming of Canada, two hurdles cause the most sleepless nights: proving you have enough money and getting your biometrics done. Let's be real, these are the stages where even a strong application can fall apart. But if you know what the visa officers are looking for, you can handle them with confidence.

This isn’t just about having a specific amount of cash in your Zenith or GTB account on the day you click "submit." It’s about presenting a clear, believable story of your financial stability. Likewise, biometrics is a simple but non-negotiable step you have to get right the first time.
The Real Story Behind Proof of Funds
When an IRCC officer in Ottawa opens your bank statement, they're not just glancing at the closing balance. They're reading it like a detective, looking for clues. What they need to see is a history of stable, legitimate funds—not a sudden cash injection that appeared out of thin air a week before you applied.
Picture this: you have ₦10 million in your account. Fantastic. But if ₦8 million of that just landed from an uncle last Tuesday, that's a huge red flag. This is called "funds parking," and visa officers are trained to spot it instantly. They will likely question the legitimacy of the funds and refuse the application.
The consistency of your financial history is far more persuasive than the size of a last-minute deposit. A steady salary coming in every month and regular savings are more convincing than a large, unexplained lump sum.
If you do get a large gift from a family member, you have to document it meticulously. Let's say your mother gifts you ₦5 million for your school fees. You'll need to provide a paper trail:
- A formal Gift Deed, properly signed by both of you.
- Your mother’s bank statement showing the money leaving her account.
- A short, clear letter from her explaining the gift and confirming your relationship.
This kind of transparency turns what could be a deal-breaker into a well-supported part of your financial narrative. For a deeper dive into building this financial picture, our detailed guide on Proof of Funds for Canada is a must-read.
To give you a clearer picture, here’s a practical breakdown of how a Nigerian student might present their funds for a one-year programme in Ontario.
Sample Breakdown of Financial Requirements for a Nigerian Student
| Expense Category | Estimated Cost (CAD) | Equivalent in Naira (Approx.) | Recommended Documentation |
|---|---|---|---|
| First-Year Tuition | $18,000 | ₦23,400,000 | Letter of Acceptance, Tuition Receipt (if paid) |
| Living Expenses (GIC) | $20,635 | ₦26,825,500 | GIC Certificate from a participating Canadian bank |
| Flight & Travel Costs | $1,500 | ₦1,950,000 | Six-month personal bank statement |
| Miscellaneous/Buffer | $2,000 | ₦2,600,000 | Six-month personal bank statement |
| Total Funds to Show | $42,135 | ₦54,775,500 | Combination of all documents listed above |
This table shows how different pieces of evidence come together to meet the total requirement. It’s not about having all the money in one place, but proving you have access to it through legitimate sources.
Using Property and Other Assets
While cash in the bank is king, don't underestimate the power of your other assets in Nigeria. Do you own a plot of land in Lekki or a flat in Abuja? These are powerful signals of your financial stability and, just as importantly, your strong ties to home.
You can't pay for your flight with a Certificate of Occupancy (C of O), so property documents can't replace the required cash funds. However, you should absolutely include them as supplementary proof. Get a professional valuation report done to show the current market value in Naira. This proves to the visa officer that you have substantial assets and roots in Nigeria that you wouldn't just abandon.
A great tip for organising your financial documents is to convert bank statement to Excel; it helps you track and explain large transactions much more clearly.
Handling Your Biometrics Appointment
After you've submitted your application and paid your fees online, you'll get a Biometric Instruction Letter (BIL) in your IRCC account. This is your cue for the next critical step, and you can't afford to delay. You have exactly 30 days from the date on the BIL to give your fingerprints and photograph at a Visa Application Centre (VAC).
In Nigeria, the VACs are in Lagos (Victoria Island) and Abuja (Maitama). You must book an appointment online beforehand—you can’t just show up.
Here’s a quick rundown of what to do:
- Book Your Slot: As soon as that BIL arrives, head to the official VFS Global website for Nigeria. Appointment slots, especially in busy seasons, get snatched up fast.
- Get Your Documents Ready: On the day of your appointment, you’ll need three things: your international passport, the appointment confirmation letter, and the Biometric Instruction Letter itself.
- Arrive on Time: Plan to be at the VAC about 15-20 minutes early. Security is strict, and they usually won’t let you in with large bags or most electronics.
- The Process: The actual biometrics capture is surprisingly quick. An official will verify your documents, and then you'll be called in to have a digital photo taken and your fingerprints scanned. The whole thing often takes less than 15 minutes.
You typically pay the biometrics fee when you pay for your visa application. As of early 2024, it's CAD $85 per person, which you'll pay in Naira at the current exchange rate. Once this is done, your part is over. Now, the waiting begins.
So, You've Hit Submit. What Happens Now?
You’ve done it. You’ve scanned, uploaded, double-checked every single detail, and finally clicked that submit button on the IRCC portal. The feeling is a unique mix of relief and pure anxiety that almost every Nigerian applicant experiences. This waiting game can feel like the toughest part of the whole process, but knowing what’s going on behind the scenes helps a lot.
Once your application is officially in the system, it joins a queue, waiting for an IRCC officer to pick it up. Your only job now is to practice patience and keep a close eye on your IRCC secure account. That’s your one and only source for official communication.
How to Track Your Application (and Keep Your Sanity)
Forget refreshing your email every two minutes. The only place you need to be looking is your IRCC portal. The status updates can be a bit cryptic, so it helps to understand the lingo.
Here’s a quick rundown of what you’ll likely see:
- Submitted: This is just confirmation that they’ve received your application. It’s the starting line.
- Biometrics Completed: This pops up after you’ve been to the VAC in Lagos or Abuja and they've successfully linked your fingerprints to your file.
- In Progress: Get comfortable, because this is usually the longest phase. It simply means an officer is looking at your file. Don't start worrying if it stays like this for weeks or even months—that's completely normal.
- Correspondence/Update: Pay close attention to this one. It means IRCC has sent you a message or needs more information. Log in and check your messages immediately.
Remember, processing times for applications from Nigeria can be all over the place. They depend on the type of visa and how busy IRCC is at that moment. You can check the official IRCC processing times tool, but treat those dates as a rough guide, not a guarantee.
"We Need More Information" – Don't Panic!
Every now and then, an IRCC officer needs a bit more clarity. You might get a request for an extra document, like a more recent bank statement or a letter of employment on a proper letterhead. If this happens to you, don't take it as a bad sign. In fact, it's a good thing! It means a human is actively reviewing your application and giving you a chance to make it stronger.
Your response should be fast and precise. If they ask for six months of bank statements, give them exactly that—no more, no less. Adding extra documents you think might help can actually complicate the review and slow things down. Upload exactly what they've asked for, well before the deadline.
A request for additional information isn't a red flag; it's an opportunity. A quick, accurate response shows the visa officer you're organised, cooperative, and serious about your application.
The Final Decision: Approval or Refusal
At the end of this long wait, it all comes down to one of two outcomes. It’s best to be mentally prepared for either possibility.
Approval and the Golden "PPR" Email
This is the moment you've been dreaming of! The best possible update is the "Passport Request" (PPR) letter appearing in your IRCC account. This is the official confirmation that your application has been approved. Now, they just need your physical passport to put the visa inside.
The PPR letter will contain very specific instructions on how to get your passport to the VAC. Follow them perfectly. Once you submit it, you can expect to get it back—with that beautiful Canadian visa inside—within a couple of weeks.
Dealing with a Refusal
Getting a refusal is gut-wrenching, but it doesn't have to be the end of your Canadian dream. The very first thing you must do is read the refusal letter carefully. It will state the specific reasons why the visa officer wasn't convinced. For Nigerian applicants, common reasons often circle back to insufficient proof of funds, an unclear purpose of visit, or not enough proof of ties to Nigeria.
Whatever you do, don't just reapply with the exact same documents. You need to tackle the reasons for refusal head-on with new, stronger evidence. The Canadian immigration system is competitive. For a bit of perspective, while the 2024-2026 immigration plan is ambitious, you can learn more about the IRCC's departmental plan. This just goes to show how critical it is to submit the strongest, most convincing application possible the first time.
Your Top Questions Answered by the Experts
After helping thousands of Nigerians navigate their Canadian visa applications, we've seen it all. Certain questions and worries come up again and again. So, let's cut through the noise and get straight to the answers you need for some of the most common concerns we hear from applicants just like you.
Can I Use My Property in Nigeria as Proof of Funds?
This is a fantastic and very common question. The short answer is no, not directly. You can't just submit the Certificate of Occupancy (C of O) for your plot in Ibeju-Lekki and expect it to count as your primary proof of funds. The visa officer needs to see liquid cash—money you can access immediately to cover your trip. A property deed isn't cash.
However, and this is crucial, those property documents are absolute gold as secondary evidence. They are one of the most powerful tools you have to demonstrate your financial stability and, more importantly, your strong ties to Nigeria. Including them paints a clear picture: you're a person with significant assets and a life you fully intend to return to.
To make this work for you, don't just scan the C of O. Go a step further and get a professional valuation report from a registered estate surveyor. This document puts a concrete market value in Naira on your property, giving the visa officer a real number to work with. It's the perfect complement to your bank statements, showing you have both available cash and long-term wealth.
How Many Months of Bank Statements Should I Really Provide?
While the official guideline often mentions a minimum of four months, our experience with Nigerian applicants shows that six months is the benchmark you should aim for. Why? Because the visa officer is doing more than just glancing at your final balance; they are reading the story your financial history tells.
One of the biggest red flags we see is a sudden, massive deposit right before an application. Imagine ₦7 million landing in your account out of the blue. The immediate assumption is that the money was borrowed simply to meet the requirement. It looks suspicious.
A consistent, healthy account history over several months is far more convincing than a large, last-minute lump sum. It proves genuine financial stability, which is precisely what they need to see.
It's much better to show the steady flow of your salary from your job in Abuja, regular savings, and normal transaction patterns. If you do have a legitimate large deposit – maybe you sold a car or received a dividend payout – you absolutely must explain it. Provide the supporting paperwork, like the car's sales agreement or the dividend certificate, and clearly explain the source of the funds in your letter of explanation. Transparency is key.
What's the Best Way to Prove My Ties to Nigeria?
This is the heart of your application. Proving your deep-rooted, unbreakable ties to Nigeria is how you convince the visa officer that you are a genuine visitor with every reason to go back home. You need to build a compelling case that rests on three essential pillars.
-
Your Family: This is about your most immediate and important relationships. You'll want to include the birth certificates of your children and spouse (if they are staying behind) and, of course, your marriage certificate. These documents are non-negotiable proof of your responsibilities at home.
-
Your Career: A stable job is one of the strongest anchors you can have. Get a detailed letter from your employer, printed on official company letterhead. This letter must confirm your role, salary, and start date, but most importantly, it needs to explicitly state that your job is secure and will be waiting for you when you return from your trip.
-
Your Assets: This is where you showcase everything that financially and materially ties you to Nigeria. Include your property documents (with those valuation reports we talked about!), your business registration certificates from the CAC if you're an entrepreneur, and even statements for any local investments you hold. The goal is to paint an undeniable picture of a life you would never abandon.
My Application Was Refused. Should I Reapply Right Away?
I know how disheartening a refusal can be. But the answer to this is a firm and absolute no. Rushing to reapply with the exact same information is the fastest way to get a second rejection. The very first thing you need to do is pause and carefully analyse what went wrong.
Read the refusal letter from IRCC word for word. It will detail the specific reasons they weren't convinced. For Nigerian applicants, the most common reasons are often insufficient proof of funds, an unclear purpose for the visit, or—the most frequent culprit—weak ties to home.
Before you even dream of hitting that 'submit' button again, your mission is to find new, much stronger evidence that directly tackles the issues they raised. If your finances were the problem, you need to build a better account history or find a more credible sponsor. If your ties to Nigeria were questioned, you must dig deeper to provide more compelling proof. A rushed reapplication is a wasted application fee. Take your time, build a stronger, undeniable case, and then you can reapply with confidence.
Navigating the Canadian immigration system can feel overwhelming, but you don't have to do it alone. For instant, clear answers tailored to your specific situation, check out JapaChat. Our AI-powered platform is designed to help Nigerians plan their journey with confidence. Get started for free at https://japachat.com.
Leave a Reply