Author: JapaChat
-

New Brunswick Critical Worker Pilot Program: A Guide for Nigerians
If you're a skilled worker in Nigeria feeling lost in the vast and competitive Express Entry pool, there’s a more direct pathway you should know about. The New Brunswick Critical Worker Pilot Program is an employer-driven stream that connects you with a genuine job offer and a clear path to permanent residency.
Forget thinking of it as another visa lottery. This is more like a targeted recruitment drive by some of New Brunswick’s biggest companies, and it's looking for people with your exact skills.
What Is the New Brunswick Critical Worker Pilot Program?

Let's say you're an experienced machine operator in Lagos or a food production supervisor in Ibadan. You've got solid, hands-on skills, but you're finding it tough to compete in broader immigration programmes like Express Entry, which often seem to favour candidates with advanced degrees or high-level management experience.
The New Brunswick Critical Worker Pilot Program (NBCWP) was designed with exactly you in mind.
This programme doesn't rely on points or random draws from a giant pool of candidates. Instead, it's a straightforward, employer-led initiative. What that means is the entire process kicks off with a real job offer from a company in New Brunswick that genuinely needs someone with your expertise. It’s a five-year pilot created to fill urgent labour shortages with skilled international talent.
A Partnership Between Employers and Immigrants
At its heart, this programme is a collaboration between you and one of six specific, pre-approved companies. These aren't just any businesses; they are major players in their respective industries with a solid history of hiring and integrating newcomers successfully.
They were handpicked because they offer more than just a pay cheque. They provide a complete support system to help you and your family get settled and truly build a life in New Brunswick.
The pilot was officially launched on November 7, 2022, and for now, it's focused on just six key employers who have demonstrated their commitment to supporting foreign workers.
The 6 Designated NBCWP Employers
This table lists the only six companies participating in the pilot, helping you quickly see if your skills align with their industries.
Company Name Primary Industry Cooke Aquaculture Aquaculture and Seafood Processing Groupe Savoie Forestry and Hardwood Manufacturing Groupe Westco Poultry Farming and Processing Imperial Manufacturing Group HVAC and Building Material Manufacturing J.D. Irving, Limited Diversified (Forestry, Shipbuilding, Transport) McCain Foods, Ltd. Food Processing (Frozen Foods) These employers were chosen specifically for their ability to provide not just jobs, but also comprehensive settlement support, from housing to language training.
Why This Programme Is Different
Unlike many immigration pathways that can feel confusing and uncertain, the NBCWP offers a clear, structured route. Once one of these six employers hires you, you’re basically on a fast track.
The programme is designed to solve real-world problems for New Brunswick's economy by targeting the critical roles that keep its most important industries moving forward.
This employer-driven model significantly boosts your chances of success. Your application isn't just another number in a queue; it's directly tied to a specific, in-demand job, which gives it immediate priority.
For hands-on workers ready to bring their skills to Canada, this pilot is a game-changer. By connecting you directly with major employers, it helps you sidestep much of the competition and uncertainty of other streams, making your dream of a Canadian permanent residency application feel much more within reach.
So, Do You Qualify? Let's Break Down the Eligibility Requirements
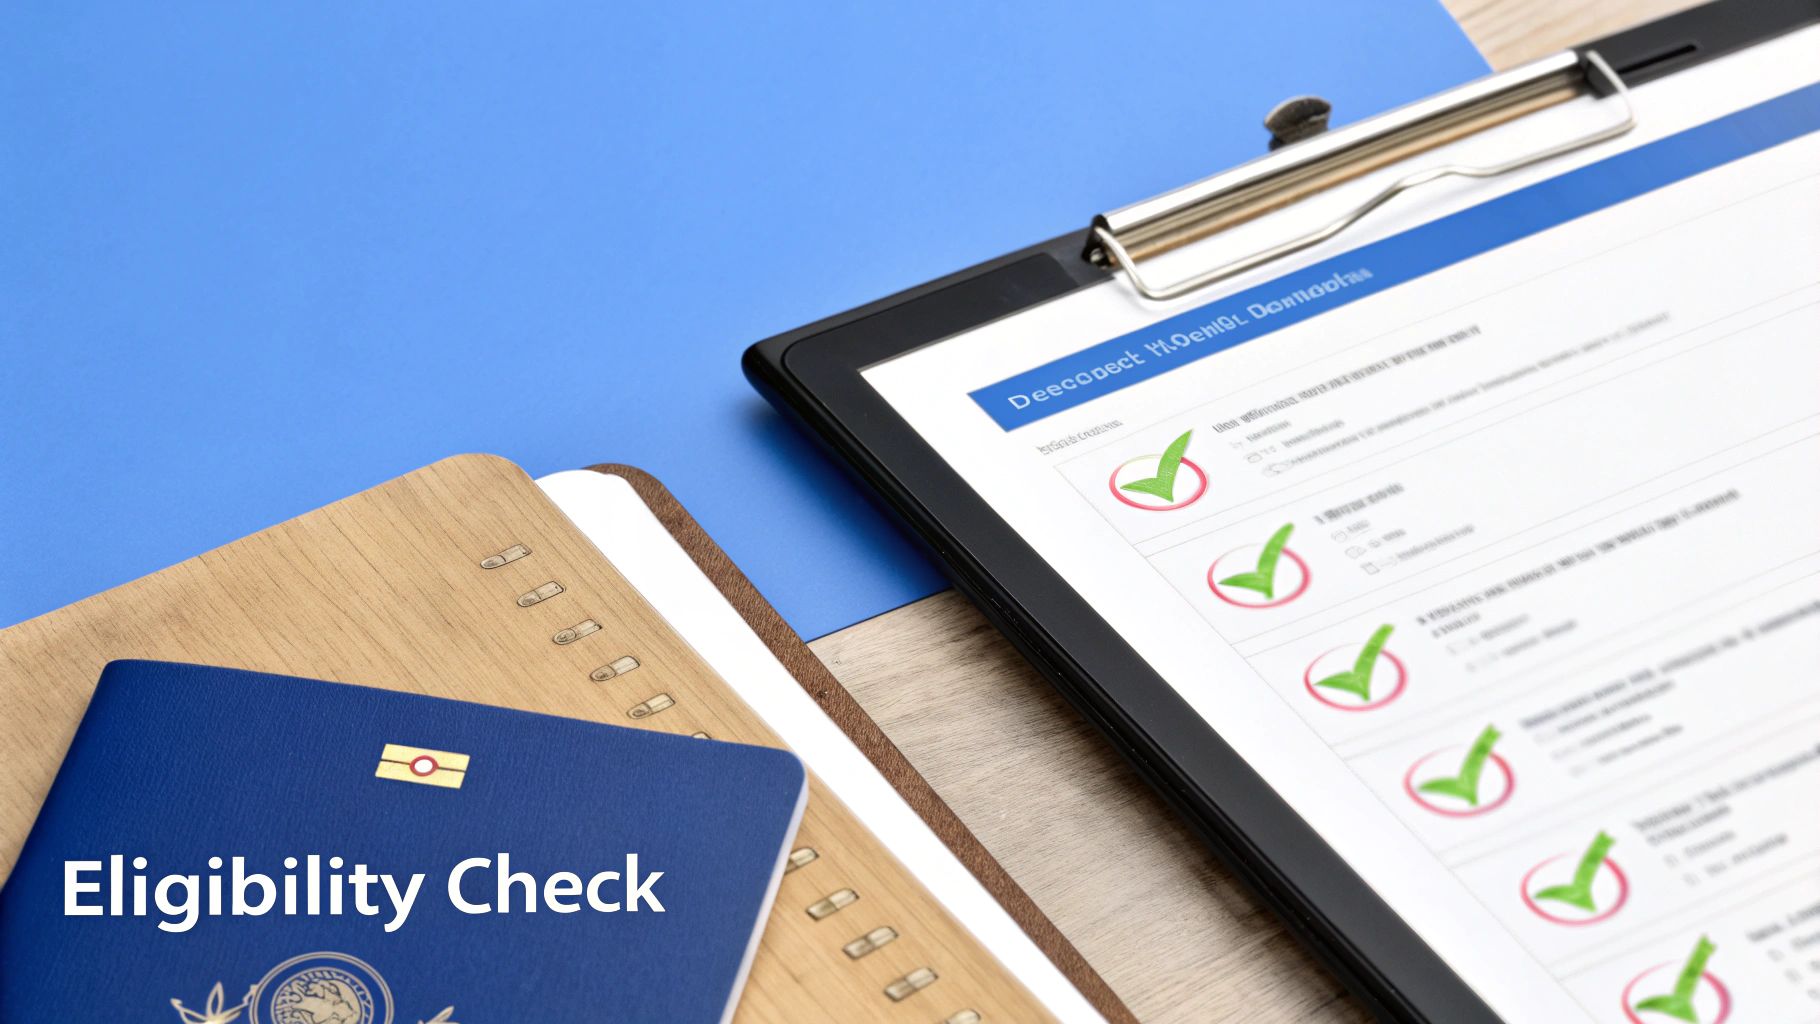
Before you start imagining your new life in New Brunswick, you need to be brutally honest about whether you fit the bill. This isn't your typical immigration pathway; the New Brunswick Critical Worker Pilot Program has a very specific type of person in mind. Think of these requirements less as hurdles and more as a checklist to see if this unique opportunity is truly for you.
The absolute first step—your golden ticket, really—is securing a full-time, permanent job offer from one of the six participating employers we mentioned earlier. Without that specific job offer, your application can't even get off the ground.
Once you have that, let's look at the other boxes you need to tick. I'll break it down with some practical advice specifically for my fellow Nigerians.
Age and Your Commitment to New Brunswick
First up, the easy part: you must be between 19 and 55 years old. Your age is counted at the moment you submit your official application, not when you first show interest.
But it's not just about your age. You also have to genuinely prove you intend to settle in New Brunswick. This isn't a backdoor to get into Canada and then move to a bigger city like Toronto. You’ll need to demonstrate real plans to put down roots and build a life in the province.
Your Education: Getting It Recognised
You'll need at least a Canadian high school diploma or its foreign equivalent. For most Nigerians, this means your WAEC or NECO certificate will do the trick, but there’s a vital step you can’t skip.
You must get your certificate evaluated by a designated body like World Education Services (WES). This process is called an Educational Credential Assessment (ECA), and it officially verifies that your Nigerian qualification is on par with a Canadian one. Make sure your ECA report is less than five years old when you apply.
An ECA is non-negotiable. One of the smartest things you can do is start your WES evaluation early, as it can take a few months. Think of it as laying the proper foundation for your entire application.
Proving Your Language Skills
You'll need to show you can communicate in either English or French by taking an approved language test. For English, that's usually the IELTS General Training or CELPIP.
The bar here is set at a Canadian Language Benchmark (CLB) level 4 across all four abilities: reading, writing, listening, and speaking. A CLB 4 is pretty basic; it just shows you can handle simple, everyday conversations and follow instructions at work. Your test results must be fresh—less than two years old.
Work Experience: The Most Important Piece of the Puzzle
This is where the programme really narrows its focus. You must have at least 1,560 hours of work experience within the last five years. That’s the equivalent of one year working full-time (about 30 hours per week).
The real kicker is the type of work. Unlike many Provincial Nominee Programs (PNPs) that hunt for highly skilled professionals, the New Brunswick Critical Worker Pilot is specifically designed for low and semi-skilled workers. We're talking about roles classified under TEER 4 and 5 of the National Occupational Classification (NOC). This is because New Brunswick has major labour shortages in sectors like food production, forestry, and manufacturing.
So, what does that mean for you?
- Who this is for: People who are machine operators, food processing labourers, fish plant workers, or general farm workers.
- Who this is NOT for: IT managers, accountants, doctors, or engineers. This pilot is all about hands-on, operational roles.
Every bit of your work experience has to be verifiable. It’s a good idea to understand how employment history is verified because they will check. Make sure your reference letters and employment records are crystal clear and accurate—this will be key.
Your Document Checklist for the NBCWP Application
Let's be honest, gathering documents is the part of any Canadian immigration process that can feel overwhelming. For the New Brunswick Critical Worker Pilot, getting organised from the very beginning isn't just a good idea—it's essential.
Think of it like preparing for a major exam. You wouldn't just show up on the day and hope for the best. You'd gather your notes, study, and have everything ready. This checklist is designed to be your study guide, specifically for Nigerian applicants, highlighting common hurdles like getting university transcripts or properly documenting your finances.
Let's walk through exactly what you need to pull together for a solid, refusal-proof application.
Foundational Identity Documents
This first batch of documents is all about proving who you are. These are the absolute basics, the foundation of your entire application. Make sure every copy is crystal clear and every document is valid.
- International Passport: Your passport is your key. It must be valid, with at least a year left before expiry and several blank pages. You'll need to scan the bio-data page for yourself and every family member coming with you.
- Birth Certificate: The official certificate issued by the National Population Commission is what you need. If your birth predates the commission, a sworn affidavit declaring your age, obtained from a high court, is the standard alternative.
- Marriage Certificate: If you're married and your spouse is part of your application, this is a must-have.
- Passport Photographs: Don't just snap a quick picture on your phone. You need recent, professional digital photos that meet the strict Canadian immigration specs – white background, neutral look, and the right size.
Proving Your Education and Language Skills
This is where you show you meet the program's standards for education and communication. This section is a common source of delays for many Nigerian applicants, so give it your full attention right from the start.
First up, you absolutely must get an Educational Credential Assessment (ECA). For most of us in Nigeria, this involves sending our WAEC results or university degree certificates to a designated body like World Education Services (WES) to have them assessed against Canadian standards. This process can drag on for months, especially when you're chasing transcripts from Nigerian universities. My advice? Start this process immediately.
Your language test is non-negotiable proof that you can communicate effectively. You'll need to submit a valid IELTS General Training or CELPIP result that shows you've hit at least the Canadian Language Benchmark (CLB) 4. Critically, the test must have been taken within the last two years when you submit your application.
Showing Your Work History and Financial Readiness
Here's where you prove you have the hands-on experience and the money to get started in New Brunswick. Canadian immigration officers are incredibly meticulous here, especially when it comes to your settlement funds.
For your work experience, you'll need to gather:
- Reference Letters: These aren't just simple notes. They must be on official company letterhead and clearly state your job duties, salary, and the exact dates you worked there.
- Payslips: Pull together at least your last six months of payslips as proof of consistent employment.
- Employment Contract: Your current work contract is another powerful piece of evidence to include.
When it comes to your finances, you have to prove you have enough settlement funds to support your family when you land. This money must be yours, easily accessible, and not borrowed. We've put together a comprehensive guide on this, and I highly recommend you read it: proof of funds for a Canadian visa.
Documenting funds from common Nigerian sources, like selling a property or receiving a cash gift from a relative, requires extra care. You may need to provide a sworn affidavit to explain the source of these funds or clarify other personal details. If you're not sure what that involves, understanding affidavit requirements is a great starting point to make sure your financial documents are accepted without question.
NBCWP Document Checklist
To make this even easier, I've organised everything into a simple table. Use this to track what you have and what you still need to get.
Document Category Specific Item Helpful Tip for Nigerian Applicants Identity & Personal Valid International Passport Ensure at least one year of validity. Scan the bio-data page clearly. Birth Certificate Use the one from the National Population Commission or get a court affidavit for age. Marriage Certificate Required if your spouse is included in the application. Passport Photographs Get professional digital photos; selfies or old pictures will be rejected. Education & Language Educational Credential Assessment (ECA) Start the WES (or other) process immediately; transcript delays are very common. Language Test Results (IELTS/CELPIP) Must be less than two years old and show a minimum of CLB 4. Work Experience Employment Reference Letters Must be on official letterhead with detailed job duties, dates, and salary. Payslips Provide at least the six most recent ones. Employment Contract Your current, signed contract is strong supporting evidence. Financial Proof of Funds Statements Bank statements showing accessible funds. Read the detailed guide linked above. Affidavit of Fact (if needed) Crucial for explaining large gifts, property sales, or other complex fund sources. Having all these documents in hand before you even think about hitting 'submit' will make your journey smoother and significantly boost your chances of success.
Your Step-by-Step Application Guide
Think of applying for the New Brunswick Critical Worker Pilot Program like planning a road trip from Lagos to Abuja. You wouldn't just jump in the car and hope for the best. You'd map your route, figure out your stops, and make sure you have everything you need for the journey. This section is your personal roadmap, breaking down each stage so you know exactly what to expect.
Unlike the massive Express Entry pool where you just create a profile and wait, this pilot has a very specific, non-negotiable starting point.
Step 1: Getting a Genuine Job Offer
This is the make-or-break step. Everything hinges on it. You absolutely cannot apply for this program unless you have a full-time, permanent job offer from one of the six participating companies.
So, forget browsing general job sites like Indeed or LinkedIn for this. Your search needs to be laser-focused.
Head directly to the careers pages for Cooke Aquaculture, J.D. Irving, Groupe Savoie, Groupe Westco, Imperial Manufacturing Group, and McCain Foods. Make sure your CV is tailored to Canadian standards and write a compelling cover letter that shows you've done your homework on their company and the specific role you want.
The key here is to think like you're applying for a job, not for immigration. Your first mission is to convince one of these companies that you're the best person for the role based on your skills. The immigration part only kicks in after they’ve decided to hire you.
Step 2: The Provincial Nomination Process
Once you’ve landed that golden job offer, the formal immigration journey begins. This stage is handled directly by the province of New Brunswick and has two key parts.
- Submit an Expression of Interest (EOI): Your new employer will point you towards the Immigration New Brunswick (INB) online portal. You'll create a profile and fill in your details—age, education, language skills, and work history. While your profile goes into a pool with others, having a job offer from a designated employer means your selection is virtually a sure thing.
- Get an Invitation to Apply (ITA): Soon after submitting your EOI, you'll receive an official Invitation to Apply from the province. This is your green light to submit a full application for provincial nomination. You’ll have a tight deadline of 45 days to get all your documents in, so preparation is everything.
This image neatly summarises the main document categories you'll need to have ready.
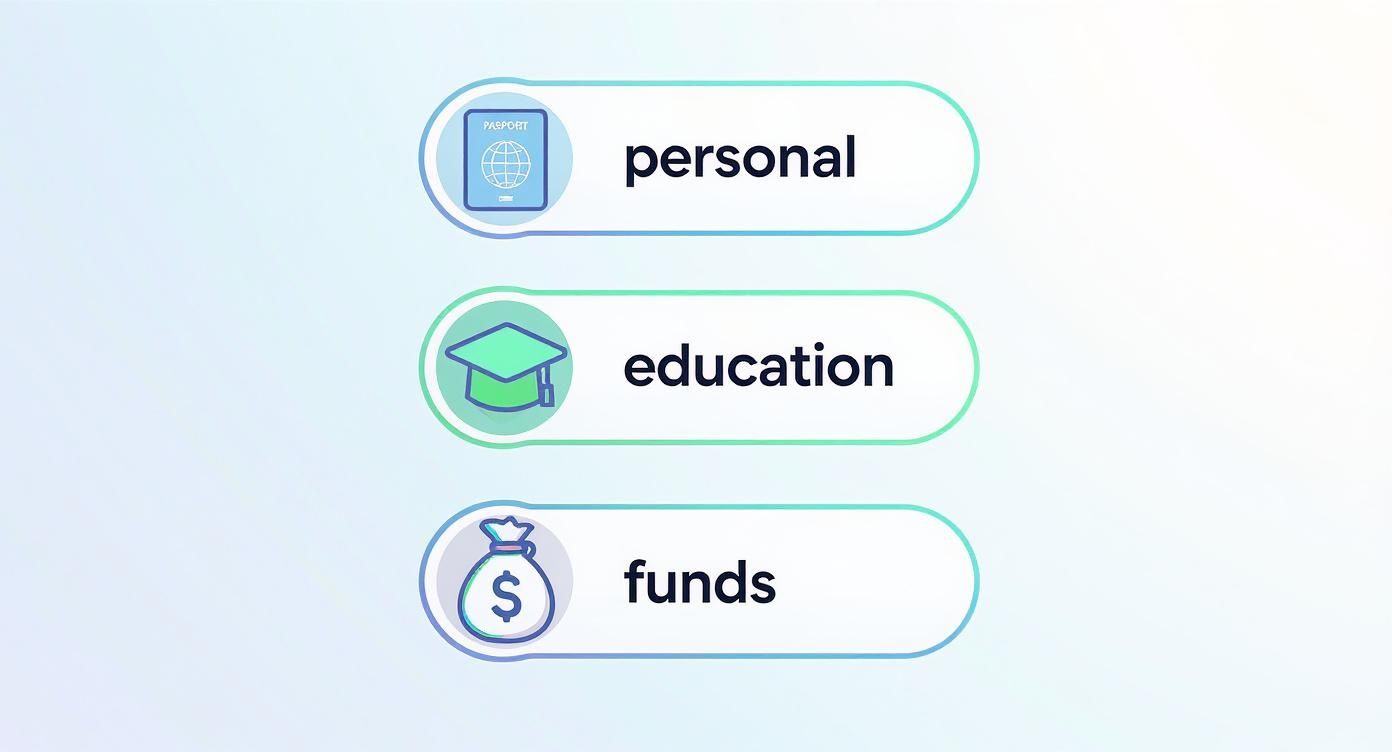
Think of these as the three pillars of your application: your personal identity, your qualifications, and your financial standing. Each one needs to be rock-solid.
Step 3: Applying for Permanent Residence with the Federal Government
After New Brunswick gives your application the thumbs up, they'll issue a nomination certificate. This is a massive win, but you're not at the finish line just yet. This certificate is your golden ticket to apply for permanent residency at the federal level with Immigration, Refugees and Citizenship Canada (IRCC).
You'll then submit another, more detailed application to IRCC. This package will include your provincial nomination certificate, medical exam results, police clearance certificates, and proof of settlement funds. Often, you can also apply for a work permit at this stage, which allows you to move to New Brunswick and start your job while your PR application is being finalised. For a deeper dive into that, our guide on the Canada work visa permit is a great resource.
What to Realistically Expect for Timelines
Patience is a virtue in any immigration journey, and this one is no different. The process takes time, so it's best to be prepared for the wait.
- Provincial Stage (EOI to Nomination): This part can take up to 6 months.
- Federal Stage (PR Application): Once you submit to IRCC, expect to wait another 15 months or more.
All in, you should be prepared for a total processing time of about two years from the day you get your ITA from New Brunswick. Knowing this roadmap from the start makes the whole multi-stage process feel a lot less daunting and much more achievable.
Comprehensive Settlement Support for Your Family

Moving your entire family to a new country is a massive undertaking. The list of worries can feel endless: Where will we live? How will we get around? What about the language barrier? The New Brunswick Critical Worker Pilot Program was specifically designed to help quiet many of these fears.
What really makes this pilot stand out from nearly every other immigration pathway is the mandatory, robust settlement plan your employer must provide. This isn't just about handing you a job offer; it’s a genuine commitment to giving your family a "soft landing."
This support is a non-negotiable part of the deal for the six participating employers. They weren't picked at random; they were chosen because they have a proven history of helping newcomers not just arrive, but truly settle in and succeed in their new communities.
Your Practical Support System on Arrival
Picture this: you and your family have just landed at the airport in Moncton or Fredericton. Instead of facing the immediate stress of finding a taxi and navigating a brand-new city, your employer has already arranged transportation to take you straight to your new home. This is the exact kind of practical, on-the-ground support the program guarantees.
This assistance is all about solving the immediate problems that cause the most stress for Nigerian families moving abroad. The aim is to get you settled in as quickly and smoothly as possible so you can focus on your new job and helping your family adjust.
Key areas of support you can expect include:
- Housing Assistance: Your employer will help you find a suitable and affordable apartment or house for your family, often before you even step on the plane.
- Transportation Arrangements: This covers everything from coordinating your pickup from the airport to helping you get your head around local transport, like bus routes or the process of getting a driver's licence.
- Community Integration: They'll connect you with local community centres, point you to grocery stores that might stock familiar African foods, and help you find recreational activities for your children.
This level of hands-on support is a complete game-changer. It turns what could be a stressful, solo struggle into a guided transition, making your family's move into New Brunswick life much smoother and faster.
Language Training and Skills Development
Another powerful feature of the settlement plan is the focus on language training. Your employer is required to offer up to 200 hours of language classes, which is crucial for building your confidence at work and in your everyday life.
This isn't just about passing an exam; it's about real-world communication. The training helps you understand instructions on the job, have a chat with your neighbours, and even help your children with their homework. It’s a real investment in your long-term success here.
Beyond language, the support often extends to skills development. These employers are committed to helping you grow in your career. They provide on-the-job training to help you adapt your existing skills to Canadian standards and open up pathways for advancement within the company. This focus on building a long-term career is a major benefit of this unique pilot program, setting you and your family up for a successful future in New Brunswick.
Got Questions? We've Got Answers for Nigerian Applicants
If you're looking at this program from Nigeria, you probably have a lot of questions swirling around. It's completely normal. The New Brunswick Critical Worker Pilot is a fantastic opportunity, but it's different from other pathways. Let's tackle some of the most common questions I hear from Nigerian applicants, so you can move forward with confidence.
Do I Really Need an Agent to Apply?
This is the big one, and the answer is a straight-up no. You absolutely do not need to pay an agent in Nigeria to get into this program.
The entire pilot is built on a direct relationship between you and one of the six participating companies. Your job is to focus on polishing your CV to a Canadian standard and applying directly for roles on their official websites. That's it.
While you can choose to hire a licensed Canadian immigration consultant for advice, it’s not a requirement. Please be very careful. If someone in Nigeria is promising you a guaranteed job offer for a fee, it's almost certainly a scam. This process is between you, the employer, and the government—there’s no need for a middleman.
Your skills and a genuine job offer are what get you in, not how much you pay an agent. Hold onto your money and deal directly with the companies.
Can I Bring My Family With Me?
Yes! This is one of the best parts of the New Brunswick Critical Worker Pilot. It’s a direct route to permanent residency, which means your family is included from day one.
Who counts as family?
- Your spouse or common-law partner.
- Your dependent children (usually under 22 years old, as long as they aren't married or in a common-law relationship).
When your application gets the green light, your whole family becomes permanent residents at the same time. This programme isn't just about filling a job; it's designed to help families settle down and build a new life in New Brunswick.
How Much Money Do I Need for Proof of Funds?
Okay, let's talk about "settlement funds." The amount you need isn't set by New Brunswick; it's a federal government requirement that changes every year. How much you need depends entirely on the size of your family. Before you do anything, you must check the latest figures on the official IRCC website.
To give you an idea, the numbers for early 2024 look something like this:
- 1 person: CAD $13,757
- 2 people: CAD $17,127
- 3 people: CAD $21,055
- 4 people: CAD $25,564
Now, here's the crucial part: this cannot be borrowed money. You have to prove the funds are yours and easily accessible. For Nigerians, this means you need solid paperwork like:
- Six months of official bank statements.
- Fixed deposit certificates from a good Nigerian bank.
- Legal documents from the sale of a property, showing the money hitting your account.
- If a large sum was a gift, you'll need a sworn affidavit from the person who gave you the money, explaining why.
A large amount of cash suddenly appearing in your account right before you apply is a major red flag. They want to see a clear history of where the money came from.
What’s Life Actually Like in New Brunswick?
If you're coming from a bustling city like Lagos, Port Harcourt, or Abuja, prepare for a big change of pace. It's important to be real about this. New Brunswick is known for being quiet, friendly, and surrounded by beautiful nature.
Let's break it down:
Aspect of Life Lagos/Abuja New Brunswick Pace of Life Go, go, go! It's fast, high-energy, and never stops. Much slower and relaxed. People take their time. Cost of Living Can be very expensive, especially for decent housing. Way more affordable. Your money goes a lot further, especially for rent. Environment Urban jungle, lots of people, and legendary traffic. Lots of green space, forests, and coastline. Think fresh air! Nigerian Community Huge and well-established. Smaller but growing fast. You'll be part of building the community. And yes, the weather is a huge factor. The winters are cold, with plenty of snow, which will be a new experience. But the good news is that the settlement support from your employer is designed for this. They'll help you with everything—from figuring out what winter coats to buy and registering your kids for school, to connecting you with local services to make sure you and your family feel at home.
Ready to start planning your move with expert guidance? JapaChat is Nigeria's first AI immigration expert, designed to answer your specific questions about visa requirements, documentation, and creating a successful immigration strategy. Get instant, accurate advice and build your relocation plan with confidence. Sign up for free at JapaChat.
-
A Nigerian’s Guide on How to Apply to Canada PR
Applying for Canadian Permanent Residency from Nigeria is a multi-step journey, but it all boils down to a clear process: pick the right immigration pathway, gather all your documents, and build a strong online profile. A successful application hinges on proving you meet Canada's requirements, which means getting your language skills tested with exams like IELTS and having your Nigerian degrees officially assessed.
Think of this process as your direct route to a new life in Canada.
Your Canadian PR Journey Starts Here
So, you're dreaming of moving to Canada from Nigeria? You’re in good company. Every year, thousands of Nigerians make this exact move, looking for new opportunities, a high quality of life, and a great place to raise a family.
I get it—the whole Canadian Permanent Residency (PR) process can feel as overwhelming as navigating Lagos traffic during rush hour. But once you have a good map, it becomes a clear and achievable journey.
This guide is that map. We’re going to cut through the official jargon and give you practical, step-by-step advice. Knowing how to apply for PR from Nigeria is all about mastering three core stages:
- Choosing Your Pathway: Your success begins with picking the route that best fits your personal profile. This could be the popular Express Entry system or a more targeted Provincial Nominee Program (PNP).
- Gathering Your Documents: This is more than just paperwork. It means getting your police clearance certificate in Nigeria, having your degree from UNILAG or OAU properly assessed, and preparing the right proof of funds from your Nigerian bank.
- Building a Strong Profile: Your application is your introduction to the Canadian government. A well-prepared profile that clearly showcases your skills and experience is what makes you stand out.
The Application Process at a Glance
To give you a clearer picture, this visual breaks down the main stages of your PR application.
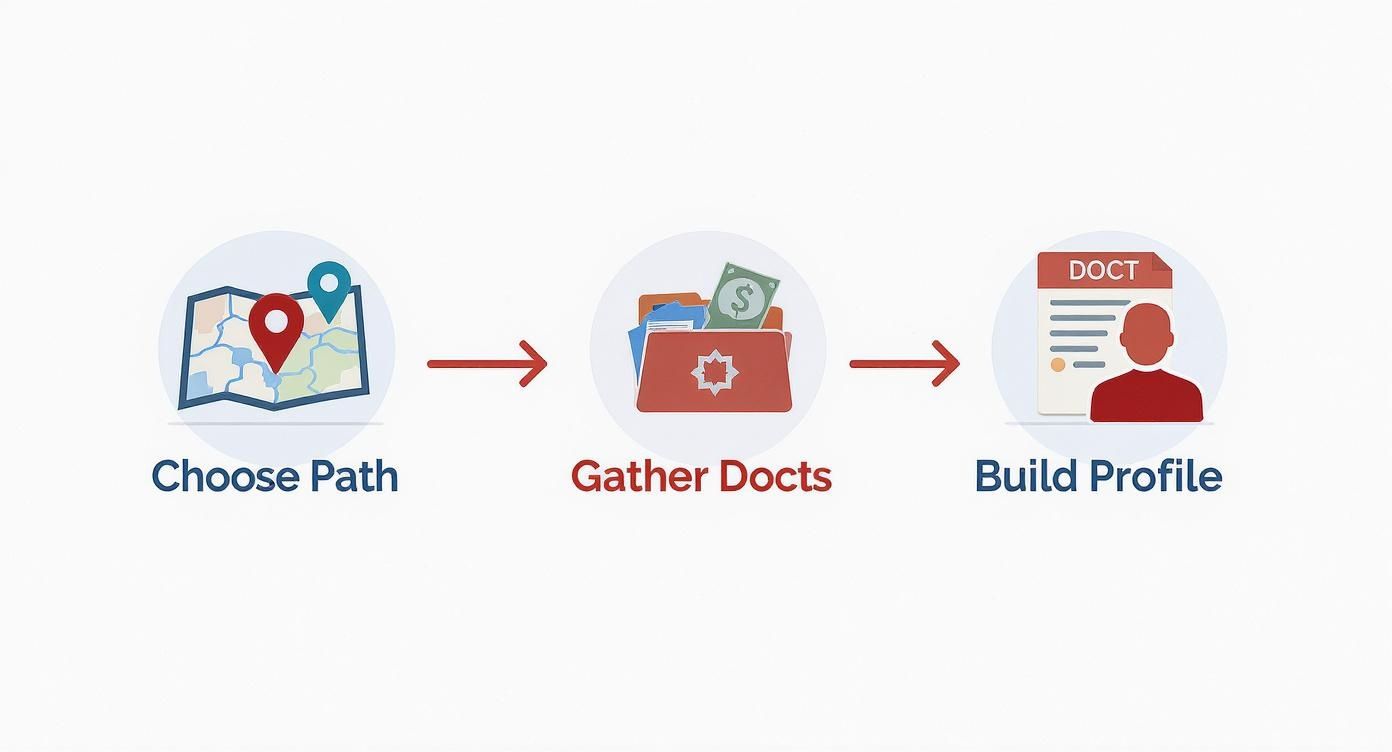
As you can see, success isn't about one single action but a series of well-planned steps.
Think of it this way: Express Entry is like the main expressway to Canada, while Provincial Nominee Programs are the strategic shortcuts that can get you there faster if you have skills a specific province is looking for. A tech professional from Abuja might find a direct route through a tech-focused PNP in British Columbia, while a healthcare worker from Port Harcourt could be in high demand in a province like Nova Scotia.
The most critical decision you'll make is selecting the correct immigration program. Over 60% of successful applications come through economic streams like Express Entry and PNPs, making these the top focus for most skilled Nigerians.
My goal here is to give you the clarity and confidence to take that first big step. We'll break down everything you need to know, from the initial eligibility check to the final approval, making sure you are fully prepared for your new life in Canada.
Finding Your Best Path with Provincial Nominee Programs
While Express Entry often grabs all the attention, you should think of Provincial Nominee Programs (PNPs) as the strategic "backdoor" to your Canadian PR journey. For many Nigerians, this route is the golden ticket because it’s often more direct and targeted.
Simply put, PNPs are how Canadian provinces and territories nominate people who have the exact skills and work experience they need to grow their local economies. If your profession is in high demand in a particular province, the PNP could be your fastest way to land in Canada.

Why PNPs Are a Game-Changer for Nigerians
The single biggest advantage of getting a provincial nomination is the massive boost it gives your profile. If you're already in the Express Entry pool, a nomination from a province automatically adds a whopping 600 Comprehensive Ranking System (CRS) points to your score.
This is a huge deal. An extra 600 points practically guarantees you'll get an Invitation to Apply (ITA) for permanent residence in the next draw. It can take your score from just "okay" to unbeatable overnight.
Let's imagine a software developer from Abuja with a decent but not amazing CRS score of 470. She might wait months, maybe even longer, for an ITA. But if she gets a nomination through the British Columbia PNP Tech stream, her score instantly jumps to 1070. She's getting that invitation, no question.
Think of a PNP nomination as a direct invitation from a province saying, "We need your skills here, and we want you to come." This makes it one of the most powerful tools in your immigration toolkit when figuring out how to apply to Canada PR.
Aligning Your Skills with a Province’s Needs
The real key to success with PNPs is research. You have to become a detective, digging into which provinces are desperately looking for someone with your exact background. Every province publishes an "in-demand occupation list" which tells you precisely the jobs they need to fill.
Here are a few real-world scenarios for Nigerian professionals:
- Healthcare Professionals: A registered nurse from Lagos will discover that provinces like Nova Scotia, Saskatchewan, and New Brunswick are actively recruiting for healthcare roles. Their specific PNP streams are built to fast-track medical professionals.
- Tech Experts: If you're a data analyst or UX/UI designer in Lekki, provinces like Ontario (through its Human Capital Priorities stream) and Alberta (with its Accelerated Tech Pathway) are constantly holding draws for tech talent.
- Engineers and Tradespeople: A civil engineer from Port Harcourt or a skilled welder will find strong demand in provinces with growing infrastructure, like Alberta and Saskatchewan.
The goal here is to match your National Occupational Classification (NOC) code with these provincial lists. This strategic alignment is what turns a hopeful application into a successful one.
Spotlighting Active Provincial Programs
Provinces are always tweaking their programs based on what their job markets need, so staying updated is vital. Some provinces have become go-to routes for Nigerians because their draws are consistent and their rules are clear.
Saskatchewan is a great example. Applying for permanent residency through the Saskatchewan Immigrant Nominee Program (SINP) has been a popular pathway for many Nigerians, especially those with experience in in-demand occupations who don't have a job offer. Their "International Skilled Worker: Occupation In-Demand" stream frequently invites candidates with the right work background.
Other provinces offer unique opportunities as well. Alberta's "Accelerated Tech Pathway" specifically targets tech workers for quick processing, while healthcare professionals will find targeted streams in provinces like Nova Scotia and New Brunswick. The key is to check their official websites regularly for the latest draws and requirements.
Your PNP Playbook
So, how do you actually do this? It all starts with a clear, organised plan.
- Identify Your NOC Code: First things first, figure out the correct NOC code for your main work experience. This code is the foundation of your entire search.
- Research Provincial Lists: Get familiar with the official immigration websites for each province. Look for their "in-demand occupations" or "occupations-in-demand" lists and see where your NOC code shows up.
- Check Stream Requirements: Once you find a match, dig into the details for that specific PNP stream. Do you need a job offer? What are the language score requirements?
- Create an Expression of Interest (EOI): Many PNPs require you to submit an EOI directly to the province. This is a totally separate profile from your federal Express Entry one.
- Secure Your Nomination: If the province selects your profile, you'll receive a nomination certificate. You then add this to your Express Entry profile to claim your 600 points.
By focusing on provinces that genuinely need your skills, you completely change the dynamic. You stop being just one of thousands in a federal pool and become a sought-after candidate that a specific province wants to welcome.
Your Nigerian Document Checklist for Canada PR
Alright, let's talk documents. Getting everything together for your Canadian PR application can feel like a full-time job, and honestly, it’s where a lot of people get overwhelmed. But if you're organised, you can get through it without pulling your hair out. This isn't just a generic list; it's a practical checklist built specifically for a Nigerian applicant.
Think of it like gathering your ingredients before you start cooking stew. Miss one thing, and the whole taste is off. We'll walk through exactly what you need, how to get it in Nigeria, and the common roadblocks you'll want to sidestep.

Core Personal Documents
These are the absolute non-negotiables—the foundation of your entire application. It's best to start gathering these first because some of them can take a surprising amount of time.
- International Passport: Your Nigerian "green passport" is your main ID. Make sure it has at least six months of validity from the date you plan to submit your application. If yours is getting close to expiring, just renew it now. Don't let a simple thing like an expiring passport hold you up later.
- Birth Certificate: You’ll need the official one issued by the National Population Commission (NPC). If you’re still holding onto that older version from your local government, it’s a good idea to get the updated NPC certificate to be safe.
- Proof of Name Change: This is crucial if your name has changed for any reason, most commonly through marriage. You must provide the official documents to back it up, like your marriage certificate, a sworn affidavit, and a newspaper publication announcing the change of name.
Your Educational Credential Assessment (ECA)
Canada needs to verify that your degree from UNILAG, OAU, or Covenant University is on par with a Canadian one. That's what an Educational Credential Assessment (ECA) is for. For most Nigerians, World Education Services (WES) is the standard and most recognised body for this.
The process is pretty straightforward on paper: you create a WES profile, get a reference number, and then your university has to send your official transcripts directly to them. That second part is where the famous Nigerian delays often kick in.
My advice? Start your ECA yesterday. Seriously. Chasing transcripts from a Nigerian university can be a slow, frustrating dance. Be ready to follow up relentlessly with calls, emails, and if you can, get someone on the ground in Nigeria to help you push things along. An ECA is mandatory for Express Entry and is valid for five years, so getting it done early is a smart move.
Getting Your Nigerian Police Clearance Certificate
Canada wants to see a police clearance certificate from every country you've lived in for six months or more since you turned 18. For your time in Nigeria, there's a specific way to get this done.
You'll need to apply through the Nigerian Police Force Central Criminal Registry (CCR) in Alagbon, Lagos, or at their headquarters in Abuja. The process involves getting your fingerprints captured and providing your ID. It can take a few weeks to be issued, so definitely don't leave it to the last minute. This certificate is only valid for one year, so you'll need to time it just right.
Demonstrating Your Proof of Funds
This is one of the most heavily scrutinised parts of the application, especially for us Nigerians. You have to prove you have enough settlement funds to support yourself and your family when you land in Canada. It's not just about having the money; it’s about proving it the right way.
You'll need an official reference letter from your Nigerian bank—think GTB, Zenith, or Access Bank. This isn't just a simple bank statement. The letter must be on the bank's official letterhead and must include:
- The bank's full contact information (address, phone, email)
- Your name and all account numbers you hold with them
- The current balance of each account
- The average balance over the last six months
- The date each account was opened
This is the important part: the letter must clearly show the funds in both Naira (NGN) and its equivalent in Canadian Dollars (CAD). The money also has to be liquid and readily available—not tied up in property, cars, or other assets. IRCC is very strict about this; large, recent deposits that can't be explained (like a "gift" from a relative that just appeared last week) will be a major red flag.
Documenting Your Work Experience
Proving your work history is how you claim those all-important points for your skills. This means getting detailed reference letters from every single one of your past and current employers.
A proper employment reference letter isn't just a note saying you worked there. It absolutely must:
- Be printed on the company's official letterhead.
- Be signed by your supervisor or someone from HR.
- Include your full name and official job title.
- List your main duties and responsibilities (these have to align with the duties of your chosen NOC code).
- State your salary and any benefits.
- Clearly specify your dates of employment (start and end dates).
If getting a letter from an old boss is proving impossible, you can sometimes substitute it with employment contracts, pay slips, and a sworn affidavit explaining why you couldn't get the letter. But don't skimp on the details here—vague job descriptions are a classic red flag and a common reason for getting your application refused.
How to Build a Winning Express Entry Profile
Think of your Express Entry profile as your personal sales pitch to the Canadian government. It's much more than just an online form; it's the digital CV that determines whether you stand out in a very crowded pool of applicants. Every single detail needs to be presented strategically to push your Comprehensive Ranking System (CRS) score as high as possible.
Your main goal here is to craft a profile that doesn't just tick the boxes but genuinely shines. Let's break down how to approach this, with a focus on what matters most for you as an applicant from Nigeria.

This is the stage where all your hard work—your qualifications, language tests, and work experience—gets converted into points. More points mean a better shot at that life-changing Invitation to Apply (ITA). So, let’s get into the nitty-gritty of making your profile a winner.
Nailing Your Work Experience Section
This is, without a doubt, one of the most critical parts of your entire profile, and it’s where a lot of Nigerian applicants stumble. It's not enough to just write down your job title. You have to correctly classify your Nigerian work experience using Canada’s National Occupational Classification (NOC) system.
The NOC framework organises jobs by duties and responsibilities, not just the title on your business card. For example, a "Relationship Manager" at a Nigerian bank could be anything from a financial advisor to a sales manager. It all depends on what you actually do day-to-day.
To get this right, you absolutely must:
- Stop guessing your NOC: Go to the official NOC website and search based on your job duties, not your title.
- Make your reference letters match: The duties you list in your employment reference letters from Nigerian employers must align with the lead statements and main duties of the NOC you've chosen.
- Be incredibly specific: Vague descriptions are a no-go. Your profile and documents have to paint a clear picture that you performed the duties required for that specific NOC.
Key Takeaway: Getting your NOC code right is non-negotiable. An immigration officer needs to glance at your reference letter and immediately see the connection. Choosing the wrong code is a very common and completely avoidable reason for refusal.
Smart Strategies to Boost Your CRS Score
Getting your profile into the pool is just the beginning. The Express Entry system is dynamic, so you can—and should—actively work on improving your score. Just waiting and hoping is not a strategy.
Here are some of the most effective ways Nigerians can pump up their CRS score:
- Smash Your Language Tests: Your IELTS or CELPIP result is one of the easiest areas to improve. If your first score was just "okay," it's worth the effort to retake the test. Pushing your score into a higher band (like a CLB 9 or 10) can give your CRS score a massive boost.
- Add a Little French: You don't need to be fluent. Even getting basic French proficiency and scoring modestly on the TEF exam can add valuable points and set you apart from thousands of other candidates.
- Clock More Work Experience: If you’re getting close to another full year of skilled work (for instance, moving from two years to three), your points will automatically jump once you hit that milestone.
- Hunt for a Provincial Nomination: As we've mentioned, a Provincial Nominee Program (PNP) is the ultimate game-changer. Securing a nomination adds a whopping 600 points to your score, which all but guarantees an invitation. Keep a close eye on PNP streams that are looking for people in your line of work.
For a deeper dive into the initial setup, our guide on creating an Express Entry profile walks you through the entire process step-by-step.
Common Pitfalls for Nigerian Applicants
Building a winning profile isn't just about what you do, but also what you avoid. Simple mistakes can lead to long delays or, even worse, a flat-out refusal. Honesty and accuracy from day one are your best friends.
One of the biggest issues is misrepresentation. It can be completely unintentional—like forgetting to declare a previous visa refusal from another country or failing to list all your family members. Be truthful and thorough in every section. A misrepresentation finding can lead to a five-year ban from applying to Canada, so the stakes are high.
Another trouble spot is your work history. Make sure there are no unaccounted-for gaps in your timeline. Be precise with employment dates and double-check that they align perfectly across all your documents. A small inconsistency can raise a red flag for the immigration officer reviewing your file. Your profile needs to be a clear, consistent, and honest story of your journey.
The Final Stretch: What Happens After You Submit Your Application
Hitting 'submit' on your Express Entry profile is a massive milestone, but don't pop the champagne just yet. This is where the real waiting game—and the next flurry of activity—begins. Knowing what’s coming is crucial for a smooth journey to PR.
Once your profile is active in the pool, you’re on the lookout for one thing: the Invitation to Apply (ITA). This is the official email from Immigration, Refugees and Citizenship Canada (IRCC) that says, "Congratulations, your CRS score was high enough in a recent draw. It's time to submit your full application."
The moment that ITA lands in your inbox, a stopwatch starts. You have exactly 60 days to get your complete, detailed application and all your supporting documents uploaded. This deadline is non-negotiable. This isn’t the time to start scrambling for your university transcript or calling an old manager for a reference letter—that work should already be done.
Mark my words: that 60-day window is unforgiving. If you miss it, your ITA simply expires. You’ll be sent back to the Express Entry pool to wait for another draw, with no guarantees. Preparation is everything.
Booking Your Biometrics and Medicals in Nigeria
After you’ve successfully submitted the full application and paid the fees, you'll receive a Biometric Instruction Letter (BIL). This is your official green light to book an appointment to give your fingerprints and have your photo taken.
In Nigeria, this can only be done at a specific Visa Application Centre (VAC) managed by VFS Global. The main centres are in Lagos (Victoria Island) and Abuja. You can't just show up; you absolutely must book an appointment online through the VFS Global Nigeria website. These slots can get booked up weeks in advance, so get on it the moment you receive your BIL.
At the same time, you'll need to get your medical examination done. And no, you can't just pop into your family doctor's clinic. The exam has to be conducted by a specific panel physician who has been approved by IRCC.
Here's a quick rundown of how to handle the medicals:
- Find an Approved Doctor: IRCC maintains an official list of panel physicians in Nigeria. You'll find them in major cities like Lagos, Abuja, and Port Harcourt.
- Schedule the Exam: Call one of the approved clinics directly to book your appointment. Make sure to tell them it’s for a Canadian permanent residency application.
- What to Bring: You’ll need your passport, the medical report form (IMM 1017E) if IRCC sent it to you, and any glasses or contact lenses you use.
The clinic handles the rest, sending your results directly to IRCC. Your medical clearance is valid for 12 months, so getting this done promptly is a critical part of keeping your application moving forward.
Common Mistakes That Can Derail Nigerian Applications
The final review stage is where dreams can be dashed by small, avoidable errors. From my experience, Nigerian applicants need to pay special attention to a few areas that IRCC scrutinises very closely.
The number one application killer is misrepresentation. This is a broad term that can cover anything from forgetting to declare a past UK visa refusal to not listing all your children (even if they aren’t coming with you). The penalty is harsh: a potential five-year ban from applying to Canada. The golden rule is absolute honesty. When in doubt, declare it.
Another major stumbling block is weak or inconsistent documentation. For instance, submitting a bank statement for Proof of Funds that doesn't clearly show a stable six-month history will raise immediate red flags. Similarly, if the job duties in your reference letter don't closely match the lead statements for the NOC code you’ve claimed, the visa officer might decide you don't have the right experience. Every single document must tell the same, consistent story.
By understanding these final hurdles and being meticulous with every detail, you can turn a nerve-wracking wait into a confident final step toward getting that life-changing Confirmation of Permanent Residence (COPR).
Your Top Canada PR Questions Answered
Let's dive into some of the most common questions that pop up when you're starting this journey from Nigeria. Think of this as a quick chat with someone who's seen it all before, designed to clear up the confusion and give you the confidence to take the next step.
How Much Money Do I Need for Proof of Funds from Nigeria?
This is the big one, isn't it? The magic number for Proof of Funds (PoF) changes every year, so it's not a one-size-fits-all answer. It's tied directly to how many people are in your family.
Right now, for a single person, you're looking at $14,690 CAD. But please, make this a habit: always double-check the latest figures on the official IRCC website before you get too far along.
To get this sorted, you’ll need an official letter from your Nigerian bank—think UBA, Zenith, or Access Bank. This isn't just a simple statement. It has to be on the bank's letterhead, show your account history for the last six months, and clearly state the final balance in both Naira and its Canadian Dollar equivalent. Crucially, this money has to be yours, liquid, and not tied up in property or borrowed from a friend.
Can I Apply for Canada PR Without a Job Offer?
Absolutely. This is probably the biggest myth out there. The truth is, the majority of Nigerians who get their PR don’t have a Canadian job offer lined up. They get it through streams like the Federal Skilled Worker Program (FSWP) under Express Entry.
Your ticket in is your Comprehensive Ranking System (CRS) score. It’s a points game based on your age, your education, your work experience in Nigeria, and how well you did on your IELTS exam. A job offer gives you a massive point boost, no doubt, but it’s far from essential. Many strong applicants get their Invitation to Apply based on their own merits alone.
Don't let the lack of a job offer stop you. Pour your energy into what you can control. Nailing your language tests and getting your education assessed properly can make all the difference.
How Do I Get My Nigerian Degree Recognised in Canada?
So you've got a degree from a great Nigerian university like Unilag or OAU. Before Canada can award you points for it, they need to know it's on par with their own standards. This is where an Educational Credential Assessment (ECA) comes in.
The go-to organisation for most people is World Education Services (WES). The process is straightforward: you create a profile on the WES site, and then you'll need to arrange for your university in Nigeria to send your official transcripts directly to them. WES then does its thing, evaluates your credentials, and issues a report showing the Canadian equivalent of your degree.
This ECA report is non-negotiable for your Express Entry profile and stays valid for five years. A word of advice from experience: start this early. Chasing up transcripts from Nigerian universities can sometimes be a test of patience!
What Is the Best PNP for a Nigerian in the Tech Industry?
If you're in Nigeria's vibrant tech scene, you're in luck. Several provinces are actively hunting for your skills through their Provincial Nominee Programs (PNPs). Keep a close eye on Ontario (OINP Human Capital Priorities stream), British Columbia (BC PNP Tech), and Alberta (Alberta Advantage Immigration Program).
These provinces run specific tech draws to fast-track people with experience in high-demand roles like software development, data analytics, or cybersecurity. Typically, you need an active Express Entry profile and work experience that lines up with what the province is looking for. The best strategy is to head directly to the immigration websites for these provinces and see which one is the best match for your specific tech skills.
Feeling a bit overwhelmed by it all? You're not alone. The road to Canada has its twists and turns, but you don't have to walk it by yourself. JapaChat is Nigeria's AI immigration expert, built to give you instant, accurate answers to your questions. Get personalised guidance, document checklists, and the clarity you need to plan your move. Sign up for free and start your journey with confidence.
-
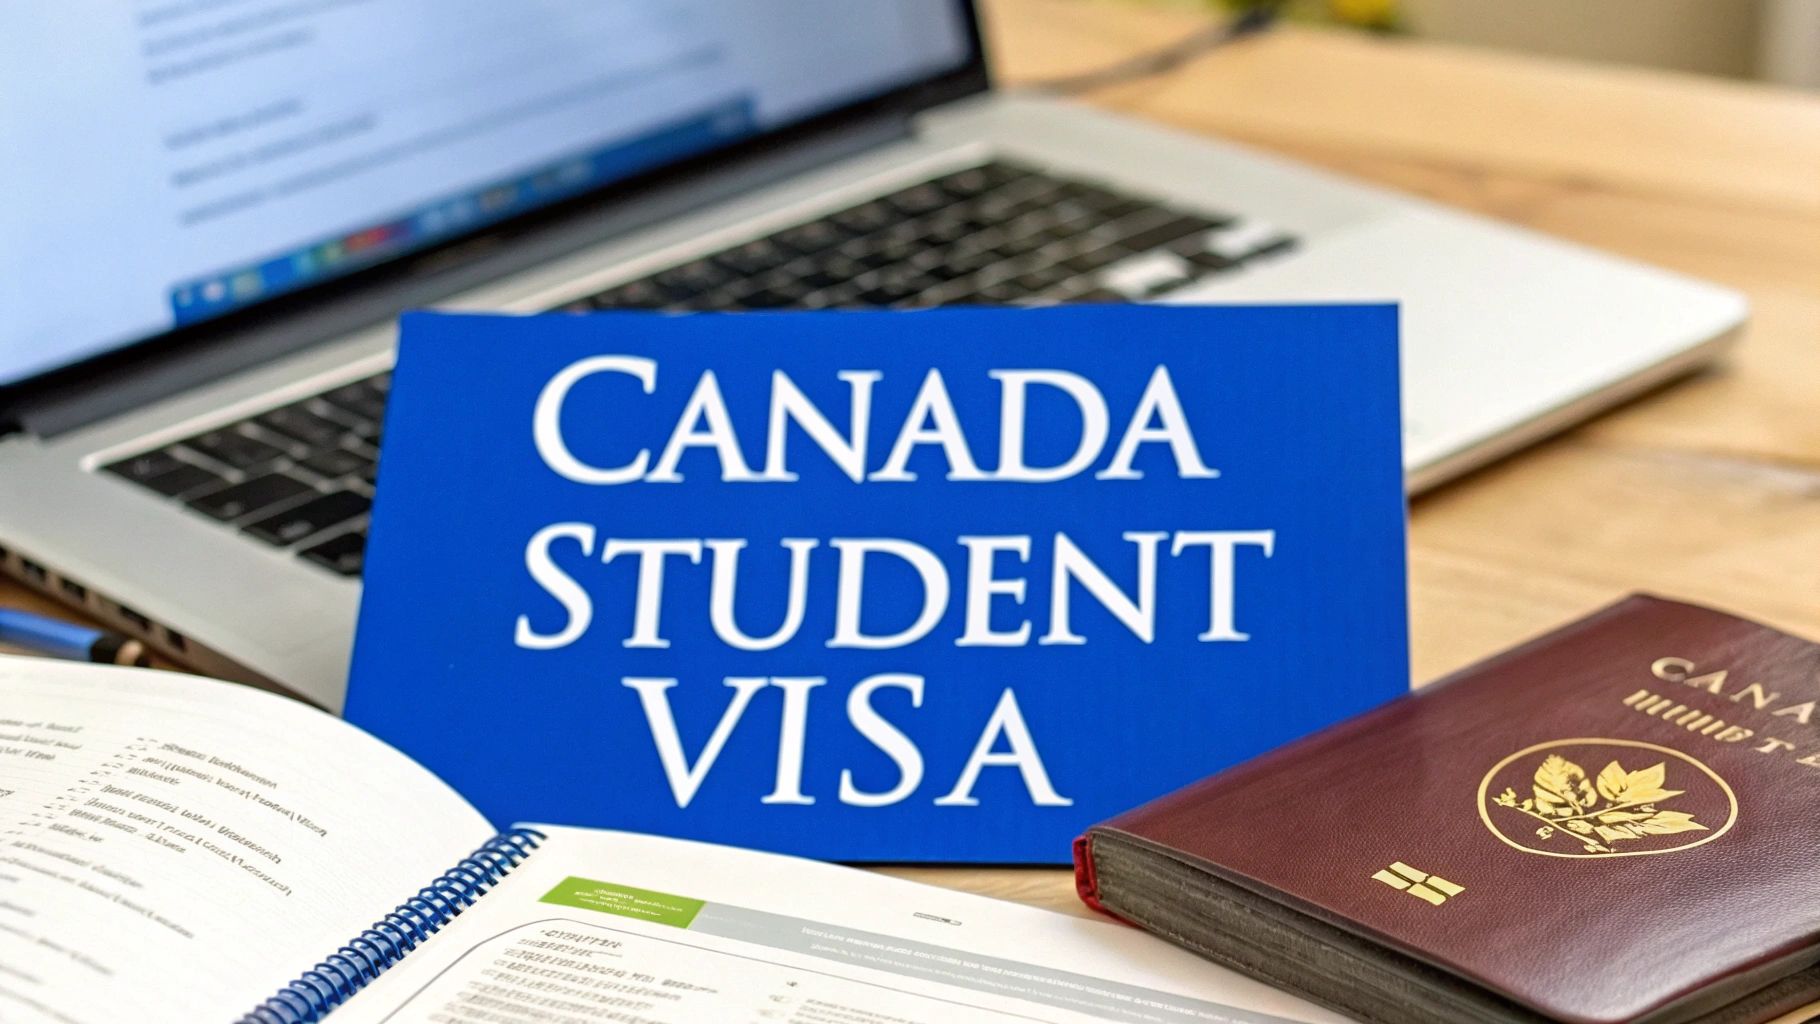
Canada Student Visa: Your Ultimate Guide for Nigerian Applicants
So, you’re thinking about studying in Canada? It’s a brilliant move, and you're certainly not alone. The first big hurdle on this journey is getting your Canada student visa. This process really boils down to securing an official document known as a study permit – that's your golden ticket to study at a Canadian institution.
Your Journey to Studying in Canada Starts Now

For many Nigerians, the dream of studying in a country like Canada is huge. It’s not just about earning a degree. It's about opening doors to new experiences, landing better jobs, and for many, it’s the ultimate ‘Japa’ goal. This guide is built just for you, cutting through the confusing jargon to give you a clear, practical roadmap.
We're going to tackle the real, updated process, looking squarely at the recent changes from Immigration, Refugees and Citizenship Canada (IRCC). The goalposts have moved, and the rules are stricter now, which means a flawless application isn't just a good idea—it's absolutely essential.
What to Expect From This Guide
This isn't just another copy-paste article you'll find online. Think of it as your personal playbook, put together to turn that big dream into a clear, actionable plan. We'll cover everything from a Nigerian applicant's point of view.
Here's a quick look at what we'll get into:
- The Key Documents: We’ll finally clear up the confusion between a student visa and a study permit. They aren't the same thing.
- Meeting the Rules: I’ll break down the eligibility criteria, especially the new proof of funds requirement, in a way that actually makes sense for someone in Nigeria.
- Step-by-Step Application: We’ll walk through the entire online process together, from creating your account to hitting submit.
- Avoiding Refusal: You’ll learn the common pitfalls that trip up Nigerian applicants and, more importantly, how you can avoid them.
Your main goal here is to build a rock-solid, convincing application that leaves no room for doubt. It’s all about proving to the visa officer that you're a genuine student with a solid plan for your future.
As you move forward, you'll find there are unique challenges and opportunities. It's a good idea to explore additional resources for international students to stay ahead of the game.
Ready? Let’s get you prepared to handle every step with confidence, from getting that admission letter to finally touching down in Canada.
What's the Difference Between a Study Permit and a Visa?
Alright, let's clear up one of the biggest points of confusion right from the start. You'll hear the terms "study permit" and "student visa" thrown around, often as if they're the same thing. They’re not, and knowing the difference is crucial for your application from Nigeria.
Think of it this way: getting into Canada to study is like going to an exclusive, members-only club. Your study permit is your membership card—it proves you belong there and have the right to enjoy the club's facilities (in this case, studying at a Canadian school).
But to even get to the club's entrance, you need a pass to get through the front door. That's your student visa, officially known as a Temporary Resident Visa (TRV). It's the sticker in your passport that lets you board the plane from Murtala Muhammed International Airport and present yourself at the Canadian border.
You absolutely need both, but they serve different purposes. The study permit is the core document that allows you to legally study in Canada. The visa is simply the travel document that gets you there.
How it Works for Nigerian Applicants
The good news? You don't have to worry about applying for these two things separately. When you apply for a "Canada student visa" from Nigeria, you're actually applying for the study permit.
If Immigration, Refugees and Citizenship Canada (IRCC) approves your application, they automatically issue you a TRV along with your study permit approval letter. It's a two-for-one deal. This makes the process much smoother – one application, one set of fees (plus biometrics), and one final decision. Your entire focus should be on proving you deserve the study permit.
Your main job is to convince the visa officer that you are a genuine student who will abide by the rules. If you do that successfully, the visa that allows you entry is granted as part of the package.
To make this even clearer, let's break it down side-by-side.
Study Permit vs Entry Visa At a Glance
Here’s a simple table that highlights the key differences between the two documents.
Feature Study Permit Entry Visa (TRV) Primary Purpose Authorises you to study at a Canadian school. Allows you to travel to and enter Canada. Document Type A physical document issued at the port of entry. A sticker or stamp placed inside your passport. Where You Get It From a border services officer upon arrival in Canada. From the Canadian visa office after your application is approved. Main Function Your legal status as a student inside Canada. Your permission to get to Canada. So, while you'll hear everyone say, "I'm applying for my Canada student visa," what you're really chasing is that study permit approval. The visa is the essential key that opens the door, but the permit is the official invitation that lets you stay and learn. Getting this straight from day one helps you focus your energy on what truly matters in your application.
Meeting IRCC Eligibility Requirements

Alright, let's get into the foundation of your entire study permit application. Think of it like building a house in Lekki—if the foundation isn't solid, everything you build on top of it will eventually crumble. The eligibility requirements set by IRCC are that foundation, and you absolutely have to meet every single one. No shortcuts.
For Nigerian applicants, this boils down to proving three key things to the visa officer: you have a genuine reason to be in Canada (your studies), you can actually pay for it, and you fully intend to return to Nigeria once you're done.
Let's break down exactly what you need to do to build a rock-solid case.
Securing Your Admission and Attestation
Before you even dream of filling out the visa forms, you need two crucial documents. Consider these your non-negotiable tickets to even start the race.
First up is your Letter of Acceptance (LOA). This isn't just a letter from any school; it must come from a Designated Learning Institution (DLI). A DLI is a school that has been officially approved by a provincial or territorial government to host international students. Always, always double-check your school's DLI status on the official IRCC website.
Second, and this is a huge new update, is the Provincial Attestation Letter (PAL). Because Canada recently set a cap on new international students, provinces now have to issue these letters to confirm you have a spot within their assigned limit. The good news is, you don't apply for this separately. Your DLI will guide you on getting it after you've been accepted.
Let me be crystal clear: without a valid LOA from a DLI and a PAL, your application is dead on arrival. It will be refused automatically. These two documents are the absolute first hurdles to clear.
Proving You Have the Funds
This is where many Nigerian students stumble. You must prove, beyond any doubt, that you have enough money to cover your first year of tuition plus your living expenses. IRCC has set a very specific benchmark for this.
As part of recent changes, you now need to show you have at least CA$20,635 for your living costs—that’s on top of your tuition fees. This figure is a significant jump from the old requirement. You need to show the visa officer you’re financially prepared for life in Canada.
So, what does CA$20,635 mean in Naira? That number changes every single day with the exchange rate. Don't get caught out. I always advise my clients to calculate the current Naira equivalent and then add a 10-15% buffer on top. This shows the visa officer you've planned for any currency fluctuations.
You can show your proof of funds in a few ways:
- Bank Statements: You'll need four to six months of your personal or your sponsor's bank statements from a reputable commercial bank (like GTBank, Zenith, etc.). They are looking for a consistent history of funds, not a huge amount of money that suddenly appeared last week (they call this "lump sum" funding and it's a major red flag).
- Guaranteed Investment Certificate (GIC): This is a fantastic option and one I highly recommend. You essentially buy a CA$20,635 GIC from a participating Canadian bank. It proves to IRCC that the money is real, it's yours, and it's ready for your expenses in Canada.
- Sponsorship: If your parents or spouse are paying, you need a full package: their bank statements, a letter from their employer, their pay slips, and a properly written letter of sponsorship clearly stating their commitment.
Having a solid grasp of your finances is essential, so it's worth understanding higher education funding options in general. For a deep dive specifically on this topic, check out our guide on https://blog.japachat.com/proof-of-funds-canada/.
Showing Your Strong Ties to Nigeria
Last but certainly not least, you have to convince the visa officer that you will leave Canada after you finish your programme. This is known as demonstrating "home ties," and honestly, it can make or break an application. IRCC needs to be sure that your main goal is education, not a backdoor to permanent residency.
What counts as strong home ties? Here are some real-world examples:
- Family: Do you have responsibilities to your parents, a spouse, or children who are staying behind in Nigeria?
- Property & Assets: Do you or your family own land, a house, or have significant business investments back home?
- Career Path: Show them you have a plan. Explain how this Canadian qualification is the key to getting a specific, better job back in Nigeria. Connect your studies to your future career at home.
Your Statement of Purpose is where you'll weave all of this together. It’s your opportunity to tell your story—why you chose this specific course in Canada, how you’ve prepared financially, and why you are certain to return to Nigeria with your valuable new skills.
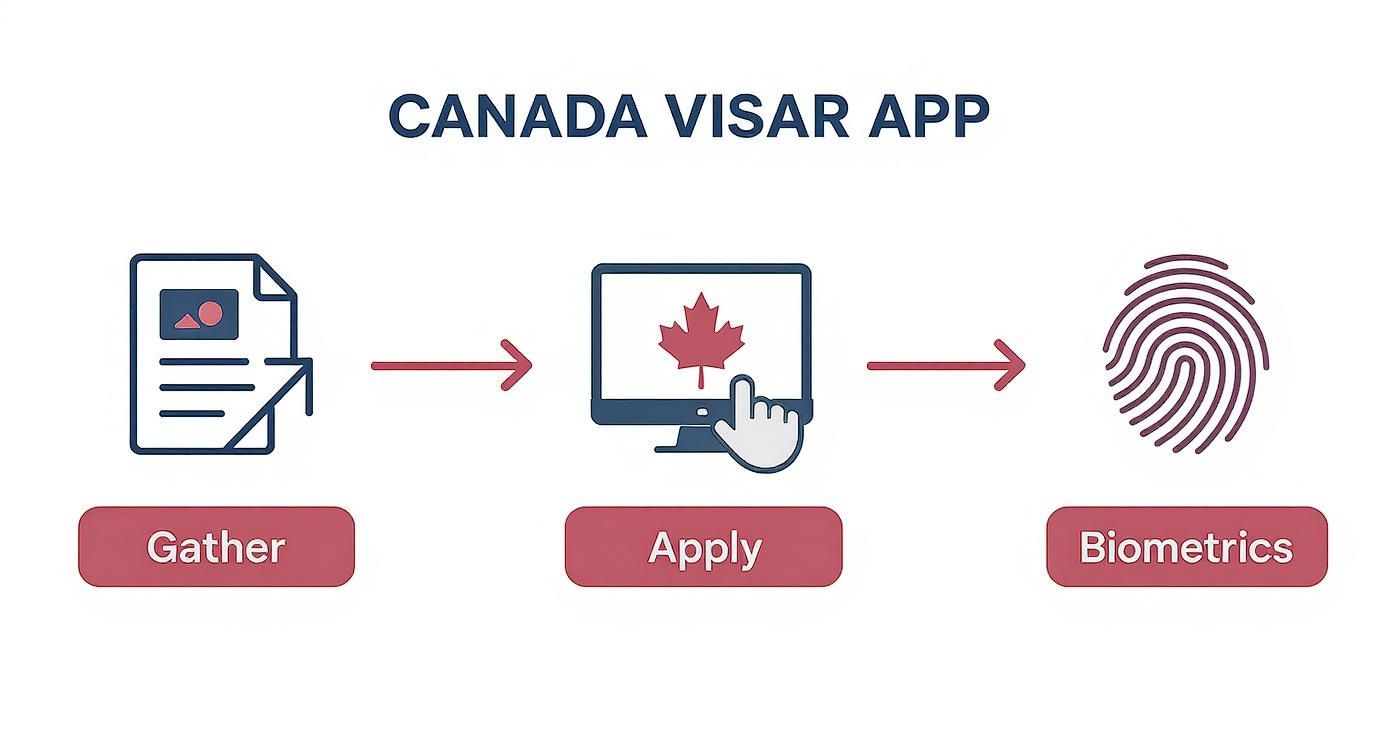
Navigating the Online Application Process
Alright, this is where it all comes together. You’ve got your acceptance letter, you’ve sorted out your proof of funds, and now it’s time to actually apply for your Canada student visa. The entire process happens online through the official Immigration, Refugees and Citizenship Canada (IRCC) portal. Don't let the formal website scare you; just think of it as a detailed checklist where you tick off the boxes one by one.
The absolute key to a smooth ride is preparation. Before you even click "create an account," get all your essential documents scanned and ready. Have digital copies of your international passport, your acceptance letter from the DLI, and your Provincial Attestation Letter (PAL) saved in a folder on your computer. Trust me, having these files handy from the start will save you a lot of stress.
Creating Your IRCC Secure Account
Your first major step is to create a secure IRCC account. This account is your personal hub for everything related to your application. It’s where you’ll fill out forms, upload documents, pay the fees, and most importantly, where you'll get all official messages from IRCC, including the final decision.
Here's what the sign-in and registration page looks like.
This is your starting point. You'll either sign in if you already have an account or register to start your application journey.
The system gives you two options to log in: "GCKey" or a "Sign-In Partner." For pretty much everyone applying from Nigeria, GCKey is the way to go. A GCKey is just a unique username and password that you create yourself. Pick security questions you'll definitely remember and store your login details somewhere very safe! Losing access to this account can cause serious headaches and delays down the line.
Completing the Forms and Uploading Documents
Once you’re logged in, the portal will walk you through a questionnaire. Your answers to these questions will automatically generate a personalised document checklist and the specific application forms you need. The main form for a study permit from outside Canada is the IMM 1294.
Take your time with this form. Every single detail matters—from your travel history to your educational background. Double-check everything, triple-check it, and if possible, have a trusted friend or family member look it over too. A small mistake, like a wrong date or a typo in a name, can be enough to trigger a refusal.
After the forms, you’ll get to the document upload section. This is where you’ll upload all the evidence you’ve painstakingly gathered—your acceptance letter, proof of funds, passport bio-data page, and all the other supporting documents.
Pro Tip: Before uploading, name your files clearly (e.g., "Proof_of_Funds_Bank_Statement.pdf," "Letter_of_Acceptance.pdf"). This keeps you organised and makes things clearer for the visa officer reviewing your file.
Paying the Fees from Nigeria
The next hurdle is paying the fees. You'll need to pay two separate costs online at this stage:
- Application Processing Fee: The standard charge for IRCC to process your study permit application.
- Biometrics Fee: This covers the cost of getting your fingerprints and photograph taken.
Paying from Nigeria with a Naira card can sometimes feel tricky, but it’s completely doable. The secret is to use a Naira debit card (Mastercard or Visa) that is enabled for international online transactions. Before you attempt the payment, it's a good idea to call your bank. Confirm that your card is activated for foreign payments and check that your daily spending limit is high enough to cover the total fee in Canadian dollars. Most major Nigerian banks can get this sorted for you.
Booking Your Biometrics Appointment
As soon as your payment goes through, you'll receive a Biometric Instruction Letter (BIL) in your IRCC account, usually within 24 hours. You absolutely cannot book your biometrics appointment without this letter.
Once you have your BIL, you need to book an appointment at a Visa Application Centre (VAC) in Nigeria. The main VACs are in Lagos and Abuja. These appointment slots can fill up fast, especially during peak season, so book yours the moment you get your BIL.
On the day of your appointment, make sure you bring:
- Your international passport.
- The Biometric Instruction Letter (BIL) you received.
- Your appointment confirmation letter.
At the VAC, they'll simply take your fingerprints and a digital photo. After that, your part is officially done. Your application is now fully with IRCC, and the waiting game begins.
How to Avoid Common Application Rejections
Nailing your Canada student visa application on the first try has never been more crucial. With recent policy shifts, the landscape is more competitive, and visa officers are poring over every detail. The secret to success? Understanding why other applications fail so you can build one that's bulletproof.
The reality is that approval rates for new study permits have taken a nosedive. This is a direct result of the government's stricter policies and new caps on student numbers. A flawless, well-argued application isn't just a good idea anymore—it's essential. You can read the full research on the steep decline in study permits to get a sense of the current climate.
Let's get into the most common pitfalls for Nigerian applicants and, more importantly, how you can sidestep them.
Fixing Weak Proof of Funds
This is the big one—the number one reason applications get refused. The visa officer isn't just looking for a specific amount of money; they're looking for a stable, clean financial history. A large sum of cash that appears out of nowhere just before you apply is a massive red flag. They call it "lump sum lodging," and it screams desperation.
What to Avoid:
- Suddenly dropping a huge amount of cash into your or your sponsor's account right before applying.
- Handing over bank statements with wild balance swings or big, unexplained transactions.
- Using statements from a microfinance bank that isn't recognised by the Canadian authorities.
What to Do Instead:
- Show a consistent six-month history of funds in a reputable commercial bank. Stability is key.
- If a large sum is a gift, back it up with a notarised gift deed and proof of where the funds came from on the giver's end.
- Seriously consider getting a Guaranteed Investment Certificate (GIC) for CA$20,635. This is the gold standard; it tells the visa officer your living expenses are already sorted and waiting for you in Canada.
This simple process map shows the main stages your application will go through. Each one needs your full attention.
From gathering your documents to the biometrics appointment, every step is an opportunity to make your case stronger.
Crafting a Convincing Statement of Purpose
Your Statement of Purpose (SOP), often called a Letter of Explanation, is your one chance to talk directly to the person deciding your fate. A generic letter that looks copied from the internet will get you nowhere. It needs to be personal, logical, and persuasive.
What to Avoid:
- Vague statements like, "I want to study in Canada because it has good schools." Be specific!
- Forgetting to explain why you chose that particular course at that particular institution.
- Failing to connect your Canadian education to your future career plans back in Nigeria.
What to Do Instead:
- Tell Your Story: Explain your academic and work journey. How did it lead you to this specific programme?
- Show You've Done Your Homework: Mention specific modules in the course curriculum or professors whose work you admire. This proves genuine interest.
- Draw a Clear Line: Connect your past (education/work), your present (the studies in Canada), and your future (your career goals in Nigeria). For example, explain how a degree in Data Science from a Canadian university will help you get a top job in Nigeria's booming tech or banking sector.
A powerful SOP anticipates and answers the visa officer's silent questions. It needs to convincingly explain 'Why this course?', 'Why this school?', 'Why Canada?', and crucially, 'Why will you come back to Nigeria?'.
Proving Strong Ties to Nigeria
A study permit is a temporary visa. That means you have to convince the visa officer that you have every intention of leaving Canada once your studies are complete. This isn't just a suggestion; it's a legal requirement. You need to show them that your life is anchored in Nigeria.
What to Avoid:
- Simply saying "I have family here." That's not proof.
- Having no clear career path or job opportunities waiting for you back home.
- Selling off all your assets in Nigeria before you even apply. This looks like you're planning a one-way trip.
What to Do Instead:
- Document Your Responsibilities: If you care for elderly parents or have a spouse and kids who are staying behind, provide evidence.
- Show Your Economic Footprint: Submit property documents, business registration papers, or even a letter from an employer guaranteeing you a job upon your return.
- Map Out Your Career: Use your SOP to explain exactly how this Canadian qualification will unlock specific, high-value jobs for you in Nigeria's key industries like FinTech, agriculture, or energy.
By tackling these areas head-on, you transform your application from a pile of papers into a credible story of a serious student with a clear plan. For a deeper dive, check out our guide on the top Canada visa rejection reasons for Nigerians.
After Your Visa Is Approved
Seeing that email with the subject "Passport Request" is the moment you've been waiting for. It’s a massive relief, but hold on—the journey isn't quite over yet. Getting this email means your application is approved, but there are a few final, crucial steps before you can start packing.
This next phase is all about getting your visa stamped. You'll need to take your original international passport to the Visa Application Centre (VAC) in either Lagos or Abuja. From there, it gets sent to the Canadian High Commission, where they’ll place the visa counterfoil (the physical sticker) inside. This sticker is your official ticket to board a flight to Canada.
At the Canadian Airport: Your Port of Entry
Landing in Canada feels like a huge win, but be ready for your first official chat with a border services officer. This is where they issue your actual study permit. Think of it this way: the visa in your passport gets you to the door, but the study permit is what lets you stay inside and study.
Keep these documents in your carry-on, ready to show the officer:
- Your international passport, complete with the new visa sticker.
- The Port of Entry (POE) Letter of Introduction from IRCC (this was part of your approval package).
- Your original Letter of Acceptance from your school (DLI).
- Proof of funds (it’s smart to carry copies of the same documents you used for your application).
- Your Provincial Attestation Letter (PAL).
The officer will likely ask a few straightforward questions about where you're studying and your plans. Once they're satisfied, they will print out and give you your official study permit. Guard this document with your life; it’s your primary status document as a student in Canada.
Working While You Study
One of the best perks of being a student in Canada is the ability to work. As of recent updates, most study permits allow you to work off-campus for up to 20 hours per week while school is in session. During scheduled breaks, like the summer holidays, you can even work full-time.
This is a brilliant way to gain valuable Canadian work experience and ease the financial pressure. But always double-check your study permit—it should explicitly state that you are permitted to work. This is a standard condition for most full-time students, but it's your responsibility to confirm.
Understanding your work eligibility from day one is key. It helps you plan your finances and integrate into Canadian society without accidentally breaking any rules.
Looking Ahead: The Post-Graduation Work Permit
Let’s be honest, your long-term goal probably involves more than just a certificate. This is where the Post-Graduation Work Permit (PGWP) becomes incredibly important. The PGWP is an open work permit that lets eligible graduates from Canadian schools work for almost any employer in Canada for up to three years.
Think of it as the bridge from your student life to your professional career in Canada. The experience you get on a PGWP is often the most critical element when you later apply for permanent residency. It’s a well-trodden path from student to professional to permanent resident.
Smart planning for the PGWP starts now, even before you land. You must ensure your programme and school are PGWP-eligible right from the very beginning. To dive deeper into this crucial next step, check out our detailed guide on the Canada Post-Graduation Work Permit.
Answering Your Top Questions About the Canada Study Permit
Even with the clearest instructions, it's natural to have a few lingering questions as you get ready to apply. Let's tackle some of the most common ones we hear from Nigerian students to help you feel confident before hitting that submit button.
How Much Proof of Funds Do I Need in Naira?
This is the million-naira question, and the answer changes almost daily. Officially, Immigration, Refugees and Citizenship Canada (IRCC) requires you to show CA$20,635 to cover your first year's living expenses, plus the full amount for your first year of tuition.
But what does that mean in Naira? Because of the ever-changing exchange rate, the number you have in your head today might be wrong tomorrow. Don’t rely on old rates. A few days before you generate your bank statements, check the current exchange rate from a credible source like the Central Bank of Nigeria (CBN).
A Word of Advice: Don't just aim for the bare minimum. We always recommend adding a buffer of at least 10-15% on top of the required amount. This extra cushion shows the visa officer that you're financially secure, even if the exchange rate takes a dip after you've submitted your application.
Can My Uncle or Aunt Be My Sponsor?
The short answer is yes, but it’s not as straightforward as having a parent or spouse sponsor you. IRCC generally sees sponsorship from immediate family as lower risk.
If your uncle or aunt is sponsoring your education, you have to work a bit harder to build a convincing case. You'll need to submit extra documents that clearly prove your relationship and show that their financial support is solid and reliable.
Key Documents for an Uncle/Aunt Sponsor:
- A notarized affidavit of support, which is a legal document where they formally promise to cover your costs.
- Solid proof of their financial standing. This could include their business registration documents, a letter from their employer, recent pay stubs, and several months of their personal or business bank statements.
- A strong letter of sponsorship explaining why they are funding your education and confirming how you are related.
Your goal is to leave absolutely no room for doubt in the visa officer's mind about your sponsor's ability and willingness to support you.
What's the Easiest Way to Pay My Fees from Nigeria?
Honestly, the most reliable method is using a Naira debit card (Mastercard or Visa) that is set up for international online payments. It's a good idea to call your bank beforehand to make sure your card is enabled for foreign transactions and to check if your daily spending limit is high enough to cover the fees.
You can pay directly on the official IRCC website when you submit your application online. This is usually the quickest option. If you prefer, the Visa Application Centres (VAC) in Lagos and Abuja can also help with payments, but doing it yourself online often gives you more direct control.
Feeling a bit stuck? You don't have to navigate this process on your own. JapaChat is an AI immigration expert built to give Nigerian students instant, reliable answers to these very questions. Whether you're trying to calculate your proof of funds or figure out the sponsorship rules, get the clear guidance you need to apply with total confidence. Start your journey today at https://japachat.com.
-

EB2 Visa Requirements for Nigerians: Your Ultimate Guide
The EB2 visa is all about proving one of two things: you either have an advanced degree or you possess exceptional ability in your field. This isn't just a temporary work pass; it's a direct route to securing a U.S. Green Card, designed for professionals whose skills are in high demand in America.
Your Bridge to a US Green Card

For many talented Nigerian professionals, the American dream can feel like it's locked behind a maze of complicated visa rules. You might be a doctor in Lagos, a software engineer in Abuja's tech scene, or a business analyst in Port Harcourt, wondering if your expertise is the key to permanent residency in the United States.
The EB2 visa is that key.
Think of it less like filling out a standard visa form and more like being headhunted for a top international role because of what you bring to the table. It’s a prestigious path created for people with high-level qualifications. Unlike a temporary work visa that often ties you to a single employer, the EB2 leads directly to a Green Card, giving you and your family the freedom to live and work permanently anywhere in the U.S.
Who Is the EB2 Visa For?
Let's be clear, the EB2 visa isn’t for everyone. It's what's known as an employment-based, second-preference immigrant visa. Its main goal is to attract top talent whose work will benefit the United States.
This category is essentially split into two groups:
- Professionals Holding an Advanced Degree: This is you if you have a master's degree, a PhD, or even a bachelor's degree followed by five years of progressive, hands-on experience in your specialty.
- Individuals with Exceptional Ability: This route is for people who can show a level of expertise significantly above the norm in the sciences, arts, or business.
This visa is a formal acknowledgement that your advanced education or remarkable talent is a valuable asset. The great news for Nigerians is that this isn't just a long shot. The EB-2 visa category has consistently seen a high approval rate for Nigerian applicants, proving it's a very real possibility for qualified candidates who prepare their applications well.
Understanding Your Options
While the EB2 visa is a fantastic tool for skilled professionals, it's just one piece of the puzzle. For those who have significant capital to invest, exploring the EB5 visa for Nigerians presents an entirely different path based on investment.
However, for most skilled professionals, the EB2 remains the most direct route. If you want to get a wider view of the U.S. visa landscape, especially for technical roles, this guide can be quite helpful: Engineers' Guide to US Visas.
By getting to grips with the core EB2 visa requirements, you can start to figure out if your professional background is a match for this incredible opportunity to "japa" the right way.
Qualifying for the EB2 Visa: Advanced Degree vs. Exceptional Ability
The entire EB2 visa process really comes down to one thing: proving you fit into one of two specific categories. Think of them as two different gateways leading to the same destination in the U.S. Figuring out which gate you hold the key to is the first, and honestly, the most important step.
You need to show that you're a professional with either an advanced degree or what USCIS calls exceptional ability in your field. Let's get into what that actually means, using examples that a Nigerian professional would instantly recognise.
The Advanced Degree Pathway
For many Nigerians, this is the most direct route. It’s straightforward, relying heavily on your academic qualifications from Nigerian universities and your work history. USCIS defines an "advanced degree" in two main ways.
The most obvious one is holding a master’s degree, a PhD, or a similar postgraduate qualification. This could be your Master of Science from the University of Ibadan, a PhD from the University of Nigeria, Nsukka, or even a postgraduate degree you earned abroad. Your degree certificate is the star of the show here.
But what if you don't have a master's? This is where the second definition is a complete game-changer for so many experienced professionals in Nigeria.
USCIS considers a U.S. baccalaureate degree (or its foreign equivalent) followed by at least five years of progressive, post-baccalaureate work experience in the specialty field as the equivalent of a master's degree.
This is a massive point. Your Bachelor of Science from UNILAG or Covenant University, paired with the right work experience, can be just as valid as a master’s degree. The keyword to focus on is "progressive". You must be able to prove that your responsibilities, skills, and authority grew over those five years.
Example: A Lagos Tech Professional
Let's picture a software developer who graduated with a BSc in Computer Science from Lagos State University. Over the last six years, she's worked for a couple of FinTech companies in Yaba.
- Years 1-2: She started out as a Junior Developer, writing basic code and handling bug fixes for a payment app.
- Years 3-4: She was promoted to a Mid-level Developer role, where she started owning specific product features and even mentoring NYSC interns.
- Years 5-6: Now, she's a Senior Developer, leading a project team, designing system architecture, and making major technical decisions for a new product launch.
Her career path clearly shows that "progressive" experience. By getting detailed letters from her employers that spell out this growth, she can tick the "advanced degree" box without ever stepping into a master's programme.
The Exceptional Ability Pathway
This path is a different kettle of fish entirely. It’s less about the certificates on your wall and more about the real-world impact you’ve made in your field. This route is designed for people who have a level of expertise that’s significantly above what’s normally seen in the sciences, arts, or business.
You don't need to be a Nobel Prize winner, but you do need to bring strong evidence showing you're a leader or a standout talent. USCIS has a checklist, and you have to meet at least three of their criteria to qualify.
- Official academic record showing a degree, diploma, or certificate from a university or institution related to your area of exceptional ability.
- Letters from current or former employers documenting at least ten years of full-time experience in your occupation.
- A licence or certification to practise your profession (e.g., COREN for engineers, Medical and Dental Council of Nigeria for doctors).
- Evidence that you have commanded a high salary or other payment for your services, showing your exceptional ability.
- Membership in professional associations that require outstanding achievements from their members.
- Recognition for your achievements and significant contributions to your industry by your peers, government bodies, or professional organisations.
Example: A Nollywood Innovator
Think about a film director in Nollywood. She doesn't hold a master's degree, but her work has left a real mark on the industry.
- She has won two "Best Director" awards at the Africa Magic Viewers' Choice Awards (AMVCA). This counts as recognition for achievements.
- She's a member of the Directors' Guild of Nigeria, which requires a solid portfolio review and peer endorsement to gain full membership. This is membership in a professional association.
- Major Nigerian publications like BellaNaija and The Guardian have written articles praising her innovative filmmaking style and her films' box office success. This shows both recognition and significant contributions.
By gathering evidence for these three points, she can build a powerful case for her exceptional ability, meeting the EB2 requirements through a different, but equally valid, path.
To make it even clearer, let's put these two paths side-by-side.
EB2 Eligibility Pathways at a Glance
Requirement Category Advanced Degree Path Exceptional Ability Path (Meet at least 3) Primary Focus Formal education and work experience. Recognised expertise and industry standing. Key Evidence Degree certificates, transcripts, detailed employer letters showing 5+ years of progressive experience. Awards (e.g., AMVCA, Headies), high salary proof, professional memberships (e.g., NBA, NMA), articles about your work, peer recognition. Ideal Candidate A senior engineer with a BSc and 8 years' experience at a top firm in Lagos. A celebrated artist, a well-paid specialist doctor, or a recognised business founder. Ultimately, both routes lead to the same EB2 visa. The key is to honestly assess your own profile and choose the path where your evidence shines the brightest.
So, you've confirmed you meet the basic EB-2 criteria—either with an advanced degree or through your exceptional ability. Now comes a critical fork in the road. You need to decide how you'll apply, and this choice splits the journey into two very distinct paths.
Getting this right is crucial because it determines whether a U.S. employer takes the lead or if you steer the ship yourself.
As you can see, no matter where you start, the destination is the same. The journey, however, can be radically different.
The Company-Led Route: PERM Labour Certification
By far, the most common way to get an EB-2 visa is with an employer's sponsorship. This is officially known as the PERM (Program Electronic Review Management) labour certification process. I like to call it the "company-led" route.
Here’s the deal: if a U.S. company wants to hire you for a permanent, full-time job, they first have to prove something to the U.S. Department of Labor. They must demonstrate that they couldn’t find a single qualified, willing, and able American worker for that specific role. This is no small feat; it involves a rigid and often lengthy recruitment process.
Let's say you're a talented data scientist in Abuja and a tech firm in America offers you a position. That company now has a long to-do list:
- Define the Job: They have to draft a precise job description, complete with minimum educational and experience requirements that perfectly match your profile.
- Test the Market: Next, they must advertise the job far and wide—think newspapers, online job boards, and other approved channels—to hunt for U.S. candidates.
- Prove No Takers: They are required to interview any qualified U.S. applicants and meticulously document legitimate, job-related reasons why none of them were a good fit.
Only after they've successfully shown that no suitable U.S. workers applied can the employer file the PERM application for you. If it gets certified, they can then move forward with the I-140 Immigrant Petition. The key takeaway is simple: the employer does all the heavy lifting, but your entire application is tied to that one job offer.
The Self-Sponsored Game-Changer: The National Interest Waiver (NIW)
But what if you don't have a job offer? Or what if your work is so significant that making an employer jump through the PERM hoops just doesn't make sense? This is where the EB-2 National Interest Waiver (NIW) comes into play, and it’s a total game-changer for many Nigerians.
The NIW is a powerful exception that lets you skip the entire PERM labour certification process. It's the "self-sponsored" route. By filing for an NIW, you're essentially making a direct appeal to the U.S. government, arguing that your work is so vital to the nation's interests that they should waive the need for a job offer and the labour market test.
The heart of a successful NIW petition is proving three core elements: that your proposed work has substantial merit and national importance, and that you are well-positioned to carry it out.
This path offers incredible freedom. You aren't tied to a specific employer, and you are in complete control of your petition. The trade-off? The burden of proof is entirely on your shoulders. You must build an airtight case demonstrating how your unique skills will benefit the United States as a whole.
NIW Examples for Nigerian Professionals
Let’s bring this to life with a few real-world examples for Nigerian professionals:
- A Public Health Researcher from Ibadan: Imagine a researcher at the University College Hospital (UCH), Ibadan, who has dedicated her career to studying infectious disease transmission. She could argue that her expertise in tracking diseases like Lassa fever is directly applicable to U.S. public health security. Her work has substantial merit (improving health outcomes) and national importance (protecting the U.S. population).
- An Agricultural Innovator from Kano: Consider an agricultural scientist from Kano who has pioneered new techniques for growing drought-resistant crops. He could build a compelling case that his innovations could help solve food security challenges and boost agricultural resilience in arid parts of the U.S., like California or Arizona. This work clearly serves the U.S. national interest.
While the NIW is a fantastic opportunity, it's vital to be aware of the changing landscape. After several years of very high approval rates, USCIS has increased its scrutiny. This means that a meticulously prepared case, clearly showing your value to the US, is more critical than ever. You can learn more about these recent EB-2 NIW approval rates and what they mean for skilled applicants.
Ultimately, choosing between the PERM and NIW paths is a strategic decision. It all comes down to your personal circumstances—whether you have a solid U.S. job offer or a powerful story to tell about your work's importance to the nation.
Building a Winning EB-2 Application: A Nigerian Checklist
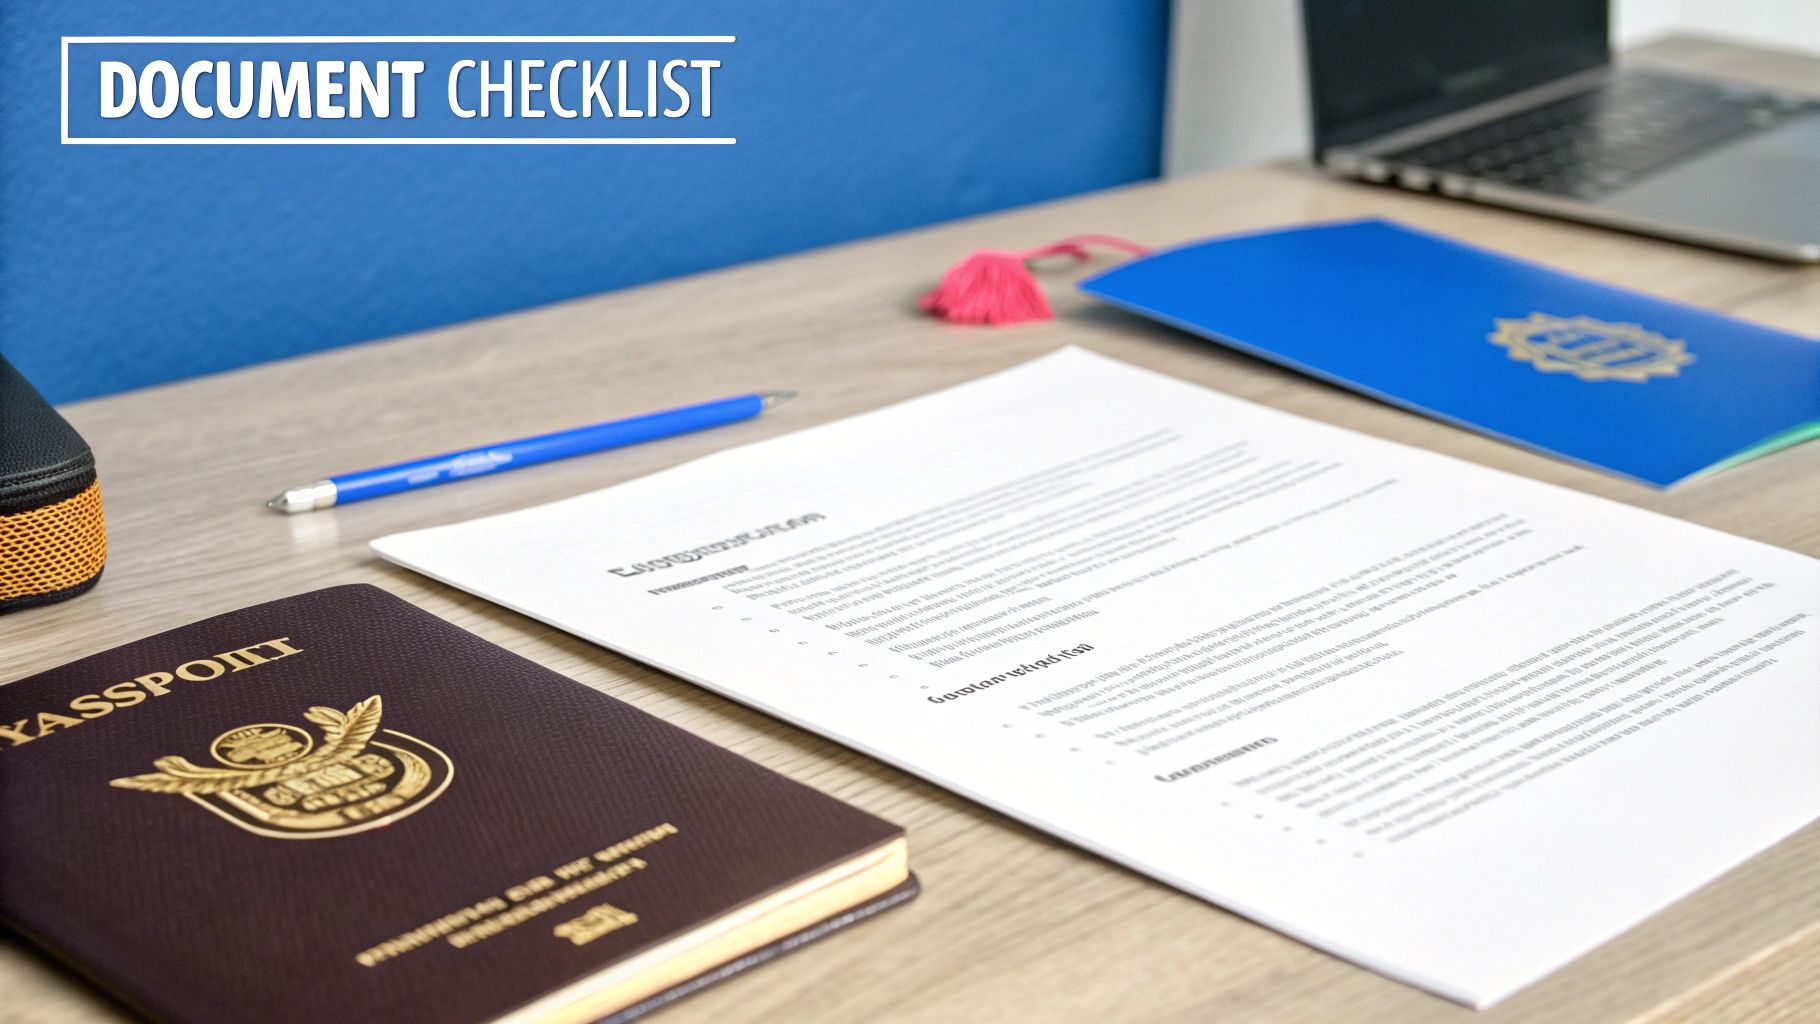
Getting through the EB-2 visa process successfully all boils down to organised, compelling paperwork. Think of your application as a detailed proposal arguing for your professional value. Every single document you submit is another piece of evidence backing up your claim to be at the top of your game.
It’s easy to feel swamped by the requirements. To keep things manageable, let’s break down the essential documents into a clear checklist designed specifically for Nigerian professionals. This will help you gather exactly what you need, whether you're going for the Advanced Degree, Exceptional Ability, or NIW route.
Foundational Documents for All Applicants
No matter which EB-2 path you take, every application is built on a set of core personal documents. These are the non-negotiables. Get these sorted out first, and the rest of the process will feel much less intimidating.
- Valid International Passport: Simple but crucial. Make sure your passport has at least six months of validity beyond the date you plan to enter the U.S.
- Birth Certificate: You’ll need an official copy issued by the National Population Commission.
- Passport Photographs: Two identical colour photos. They must meet the specific U.S. visa photo requirements—don't just use any random passport picture you took for your NIN.
- Educational Credential Evaluation (ECE): This is a huge one for anyone with a Nigerian degree. USCIS needs to see official proof that your degree from UNILAG, OAU, or any other Nigerian university is equivalent to a U.S. degree. A WES (World Education Services) evaluation is considered the gold standard and is highly recommended.
Pro Tip: Start the WES evaluation process as soon as possible. Seriously. It can take weeks, sometimes even months, for your Nigerian university to send your transcripts directly to WES, and that’s a mandatory step. Don't let this be the reason for delay.
Evidence for the Advanced Degree Path
If your ticket is a master’s degree, or a bachelor’s degree plus five years of progressively responsible experience, your evidence needs to spell this out clearly.
Your documents must weave together a story of your academic and professional growth.
- Degree Certificates: Official copies of all your degrees (BSc, MSc, PhD).
- Academic Transcripts: The complete, official transcripts for all your post-secondary education.
- Letters Verifying Work Experience: These are not just simple "To Whom It May Concern" letters. Each letter from an employer (past or present) must detail your job title, dates of employment, specific duties, and—most importantly—show how your responsibilities grew over time to satisfy that "progressive" experience requirement.
Evidence for Exceptional Ability and NIW Paths
For those taking the Exceptional Ability or self-sponsored NIW track, the required evidence is much more extensive. You’re not just proving you have a degree; you're building a powerful case that proves your high standing and why your work matters on a national scale.
Your goal here is to present a portfolio that screams "leader in the field."
- Strong Recommendation Letters: These are mission-critical. They shouldn't be character references from friends or family. They must come from recognised experts and leaders in your field (both in Nigeria and internationally, if possible) who can speak directly to your specific contributions and influence. A huge part of this is securing compelling letters of recommendation; knowing how to ask effectively can make or break your case.
- Proof of High Compensation: Evidence showing you earn a salary, bonuses, or other payment that is significantly higher than others in your field. Think pay slips, tax documents, or detailed employment contracts from your Nigerian employers.
- Published Material About You: Have you been featured in the media? Articles in newspapers, trade journals, or major online publications that are about you and your work are powerful. A feature in a respected Nigerian outlet like TechCabal or The Guardian is excellent evidence.
- Awards and Honours: Any certificates or official letters for national or international awards that recognise excellence in your profession.
- Professional Association Memberships: Proof of membership in professional bodies, especially those that require outstanding achievements from their members to join.
- Evidence of Significant Contributions: This is where you show your impact. Think patents, research publications, or proof of the commercial success of your work that has genuinely moved your industry forward.
Tackling this checklist methodically will turn a daunting process into a manageable project, setting you on a clear path to a successful EB-2 application.
Navigating Timelines, Costs, and Common Mistakes
Taking the leap toward an EB-2 visa is a huge step that demands both patience and smart financial planning. Getting a clear picture of the time and money involved right from the start helps you set realistic goals and sidestep the kind of surprises that can throw your application off track. It’s important to remember this is a marathon, not a sprint.
The costs fall into a few main categories. While the figures here are estimates and can change, they’ll give you a solid baseline for your budget.
A Realistic Look at the Financial Commitment
The total cost for an EB-2 application can differ, but you should generally plan for two main expenses: government filing fees and, more often than not, legal fees.
- USCIS Filing Fees: These are the fixed, non-negotiable charges from the U.S. government. The main fee is for the Form I-140 (Immigrant Petition for Alien Worker), which currently sits at $715. Later, if you're eligible to file for Adjustment of Status with Form I-485, that comes with its own set of fees, roughly $1,440 (this usually includes the biometrics fee).
- Legal Fees: While it's possible to file on your own (especially for an NIW), most people choose to hire an immigration lawyer to get it right. Legal fees for an EB-2 case can vary quite a bit, from $5,000 to over $12,000, depending on how complex your case is. When you convert that to Naira at the current exchange rate, you're looking at a significant investment.
It’s better to see legal help not just as a cost, but as an investment in making your petition as strong and accurate as possible. A good lawyer can help you dodge common mistakes that lead to expensive delays or even a flat-out denial.
Demystifying the Application Timeline
The timeline for an EB-2 visa isn’t one single waiting period. It's a series of stages, and each one has its own processing time. Understanding this flow helps you mentally prepare for the long wait that often follows your initial submission.
One of the most important concepts you need to get your head around is your Priority Date. This is simply the date USCIS officially receives your I-140 petition. Think of it like taking a ticket at a counter—it secures your place in the queue for a visa. As a Nigerian, you fall into the "Rest of World" (ROW) category, which is good news because it usually means a shorter wait compared to countries with massive backlogs like India or China.
You'll need to keep an eye on the monthly Visa Bulletin to see when your Priority Date becomes "current." That’s the green light, telling you it’s your turn to move to the final stage. The journey itself can be unpredictable. For employment-based petitions like the EB-2, the average processing time for the I-140 has been around 6.7 months, though it has bounced between 5.2 and 8.2 months recently. With a huge backlog of over half a million cases pending in 2024, delays are a very real possibility. You can find more insights about current green card statistics and trends on Docketwise.
Common Mistakes Nigerian Applicants Must Avoid
So many promising applications from Nigeria get weakened by simple, avoidable errors. Knowing what these common pitfalls are can seriously boost your chances of success.
- Improper Credential Evaluation: Just sending in your Nigerian degree certificate won’t cut it. You absolutely must have it evaluated by a designated U.S. agency like WES to prove it’s equivalent to a U.S. degree. Failing to do this is a classic mistake that often leads to a Request for Evidence (RFE) or an outright denial.
- Weak Evidence of Progressive Experience: If you're using the "BSc + 5 years" route, your proof has to be ironclad. The letters from your employers need to do more than just state your job title and dates; they must spell out exactly how your responsibilities and skills grew over those years. A generic letter is a red flag.
- Underestimating NIW Evidence: For a National Interest Waiver, the standard of proof is incredibly high. A lot of applicants fall short because they don't provide enough objective evidence showing their work is important on a national scale. Your own statements aren't enough—you need hard data, letters from other experts, media mentions, and anything else that builds a powerful, undeniable case.
- Misrepresentation: This is the big one. Never, ever provide false information or fake documents. The consequences are severe and can get you permanently banned from the U.S. Honesty is everything. It’s crucial to understand what counts as visa application misrepresentation and its serious outcomes.
Where Do You Go From Here? Your Path to a US Green Card
Navigating the EB-2 visa process can feel like a huge undertaking, but it’s a well-defined path to an incredible future. For Nigeria’s brightest professionals, this isn't just a dream; it's an achievable goal. You already have the talent and the drive—now it's just a matter of putting together a compelling application that proves it.
Think back to the two main routes we covered. The Advanced Degree path is a solid fit if you hold a master's degree or a bachelor's with five years of progressive experience. On the other hand, the Exceptional Ability path is designed for those who have clearly risen to the top of their profession. You can approach either of these with a company sponsoring you through the PERM process, or you can go it alone with the National Interest Waiver (NIW) for more control over your career.
So, what's the very next thing you should do?
Charting Your Course
Let's turn all this information into a concrete plan. Here are the immediate steps you can take to get the ball rolling:
-
Do a Proper Self-Assessment: Take a serious, honest look at your career and qualifications. Which path—Advanced Degree or Exceptional Ability—is the best showcase for your unique strengths? Be completely realistic about the documents and evidence you can actually get your hands on.
-
Start Gathering Your Documents Now: Seriously, don't put this off. Begin the process of requesting official transcripts from your university in Nigeria so you can get your credentials evaluated by WES. At the same time, contact your past and current employers for detailed letters confirming your work experience. Getting a head start on this will save you a world of stress later.
-
Find an Experienced Immigration Lawyer: This isn't a step to skip. A good lawyer, especially one who gets the unique challenges and opportunities for Nigerian applicants, can be the deciding factor. They can spot weaknesses you might miss and help you build the strongest case possible.
Remember, this is a marathon, not a sprint. Every document you collect and every step you take brings you one step closer to your goal.
Burning Questions from Nigerian EB-2 Applicants
As you get deeper into the EB-2 visa process, questions are bound to come up. That’s perfectly normal. Getting straight answers is the best way to keep your confidence high, so let’s dive into some of the most common questions we hear from Nigerian professionals like you.
Can I Really Apply for the EB-2 NIW from Nigeria Without a U.S. Job Offer?
Yes, you absolutely can. This is the standout feature of the National Interest Waiver (NIW) and what makes it so attractive. It’s a self-petition, which means you don't need a U.S. company to sponsor you or offer you a job.
Instead of focusing on an employer, your entire NIW application is about you and your work. Your goal is to convince U.S. immigration that what you do is important to the United States and that you have a solid plan to continue that work once you arrive.
How Can I Prove My 5 Years of Progressive Experience from My Jobs in Nigeria?
This is where your documentation has to tell a story. You'll need detailed employment verification letters from all your relevant employers in Nigeria—both past and present. These letters need to go far beyond simply stating your job title and employment dates.
Each letter should paint a clear picture of your role, specifically outlining your duties and showing how your responsibilities expanded over time. Think of it as a certified summary of your career progression, signed by a manager or HR. To make your case watertight, include supporting evidence like promotion letters, official performance reviews, and even notices of salary increases. These documents prove your growth wasn't just on paper.
My Priority Date Isn't Current. What Does That Mean for Me?
Your priority date is simply the date USCIS officially received your I-140 petition. It's your place in the line for a visa. When you check the monthly Visa Bulletin and see your date isn't "current" yet, it just means you have to wait a bit longer before you can move to the final stage, which for applicants in Nigeria is consular processing in Lagos.
It's crucial to understand that this waiting period does not harm your case in any way. Your petition remains approved and valid. You just need to be patient for your turn in the queue.
The good news? Nigeria is in the 'Rest of World' category, which typically means much shorter waits compared to countries with huge backlogs. Keep a close eye on the Visa Bulletin, published monthly by the U.S. Department of State, to track your progress and know when it’s your time.
Planning your move abroad requires accurate information and a solid strategy. JapaChat is here to provide the clarity you need. As Nigeria’s AI immigration expert, we offer instant answers to your visa questions and provide tools to help you organise your journey with confidence. Start planning your future today by visiting https://japachat.com.
-

Applying for a UK Visit Visa in Nigeria
So, you're dreaming of a trip to the UK. Maybe it's to see the sights in London, visit family up in Manchester, or even attend a quick business conference. Whatever your reason, the Standard Visitor Visa is your ticket to get there. It's the official green light you need to enter the UK for things like tourism, family visits, or certain business activities for up to six months.
What a UK Visit Visa Means for You

For many Nigerians, the idea of applying for a UK visa can feel a bit daunting. We've all heard the stories of applications getting turned down, and the process itself can look pretty complex from the outside.
But here’s the best way to think about it: this isn't a barrier. It’s more like a formal invitation process. Your job is to show the UK government that you're a genuine visitor who plans to return home after your trip. Getting this right is the first, and most important, step.
This guide is here to walk you through it all, breaking down the entire journey into simple, manageable steps. We'll clear up the confusion around the requirements and give you the confidence you need to make your travel plans a reality. A successful application is completely within your reach with the right information and preparation.
To give you a quick snapshot, here’s what the Standard Visitor Visa looks like for someone applying from Nigeria.
UK Standard Visitor Visa at a Glance
Feature Details for Nigerian Applicants Purpose of Visit Tourism, visiting family/friends, business meetings, short-term study (under 30 days), private medical treatment. Duration of Stay Typically up to 6 months per visit. Financial Requirement Must prove you can fund your trip and return journey without accessing public funds. No "show money" figure; it's about affordability. Return Intention Crucial to prove strong ties to Nigeria (job, family, property, CAC documents, etc.). Work Prohibition You cannot work (paid or unpaid) for a UK company or be self-employed in the UK. Application Location Must apply from outside the UK, usually from Nigeria. This table covers the basics, but the real key to success is understanding the nuances, especially when it comes to proving your intentions.
The Reality of UK Visa Applications from Nigeria
Let's be upfront about the numbers. While the global approval rate for the UK visitor visa hovers around 77%, Nigerian applicants face a slightly lower success rate of about 67.8%.
Why the difference? It often boils down to the high level of scrutiny on financial documents and the need to provide rock-solid proof that you have strong reasons to return to Nigeria. Despite these hurdles, getting your visa is absolutely achievable when you present a clear, honest, and well-prepared application. You can discover more insights about global UK visa statistics and see for yourself why a strong case is so important.
What You Can Do with a Standard Visitor Visa
The UK visit visa is quite flexible, but it comes with some very firm rules. Knowing exactly what’s allowed helps you frame your application correctly from the start and avoid any trouble down the line.
Here’s a breakdown of what's permitted:
- Tourism and Leisure: This is the most popular reason. You can explore the UK, see the sights, and just enjoy a holiday.
- Visiting Family and Friends: You can stay with relatives or friends living in the UK.
- Business Activities: You're allowed to attend meetings, conferences, or negotiate contracts. But—and this is a big but—you cannot do any paid or unpaid work for a UK company.
- Short-term Study: Fancy a short course? You can take a recreational class that lasts no more than 30 days, like a cooking workshop or a language course.
- Medical Treatment: You can come to the UK for private medical treatment, as long as you can prove you’ve made arrangements and can pay for it all yourself.
If there are two things to take away, it's these: You must prove you can comfortably pay for your entire trip without working in the UK, and you must have compelling reasons (like a good job, family commitments, or property) that guarantee you'll return to Nigeria. This is the heart of a successful application.
Meeting the Core UK Visa Requirements
Getting a UK visit visa isn't about crossing your fingers and hoping for the best. It's about methodically proving three core things to the Entry Clearance Officer who reviews your file. I like to think of it as a three-legged stool. If any one of those legs is weak, the whole application comes crashing down.
These three pillars are your genuine intention to visit, your financial stability, and your strong reasons to return to Nigeria. Getting this right is everything, because this is the exact framework UK Visas and Immigration (UKVI) uses to judge your application. You have to convince them on all three points.
Pillar 1: Your Visit Must Be Genuine
First things first, you need to prove you're a genuine visitor. This is the UKVI’s way of asking, "Are you a real tourist, or are you just trying to ‘japa’ and not come back?"
Your application has to tell a story that makes sense. If you're applying as a tourist, you should have a credible itinerary. It doesn't need to be minute-by-minute, but you should know where you plan to stay and what you want to see. A flimsy plan just looks suspicious.
If you’re visiting family, like your sister in London, you’ll need a proper invitation letter from her. This letter should clearly state your relationship and why you’re visiting. Your goal is to paint a clear picture of a well-thought-out, temporary trip. For a deeper dive into different reasons for visiting, you can explore our guide on the various UK visa types available to Nigerians.
Pillar 2: You Must Have Sufficient Funds
This second pillar is a big one and often where many Nigerian applications fall short. You have to prove you can afford your trip—the flight, accommodation, and spending money—without needing to work or ask for public help in the UK.
There isn't a magic number that guarantees approval. What matters more is that your bank statements tell a logical story. A sudden, massive deposit of millions of Naira a week before you apply, a practice we call 'funds parking', is one of the biggest red flags you can raise.
What visa officers are looking for is a stable financial history. They want to see your salary coming in consistently, a pattern of savings, and a closing balance that shows you can fund your trip without draining your entire life's savings. Your six-month bank statement needs to reflect your real financial life, not a last-minute ‘loan’ from an uncle.
Pillar 3: You Must Have Strong Ties to Nigeria
Finally, and arguably the most crucial part, is proving you have strong ties that will pull you back home to Nigeria after your holiday. This is your evidence that you have a life and commitments you won't just abandon.
Think about it: what roots you to Nigeria? It's not enough to just say you'll return; you have to provide concrete proof.
- Your Job: A letter from your employer is gold. It should confirm your position, salary, and that your leave for the trip has been approved. This shows you have a stable job waiting for you.
- Your Business: For entrepreneurs, your CAC registration documents, business bank statements, and tax clearance certificates are essential. They prove you run a legitimate, active enterprise in Nigeria.
- Your Family: Are you married? Do you have kids in school? These are powerful ties. Include your marriage and their birth certificates as evidence of these responsibilities.
- Your Property: Owning land or a house in Nigeria is a very strong anchor. Documents like a Certificate of Occupancy or Deed of Assignment can make a huge difference.
Your entire application needs to make a convincing case that your life, career, and responsibilities are firmly planted in Nigeria, making your UK trip exactly what you claim it is: a short, temporary visit.
The Step-by-Step Visa Application Process
Alright, you've got a handle on the main requirements. Now, let’s get down to the brass tacks: the actual application process. Think of this as your roadmap, guiding you from the very first click online to the day you attend your appointment here in Nigeria.
The entire journey starts and ends on one official platform: the UK Government website, GOV.UK. Be warned, this is the only legitimate place to begin your application. It’s your official starting line.
Completing the Online Application Form
First things first, you need to tackle the online application form. This isn't a quick two-minute job; it's a deep dive into your personal details, travel history, financial standing, and exactly what you plan to do in the UK.
Let me be clear: accuracy is everything here. A tiny mistake—getting a date wrong, slightly misstating your salary—can create a red flag for the visa officer. Take your time, check every single answer twice, and be ruthlessly honest. The details you enter here must perfectly match the documents you’ll provide later.
This diagram neatly summarises the three pillars of a successful application. You're proving your reason for visiting, showing you can fund the trip, and demonstrating that you have strong reasons to return to Nigeria.
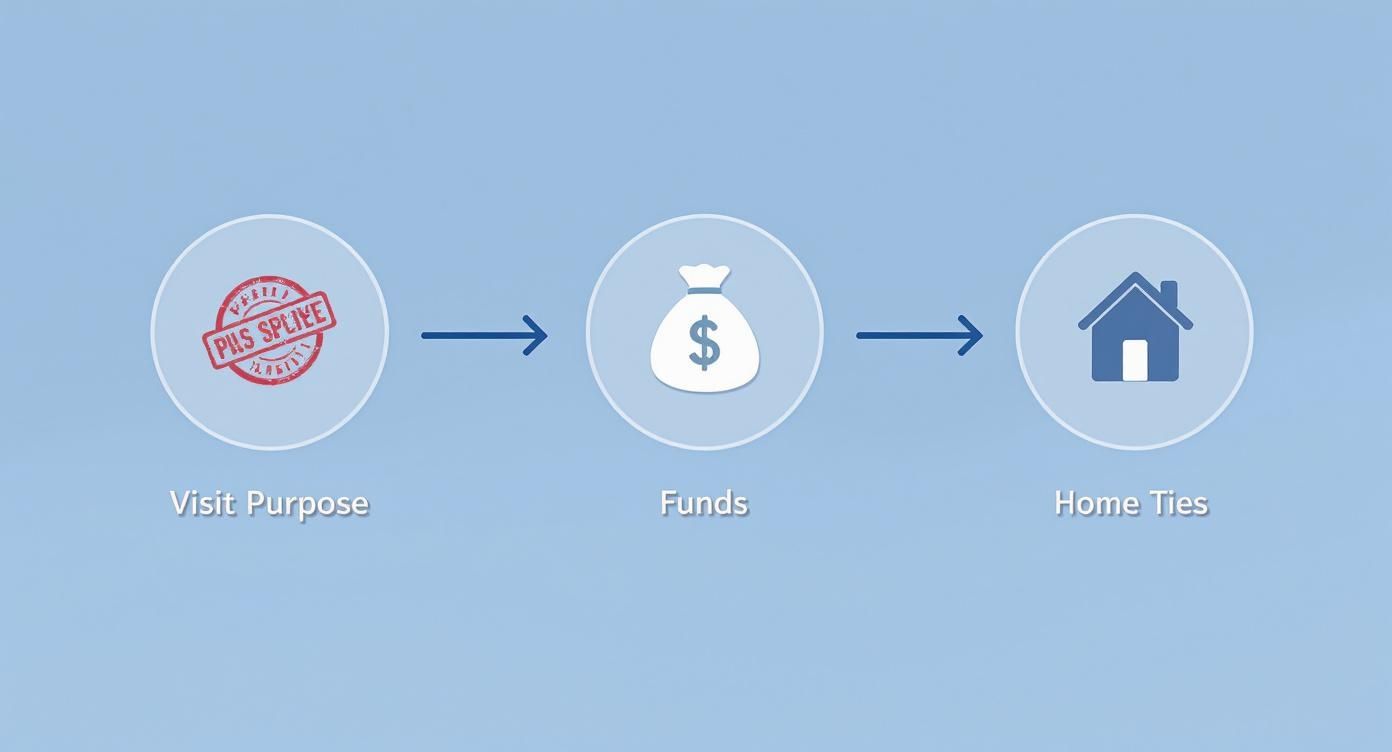
Getting these three elements right is the foundation of your entire case. You'll build on this foundation as you fill out the form and gather your documents.
Once you’ve completed the form, you’ll be prompted to pay the visa fee online. The standard fee for a 6-month visitor visa currently sits at £115. You have to pay this fee before you can move on to the next step.
Booking Your Appointment at the VAC
After your payment goes through, the system will pass you over to the website for TLScontact, the UK's official partner in Nigeria. This is where you'll book your appointment at a Visa Application Centre (VAC).
You can choose a VAC in major hubs like Lagos (they have centres in both Victoria Island and Ikeja) or Abuja. This is also the point where you'll upload digital copies of all your supporting documents. It’s absolutely vital to have everything scanned and ready to go before you even start this stage.
Pro Tip: Don’t leave booking your appointment to the last minute. Appointment slots, especially during peak travel times like summer or Christmas, get snapped up fast. Aim to book your slot at least a few weeks before your planned travel date.
Attending Your Biometrics Appointment
When your appointment day arrives, you must show up at the VAC in person. The main purpose of this visit is for biometrics collection. It’s a straightforward process where they’ll take your fingerprints and a digital photo.
Be sure to have these items with you:
- Your current, valid Nigerian international passport.
- A printout of your appointment confirmation.
- The document checklist that was generated after you finished your online application.
Remember, the staff at the VAC are just there to collect your information and biometrics. They play no part in deciding whether you get the visa. From there, your application is sent electronically to UK Visas and Immigration (UKVI), where an Entry Clearance Officer makes the final call.
Choosing a Service Speed
As you book your appointment on the TLScontact site, you’ll see options for different service speeds. Which one you pick really comes down to how urgently you need an answer and what your budget looks like.
- Standard Service: This is the default option. UKVI’s goal is to process these within 15 working days (roughly three weeks). However, during busy periods, it can definitely take longer.
- Priority Visa (PV) Service: For an extra fee (around £500), this service aims to get you a decision within 5 working days. It just fast-tracks your application in the queue; it absolutely does not improve your chances of success.
- Super Priority Visa (SPV) Service: This is the Usain Bolt of visa services, aiming for a decision by the next working day. It comes with a hefty price tag (around £1,000) and should only be considered for genuine, provable emergencies.
Take a moment to weigh whether the extra cost for a faster service makes sense for you. If your trip isn't urgent and your application is solid, the standard service is usually the most practical choice.
Your Essential Document Checklist for Nigeria
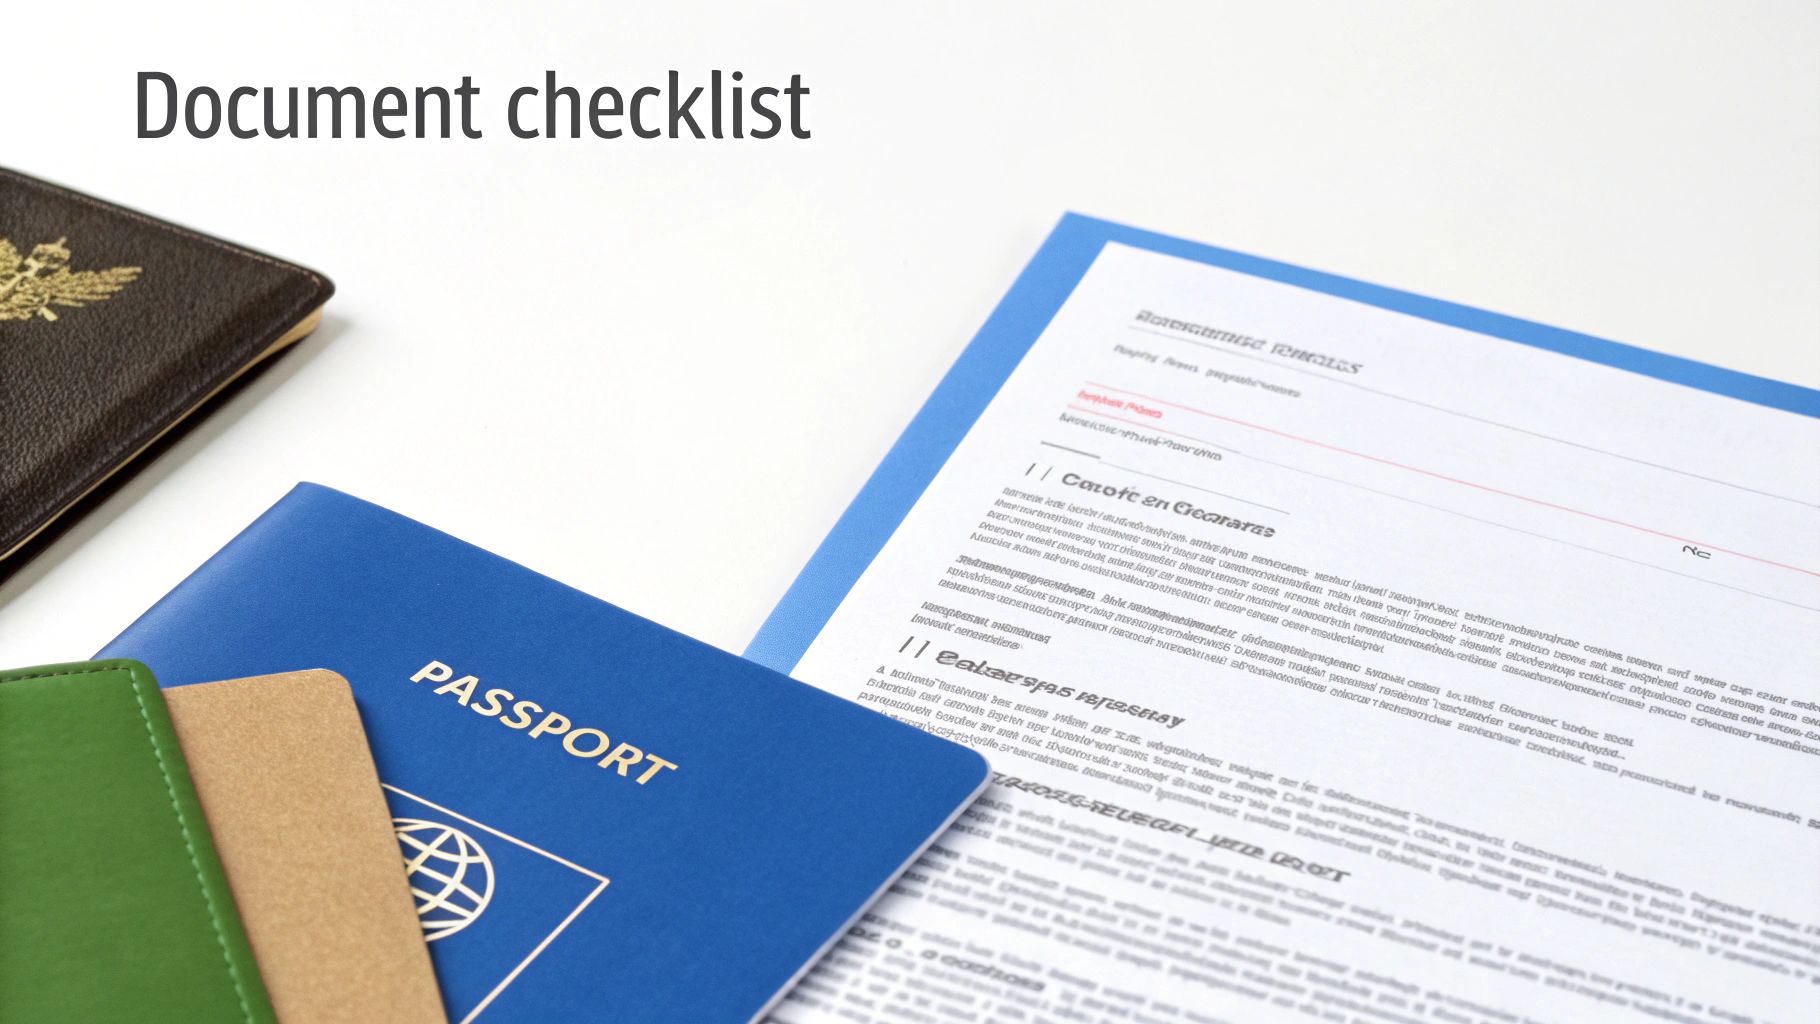
Alright, let's get down to the paperwork. Think of your supporting documents as your proof. You're building a case for the Entry Clearance Officer, and every single document is a piece of evidence to show you’re a genuine visitor who will return to Nigeria.
This isn't just a list; it's a strategy. We'll go beyond the basics and focus on the specific documents that Nigerian applicants need to build a rock-solid, refusal-proof application.
Core Documents for Every Applicant
No matter who you are or what you do, these documents are the absolute foundation of your application. Don't even think about submitting without them. They are non-negotiable.
- Your Nigerian International Passport: It has to be valid for your entire planned stay in the UK. Just as importantly, make sure it has at least one full blank page (both sides) for the visa sticker itself.
- Proof of Financial Stability: This is where many applications fall apart. You need your personal bank statements from the last six months. The officer wants to see a consistent and credible flow of money—your salary, business income, whatever your source is—coming in regularly.
- A Clear Travel Itinerary: You don’t need to buy your flight tickets yet, but you do need a plan. Show your proposed travel dates, where you intend to stay (like a hotel booking confirmation), and a simple outline of your planned activities.
Proving Your Strong Ties to Nigeria
This is the big one. You have to convince the visa officer that you have very good reasons to come back home. Your evidence here will depend entirely on your personal circumstances.
Document Checklist by Applicant Type
Your profession dictates the kind of proof you need to provide. A business owner's evidence of ties will look very different from a student's. Here’s a quick comparison to help you figure out exactly what applies to you.
Document Type Salaried Employee Business Owner Student/NYSC Proof of Employment/Status Letter of Introduction from employer Certificate of Incorporation & other CAC documents Letter from university or PPA Proof of Income Last 6 months' payslips Business bank statements (last 6 months) Sponsor's financial documents Proof of Legitimacy N/A Business Tax Clearance Certificate N/A As you can see, the goal is always to present official, verifiable documents that confirm your status and responsibilities in Nigeria.
For the Salaried Employee
If you’ve got a 9-to-5, your job is your strongest tie. You need to prove it’s real, stable, and waiting for you.
- A Letter of Introduction from Your Employer: This isn’t just any letter. It must be on official company letterhead and clearly state your job title, your annual salary, and when you started. Crucially, it must confirm that your leave for the trip is approved and that you're expected back at your desk afterwards.
- Your Last Six Months' Payslips: These are vital. They must match the salary deposits you show in your bank statements, creating a clean, easy-to-follow financial trail for the officer.
For the Business Owner
Running your own business? You need to show that it's a legitimate, thriving enterprise that you wouldn't just abandon.
- Corporate Affairs Commission (CAC) Documents: Your Certificate of Incorporation is the ultimate proof. Include all your registration documents to show your business is officially recognised by the Nigerian government.
- Business Bank Statements: Just like personal statements, provide the last six months for your business account. This demonstrates healthy financial activity and turnover.
- Tax Clearance Certificate: This is a powerful document. It shows you're a responsible business owner who is compliant with Nigerian law, which adds a huge amount of credibility to your application.
For Students or NYSC Members
Your ties are to your education and national service. The focus is on proving you have commitments to complete.
- A Letter from Your University: Get an official letter confirming you are a current student in good standing. It should also mention your course and your expected graduation date.
- For NYSC Members: You'll need an official letter from your Place of Primary Assignment (PPA). It must confirm your service and state your expected passing out parade (POP) date.
The secret is to build a narrative. For example, a business owner’s CAC documents, business bank statements, and tax clearance certificate all work together to tell a powerful story of a thriving enterprise that they would never abandon for an illegal stay in the UK.
Documenting Financial Sponsorship Correctly
It’s very common for Nigerian applicants to have their trip paid for by a sponsor, whether in Nigeria or the UK. This is perfectly fine, but you have to document it perfectly or it can lead to a quick refusal.
If someone else is footing the bill, you must provide:
- A Sponsorship Letter: A formal letter from your sponsor is essential. It needs to explain their relationship to you and clearly state they are financially responsible for your trip, specifying what they’ll cover (e.g., flights, accommodation, spending money).
- Sponsor's Financial Documents: Your sponsor must back up their promise with proof. This means their own bank statements for the last six months and evidence of their income, like their payslips or business documents.
- Proof of Relationship: You have to prove how you're connected. This could be a birth certificate if your parent is sponsoring you, or a marriage certificate for a spouse.
While we're focused on the UK, it's often helpful to see how other visa systems work to appreciate the universal logic. For instance, understanding visa insurance requirements for Europe highlights how different regions approach documentation. The core principle is always the same: present a complete, logical, and believable set of documents.
Avoiding Common Visa Refusal Reasons
Getting that visa refusal email is gut-wrenching, especially after all the time and money you've poured into the application. To make sure that doesn't happen to you, it's crucial to understand why so many applications from Nigeria get turned down. Let’s get into the common mistakes and how you can steer clear of them.
Think of the UK's Entry Clearance Officer (ECO) as a detective. They're trained to hunt for inconsistencies, gaps, and anything that just doesn’t add up in your story. If any part of your application seems shaky or poorly explained, it raises an instant red flag. Your goal is to build a case so solid and well-documented that it leaves them with no questions, only an approval stamp.
This section will help you get inside the mind of an ECO, so you can spot and fix any weak links in your application long before you hit submit.
The Danger of Unexplained Finances
One of the biggest tripwires for Nigerian applicants is something called 'funds parking'. This is when a large chunk of cash suddenly lands in your bank account right before you apply for your UK visit visa.
Here's a classic example: Ade needs to show he has ₦4 million for his trip. A week before he prints his bank statement, his uncle sends the full amount to his account. To the ECO, this looks highly suspicious. They can't tell if this money is genuinely his or if it's just a loan to make his account look good. It immediately casts doubt on his real financial stability.
To avoid this trap, your financial history needs to tell a consistent story. Your bank statements should reflect a logical pattern of income, savings, and spending that builds up to the closing balance. It has to make sense.
If you do get a large, legitimate sum of money—maybe from selling a car or a generous gift from a parent—you absolutely must explain where it came from. Provide the proof, whether it's a Deed of Sale or a signed gift deed letter from the person who sent it. Never leave a big deposit unexplained.
Weak Proof of Ties to Nigeria
Just saying you'll come back to Nigeria isn't nearly enough. You have to prove it with hard evidence. A vague application on this point is practically asking for a refusal.
Let's take Tunde's case. He applied for a tourist visa, but his employment letter was too generic. It stated his job title but didn't confirm his leave was approved or mention when he was expected back at work. He also said he owned a business but didn't bother to include his CAC registration papers.
What does the ECO see? Tunde's ties look weak and unproven. His job doesn't seem secure, and without CAC documents, his "business" is just a claim. This creates serious doubt about whether he actually intends to return.
You have to back up every claim with official documents to make your case strong:
- Employment: Get a detailed leave letter on company letterhead that explicitly states your return date.
- Business: Don't forget your full CAC registration documents and your business bank statements.
- Family: Prove your responsibilities with marriage and birth certificates.
- Property: If you own property, include the Certificate of Occupancy or Deed of Assignment.
For a deeper dive, check out our guide on the most common UK visa rejection reasons and how to tackle them.
Inconsistent Information Across Your Application
This is another huge red flag. It happens when the details on your application form don't match what's in your supporting documents. For example, you write that your monthly salary is ₦500,000, but your payslips and bank statements only show ₦450,000 coming in.
That small difference instantly destroys your credibility. The ECO will think you're either careless or, worse, dishonest—and neither gets you a visa. You need to comb through your entire application, checking every single detail to ensure it all lines up perfectly before you submit.
So, What Happens After You've Applied?
That feeling after you walk out of the VAC in Lagos or Abuja… it's a mix of relief and anxiety. You’ve submitted everything, your biometrics are done, and now the real waiting game begins. It can be a bit nerve-wracking, but let's break down exactly what's happening behind the scenes and what you should expect next.
Once your fingerprints and photo are taken, your entire application bundle is securely sent off to a UK Visas and Immigration (UKVI) Entry Clearance Officer. This is the official who will meticulously go through your documents and decide the fate of your application.
The standard waiting time is typically around 15 working days, which is about three weeks. However, be prepared for this to stretch a bit longer, especially during busy travel periods like summer or the Christmas holidays.
How Can I Check My Application Status?
Staring at your phone waiting for an update can be maddening. The good news is, you don't have to wait in complete darkness. The TLScontact portal, where you uploaded your documents, becomes your window into the process.
You can log in with the details you were given after your appointment to see where your application is at. For a deeper dive into making sense of the different statuses, our guide on how to master visa application tracking is a lifesaver.
You’ll typically see the status change from something like "Application Transferred to UKVI" to the one you’re waiting for: "Decision Made." This simply means the officer has made their final call, and your passport is being sent back to the VAC.
One crucial thing to remember: the online tracker is very discreet. It will tell you that a decision has been made, but it will never reveal what the decision is. The suspense continues until you have your passport back in your hands.
Getting the Decision and Your Passport
The moment of truth arrives with an email or SMS from TLScontact, telling you that your processed application is ready for collection.
When you go to pick it up, there are two possible outcomes.
If your visa was granted, you’ll find a sticker (called a vignette) placed on one of the pages of your passport. It’s a beautiful sight! Before you start celebrating, do a quick but thorough check of the details:
- Make sure your name and passport number are perfect.
- Check the "valid from" and "valid until" dates to ensure they cover your intended travel period.
- Confirm the visa type is correct, usually "C-VISIT."
If your application was refused, you’ll receive your passport back along with an official refusal letter. It’s disappointing, but don't just throw it aside. That letter is incredibly valuable. It will explain exactly why the Entry Clearance Officer wasn't satisfied. Read every word, understand their concerns, and see it as a blueprint for what to fix if you choose to re-apply for a UK visit visa down the line.
Frequently Asked Questions
When you're deep into the UK visit visa application, a hundred little questions can pop into your head. Let's tackle some of the most common ones we hear from Nigerian applicants, giving you straight, practical answers to clear things up.
How Much "Show Money" Is Enough?
Honestly, there's no magic number that guarantees your visa gets approved. The Home Office is less interested in a specific figure and more interested in the story your finances tell. Can you comfortably cover your entire trip – flights, accommodation, and daily spending – without wiping out your life savings? That's the real question.
Let's break it down for a typical two-week trip. You might budget for a flight (say, ₦1.5M – ₦2.5M), a hotel (maybe £70 – £150 a night), and some spending money (£50 – £100 per day). But here’s the golden rule: the history of your funds is far more important than the final balance. A large, suspicious deposit right before you apply is a huge red flag. They want to see a consistent, believable pattern of income and savings over time.
Can I Get a Visa if I Am Unemployed or Self-Employed?
Yes, you absolutely can, but you have to be smart about it. If you're currently unemployed, the focus shifts to proving your deep roots in Nigeria. This could be through significant family responsibilities, property you own, or other commitments you can't just walk away from. You'll also likely need a sponsor with a rock-solid financial profile who can legitimately fund your entire trip.
For freelancers and business owners, it's all about proving your business is real, stable, and profitable. You need to pull out all the stops: your CAC registration documents, business bank statements showing regular cash flow, and a recent Tax Clearance Certificate. It also helps to include things like client contracts, invoices, or a portfolio of your work. Your goal is to convince the visa officer that your business is a compelling reason for you to return to Nigeria.
What Should I Do if My UK Visa Is Refused?
First things first: take a deep breath. Don't panic. The most crucial step is to read the refusal letter from top to bottom. The Entry Clearance Officer will have laid out their exact reasons for the decision, and you need to understand every single point. Remember, standard visitor visas don't come with a right of appeal in the UK.
Your best bet is usually to prepare a fresh application. This isn't just about trying again; it's about directly fixing the weak points from the first attempt. If they questioned your finances, you need to come back with clearer bank statements and a detailed letter explaining where every large deposit came from. A stronger, well-prepared new application that addresses the previous concerns head-on is often the key to success.
Is the Priority Visa Service Worth the Extra Cost?
The Priority Visa (PV) service, which promises a decision within 5 working days, can be a lifesaver if you have a genuinely urgent need to travel and your application is squeaky clean. But let’s be very clear: paying more does not increase your chances of getting the visa. It only speeds up the processing time.
It’s also not a guarantee. If your case is complex—maybe you have a previous refusal or a tricky financial history—it could still be delayed for extra checks. So, you have to weigh the high cost against your actual need for speed. If you're not in a massive rush, the standard service is a much more sensible and cost-effective choice.
Feeling like you're drowning in visa details? You don't have to navigate this alone. JapaChat is Nigeria's AI immigration expert, built to give you instant, clear answers to your visa questions. Get the personalised guidance you need to plan your trip with confidence. Start chatting for free with JapaChat.
-
Complete Work Permit Canada Requirements for Nigerians
When you're trying to get a Canadian work permit from Nigeria, it all boils down to a few key things: a genuine job offer from a Canadian employer, enough money to support yourself, and solid proof that you'll head back home once your work contract is up.
Think of it this way: your work permit isn't a free pass to work anywhere in Canada. It's a specific key for a specific lock—a particular job with a particular company. Most of the time, your future employer has to get something called a Labour Market Impact Assessment (LMIA). This is just the government's way of confirming that the company couldn't find a Canadian or permanent resident to do the job first.
Your First Look at Canada Work Permit Requirements
For many Nigerians dreaming of a Canadian career, the application process can feel like navigating Lagos traffic during rush hour—overwhelming. But if you break it down, it starts to make sense. A Canadian work permit is a temporary visa that gives you the legal green light to work in the country. It's not the same as permanent residency, but for countless people, it's the most important stepping stone on that path to "japa".
The first thing to get straight is that there are two main routes you can take. One is the super common highway, and the other is a much quieter side street.
- The Job Offer Path (Employer-Specific Permit): This is the journey over 90% of applicants from Nigeria will take. It starts when you find a Canadian employer who wants to hire you. They'll give you a formal job offer letter and, in most cases, a positive LMIA. Your permit is then tied directly to them—you can't just switch jobs without getting a new permit.
- The Special Path (Open Work Permit): This one is much rarer. It lets you work for almost any employer in Canada. You might qualify for an open work permit if you're the spouse of an international student or a skilled worker already in Canada, or if you fit into a few other special programmes.
The Core Mindset for Success
Approach your application like you're trying to convince a skeptical bank manager in Abuja for a loan. You have to prove you're a reliable person who will stick to the agreement. For a Canadian work permit, that means convincing the visa officer of two critical things.
First, you must show them you've got the skills and experience to actually do the job you've been offered. Your CV, reference letters, and qualifications are your proof.
Second—and this is just as crucial—you have to demonstrate that you have strong ties to Nigeria and will leave Canada when your permit expires. This isn't optional. Visa officers are trained to look for things like family back home, property you own, or a career plan that makes sense for you to return to Nigeria. For a broader look at this journey, our guide on how to relocate to Canada from Nigeria provides some great context.
The Canadian government has a simple goal: fill temporary gaps in the job market while making sure foreign workers respect the rules of their stay. Your entire application needs to show the visa officer that you'll help with the first part and absolutely follow the second.
Before we dive deeper, let's quickly summarise the essentials you'll need to have in order.
Key Requirements Snapshot for Nigerian Applicants
This table gives you a quick-glance view of the fundamental pillars of a successful work permit application. Getting these right from the start is half the battle won.
Requirement Category What This Means for You Valid Job Offer You need an official offer letter from a Canadian company. This is your ticket to apply. Employer Compliance Your employer must be eligible and (usually) have a positive Labour Market Impact Assessment (LMIA). Proof of Qualifications You must prove you have the experience, education, or skills required for the job. Proof of Funds You need to show you can support yourself and any family members upon arrival in Canada. Ties to Nigeria You must convince the visa officer you will return home after your permit expires (family, property, etc.). Admissibility You must be in good health and have no serious criminal record. A medical exam may be required. Nailing each of these points is non-negotiable. Your application builds a case, and every document you provide is a piece of evidence supporting that case.
Choosing Your Path: Employer-Specific vs. Open Permits
When you start looking into working in Canada, you'll quickly see there are two main paths you can take. Think of it like this: one is a dedicated BRT lane that takes you directly to a specific destination, while the other is a general "danfo" pass that lets you hop on and off wherever you please. Figuring out which route is right for you is the first, and most crucial, step.
For the vast majority of Nigerians planning this move, the journey begins on that dedicated BRT lane. In the world of Canadian immigration, this is called the Employer-Specific Work Permit. It's by far the most common way in.
This permit ties you to a single employer, for a particular job, in a specific city. You can't just quit and start a new job elsewhere without first applying for and getting a brand new work permit. This is the starting point for most people's Canadian work adventure.
The Employer-Specific Permit: Your Direct Route
At the very heart of the employer-specific permit is one thing: a job offer. Without it, your application can't even get off the ground. A Canadian company must not only want to hire you, but they often have to prove to the government that they couldn't find a Canadian citizen or permanent resident to do the job.
This "proof" comes in the form of a document called a Labour Market Impact Assessment (LMIA).
Let’s say a tech company in Toronto wants to hire you, a talented software developer from Lagos. Before they can officially offer you the job, they usually have to get an LMIA. You can think of it as a permission slip from the Canadian government, confirming the company looked for local talent first and couldn't find anyone suitable. A positive LMIA is a green light for the visa officer, showing them your skills are genuinely in demand.
Securing that job offer is everything. To get a feel for what companies are looking for, you can start to explore remote job opportunities in Canada and see what's out there.
The choice of which permit to aim for really boils down to whether you have a job offer lined up. This flowchart breaks down the decision-making process perfectly.
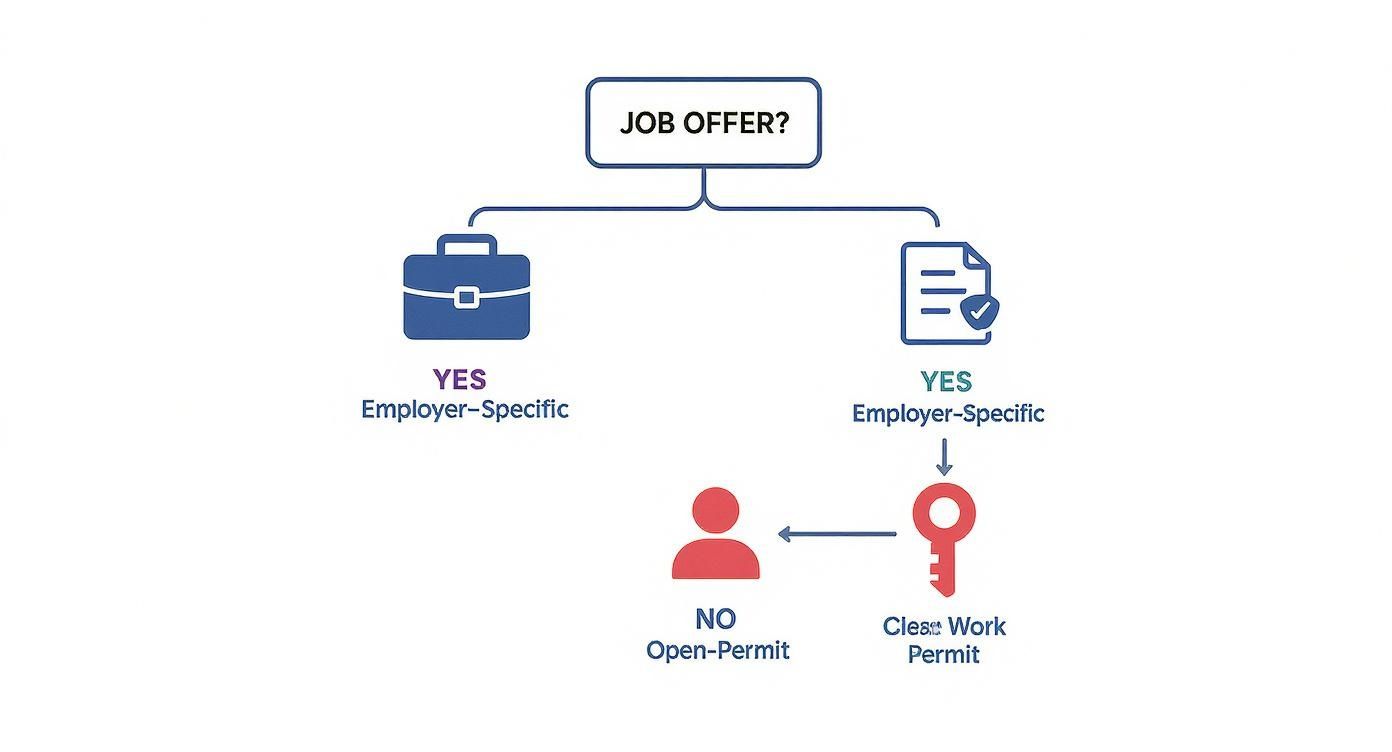
As you can see, having a job offer immediately points you towards the employer-specific route. This is the most defined and reliable pathway for Nigerian professionals aiming to work in Canada.
The Open Work Permit: A More Flexible but Rarer Path
Now, let's talk about that general pass—the Open Work Permit. This is what many people dream of because it offers incredible freedom. With an open permit, you can work for almost any employer, anywhere in Canada, without needing that initial job offer or an LMIA.
But here’s the catch: you can’t just decide to apply for one. Eligibility is extremely limited and is almost always tied to your unique situation.
An Open Work Permit isn't a standard application category you can just choose. It’s a special privilege granted to people who meet very specific criteria, usually because of their connection to someone else in Canada or through a specific programme.
So, who are the people who actually get these permits? Here are some of the most common examples for Nigerians:
- Spouses of International Students: If your partner is in Canada studying at an approved university or college, you might be eligible for an open work permit to come and work while they study.
- Spouses of Skilled Workers: In the same way, if your spouse is already in Canada on a work permit in a skilled profession (NOC TEER 0, 1, 2, or 3), you could qualify for an open permit yourself.
- Post-Graduation Work Permit (PGWP) Holders: After completing a degree at an eligible Canadian institution, Nigerian students can apply for a PGWP. This is a type of open work permit designed to help them get Canadian work experience.
- Special Programme Participants: From time to time, Canada introduces pilot programmes that might include an open work permit component.
For the typical professional in Nigeria looking to make the move, the open work permit isn't a realistic starting line. Your energy is best spent on the tried-and-tested method: securing a job offer that unlocks the door to an employer-specific permit. That is your most solid strategy for success.
The Essential Document Checklist for Nigerians
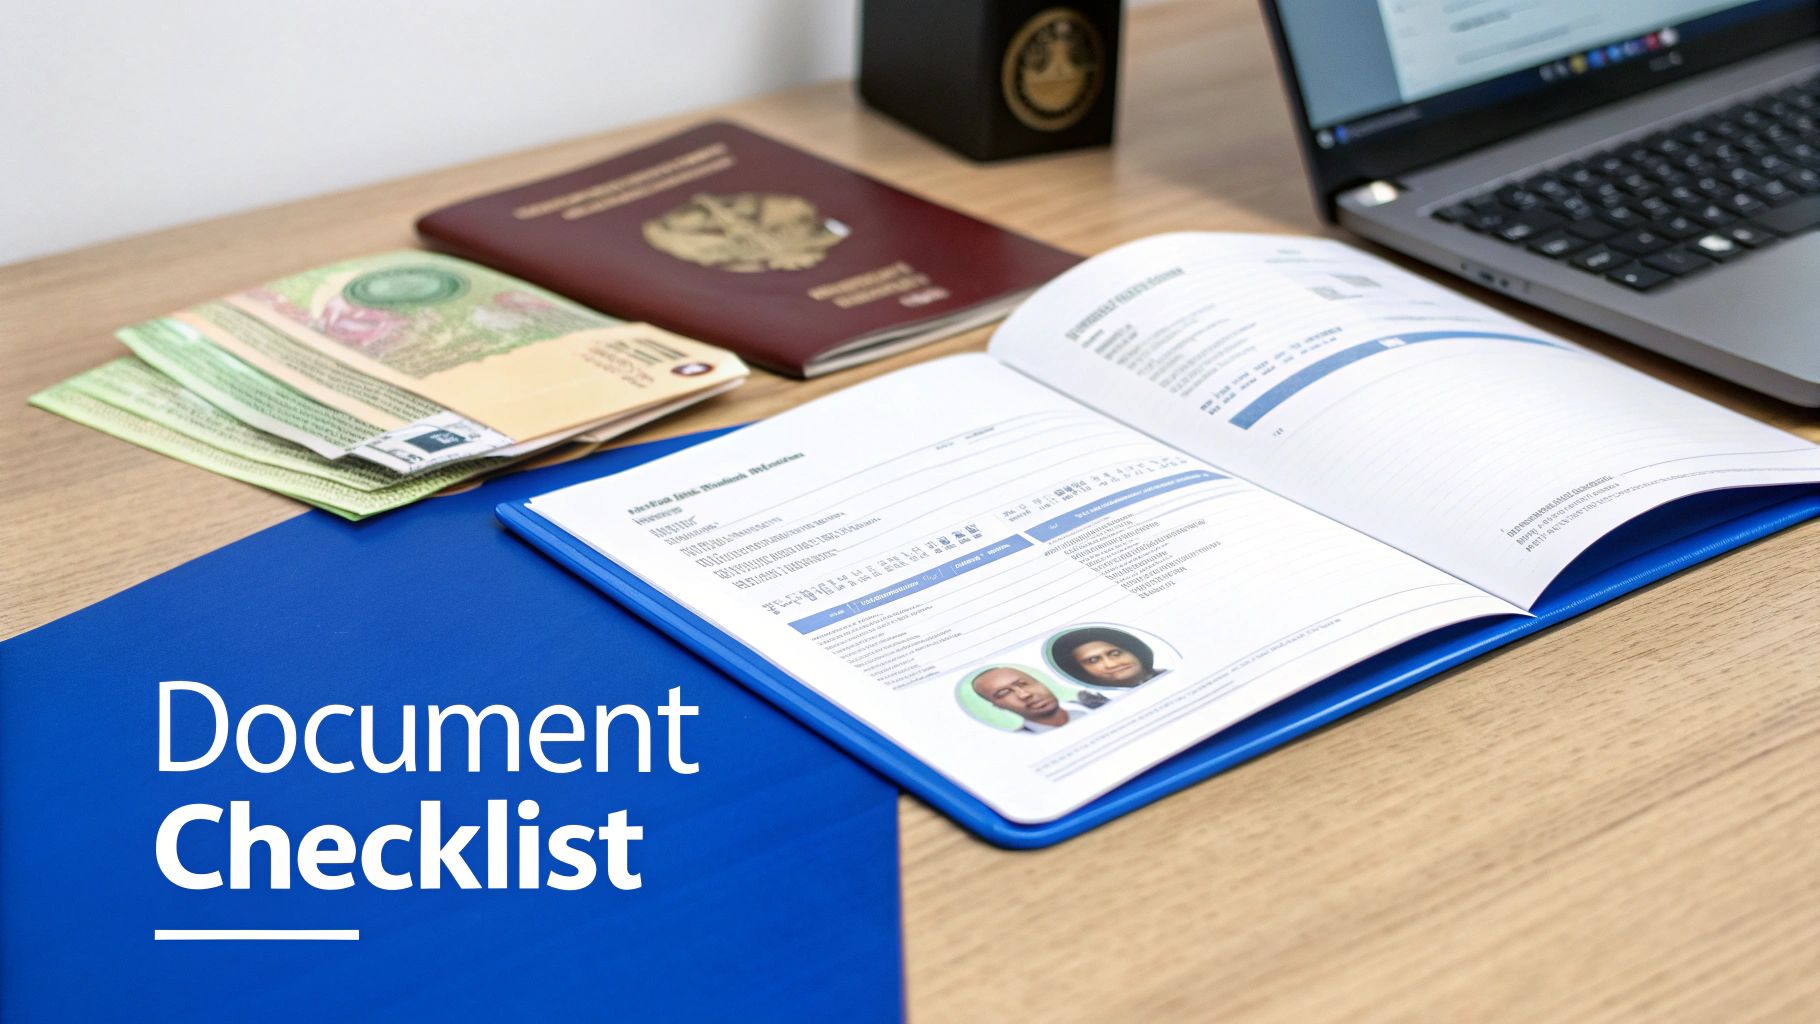
Alright, this is where the rubber meets the road. Getting your documents perfectly in order is, without a doubt, the most critical step of your entire work permit application. Think of it less like filling out forms and more like building a case for yourself. Every single paper must be correct, complete, and ready to go.
This isn't just a generic list. We've tailored this as a practical action plan for you, a Nigerian applicant, because small mistakes here can cause massive delays or even a flat-out refusal. Let’s get it right the first time.
Core Identification and Application Forms
First things first, let's nail down the basics. These are the non-negotiables that form the bedrock of your application file.
Your International Passport is everything. It must be valid for the whole time you plan to be in Canada. Double-check that you have at least one completely blank page (not the last page) for that precious visa sticker.
Next up are the application forms. You’ll need to meticulously fill out the Application for Work Permit Made Outside of Canada (IMM 1295) and the Family Information form (IMM 5707). Be brutally honest and consistent across every form you fill. Any little mismatch in dates or details is a red flag for the visa officer.
Finally, you’ll need two recent passport-sized photographs that meet IRCC’s very specific rules. They need a plain white background and a neutral facial expression. Don't try to use an old picture. Just go to a proper photo studio in Lagos or Abuja and tell them you need photos for a Canadian visa application—they'll know exactly what to do.
Proving Your Financial Stability
One of the key work permit Canada requirements is showing you have enough funds to support yourself when you first land. You need to prove you can cover your initial expenses before that first Canadian paycheque comes in.
Think of this as your "landing money." The visa officer needs to be 100% sure you won't become a financial burden on Canada. How clearly you demonstrate this can make or break your application.
For us in Nigeria, this is best shown through bank statements. Here’s the game plan:
- Official Bank Statements: Get statements for the last four to six months from your Nigerian bank (like GTBank, Zenith, or Access Bank).
- Consistent Savings History: The statements need to show a steady build-up of funds, not a huge, sudden deposit right before you apply. That last-minute "maga-don-pay" lump sum looks suspicious and will absolutely be questioned.
- Sufficient Balance: While there's no magic number, you should show enough to comfortably cover your travel costs and your first month's living expenses.
Getting this right is crucial. For a much deeper dive, check out our detailed guide on how to prepare your proof of funds for Canada.
Essential Nigerian-Specific Documents
Now, let's get into the documents that require you to take specific actions right here in Nigeria.
Police Clearance Certificate: You have to prove you're not criminally inadmissible. For this, you need a Police Character Certificate from the Nigeria Police Force Criminal Investigation Department (CID) in Alagbon, Ikoyi. This involves submitting your fingerprints at their office, so plan ahead because this process takes time.
Medical Examination: All applicants from Nigeria must pass a medical exam. You can't just pop into any hospital; the exam must be done by a panel physician officially approved by Immigration, Refugees and Citizenship Canada (IRCC). You can find the list of approved doctors on the IRCC website, with clinics in major cities like Lagos and Abuja. Book your appointment as soon as you can, because this is a mandatory step. The clinic sends your results directly to IRCC, so you don't have to worry about that part.
Lastly, if your job requires it, you must include a copy of the positive Labour Market Impact Assessment (LMIA) and your official Job Offer Letter from the employer. These documents are the heart of an employer-specific permit application, directly linking you to your Canadian job. Nailing every item on this checklist will put you in the strongest position for a successful outcome.
Understanding the LMIA and Employer Rules

If you're a Nigerian looking for a job in Canada, you're going to hear one acronym a lot: "LMIA." Getting your head around this concept is probably the single most important thing you can do. It's the key that separates a real, life-changing job offer from a heartbreaking scam.
Think of the Labour Market Impact Assessment (LMIA) as a permission slip a Canadian company needs from the government before they can hire you. When the government grants a positive LMIA, they're essentially saying, "Alright, we've checked, and we agree you need to hire this person from abroad because you couldn't find a Canadian to do the job."
This process is a big deal for the employer. It's not fast, and it's not cheap. They have to prove they looked high and low across Canada for someone. This is your first major clue: if a company is willing to go through the LMIA headache for you, they are serious about bringing you on board.
What the Employer Must Do
The moment a Canadian company decides you're the one for the job, they have to jump through a series of hoops with a government body called Employment and Social Development Canada (ESDC). It's a mountain of paperwork, and that's by design—it's there to protect the local job market.
Here's a glimpse of what they're up against:
- Post the Job Everywhere: They can't just put up a single advert. They must post the role on Canada's official Job Bank and at least two other places that reach the right Canadian audience.
- Show Their Work: They have to submit proof of their recruitment efforts. This means showing where they advertised, who applied, and giving valid reasons why the Canadian applicants weren't a fit.
- Plan for the Future: For higher-paying roles, the company even has to create a "Transition Plan." This is a formal document explaining how they'll eventually train a Canadian for the role or reduce their need for foreign workers over time.
The whole system is built to be tough. It makes sure that hiring a skilled worker from Nigeria is a solution to a real labour shortage, not just a shortcut.
How This Protects You
Knowing what the employer goes through is your best defence. It helps you spot fake job offers from a mile away. A common scam involves someone promising you a job and then asking you to pay a fee for the "LMIA processing." That is a massive red flag.
A legitimate Canadian employer always pays for the LMIA. The entire cost and application process is their responsibility, period. If anyone asks you for money to secure a job or an LMIA, walk away. It's a scam.
Armed with this knowledge, you can go into interviews with confidence. Ask them directly: "Does your company have experience with the LMIA process?" or "Are you prepared to sponsor a candidate through an LMIA?" Their answer will tell you everything you need to know.
LMIA-Exemptions and Employer Compliance
Now, while the LMIA is the standard rule, there are exceptions. Some jobs are LMIA-exempt, often because they fall under international agreements or are in specific high-demand fields Canada wants to fill quickly. You might see this for some specialised tech roles or academic positions. For most jobs Nigerians are likely to apply for, however, an LMIA is the way to go.
Even if a job is exempt, the employer isn't completely off the hook. They still have to submit your job offer through an official "Employer Portal" and pay a $230 compliance fee. This gets the job on IRCC's radar and makes sure the employer is accountable for everything they promised you—from your salary to your working conditions.
This is all part of Canada's system to protect foreign workers. Provinces also have their own priorities that influence these rules. Nova Scotia, for example, is laser-focused on keeping workers in key sectors like healthcare. You can learn more about Nova Scotia's immigration updates to see how regional needs shape these opportunities.
Submitting Your Application and Biometrics
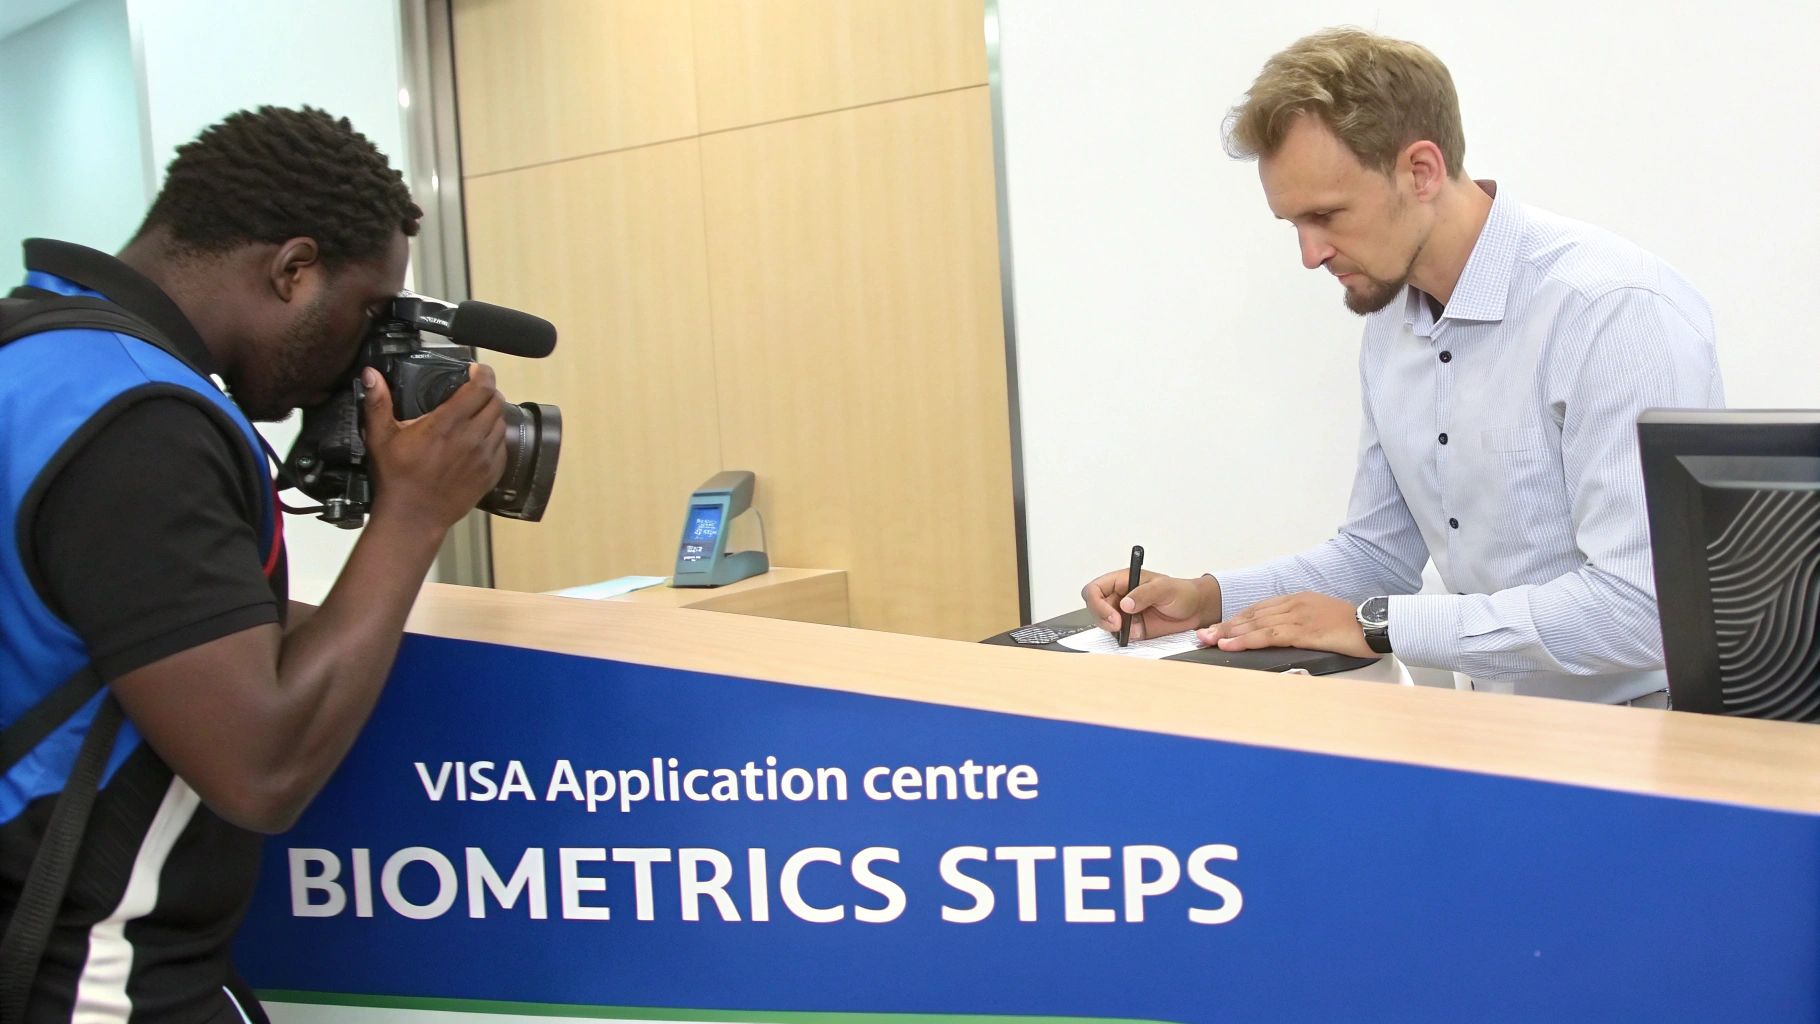
You’ve done the hard work of gathering every last document. Now it’s time for the final push: submitting your application. This part of the process is almost entirely digital, so make sure you have a reliable internet connection and a decent scanner or phone camera ready to go.
Everything kicks off on the official Immigration, Refugees and Citizenship Canada (IRCC) website. Your first task is to create a secure online account. Think of this as your personal portal for the entire journey—it's where you'll upload all your documents, fill out forms, and anxiously check for updates.
After setting up your account, you’ll be guided through a series of questions. Based on your unique situation, the system generates a personalised document checklist and the exact forms you need. It’s a great final check to ensure nothing has slipped through the cracks.
The Biometrics Process for Nigerians
If you're a Nigerian applicant between the ages of 14 and 79, giving your biometrics (fingerprints and a photograph) is non-negotiable. It's a standard and mandatory security step for anyone applying for a Canadian work permit from Nigeria.
Once you’ve uploaded your documents, paid all the necessary fees, and hit that final ‘submit’ button, you’ll get a Biometric Instruction Letter (BIL) in your IRCC account. This letter is your key to the next phase.
Crucial Tip: Hold off on booking any biometrics appointment until you have the official BIL in your hands. Trying to jump the gun will only cause confusion and delay. The BIL confirms you've paid the fee and are officially required by IRCC to proceed.
With your BIL, you can now book an appointment at a Visa Application Centre (VAC). In Nigeria, the VACs are located in Lagos and Abuja. You’ll book this online through the official partner that manages the centres for Canada, like VFS Global.
What to Expect at Your VAC Appointment
The appointment at the VAC is usually a quick and simple affair. Be sure to bring your original international passport, your appointment confirmation, and of course, your Biometric Instruction Letter. An official will take your fingerprints with a digital scanner and snap a photo. It’s all very routine.
And with that, your active role in the application is mostly done. The VAC sends your biometrics data directly to IRCC, which completes your file. Now, the waiting game begins as a visa officer reviews your entire application package.
It's really important to set realistic expectations for this waiting period. Processing times aren't static; they can fluctuate based on global events and shifts in Canadian immigration priorities. For example, a recent sharp drop in international student arrivals has had a knock-on effect on the entire immigration system, including work permit processing. IRCC data showed new study permit holders arriving in August plummeted by nearly 60% compared to the previous year. You can read the full analysis of recent immigration data to get a sense of how these bigger trends impact timelines.
For the most accurate estimate, always check the official IRCC website for the latest processing times for applications submitted from Nigeria.
Common Mistakes Nigerian Applicants Must Avoid
https://www.youtube.com/embed/EEIGfGLUU9s
Learning from the mistakes of others is the fastest way to get ahead on your immigration journey. So many strong candidates from Nigeria get a refusal, not because they aren't qualified, but because of small, avoidable errors. Let's walk through the most common pitfalls so you can make sure your application is honest, strong, and ready for a yes.
The competition for Canadian work permits is incredibly stiff, and even a tiny mistake can sideline your application. Just to give you an idea, some provincial nominee programs are swamped. Nova Scotia’s immigration streams have a total quota of 3,150 spots, but they're staring down a mountain of roughly 9,800 expressions of interest. In certain streams, that’s about 18 people fighting for every single opening. You can discover more insights about these competitive quotas to see why getting your application perfect is non-negotiable.
Failing to Prove Ties to Nigeria
This is, without a doubt, one of the biggest reasons Nigerian applications get rejected. The visa officer needs to be completely convinced that you'll pack your bags and head home once your work permit expires. Just saying you'll return isn't nearly enough—you have to prove it with solid evidence.
Think of it like building a case for your life back in Nigeria. What keeps you grounded there? Strong ties can be things like:
- Family Responsibilities: Do you have elderly parents or children who depend on you and aren't travelling with you? Provide evidence.
- Property Ownership: Owning landed property or other significant assets in your name is a powerful anchor.
- Career Progression: A letter from your current employer in Nigeria is crucial. It should detail your role, salary, and state that you're on an approved leave of absence with your job waiting for you when you get back.
Your mission is to paint a vivid picture of a stable, promising life in Nigeria that you have every reason to return to.
Inconsistent Information and Misrepresentation
Submitting forms with information that doesn't match up is a massive red flag for any visa officer. This could be anything from mismatched employment dates, different spellings of names across documents, or conflicting details about your family. These kinds of errors instantly create doubt and damage your credibility.
Even worse is misrepresentation—which is a formal way of saying you provided false information or fake documents. This is the single most serious mistake you can make. The consequences are severe, including a potential five-year ban from applying for any Canadian visa.
Always, always be truthful. It is far better to have your application refused for a genuine reason that you can fix later than to be banned from Canada for dishonesty. It's simply not worth the risk.
Finally, a simple but common mistake is just not following instructions. Forgetting to sign a form, using a photo with the wrong dimensions, or missing a required document can lead to a straight-up refusal. Before you hit submit, go through the official IRCC checklist one last time. Then check it again.
Burning Questions From Nigerian Applicants
Let's be honest, the Canadian work permit process can feel like a maze. You're not alone in having a lot of questions. Here, I'll tackle some of the most common queries I hear from fellow Nigerians to give you the clarity you need.
Can I Bring My Family With Me to Canada on a Work Permit?
Absolutely, this is one of the biggest perks of the Canadian system. If you land a job offer in a skilled position (think TEER categories 0, 1, 2, or 3), your spouse or common-law partner can often apply for an open work permit.
What's an open work permit? It's gold. It means they can work for almost any employer in Canada, giving your family incredible flexibility. Your dependent children can also come along and apply for study permits to enrol in Canadian schools. Just be sure to include everyone on your initial application so your files are processed together.
How Much Money Is Enough for Proof of Funds?
This is the million-naira question, isn't it? Unlike the strict proof of funds requirements for students, IRCC doesn't give a specific figure for work permit applicants. The goal is simply to prove you can handle your expenses before you get that first Canadian paycheque.
A solid benchmark is to have enough to cover your first month's living costs—rent, food, transportation, and settling-in expenses. Imagine what you’d need for a month in Lagos or Abuja, then remember that cities like Toronto or Calgary are generally more expensive. Having bank statements that show a consistent balance of at least CAD $2,500 to CAD $3,000 per person is a good, safe target.
The most important thing here is showing a stable financial history. A sudden, large lump sum deposit right before you apply is a massive red flag for visa officers. They want to see your savings grow over time, not a last-minute miracle.
What Happens If My Work Permit Application Is Refused?
Getting a refusal stings, but don't let it knock you down for good. It's not necessarily the end of your Canadian dream. Your first move is to read the refusal letter from IRCC very, very carefully. It will spell out exactly why they said no.
Often, it comes down to common issues: not showing enough money, failing to prove you have strong ties that will bring you back to Nigeria, or maybe they had doubts about your job offer. Once you know the problem, you can fix it. Gather stronger documents, write a better letter of explanation, and reapply with a case that’s ten times stronger.
And for those of you who can't imagine moving without your furry family members, make sure you understand the regulations for importing pets to Canada well in advance. It's a key piece of the puzzle once your permit is approved.
Ready to stop the guesswork and move forward with real confidence? JapaChat is Nigeria's first AI immigration expert, built to give you instant, accurate answers to all your relocation questions. Plan your journey with a tool designed specifically for you. Sign up for free and get the clarity you need at https://japachat.com.
-
6 Ways of Acquiring Citizenship: A Nigerian’s Guide to Japa (2025)
For many Nigerians, the dream of relocating abroad, popularly known as 'Japa', is about securing a better future and global opportunities. While the journey often starts with a visa for work or study, acquiring a second passport is the ultimate goal. It offers stability, extensive visa-free travel, and new possibilities for you and your family. However, the path to a new nationality is often complex and filled with misinformation, making it difficult to know where to begin.
This guide is designed to cut through the noise. We will break down 10 official and practical ways of acquiring citizenship, providing realistic insights tailored specifically for Nigerians. From the straightforward principles of birthright citizenship to the strategic routes of investment and naturalisation, this article will detail what each pathway entails. We will cover typical eligibility criteria, required documents, expected timelines, and the common pitfalls to avoid.
For each method, we will provide actionable next steps and show how you can use JapaChat, Nigeria's AI immigration expert, to check your eligibility, prepare documents, and confidently plan your relocation. For instance, understanding the specific naturalisation rules of a country is crucial. To begin your journey, explore our comprehensive guide on How to Get Dutch Citizenship, which outlines all potential pathways in a popular European destination. Let's explore your options for a new beginning.
1. Jus Soli (Right of Soil/Birthright Citizenship)
Jus soli, a Latin term meaning "right of the soil," is one of the most direct ways of acquiring citizenship. This principle automatically grants citizenship to any individual born within a country's territory, regardless of their parents' nationality. For Nigerian parents planning for their children's future, understanding this concept is crucial, as having a child in the right country can secure a powerful passport for them from birth.
This method is a cornerstone of citizenship law in the Americas. Countries like the United States, Canada, Brazil, and Argentina are prominent examples where a child born on their land is immediately considered a citizen. For instance, a child born to Nigerian parents who are visiting Toronto automatically becomes a Canadian citizen, entitled to all associated rights and benefits, including access to world-class education and healthcare.
How to Secure and Document Jus Soli Citizenship
Securing citizenship through jus soli is straightforward but requires diligent documentation. The birth certificate is the primary proof of citizenship, making prompt registration essential.
- Immediate Registration: Register your child’s birth with the local municipal or state authorities as soon as possible. In Canada, this is done through the provincial Vital Statistics Agency.
- Obtain the Birth Certificate: This official document is the key to applying for your child's passport and asserting their citizenship rights.
- Keep Supporting Records: Maintain all hospital records, such as the proof of birth letter, as these can serve as supplementary evidence if needed.
- Know the Exceptions: Be aware that this right typically does not extend to children born to foreign diplomats or consular officers on official duty.
Key Insight: While jus soli grants citizenship to the child, it does not automatically give residency or citizenship rights to the parents. However, in some countries like the USA, a citizen child can sponsor their parents for a green card once they turn 21.
This pathway offers a significant advantage by providing your child with a strong passport and global mobility from day one. You can learn more about the specifics of citizenship by birth on JapaChat's blog to fully understand the nuances.
2. Jus Sanguinis (Right of Blood/Citizenship by Descent)
Jus sanguinis, a Latin term meaning "right of blood," offers another powerful pathway to citizenship based on ancestry rather than birthplace. Under this principle, citizenship is passed down from parent to child, regardless of where the child is born. For many Nigerians with European or other foreign ancestry, this can be a key to unlocking a second citizenship by tracing their family lineage.
This method is prevalent in Europe and Asia, in countries that define nationality by ethnicity and descent. Nations like Italy, Ireland, Poland, and Germany have well-established citizenship by descent programmes. For example, if your grandparent was an Irish citizen, even if you and your parents were born and raised in Lagos, you may be eligible to claim Irish citizenship. This right connects you to your heritage and provides access to the European Union.
How to Secure and Document Jus Sanguinis Citizenship
Acquiring citizenship through descent is a document-intensive process that requires proving a direct, unbroken link to your ancestor. Precision and thoroughness are non-negotiable.
- Trace Your Lineage: The first step is to build your family tree and identify the qualifying ancestor. You must prove their citizenship and your direct biological relationship to them.
- Gather Vital Records: Collect official, certified copies of all relevant birth, marriage, and death certificates for every person in your direct line of descent, from your ancestor down to yourself.
- Check Generational Limits: Be aware of each country's specific rules. Ireland allows claims up to the grandparent generation, while Italy often has no generational limit, provided the lineage was not broken.
- Prove Unbroken Citizenship: You must show that your ancestor did not renounce their citizenship before the next person in your lineage was born. This often requires naturalisation records or consular letters of non-acquisition.
Key Insight: The biggest challenge in jus sanguinis applications is often sourcing historical documents from different countries. A minor name misspelling or a missing certificate from the National Population Commission can derail the entire process, making meticulous preparation essential.
This pathway is an excellent option for those with known foreign ancestry, offering a direct route to a second passport. You can explore the specific requirements for countries like Ireland on JapaChat's blog to start your journey.
3. Naturalization (General/Standard)
Naturalization is the most common legal process for foreign nationals to acquire citizenship in a new country. This pathway involves a formal application after meeting a series of state-mandated requirements, including a minimum period of legal residency and demonstrating integration into the new society. For many Nigerians who have moved abroad for work or family, naturalisation is the ultimate goal in their japa journey, transforming them from residents into full citizens.

This method is well-established globally. For instance, the United Kingdom typically requires five years of legal residence, while Canada requires you to be physically present for three years (1,095 days) within a five-year period. Similarly, Australia requires four years of residency with at least one year as a permanent resident. These countries often require applicants to pass language and civics tests to prove their knowledge of local customs, history, and laws, solidifying their commitment to their new home.
How to Prepare for Naturalisation
Successfully navigating the naturalisation process requires careful planning and meticulous record-keeping. The journey from resident to citizen is a marathon, not a sprint, and preparation is key.
- Maintain Continuous Residency: Avoid long absences from your host country, as this can reset your residency clock or raise questions about your ties to the nation. For Canada, you must be physically present for the required days.
- Prepare for Tests: Start studying for any required language (like IELTS for the UK or Canada) and civics examinations well in advance. Many countries offer official study guides.
- Keep Impeccable Records: Maintain a clean criminal record and ensure all your taxes are paid on time. Financial stability and good character are often key criteria.
- Document Everything: Keep organised records of your employment history, residency permits, travel dates (e.g., entry/exit stamps), and any other documents that prove you meet the eligibility criteria.
Key Insight: The naturalisation timeline begins from the day you gain legal residency (like Permanent Residency in Canada), not the day you arrive in the country on a temporary visa. If Portugal is a country you are considering, you can gain valuable insights into the eligibility routes and required documents by reading about how to apply for Portuguese citizenship.
This pathway is the most structured of all ways of acquiring citizenship, offering a clear and attainable route for those who have already established a life abroad.
4. Naturalization by Marriage
Naturalization by marriage is a common pathway to citizenship, offering an accelerated or simplified process for individuals married to a citizen of a country. This method recognises the marital union as a significant tie to the nation, often leading to reduced residency requirements. For Nigerians with a spouse holding a foreign passport, this can be one of the most direct ways of acquiring citizenship and building a life together abroad.
This route is prevalent worldwide, though specific rules vary. In the United States, spouses of citizens can apply for naturalization after just three years of permanent residency, compared to the standard five. Similarly, in the United Kingdom, a spouse can apply for citizenship as soon as they receive Indefinite Leave to Remain (ILR), without the usual 12-month waiting period. Other countries like Germany and France also offer facilitated processes for spouses of their citizens.
How to Secure and Document Citizenship by Marriage
Successfully navigating this path requires proving the authenticity of your marriage alongside meeting residency and other criteria. Comprehensive documentation is non-negotiable.
- Prove Your Genuine Relationship: Immigration authorities will scrutinise your relationship. Gather evidence like your marriage certificate, joint bank account statements, shared property deeds or tenancy agreements, photos together over time, and even social media posts and messages.
- Meet Residency Requirements: You must live together in the country for a specified period. For example, a Nigerian married to a US citizen must maintain continuous residence and physical presence for the required three years.
- Maintain Legal Status: Ensure you maintain your legal residency status (e.g., a spousal visa or permanent residency) throughout the waiting period. Any lapse can reset your timeline.
- Prepare for Interviews: Most countries conduct a marriage-based interview where you and your spouse may be questioned together or separately to verify the legitimacy of your union.
Key Insight: The focus is on the authenticity of the marriage. Immigration fraud is a serious offence. Do not enter a "contract marriage" solely for citizenship benefits, as this can lead to deportation and a permanent ban from the country.
This pathway cements your family unit in your new home country, providing stability and full legal rights. You can explore a detailed guide on the process of getting a green card through marriage on JapaChat's blog to understand the journey better.
5. Investment-Based Citizenship (Golden Visa/Citizenship by Investment)
For high-net-worth Nigerians seeking an accelerated path to a second passport, Citizenship by Investment (CBI) or Residency by Investment (RBI), often called "Golden Visas," presents a direct route. This pathway allows you to acquire citizenship or permanent residency in another country in exchange for a significant financial contribution to its economy. It is one of the fastest ways of acquiring citizenship for those who have the means.
This method is designed to attract foreign capital and offers a powerful second passport with enhanced global mobility. Prominent programmes include those in Caribbean nations like St. Lucia (from a $100,000 donation) and European countries like Portugal (from a €250,000 investment). For a Nigerian entrepreneur, investing €500,000 in a Spanish business could secure residency for their family, granting access to the Schengen Area and a pathway to EU citizenship.
How to Navigate Citizenship by Investment Programmes
Securing citizenship through investment is a complex financial and legal process that demands meticulous planning and professional guidance. Due diligence is non-negotiable to protect your capital and ensure the application is successful.
- Verify Programme Legitimacy: Only work with government-authorised agents and programmes. Always cross-reference information on official government immigration websites.
- Engage Professionals: Hire reputable immigration lawyers and financial advisors who specialise in CBI. They can vet investment options and navigate the complex legal requirements.
- Understand Investment Terms: Be clear on the investment holding period (e.g., you might need to hold a real estate investment for at least five years) and any additional fees.
- Prepare Financial Documentation: You will need to provide extensive proof of the source of your funds to meet anti-money laundering regulations. Be prepared for serious scrutiny.
Key Insight: A Golden Visa typically grants residency first, which can lead to citizenship after a few years. Direct Citizenship by Investment programmes, common in the Caribbean, grant a passport within months without residency requirements.
This pathway offers unparalleled speed and convenience for securing a better future for your family. You can dive deeper into the world of Citizenship by Investment on the JapaChat blog to explore specific country programmes.
6. Naturalization by Employment/Professional Status
For many skilled Nigerian professionals, the most direct pathway to acquiring citizenship in a new country is through their career. This method, often called naturalization by employment or skilled migration, allows countries to attract and retain top talent by offering a clear route to citizenship based on professional contributions, specific skills, and sustained employment within their borders.
This is one of the most structured and popular ways of acquiring citizenship for Nigerians looking to japa. Countries like Canada with its Express Entry system, Australia through its Skilled Migration Program, and Germany via the EU Blue Card have well-defined processes. For example, a Nigerian software developer with the right qualifications and work experience can enter Canada as a permanent resident through Express Entry and apply for citizenship after meeting the residency requirement, typically three years.
How to Secure Citizenship Through Your Profession
Navigating this pathway requires strategic planning and meticulous documentation of your professional history. Your skills are your primary asset.
- Verify Your Occupation: Check if your profession is on the in-demand or eligible occupations list of your target country. For Canada, this means checking the National Occupational Classification (NOC).
- Assess Your Credentials: Have your educational and professional qualifications officially assessed by the designated body in that country, like WES for Canada.
- Gain Relevant Experience: Accumulate the required years of work experience, both in Nigeria and, if possible, in the destination country.
- Maintain Stable Employment: Once you secure a work permit and relocate, maintaining continuous, legal employment is crucial for meeting the naturalisation requirements.
Key Insight: This pathway is highly competitive and dynamic. Immigration policies and in-demand occupation lists change based on a country's economic needs. Staying updated on these changes is essential for a successful application.
By leveraging your professional skills, you can build a stable life abroad and eventually secure a second passport. For expert guidance on aligning your career with your immigration goals, you can explore the resources available at JapaChat's career services.
7. Naturalization by Economic Contribution/Entrepreneurship
Naturalization by economic contribution is a powerful pathway to citizenship designed for innovative individuals who can stimulate a country's economy. This method grants residency, and eventually citizenship, to entrepreneurs and investors who establish businesses, create jobs, and make significant financial contributions. For Nigerian business owners and investors looking to expand their global footprint, this is one of the most proactive ways of acquiring citizenship.
This route rewards your business acumen with a new passport. Countries like Canada, with its Start-up Visa program, actively court foreign entrepreneurs with innovative ideas. Similarly, the United States' EB-5 Immigrant Investor Program offers a path to a Green Card for those who invest a significant amount (currently starting at $800,000 in targeted employment areas) and create at least 10 full-time jobs for U.S. workers. Other notable programmes include the UK's Innovator Founder visa and Singapore's EntrePass.
How to Secure and Document Entrepreneurship-Based Citizenship
Securing citizenship through entrepreneurship is a multi-stage process that hinges on the viability and impact of your business venture. Diligent planning and documentation are non-negotiable.
- Develop a Solid Business Plan: Your business plan is your most critical document. It must be comprehensive, realistic, and demonstrate high growth potential and job creation.
- Secure Funding and Prove its Legitimacy: Authorities will scrutinise the source of your investment capital. Ensure you have clear, documented proof of funds from legitimate sources.
- Obtain Endorsements: Many programmes, like Canada's Start-up Visa, require you to get support from a designated venture capital fund, angel investor group, or business incubator.
- Engage Professional Help: The complexity of these applications often necessitates hiring experienced business immigration lawyers and financial advisors to navigate legal and commercial requirements.
Key Insight: This path is not just about having the money; it's about proving you have a viable, innovative business concept that will benefit the host country's economy. The focus is on long-term economic value, not just a passive investment.
This pathway offers a direct route to residency and citizenship by leveraging your professional skills and capital. You can explore a detailed comparison of investor programmes on JapaChat's immigration blog to find the best fit for your business goals.
8. Naturalization by Ancestry/Heritage Recognition
Naturalization by Ancestry or Heritage Recognition is a unique pathway to citizenship that extends beyond direct parent-to-child lineage. This principle allows countries to grant citizenship to individuals who can demonstrate a strong cultural, ethnic, or historical connection to the nation, even if their direct ancestors were not citizens. It's a way for nations to reconnect with their diaspora and those who share a common heritage.
This method differs from jus sanguinis because it often relies on proving a cultural or ethnic identity rather than a direct, documented bloodline. For Nigerians who may have distant roots or strong cultural affiliations with another country, this can be a viable, though complex, one of the ways of acquiring citizenship.
Countries like Hungary, Armenia, and Turkey offer such programmes. For instance, Hungary's simplified naturalisation process is available to individuals who can prove they have Hungarian ancestors and speak the language, even if their family left the country generations ago. Similarly, Turkey offers routes for those of Turkish heritage, such as Ahiska Turks, to acquire citizenship.
How to Secure and Document Heritage-Based Citizenship
Securing citizenship through heritage recognition requires deep research and compelling evidence of your connection to the country. The documentation often goes beyond standard birth and marriage certificates.
- Gather Historical and Cultural Proof: This could include old family letters, photographs, records from religious institutions (e.g., churches or synagogues), or membership in cultural organisations that prove your family’s connection to the diaspora.
- Demonstrate Language Proficiency: Many of these programmes, like Hungary's, require you to speak the national language to a certain level. Enrolling in language courses early is essential.
- Engage with Diaspora Communities: Actively participating in cultural communities in Nigeria or online can strengthen your application by demonstrating a genuine and ongoing connection to the heritage.
- Prepare a Personal Narrative: You may need to write a detailed personal statement explaining your connection to the country’s heritage and your reasons for seeking citizenship.
Key Insight: This pathway is highly specific and often political, with rules that can change based on the government in power. The burden of proof is entirely on you to demonstrate a meaningful and authentic connection to the nation's cultural or ethnic identity.
9. Naturalization through Military Service/Contribution
Naturalization through military service is a unique and accelerated pathway to citizenship offered by several countries to non-citizens who serve in their armed forces. This route acknowledges the significant sacrifice and contribution of individuals who commit to defending a nation's security, often fast-tracking the typically lengthy naturalization process. For Nigerians with an interest in a military career abroad, this can be one of the most direct ways of acquiring citizenship.
This method is well-established in countries that value military contributions from residents. The United States, for example, has specific provisions under the Immigration and Nationality Act that allow members of the U.S. armed forces to naturalise, often waiving residency requirements. Similarly, the United Kingdom offers a streamlined process for military personnel, and France is famous for its Foreign Legion, which provides a path to French citizenship after a period of honourable service.
How to Secure and Document Citizenship through Military Service
Securing citizenship through this pathway requires a documented history of honourable service and adherence to specific military and immigration protocols. Your service record is the most critical piece of evidence.
- Confirm Eligibility: Before enlisting, confirm the specific eligibility criteria. Some countries, like the U.S., allow permanent residents (Green Card holders) to join, while others may have different entry requirements.
- Maintain Honourable Service: Your entire military career must be characterised by honourable service. A dishonourable discharge will disqualify you from this pathway.
- Gather Service Records: Collect all official military documents, including your enlistment contract, service records (like the DD Form 214 in the U.S.), commendations, and proof of deployment.
- Start the Application Promptly: Many countries allow service members to apply for citizenship while still on active duty or immediately after their service ends. Timeliness is crucial.
- Obtain Command Endorsement: Letters of recommendation or character references from commanding officers can significantly strengthen your application, attesting to your good moral character.
Key Insight: This path is not merely an immigration strategy; it is a profound commitment to serve and potentially risk your life for another country. It demands physical and mental resilience, and the citizenship awarded is earned through significant personal sacrifice.
For those committed to a life of service, this remains one of the most respected ways of acquiring citizenship, offering both a new nationality and a decorated career. You can explore immigration pathways for skilled professionals, including those in specialised fields, on JapaChat's blog about the UK Skilled Worker visa.
10. Special Circumstances Naturalization (Refugees/Asylum, Stateless Persons)
Special circumstances naturalization provides one of the most vital ways of acquiring citizenship, offering a lifeline to vulnerable individuals. This pathway is designed for refugees, asylum seekers, and stateless persons, granting them protection and eventually a new nationality based on humanitarian grounds and international law. For Nigerians facing persecution or who find themselves without a country, this route represents safety, stability, and the chance to rebuild their lives.
This humanitarian approach is recognised by many nations that are signatories to international conventions. Countries like Canada, Germany, Sweden, and the United States have established programmes that allow recognised refugees to gain permanent residence and, after a set period, apply for citizenship. For instance, a Nigerian granted asylum in Germany can often apply for naturalization after just five years of legal residence, a shorter period than required for other immigrants, acknowledging their need for permanent integration.
How to Navigate the Special Circumstances Pathway
Securing citizenship through this route involves a multi-stage legal process that begins with seeking protection. Diligent documentation and full cooperation are paramount to success.
- Seek Legal Status: The first step is to be officially recognised as a refugee, asylee, or stateless person by the host country or the UNHCR. This requires a credible claim of persecution or lack of nationality.
- Maintain Your Status: Adhere strictly to the conditions of your protected status and maintain a clean record within the community.
- Document Everything: Keep meticulous records of your persecution claim, identity documents, and any correspondence with immigration authorities or aid organisations.
- Engage with Integration Programmes: Actively participate in language courses, cultural orientation, and settlement services. This demonstrates your commitment to integrating into your new society, which is often a key consideration.
Key Insight: This is a complex and often lengthy process that requires substantial evidence and legal support. The pathway to citizenship is not automatic upon receiving refugee status; it requires a separate application after fulfilling specific residency and integration requirements.
10 Methods of Acquiring Citizenship — Comparative Overview
Method Implementation Complexity 🔄 Resource Requirements ⚡ Expected Outcomes 📊⭐ Ideal Use Cases 💡 Key Advantages ⭐ Jus Soli (Birthright) 🔄 Very low — automatic at birth; narrow exceptions ⚡ Minimal — birth registration & certificate 📊 Immediate citizenship; strong statelessness prevention 💡 Newborns born on territory; inclusive national policies ⭐ Simplicity, social integration, no fees Jus Sanguinis (Descent) 🔄 Moderate — document lineage; generational limits ⚡ Records-heavy — certified birth/marriage certificates, genealogy 📊 Citizenship across generations; diaspora retention 💡 Descendants abroad claiming parental nationality ⭐ Preserves family/cultural continuity Naturalization (General) 🔄 High — long residency, tests, vetting ⚡ High — time, fees, language & civics preparation 📊 Full citizenship after integration; political & social rights 💡 Adult immigrants seeking long-term settlement ⭐ Transparent legal path; integration-focused Naturalization by Marriage 🔄 Moderate — reduced residency but relationship scrutiny ⚡ Moderate — marriage proof, joint documents, possible tests 📊 Faster spousal citizenship; family unification 💡 Spouses of citizens seeking accelerated route ⭐ Shorter timeline; often lower fees Investment-Based Citizenship 🔄 Low procedural complexity but heavy due diligence ⚡ Very high — significant capital, legal & advisory fees 📊 Rapid citizenship; enhanced mobility (visa-free travel) 💡 High-net-worth individuals prioritizing mobility/tax planning ⭐ Speed, family inclusion, no residency in many programs Naturalization by Employment/Professional Status 🔄 Moderate — employment verification, credential checks ⚡ Moderate — employer sponsorship, qualification recognition 📊 Accelerated for skilled contributors; labor-market integration 💡 Skilled professionals in high-demand sectors ⭐ Fast-track for talent; meets economic needs Naturalization by Economic Contribution/Entrepreneurship 🔄 High — business plans, job-creation monitoring ⚡ High — startup capital, ongoing compliance & reporting 📊 Citizenship tied to economic impact and job creation 💡 Entrepreneurs willing to invest and create local jobs ⭐ Encourages investment, innovation, local development Naturalization by Ancestry/Heritage Recognition 🔄 Moderate — heritage proof; possible cultural criteria ⚡ Low–Moderate — heritage documents, community evidence 📊 Citizenship for those with cultural/historical ties 💡 Diaspora members with ethnic or historical links ⭐ Preserves heritage; broader access than strict descent Naturalization through Military Service 🔄 Moderate — service commitments, security vetting ⚡ Moderate — enlistment/training, possible risk exposure 📊 Expedited citizenship recognizing service; family benefits 💡 Non-citizens serving in armed forces or defense roles ⭐ Clear objective criteria; honors sacrifice; fast-track Special Circumstances (Refugees/Stateless) 🔄 Moderate — status determination, complex cases ⚡ Moderate — legal aid, UNHCR involvement, documentation 📊 Protection and durable solution; reduced residency needs 💡 Refugees, asylum-seekers, stateless people needing protection ⭐ Humanitarian relief; addresses statelessness; aligns with international law Your Next Step: Make Your Relocation Plan a Reality
The journey to a new passport is one of the most significant you will ever undertake. As we have explored, the various ways of acquiring citizenship are not one-size-fits-all; they are a complex tapestry of laws, personal histories, and individual aspirations. From the automatic right of soil (Jus Soli) to the dedicated path of naturalisation through professional contributions, each route presents a distinct set of opportunities and challenges. For a Nigerian professional, what works for a colleague with European ancestry will differ from what works for an entrepreneur with capital to invest.
The path you choose will fundamentally shape your future. A Citizenship by Investment programme might offer speed, while naturalisation by marriage is rooted in personal relationships. Citizenship by Descent connects you to your heritage, and securing a passport through military service is a testament to national contribution. Understanding these nuances is the first, most critical step in transforming the popular Nigerian dream of 'japa' from a vague hope into a structured, achievable project.
From Information to Action: Key Takeaways
The most important lesson from this guide is that clarity precedes success. Navigating the intricate maze of immigration law requires more than just ambition; it demands meticulous planning, strategic decision-making, and an unwavering focus on your specific circumstances.
Let’s crystallise the core insights:
- Self-Assessment is Non-Negotiable: Before you even shortlist countries, you must honestly assess your own profile. What are your strongest assets? Is it your family lineage (Jus Sanguinis), your financial capacity (Investment), your professional skills (Employment-based), or your marital status? Your best pathway is the one that aligns with your existing strengths.
- Documentation is King: In every single pathway, from birthright claims to investment applications, your case is built on paper. A missing document, an incorrectly filled form, or a poorly translated certificate can cause months, or even years, of delays. Start organising your vital records, like your birth certificate, educational transcripts, and professional certifications, now.
- Timelines are a Marathon, Not a Sprint: With the exception of some rapid investment programmes, acquiring citizenship is a long-term commitment. The standard naturalisation process often requires years of legal residency, integration, and patience. Set realistic expectations to avoid burnout and frustration on your journey.
- The "Why" Matters: Why are you seeking a new citizenship? Is it for your children's future, professional growth, or global mobility? Your motivation will determine your destination and the sacrifices you are willing to make. A clear "why" will keep you focused when the process becomes challenging.
The Power of a Personalised Plan
Moving from dreaming about a new life to actually living it requires a bridge, and that bridge is a personalised plan. Generic advice found on forums can be misleading and often outdated. Your journey from Nigeria to a new citizenship is unique. It will be defined by your age, your profession, your family structure, and your financial situation.
Think of it like this: you would not build a house without a detailed blueprint. Similarly, you should not embark on an international relocation without a clear, step-by-step strategy. This means identifying your most viable pathway, understanding the specific eligibility criteria for your target country, creating a comprehensive document checklist, and establishing a realistic timeline and budget. This level of preparation is what separates successful applicants from those who face rejection and disappointment. The various ways of acquiring citizenship demand this personalised approach.
Your dream of global citizenship is valid and achievable. The information in this article is your foundation. Now, it is time to build upon it with decisive action, leveraging modern tools designed to simplify this complex process. The next chapter of your life is waiting to be written; ensure you are holding the right pen.
Ready to move from information overload to a clear, actionable plan? Nigeria's first AI immigration expert, JapaChat, is designed to analyse your unique profile against global immigration pathways, helping you check eligibility and understand the specific requirements for the various ways of acquiring citizenship. Get personalised guidance and start building your relocation blueprint for free at JapaChat today.
-
best city to live in canada: Top 10 picks for 2025
The dream of moving to Canada is a big one for many Nigerians, but the most crucial first step is deciding where to land. Canada is massive, and the city you choose can make or break your entire "Japa" experience. One person's perfect city is another's nightmare. For instance, are you chasing a high-paying tech job like those in Lagos's Yabacon Valley, or are you looking for a quiet, affordable place to raise a family, far from the hustle?
Do you mind bundling up like you're in the deep freezer section of Shoprite for half the year, or do you need milder weather? Finding the best city to live in Canada depends entirely on your personal and professional goals. This guide is specifically for you, the Nigerian professional or family planning your move.
We'll break down the top 10 cities, looking at the things that truly matter:
- Job opportunities in your field.
- The real cost of living (not just what you see online).
- The strength of the Nigerian community to help you settle.
- The most suitable immigration routes for each location.
We'll use practical examples you can relate to, so you can make an informed choice. Beyond the initial immigration process, settling in Canada involves practical considerations such as maintaining communication with family back home; it's wise to explore cost-effective international calling solutions to stay connected without breaking the bank. To make your planning even smoother, we’ll show you how JapaChat, Nigeria's AI immigration expert, can provide personalised guidance for your chosen city.
1. Calgary, Alberta: Where Your Naira Goes Further
Imagine a city with the organised structure and career opportunities of Abuja but with a significant financial edge. That’s Calgary. It offers some of Canada’s highest average salaries, particularly in its world-renowned energy sector, yet avoids the punishing housing costs of cities like Toronto and Vancouver. This combination makes it a top contender for the best city to live in Canada, especially for Nigerians focused on building wealth and a stable career.
Why Calgary Stands Out
A major draw is Alberta's unique tax advantage: there is no Provincial Sales Tax (PST). This means the price you see on most goods and services is much closer to what you actually pay, making your money stretch further on everything from groceries to a new car. It’s like enjoying a permanent discount compared to other provinces.
For professionals, the opportunities are immense. A petroleum engineer from Port Harcourt or a geologist from Lagos will find their skills in high demand. Beyond oil and gas, Calgary's tech sector is booming, creating roles in software development, data analysis, and project management.
The Nigerian Community and Lifestyle
You won't have to look far to find a taste of home. The Nigerian community in Calgary is vibrant and growing, with stores like The African Store and Afrik Inter-Continental stocking everything from egusi to yam flour. This strong community network provides crucial support for newcomers settling into Canadian life.
Key Insight: Calgary delivers a powerful one-two punch for immigrants: high earning potential in key sectors and a lower cost of living. This allows you to save, invest, and build a solid financial foundation faster than in many other major Canadian cities.
Actionable Steps for Your Move
- Immigration Pathways: The Alberta Advantage Immigration Program (AAIP) is your primary route. It features dedicated streams for tech workers, tradespeople, and those with experience in in-demand occupations. Explore the program to see if your National Occupational Classification (NOC) code aligns with Alberta's needs. For a detailed guide, you can learn more about the Alberta Provincial Nomination Program.
- Prepare for Winter: Don’t underestimate the Calgary winter. Investing in a reliable car with quality winter tyres and a block heater is not a luxury; it's essential for safety and mobility.
- Career Networking: Tap into the energy sector's ecosystem. Even if you're in a support role like IT, HR, or finance, your career can accelerate by connecting with professionals in this dominant industry.
2. Toronto, Ontario: Economic Powerhouse and Diversity Hub
If Calgary is like Abuja for its organised structure and career focus, Toronto is the Lagos of Canada: a bustling, high-energy metropolis that serves as the nation’s economic and cultural engine. For ambitious Nigerians aiming for the top of their fields in finance, tech, or the arts, Toronto offers an unparalleled concentration of opportunities. It is undoubtedly a top contender for the best city to live in Canada for those who thrive in a fast-paced, multicultural environment.
Why Toronto Stands Out
Toronto's sheer economic scale is its biggest draw. It is the headquarters for Canada’s "Big Five" banks (RBC, TD, BMO, CIBC, Scotiabank), making it the equivalent of Victoria Island for financial professionals. The city also hosts major offices for global tech giants like Google, Microsoft, and Amazon, creating a constant demand for skilled tech talent from software engineers to data scientists.
This economic gravity means career ceilings are exceptionally high. The networking opportunities are immense, and climbing the corporate ladder or launching a start-up is more feasible here than almost anywhere else in the country. The trade-off is a significantly higher cost of living, particularly for housing, which requires careful financial planning.
The Nigerian Community and Lifestyle
Toronto boasts one of the largest and most established Nigerian communities in Canada. Areas like the Weston-Mount Dennis neighbourhood are hubs for Nigerian culture, featuring countless restaurants, grocery stores, and community centres. You can easily find everything from authentic suya at The Suya Spot to pounded yam at The Ace. This vibrant community makes the transition to Canadian life much smoother, providing an instant network of support and familiarity.
Key Insight: Toronto is the ultimate destination for career acceleration and networking. While the cost is high, the access to top-tier companies, global talent, and endless amenities provides a launchpad for professional growth that is unmatched in Canada.
Actionable Steps for Your Move
- Immigration Pathways: The Ontario Immigrant Nominee Program (OINP) is your key to landing in Toronto. It has specific streams for tech workers (Human Capital Priorities stream) and those with job offers. To understand the specific requirements, you can find a comprehensive guide on the Ontario Provincial Nomination Program.
- Master Public Transit: A car in downtown Toronto can be a liability. Familiarise yourself with the Toronto Transit Commission (TTC) network of subways, streetcars, and buses. Living near a subway line is a strategic move that saves time and money.
- Budget for Housing: Be realistic about housing costs. Many newcomers start by renting in neighbourhoods outside the downtown core, such as Scarborough or Etobicoke, which offer more affordable options and are well-connected by public transport.
3. Calgary, Alberta: Affordability with Economic Vitality
Imagine a city with the organised structure and opportunities of Abuja but with a significant financial edge. That’s Calgary. It offers some of Canada’s highest average salaries, particularly in its world-renowned energy sector, yet avoids the punishing housing costs of cities like Toronto and Vancouver. This combination makes it a top contender for the best city to live in Canada, especially for Nigerians focused on building wealth and a stable career.
Why Calgary Stands Out
A major draw is Alberta's unique tax advantage: there is no Provincial Sales Tax (PST). This means the price you see on most goods and services is much closer to what you actually pay, making your money stretch further on everything from groceries to a new car. It’s like enjoying a permanent discount compared to other provinces.
For professionals, the opportunities are immense. A petroleum engineer from Port Harcourt or a geologist from Lagos will find their skills in high demand at industry giants like Enbridge and TC Energy. Beyond oil and gas, Calgary's tech sector is booming, creating roles in software development and data analysis at innovative firms like Benevity and AltaML.
The Nigerian Community and Lifestyle
You won't have to look far to find a taste of home. The Nigerian community in Calgary is vibrant and growing, with stores like The African Store and Afrik Inter-Continental stocking everything from egusi to yam flour. This strong community network provides crucial support for newcomers settling into Canadian life, while the city's proximity to Banff National Park offers world-class scenery for weekend escapes.
Key Insight: Calgary delivers a powerful one-two punch for immigrants: high earning potential in key sectors and a lower cost of living. This allows you to save, invest, and build a solid financial foundation faster than in many other major Canadian cities.
Actionable Steps for Your Move
- Immigration Pathways: The Alberta Advantage Immigration Program (AAIP) is your primary route. It features dedicated streams for tech workers, tradespeople, and those with experience in in-demand occupations. Explore the programme to see if your National Occupational Classification (NOC) code aligns with Alberta's needs. You can get more details on the Alberta Provincial Nomination Program.
- Prepare for Winter: Don’t underestimate the Calgary winter. Investing in a reliable car with quality winter tyres and a block heater is not a luxury; it's essential for safety and mobility during the cold months.
- Career Networking: Tap into the energy sector's ecosystem. Even if you're in a support role like IT, HR, or finance, your career can accelerate by connecting with professionals in this dominant industry.
4. Montreal, Quebec: Cultural Richness and European Charm
Picture the artistic energy and sophistication of a European capital like Paris, but with a distinctly Canadian welcome and much more affordable living costs. That is Montreal. This city offers a unique blend of North American opportunity and French-Canadian culture, making it an irresistible choice for creatives, tech enthusiasts, and students looking for a world-class experience without the financial strain of Toronto or Vancouver.

Why Montreal Stands Out
Montreal’s primary advantage is its affordability combined with a high quality of life. Housing, childcare, and post-secondary education are significantly cheaper here than in other major Canadian hubs. This financial breathing room allows you to enjoy the city’s vibrant cultural scene, from its world-famous Jazz Festival to countless street fairs and art installations.
The city is a global powerhouse in specific industries. For anyone in video game development, Montreal is a dream destination, home to giants like Ubisoft. The aerospace sector, with companies like Bombardier, and a thriving Artificial Intelligence (AI) research community also provide specialised, high-paying career paths.
The Nigerian Community and Lifestyle
While smaller than in Toronto, the Nigerian community in Montreal is close-knit and supportive. You will find African markets like Marché B.K. and Sénégal Marché to get your key ingredients. The city’s multicultural fabric means you can easily find Pentecostal churches, mosques, and social groups that provide a sense of belonging and make the transition smoother for your family.
Key Insight: Montreal offers a bargain: you get the vibrancy, culture, and career opportunities of a major global city but at a fraction of the cost. The key to unlocking its full potential, however, is embracing the French language, which opens up more jobs and deeper community integration.
Actionable Steps for Your Move
- Immigration Pathways: The Quebec Skilled Worker Program (QSWP) is the main route. It uses a points-based system where French language proficiency provides a significant advantage. Start learning French before you apply to drastically improve your chances.
- Embrace Bilingualism: Don't just learn French for immigration; learn it for your career. While many tech and corporate jobs can be done in English, daily life and the best opportunities are accessible to those who can communicate in both official languages.
- Prepare for Serious Winter: Montreal winters are intense, with heavy snowfall. Invest in high-quality insulated boots, a warm parka, and learn to use the city’s extensive "Underground City" (RESO), a network of tunnels connecting metro stations and shopping centres, to escape the cold.
5. Ottawa, Ontario: Government Centre with Quality of Life
Think of Ottawa as Canada’s Abuja, but with a vibrant tech scene and an unmatched quality of life. As the nation's capital, it offers incredible job stability through federal government roles, combined with the safety and community feel of a smaller city. This makes it a prime candidate for the best city to live in Canada, particularly for Nigerian families and professionals seeking a secure, long-term future.
Why Ottawa Stands Out
The primary advantage of Ottawa is its economic stability, anchored by the Government of Canada. This creates a steady demand for professionals in public administration, policy analysis, IT, and bilingual communications (English and French). Unlike cities driven by fluctuating market trends, Ottawa’s job market is resilient and predictable.
Beyond government, Ottawa has earned the nickname "Silicon Valley North." The Kanata North Technology Park is a major hub for tech innovation, home to global giants and startups alike. This dual-engine economy provides diverse opportunities, whether your background is in public service or software engineering.
The Nigerian Community and Lifestyle
The Nigerian community in Ottawa is well-established and supportive, offering a welcoming environment for newcomers. You can find essential groceries and a sense of home at shops like Afro-West Indian Groceries on Cyrville Road. The city is exceptionally family-friendly, with excellent schools, numerous parks, and a significantly lower crime rate than other large Canadian cities.
Key Insight: Ottawa offers a unique blend of high-paying, stable careers in both the public and private sectors, combined with a peaceful, family-oriented lifestyle. It’s a city where you can build a formidable career without sacrificing work-life balance or safety.
Actionable Steps for Your Move
- Immigration Pathways: Focus on the Ontario Immigrant Nominee Program (OINP), especially the Human Capital Priorities stream, which often targets tech and other in-demand occupations. For government jobs, proficiency in both English and French is a massive advantage, so consider taking French lessons before you arrive.
- Target Your Job Search: Create a profile on the official GC Jobs website for federal government positions. For tech roles, focus your search on the Kanata area and network with companies located in the technology park.
- Embrace the Lifestyle: Get ready for a city that celebrates all four seasons. Investing in good skates to enjoy the famous Rideau Canal Skateway in winter is a must. Also, familiarise yourself with the OC Transpo bus and light-rail system, especially if you plan to live near a Transitway station for an easy commute.
6. Victoria, British Columbia: Canada's Tranquil Coastal Haven
Picture the serene, green landscapes of a place like Obudu Cattle Ranch, but set on an island with the ocean at your doorstep and a charming, organised city centre. This is Victoria, the capital of British Columbia. It offers a much slower, more relaxed pace of life compared to the mainland hustle, making it an ideal choice for those prioritising work-life balance, natural beauty, and a gentle climate.
Why Victoria Stands Out
Victoria’s biggest draw is its climate. It boasts some of the mildest winters in Canada, a welcome relief for anyone dreading the extreme cold. Instead of heavy snow, you’ll experience more rain, but the trade-off is year-round greenery and the ability to enjoy outdoor activities almost every month. This makes it a contender for the best city to live in Canada for those who value comfort and nature over a fast-paced urban life.
The city’s economy is heavily driven by tourism, technology, and government services. For Nigerians with experience in hospitality, public administration, or the creative arts, Victoria presents unique opportunities. The tech sector, nicknamed "Tectoria," is also a growing employer, offering roles without the intense competition of Vancouver.
The Nigerian Community and Lifestyle
While smaller than in other major cities, the Nigerian and broader African community in Victoria is close-knit and supportive. You will find African food stores and community events that help create a sense of belonging. The lifestyle is centred around the outdoors: hiking in lush parks, kayaking along the coastline, and visiting world-famous attractions like the Butchart Gardens.
Key Insight: Victoria is perfect for the remote worker or the professional seeking a lifestyle change. If your career allows for flexibility, you can enjoy a world-class quality of life here that is less focused on the corporate grind and more on personal well-being.
Actionable Steps for Your Move
- Immigration Pathways: The British Columbia Provincial Nominee Program (BC PNP) is your main route. Pay close attention to the Tech Stream if you have relevant experience, as it offers prioritised processing. Also, explore regional streams that may favour jobs outside of Vancouver.
- Secure Housing Early: The rental market in Victoria is competitive due to its desirability. Begin your search well before you arrive and be prepared with references and a deposit, as good places are taken quickly.
- Embrace the Island Mentality: Life moves at a different pace. Learn to use the BC Ferries system for travel to the mainland and explore the smaller surrounding islands. This is a key part of the local culture and your primary link to bigger city amenities in Vancouver.
7. Edmonton, Alberta: Emerging Opportunity with Affordability
Think of Edmonton as the quieter, more budget-conscious sibling to Calgary, much like Ibadan is to Lagos. It offers the same Albertan benefits, such as high wages and no provincial sales tax, but with even more affordable housing. For Nigerian families and professionals looking for excellent value, strong public services, and a family-friendly atmosphere, Edmonton is arguably one of the best cities to live in Canada.
Why Edmonton Stands Out
Edmonton’s strength lies in its stable, public-sector-driven economy. It is the provincial capital, meaning government jobs are plentiful. Furthermore, Alberta Health Services, one of Canada’s largest employers, is headquartered here, creating immense opportunities for doctors, nurses, lab technicians, and healthcare administrators.
Beyond government and healthcare, the city is a hub for education and research, led by the world-class University of Alberta. This creates a fertile ground for innovation and an emerging tech scene focused on artificial intelligence and health sciences. For those seeking a career in public service or academia, Edmonton offers a direct and stable path.
The Nigerian Community and Lifestyle
Like its southern neighbour, Edmonton boasts a thriving and supportive Nigerian community. You'll find familiar groceries at stores like B-J African Store and several Nigerian restaurants to satisfy cravings for jollof rice or suya. The community often organises cultural events, providing a soft landing for newcomers and a strong sense of belonging.
Key Insight: Edmonton offers the "Alberta Advantage" with a lower price tag. Its economic stability, driven by healthcare, government, and education, provides a secure foundation for families who prioritise affordability and community well-being over the fast-paced energy sector.
Actionable Steps for Your Move
- Target Key Sectors: If you have a background in healthcare, public administration, or education, focus your job search here. Tailor your CV to highlight skills relevant to large organisations like Alberta Health Services or provincial government ministries.
- Prepare for a Deep Winter: Edmonton’s winters are colder and longer than Calgary's. A remote car starter isn’t a luxury; it's a necessity. Invest in high-quality thermal wear, winter tyres, and a block heater before the first snowfall.
- Explore Provincial Nomination: The same Alberta Advantage Immigration Program (AAIP) applies here. Check the in-demand occupation list, which often features healthcare and technology roles that are prominent in Edmonton's economy.
8. Waterloo, Ontario: Canada's Silicon Valley North
Imagine the innovative energy of Yaba's tech scene, but scaled up with global tech giants and a constant stream of talent from world-class universities. This is Waterloo, a city that has firmly established itself as Canada's premier technology hub. It's a prime destination for Nigerian tech professionals, entrepreneurs, and students looking for a city that blends career ambition with a high quality of life.
Why Waterloo Stands Out
Waterloo's strength lies in its unique ecosystem where academia and industry are deeply intertwined. The University of Waterloo is a powerhouse, famous for its co-op programme that feeds a steady stream of skilled graduates into the local tech industry. This creates a self-sustaining cycle of innovation and job creation, making it one of the best cities to live in Canada for career growth in the tech sector.
The city is home to major offices for global giants like Google, Microsoft, and Shopify, alongside hundreds of dynamic startups. For a software developer from Lagos or a data scientist from Abuja, this means a wealth of opportunities without the intense competition and soaring living costs of Toronto.
The Nigerian Community and Lifestyle
The Nigerian community in Waterloo is driven by students and professionals, creating a network that is both intellectual and supportive. The presence of two major universities, the University of Waterloo and Wilfrid Laurier University, attracts many Nigerian students. This youthful, educated community means you'll find familiar faces at local events and can easily build professional and social connections.
Key Insight: Waterloo offers a unique proposition for tech professionals: the opportunity to work on world-class projects and build a global career, all within a more affordable, manageable, and community-focused city than Canada's larger metropolitan centres.
Actionable Steps for Your Move
- Immigration Pathways: The Ontario Immigrant Nominee Program (OINP) is your key. Pay close attention to the Human Capital Priorities stream, especially its tech-specific draws which frequently invite candidates with experience in software engineering, data science, and web development.
- Leverage University Networks: Even if you aren't a student, tap into the university ecosystem. Attend public lectures, tech meetups, and career fairs hosted by the universities. This is a powerful way to network directly with recruiters from top companies.
- Housing Strategy: While more affordable than Toronto, Waterloo's housing market is competitive due to its rapid growth. Consider living in the neighbouring city of Kitchener initially, which is part of the same region and offers more housing options at a slightly lower cost.
9. Winnipeg, Manitoba: Prairies Gem with Cultural Character
Think of Winnipeg as the cultural heart of the prairies, offering a blend of affordability and artistic vibrancy that is hard to find elsewhere. For Nigerians seeking a city with a strong sense of community, low housing costs, and a rich cultural scene, Winnipeg presents a unique and compelling option. It provides a more relaxed pace of life without sacrificing access to essential amenities and growing career sectors.
Why Winnipeg Stands Out
Winnipeg’s most significant advantage is its exceptional affordability. Housing, whether renting or buying, is among the cheapest of any major Canadian city. This financial relief allows newcomers to settle more comfortably, save money, and invest in their future without the immense pressure found in larger metropolitan areas. It is an ideal choice for the budget-conscious professional or family.
The city is also a hub for arts and culture, boasting institutions like the Royal Winnipeg Ballet and hosting the famous Winnipeg Folk Music Festival. This creative energy fuels opportunities in the arts, film production, and digital media, making it an attractive destination for those with a creative flair.
The Nigerian Community and Lifestyle
The Nigerian community in Winnipeg is well-established and supportive, offering a familiar network for those new to Canada. You can find African grocery stores like Dino's Grocery Mart and community organisations that help you connect and feel at home. This strong community backbone makes the transition into the Manitoban lifestyle, including its cold but beautiful winters, much smoother.
Key Insight: Winnipeg offers a balanced lifestyle where your income goes significantly further. It's one of the best cities to live in Canada if you prioritise affordability, community, and cultural engagement over the fast-paced environment of larger hubs.
Actionable Steps for Your Move
- Immigration Pathways: The Manitoba Provincial Nominee Program (MPNP) is your key to moving here. It has specific streams for skilled workers, international students, and those with connections to the province. You can explore the detailed requirements and learn more about the Manitoba Provincial Nomination Program.
- Embrace the Culture: Winnipeg's identity is tied to its four distinct seasons. Get involved in winter activities like skating on the river trail and enjoy the summer festivals. Engaging with the local culture is the fastest way to feel like a true Winnipegger.
- Explore Diverse Neighbourhoods: From the historic architecture of the Exchange District to the family-friendly suburbs of St. Vital, take time to find the neighbourhood that fits your lifestyle and budget.
10. Halifax, Nova Scotia: Atlantic Coastal Living with Growth Potential
Imagine the laid-back, scenic coastal vibe of a city like Calabar, but with the structure and growing economic pulse of a modern hub. This is Halifax. As the capital of Nova Scotia, it offers a refreshing alternative to the frenetic pace of larger cities, blending affordability, a stunning oceanfront, and an emerging tech scene. For Nigerians seeking work-life balance without sacrificing career growth, Halifax is an increasingly popular choice for the best city to live in Canada.
Why Halifax Stands Out
Halifax's primary appeal is its unmatched quality of life at a lower cost. Housing, while rising, is still significantly more affordable than in Ontario or British Columbia. This means your dream of owning a home near the water is far more attainable. The city is compact and highly walkable, particularly around its beautifully redeveloped waterfront, which is alive with shops, restaurants, and events like the Halifax International Busker Festival.
Professionally, the city's economy is diversifying beyond its traditional maritime roots. A burgeoning tech sector, with companies like Shopify establishing a presence, is creating new opportunities in software development and IT. This provides a promising landscape for tech professionals from Lagos or Abuja looking for a less saturated market.
The Nigerian Community and Lifestyle
The Nigerian community in Halifax is close-knit and supportive, offering a warm welcome to newcomers. While smaller than in Toronto, it is vibrant, with African grocery stores like JJ Mart and Princess Variety African & Caribbean Market ensuring you can find ingredients for your favourite jollof rice or egusi soup. The city’s friendly, small-town feel makes it easier to build meaningful connections.
Key Insight: Halifax offers a strategic trade-off: a slightly smaller job market in exchange for a significantly lower cost of living and a superior work-life balance. It's ideal for those who prioritise community, nature, and financial breathing room.
Actionable Steps for Your Move
- Immigration Pathways: The Nova Scotia Nominee Program (NSNP) is your key. Pay close attention to streams like the Nova Scotia Experience: Express Entry and the Occupations in Demand stream, which often target healthcare, tech, and skilled trades professionals.
- Embrace the Atlantic Climate: Prepare for a unique maritime climate. Winters are milder than in the Prairies but can be damp and snowy, while summers are pleasant but can be foggy. Investing in good waterproof and windproof outerwear is essential.
- Explore Remote Work: Halifax is becoming a haven for remote workers. If your job allows you to work from anywhere, you can enjoy the city’s lifestyle benefits while potentially earning a salary pegged to a higher-cost market like Toronto.
Top 10 Canadian Cities Comparison
City Relocation Complexity 🔄 Cost & Housing ⚡ Job Market & Outcomes 📊 Ideal Use Cases 💡 Key Advantages ⭐ Vancouver, BC High 🔄: competitive housing search, traffic; good core transit Very high ⚡: detached ~$1.2M+, condos $600–900K; rents $1,800–2,400 Strong 📊: tech, film, healthcare; low unemployment; high salaries offset by cost Professionals/families valuing outdoors, multicultural life; high-income earners ⭐⭐⭐⭐☆ Natural beauty, outdoor access, diverse economy Toronto, ON Very high 🔄: intense competition, transit crowding, winter prep Very high ⚡: detached $800K–1M; condos $500–700K; rents $1,600–2,200 Robust 📊: finance, tech, media; largest job market and growth opportunities Career-driven professionals, entrepreneurs, cultural seekers ⭐⭐⭐⭐☆ Economic opportunities, cultural institutions Calgary, AB Moderate 🔄: easier housing than coasts; car-dependent outside core Affordable ⚡: detached $400–550K; condos $250–350K; rents $1,200–1,600 Strong but cyclical 📊: energy-led with growing tech; high wages, volatility risk Families and pros seeking affordability + mountain access ⭐⭐⭐☆ Affordability, high salaries, outdoor lifestyle Montreal, QC Moderate 🔄: bilingual considerations for some jobs; walkable cores Lower cost ⚡: detached $450–600K; condos $300–450K; rents $1,000–1,400 Cultural/academic 📊: strong arts, gaming, universities; some French-language constraints Artists, students, creatives, researchers seeking culture and value ⭐⭐⭐☆ European charm, culture, affordable living Ottawa, ON Low–Moderate 🔄: stable gov't hiring; car outside downtown Moderate ⚡: detached $500–650K; condos $300–450K; rents $1,200–1,500 Stable 📊: government, growing tech (Kanata); reliable employment Families, civil servants, those seeking stability and services ⭐⭐⭐☆ Job stability, good schools, safe neighborhoods Victoria, BC Moderate 🔄: limited local roles, ferry dependence Moderate–High ⚡: detached $700–900K; condos $400–600K; rents $1,300–1,700 Limited 📊: tourism, healthcare, government; fewer professional openings Retirees, remote workers, lifestyle-focused residents ⭐⭐⭐⭐☆ Mildest climate, island lifestyle, safety Edmonton, AB Low–Moderate 🔄: very affordable market; car needed outside core Low ⚡: detached $350–450K; condos $200–300K; rents $1,000–1,300 Emerging 📊: healthcare, education, tech; energy exposure remains Budget-conscious families, healthcare/education professionals ⭐⭐⭐☆ Best affordability, parks, public services Waterloo, ON Moderate 🔄: tech growth driving demand; rising housing costs Moderate ⚡: detached $500–650K; condos $300–400K; rents $1,100–1,400 Strong 📊: fast-growing tech hub, low unemployment, university spinouts Tech professionals, entrepreneurs, students ⭐⭐⭐⭐☆ Tech ecosystem, universities, startup support Winnipeg, MB Low 🔄: easy affordability; fewer high-paying roles Very low ⚡: detached $300–400K; condos $150–250K; rents $850–1,200 Stable but limited 📊: healthcare, education, creative sectors Budget-conscious creatives, remote workers, families ⭐⭐⭐☆ Exceptional affordability, cultural character Halifax, NS Moderate 🔄: coastal weather, smaller market dynamics Low–Moderate ⚡: detached $350–500K; condos $250–350K; rents $1,000–1,300 Growing 📊: tech, tourism, education; smaller scale than major cities Lifestyle seekers, remote workers, coastal living enthusiasts ⭐⭐⭐☆ Coastal lifestyle, lower costs, growing opportunities Making Your Final Choice: Let JapaChat Guide Your Way
Choosing the best city to live in Canada is perhaps the most significant decision you will make in your entire immigration journey. It’s a choice that goes far beyond just picking a spot on the map; it’s about selecting the foundation upon which you will build your new life, career, and future. As we have explored, Canada is a vast and varied nation, and the ideal city for one person might be a complete mismatch for another.
The bustling, multicultural streets of Toronto offer unparalleled career opportunities for those in finance and tech, mirroring the energy of Lagos but with a different set of rules. In contrast, the resource-rich economy of Calgary presents a direct and rewarding path for engineers and tradespeople from the Niger Delta, offering high earning potential and a more affordable lifestyle. For those drawn to a unique cultural experience and European flair, Montreal stands out, while Ottawa provides stability and a high quality of life for professionals in the public sector. Each city, from Vancouver’s stunning but expensive coastline to Halifax’s growing maritime economy, presents a distinct package of opportunities and challenges.
Your Personalised "Best City" Blueprint
The critical takeaway is this: there is no single best city to live in Canada, only the best city for you. Your decision must be a strategic one, carefully balancing several key factors. Don’t simply follow the crowd or choose a city because it's the one you hear about most often. Instead, use the information in this guide as your starting point for a deeper, more personal evaluation.
Consider these critical questions:
- Career Alignment: Does the city have a strong job market for your specific profession? An IT professional might thrive in the Waterloo tech corridor, while a healthcare worker could find faster provincial nomination pathways in provinces like Manitoba or Nova Scotia.
- Financial Reality: What is your budget for relocation and settlement? The cost of renting a two-bedroom apartment in Vancouver is drastically different from what you would pay in Edmonton. Your proof of funds will go much further in a city with a lower cost of living.
- Lifestyle and Family Needs: Are you single and looking for a vibrant social scene, or are you moving with family and prioritising good schools and safe neighbourhoods? Do you prefer the fast pace of a metropolis or the calmer rhythm of a smaller city?
- Climate Considerations: Can you handle the long, cold winters of the prairies, or does the milder, rainier climate of the West Coast appeal more to you? This is a practical consideration that significantly impacts daily life and mental well-being.
Key Insight: Your successful transition to Canada hinges on making an informed, data-driven decision. Choosing the right city from the start saves you the immense stress and cost of having to relocate again within Canada a few years down the line. It sets you on a direct path to achieving your settlement goals.
Taking the Next Actionable Steps
With this guide as your foundation, your next step is to transform this broad knowledge into a concrete action plan. This involves moving from general research to personalised analysis. This is precisely where the right tools become invaluable, helping you cut through the noise and misinformation often found in online forums and WhatsApp groups. Instead of relying on anecdotal evidence, you need precise, tailored advice for your unique profile.
This is the gap that JapaChat was designed to fill. As Nigeria's first AI immigration expert, it moves beyond generic lists and provides you with instant, personalised guidance. You can ask it highly specific questions relevant to your situation, such as, "Compare the Express Entry draw scores for the Ontario Immigrant Nominee Program versus the Alberta Advantage Immigration Program for a marketing manager with my CRS score," or, "What are the current housing costs and vacancy rates in Halifax for a family of four?" JapaChat empowers you to build a confident and successful Japa strategy, ensuring your final choice is the right one for you and your family.
Ready to move from dreaming to planning? Let JapaChat be your personal guide to finding the best city to live in Canada based on your unique profile. Get instant, accurate, and personalised answers to your toughest immigration questions by signing up for free at JapaChat today.
-
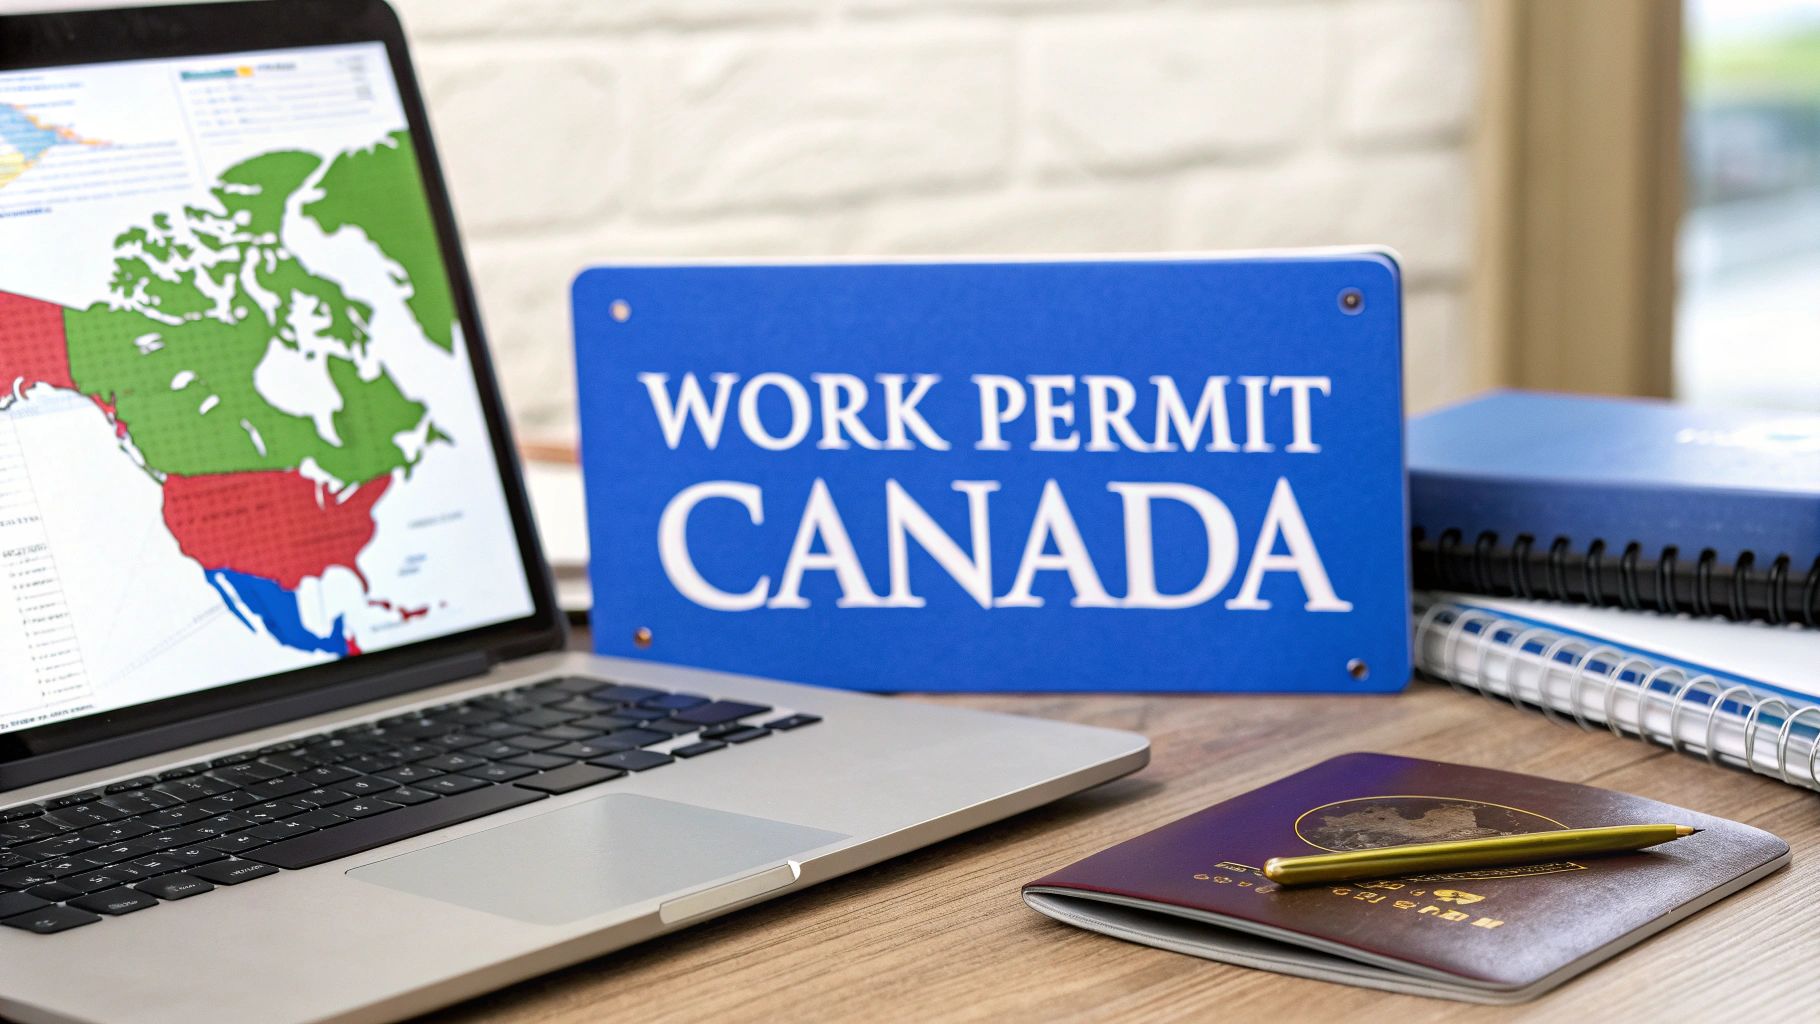
Work Permit Canada: Your Nigerian Guide to Working in Canada
So, you're dreaming of working in Canada? You're definitely not alone. For many Nigerians, getting a Canadian work permit isn't just about 'japa'—it's the first real step toward building a new career and a new life. This guide is here to show you exactly how to make that happen.
Your Journey to Working in Canada Starts Here

The idea of moving from Nigeria to Canada is exciting, but turning that dream into a reality takes a proper plan. That’s why we’ve created this guide—to help you cut through all the online noise and get straight, practical advice on securing your work permit.
We’re going to tackle the real questions that Nigerian applicants have. We'll break down everything from the different types of work permits and the documents you'll need, to how you can eventually use that Canadian work experience as a stepping stone to permanent residency.
Why Canada Is Looking for Nigerian Professionals
It's no secret: Canada needs skilled workers to fill crucial gaps in its job market. And this isn't just talk; the numbers back it up. Over a decade, the total number of work permit holders in Canada shot up from 531,700 in 2010 to 963,400 in 2021—that’s a massive 81% increase. This trend creates real opportunities for Nigerian professionals across many industries.
Wondering what you could earn? It’s always a good idea to look into the economic landscape. For instance, you can check out the average salaries for communications roles in Canada to get a feel for the potential.
A Practical Roadmap for Your Move
Think of this guide as your personal playbook. We’ll give you a clear, structured approach to avoid common pitfalls and focus on what really counts for a successful application. We’ll turn complex immigration rules into simple, actionable steps.
If you're at the very beginning of your planning stage, our guide on how to relocate to Canada from Nigeria is another great resource to check out. Let's get you on the path to achieving your professional goals in Canada.
Understanding the Two Main Types of Work Permits
Before you even think about applying for a work permit in Canada, you need to grasp a fundamental concept. There are essentially two main doors into the Canadian workforce, and your entire approach will depend on which one you can open.
Think of it like this: one key opens a single, specific door, while the other is a master key that can open almost any door in the building. These two keys are the Employer-Specific Work Permit and the Open Work Permit. Let's break down what each one means for you.
The Employer-Specific Work Permit: A Dedicated Key
This is the most common route for Nigerians who have already landed a job offer from a Canadian company. As the name suggests, an Employer-Specific Work Permit ties you directly to one employer. It’s a dedicated key for one specific job.
Picture a software engineer from Lagos who gets a fantastic offer from a tech firm in Vancouver. The work permit she receives will have that company's name printed right on it. It will also state her exact job title and the location. With this permit, she can only work for that company, in that role, at that location. Period.
This permit is usually connected to something called a Labour Market Impact Assessment (LMIA), a document your employer needs to secure. It’s their way of proving to the Canadian government that no Canadian citizen or permanent resident was available to do the job.
The Bottom Line: An Employer-Specific Work Permit is a straight line to a particular job, but it comes with a catch—your legal right to work in Canada is tied exclusively to that employer.
The Open Work Permit: A Master Key
Now, an Open Work Permit is the complete opposite. It’s the master key we talked about. It gives you the freedom to work for nearly any employer, anywhere in Canada. This kind of flexibility is a game-changer, but these permits aren't handed out to just anyone.
So, how can a Nigerian get one? There are a few specific pathways:
- You might be the spouse or common-law partner of an international student or a skilled worker already in Canada.
- You could be a recent graduate from a designated Canadian university or college.
- You might qualify through special programmes, like certain streams of the Atlantic Immigration Program.
Here’s a real-world example: A Nigerian doctor secures a job at a hospital in Calgary with an employer-specific permit. His wife, who is an accountant, could then be eligible for an open work permit. This means she can arrive in Canada and start looking for a job in her field with any company she wants. It's a massive advantage for the family.
Many international students also plan for this. After graduation, they transition to an open permit to gain crucial Canadian work experience, often looking into the Canada Post-Graduate Work Permit.
To make it even clearer, let's put them side-by-side.
Employer-Specific vs. Open Work Permit at a Glance
Here’s a quick comparison to help you see which path aligns with your situation.
Feature Employer-Specific Work Permit Open Work Permit Employer Tied to a single, named employer. Can work for almost any employer. Job Offer A valid job offer is mandatory. Not required to apply. Flexibility Low; you cannot change employers easily. High; you can switch jobs freely. Commonly For Professionals with a pre-arranged job. Spouses, recent graduates, etc. Ultimately, the right choice boils down to your personal circumstances. Do you have a job offer in hand? Is your spouse moving with you? Or are you about to graduate from a Canadian school? Your answer will point you down the right path.
Cracking the Code on LMIAs for Nigerian Applicants
For many Nigerians dreaming of working in Canada, the acronym "LMIA" can sound like a huge, intimidating hurdle. It’s often seen as this complicated, almost mythical document that stands between you and your Canadian career goals. But let's pull back the curtain on this. The Labour Market Impact Assessment (LMIA) isn’t something you have to worry about filling out. It's on your potential employer.
Here’s a simple way to think about it: the Canadian government’s first priority is to make sure Canadians and permanent residents have jobs. So, before a company in Calgary can hire an accountant from Abuja, they have to prove that they looked for someone locally first and couldn't find the right fit. The LMIA is the official document from the government that essentially says, "Okay, we've checked, and we agree. You need to hire someone from outside Canada for this job."
What this really means for you, as a Nigerian job seeker, is a shift in strategy. Your energy shouldn't be spent on figuring out the LMIA paperwork. It should be focused on finding Canadian employers who are either ready to go through that process for you or are hiring for jobs that don't need one in the first place.
Why Would a Canadian Company Bother with an LMIA?
Let's be honest, getting an LMIA is a bit of a hassle for an employer. It costs them time and money. We're talking a government processing fee that starts at CAD $1,000, and that doesn't even include potential lawyer fees or the cost of advertising the job. So, why go through all that trouble? The answer is simple: they desperately need your skills.
Employers are most likely to go down the LMIA path when they're facing a real talent shortage and can't find the people they need to grow their business. This happens a lot in certain high-demand industries across Canada.
- Tech: Think software engineers, cybersecurity experts, and data scientists. Tech hubs are booming, and they often need very specific skills that aren't available locally.
- Healthcare: Nurses, personal support workers, and lab technicians are in critical demand from coast to coast. Many healthcare providers are very experienced with the LMIA process because they rely on international talent.
- Skilled Trades: Canada's economy runs on welders, electricians, and long-haul truck drivers. Employers in these fields frequently look overseas to fill crucial roles.
Your job is to show them that you're the perfect solution to their problem. Your CV and cover letter need to scream, "I have the exact expertise you've been looking for, and I'm worth the extra paperwork."
The Holy Grail: Finding Jobs That Don't Need an LMIA
Even better than finding an employer willing to get an LMIA is finding a role that's completely exempt from it. These LMIA-exempt work permits are like a fast track for Nigerian professionals, created because Canada knows that attracting certain talent brings huge benefits to the country.
One of the best LMIA-exemptions for Nigerians is the Intra-Company Transfer (ICT).
This pathway is a golden ticket for anyone working at a multinational company with offices in both Nigeria and Canada. If your employer is a global name like KPMG, Deloitte, Shell, or a major bank with a Canadian presence, you need to look into this.
The ICT program is designed to let these global companies move key employees to their Canadian operations smoothly. To qualify, you generally need to:
- Have worked for the company in Nigeria for at least one full year within the last three years.
- Be moving to a Canadian branch that is a parent, subsidiary, or affiliate of your current employer.
- Be in a role as a senior manager, an executive, or a worker with "specialised knowledge" that is vital to the company's operations.
Imagine you're an operations manager at a multinational's office in Port Harcourt. Under the ICT, you could be transferred to their office in Vancouver without your company ever having to apply for an LMIA. This makes you an incredibly valuable asset for an internal move, saving your employer a ton of time and administrative headaches. It's one of the most direct and efficient routes to landing a work permit in Canada.
Your Step-by-Step Application Guide from Nigeria
Right, you’ve got the basics down. Now, let’s get into the practical side of things—your action plan for applying for a work permit for Canada right here from Nigeria. The whole thing is handled online through the official Immigration, Refugees and Citizenship Canada (IRCC) portal, so forget any stories about needing a special 'agent' to handle it for you. You can do this.
Think of it like putting together a detailed business proposal. Every single document you submit is a piece of evidence. You're not just filling out forms; you're building a case to prove you're the right person for the job and that you'll respect Canada's immigration laws. Let's walk through it, and I'll point out the common hurdles for Nigerian applicants.
Gathering Your Essential Documents
Before you even think about logging into the IRCC website, your first job is to get your documents in order. Trust me, being organised now will save you a world of stress later. The goal is to have everything scanned and ready to upload the moment you start your online application.
Here’s your core document checklist:
- Your International Passport: It must be valid for the entire time you plan to stay in Canada. No exceptions.
- Proof of Financial Support: This is a big one, and visa officers look at it very closely.
- Police Clearance Certificate: You'll need to get this from the Nigerian Police Force.
- Medical Examination: This has to be done by a doctor approved by IRCC.
- Educational Credential Assessment (ECA): This report confirms your Nigerian qualifications meet Canadian standards.
- Job Offer Letter and LMIA (if applicable): For an employer-specific permit, this is the heart of your application.
Getting these papers sorted is your first concrete step towards a successful application.
Nailing the Proof of Funds Requirement
For us in Nigeria, showing you have enough money is about more than just a bank statement with a fat balance. IRCC officers are trained to spot inconsistencies. A huge, sudden deposit into your account right before you apply—what’s often called "stuffing"—is a massive red flag.
You need to show a stable financial history, typically over the last four to six months. This proves the money is genuinely yours and wasn't just borrowed to pass the test. While there isn't a magic number for a work permit, a good rule of thumb is to show you can cover your first few months of living costs. Aim for around CAD $3,000 to $5,000, separate from your flight and travel expenses. Present clean bank statements, and consider adding a short letter explaining where the funds came from.
The Medical Exam and Police Clearance
Canada requires applicants from Nigeria to do an upfront medical exam. You must book this with an IRCC-approved panel physician, which you'll find in cities like Lagos or Abuja. You can't just go to your family doctor. The clinic sends the results directly to IRCC, and they’ll give you an information sheet to upload with your application.
In the same vein, you'll need a Police Character Certificate from the Nigeria Police Force Criminal Investigation Department (CID). This process isn't always quick, so start early. It's simply a certificate confirming you don’t have a criminal record that would make you inadmissible to Canada.
This flowchart breaks down the LMIA process, showing how your employer, the government, and you are all involved.
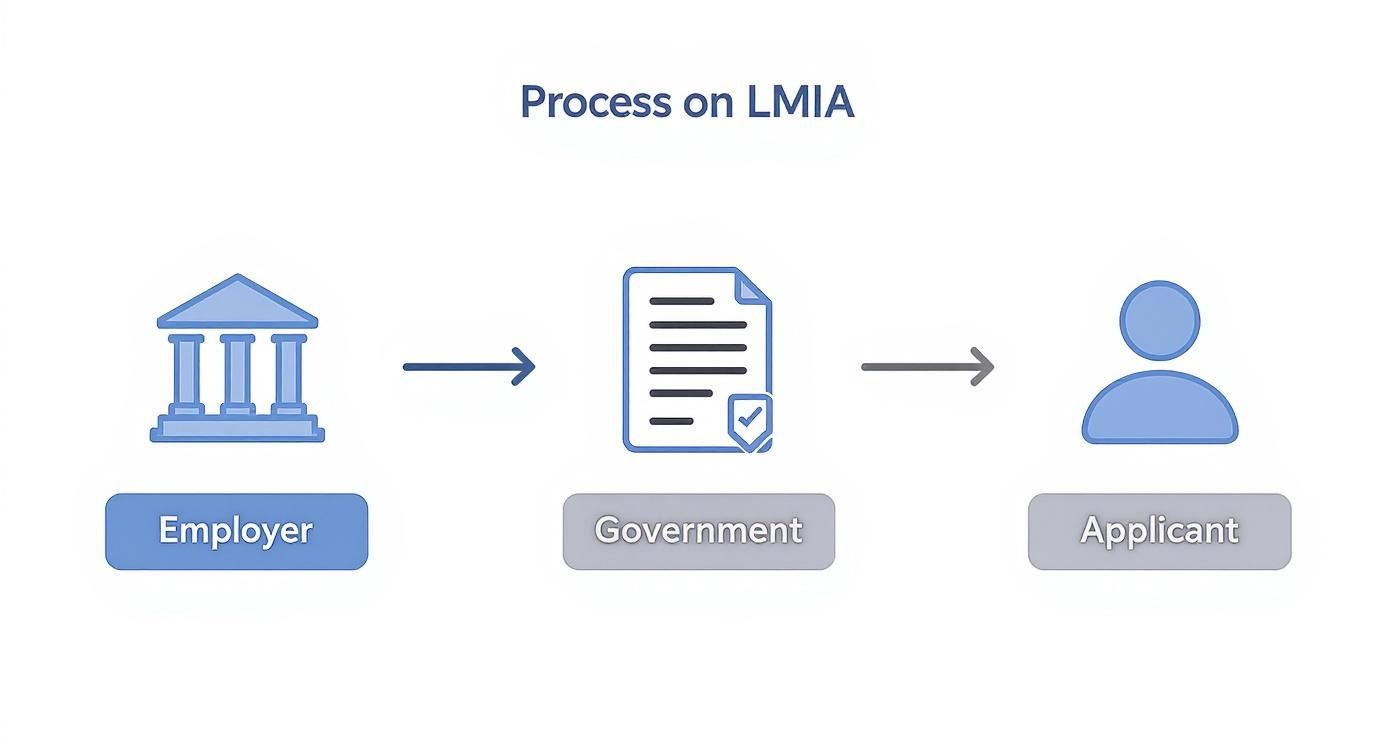
As you can see, your part in the process really only starts after your employer has done their homework and gotten the green light from the Canadian government.
Avoiding Common Refusal Traps for Nigerians
Here’s a hard truth: many qualified Nigerians get refused not because they are ineligible, but because they fail to convince the visa officer of one critical point: strong ties to Nigeria. The officer must be confident that you will leave Canada when your permit expires if you don't have legal status to remain.
So, how do you prove it?
- Family Ties: Show evidence of your close family in Nigeria. This means marriage certificates, and birth certificates for your children.
- Assets and Property: Do you own land, a house, or run a business in Nigeria? Get the deeds and registration documents together to prove it.
- Employment: A letter from your current Nigerian employer confirming you’re on a leave of absence and are expected to return can be very powerful.
The number of applications Canada gets is massive. Just to give you an idea, under the International Mobility Program, 472,070 new permits were issued in 2022 alone, bringing the total to 677,400 valid permits by the year's end. You can find more of these temporary worker statistics on the Statistics Canada website. These figures show why officers are so careful. Your job is to make your application stand out with clear, convincing evidence that leaves no room for doubt.
Popular Immigration Pathways for Nigerian Professionals
While getting a job offer with a positive LMIA is a well-known path, it’s certainly not the only way to secure a work permit for Canada. Several other strategic routes are perfectly suited for Nigerian professionals, and many of these bypass the often-difficult LMIA process entirely. This makes things much simpler for both you and a potential employer.
Thinking strategically is the name of the game here. Many Nigerians who successfully immigrated didn't just wait for a direct job offer to fall into their laps. They used other programmes as a clever stepping stone to gain that all-important Canadian experience, which later became their golden ticket to permanent residency.
Let's break down some of the most effective options available to you.
The Post-Graduation Work Permit: A Strategic Investment
One of the most powerful and reliable pathways is the Post-Graduation Work Permit (PGWP). Now, this isn't something you apply for directly from Nigeria. Instead, you earn it after completing your studies at a Designated Learning Institution (DLI) in Canada. Think of it as a long-term investment in your Canadian dream.
The process is straightforward: you come to Canada as a student, finish a programme that's at least eight months long, and then you're eligible for an open work permit. The permit's length usually matches your study period, up to a maximum of three years. For instance, completing a two-year master's degree could land you a three-year open work permit to kickstart your career.
This pathway is a true game-changer. A PGWP is an open work permit, meaning you have the freedom to work for almost any employer, anywhere in Canada. This allows you to build the skilled Canadian work experience that weighs so heavily in permanent residency applications.
Leveraging the International Mobility Program
The International Mobility Program (IMP) is a collection of LMIA-exempt streams designed for foreign workers whose presence provides a significant benefit to Canada. These streams offer unique advantages for Nigerian professionals with specific skills or connections.
A fantastic option within the IMP is the Francophone Mobility stream. This is a golden opportunity for French-speaking Nigerians. If you can demonstrate a moderate command of the French language, a Canadian employer can hire you for a skilled job outside of Quebec without needing to go through the LMIA process.
Imagine a bilingual project manager from Lagos getting hired by a tech company in an English-speaking province like Ontario or Alberta. This gives Canadian employers a massive incentive to choose you, saving them the time, money, and paperwork of an LMIA.
Finding Your Niche in Provincial Programs
Don't just focus on federal programmes; the provinces themselves hold incredible opportunities. Many Provincial Nominee Programs (PNPs) have special streams that make it easier for employers to hire foreign talent for in-demand jobs.
Some provinces have targeted programmes for tech workers, while others are desperate for healthcare professionals. Digging into what the different PNPs offer could be your smartest move. To see how this works in practice, check out our guide on how a province like Manitoba selects candidates: https://blog.japachat.com/manitoba-provincial-nomination/.
As you explore these pathways—many of which lead to a job hunt—your online professional brand is crucial. For practical advice on making your profile irresistible to Canadian recruiters, focus on optimizing your LinkedIn profile. A polished and professional online presence can truly make all the difference in catching an employer's attention.
Turning Your Work Permit into Permanent Residency
For most Nigerians, getting a work permit for Canada is not the final destination. It's the launchpad. Think of it as the crucial first step on a much bigger journey—the path to becoming a permanent resident (PR). Your work permit is the foundation, but the real prize is building the rest of your life on top of it.
The Canadian work experience you gain is, without a doubt, the most powerful asset you'll have when you eventually apply for PR. It's your proof to the Canadian government that you can fit into the job market and contribute to the economy. This experience unlocks immigration programmes that would otherwise be completely out of reach.
Your Work Experience and Express Entry
The fastest and most popular highway to permanent residency is the Express Entry system. This isn't one specific programme, but a system that manages applications for Canada's main economic immigration streams. And guess what? Your work experience is a major factor here.
The key programme for you will be the Canadian Experience Class (CEC). This stream was practically built for people who have already worked in Canada. All you need is at least one year of full-time, skilled work experience in Canada, and suddenly, you're eligible to apply through the CEC.
This is where it all connects. That one year you spend working as a software developer in Toronto or a nurse in Calgary doesn't just earn you a salary—it gives your Express Entry profile a massive boost. This significantly increases your chances of getting that coveted invitation to apply for PR.
How Provincial Nominee Programs Can Help
Beyond the federal Express Entry system, every province has its own immigration programmes, known as Provincial Nominee Programs (PNPs). Don't overlook these! They are incredibly valuable because provinces are always looking to nominate skilled workers who are already employed and settled in their region.
Having a job and work experience in a province like Alberta, Saskatchewan, or Manitoba can make you a top-tier candidate for their PNP. This is a game-changer, and here’s why:
- Targeted Draws: Provinces often dip into the Express Entry pool to invite candidates who have work experience in specific, in-demand jobs within their borders.
- Direct Applications: Some PNP streams let you apply directly to the province if you have a local job offer and have been working there for a while.
- Massive Point Boost: This is the big one. Securing a provincial nomination adds a whopping 600 points to your Express Entry score. That practically guarantees you’ll receive an invitation to apply for permanent residency.
Let’s say you’re a project manager working in Regina, Saskatchewan. You could become eligible for one of Saskatchewan's PNP streams designed specifically for workers already in the province. This gives you a clear and direct route to PR, often much faster than waiting in the general Express Entry pool.
Your work permit isn’t just a permit; it's your key to unlocking these powerful provincial opportunities.
Common Questions We Hear from Nigerian Applicants
Trying to get a work permit for Canada can feel like navigating a maze, and it's totally normal to have a lot of questions. We've seen many Nigerian applicants run into the same hurdles, so we’ve gathered the most common ones here to give you direct, practical answers and a bit more confidence.
How Much Money Do I Really Need to Show?
This is probably the number one question we get. While there's no official "magic number" for a work permit, the whole point is to show you can take care of yourself before your Canadian paycheques start rolling in. A good ballpark figure to aim for is somewhere between CAD $2,500 and $4,000 if you're coming alone.
But here’s the thing: the amount is only half the battle. Where the money came from is actually more important. IRCC officers are trained to sniff out funds that appear out of nowhere just for the application (what they call "loan-sharking"). You’ll need to provide bank statements from the last four to six months that show a steady, consistent balance. This proves the money is genuinely yours and has been for a while.
My Visa Was Refused Before. Can I Apply Again?
Yes, you absolutely can. A past refusal isn't a life sentence. However, you can't just resubmit the exact same application and cross your fingers for a different outcome. Your first, most critical step is to find out precisely why you were denied. You can do this by ordering your GCMS (Global Case Management System) notes, which will show you the visa officer's detailed comments.
Common reasons for refusal among Nigerians are things like not showing strong enough ties to home or having shaky proof of funds. Your new application must tackle these old issues head-on with new, convincing evidence. For instance, if "weak home ties" was the problem, come back with property documents, a letter from your current employer in Nigeria, or proof of family you care for back home.
Do I Have to Use an Agent in Nigeria?
Nope, not at all. You are perfectly capable of completing and submitting the entire application yourself through the official Government of Canada website. All the necessary forms and instructions are available there for free.
Be very, very wary of local "agents" promising guaranteed jobs or visas in exchange for a huge fee. Many of these are flat-out scams. While a licensed and regulated Canadian immigration consultant can offer legitimate help, you should never feel forced to use one. The power to apply is yours.
What if My Job Isn’t on a High-Demand List?
Don't sweat it. Your chances can still be quite good. Sure, having a job in a hot field like tech or healthcare makes it easier for an employer to get an LMIA, but it’s not a must-have for every role. Any employer can apply for an LMIA as long as they can prove to the government that they advertised the job and couldn't find a Canadian citizen or permanent resident to do it.
The best approach is to focus your job search on what makes you stand out. Showcase your unique skills and experience. Build a compelling case for why a Canadian company should go through the trouble of hiring you from abroad. It's your unique value that will convince an employer it's worth the effort.
Planning a move to Canada has a lot of moving parts, and getting straight answers is key. For instant, reliable answers to all your immigration questions, JapaChat is ready to help. As Nigeria’s AI immigration expert, we offer guidance that’s tailored to your unique situation. Start planning your journey with confidence by visiting https://japachat.com today.
-
A Practical Guide to Canada Visitor Visa Requirements for Nigerians
So, you're dreaming of a trip to Canada – maybe to see the famous CN Tower light up the Toronto sky or visit family out in Calgary. That's fantastic! But first, you'll need to get a Canadian visitor visa, which is officially called a Temporary Resident Visa (TRV).
For us Nigerians, getting this visa is all about careful preparation. It’s not just about filling out forms; it’s about telling a convincing story that you're just visiting and will definitely come back home.
Think of the visa officer as a gatekeeper. Their primary concern is making sure that visitors will leave Canada once their stay is over. Every single document you provide needs to help answer their number one question: “Is this person going to return to Nigeria?”
The Three Pillars of a Strong Application
Your entire application is built on proving three non-negotiable points. Get these right, and you're well on your way.
-
A Genuine Reason for Visiting: Why exactly are you going to Canada? "Tourism" is too broad and won't cut it. You need a specific, verifiable reason. For example, "I'm attending my niece's convocation at the University of British Columbia on June 15th" is much stronger, especially when backed up by an official invitation letter.
-
Sufficient Funds for Your Trip: You must prove you can comfortably afford your entire trip without needing to work illegally in Canada. It's not about having a billion naira in your account. What they're really looking for is a stable financial history. A huge, unexplained lump sum that suddenly appears in your account a week before you apply is a massive red flag. They'd rather see a consistent pattern of income, like your monthly salary, over the last four to six months.
-
Strong Ties to Nigeria: Honestly, this is the make-or-break factor for most Nigerian applicants. What powerful reasons do you have to come back home? This is where you show them your roots are firmly planted in Nigeria. Think about your stable job, your registered business, properties you own, or your family responsibilities (like caring for elderly parents or your own children).
The secret to a successful application is proving "non-immigrant intent." You have to convince the visa officer that your life, your career, and your family are all in Nigeria, making your return a foregone conclusion.
Core Visa Requirements at a Glance for Nigerians
To make this crystal clear, let's break down these pillars. Think of these as the absolute must-haves for your application. If any of these are weak, your chances of approval drop significantly.
Requirement Category What It Means in the Nigerian Context Why It's Critical for Approval Clear Travel Purpose Having a specific, verifiable reason for your trip (e.g., attending a wedding, a business conference, or a specific family event). A vague plan suggests you might not be a genuine tourist and could be looking for ways to overstay. Financial Stability Showing a consistent flow of income and enough savings to cover all trip expenses (flights, accommodation, spending money). This proves you won't become a financial burden on Canada or be tempted to work illegally to support yourself. Strong Ties to Nigeria Demonstrating significant professional, family, and economic connections that compel you to return home after your visit. This is the strongest evidence against the suspicion that you plan to stay in Canada permanently. Getting these elements right shows the visa officer that you're a low-risk applicant who respects Canada's immigration laws. It's all about painting a clear picture of a responsible traveller.
It's also worth noting that the review process has become more intense lately. Visa officers are scrutinising applications more than ever, so building a rock-solid case is crucial.
While our focus here is Canada, it's interesting to see how other countries handle this. For instance, this detailed Dubai visa guide for Philippine citizens shows that basic principles like proving you have enough money and a clear reason to visit are pretty much universal. If your plans are more long-term, you might also want to check out our guide on how to relocate to Canada from Nigeria.
Your Definitive Document Checklist
Think of your application documents as your legal team, each one presenting a piece of evidence to argue your case. Every single paper must work together to convince the visa officer that your trip is legit and that you have every reason to come back home to Nigeria.
Let's break down exactly what you need, item by item, with some real-world advice specifically for Nigerian applicants.
The Non-Negotiable Core Documents
These are the absolute must-haves. Don't even think about the other documents until you have these sorted out and looking perfect.
- Valid Nigerian International Passport: First things first, check your passport. It needs to be valid for at least six months after you plan to leave Canada. Also, make sure you have at least two completely blank pages for the visa sticker.
- Completed Application Forms: Whether you're applying online or dropping off a paper application at a VFS Centre, you have to fill out all the required forms (like the IMM 5257). Fill them out completely and, most importantly, honestly. A tiny mistake can cause a major headache, so double-check every single detail.
- Two Recent Passport Photographs: Don't just pull an old picture from your drawer. You need to get fresh photos taken that meet the exact specifications set by Immigration, Refugees and Citizenship Canada (IRCC). They are very particular about the size, background colour, and even your facial expression.
Proving You Can Fund Your Trip
This is a major stumbling block for many people. The goal here isn't to look like you just won the lottery; it's to show that you are financially stable and can comfortably afford your trip without any strain.
A huge red flag for visa officers is "fund parking." This is when a large, random amount of money suddenly appears in your account right before you apply. Honestly, they'd rather see a consistent salary of ₦500,000 coming in every month for the last six months than a suspicious, one-off deposit of ₦5 million.
Your bank statements are your star witness. You'll need to provide:
- Original bank statements from the last four to six months.
- A healthy closing balance that clearly covers your estimated travel costs.
- Proof of regular income, like your monthly salary payments hitting the account.
The story your bank statement tells should make sense. It should show your salary or business income arriving predictably and a reasonable pattern of spending and saving. For a masterclass on getting this right, you should definitely check out this detailed guide on how to prepare your Proof of Funds for a Canadian visa.
Getting Sponsorship Right
If a family member in Nigeria or Canada is footing the bill for your trip, you'll need a formal sponsorship letter. This doesn't mean you can skip your own financial documents; it just adds another layer of support to your application.
Your sponsor needs to provide:
- A Letter of Invitation that clearly states their relationship to you, why you're visiting, and a promise that they will cover all your expenses.
- Proof of their legal status in Canada (like a copy of their Permanent Resident card or Canadian passport).
- Solid proof that they can actually afford to support you. This includes a letter from their employer, their T4 tax slip, and their own recent bank statements.
Showing Unbreakable Ties to Nigeria
This is it. This is arguably the most important part of your application. You have to prove, beyond any doubt, that you have very strong reasons to return to Nigeria. Your life back home needs to look so good and so established that the thought of abandoning it for Canada would seem completely illogical.
Here are some powerful documents that work well for us Nigerians:
Professional and Business Ties:
- Employment Letter: This needs to be on official company letterhead. It must state your job title, salary, how long you've worked there, and—this is critical—that your leave for the trip has been approved. It should also state when you are expected back at your desk.
- CAC Business Registration Documents: If you're a business owner, this is your proof. Provide your Certificate of Incorporation, MEMART, and business bank statements to show you have a real, operating company to return to.
- Tax Clearance Certificate: This is solid evidence that you are an economically active and law-abiding citizen.
Property and Financial Ties:
- Deed of Assignment or Certificate of Occupancy: Owning property is a massive home tie. If you own land or a house, provide the official, legally recognised documents.
- Investments: Do you have significant investments in Nigerian stocks, mutual funds, or fixed deposits? Show the paperwork. It proves you have financial roots in the country.
Family Ties:
- Marriage Certificate: A must-have if you are married.
- Birth Certificates of Children: This demonstrates you have dependents you would never leave behind.
- Evidence of Family Responsibilities: Maybe you're the primary caregiver for your elderly parents. A letter from their doctor or a sworn affidavit explaining your crucial role can be very powerful. Your application needs to paint a clear picture of a life filled with responsibilities that firmly anchor you in Nigeria.
How to Navigate the Visa Application Process
Alright, you've got your documents in order. Now comes the part that can feel a bit daunting: the application itself. This stage is less about what you've gathered and more about how you put it all together. For many Nigerians, the online portal can be tricky, but let's walk through it step-by-step to avoid the common pitfalls that cause unnecessary delays.
The entire process happens online through the official Immigration, Refugees and Citizenship Canada (IRCC) secure portal. This is your command centre for creating your account, answering the crucial questions, and uploading all those documents you worked so hard to prepare.
Starting Your Application Journey Online
First things first, you need to create your secure IRCC account. Think of this as your personal dashboard for your entire visa journey. It’s where you’ll get messages from IRCC and track your application's progress, so keep your login details somewhere very safe.
Once you’re in, the system will walk you through an eligibility questionnaire. Pay close attention here. Your answers are critical because they generate a personalised document checklist specifically for your situation.
Be extremely careful and honest when answering these questions. A wrong answer, even an accidental one, can lead to a request for documents you don't have, or worse, a misrepresentation finding. For example, if you mistakenly say you have a relative in Canada when you don’t, it creates a complication you don't need.
After you finish the questionnaire, you'll get a personal reference code and that all-important document checklist. This is your green light to start uploading your files. Make sure every single scan is crystal clear and in the right format (usually PDF, JPG, or PNG) and size. A blurry or unreadable bank statement is as good as no bank statement at all.
The All-Important Biometrics Step
Once you've submitted your application and paid the fees online, you should receive a Biometric Instruction Letter (BIL) in your IRCC account within about 24 hours. You absolutely cannot book your biometrics appointment without this letter.
Biometrics—your fingerprints and a photograph—are a mandatory part of the visitor visa requirements. Canada relies on this data to securely manage millions of applications. It's a standard part of the process for temporary immigration to Canada.
In Nigeria, biometrics are handled by VFS Global, which has centres in Lagos and Abuja. You must book an appointment online through their website; you can't just show up.
- Book Early: Appointment slots, especially in Lagos, can fill up very quickly. Book yours the moment you get that BIL.
- What to Bring: On your appointment day, you'll need three things: your international passport, your Biometric Instruction Letter, and your appointment confirmation email.
- The Process: The actual process is fast and simple. You’ll have a digital photo taken and your fingerprints scanned. It’s a straightforward procedure designed for security and identification.
Understanding the Costs Involved
Paying the correct fees is a non-negotiable step. There are two main fees you must pay online when you submit your application:
- Application Fee: This is the standard processing fee for the visitor visa. As of early 2024, this is CAN$100 per person.
- Biometrics Fee: This covers the cost of VFS collecting your fingerprints and photo. It is CAN$85 per person.
You'll pay both fees together online with a credit or debit card (Visa or Mastercard are accepted) as the final step before submitting your application. The IRCC portal won't let you proceed without it. Make sure to save the receipt it generates as your proof of payment.
Managing Expectations on Processing Times
After your biometrics are done, the waiting game begins. And honestly, this is often the hardest part. It's so important to have realistic expectations. While the IRCC website provides an average processing time, the reality for Nigerian applicants can sometimes be longer.
Things like the sheer volume of applications at the Accra visa office (which handles many Nigerian cases) and the complexity of your own file can really affect the timeline. It's a good idea to check the official processing time calculator on the IRCC website regularly, but be prepared for it to take several weeks, or even a few months. My strongest advice? Avoid making any non-refundable travel plans until that visa is actually stamped in your passport.
Proving Strong Ties to Nigeria
This is it. The make-or-break part of your entire application. While having a valid passport and enough funds are non-negotiable, the visa officer's decision truly hinges on one simple question: will you go back home?
Your entire goal is to convince them that abandoning your life in Nigeria for Canada would be completely unthinkable. It’s not about one magic document, but about weaving together a compelling story of your life—a web of responsibilities, assets, and relationships that firmly anchor you to Nigeria. Let's break down the four pillars you need to build this case, using real-world Nigerian examples.
Financial and Property Ties
Money talks, and so does property. Your financial footprint in Nigeria is a powerful anchor, showing you have an established economic life you wouldn’t just walk away from. This goes way beyond the balance in your bank account.
- Property Ownership: Owning land or a house is perhaps the strongest tie you can show. A legally registered Deed of Assignment or a Certificate of Occupancy (C of O) in your name is pure gold. It’s a massive, long-term commitment to your life here.
- Registered Business: If you’re an entrepreneur, your Corporate Affairs Commission (CAC) documents are your proof. Get your Certificate of Incorporation, MEMART, and recent business bank statements ready. This shows you have a living, breathing company that needs you at the helm.
- Investments: Do you have a stock portfolio with a Nigerian firm or investments in mutual funds? Providing statements for these shows you have capital tied directly to the Nigerian economy.
Family Ties
Family is the bedrock of Nigerian society, and visa officers know this. It’s a massive indicator of your intention to return. You need to paint a clear picture of the people in Nigeria who depend on you—people you would never dream of leaving behind.
To a visa officer, the idea of someone leaving a spouse and young children behind is a huge red flag against overstaying. Your application needs to clearly highlight your role as a husband, wife, parent, or primary caregiver.
Make sure you include:
- Your marriage certificate if you're married.
- The birth certificates for all your children to prove you have dependents.
- Evidence of caring for elderly parents. This could be a sworn affidavit or even a letter from their doctor explaining your crucial role as their caregiver.
Career and Professional Ties
A stable, growing career is another major reason to come back home. It's not enough to just say you have a job; you have to prove it's a career you're invested in. A flimsy, one-paragraph letter just won't cut it.
Your employment letter needs to be detailed and on the company’s official letterhead. It must clearly state:
- Your official job title and a short summary of what you do.
- Your annual salary and the date you were hired, which shows stability.
- A direct confirmation that your leave has been approved for the exact dates of your trip.
- A clear mention of your expected date of resumption at work.
That last point is absolutely critical. It’s a formal promise to your employer that you'll be back, which powerfully backs up the promise you're making to the visa officer.
Social and Community Ties
This is the part many people overlook, but it adds a rich, valuable layer to your application. These ties show you’re not just living in Nigeria—you’re an active, integrated member of your community.
Think about including proof of:
- Professional Memberships: Are you a member of the Nigerian Bar Association (NBA), ICAN, or the Nigerian Society of Engineers (NSE)? Your membership certificate or ID card is great supporting evidence.
- Community Organisations: Membership in your church or mosque, a well-known community development association, or even a respected social club can show deep local roots. A simple letter from the organisation's leadership confirming your active membership can make a real difference.
When you strategically combine proof from these four areas, you’re no longer just submitting documents. You're presenting a complete, convincing picture of a person whose life is firmly and happily established in Nigeria, making your plan to return after a short visit feel both credible and undeniable.
Common Visa Refusal Reasons and How to Avoid Them
Getting that refusal letter can feel like a punch to the gut, especially after all the time and effort you’ve poured into your application. The reasons they give can seem frustratingly vague, but think of them as clues. They point directly to what the visa officer saw as a weakness in your story.
Knowing these common pitfalls is the key to building a rock-solid application from the very beginning. Let’s break down the top reasons Nigerian applicants get denied and, more importantly, what you can do to avoid them.
Unclear Purpose of Visit
This is a big one. When the officer says your purpose of visit isn't clear, it means they don't believe your plan. They’re worried your stated reason—be it tourism, a family visit, or a conference—is just a cover for something else.
To fix this, you need to be incredibly specific. A weak application vaguely says, "I'm going for tourism for two weeks." A strong one paints a vivid, believable picture.
For instance, instead of just saying you plan to visit Toronto for 10 days, map it out clearly:
- Days 1-3: Land at Pearson Airport, check into the Marriott Downtown (booking confirmation attached). First stop: CN Tower, then Ripley's Aquarium.
- Days 4-5: Taking a pre-booked bus tour to Niagara Falls (tour receipt attached).
- Days 6-8: Exploring the Royal Ontario Museum and catching a Blue Jays baseball game (tickets purchased).
- Days 9-10: Last-minute shopping at the Eaton Centre before my flight back to Lagos.
This kind of detail proves you’ve done your homework and have a genuine, thought-out plan. It screams "real tourist," not "potential overstayer."
Insufficient Financial Resources and Fund Parking
This isn't just about having enough money. It’s about the history of that money. The single biggest financial red flag for a visa officer is what we call "fund parking." This is when a large, unusual sum of money suddenly appears in your account right before you apply.
Picture this: your bank statement shows a consistent balance of around ₦800,000 for months. Then, two weeks before your application, ₦7 million magically appears. To an officer, this looks like you borrowed money to inflate your account, and it’s an almost guaranteed recipe for refusal.
The key is consistency. Your financial story needs to make sense. A history of regular salary payments and steady savings is far more convincing than a huge, last-minute deposit. Authenticity will always win.
Your bank statement for the last four to six months should show your income, your spending habits, and a closing balance that can easily cover your trip without emptying your entire life savings. For a deeper dive into other missteps that can sink an application, check out our guide on common visa rejection reasons.
Doubts About Your Intention to Return
This is the make-or-break issue for every visa officer looking at an application from Nigeria. They must be 100% convinced you have strong reasons to return home. As we've discussed, your ties to Nigeria—your job, your family, your business, your property—are your most powerful evidence.
If your ties seem weak—for example, you're single, unemployed, and don't own any assets—the officer will naturally assume you have very little pulling you back to Nigeria. It’s your job to prove them wrong by providing concrete evidence of your stable and established life here.
With the total number of temporary visa applications to Canada expected to reach 9.8 million in 2024, officers are under pressure to make decisions quickly. They won't have time to connect the dots for you. Every single document you submit must work hard to prove one thing above all else: you are coming back home.
Frequently Asked Questions From Nigerian Applicants
Going through the Canada visitor visa requirements often brings up a ton of questions, especially for those of us applying from Nigeria. Let's tackle some of the most common ones I hear, so you can move forward with a bit more clarity.
How Much Is Enough for Proof of Funds in Naira?
Look, there’s no official magic number that guarantees an approval. But from experience, a solid application shows you can pay for your flight, where you’ll stay, and your day-to-day spending without needing to empty your bank account.
A good rule of thumb for a two-week trip is to show you have the equivalent of CAD $3,000 – $5,000 per person. And this is after you've factored in your flight and hotel budget.
But here’s the real secret: the amount of money isn't nearly as important as where it came from. A visa officer wants to see a steady, believable history of your income and savings over the last four to six months. A consistent balance of ₦4 million over that time looks much stronger than a sudden, unexplained deposit of ₦7 million that appears just a week before you apply. Consistency is key.
Can My Relative in Canada Sponsor My Trip?
Yes, they absolutely can, but don't think of it as a golden ticket. A sponsorship letter is a great supporting document, but it doesn't replace the need for you to prove your own stability back home.
If your relative is sponsoring you, they’ll need to provide:
- A formal Letter of Invitation.
- Proof of their legal status in Canada (like a copy of their permanent resident card or Canadian passport).
- Evidence that they can financially support your stay, such as a letter from their employer and their recent bank statements.
Even with all that, the spotlight is still on you. You have to prove your own financial standing and, critically, that you have strong ties to Nigeria that will bring you back. The visa officer's primary job is to be convinced you won't overstay, so your application needs to be solid on its own.
My Visa Was Refused Before. Can I Reapply?
You can definitely reapply, but please don't just send in the same documents again. That’s a recipe for another refusal.
The very first thing you must do is read the refusal letter carefully. Understand the exact reasons the visa officer pointed out. Your new application has to directly address those issues with significant new evidence.
- Was it weak financial ties? You'll need to show a major positive change. Maybe you got a promotion with a higher salary that's reflected in your bank statements for several months, or you've recently acquired property.
- Was the purpose of your trip unclear? Your new application needs a much more detailed and believable itinerary that makes complete sense.
Reapplying without fixing the original problems is almost a guaranteed way to get another "no."
Do I Need to Buy a Flight Ticket Before Applying?
No, you don’t, and you absolutely shouldn't! This is one of the most common and expensive mistakes people make. Never buy a non-refundable ticket until your visa is approved and stamped inside your passport.
What should you do instead? Just ask a travel agent for a flight reservation or itinerary. It's a simple document that shows your planned travel dates and route without you having to spend a kobo. This is all you need to include as proof of your travel plans. Once you get that visa, you can go ahead and book your flight with confidence.
Feeling a bit lost in the visa maze? JapaChat can help you find your way. Get quick, reliable answers to your immigration questions from an AI expert built specifically for Nigerians. Start planning your trip with confidence. Sign up for free at https://japachat.com.
-
-

Ireland Visa Application in Nigeria: A Practical Guide
Thinking about applying for an Irish visa from Nigeria? It might feel like a big mountain to climb, but once you break it down, it's a step-by-step process. The whole journey really boils down to three main stages: picking the right visa, getting your online application in, and then heading to a VFS centre in Lagos or Abuja for your appointment.
Getting your head around this journey from the start is the best way to prepare for a successful outcome.
Your Ireland Visa Journey from Nigeria
So, you're looking to study, work, or maybe just visit the Emerald Isle. Fantastic. The very first thing you need to lock down is which visa you actually need. Ireland has two main categories for Nigerians, and picking the right one is hands down the most crucial part of your entire application.
This guide is your roadmap. We'll walk through everything, from the first document you need to find to the moment you get that passport back in your hands. If you're looking at the bigger picture of moving abroad, this relocation guide for expats offers some great general advice.
Here’s a quick visual of the three-stage journey you're about to embark on.
As you can see, it's a logical flow: figure out your visa, submit the forms, and then get your passport back. Each step builds on the last.
Short-Stay vs. Long-Stay Visas: What's the Difference?
Your reason for going to Ireland is what decides whether you need a Short-Stay 'C' Visa or a Long-Stay 'D' Visa. Let's break it down in a way that makes sense for us here in Nigeria.
A Short-Stay 'C' Visa is what you'll need for any trip that’s less than 90 days. This covers things like tourism, popping over for a business conference in Dublin, visiting your sister in Cork, or taking a short English language course. If you're a software developer from Yaba heading to a week-long tech summit in Dublin, this is the one for you.
On the other hand, a Long-Stay 'D' Visa is for anyone planning to stay for more than 90 days. This is the visa for students who've been accepted into a Master's programme at University College Cork, professionals who've landed a job with an Irish company, or people joining family already living in Ireland.
The difference seems simple, but getting it wrong is a big deal. Applying for the incorrect visa type is one of the quickest ways to get an immediate refusal. Make absolutely sure you've chosen the right one before you even think about starting the forms.
Choosing the Right Irish Visa in Nigeria
To make it even clearer, here’s a quick comparison to help you pinpoint exactly which visa category fits your travel plans.
Feature Short-Stay 'C' Visa Long-Stay 'D' Visa Duration of Stay Up to 90 days More than 90 days Common Purposes Tourism, business meetings, visiting family, short courses, conferences Study (degree programmes), work (with a permit), family reunification Right to Work No Yes, if you have a valid work permit Example Scenario Attending a wedding in Galway for a week Enrolling in a four-year degree at Trinity College Dublin Ultimately, your "why" for travelling dictates the visa. If it's a short trip, think 'C'. If you're moving there for a while, think 'D'.
A Realistic Look at Approval Rates
It’s important to go into this with your eyes wide open. The numbers show that a successful application takes serious effort and attention to detail.
For instance, in the first half of 2022, Nigerian applicants submitted 4,112 Irish visa applications. The approval rate? Around 44.4%. That means more than half of all applications were turned down. For comparison, a country like India had an 85% approval rate during the same period.
This isn't to discourage you, but to stress just how critical it is to submit a flawless, well-supported application. Every single document counts.
Getting Your Application Documents in Order
This is, without a doubt, the most important part of your Ireland visa application. A single missing document, a tiny mistake on a form, or information that just doesn't add up can unfortunately bring everything to a halt with a refusal letter.
Think of your paperwork as telling a story to the visa officer—your story. Every single piece must be consistent, clear, and ultimately, convincing.

It’s not just about ticking boxes. You need to understand why each document is required. Let's break down exactly what you need to build a strong, refusal-proof application package, with some practical advice specifically for applicants in Nigeria.
Core Identity and Travel Documents
First up, the absolute basics. These documents are the foundation of your application, and there's simply no room for error here.
- Your Current Passport: It must be valid for at least 6 months after the date you plan to leave Ireland. Check that you have at least two completely blank pages for the visa sticker.
- Photocopies of Previous Passports: If you have any old passports, you need to photocopy every single page. Yes, even the blank ones. This is crucial for establishing your travel history.
- Two Recent Passport Photographs: These aren't just any photos. They have very strict requirements—usually a white background, 35mm x 45mm, and a neutral expression (no smiling). Don't just use a photo from your phone; go to a proper photo studio in Ikeja or Wuse and tell them it’s specifically for an Irish visa application. They'll know what to do.
These items are non-negotiable. Make sure they are in perfect condition and meet all the rules.
Proving You Can Fund Your Trip
This is a major hurdle where many Nigerian applications fall short. The visa officer needs solid proof that you can pay for your trip without working illegally or becoming a burden on the Irish state. It's less about having a huge amount of money and more about showing a stable, credible financial situation.
The main document for this is your six-month bank statement from your personal current account.
A convincing bank statement shows a steady, regular pattern of income and spending. A salary coming in each month from your employer, followed by normal daily expenses, looks far more believable than a huge, unexplained sum of money that suddenly appears a week before you apply. That N2,000,000 your uncle sent to "boost" your account? It's a massive red flag and will likely do more harm than good.
When you get your statement, make sure it's the original, stamped copy directly from your bank, like GTB or Zenith. A simple printout from your banking app won't cut it. Your name, address, and account number must be clearly visible.
Demonstrating Strong Ties to Nigeria
The Irish authorities' biggest concern is that you won't leave when your visa expires. You have to prove that you have a life, responsibilities, and connections in Nigeria that you are compelled to return to. This is probably the most important part of proving your intentions are genuine.
How you do this depends on your personal circumstances:
- If you're an employee: You'll need an official, signed letter from your employer on company letterhead. This letter should confirm your job title, salary, start date, and, crucially, that your leave has been approved and you're expected back at your desk on a specific date. You'll also need to include your last three payslips.
- If you're self-employed: This takes a bit more work. You must provide your CAC business registration documents, your business bank statements for the last six months, and some proof of your business activities, like recent invoices or client contracts.
- If you're a student: Get a letter from your university or school. It needs to confirm you are enrolled, state your course of study, and specify the date you are expected to resume classes after your trip.
- Family ties: Don't forget these. If you're married, include your marriage certificate. If you have children, include their birth certificates. These documents show you have an immediate family waiting for you back home.
Your goal is to paint a clear picture of a stable life in Nigeria—a life you have every reason to return to.
Your Application Letter and Travel Plans
Your application needs to be supported by a detailed letter that clearly explains why you want to visit Ireland. This is your one chance to speak directly to the visa officer, so make it count. A well-written letter can make a huge difference. For some great tips, check out our guide on how to write a compelling letter of intent for your visa application.
Alongside this letter, you have to provide a concrete plan for your trip. This isn't just a rough idea; it needs to be specific.
Document What to Include A Real Nigerian Example Flight Bookings A printout of your flight reservation. Crucially, do not pay for the actual ticket until your visa is approved. A reservation showing a return flight from Murtala Muhammed Airport (LOS) to Dublin (DUB). Accommodation Confirmed hotel bookings for the entire time you plan to be in Ireland. A booking confirmation email from a hotel in Dublin covering all the nights of your stay. Daily Itinerary A simple, day-by-day plan of what you intend to do. Day 1: Arrive in Dublin, check into the hotel. Day 2: Visit Trinity College and the Book of Kells. Day 3: Take a day trip to the Cliffs of Moher. Other Essential Requirements
We're almost there. There are just a few more critical items to sort out. You must have valid travel medical insurance. This needs to cover you for your entire trip and have a minimum coverage of €25,000. Even though Ireland is not in the Schengen Area, this is the standard they require.
For family-sponsored applications, the person sponsoring you in Ireland must also show they can support you. If they are employed on a work permit, for instance, they typically need to show an annual income of at least €30,000.
Finally, and this is very important: if you have ever been refused a visa for any country before, you must declare it. Hiding a past refusal is seen as deception and will almost guarantee your Irish visa application is denied. Instead, include a copy of the refusal letter and write a short note explaining how your circumstances have improved since then. When it comes to visa applications, honesty is always the best policy.
Finishing the Online Form and Nailing Your Appointment Booking
Once you've got all your paperwork sorted, it's time to head online. This part of the process happens on two different websites: the AVATS platform, where you'll fill out your official application, and the VFS Global portal, where you book the appointment to submit everything.
Getting this stage right is crucial. Simple typos on the form or a missed step in the booking process can cause serious headaches and delays. Let’s walk through how to do it properly, from filling out the form to securing your slot in Lagos or Abuja.
Tackling the AVATS Online Application Form
The official Irish visa application is done through a system called AVATS (AVATS Visa Application Type Service). While the form itself is fairly logical, there are a few common pitfalls that Nigerian applicants, in particular, tend to fall into. Our best advice? Slow down and check every single detail before you hit that submit button.
For example, a frequent mistake is with addresses. When the form asks for your residential address, you absolutely must put the full, physical address where you actually live. Do not use a P.O. Box. An application with a P.O. Box can be a red flag for visa officers, as it doesn't confirm a stable place of residence.
Your journey starts on the official Irish Immigration website.

This is the gateway to the AVATS form, which is your first official step in lodging your details with the Irish government.
After you've carefully entered everything—from your passport details to your travel history—you'll submit the form online. The system will then generate a unique Application Transaction Number.
Don't Forget This: The moment you submit, a summary sheet will pop up. You must print this. It has your transaction number and a unique barcode on it. This isn't just a confirmation; it's a critical document you have to bring to your appointment at VFS.
How to Book Your VFS Appointment in Lagos or Abuja
With your AVATS summary sheet printed and ready, the next step is to visit the VFS Global website. VFS is the company that handles all the logistics for the Irish government in Nigeria, from collecting your documents to taking your fingerprints. You can't just walk into the embassy; everything goes through VFS.
You'll need to create an account on their site. Once you're in, you'll use your AVATS transaction number to book an appointment at one of their two centres in Nigeria:
- Lagos: VFS Application Centre, Lekki
- Abuja: VFS Application Centre, Wuse II
Be warned: finding an open slot can be a challenge, especially during peak travel times. For students aiming for a long-stay 'D' visa, the window between July and September is incredibly competitive. Appointment slots are often snapped up within minutes of being released. The key is to start checking the VFS portal the moment you have your AVATS summary sheet in hand.
Breaking Down the Full Cost of Your Application
It’s important to budget correctly so there are no last-minute surprises. The total cost of your Ireland visa application is split into two separate payments to two different organisations.
Fee Type Amount (EUR) Payable To Notes for Nigerian Applicants Visa Application Fee €60 (Single Entry) or €100 (Multi Entry) Irish Naturalisation and Immigration Service This is the main fee for the visa itself. The Naira equivalent fluctuates with the exchange rate, so always check the VFS website for the current amount. VFS Service Charge Varies VFS Global This is a separate admin fee for their services, which includes taking your biometrics. You'll also pay this in Naira, and the final amount is confirmed when you book online. It's vital to remember these are two completely separate payments. One goes to the Irish government, and the other goes to VFS for managing the process here in Nigeria. Make sure you bring proof of payment for both fees to your appointment. Always double-check the official VFS Global Nigeria website for the most up-to-date fees in Naira before you pay anything.
What to Expect on Your VFS Appointment Day
Knowing what goes on inside the VFS centre in Lekki or Wuse II can really calm your nerves on appointment day. Let's be clear: this isn't a scary interview. It's a formal, step-by-step process for submitting your documents and giving your biometrics. Think of it as the final, official handover of all your hard work.
Preparation is everything here. The entire process, from walking through the door to leaving with your receipt, is designed to be efficient. Understanding the flow will give you a major confidence boost on the day.
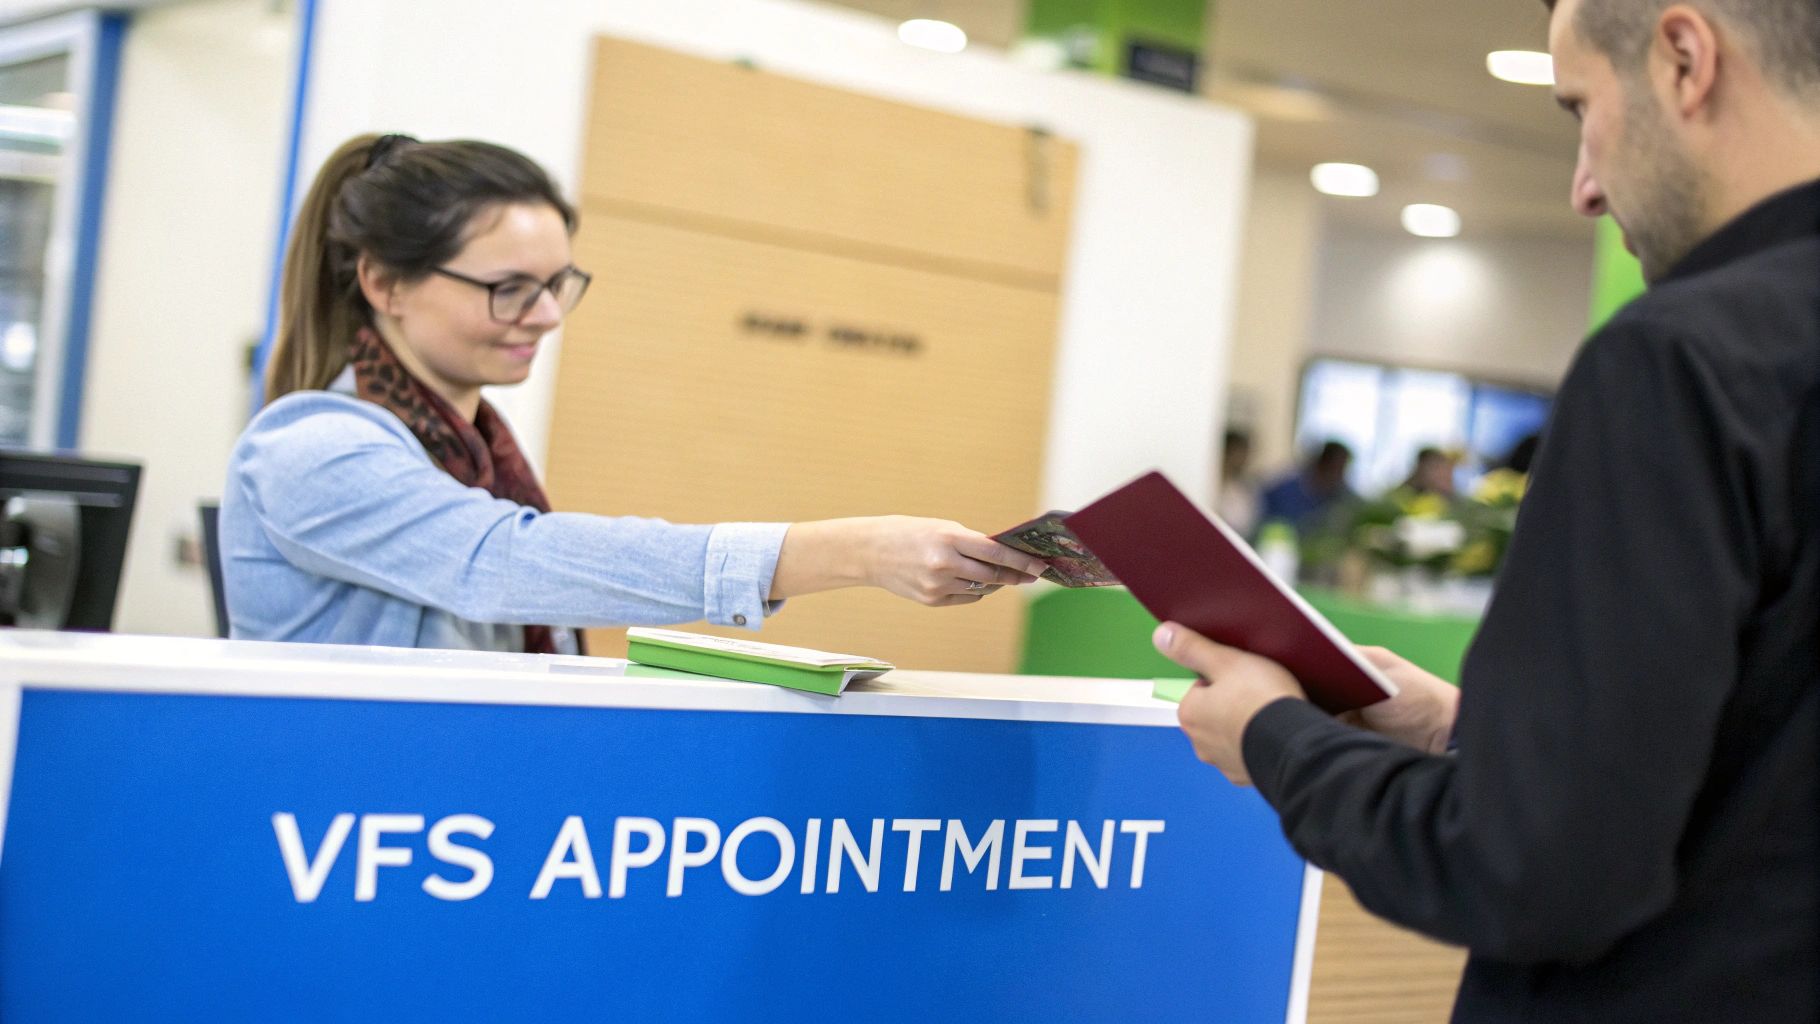
Arriving at the VFS Centre
Timing is crucial. Plan to arrive about 15 minutes before your scheduled slot. Showing up an hour early won't get you seen any faster; it just adds to the crowd and your own stress levels. Punctuality is what matters.
You'll pass through a quick security check at the entrance, much like you would at a bank. They'll ask you to switch off your phone. To keep things simple, travel light—large bags or extra gadgets might not be allowed inside.
Once you’re through security, you’ll get a token number. Listen for your number to be called, then head to the designated counter where a VFS staff member will start processing your application.
The Document Submission Process
This is the main event. You’ll hand over your complete application package to the VFS staff. It’s important to remember they are not visa officers; they don't decide if you get the visa. Their job is purely administrative: to make sure you have everything on the official checklist.
Here’s what you absolutely must have with you, all neatly arranged:
- Your International Passport
- The printed AVATS summary sheet (make sure the barcode is clear)
- All your supporting documents, arranged in the correct order
- Proof of payment for both the visa fee and the VFS service charge
The official will methodically go through your papers, ticking items off their list. Once they're satisfied everything is there, they will place it all into a sealed envelope, ready to be sent to the Irish Embassy in Abuja, which then forwards it to Dublin where the real decision is made.
Don't be surprised if the VFS staff ask a few simple verification questions. They might ask for your name, date of birth, or the purpose of your trip. This is just to confirm the details on the form match the person submitting it. It's a routine check, not an interrogation. To be on the safe side, it never hurts to review some common visa interview questions and answers.
Biometric Data Collection
After your documents are checked and submitted, you’ll be directed to the biometrics booth. This part is fast and painless.
Your biometrics involve just two things:
- Digital Fingerprinting: You'll be asked to place your fingers on a digital scanner. No messy ink involved.
- Digital Photograph: They'll take a photo of you right there against a plain background. This is the photo that will appear on your visa.
With your biometrics captured, your job is done. You will be handed a receipt which contains a crucial piece of information: your application tracking number. Guard this receipt carefully! You’ll need it to track your application status online and, most importantly, to collect your passport when it's all over.
Understanding Visa Decisions and Processing Times
So, you’ve submitted your documents at VFS. Now comes the hard part: the wait. This is easily the most nerve-wracking stage of the whole Ireland visa process in Nigeria, filled with anxiety and constant checking for updates. The best thing you can do for your sanity is to go into this period with a realistic idea of how long it might actually take.
Patience is your best friend here. Your application isn't just sitting in an office in Lagos or Abuja; it’s been sent all the way to the main visa office in Dublin. There, decision-makers are going through every single document you provided. It's a detailed review, and it simply can't be rushed.
Setting Realistic Timelines
Official processing times can change a lot depending on the visa you're applying for and even the time of year. For a straightforward short-stay 'C' visa for a holiday, you’re likely looking at around eight to twelve weeks for a decision after your documents land in Dublin. But remember, this is just a guideline.
Long-stay 'D' visa applications, like those for work or study, almost always take longer. It’s not uncommon for these to stretch into several months. The reason is simple: the visa officers in Dublin have more to verify. If it’s a work visa, they need to cross-check your employment permit and contract with your new employer in Ireland. For a student visa, they'll be confirming your admission directly with the college. These extra verification steps add significant time to the process.
The waiting game is tough. But whatever you do, resist the urge to book non-refundable flights or make solid travel plans until that visa is actually stamped in your passport. Treat the published timelines as estimates, not guarantees, and plan your life accordingly.
Dealing with a Visa Refusal
Getting a refusal is a gut punch, but it’s not the end of your journey. The most important thing you can do is understand why your application was denied. This is the first and most critical step towards getting it right the next time. A lot of Nigerian applications are refused for a handful of common, and frankly, preventable reasons.
Knowing what these pitfalls are helps you avoid them from the very start. A refusal isn’t a permanent ban; think of it as direct feedback from the visa officer on what was missing or wasn't convincing enough in your application.
Common Ireland Visa Refusal Reasons for Nigerians
Understanding why applications are denied is the first step to building a stronger case. The refusal letter you receive will state the specific grounds for the decision, which usually fall into one of these categories.
Refusal Reason What It Really Means How to Fix It Inconsistent Information The details in your application letter, bank statements, and employer's letter don't match up. For example, your letter says a 2-week trip but you booked a hotel for 3 weeks. Double-check every single document. Ensure your travel dates, purpose, and financial details are consistent across the board. Insufficient Financial Proof The visa officer isn't convinced you can afford the trip without working illegally. This is often due to large, unexplained deposits. Provide a six-month bank statement showing a stable income and savings pattern. Avoid "boosting" your account just before applying. Weak Ties to Nigeria They are not convinced you will return home after your visa expires. This is a very common reason for refusal for young, single applicants. Strengthen this area with more evidence—a letter from your employer, proof of property ownership, CAC documents, or family certificates. Looking at this, you can see how a small oversight can lead to a big problem. The key is to be meticulous and build a case that leaves no room for doubt.
Your Next Steps After a Refusal
If you get that dreaded refusal email, take a deep breath and read the letter carefully. It will spell out exactly why they made that decision. You usually have the option to appeal within two months, but honestly, this can be a very long and drawn-out process.
Often, a much better strategy is to take their feedback on board, gather stronger evidence, and submit a completely fresh application. Address every single point they mentioned in the refusal letter. For instance, if they had questions about your finances, provide a more detailed bank statement or show proof of other assets. If they doubted your ties to home, load up your new application with more evidence of your responsibilities in Nigeria.
Once your new application is in, you can keep an eye on its progress. Our guide on visa application tracking can help you understand that process a lot better.
Securing an Irish Employment Permit
For most skilled professionals in Nigeria looking to work in Ireland, the journey doesn't start with the visa form. It actually begins much earlier, with a crucial document: the Irish Employment Permit. Think of this permit as the golden ticket, the absolute foundation for your long-stay 'D' work visa application.
You simply cannot apply for a work visa without it. This isn't something you get from the visa office; it's issued by Ireland's Department of Enterprise, Trade and Employment. In short, your future Irish employer has to apply for it on your behalf.
The Critical Skills Employment Permit
The most popular pathway for Nigerian professionals is the Critical Skills Employment Permit. It’s specifically designed to attract highly skilled people into roles where Ireland has a known labour shortage. For a visa officer, seeing this permit means your skills are officially in high demand.
We see a lot of Nigerian talent being headhunted for specific fields, including:
- Information Technology: Especially Software Developers and Cybersecurity Analysts.
- Healthcare: Doctors, Nurses, and Pharmacists are consistently needed.
- Engineering: Civil, Mechanical, and Electrical engineers are sought after.
- Financial Services: Roles like Accountants and Data Analysts are common.
These aren't just random examples; the statistics back it up. Nigerians are now the largest African immigrant group in Ireland, and this is largely driven by professional employment. In recent years, over 60% of all employment permits issued to Nigerians were for Critical Skills positions. The average salary attached to these roles hovers around €58,746, particularly in sectors like healthcare.
Why the Permit Always Comes First
Getting the permit sorted before you even touch the visa application makes everything that follows incredibly smoother. It serves as undeniable proof to the visa authorities that you have a legitimate, high-value job offer waiting for you and that your presence fills a specific economic need in Ireland.
Once you have that Critical Skills Employment Permit in hand, your visa application is instantly much, much stronger.
The permit is your proof. It tells the visa officer, "An Irish company has vetted this person, confirmed their qualifications, and is waiting for them to start work." This removes a huge amount of doubt and is a massive factor in getting an approval.
So, your first real task is to concentrate your job search on Irish companies that are open to sponsoring an employment permit. The interview is where you make your case. To give yourself the best shot, check out these 10 actionable job interview preparation tips. Nail the interview, get the job offer, and once the employer secures your permit, you're perfectly positioned for a successful ireland visa application in nigeria.
Got Questions? We've Got Answers
Going through the Ireland visa process from Nigeria naturally brings up a lot of questions. Let's tackle some of the most common ones we hear from applicants just like you.
How Much "Show Money" Do I Really Need for an Irish Visa?
This is the million-naira question, isn't it? While there's no single magic figure for every application, the visa officer needs to see that you can fund your trip without any trouble or the need to work illegally.
If you're applying for a tourist visa, this means having enough to cover your return flights, your accommodation for the entire stay, and a reasonable amount for daily spending.
For students, the figure is much more concrete. You must show evidence that you have access to a minimum of €10,000 for each year of your studies. But here's the crucial part: it’s not about a huge lump sum that suddenly appeared in your account last week. What they really want to see is a consistent, stable financial history reflected in your six-month bank statement.
Will a Previous Visa Refusal Hurt My Irish Application?
It can, but only if you aren't upfront about it. Honesty is everything here. You are required to declare any previous visa refusal from any country on your application form. Trying to hide it is seen as deception, which is a near-guaranteed reason for another refusal.
Always declare a past refusal. It's much better to be transparent and, if possible, briefly explain how your situation has changed for the better since then. For a visa officer, seeing that you're honest builds crucial trust.
What Are the Actual Processing Times for Applications from Nigeria?
Patience is key. The official timelines are one thing, but the reality on the ground often means a bit of a wait. For a standard short-stay 'C' visa (like for tourism or a conference), you should realistically budget for 8 to 12 weeks from the time your application packet arrives in Dublin.
Long-stay 'D' visas for work or study take even longer. It’s not uncommon for these applications to stretch out to six months, especially during the peak student rush between July and September. My best advice? Apply at least three to four months before you plan to travel. It's the surest way to avoid a last-minute panic.
Feeling a bit more confident but still have a unique question bugging you? The JapaChat AI is built to provide instant answers based on your specific circumstances. Stop wondering and get the clarity you need for your move. Get started for free on JapaChat.
-
UK Visa Requirements for Nigerians: A Complete Guide
Thinking about moving to the UK from Nigeria? It's a big step, and the visa process can seem like a mountain to climb. But here’s the good news: getting a handle on the core UK visa requirements is your first, and most important, step towards making it happen.
The key is paying close attention to the details, especially when it comes to proving you have enough funds (your 'proof of funds') and showing you have strong reasons to return to Nigeria (if you're applying for a temporary visa like a visitor or student visa). This guide is here to cut through the official jargon and give you a clear, straightforward path to follow, using examples that make sense for someone in Nigeria.
Your Roadmap to a UK Visa From Nigeria
Every year, thousands of Nigerians set their sights on the UK. You might be heading to a top university for your Master's, taking up a new tech job in Manchester, or just visiting family in London for a wedding. Whatever your reason, a successful application hinges on one thing: clearly showing the UK Home Office that you meet their criteria. It's less about just filling in forms and more about presenting a complete picture of your plans, backed up by the right documents.
As a Nigerian applicant, there are a few specific hurdles you'll need to prepare for. One of the biggest is demonstrating your financial stability in pounds sterling (£). With the Naira’s constant fluctuations, this takes careful planning and often means keeping more than the minimum required amount in your account. You also need to convince them that you'll respect the rules of your visa—a crucial point for temporary stays like student or visitor visas, to show you won't 'japa' and overstay.
Why This Guide Is for You
We've built this guide specifically for Nigerians, tackling the common questions and frustrations we see all the time. Think of it as your personal roadmap, covering everything from start to finish:
- Key Visa Categories: We’ll break down the most popular routes, including the Skilled Worker, Student, and Visitor visas.
- Document Checklists: A no-nonsense list of what you need, from your bank statements to your TB test certificate, and how to get it right.
- The Application Journey: We'll walk you through the entire process, from completing the online form to attending your biometrics appointment in Lagos or Abuja.
- Avoiding Common Pitfalls: We'll show you why some applications are refused and, more importantly, how you can sidestep those common mistakes.
The relationship between Nigeria and the UK is deep-rooted. In fact, Nigerians are consistently one of the largest groups of non-EU nationals moving to the UK. In a recent period, around 52,000 Nigerian nationals made the move for work, study, and family reasons. You can read more about Nigeria's key role in UK migration trends at The Journal Nigeria.
This shows just how many people have walked this path before you. With the right preparation, you can too.
Choosing the Right UK Visa Pathway
Picking the correct visa is the first—and most critical—step of your entire UK journey. Think of it like this: the UK immigration system has several doors, each for a specific purpose like work, study, or visiting family. Your job is to find the one key that fits your door perfectly. Get it wrong, and the door won’t budge, no matter how strong the rest of your application is.
There's no such thing as a "general" UK visa. You have to apply for a specific route that matches exactly what you plan to do in the UK. A mismatch here almost always leads to a swift refusal, which is a painful waste of your time, effort, and hard-earned Naira. So, let’s get this right from the start.
This simple flowchart breaks down the main options based on your reason for travelling.
As you can see, your goal—working, studying, or just visiting—points you directly to the right category. Let's break down what each of these means for you.
To help you quickly compare the main options, here’s a simple table outlining the most common visa routes for Nigerians.
Quick Guide to Common UK Visa Routes for Nigerians
Visa Category Primary Purpose Ideal Applicant Profile (Nigerian Context) Key Requirement Skilled Worker Long-term employment in a specific role A professional (e.g., doctor, IT specialist, engineer) with a confirmed job offer from a UK company. A valid Certificate of Sponsorship (CoS) from a licensed UK employer. Student Full-time academic study at a UK institution A student who has been accepted into a degree programme (BSc, MSc, PhD) at a UK university like Coventry or Manchester. A Confirmation of Acceptance for Studies (CAS) from the educational institution. Standard Visitor Short-term visits (up to 6 months) A tourist, a business person attending meetings, or someone visiting family and friends for a wedding or graduation in the UK. Strong proof of ties to Nigeria (job, family, property) and funds to cover the trip. Family Joining a close family member in the UK permanently The spouse, partner, or child of a British citizen or someone with settled status (Indefinite Leave to Remain) in the UK. Evidence of a genuine relationship and meeting the strict minimum income requirement. This table gives you a bird's-eye view, but the details are where applications are won or lost. Let's dive a little deeper into each one.
The Skilled Worker Visa
This is the main work visa for Nigerian professionals who have already secured a job offer from a UK company. It's not enough to just have the offer, though. The company must be a Home Office-licensed sponsor, and they are responsible for giving you a Certificate of Sponsorship (CoS).
Don't let the name fool you; this isn't a physical certificate. It’s a unique digital reference number that proves your job offer is real and meets the UK's strict salary and skill-level rules. For example, a software developer from Lagos who lands a role with a tech firm in Reading can't even start their visa application until that firm issues them a CoS.
The Student Visa
If your dream is to get a degree from a UK university, the Student visa is your ticket. This route is for long-term academic courses, such as a Bachelor's, Master's, or PhD programme. Similar to the work visa, you need a sponsor. In this case, your sponsor is the university, and the document they provide is called a Confirmation of Acceptance for Studies (CAS).
Think of the CAS as your golden ticket. It’s issued by the university only after you've formally accepted their admission offer and met all their conditions (like paying your deposit). For a graduate from UNILAG heading to the University of Bristol for a Master's, that CAS is the single most important piece of evidence in their visa application.
It's also crucial to stay updated on policy changes. For instance, after the UK government restricted students from bringing most family members as dependants (except for PhD students), visa issuances for Nigerian student dependants dropped significantly. This shows just how quickly the rules can change, so always check the latest official guidance.
The Standard Visitor Visa
Planning a holiday, a trip to see your cousin in London, or attending a short business conference in Birmingham? The Standard Visitor visa is built for these kinds of short-term trips, which usually last up to six months.
Unlike the work and study routes, you don't need a sponsor. Instead, the burden of proof is on you to convince the visa officer that your visit is genuine and, most importantly, that you will leave the UK when you say you will.
The secret to a strong visitor visa application is proving you have strong ties to Nigeria that will pull you back home. This could be a stable job with an approved leave letter, family responsibilities like caring for elderly parents, or property you own in Nigeria.
The Family Visa
This pathway is for people looking to join a close family member—like a spouse, partner, child, or parent—who is already a British citizen or has settled status in the UK.
Be prepared, because the requirements here are incredibly strict. You’ll need to provide extensive proof that your relationship is genuine and has been ongoing (not a "marriage for visa" setup). Furthermore, your family member in the UK must meet a specific minimum income threshold to prove they can support you financially without needing government help.
To get a clearer picture of these options, check out our detailed guide on the main UK visa types.
Your Essential Document Checklist
Think of your visa application as a house you're building. To make it strong enough to stand, you need a solid foundation made of precise, complete, and perfectly presented documents. Getting your paperwork right from the very start isn't just important—it's everything. Even one small mistake, like a name spelled differently on two documents, can bring the whole thing crashing down into a refusal.
This section is your master checklist, built with Nigerian applicants in mind. We’ll go beyond just listing items; we'll explain the little details and common pitfalls that many applicants from Nigeria overlook, making sure your submission is as strong as possible.
Core Identity and Travel Documents
These are the non-negotiables, the absolute fundamentals of your application. Every other piece of paper you provide links back to these core IDs, so they have to be flawless.
-
Your Nigerian International Passport: This must be valid for the whole time you plan to be in the UK. Make sure it has at least one completely blank page for the visa sticker. Critically, you need to double-check that the name on your passport is an exact match for the name on every other document—your bank statements, WAEC certificate, and sponsor letters. Even a tiny difference like "Chukwuemeka" vs "Emeka" can raise a red flag.
-
Tuberculosis (TB) Test Certificate: If you're heading to the UK for more than six months, a TB test is mandatory. This isn't something you can do at any clinic; it must be done at a UK Home Office-approved centre in Nigeria. You can find the official list of approved IOM clinics in Lagos and Abuja on the GOV.UK website. The certificate is only valid for six months, so time it carefully with your application submission.
Proving Your Financial Stability
Let's be honest, this is often the trickiest part of the uk visa requirements for Nigerians, especially with the Naira's constant fluctuations. Your mission here is to convince the Home Office that you can comfortably support yourself without ever needing to touch UK public funds.
Your bank statements are the main evidence. But it’s not just about having the money; it’s about how it looks on paper. The funds must be held in your account for a solid, unbroken 28-day period. And the closing balance date on your statement must be no more than 31 days before you hit 'submit' on your online application.
A common and fatal mistake is a "funds dip." This is where your balance drops below the required amount, even for a single day, within that 28-day window. It’s an automatic red flag. Because of the Naira-to-Pound exchange rate, it's smart to keep a buffer of at least 10-15% more than the minimum required amount to be safe.
You also have to explain any large, unusual deposits that appear in your account right before this 28-day period. For example, if your father sold a piece of land in Lekki to fund your education, you must provide the sales agreement, a signed gift deed from him, and his bank statement showing the money leaving his account and entering yours. Unexplained "money drops" are a top reason for visa refusals.
Supporting and Sponsor-Specific Documents
Depending on why you're going to the UK, you’ll need specific documents that prove the purpose of your trip. These are the "golden tickets" that validate your application.
-
For Students (Student Visa): The most important document is your Confirmation of Acceptance for Studies (CAS). This is a unique reference number given to you by your UK university. You'll also need your academic qualifications, like your WAEC certificate and university degree transcript, especially if they are mentioned on your CAS.
-
For Workers (Skilled Worker Visa): Here, the key is your Certificate of Sponsorship (CoS) reference number from your UK employer. You might also need to provide your professional qualifications, references from previous jobs, and proof that you meet the English language requirement (your WAEC certificate with a C6 or above in English can sometimes be used).
-
For Visitors (Standard Visitor Visa): The focus is all on proving your strong ties to Nigeria—reasons you will definitely return home. You'll want a letter from your employer confirming your job, salary, and that your leave has been approved. Other powerful documents include property ownership papers (like a Certificate of Occupancy), evidence of close family ties (like marriage and birth certificates for your spouse and children), and a clear itinerary of your planned trip.
Remember, every single document tells a part of your story. Make sure they are all consistent, clear, and easy for the visa officer to understand. Taking the time to get this right is the best investment you can make in a successful application.
The Step-by-Step UK Visa Application Process

Alright, you’ve gathered your documents. Now for the main event: the application itself. It’s a process that starts on your laptop and ends with a physical appointment. Think of it as a journey with clear stages.
Knowing what’s coming next is half the battle. Let’s walk through each step, so you're never caught off guard, from the first click on the GOV.UK site to a potential chat with a visa officer.
Step 1: Completing the GOV.UK Online Form
Your journey begins, and can only begin, on the official GOV.UK website. Be warned: this form is thorough. Don't try to squeeze it in during a lunch break; set aside a good few hours so you can focus and get it right the first time.
Accuracy is everything here. The smallest mistake can cause big problems later. A classic error is having tiny differences between what you type and what’s on your documents. Your name, for instance, must be spelled exactly the same way on the form as it is on your passport, birth certificate, and bank statements. No exceptions.
Pay close attention to the travel history section. They want to know about all your international trips in the last 10 years. Even that short trip to Ghana you barely remember needs to be included. Be completely honest and detailed—the Home Office has systems to verify this information.
Step 2: Paying the Visa and IHS Fees
After you've triple-checked every entry on your form, you’ll land on the payment page. This is where you'll use a debit or credit card (like a Naira MasterCard or Visa card) to settle two key fees.
- Visa Application Fee: This is the base cost for the Home Office to process your specific application.
- Immigration Health Surcharge (IHS): If you're applying for a long-term stay (like a Student or Skilled Worker visa), this is a mandatory fee that gives you access to the UK's National Health Service (NHS). You have to pay the full amount for your entire visa duration upfront.
A crucial tip for Nigerian applicants: Before you even start filling out the form, call your bank. Make sure your card is enabled for international transactions and that the spending limit is high enough to cover the combined cost of both fees. Many Nigerian cards have a low monthly dollar limit, so a failed payment at this stage is a frustrating setback you don't need.
Step 3: Booking Your Biometrics Appointment
Once your payment is confirmed, the system will pass you over to the website for TLScontact, the official partner that handles visa processing for the UK in Nigeria. This is where you'll book an appointment to give your biometric data.
You'll see options for Visa Application Centres (VACs) in places like Lagos (both Victoria Island and Ikeja) and Abuja. As you book your slot, you will also be asked to upload digital copies of all your supporting documents. It is absolutely vital that these are clear, high-quality scans of every single page you're relying on.
So, what happens at the appointment? It's quick and simple. A staff member will:
- Scan your passport to verify it’s you.
- Take a digital photo for your visa.
- Take electronic scans of all 10 of your fingerprints.
The whole thing is usually over in under 30 minutes. Just be sure to bring your original passport, the appointment confirmation letter, and a printed copy of your document checklist.
Step 4: Attending a Credibility Interview (If Required)
This step doesn't apply to everyone, but it’s common for certain routes, especially the Student visa. A credibility interview is simply a way for the visa officer to check that your intentions for coming to the UK are genuine.
It's not an interrogation. It's usually a brief video call with a UKVI official who is actually in the UK. They just want to hear your story in your own words. Be ready for questions like:
- Why did you pick this university over others in the UK, or even in Canada or the US?
- How will this specific course help your career back in Nigeria?
- Can you explain how you'll pay for your tuition and living expenses?
The goal is to be confident, clear, and consistent. Your answers should match the story your application and documents tell. It’s your chance to personally prove you’re a genuine applicant.
Getting to Grips with Visa Fees and Timelines
Figuring out the money and time involved in a UK visa application is a huge part of the process. It's not just about one single fee; it's a mix of costs you need to budget for properly. And of course, knowing how long you'll have to wait for a decision is crucial for your plans and your peace of mind.
Let's break down what you should expect to pay. The total cost isn't just the application fee you see advertised. First, you have the standard visa application fee itself, which is different for every visa category. A Student visa doesn't cost the same as a Skilled Worker visa, for instance.
Then comes a major one: the Immigration Health Surcharge (IHS). If you’re planning to be in the UK for more than six months, this is a compulsory payment that gives you access to the UK's National Health Service (NHS). You have to pay the entire IHS for your whole visa duration upfront, which can be a significant amount.
Breaking Down the Main Costs
Getting a clear picture of the financial side helps you prepare without any last-minute surprises. Each visa has its own specific fee, and it’s important to remember that the UK Home Office reviews and sometimes changes these prices. Always double-check the official GOV.UK website for the most current figures before you apply.
Here’s a simple look at the costs you'll encounter:
- Visa Application Fee: The main charge for processing your application.
- Immigration Health Surcharge (IHS): The mandatory health fee for anyone staying over six months.
- Biometrics Appointment Fee: A small service fee you'll pay to the visa application centre (TLScontact).
- Priority Service Fees: These are optional. You can pay extra to get a decision much faster.
One key thing to remember: all fees are based on Pound Sterling (£), but you'll pay in Naira using your bank card. Because the exchange rate can change from one day to the next, the final amount you pay in Naira might be slightly different from what you expected. It's always a good idea to budget a little extra just in case.
If you’re heading down the work visa route, our guide on the UK work visa cost gives you a much more detailed financial breakdown.
Choosing Your Processing Speed
After you've submitted your application and given your biometrics, the waiting begins. Thankfully, UK Visas and Immigration (UKVI) offers a few different processing speeds, so you can choose one based on how urgently you need to travel.
Standard Processing: This is the basic, no-frills option. The wait time can really vary—sometimes it's a few weeks, other times it can stretch into months, especially during busy periods like the student rush between July and September.
Priority Visa (PV): If you're in a bit of a hurry, you can pay an extra fee for this service. It aims to get you a decision within 5 working days. This is a great option for students who have a set start date for their course or anyone working to a tight deadline.
Super Priority Visa (SPV): This is the fastest you can get. It’s also the most expensive. With SPV, you typically get a decision by the end of the next working day after your biometrics appointment. This is really for genuine emergencies or very urgent business trips.
Deciding which service to use is a personal choice. It’s all about balancing how quickly you need your visa against how much you're willing to spend. Think it over carefully before you make your payment.
Common Visa Refusal Reasons and How to Avoid Them
Getting that visa refusal email is a gut-wrenching moment, but it's rarely a random decision. Most of the time, refusals happen for very predictable reasons—reasons you can absolutely avoid with some careful preparation. The best way to build a bulletproof application is to understand why others have been rejected and sidestep those same mistakes.
Think of it this way: the Entry Clearance Officer (ECO) is trying to piece together your story. They need that story to be consistent, believable, and backed up with solid proof. Any gaps, weird inconsistencies, or red flags will almost certainly lead to a "no".
Let’s break down the most common traps Nigerian applicants fall into, so you can steer clear.
Financial Inconsistencies
This is, hands down, the biggest hurdle for so many Nigerians. It's not just about having the money; it’s about proving where it came from and that it’s genuinely yours to use, all in a way that ticks every single box of the UK visa requirements.
Here are the classic money mistakes we see time and time again:
- Breaking the 28-Day Rule: You must hold the required funds in your bank account for at least 28 consecutive days. If that balance dips below the minimum, even just for one day, it’s a major red flag and can lead to a straight refusal.
- "Funds Parking": This is a huge one. It’s when a large chunk of cash suddenly lands in your account right before you start counting the 28 days. The ECO will immediately suspect you’ve borrowed the money just to look good for the application, which kills your credibility. If you do have a large, legitimate deposit (like from selling a car), you need to prove its source with something like a gift deed, a property sale agreement, or an inheritance letter.
- Unverified Sponsors: If your parents are sponsoring you, that’s great, but you have to prove your relationship with a birth certificate. Relying on a sponsor who isn't a parent or legal guardian is often a non-starter, especially for routes like the Student visa.
Credibility and Genuine Intentions
For any temporary stay, like a Student or Visitor visa, your main job is to convince the ECO that you will leave the UK when you’re supposed to. This is all about proving your "ties to home."
A refusal on these grounds simply means you didn’t give them enough evidence that you have compelling reasons to return to Nigeria. It’s not enough to just say you’ll come back; you have to show them. This could be a stable job, strong family ties, property you own, or a business you run.
A visa officer once noted that an applicant's entire life seemed "portable." You want to avoid that at all costs. Show them you have deep roots in Nigeria—get a letter from your employer confirming your role and approved leave, include your land documents, or provide evidence that you’re a primary caregiver for a family member.
Inconsistent and Incomplete Information
Your application form and your supporting documents have to tell the exact same story. If you say on your form that your salary is ₦400,000 a month, but your bank statements show erratic deposits that don't add up, it immediately creates doubt.
And let’s be clear: submitting false information or fake documents is the fastest way to not only get refused but also to get a multi-year ban. Honesty is everything. If you’ve had a previous visa refusal from any country, you must declare it. Trying to hide it is considered misrepresentation and comes with serious consequences. To get a better handle on this, you can learn more about what counts as visa application misrepresentation and how to stay on the right side of the rules.
Keep in mind that wider economic trends can also affect your application. Nigeria's shift to a floating exchange rate has massively impacted the Naira's value, making the cost of UK education soar for many families. This, along with recent UK policy changes on bringing dependants, has led to a drop in study visas being issued. You can find more insights on these UK visa statistics on the British Council's Opportunities Insight blog. By understanding these external pressures and presenting a rock-solid case, you can prove your application is genuine and overcome these challenges.
Common Questions from Nigerian Applicants
Let's dive into some of the most common questions we see from Nigerian applicants. Getting these details right is often the difference between a successful application and a refusal.
How Do I Calculate My Proof of Funds in Naira?
This is where many people get tripped up, so pay close attention. The UK government sets the amount in pounds sterling (£), and it depends on your visa type and where you'll be living/studying. For students, you need enough to cover your first full year of tuition fees, plus living costs.
Right now, that's £1,334 per month if you're in London, or £1,023 per month for anywhere outside London, for a period of up to nine months.
Once you have your total in pounds, you must convert it to Naira using the official OANDA exchange rate on the exact day you submit your online application. The crucial part? That money must have been sitting in your (or your sponsor's) bank account for at least 28 straight days without dropping below the required amount for even a single day. Given how much the Naira can fluctuate, it's smart to keep a buffer of 10-15% extra in the account just to be safe.
Can My Uncle in the UK Sponsor My Visa Application?
For a Student visa, the rules on who can sponsor you are incredibly strict. While your uncle might have the best intentions and even be a British citizen, the Home Office will almost certainly not accept him as a financial sponsor.
The only sponsors they typically recognise are:
- You (the applicant)
- Your parents
- Your court-appointed legal guardians
- An official sponsor, like a government scholarship board (e.g., PTDF) or a recognised international company.
If your parents are funding your studies, you’ll need to prove your relationship with documents like your birth certificate showing their names.
The Home Office needs to see a direct, verifiable link between you and the money. Relying on funds from extended family members like uncles, aunts or siblings is one of the most common reasons for refusal because they don't consider the money to be genuinely available to you for your studies.
What Happens in a UK Visa Credibility Interview?
Don't panic if you get an email asking for a credibility interview. It’s a standard check to make sure your intentions are genuine. It's usually a short video call with a UKVI official. Not everyone is called for one, but you should always be ready.
They’ll ask you some pretty direct questions about your application. For students, they often focus on:
- Why did you pick this specific university and this particular course?
- How will this degree help your career back in Nigeria?
- Can you walk me through your finances and explain how you'll pay for your tuition and living costs?
The goal is simply to give honest, consistent answers that line up with what you wrote in your application. Think of it as your opportunity to show them you're a serious, genuine student.
What Is the Immigration Health Surcharge (IHS)?
The IHS is a compulsory fee for most people applying for a UK visa that's longer than six months. Paying it gives you access to the UK's National Health Service (NHS) just like a permanent resident.
You have to pay the full IHS fee upfront when you submit your online visa application. If you forget, or if the payment doesn't go through, your application will be automatically rejected. While you're sorting out these big-ticket items, you might also think about practicalities like staying connected during your trip to the UK.
Feeling stuck on your UK journey and need clear answers for your specific situation? JapaChat is here for you. Our AI platform gives you instant, reliable guidance on your visa questions, so you can plan your move with total confidence. Get started for free at https://japachat.com.