Author: JapaChat
-
Your Guide to the UK Tech Nation Visa
For many Nigerian tech professionals, the UK's Global Talent Visa is the golden ticket. It's a special route, endorsed by an organisation called Tech Nation, that lets you bring your skills to the UK without needing a company to sponsor you. This isn't your typical work visa; it's designed for top talent in fields like software engineering, data science, and product management. The visa focuses on your individual expertise, not a specific job offer.
Your Pathway to the UK Tech Scene
Picture this: you take all the experience you've built in Lagos or Abuja and plant it right in the middle of London's buzzing tech scene. It’s not just a nice thought. The UK's Global Talent Visa makes this a genuine possibility, and this guide will walk you through exactly how it works for Nigerian professionals.
We're going to cut through the official jargon. What you really need to know is that this visa is a direct bridge for Nigeria’s brightest in tech—from coders to cybersecurity experts—to make their mark in one of the world's most dynamic digital economies.
Why Is This Visa Gaining So Much Traction in Nigeria?
The buzz around the Tech Nation visa is real, and for good reason. It has quickly become a go-to option for Nigerian tech talent. In fact, Nigerians make up a significant 10% of all Global Talent Visa approvals, putting the country in the same league as giants like India and the United States.
This visa is so much more than just a permit to work. It comes with some serious perks that are perfect for ambitious professionals wanting to build a global career. Getting a feel for the talent search technologies in recruitment used by UK firms can also give you a head start in understanding the market you're entering.
The Core Benefits for Nigerian Applicants
Let's break down why this visa is such a game-changer. It’s not just about getting a job; it’s about giving you real career freedom and a solid foundation for the future.
Here's a quick look at the major advantages and what they really mean for you.
Feature What It Means For You No Sponsorship Needed You're in the driver's seat. Your application is based on your talent, not a job offer. Ultimate Flexibility Change jobs, launch a startup, or even do freelance work without visa headaches. Faster Settlement You can apply for indefinite leave to remain (settlement) in as little as 3-5 years. Bring Your Family Your partner and children under 18 can come with you, making it a move for everyone. These benefits combined make it one of the most attractive options out there.
Of course, this is just one of several routes into the UK. It’s always a good idea to see how it stacks up against other options. To get the full picture, you might want to check out our overview of different UK visa types available to Nigerian professionals. Thousands of your peers have already made this move, turning their local skills into international success stories.
Understanding the Talent and Promise Routes

Before you even think about compiling documents, the very first step is figuring out where you fit in the Tech Nation visa scheme. It’s not a one-size-fits-all deal. Instead, it’s split into two clear pathways: Exceptional Talent and Exceptional Promise.
Think of it like this: Exceptional Talent is for the established veterans, the people who've already made a big splash in the tech world. On the other hand, Exceptional Promise is for the rising stars, those on a clear path to becoming tomorrow's leaders. Getting this right is critical because your entire application and all the evidence you provide will be judged against the standards of the route you choose.
The Exceptional Talent Route for Established Leaders
So, are you a senior figure in tech with more than five years of solid experience? If so, the Exceptional Talent route is probably for you. This pathway is specifically designed for people who are already recognised as leaders in the digital technology scene.
Let’s put this into a Nigerian context. Imagine you're a senior product manager who led the team that scaled a major fintech app—say, Kuda or PiggyVest—and massively grew its user base across West Africa. Your track record of commercial success and innovation speaks for itself. That’s the kind of profile they’re looking for.
This route is all about showing a history of excellence. The people reviewing your application want to see proof that you haven't just been a passenger in the tech scene but have actively shaped it through your leadership and impactful work.
Applicants on this route often have things like:
- A history of speaking at major tech conferences in Lagos or Abuja.
- Significant contributions to a well-known open-source project.
- A proven track record of innovation or mentoring that has helped push the Nigerian tech ecosystem forward.
The Exceptional Promise Route for Emerging Stars
What if you have less than five years of experience but can clearly show you have the potential to be a leader? That’s where the Exceptional Promise route comes in. This path is perfect for talented people who are already making waves early in their careers.
Picture this: you’re a young software developer in Yaba who co-founded a health-tech startup. Your company just won a local innovation award and is starting to get real traction. You might not have a decade of experience, but you can point to clear evidence of your potential for future success and innovation. This is exactly what the "Promise" route was made for.
To qualify, you need to convince them you have strong potential to contribute to the UK tech sector. While your focus is on the Tech Nation Visa, it doesn’t hurt to get a wider view by understanding general visa requirements for skilled tech professionals, as the core ideas behind talent-based immigration are often similar. It's also smart to keep an eye on any new UK immigration rules that could impact your plans.
Key Differences at a Glance
Choosing your path is the foundation of your whole application. A mistake here can lead to a quick rejection because you'll be measured against the wrong yardstick. To help you decide, here’s a simple breakdown of the main differences.
Criteria Exceptional Talent Exceptional Promise Experience Level Typically 5+ years as a recognised leader. Usually less than 5 years of experience. Focus of Evidence Proven track record of past achievements. Clear potential for future success. Nigerian Example A CTO at a top Nigerian bank leading digital transformation. A UX designer whose portfolio shows innovative work for a rising startup. Visa Length Up to 5 years initially. Up to 5 years initially. Settlement Path Can apply for settlement in 3 years. Can apply for settlement in 5 years. Making the right choice from the get-go sets you up for success. It ensures you gather the right kind of evidence to build a compelling story that resonates with what the Tech Nation assessors are looking for.
How to Build a Winning Application
Putting together a successful Tech Nation visa application is much more than just gathering documents. Think of it as crafting a compelling story about your career, your impact, and your potential. For those of us in the Nigerian tech scene, this means translating our achievements—whether they happened in a Yaba hub or a Maitama office—into a narrative that a global assessor will understand and value.
This section is your practical guide to building that story. We're going to go beyond a simple checklist and get into the why behind each piece of evidence, helping you frame your Nigerian experience for a winning application.
Your Personal Statement: The Heart of Your Story
Your personal statement is, without a doubt, the most important document in your entire application. It’s your one chance to speak directly to the assessors, to connect the dots between all the evidence you’ve submitted, and to make a clear case for why you belong in the UK’s tech ecosystem. This isn't just a cover letter; it's your professional manifesto.
Treat it like your personal pitch. You need to state clearly which route you're applying for (Talent or Promise) and explain exactly why you fit the bill. Weave together your career highlights, your passion for technology, and what you plan to achieve in the UK. For a deeper dive on this, our guide on writing a letter of intent for your visa application has some brilliant strategies you can adapt.
Choosing Referees Who Truly Matter
Your three letters of recommendation are not just a box to tick. They are powerful, personal endorsements of your skills and standing. The people you choose to write them must be senior, well-regarded figures who can speak with real authority about your work.
When picking your referees from the Nigerian tech world, aim for a mix like this:
- A Senior Leader from a Past Employer: Think CTO, Head of Product, or a C-level executive who can give specific details about your contributions to a major project or the company's growth.
- An Industry Expert: This could be a well-known VC, an incubator lead, or the organiser of a major conference like Techpoint Build. You want someone who knows your reputation in the wider community.
- An Academic or Mentor: A professor or a senior figure who has overseen your technical work and can vouch for your expertise on a deeper level.
Try to avoid choosing your direct line manager from a small, unknown company, unless they have a significant profile of their own. The goal here is validation from people whose opinions carry serious weight.
Demystifying the 10 Pieces of Evidence
You need to submit up to 10 documents, each no more than three pages long, to prove you meet the criteria. This is where you back up your story with hard proof. Your mission is to showcase your impact, innovation, and recognition in the industry.
Let's break down what this looks like for a tech professional in Nigeria.
The evidence you provide should paint a clear picture of a professional who is not just participating in the tech industry, but actively shaping it. Each document should be a testament to your innovation, leadership, or significant impact.
Evidence Examples for Nigerian Applicants:
- Innovation: Did you lead the development of a feature for a Nigerian fintech app that slashed transaction fraud? Document it. Show project plans, performance metrics (before and after), and even customer testimonials.
- Recognition: Have you been quoted or featured in leading Nigerian tech publications like TechCabal or Benjamin Dada? An article where you’re sharing your expertise is far more powerful than a simple mention of a new job.
- Speaking Engagements: Gave a talk at a respected event like Art of Technology Lagos or a local Developer Festival (DevFest)? Grab screenshots of the event agenda with your name, a summary of your talk, and any photos or videos you can find.
- Open Source Contributions: Your GitHub profile can be a goldmine. Show your contributions to significant open-source projects, especially if your pull requests were accepted. Explain the impact of the code you wrote.
- Scaling a Business: Were you an early or key employee at a Nigerian startup that raised a big funding round or expanded across Africa? Provide evidence that links your role to that growth—think company announcements, press releases, or performance data you can share.
It's worth noting that the UK Nigeria Tech Hub, a UK government initiative, has been a major player here. It has supported 168 Nigerian tech businesses, and many of their founders and key employees have used that experience to successfully get the Tech Nation Visa. This shows just how much contributions to local tech growth are valued.
By carefully choosing your evidence and framing it correctly, you can turn your brilliant achievements in Nigeria into a compelling case for being recognised as global talent.
Navigating the Two-Stage Application Process
The Tech Nation Visa application isn't a one-and-done deal; it’s a journey with two very distinct parts. Think of it like trying to build a new house in Nigeria. First, you need to get your architectural plans officially approved. That’s Stage 1: The Endorsement. Only after you have that stamp of approval can you actually start buying materials and laying the foundation. That’s Stage 2: The Visa Application.
Getting your head around these two separate stages is the first step to a smooth and successful application.
Stage 1: Securing Your Tech Nation Endorsement
This is where the real work happens. Your first major goal is to get the official endorsement from Tech Nation. This is the part where you make your case and prove you meet either the "Exceptional Talent" or "Exceptional Promise" criteria.
You'll need to fill out an online form, pay the endorsement fee (currently £524), and upload all the evidence you’ve painstakingly gathered. The entire focus of this stage is to convince the experts at Tech Nation that you're a valuable addition to the UK's digital technology scene.
Once you have that endorsement in hand, you're ready for the next step.
Stage 2: Applying for the UK Visa
With your endorsement confirmed, it's time to formally apply for your visa through the UK Home Office. This is a completely separate process with its own forms and fees (the visa fee itself is around £247).
This is the more administrative part of the journey. You'll schedule your biometrics appointment at a TLScontact centre in Lagos or Abuja, hand over your passport, and wait for the final decision from the Home Office.
This simple graphic breaks down the core pieces you need to bring together for that all-important endorsement application.
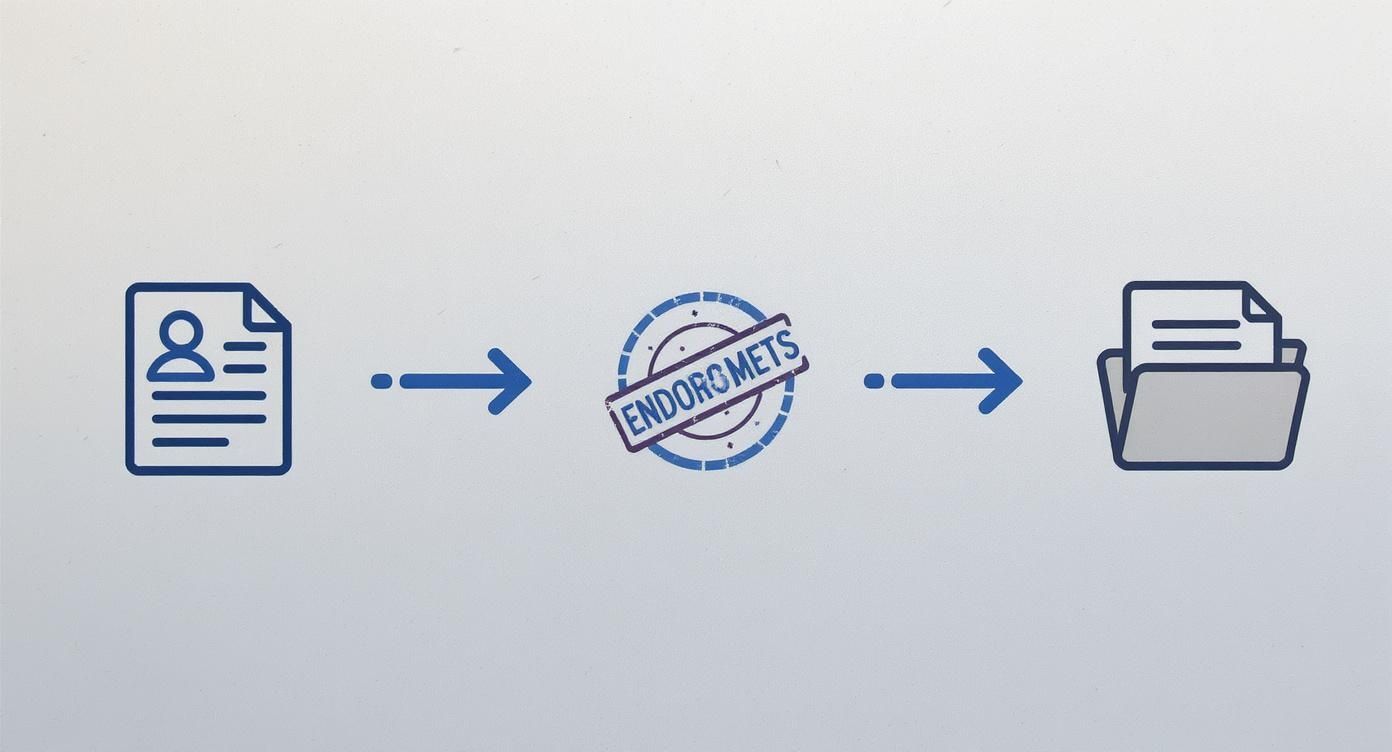
As you can see, a winning application is really built on three core pillars: your unique personal story, credible letters of recommendation, and solid proof of your achievements.
The official processing time for an endorsement decision is up to eight weeks. In my experience, and from what I've seen with many Nigerian applicants, this can sometimes be faster if your application is clear and well-organised. The key here is patience.
Once you get that fantastic email confirming your endorsement, a new clock starts. You have precisely three months from the date on your endorsement letter to submit your visa application. Don't let this deadline slip by, or your endorsement will expire, and you’ll have to go back to square one.
My best advice? Treat these as two completely separate projects. Pour all your energy into building a rock-solid endorsement case first. Once that's secured, then you can switch gears and focus on the paperwork for the visa application itself. Trying to juggle both at once just creates confusion.
Application Stage Timelines and Costs
To plan properly, you need a clear picture of the time and money involved. Here’s a quick overview of what to expect for each stage of the application.
Stage Key Action Estimated Timeline Approximate Cost Stage 1: Endorsement Submitting your evidence to Tech Nation for assessment. Up to 8 weeks £524 (Endorsement Fee) Stage 2: Visa Submitting your visa application to the UK Home Office. Up to 3 weeks £247 (Visa Fee) + IHS Surcharge Note: These fees are correct at the time of writing but can change. Currency fluctuations will also affect the final cost in Naira. The Immigration Health Surcharge (IHS) fee varies depending on the length of your visa.
Understanding this two-part structure from the outset helps you manage your expectations, prepare everything you need for each step, and move forward with confidence.
Common Mistakes to Avoid
One of the smartest things you can do is learn from the mistakes others have made. I've seen far too many talented Nigerian professionals get that dreaded rejection email, not because they weren't qualified, but because they simply didn't tell their story well.
It often comes down to a few common, and totally avoidable, errors. Think of this section as your guide to sidestepping those pitfalls so you can build an application that’s as rejection-proof as possible. Let’s get into what not to do.
Submitting a Generic Personal Statement
Your personal statement is your one chance to speak directly to the assessors. The biggest mistake you can make is treating it like just another cover letter or, even worse, a long-winded version of your CV. This is your story—it needs to connect the dots between what you’ve accomplished back home in Nigeria and what you plan to do in the UK.
A bland statement that just lists your skills will get lost in the pile. For instance, don't just say, "I am a skilled software developer." Instead, tell them how you led the team that built a mobile banking feature which boosted user engagement by 40% for a major Nigerian bank. Now that shows impact.
The assessors want to understand your unique narrative. Why you? Why the UK tech scene? A personal statement that doesn't answer these questions with passion and concrete examples is a massive missed opportunity.
Choosing Ineffective Referees
The weight of your recommendation letters is directly tied to who writes them. A frequent stumble is picking referees based purely on a close working relationship, like your line manager at a small, unknown startup. They might sing your praises, but their endorsement may not have the clout it needs.
Think of it like this: a letter from a recognised figure in the Lagos tech scene—say, a venture partner at a well-known fund or an organiser of Art of Technology (AOT) Lagos—instantly validates your talent. Their reputation lends your application a huge credibility boost.
Who to Prioritise for Recommendations:
- Industry Leaders: Think C-level executives at major Nigerian tech companies people recognise, like Paystack, Flutterwave, or Andela.
- Community Figures: This could be founders of prominent tech hubs, respected VCs, or organisers of major tech events.
- Senior Academics: A university professor with a strong industry reputation in a relevant field who personally supervised your work can also be a powerful voice.
Providing Weak or Unclear Evidence of Impact
At its core, the Tech Nation visa is all about impact. It’s not enough to list what you did; you have to prove it mattered. This is where many Nigerian applicants fall short, providing evidence that's either too vague or completely lacks metrics.
For example, just sending a link to your company’s website proves nothing about your specific contribution. A much stronger approach is to provide screenshots of a product you led, side-by-side with data showing its user growth in the Nigerian market. Show them the 'before' and 'after' that you created.
Remember, each of your 10 evidence documents has a job to do. They need to tell a compelling story of your excellence. Focus on quality, not quantity, and make sure every single piece directly backs up one of the key criteria. Your goal is to leave the assessor with no doubt about the value you bring.
Got Questions? We've Got Answers
Going through the Tech Nation Visa process can feel like a maze, and it's natural to have a lot of questions pop up. Let's tackle some of the most common ones we hear from Nigerian applicants, so you can move forward with clarity and confidence.
Do I Need a UK Job Offer Before I Apply?
Not at all! This is actually one of the biggest perks of the Global Talent route. Unlike a lot of other work visas that tie you to a specific company, the Tech Nation visa is all about you—your skills, your achievements, and your potential.
Think of it this way: your talent is the key, not a job offer letter. This gives you incredible freedom. You can land in the UK with your visa already sorted and then take your time to find that dream job, launch your own startup, or even go the freelance route.
What if My Role Isn't Purely Technical?
That's a very common question, and the answer is yes, you can absolutely apply. There's a big misconception that this visa is just for software developers and coders. The truth is, Tech Nation knows that a successful tech company needs much more than just engineers.
They're looking for talent across the whole digital technology ecosystem. So, if you're a Product Manager, a UX/UI Designer, a senior marketer in a tech firm, or hold a commercial leadership position, you're definitely in the running. The crucial part is demonstrating how your work has directly fuelled the growth and success of a product-led digital business. It’s about your impact, not just your job title.
How Much Money Do I Need to Show for Proof of Funds?
Here's another bit of good news. For Stage 1 (the endorsement application), you don't need to show any proof of funds. The entire focus is on your skills and the evidence you provide.
When you get to Stage 2 (the visa application to the Home Office), most Global Talent applicants don't have to show maintenance funds either. That said, it’s always smart to double-check the latest UKVI guidance, just to be safe. On a practical note, you’ll still want to have enough personal savings to cover your flight from Nigeria, your first month's rent, a security deposit, and living expenses while you get settled.
What if My Endorsement Application Gets Rejected?
It can feel like a real setback if your endorsement is rejected, but it doesn't have to be the end of the story. If Tech Nation turns down your application, you have the right to request an endorsement review within 28 days of receiving the decision.
Now, it's important to know what a review is for. You can't add new evidence. A review is your opportunity to make a case that the assessors misinterpreted the evidence you originally sent or made an error in their judgement. Your application will be passed to a different set of assessors for a fresh look.
If the review doesn't work out, the next step is to plan a future re-application. This means really digging into the feedback, strengthening your profile, and gathering new, more powerful evidence of your achievements.
Can My Family Come with Me?
Yes, they can! The Global Talent Visa allows you to bring your partner (whether you're married or not) and your children under 18 to the UK. They will apply for their own visas as your dependents once yours has been approved.
For many Nigerian professionals, this is a huge plus. It offers a clear, stable path for your whole family to relocate and start a new chapter together in the UK.
Planning a move abroad is a big deal, with a lot of moving parts. JapaChat was built to make it simpler. As Nigeria’s first AI immigration expert, we give you instant, reliable answers to your toughest questions. We help you avoid expensive errors and plan your relocation with confidence. Sign up for free today and join over 10,000 Nigerians turning their international dreams into reality. Get started at https://japachat.com.
-

Dependant visa uk requirements: Your quick guide
So, you’ve landed that dream job or secured a place at a UK university. Fantastic news! But what about your family back in Nigeria? Starting a new life in the UK is an incredible opportunity, but for many, it only feels complete when loved ones can share in the journey.
The good news is that the UK immigration system allows for this. The core dependant visa UK requirements hinge on a few key things: you, the main visa holder, must have a valid visa (like a Skilled Worker or Student visa), you need to prove your relationship is genuine, and you must show you can support your family financially without relying on public funds.
Bringing Your Family to the UK From Nigeria

Let's paint a picture. You've just received your visa to work as a software developer in Manchester. The excitement is real, but your very next thought is probably, "How do I get my husband and our two kids here from Lagos?" It’s the single most common question we hear, and this guide is here to give you the answers.
We're going to cut through the jargon and confusing rules to give you a clear, straightforward roadmap for the UK dependant visa. This is the official route that allows your partner and children to join you while you work or study. Getting a handle on these rules is your first big step to reuniting your family on UK soil.
If you want a broader look at the entire process, our detailed article on UK visa requirements for Nigerian citizens is a great place to start.
What to Expect in This Guide
Our goal is to walk you through the entire process, step-by-step, so you feel confident and prepared. We'll cover everything from who actually counts as a 'dependant' in the eyes of the Home Office to the nitty-gritty of the documents you’ll need from Nigeria.
We're focusing on practical advice you can actually use. After all, moving a family internationally is about more than just visas; it's about setting up a new life. On that note, checking out some helpful resources for UK relocation can be a lifesaver for finding accommodation and settling in.
Here’s a quick look at what we’ll be covering:
- Eligibility: Who can apply? We’ll break down the rules for spouses, civil partners, and children.
- Sponsor Duties: What are your obligations as the main visa holder? It's more than just a title.
- Financial Proof: The money part. We’ll get specific about exactly how much you need to have in the bank and for how long.
- Document Checklist: Your essential paperwork list, from marriage certificates to birth certificates.
- Application Steps: A simple walkthrough of the online form, paying the fees, and booking the biometrics appointment.
By the time you've finished reading, you'll understand the dependant visa UK requirements inside and out, putting you in the best possible position to submit a successful application for your family.
Who Can Qualify as a Dependant
Before you even think about paperwork, the very first step is getting to grips with who the UK Home Office actually defines as a ‘dependant’. The rules are quite specific, so let’s walk through the main categories that typically apply to families from Nigeria.
The most common relationships that meet the dependant visa UK requirements are:
- Your husband or wife (your spouse)
- Your civil partner
- Your unmarried partner, but only if you’ve lived together for at least two years
- Your children under the age of 18
For married couples, a marriage certificate from a Nigerian registry is usually all you need. But for unmarried partners, the Home Office needs a lot more convincing to prove your relationship is genuine and has been ongoing for at least two years.
Proving Your Relationship as an Unmarried Partner
Think of it as building a case file that proves you and your partner share a life. The Home Office isn't just taking your word for it; they want to see official documents showing you’ve been living at the same address.
For example, you could show a joint tenancy agreement for your flat in Lekki or Ikeja. Another great piece of evidence is a joint bank statement from a Nigerian bank like GTBank or Zenith Bank, showing you've been managing finances together. Utility bills from Eko Electricity Distribution Company (EKEDC) with both of your names on them also work wonders.
The secret here is consistency and official paperwork. The Home Office is looking for solid proof that your relationship is not only genuine but also stable, similar to a marriage. Your job is to paint a clear picture of your shared life through these documents.
Requirements for Dependent Children
When it comes to your children under 18, the process is generally straightforward, but the details matter. You'll need to provide their original birth certificate issued by the National Population Commission.
A really important point is proving that your child actually depends on you. If a child is applying with both parents, this is usually obvious. But if only one parent is the main visa holder in the UK, you might have to demonstrate you have sole responsibility for raising the child. This often comes up in cases of separation or divorce and will require extra documentation like school reports or doctor's letters addressed to you.
For children who are 16 or 17, they must not be living an independent life. This means they can't be married, in a civil partnership, or have their own children. They still need to be financially reliant on you.
Getting these rules right is more crucial now than ever. Recent changes have made the dependant visa route much tougher, especially for students. In the year ending June 2025, the number of visas granted to student dependants dropped by a massive 81%. This shows just how strict the immigration climate has become, making it essential to meet every single requirement perfectly. You can discover more insights about these UK immigration statistics on the official report.
Your Responsibilities as the Main Visa Holder
Think of yourself as the anchor for your family's move to the UK. As the main visa holder, your stability and valid visa status are what make their applications possible. In the eyes of the Home Office, you are their sponsor, and that comes with a few key responsibilities you’ll need to meet for them to join and stay with you.
First and foremost, you need to hold a qualifying visa yourself. Not every UK visa type allows you to bring your family along. Generally, it's the long-term work routes that open this door.
- Skilled Worker Visa: This is a very common path for many Nigerians heading to the UK for work, and it definitely allows you to bring your partner and children.
- Health and Care Worker Visa: Much like the Skilled Worker visa, this route also lets you sponsor your dependants.
- Global Talent Visa: If you’re recognised as a leader in your field, you can bring your family over with you on this visa.
It's crucial to be aware of recent changes, especially for students. Since early 2024, most international students on taught master's courses can no longer bring dependants. This option is now typically reserved for those on PhD programmes or other research-based postgraduate courses.
Your Core Duties as a Sponsor
Beyond simply holding the right visa, you have three core duties to meet the dependant visa UK requirements. The first is to keep your own visa status in perfect order. Any problems with your visa, like breaking its conditions, could put your dependants' right to stay in the UK at risk.
Honesty throughout the process is non-negotiable. Providing false information can lead to really serious outcomes. If this is a concern, it’s a good idea to understand the risks of visa application misrepresentation to make sure you steer clear of any trouble.
Second, you must show that you can support your family financially without needing to access public funds. This is the "maintenance requirement," and it means having a specific amount of money saved up in your bank account for a continuous period.
Your financial stability is a direct promise to the UK government that your family will not become a burden on the state. You are essentially vouching for them with your own resources.
Finally, you need to have a suitable place for your family to live sorted out before they arrive. The home can't be legally overcrowded by UK standards. You’ll be asked to provide proof of this, usually a tenancy agreement, to show you have a proper home for everyone.
Meeting the Financial Maintenance Requirements
Proving you have enough money to support your family is often the biggest hurdle in the dependant visa application. The UK Home Office needs to see that your loved ones won't need to rely on public funds, and they have very strict, non-negotiable rules about how you demonstrate this. Getting this right is a cornerstone of the dependant visa UK requirements.
Let's get into the specifics of what you'll need. The main element here is the maintenance funds requirement. You must have a set amount of cash saved for each family member joining you. Crucially, this money has to sit untouched in your bank account (or your partner’s) for at least 28 consecutive days before you submit your application. The balance cannot dip below the required amount, not even for a single day during that 28-day window.
Understanding the 28-Day Rule
Think of the 28-day rule as a test of your financial stability. The Home Office uses it to make sure the money isn't just a last-minute loan from a friend or relative to tick a box. They want to see that these funds are genuinely available to you.
For applicants from Nigeria, this means you'll need to get official, stamped bank statements from your bank, whether it's Zenith Bank, GTBank, or Access Bank. Your statements must clearly show the bank’s name, your name, the account number, and the full transaction history for those 28 days. The closing date of the statement can't be more than 31 days before you apply.
This infographic provides a great overview of a visa holder's core responsibilities, which go hand-in-hand with the financial side of things.

As you can see, proving you have the funds is just as critical as maintaining your legal status and securing a proper home for your family.
How Much Money Do You Need?
The exact amount you need to show depends entirely on the main applicant's visa type. For most work-based routes, like the popular Skilled Worker visa, the required funds are broken down like this:
- £285 for your partner
- £315 for your first child
- £200 for each additional child
Remember, these figures are on top of the £1,270 the main applicant needs for their own maintenance. The only exception is if their employer is an A-rated sponsor who agrees to certify their maintenance, which would cover their personal funds but not the funds for dependants.
Important Note: These financial thresholds are not set in stone and can change. Recent government policies have made sponsoring family members tougher, particularly on the family visa route, which now has much higher and more complex income requirements.
The impact of these tighter financial rules is already being felt. Statistics show that family visa applications (which include dependant applications) dropped by nearly 23% in the year ending June 2025, right after a major increase in the minimum income requirement. This really drives home how critical it is to meet the financial criteria. For a deeper dive, you can read the full research about these immigration statistics for more context.
To help you visualise this, here is a table showing what you might need to save for your family, depending on the visa route.
Dependant Visa Financial Requirements Example
This table shows the minimum funds a main applicant must have available for their dependants, in addition to their own maintenance funds. Funds must be held for at least 28 consecutive days.
Dependant Type Visa Route Example Required Funds Per Dependant Partner/Spouse Skilled Worker Visa £285 First Child Skilled Worker Visa £315 Each Additional Child Skilled Worker Visa £200 Taking the time to carefully calculate and save these funds is an absolutely essential step towards bringing your family together in the UK.
Your Essential Document Checklist
Getting your paperwork in order is probably the most crucial part of the entire application process. Honestly, a single missing or incorrect document can lead to frustrating delays or, even worse, a flat-out refusal. Think of this checklist as your roadmap to gathering everything you need, tailored specifically for applicants from Nigeria.
We’ll break down the documents into simple, clear categories so you don't miss a thing. A bit of careful preparation here will make all the difference in meeting the dependant visa UK requirements.
Documents for All Applicants
First things first, there are a few core documents that everyone applying will need – that’s you, your partner, and each of your children. These are the non-negotiables.
- Current International Passport: It must be valid and, importantly, have at least one completely blank page for the visa sticker.
- Tuberculosis (TB) Test Certificate: This is a mandatory requirement for anyone applying from Nigeria. You absolutely must get this test done at a Home Office-approved clinic, which you'll find in Lagos and Abuja. A certificate from any other clinic will simply be rejected.
- Proof of Relationship to the Main Applicant: This is where you prove you’re a family. What you need will depend on your situation, and we'll dig into that next.
For Your Spouse or Partner
If your husband or wife is the one applying to join you, you'll need to provide solid proof of your relationship. The cornerstone of this is your official marriage certificate from a Nigerian registry.
The Home Office isn't just looking for a piece of paper; they need to believe your relationship is genuine and ongoing. They often look very closely at this, so it's smart to provide more than just the certificate.
To build a stronger case, it's a great idea to include other evidence that paints a picture of your life together. Things like:
- Photographs of the two of you over time – think wedding pictures, holiday snaps, and photos from family gatherings.
- Screenshots of your chat logs from apps like WhatsApp or your call history to show you're in regular contact.
- Evidence of shared finances, like a joint bank account in Nigeria. Since bank statements are a vital part of your application, knowing how to download a bank statement efficiently can save you a real headache.
For Your Children
For every child under 18 who is coming with you, you'll need to submit their birth certificate. If you're applying from Nigeria, it’s crucial to use the official version issued by the National Population Commission. Just make sure the copy is clear, easy to read, and shows the names of both parents.
One last thing – if any of your documents aren't in English (this can sometimes be the case with older marriage or birth certificates), you must get a certified translation. This isn't just any translation; it has to be done by a professional who provides a statement confirming it's an accurate and true translation. Getting all of this organised neatly is your best bet for a smooth and successful application.
The Step-by-Step Visa Application Process
Once you’ve gathered all your documents, the next stage is the application itself. I know this part can feel like the most daunting, but if you break it down into a few clear steps, it’s much more manageable. Let's walk through exactly what you need to do to meet the dependant visa UK requirements and bring your family over.
The whole process kicks off online but wraps up with an in-person appointment. It's crucial to remember that every single dependant, including each child, requires their own individual application. Yes, it's a bit of a paperwork marathon, but being meticulous now will save you a world of headaches later.
Completing and Paying for the Application
First things first: you need to complete the official online application for each family member. This form is the absolute cornerstone of their case, so accuracy is key.
-
Fill Out the Online Form: Head over to the GOV.UK website to find the correct form. My best advice is to take your time. Double-check, and then triple-check, every detail – a simple typo in a date of birth or passport number can cause serious delays down the line.
-
Pay the Fees: After submitting the form, you'll be prompted to pay two fees online: the visa application fee and the Immigration Health Surcharge (IHS). The IHS is mandatory and gives your family access to the NHS, which is a huge peace of mind.
A word to the wise: visa fees are not static. I always tell my clients to check the very latest costs on the official UK government website before they start. This helps avoid any nasty surprises and keeps your budget on track.
Booking and Attending Your Appointment
With the online part done and dusted, the final phase involves booking and attending a biometrics appointment.
-
Book Your Biometrics: You'll be automatically directed to the website of TLScontact, the Home Office's official partner in Nigeria. This is where you book an appointment slot for each dependant at one of their centres in Lagos or Abuja.
-
Upload Documents and Attend: Before the appointment, you must upload high-quality digital scans of all your supporting documents to the TLScontact portal. Then, on the day of the appointment, your family members will have their fingerprints and a photograph taken. It’s a pretty straightforward affair, but make sure they get there on time with their passports and the appointment confirmation printout.
Common Questions from Nigerian Applicants
Navigating the UK dependant visa process can throw up a lot of questions. Let's break down some of the most common queries we see from Nigerian families, giving you clear, straightforward answers to help you prepare.
Can I Use Funds from a Sponsor in Nigeria?
This is a big one we hear all the time. For the most part, the Home Office expects the proof of funds to be in a bank account belonging to the main visa applicant or their partner (the dependant).
Relying on a third-party sponsor back in Nigeria, like an uncle or family friend, to meet the financial requirement is generally not allowed and can put your application at risk. The simplest and safest route is always to use your own funds.
Do I Need to Legalise My Nigerian Marriage Certificate?
Typically, you don't need to go through the extra step of legalising your Nigerian marriage certificate. An original or a certified copy from the marriage registry is usually sufficient for the UK visa application.
What the UK Visas and Immigration (UKVI) team really cares about is authenticity and clarity. As long as the document is official and easy to read, you're good to go. If any part of it isn't in English, you absolutely must include a certified translation.
The UKVI's focus is on the authenticity and clarity of your documents. A clear, official certificate and a professional translation if needed are far more important than extra legalisation steps.
What Happens If My Dependant Visa Is Refused?
Getting a refusal notice is tough, but it doesn't automatically mean it's over. The refusal letter will spell out the exact reasons why the visa was denied, and you need to read these reasons very carefully.
Depending on the problem, you may have the option to apply for an Administrative Review or simply submit a fresh application that addresses the issues from the first one. To get a better handle on what can go wrong, it's worth reading up on common UK visa rejection reasons.
It's important to remember that Nigeria is a major source of students for the UK, so applications are looked at very closely. Even with recent policy shifts, Nigerian study visa applications saw a massive 64% year-on-year increase in the first quarter of 2025. This shows that interest remains high, but so does the level of scrutiny. Discover more insights about these international student trends to understand the bigger picture.
Feeling overwhelmed by the requirements? Let JapaChat simplify your journey. Our AI-powered platform provides instant answers to your specific immigration questions, tailored for Nigerians. Plan your move with confidence by visiting https://japachat.com to get started for free.
-

Colleges in Canada Without IELTS: 7 Top Picks for Nigerians
The dream of studying in Canada is a big one for many Nigerians, but the IELTS test can often feel like a major roadblock. The cost in Naira, the stress of preparing at a tutorial centre, and the fear of not getting the required band score can be discouraging. But what if you could find colleges in Canada without IELTS being a mandatory requirement? This isn't about a secret "backdoor"; it's about understanding the system and knowing which doors are already open for you.
Many Canadian institutions recognise that a strong secondary school education in English, proven by good WAEC or NECO results, is a valid measure of your language skills. Others now accept more accessible alternatives like the Duolingo English Test (DET) or offer dedicated pathway programmes designed to prepare you for college-level studies upon arrival.
This guide is built specifically for Nigerian students navigating their study abroad journey. We will break down seven verified resources and institutions that offer legitimate routes to admission without the IELTS headache. For each option, we'll provide direct links and clear details on what they require, how to apply, and practical, no-nonsense advice to help you plan your 'japa' journey smartly. This article is your game plan for finding the right Canadian college that fits your academic profile and bypasses the traditional English test barrier.
1. EduCanada (Government of Canada portal)
EduCanada is the official Government of Canada website for international students and your most reliable starting point for finding colleges in Canada without IELTS. While it won’t give you a direct list of “no IELTS” schools, it acts as an authoritative directory. It helps you find official college programmes and then directs you to the school’s own website, where you can find the specific English proficiency requirements and alternatives.
Think of it as the official map before you begin your journey. Because it's a government portal, the information is unbiased and up-to-date, covering everything from tuition estimates to programme lengths. For a Nigerian applicant, this is crucial for avoiding fraudulent agents and getting information directly from the source.
How to Use EduCanada to Find IELTS Alternatives
Using EduCanada effectively requires a two-step process. First, you use its powerful search tool to find colleges that match your career goals and budget. Then, you visit the individual college websites to confirm their specific English language policies.
Here is a practical guide:
- Search for a Programme: On the EduCanada website, use the "Find a school or program" tool. You can filter by province (e.g., Ontario, Manitoba), level of study (e.g., college diploma), and field of study (e.g., Health Sciences).
- Identify Potential Colleges: The search results will show a list of designated learning institutions (DLIs) offering your chosen programme, along with estimated tuition fees.
- Visit the College Website: Click the link provided for each college. This will take you to their official page.
- Locate Admission Requirements: On the college's website, navigate to the "International Admissions" or "English Language Proficiency" section. This is where you will find the specific details on alternatives to IELTS.
Pro Tip: Look for phrases like "English Language Proficiency Waivers," "Alternative Proof of English," or a list of accepted tests. Many schools now accept the Duolingo English Test (DET), Pearson Test of English (PTE), or may even waive the requirement if you have a strong WAEC/NECO English result (like a B2 or A1).
Why It's the Best Starting Point
EduCanada stands out because it is the official and most trustworthy source. While blogs and agents provide lists, those can quickly become outdated. College policies change, and EduCanada provides direct links to the source, ensuring you get the most current information. This is vital when preparing your application, as providing the wrong documents can lead to delays or rejection. Understanding these details is a key part of the Canada student visa requirements for Nigerians.
Pros & Cons of Using EduCanada
Pros Cons Official & Trusted: Information comes directly from the Canadian government. Indirect Process: You must click through to each school's site to find IELTS waiver info. Comprehensive Database: Lists nearly all Designated Learning Institutions (DLIs). No "No IELTS" Filter: The platform doesn't have a feature to filter schools by accepted tests. Free to Use: Access is completely free, with no hidden charges. Requires More Effort: You have to do the research yourself rather than getting a pre-made list. Official Website: https://www.educanada.ca/
2. Duolingo English Test (DET) — Official site
The official Duolingo English Test (DET) website is not a directory of colleges itself, but a crucial tool for finding colleges in Canada without IELTS. It serves as the primary resource for registering for the DET, a modern, online English proficiency test that is now widely accepted by hundreds of Canadian institutions. For a Nigerian student, this test is a game-changer due to its accessibility and fast results.
Think of the DET website as your portal to a more convenient proof of English proficiency. The test costs about $65 USD, can be taken from home in under an hour, and you get your results within two days. This speed is a massive advantage compared to the longer waiting times and higher costs associated with traditional test centres in cities like Lagos or Abuja. You don't need to travel to a centre; just a laptop and stable internet.
How to Use the DET Website to Find Accepting Colleges
The DET website helps you confirm which schools will accept its results, making your college search more targeted. Instead of guessing, you can use their official list to build your application strategy.
Here is a practical guide:
- Explore Accepting Institutions: On the DET website, navigate to the "Accepting Institutions" page. This section has a searchable database.
- Filter for Canada: Use the search filters to narrow down the list to "Canada" and the level of study you are interested in (e.g., "Undergraduate" for college diplomas).
- Identify Potential Colleges: This will generate a list of all the colleges and universities in Canada that officially accept the DET for admissions. You'll see popular names like Seneca College, Conestoga College, and Bow Valley College.
- Verify Programme-Specific Requirements: After identifying a college, always visit its official admissions page to confirm the minimum DET score required for your specific programme. Some high-demand programmes like Nursing might have higher score requirements.
Pro Tip: While the DET website's list is a great starting point, college policies can change. Always cross-reference the information with the college's official website before you pay the DET fee. A quick email to the college's international admissions office can also provide the most current information.
Why It's a Key Resource
The DET website is your direct link to one of the most popular IELTS alternatives. Its official list of accepting institutions saves you countless hours of manual research. For Nigerian applicants facing tight deadlines or limited access to test centres, the ability to take a recognised test online and get results in 48 hours can make the difference in submitting a timely application. This convenience and affordability are why the DET has become a preferred choice for many seeking admission to Canadian colleges.
Pros & Cons of Using the DET Website
Pros Cons Official List: Provides an official, searchable database of colleges that accept the DET. Verification Needed: You must still visit the college's website to confirm programme-specific rules. Convenient & Affordable: Test can be taken from home for a fraction of the cost of IELTS. Not Universally Accepted: Some programmes or institutions still insist on IELTS or TOEFL. Fast Results: Results are typically delivered within two days, speeding up your application process. Strict Testing Rules: The at-home proctoring has very strict rules that can lead to test invalidation. Official Website: https://englishtest.duolingo.com/
3. ApplyBoard
ApplyBoard is a massive international student recruitment platform that simplifies the process of finding and applying to colleges in Canada without IELTS. It functions like a centralised application portal, listing thousands of programmes from various Canadian institutions. For a Nigerian student, its biggest advantage is its detailed search filters, which allow you to specify your English proficiency status from the start.
This platform streamlines your search by showing you exactly which schools accept alternatives like the Duolingo English Test (DET), TOEFL, or PTE. It also highlights pathway programmes for those who need to improve their English first. Think of it as an organised catalogue that helps you quickly shortlist institutions that fit your academic and language profile, much like how you would use Jumia to filter for products.
How to Use ApplyBoard to Find IELTS Alternatives
ApplyBoard’s strength lies in its ability to match your profile to suitable programmes. By inputting your test scores (or lack thereof), the platform does the heavy lifting for you. This is particularly useful for finding some of the cheapest universities for international students in Canada that also have flexible language requirements.
Here’s how to use it effectively:
- Create a Profile: Sign up and build your applicant profile. Be thorough when filling in your academic history and English proficiency details. You can specify which test you have taken (e.g., DET, TOEFL) or indicate if you have none.
- Search for Programmes: Use the platform’s search engine to filter programmes by country (Canada), institution type, and field of study. The system will automatically suggest programmes you are eligible for based on the information in your profile.
- Review English Requirements: Each programme listing clearly outlines the required English proficiency scores. You can see at a glance if your DET or TOEFL score meets the criteria, saving you the time of visiting each school’s website individually.
- Purchase a DET Voucher: If you decide the Duolingo English Test is your best option, ApplyBoard often sells vouchers, sometimes at a discounted rate. This makes it a one-stop-shop for both finding a suitable programme and preparing for the required test.
Pro Tip: While ApplyBoard is incredibly convenient, always double-check the English language requirements on the college's official website before submitting your final application. Policies can change, and the school's own site is the ultimate source of truth.
Why It's a Great Application Tool
ApplyBoard's unique value is its integration of search, eligibility checking, and application submission into one platform. For a Nigerian applicant who may not have access to an agent, it provides a structured and transparent way to manage applications. The ability to buy a DET voucher directly is a practical feature that helps you act quickly.
Pros & Cons of Using ApplyBoard
Pros Cons Streamlined Application: Search, filter, and apply to multiple schools from one account. Login Required: Full access to all features and programme details often requires creating an account. Direct DET Access: Offers the convenience of purchasing Duolingo English Test vouchers. Verification Needed: You should always cross-check requirements on the official college website. Clear Eligibility: Shows which programmes you qualify for based on your profile and test scores. Not an Official Source: It's a third-party platform, not a government or college body. Official Website: https://www.applyboard.com/
4. ILAC (International Language Academy of Canada) – University Pathway
The ILAC University Pathway is a unique and practical route for students looking to find colleges in Canada without IELTS. Instead of a direct application or a waiver, this programme prepares you for academic studies in English. By successfully completing the required ILAC pathway level, you can gain admission into one of their 100+ partner colleges and universities across Canada, completely bypassing the need for an IELTS, TOEFL, or Duolingo score.
Think of it as an academic bridge, like a pre-degree or foundation programme. For a Nigerian student who may be more comfortable demonstrating their English proficiency through coursework rather than a single high-stakes test, this is an excellent option. ILAC works directly with its partner schools, so completing their programme serves as your proof of English ability, often leading to a Conditional Letter of Acceptance even before you finish.
How to Use the ILAC Pathway to Avoid IELTS
The process involves enrolling in the ILAC programme first, and then transitioning to your chosen college. It’s a structured path designed to ensure you succeed once you begin your main diploma or degree studies.
Here's how it typically works:
- Choose a Partner College: Visit the ILAC website and browse their list of over 100 partner institutions. You can find top colleges like Seneca College, George Brown College, and Humber College on their list.
- Apply to ILAC and the College: You apply to both ILAC’s Pathway Program and your desired college programme at the same time. The college will then issue a Conditional Letter of Acceptance (LOA), stating that your admission is guaranteed once you complete the required ILAC English level.
- Complete the Pathway Programme: You will take an English placement test to determine your starting level at ILAC. You then complete the necessary levels online or in Canada until you reach the proficiency required by your chosen college.
- Transition to Your College: Once you successfully finish the pathway, ILAC provides you with the documents to prove you’ve met the language condition. Your conditional offer becomes a full offer, and you can start your main programme.
Pro Tip: The ILAC Pathway is ideal if you need to improve your academic English skills (like essay writing and presentation skills), not just your general English. The skills you learn will be directly applicable to your college coursework, making you more prepared than students who only passed a test.
Why It's a Great Alternative
ILAC stands out because it replaces the stress of a standardised test with a structured learning experience. Instead of just passing a test, you are actively preparing for the Canadian classroom environment. For Nigerian students, this can provide a much smoother transition into college life. The strong partnerships and dedicated advisors ensure that your move from the pathway to the college is seamless.
Pros & Cons of Using the ILAC Pathway
Pros Cons Clear, Test-Free Route: A guaranteed path into over 100 partner colleges and universities. Extra Time and Cost: You must pay tuition for the pathway programme before starting your main studies. Builds Academic Skills: Prepares you for the specific demands of a Canadian classroom. Not All Programmes Accept It: Some competitive programmes at partner schools may still require a test. Strong Support System: ILAC provides dedicated advisors to help with the transition to college. Requires Commitment: You must successfully complete all the required course levels to gain admission. Official Website: https://www.ilac.com/pathway/
5. ILSC — University Pathway
The ILSC University Pathway programme offers a practical and alternative route for admission into colleges in Canada without IELTS. Instead of a one-off standardized test, this programme allows you to prove your English proficiency through dedicated coursework. Upon successful completion, ILSC provides a direct entry recommendation to its 125+ partner colleges and universities in Canada, often satisfying their English language entry requirements.
For a Nigerian student who may be more comfortable with continuous assessment than a high-stakes exam like IELTS, this pathway is an excellent choice. It not only prepares you for the language demands of a Canadian classroom but also provides a structured route into a partner institution, effectively replacing the need for a separate English test score.
How to Use the ILSC Pathway to Avoid IELTS
The process involves enrolling in the pathway programme first, completing it successfully, and then using that qualification to apply to a partner college. It’s a multi-step journey but one that builds academic confidence.
Here is a practical guide:
- Explore Partner Schools: Visit the ILSC University Pathway website and review their list of over 125 partner institutions. Find colleges that offer the diploma or certificate programme you are interested in.
- Enrol in the Pathway Programme: Contact ILSC to enrol. You will likely take a placement test to determine your starting English level.
- Complete the Required Levels: You will progress through different levels of academic English, focusing on skills like research, essay writing, and presentation skills needed for college success.
- Receive Your Pathway Certificate: Once you successfully complete the required level for your chosen college, you receive a certificate.
- Apply to the Partner College: You can then apply to the partner college using your ILSC certificate as proof of English proficiency, bypassing the IELTS requirement.
Pro Tip: Before enrolling, contact your target college's admissions office directly. Confirm that they accept the specific ILSC Pathway level for your desired programme and ask if there are any other conditions. This step prevents any surprises later.
Why It's a Strong Alternative
The ILSC Pathway stands out because it focuses on building academic skills, not just test-taking strategies. This approach can lead to greater success once you start your main college programme. For many Nigerian students, the hands-on support and advising from ILSC counsellors throughout the process is invaluable for navigating the Canadian education system.
Pros & Cons of Using ILSC University Pathway
Pros Cons Practical Alternative: Ideal for students who prefer coursework over exams. Additional Cost & Time: You must pay for and complete the pathway before your main programme. Large Partner Network: Provides access to over 125 colleges and universities. Acceptance Varies: Waiver conditions and required pathway levels differ between partner schools. Builds Academic Skills: Prepares you for the specific demands of Canadian college. Not a Direct Application: It is a preparatory step, not a direct college application platform. Official Website: https://www.ilsc.com/tr/language-schools/programs/university-pathway
6. University of Manitoba — English proficiency waivers & pathway
The University of Manitoba’s official admissions website is a prime resource for finding colleges in Canada without IELTS, as it clearly outlines multiple pathways to meet English proficiency requirements. For Nigerian applicants, this is a game-changer because the university explicitly lists Nigeria as one of the countries whose citizens may be exempt from providing a test score if they meet certain educational criteria. This direct, transparent policy removes guesswork and streamlines the application process.
Beyond the country-specific exemption, the university offers an in-house pathway called the Intensive Academic English Program (IAEP). Completing this programme can satisfy the English proficiency requirement for admission into many of its undergraduate courses, providing a structured alternative for students who do not qualify for a direct waiver.
How to Use the University of Manitoba Website for IELTS Alternatives
Navigating the university’s website is straightforward. The information is centralised on their English Language Proficiency Requirements page, making it easy to see if you qualify for an exemption or if the pathway programme is a better fit.
Here is a step-by-step guide:
- Visit the Admissions Page: Go directly to the "English Language Proficiency Requirements" section on the University of Manitoba's website.
- Check for Exemptions: Review the section titled "Countries where English is the primary language/language of instruction." Nigeria is listed here, meaning if you completed at least three years of full-time, recent secondary or post-secondary education in Nigeria, you may be exempt.
- Explore the Pathway Programme: If you do not meet the waiver criteria, look for information on the Intensive Academic English Program (IAEP) offered by the university's English Language Centre.
- Confirm Programme-Specific Rules: Always check the admission requirements for your specific desired programme (e.g., Engineering, Nursing). Some highly competitive or professional faculties may have stricter requirements that do not accept the IAEP alone.
Pro Tip: Even if you qualify for a waiver, having a strong command of English is crucial. The IAEP can still be a valuable option to build academic English skills needed for university-level studies in Canada, and it can help ease the transition into a new educational system.
Why It's a Top Option for Nigerians
The University of Manitoba stands out due to its explicit inclusion of Nigeria in its exemption list. This clarity is invaluable and saves applicants from the uncertainty common with other institutions. The provision of an internal pathway (IAEP) creates a clear, university-approved route to admission, making it a reliable choice for students who need to strengthen their English skills. This can also be a strategic way to manage costs, as pathway programme fees are separate and may be more manageable upfront than other options, though this financial planning is essential when also considering the availability of scholarships for international students.
Pros & Cons of Using University of Manitoba's Pathways
Pros Cons Multiple Non-IELTS Routes: Offers both an official country exemption and an internal pathway. Competitive Programmes May Have Stricter Rules: Some faculties might not accept the pathway alone. Transparent & Clear Info: The website clearly lists Nigeria, removing ambiguity. Pathway Has Separate Costs: The IAEP requires separate tuition and a placement test to determine your starting level. Direct University Pathway: The IAEP is run by the university, ensuring quality and direct admission upon completion. Waiver is Not Automatic: You must provide proof of meeting the specific educational requirements. Official Website: https://umanitoba.ca/explore/undergraduate-admissions/requirements/english-language-proficiency-requirements
7. Memorial University of Newfoundland — WAEC/NECO admissions route
Memorial University of Newfoundland (MUN) offers a direct and highly practical pathway for Nigerian students looking for colleges in Canada without IELTS. The university's official admissions website clearly outlines how strong results from the West African Examinations Council (WAEC) or National Examinations Council (NECO) can be used to satisfy English proficiency requirements, removing a major hurdle for many applicants.
This policy makes MUN a standout choice because it acknowledges the high standard of English education in Nigeria. Instead of focusing solely on standardised tests like IELTS, it evaluates an applicant's English skills based on their secondary school performance, a system familiar to every Nigerian student. This transparent approach simplifies the application process significantly.
How to Use Your WAEC/NECO Results for Admission
The process is straightforward, but you must meet the specific grade thresholds. The university’s admissions page provides a clear guide on how to leverage your WAEC or NECO certificate to prove English proficiency.
Here is a practical guide:
- Check the Grade Requirement: Visit the MUN international admissions page for West African curriculum. The university typically requires a grade of C4 or better in English on the WAEC or a specific equivalent on the NECO.
- Gather Your Documents: You will need your official WAEC/NECO scratch card details (serial number and PIN) so the university can verify your results directly from the examination body's portal.
- Submit During Application: When you apply online, indicate that you will be using your WAEC/NECO results to meet the English proficiency requirement. You will be prompted to provide the necessary verification details.
- Confirm with the Admissions Office: After submitting, it is wise to follow up with the admissions office to ensure your results have been successfully verified and that no further proof of English proficiency is needed.
Pro Tip: Even if you meet the minimum requirement with your WAEC/NECO English grade, some highly competitive programmes (like Engineering or Nursing) may have stricter language requirements. Always check the specific programme page for any additional demands.
Why It's a Top Option for Nigerian Applicants
MUN's WAEC/NECO route is exceptional because it is an official, institutional policy, not just a case-by-case exception. This provides certainty and a clear target for Nigerian students aiming for admission. By having a strong grade in English from WAEC, you can potentially save time and the significant cost associated with preparing for and taking the IELTS exam. This direct pathway is a testament to the university's understanding of the Nigerian educational system.
Pros & Cons of MUN's WAEC/NECO Policy
Pros Cons Practical Pathway: Directly uses familiar Nigerian qualifications (WAEC/NECO). Strict Threshold: You must meet the minimum grade (e.g., C4); anything less requires a standardised test. Cost-Effective: Saves you the money and time required for IELTS preparation and fees. Programme-Specific Rules: Competitive programmes may still demand a test score regardless of your WAEC result. Transparent Requirements: The university website clearly states what is needed. Verification Dependent: The process relies on successful online verification by the university. Official Website: https://www.mun.ca/undergrad/admissions/i-want-to-apply/international-high-school-curriculum-requirements/west-african-examinations-council-waec-or-nation/
7 Canadian IELTS-Free Admission Options Compared
Item Implementation complexity 🔄 Resource requirements ⚡ Expected outcomes ⭐📊 Ideal use cases 💡 Key advantages ⭐ EduCanada (Government of Canada portal) Low — web search & filters; click-through to schools 🔄 Minimal — internet & time ⚡ Authoritative program listings and policy notes; starting point for verification 📊⭐ Comparing programs across provinces; finding official admissions/English‑proficiency pages 💡 Official, regularly updated government database; trusted source ⭐ Duolingo English Test (DET) — Official site Low — online registration and test at home 🔄 Moderate — test fee, device, stable internet ⚡ Fast certificate turnaround; widely accepted by many institutions 📊⭐ Applicants needing quick at‑home test and rapid results; those seeking DET-accepting schools 💡 Convenient online test with rapid results; growing institutional acceptance ⭐ ApplyBoard Medium — account setup, profile management, applications 🔄 Moderate — account, possible service fees; can buy DET vouchers ⚡ Streamlined shortlisting/applications; access to institution acceptance info 📊⭐ Applicants applying to many programs or seeking centralized search + voucher purchase 💡 Centralized search and application flow; direct DET voucher sales; simplifies non‑IELTS paths ⭐ ILAC — University Pathway Medium — enroll and complete pathway levels; partner coordination 🔄 High — pathway tuition and additional study time ⚡ Pathway completion can waive standardized tests at partners; conditional LOAs 📊⭐ Students preferring structured academic English coursework to replace tests 💡 Clear test‑free route into many partners; strong advising and transfer support ⭐ ILSC — University Pathway Medium — pathway enrollment and completion 🔄 High — tuition and time investment ⚡ Completion often meets partner English requirements; prepares for post‑secondary study 📊⭐ Students seeking coursework-based waiver accepted by many partners (125+) 💡 Large partner network; practical alternative to standardized tests ⭐ University of Manitoba — English waivers & pathway Low–Medium — check exemptions or enroll IAEP; placement processes 🔄 Variable — low if country exemption; higher for IAEP fees/time ⚡ Multiple non‑IELTS routes (country exemptions, IAEP) with clear policies 📊⭐ Applicants from exempt countries (e.g., Nigeria) or those opting for internal pathway 💡 Transparent criteria, internal pathway (IAEP) that satisfies entry requirements ⭐ Memorial University — WAEC/NECO admissions route Low — submit qualifying WAEC/NECO results and documents 🔄 Low — use existing exam results; document verification ⚡ WAEC/NECO meeting thresholds can satisfy English proficiency for admission 📊⭐ Nigerian applicants with required WAEC/NECO grades seeking IELTS waiver 💡 Clear WAEC/NECO thresholds and submission steps; practical route for Nigerian applicants ⭐ Your Next Steps to a Canada Without IELTS
The journey to studying in Canada doesn't have to start and end with the IELTS exam. As we've detailed, there are numerous, legitimate pathways for Nigerian students to gain admission into Canadian colleges and universities without this specific test. Your dream of a Canadian education is closer than you think, provided you approach it with the right strategy and information.
This article has equipped you with a diverse toolkit. We explored official government resources like EduCanada, accessible alternatives like the Duolingo English Test (DET), and powerful application platforms like ApplyBoard. We also delved into specific institutional pathways, such as the programmes offered by ILAC and ILSC, and direct admission routes using WAEC/NECO at forward-thinking universities like Memorial University of Newfoundland. The core lesson is clear: your options are wider than you may have initially believed.
Key Takeaways and Strategic Planning
To successfully navigate the process of finding colleges in Canada without IELTS, you must move from awareness to action. Here are the most critical takeaways to guide your next steps:
- Verification is Non-Negotiable: University and college policies are not static. Always, without exception, visit the official school website for your specific programme and intake year. Verify their English language proficiency requirements directly from the source. What applies to the Faculty of Arts may not apply to the Faculty of Engineering.
- Admission is Only Half the Battle: Securing an admission letter without IELTS is a major victory, but your work isn't done. You must still convince the visa officer that you have sufficient English proficiency to succeed in your studies. Your past academic performance, a compelling Statement of Purpose (SOP), and strong ties to Nigeria are crucial components of your study permit application.
- Build a Holistic Profile: Don't rely on just one part of your application. While you are using an alternative to IELTS, ensure every other document is impeccable. Strong grades in English in your WAEC/NECO, a well-written SOP, and clear, organised financial documents create a powerful, convincing narrative for both the admissions committee and the visa officer.
Choosing the Right Path for You
How do you decide which option is best? Your personal circumstances, academic background, and budget will be the deciding factors.
- For the Academically Strong: If you have excellent WAEC/NECO English grades (B2 or A1), focusing on universities like Memorial University or researching specific waiver conditions at institutions like the University of Manitoba is a direct and cost-effective route.
- For Those Needing Convenience and Speed: The Duolingo English Test (DET) is an excellent choice. It's affordable, can be taken from home, and delivers results quickly. Many Canadian institutions now accept it, making it a flexible alternative.
- For a Structured Transition: If you want to improve your academic English and acclimatise to the Canadian education system before starting your main programme, a university pathway with ILAC or ILSC is an ideal, structured solution. It provides a softer landing and builds a strong academic foundation.
Ultimately, your preparation should be meticulous. Start organising your documents, researching specific course modules, and creating a detailed budget. Financial planning is critical, and as you map out your expenses, from tuition to living costs, remember to look for savings. Exploring resources for Canadian student deals can help you manage your budget by offering discounts on everything from technology to daily essentials once you arrive. This proactive financial planning demonstrates maturity and readiness to the visa officer. Your journey to study in Canada without IELTS is entirely achievable. It demands diligence, strategic planning, and the use of the right tools to navigate the complexities.
Feeling overwhelmed by the checklists, deadlines, and conflicting advice online? You don't have to figure it all out alone. Get instant, accurate, and personalised guidance for your study abroad journey with JapaChat. Built for Nigerians, it helps you understand visa requirements, organises your application tasks, and provides clear answers to your toughest questions about finding colleges in Canada without IELTS. Stop guessing and start planning with confidence by visiting JapaChat today.
-
Documents Required for Canada Tourist Visa: Your Ultimate Nigerian Checklist
Dreaming of seeing the CN Tower in Toronto or the beautiful mountains of Banff? For many Nigerians, a trip to Canada is a top travel goal. But before you can pack your bags, there's a crucial step: getting your visitor visa. The application process can seem confusing, especially when it comes to gathering the right paperwork. One small mistake—a missing document or an incorrectly filled form—can lead to frustrating delays or even a visa refusal.
This guide is designed specifically for Nigerian applicants to demystify the process. We will break down every one of the essential documents required for a Canada tourist visa, providing practical examples and pro-tips you can relate to. We'll show you exactly what the visa officer is looking for, how to obtain each document, and how to present your application for the best chance of success. To ensure your application is complete, you might need to get certain documents officially certified. Understanding the requirements is key; review a guide to the most commonly notarized documents to see if any apply to your situation.
Consider this your ultimate checklist to navigate the process with confidence. We will cover the official IRCC portal, booking your biometrics via VFS Global, and even platforms for getting compliant visa photos and refundable hotel bookings. Let's get your paperwork perfect.
1. The Official Government of Canada Immigration Website (IRCC)
The absolute first and most crucial online resource for your Canadian tourist visa application is the official Immigration, Refugees and Citizenship Canada (IRCC) website. This is the official portal of the Canadian government, and it should be your primary source of truth for all required documents and procedures. Think of it as the ultimate instruction manual, written by the visa officers themselves.
Why It's Your Essential Starting Point
Unlike travel agents or third-party sites that might give you outdated advice, the IRCC website provides the most current, accurate, and unbiased information directly from the source. Immigration rules and document checklists can change without notice, and this is the only place you are guaranteed to find the latest updates. Using old information from a blog or an agent can lead to an immediate application refusal.
For instance, the IRCC website has a powerful "Find out if you need a visa" tool that generates a personalised checklist of the documents required for your Canada tourist visa based on your specific circumstances, including your nationality (Nigerian).
How to Use the IRCC Website Effectively
Navigating a government website can sometimes feel overwhelming, but a structured approach makes it simple.
- Find the Official Checklist: Start by searching for "Visitor visa: How to apply" on the website. This will lead you to the application guide and the official document checklist (form IMM 5484).
- Use the Help Centre: The site has a comprehensive Help Centre. If you are unsure about a term like "proof of funds" or "ties to home country," you can find detailed explanations and examples tailored to what visa officers look for. For example, 'ties to home country' for a Nigerian could include a letter from your employer in Lagos, land documents in Abuja, or proof of family responsibilities.
- Check Processing Times: The website provides real-time estimates for visa processing times for applications submitted from Nigeria. This helps you plan your application timeline realistically.
Pro Tip: Before you start your application, download the official Document Checklist (IMM 5484) directly from the IRCC website. Use this as your master list, ticking off each item only when you have the official, correct version ready. This prevents confusion and ensures you don't miss a single critical document.
This platform is completely free to use. All the forms, guides, and checklists are available for download without any cost. It is your non-negotiable first stop for a successful application.
Website Link: www.canada.ca/en/immigration-refugees-citizenship.html
2. The Official IRCC Secure Portal for Online Application
Once you have gathered your information from the main Government of Canada website, your next stop is the official IRCC Secure Portal. This is the digital gateway where you will actually submit your application and upload all the documents required for your Canada tourist visa. Think of this as the official submission counter, but online.
Why It's Your Essential Submission Tool
This portal is the only official channel to apply for a Canadian visitor visa online directly. Using this platform ensures your personal information is secure and your application goes straight to the visa authorities without any middlemen. It provides a structured, step-by-step process for uploading documents and making payments, reducing the risk of administrative errors.
For instance, after you upload your filled IMM 5257 form, the system often validates it to catch common errors before you can even submit. This direct-to-government system is far more reliable than emailing documents to an agent who might misplace them or delay your submission.
How to Use the IRCC Portal Effectively
While the portal is straightforward, knowing how to navigate it can save you a lot of time and frustration.
- Create Your Secure Account: You will need to register for an account using either a GCKey or a Sign-In Partner. For most Nigerian applicants, creating a GCKey is the standard and most direct method.
- Follow the Upload Prompts: The portal will provide specific upload slots for each required document (e.g., "Proof of Financial Support," "Purpose of Travel"). Ensure you are uploading the correct file, like your stamped bank statement from a Nigerian bank, to the corresponding slot.
- Pay the Official Fees: You can pay the visa fee (CAD $100) and biometrics fee (CAD $85) directly on the portal using a valid debit or credit card (e.g., a UBA Dollar Prepaid Card or a GTBank Naira Mastercard). This generates an instant receipt, which serves as proof of payment.
Pro Tip: The application forms, like IMM 5257, must be downloaded, filled using Adobe Reader, and then validated before you can upload them. Clicking the "Validate" button on the form generates a page with barcodes. This barcoded page is crucial for the system to read your application correctly.
Using the portal is free, but you must pay the mandatory government application fees to submit. This is the most secure and efficient way to lodge your Canada tourist visa application from Nigeria.
Website Link: www.canada.ca/en/immigration-refugees-citizenship/services/visit-canada/apply-visitor-visa.html
3. VFS Global (Canada Visa Application Centres in Nigeria)
While the IRCC website is where your application lives online, VFS Global is the official, on-the-ground partner that handles the mandatory in-person steps in Nigeria. After you submit your application online and receive a Biometric Instruction Letter (BIL), VFS Global is the only authorised place to provide your fingerprints and photograph, and later, to submit your passport for visa stamping.
Why It's Your Essential In-Person Hub
VFS Global acts as the bridge between you and the Canadian High Commission. They do not make any decisions on your visa, but they are crucial for collecting biometrics, which is a non-negotiable part of the process. Their centres in Lagos and Abuja are equipped to handle these sensitive procedures securely and transmit the information directly to IRCC. Trying to bypass this official channel is not possible.
For instance, after receiving your BIL, you must use the VFS Global website to book a mandatory appointment. This platform is the only legitimate portal for scheduling your visit to their Lagos or Abuja centres to complete this requirement for your documents required for Canada tourist visa.
How to Use the VFS Global Website Effectively
The VFS Global website is primarily for appointment management and logistics. Here is how to navigate it efficiently:
- Book Your Biometrics Appointment: As soon as you receive your Biometric Instruction Letter (BIL) from IRCC, visit the VFS website to schedule an appointment. Do this immediately, as slots in Lagos and Abuja, especially during peak travel seasons, can fill up quickly.
- Understand On-site Requirements: The website clearly outlines what you need to bring to your appointment: your original passport, the BIL from IRCC, and your appointment confirmation letter. Knowing this prevents you from being turned away. One of the most important documents is your passport, so ensure it is valid and in good condition. You can find out more about how to renew your Nigerian passport online.
- Track Your Passport: Once a decision is made and if you are asked to submit your passport, VFS handles the logistics. You can use their online tracking service to monitor its status, from submission to its return.
Pro Tip: While VFS offers optional paid services like SMS updates, premium lounge access, and courier returns, these do not influence the speed or outcome of your visa decision. The core service, booking your biometrics appointment, is completely free. Stick to the essentials to save money.
Using the VFS Global website is a mandatory step in the process. It is free to book an appointment, but be mindful of the optional add-on services which come at an extra cost.
Website Link: https://visa.vfsglobal.com/one-pager/nigeria/canada/english/
4. IRCC — Find a Panel Physician (Immigration Medical Exam tool)
While not every tourist visa applicant from Nigeria needs a medical exam, certain circumstances require it. The IRCC Panel Physician finder is the official and only tool you should use to locate an approved doctor in Nigeria to perform this examination. This is not just a recommendation; using a non-approved physician will result in your medical results being rejected, causing significant delays or even refusal of your application.
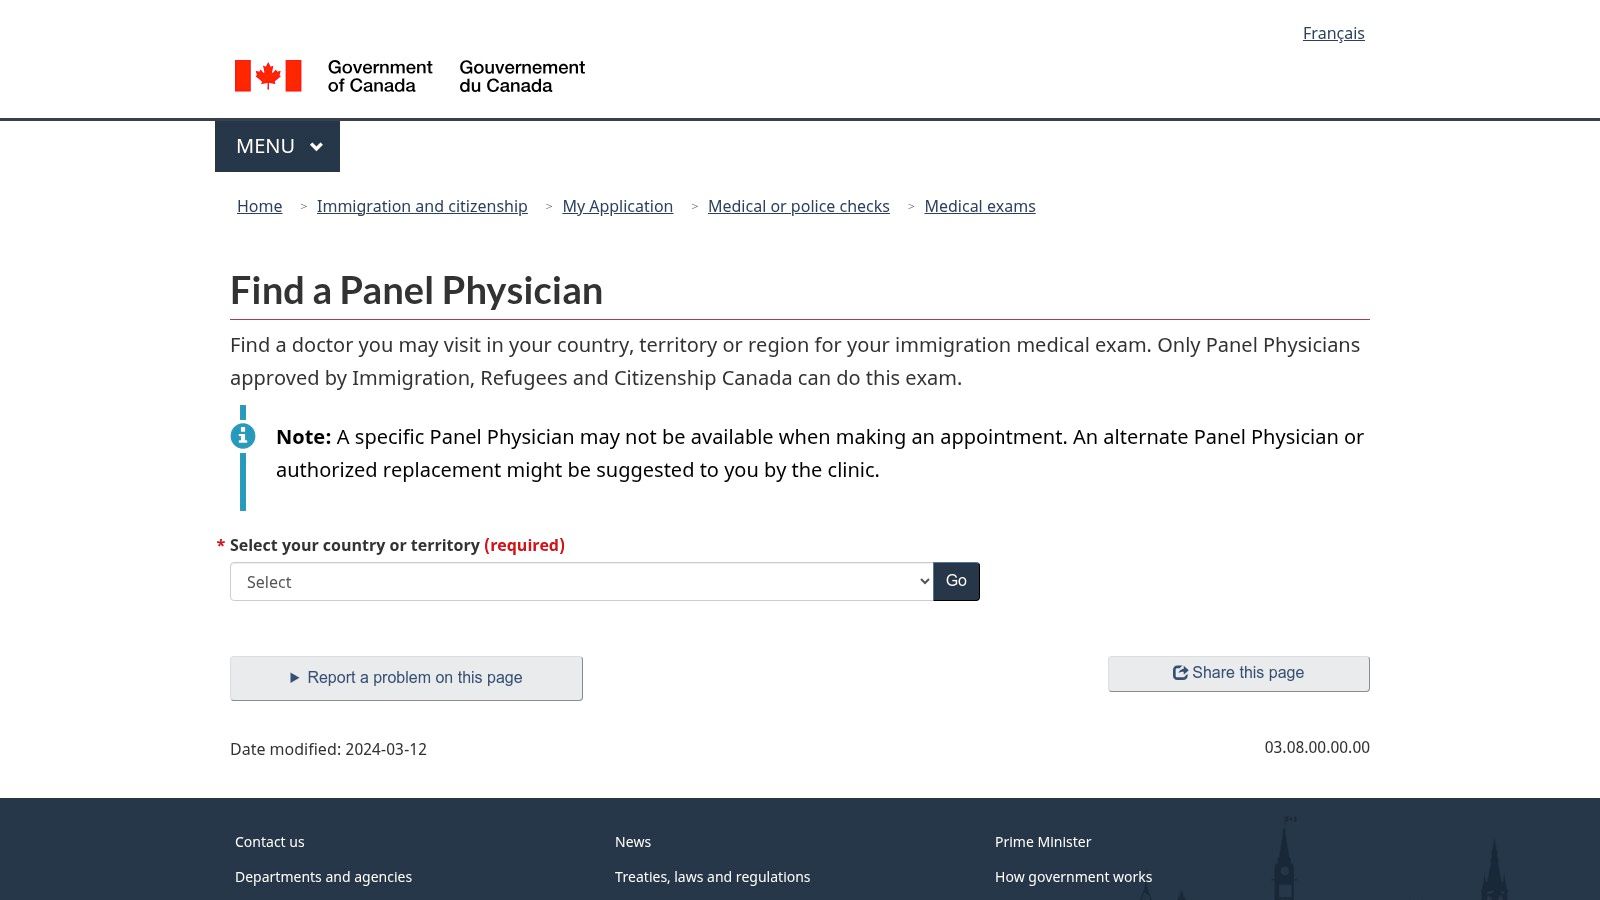
Why This Tool is Non-Negotiable for Medicals
This official IRCC tool is your safeguard against fraud and ensures your medical examination report is valid. The physicians listed are specifically authorised by the Canadian government and are the only ones who can submit results directly to IRCC through their secure eMedical system. This direct submission process is a key part of the application and cannot be bypassed.
The tool clearly explains if you need an exam. For example, if you plan to stay in Canada for more than six months or have recently lived in certain countries, a medical exam will be a mandatory part of the documents required for your Canada tourist visa. Using this tool eliminates any guesswork.
How to Use the Panel Physician Finder Effectively
The tool is straightforward, designed to get you the correct information quickly without confusion.
- Find Your Local Clinic: Simply select "Nigeria" from the country dropdown menu. The tool will generate a list of all approved panel physicians and clinics in cities like Lagos, Abuja, and Port Harcourt, along with their addresses and phone numbers.
- Prepare for Your Appointment: The website provides guidance on what to bring, such as your passport, glasses or contact lenses, and any existing medical reports.
- Understand the Process: Results are sent electronically by the clinic to IRCC. You will be given a document confirming you completed the exam, which you must include with your visa application.
Pro Tip: Schedule your medical appointment as soon as you confirm it's needed. Appointment slots at clinics like IOM in Lagos or Abuja can be limited, and the entire process can take a few weeks. Do not wait until the last minute, as this could jeopardise your travel plans.
Using this tool is free. However, you are responsible for paying the medical examination fees directly to the clinic. These fees can vary, so it is wise to call a few approved clinics to compare costs before booking.
Website Link: https://secure.cic.gc.ca/pp-md/liste-md.aspx
5. PhotoAiD (Canada visa photo tool)
One of the most common and easily avoidable reasons for a visa application delay or rejection is an incorrect photograph. The Canadian government has very strict specifications for visa photos, from the exact dimensions to the background colour. PhotoAiD is an online tool designed to eliminate this risk by helping you create a perfectly compliant visa photo from the comfort of your home.
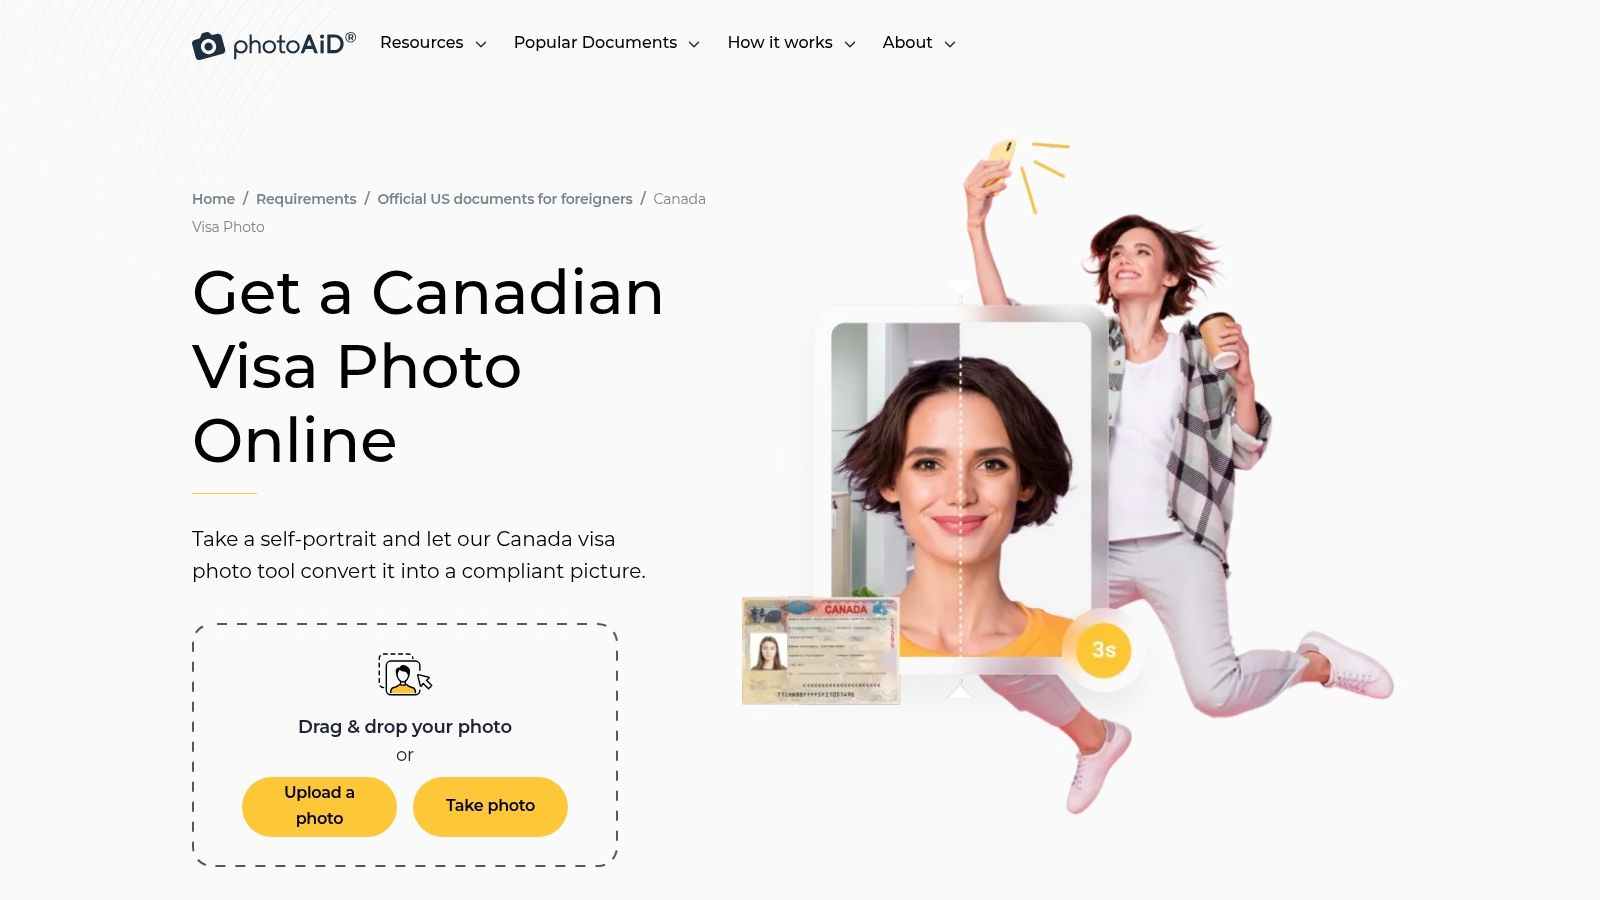
Why It's a Reliable Tool for Your Application
Finding a photo studio in Nigeria that is consistently up-to-date with the latest Canadian visa photo requirements can be a challenge. PhotoAiD solves this by using artificial intelligence and human verification to ensure your photo meets every single specification. This makes it an invaluable tool among the documents required for your Canada tourist visa.
For example, the tool automatically crops your image to the precise 35 mm x 45 mm size, removes any non-compliant background and replaces it with plain white, and ensures your head size is within the required 31 mm to 36 mm range. This level of precision is difficult to guarantee at a standard photo studio in Ikeja or Wuse.
How to Use PhotoAiD Effectively
The platform is designed to be straightforward and user-friendly, even for those who are not tech-savvy.
- Upload Your Photo: Take a photo with your smartphone against any background. The key is to have good lighting and a clear, forward-facing view.
- Let the AI Work: The tool’s AI will automatically adjust the photo. It will resize it, centre your face, and replace the background, providing you with a preview of the final, compliant image.
- Get It Verified: PhotoAiD offers an expert check to confirm the photo meets all official requirements. They also provide an acceptance guarantee, offering a refund if the photo is rejected for non-compliance, which adds a layer of security to your application.
Pro Tip: After you receive your digital photo file from PhotoAiD, you can print it at a high-quality printing shop in Nigeria. Ask for it to be printed on matte or semi-matte photo paper to meet the IRCC’s requirements. This is often faster and cheaper than ordering prints to be delivered.
The service is a paid one, with costs for the digital file and an additional fee for ordering physical prints. However, considering the potential cost and delay of a rejected application due to a bad photo, it is a worthwhile investment.
Website Link: https://photoaid.com/en-ng/canada-visa-photo
6. AXA Mansard (Nigeria) — Travel Insurance
While not always a mandatory upfront requirement, including proof of travel insurance can significantly strengthen your Canadian tourist visa application. It demonstrates that you are a responsible traveller who has made provisions for potential medical emergencies. AXA Mansard’s online platform is a go-to resource for Nigerian applicants to quickly secure this crucial supporting document.
Why It's a Strong Supporting Document
Including a valid travel insurance policy shows the visa officer that you will not become a financial burden on the Canadian healthcare system if you fall ill or have an accident. This adds another layer of credibility to your application, alongside your proof of funds, by showing you have planned for every contingency. A policy certificate from a reputable Nigerian insurer like AXA Mansard is easily verifiable and understood by visa officers.
How to Use the AXA Mansard Website Effectively
The platform is designed for speed and convenience, allowing you to get your policy document in minutes.
- Get an Instant Quote: On the travel insurance page, enter your destination (Canada), travel dates, and the age of the traveller. The system will immediately generate quotes for different plans.
- Select a Plan and Pay: Choose the plan that best suits your needs and budget. You can pay in Naira using Nigerian debit cards (Verve, Mastercard) or other local payment methods, which is a major advantage.
- Receive Your Certificate Instantly: Once payment is confirmed, your official travel insurance certificate is emailed to you almost immediately. You can then print this document to include with your visa application file.
Pro Tip: When purchasing your policy, ensure the coverage dates align perfectly with the proposed travel dates in your visa application. Any discrepancy could raise questions. Also, select a "Worldwide" plan that explicitly includes Canada, as some plans may have regional limitations.
Purchasing a policy involves a premium, with the cost depending on your age, trip duration, and the coverage level you choose. However, the peace of mind and the added strength it gives your application make it a worthwhile investment.
Website Link: www.axamansard.com/insurance/travel
7. Expedia — Refundable Hotel Bookings for Proof of Accommodation
While not a direct visa document portal, Expedia is an invaluable tool for securing one of the key supporting documents: proof of accommodation. Visa officers want to see a clear plan for where you will stay in Canada. Expedia allows you to book hotels with free cancellation policies, providing the necessary confirmation without locking in your money before the visa is approved.
Why It's Your Essential Tool for Itinerary Planning
Booking a non-refundable hotel in Lagos is one thing, but committing thousands of Naira to a Canadian hotel before your visa is even approved is a huge financial risk. Expedia solves this problem by making it easy to find and book accommodations that offer full refunds. This allows you to generate a legitimate hotel confirmation, a critical piece of the documents required for your Canada tourist visa, that satisfies the visa officer's need for a planned itinerary.
This approach demonstrates that you have organised your trip, a key factor in proving you are a genuine visitor. It shows you have a place to stay, which strengthens your overall application.
How to Use Expedia Effectively
Finding the right booking on Expedia requires a strategic approach to avoid any unexpected charges.
- Filter for Flexibility: On the search results page, immediately use the "Free cancellation" filter. This is the most important step to ensure you only see properties that offer refundable rates.
- Read the Fine Print: Before booking, click on the property and carefully read the cancellation policy. Note the exact deadline for free cancellation (e.g., "free cancellation before 4 PM on 25 October"). Set a reminder on your phone a few days before this deadline.
- Generate Your Proof: Once booked, you will receive an email confirmation. Save this confirmation as a PDF. It will contain your name, the hotel's details, and the booking dates, which is exactly what you need to upload to your IRCC application.
Pro Tip: Book your refundable hotel to align perfectly with the travel dates mentioned in your application form and your flight itinerary. Consistency across all your documents is crucial. Any discrepancy, like hotel dates not matching flight dates, can raise red flags for the visa officer.
Using the platform to search and find hotels is free. You will only need a credit or debit card to secure the booking, but no money will be charged if you cancel within the specified free-cancellation window.
Website Link: https://www.expedia.com/lp/b/free-cancellation
Canada Tourist Visa: 7-Provider Document Requirements Comparison
Item Implementation complexity 🔄 Resource requirements ⚡ Expected outcomes ⭐ Ideal use cases 💡 Key advantages 📊 JapaChat Low 🔄 — chat UX, instant answers Low ⚡ — web/mobile + internet; optional paid consults High ⭐ — fast, tailored guidance; reduces misinformation 💡 Early-stage planning for Nigerians (visas, checklists, country guides) 📊 AI + vetted consultants; Nigeria‑focused; free start IRCC (Canada portal) Medium 🔄 — form completion & validated PDFs Low ⚡ — internet, PDF tools Very high ⭐ — authoritative, policy‑current requirements 💡 Official application submission and exact document checklists 📊 Official source; direct payment & submission VFS Global (VACs Nigeria) Low–Medium 🔄 — appointment booking; in‑person steps Medium ⚡ — travel to VAC, time for biometrics High ⭐ — secure biometrics and passport handling 💡 Booking biometrics/secure passport surrender after BIL 📊 Official VAC services; clear on‑site guidance; optional courier IRCC — Find a Panel Physician Low 🔄 — locate clinic and book exam Medium ⚡ — clinic fees, travel, appointment time High ⭐ — approved medicals accepted by IRCC 💡 Required immigration medical exams for temporary residents 📊 Lists authorized physicians; avoids non‑compliant clinics PhotoAiD (visa photo tool) Low 🔄 — upload or take photo; auto adjust Low ⚡ — smartphone/camera + paid service for files/prints High ⭐ — reduces photo rejections; compliance guarantee 💡 Produce Canada‑compliant visa photos remotely 📊 AI cropping + human verification; refund if rejected AXA Mansard (travel insurance) Low 🔄 — online quote & purchase, instant policy Medium ⚡ — premium varies by age/destination Medium ⭐ — immediate certificate to support visa file 💡 Provide proof of medical/evacuation coverage for applications 📊 Local payments; fast issuance; multiple plan options Expedia (refundable hotel bookings) Low 🔄 — search & book refundable options Low ⚡ — payment; possible temporary holds Medium ⭐ — usable proof of accommodation without commitment 💡 Generate cancellable confirmations for visa evidence 📊 Large inventory; refundable filters; flexible cancellation windows Your Next Steps to a Successful Application
Navigating the extensive checklist of documents required for a Canada tourist visa can feel like a major project. However, as we've detailed, breaking it down into manageable steps and leveraging the right tools transforms this challenge into a clear, achievable goal. The secret to a successful application lies not just in submitting documents, but in telling a coherent and believable story about your visit and your intention to return to Nigeria.
Your primary focus should always be on demonstrating strong ties to your home country. This is the cornerstone of your application. Your employment letter, CAC business registration documents, property documents (like a Deed of Assignment), and proof of family connections in Nigeria are not just pieces of paper; they are powerful evidence that you have compelling reasons to come back after your holiday. Similarly, your financial documents must paint a picture of stability, showing you can comfortably fund your trip without any intention of working illegally in Canada.
Key Takeaways and Actionable Advice
To move forward effectively, keep these critical points in mind:
- Be Meticulous: Double-check every single detail. A simple mistake, like a name spelled differently on two separate documents or a date that doesn’t align, can raise red flags. Consistency across all your paperwork is non-negotiable.
- Use Official Sources: Rely on the IRCC website and VFS Global Nigeria as your ultimate sources of truth. Policies and forms can change, and these platforms will always have the most up-to-date information.
- Leverage Specialised Tools: Each tool we've discussed serves a specific, crucial purpose. Use PhotoAiD to get your visa photo right the first time, book a refundable hotel on Expedia to secure your proof of accommodation without financial risk, and find an approved doctor through the IRCC’s Panel Physician tool to avoid medical exam delays. These small steps save you from major headaches later on.
- Don't Underestimate the "Why": Your purpose of travel letter is your chance to speak directly to the visa officer. Be clear, concise, and genuine about your reasons for visiting Canada. A well-written letter can tie all your documents together and make your application much more compelling.
As you gather the documents required for a Canada tourist visa, think of it as building a case. Each document is a piece of evidence supporting your claim as a genuine tourist. With careful organisation and the support of modern tools, you are well-equipped to present a strong, convincing application that paves the way for your Canadian adventure.
Feeling overwhelmed or have a unique question about your specific situation? Get instant, AI-powered guidance tailored for Nigerian applicants with JapaChat. Visit JapaChat to simplify your journey and ensure your application is as strong as it can be.
-
How to Obtain a Work Permit in Canada: A Practical Guide for Nigerians
Getting a Canadian work permit from Nigeria starts with a simple, yet crucial, first step: securing a job offer from a Canadian employer. In most cases, your new employer will also need to get a document called a Labour Market Impact Assessment (LMIA). Once you have your offer letter and other key documents, you'll apply directly to Immigration, Refugees and Citizenship Canada (IRCC).
It's a process that demands careful planning, but with the right information, you can navigate it successfully.
Your Journey to Working in Canada from Nigeria
The idea of moving to Canada for work can feel as daunting as navigating the Third Mainland Bridge during rush hour. But just like that journey, it becomes much more manageable when you have a clear map. Thousands of Nigerians have made this move, and this guide is designed to be your personal roadmap, cutting through the complex jargon to give you practical, actionable advice.
Think of your journey as having two main lanes. The most common route for Nigerians is the Employer-Specific Work Permit, which ties you to one company. The other, less travelled path is the Open Work Permit, which offers more flexibility but is only available in very specific situations.
Understanding the Key Players
Before we get into the details, let's get familiar with two names you'll see a lot. Think of them as the gatekeepers on your path to Canada.
- IRCC (Immigration, Refugees and Citizenship Canada): This is the Canadian government department in charge of everything immigration. They set the rules, review your application, and ultimately decide whether to approve your permit.
- LMIA (Labour Market Impact Assessment): This is a document a Canadian employer often needs to get before they can hire a foreign worker. To get an LMIA, the employer has to prove to the government that no Canadian citizen or permanent resident was available to do the job.
For most people, the biggest challenge is finding a job with an employer who is willing to go through the LMIA process. It’s the cornerstone of a successful application.
A strong application is built on a foundation of thorough preparation. Understanding these core concepts from the start helps you avoid common mistakes and sets realistic expectations for how long this will all take.
A Quick Look at Your Options
Choosing the right work permit is the first major decision you'll make. This table breaks down the main options to help you see which path might be right for you.
Canadian Work Permit Options for Nigerian Applicants
Permit Type Job Offer Required? Who It's For Main Hurdle Employer-Specific Yes, from a specific employer The vast majority of Nigerian professionals with a Canadian job offer. Finding an employer willing to secure a Labour Market Impact Assessment (LMIA). Open Work Permit No Spouses of certain international students/workers or post-graduate students. Meeting the very specific and strict eligibility criteria. PGWP (Post-Graduation) No Nigerians who have graduated from an eligible Canadian school. You must complete a qualifying programme of study in Canada first. Bridging Open Permit No Applicants who have already applied for Permanent Residency in Canada. You must have an active Permanent Residency application in progress. As you can see, your personal situation—whether you have a job offer, have studied in Canada, or have a spouse there—will determine which permit you can apply for.
If your job offer comes with a move, it's smart to learn how to negotiate a relocation package with your new employer. A good package can make a huge difference, helping cover your flight, shipping costs, and even your first month's rent. The work permit is just one piece of the puzzle, and you can learn more about how to successfully relocate to Canada from Nigeria in our comprehensive guide.
Choosing Your Canadian Work Permit Pathway

Alright, now that we've covered the basics, let's get into the details. When you're thinking about working in Canada, you're essentially looking at two major roads. One is the main expressway that most people travel on. The other is a more exclusive route, available only to a select few. Which one you take depends entirely on your personal circumstances.
The most common pathway, and the one most Nigerians will end up on, is the Employer-Specific Work Permit. As the name suggests, this permit ties you to a single Canadian employer. Then there's the Open Work Permit, which offers the freedom to work for nearly any employer in Canada but comes with much stricter eligibility rules.
The Employer-Specific Permit: The LMIA Route
This is the reality for the vast majority of professionals in Nigeria looking to make the move. The process is straightforward in theory: you secure a job, a Canadian company agrees to hire you, and they sponsor your permit. But here's the catch—your employer has a big hurdle to clear first. They need to get a positive Labour Market Impact Assessment (LMIA).
So, what’s an LMIA? Think of it as the Canadian government’s way of protecting its local job market. Before an employer can hire you, they have to prove that they advertised the position across Canada and couldn't find a qualified Canadian citizen or permanent resident to fill it. It’s a process that can be quite long and costly for the company, making it a significant commitment on their part.
Let's imagine a real-world scenario.
Tunde, a senior software developer from Lagos, gets a fantastic offer from a tech startup in Toronto. The company had been struggling for months to find someone with his niche skills in AI development. They apply for an LMIA, showing proof of their recruitment efforts, and thankfully, it gets approved. With that LMIA approval and his job offer letter in hand, Tunde can now apply for his employer-specific work permit.
This route is particularly common in fields where Canada is experiencing labour shortages. We see it all the time in:
- Information Technology (IT): Roles like software engineers, cybersecurity analysts, and data scientists are always in demand.
- Healthcare: Canada has a constant need for nurses, personal support workers, and medical lab technicians.
- Skilled Trades: If you’re a welder, electrician, or heavy-duty mechanic, many employers are willing to go through the LMIA process for you.
Remember, getting the LMIA is the employer's job, not yours. Your focus should be on landing a job offer from a company that is ready and willing to take on this critical step.
The Open Work Permit: Freedom with Strict Rules
On the flip side, an Open Work Permit offers incredible flexibility. You don't need a job offer or an LMIA to apply. But, and this is a big but, it's only available to a very small, specific group of people. You can't just apply for one because you want the freedom to job-hunt in Canada.
This is not a pathway for someone in Nigeria hoping to land in Canada first and then start looking for work. It’s designed for people who already have a strong, direct connection to Canada.
Here's a typical example.
Aisha’s husband, David, receives an admission letter to study for his master's degree at the University of Manitoba. Because David will be a full-time international student, Aisha becomes eligible to apply for an Open Work Permit as his spouse. This permit allows her to join David in Canada and work for any employer, helping to support their family while he completes his studies.
Other common situations where Nigerians might qualify for an Open Work Permit include:
- Spouses of Skilled Workers: If your partner holds an employer-specific work permit for a high-skilled job (TEER 0, 1, 2, or 3), you might be eligible for an open permit yourself.
- Post-Graduation Work Permit (PGWP): After graduating from an eligible Canadian college or university, many Nigerian students can get an Open Work Permit. You can learn more in our detailed guide to the Canada Post-Graduate Work Permit.
Figuring out which of these two paths you fit into is the most crucial first step in your journey. For most people reading this, the focus will need to be on securing that all-important job offer that unlocks the employer-specific route.
Navigating Canada's Tougher Stance on Immigration
Let's be straight with you—the dream of working in Canada is still alive, but the game has changed. The Canadian government is pulling back the welcome mat a bit, actively trying to lower the number of temporary residents. For anyone in Nigeria eyeing a work permit, this means the competition is fiercer than ever.
This isn't to scare you off. It's to prepare you.
The days of simply sending in a "good enough" application are long gone. With fewer invitations being sent out, your application needs to be more than just complete; it has to be perfect. Think of it as a competition where only the most meticulously prepared candidates make the cut.
The Numbers Don't Lie
This isn't just a hunch; the data tells a clear story. The influx of new temporary workers has slowed down significantly.
IRCC data shows that in the first eight months of the year, Canada averaged about 19,300 new work permit holders each month. Compare that to the same period last year, when the average was 37,600 per month. That's a staggering drop of nearly 50% year-over-year. This is a deliberate move by the federal government, and you can get a deeper look at these population trends from Scotiabank's economic analysis.
What does this mean for your application? It means visa officers are now scrutinising every single detail. A small mistake that might have slipped by a year ago could now be the very thing that gets your application refused.
Provincial Nominee Programs Are Feeling the Squeeze Too
It’s not just the federal work permit routes that are tightening their belts. The Provincial Nominee Programs (PNPs) have always been a fantastic pathway for skilled workers, allowing provinces to hand-pick people with the exact skills they need.
But as more and more people apply through PNPs, the competition has exploded. A province like Ontario or British Columbia might get thousands of applications for just a few hundred spots in any given draw.
So, as a Nigerian applicant, here’s what you need to be ready for:
- The Bar is Higher: Provinces are demanding more. Think higher language scores, more specific work experience, or a stronger proven connection to the province.
- Targeted Invitations: Many provinces are now only inviting candidates from specific, high-demand fields like healthcare or the skilled trades. If your profession isn't on their priority list, getting an invitation is a long shot.
- Only the Best Profiles Get Picked: Simply meeting the minimum criteria won't cut it anymore. Your profile has to be exceptional and perfectly match what the province is searching for.
In this new climate, your strategy is everything. You're not just filling out forms; you're building a rock-solid case that proves to a visa officer that you are an ideal candidate who will make a real contribution to Canada.
Understanding this new reality is the first crucial step. It means you have to be strategic, detailed, and proactive from the very beginning. The goal is to put together an application so strong and well-documented that it leaves no room for doubt. The effort you put in now will make all the difference.
A Practical Guide to Your Application Process
With the tougher immigration landscape these days, your application isn't just a pile of papers—it's the story you're telling the visa officer. Think of this section as your hands-on guide to putting together a complete and convincing application package right here from Nigeria. Every single document matters, and getting it right the first time can be the difference between success and a frustrating refusal.
The whole thing boils down to three main phases: gathering your documents, accurately filling out the online forms, and then showing up for your biometrics appointment.
This infographic gives you a clean visual of the core stages.
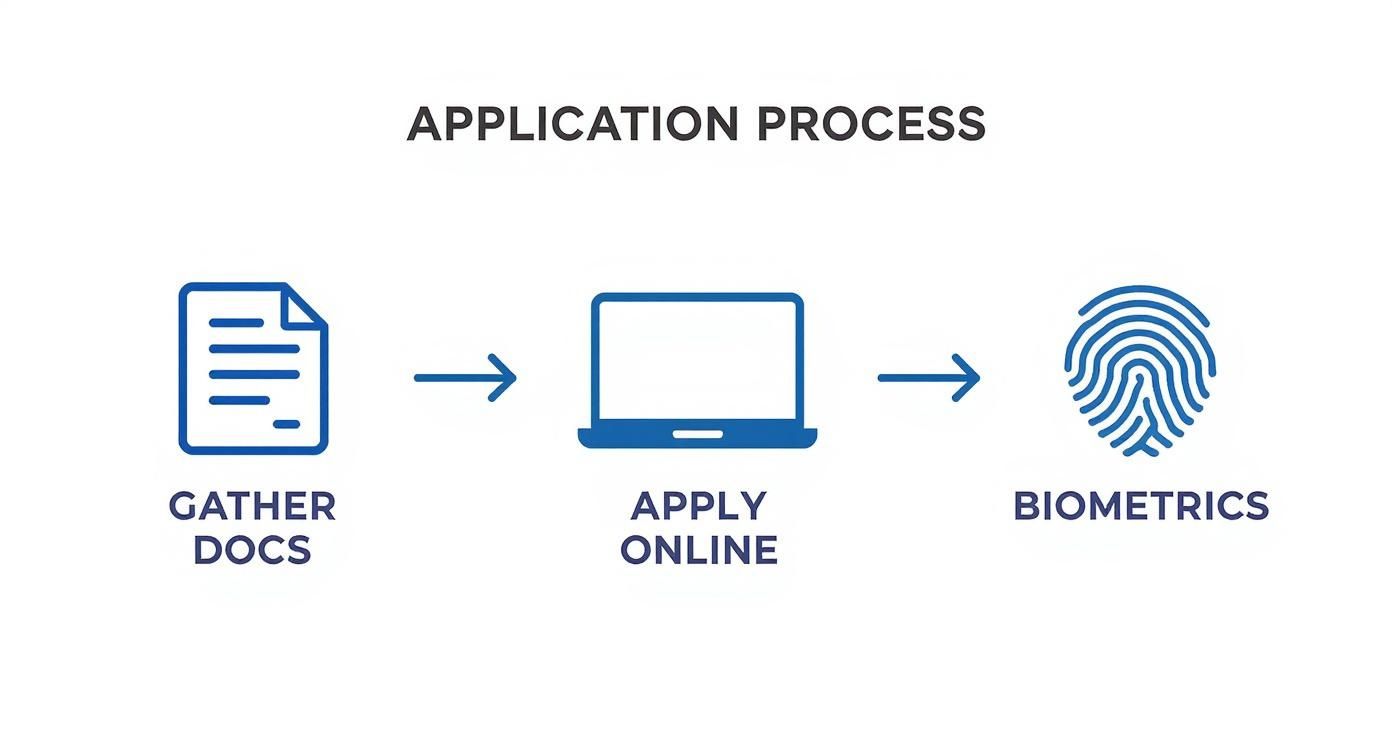
As you can see, it’s a logical sequence: prepare, submit, and verify. Each stage builds on the one before it, which is why a solid, organised approach to gathering your documents is absolutely essential for a smooth process later on.
Assembling Your Documents
Think of this part as building your case file. You need to provide rock-solid proof for every claim you make. I’ve seen applications get delayed or even refused for one missing document, so attention to detail is your best friend here.
Getting your documents in order is the foundation of a strong application. Below is a checklist of the essentials you'll need, along with some practical advice on where to get them in Nigeria and what to watch out for.
Essential Document Checklist for Nigerian Applicants
Document Where to Get It in Nigeria Pro Tip Nigerian International Passport Nigeria Immigration Service (NIS) office. Check your expiry date! It must be valid for your entire intended work period in Canada. If it's expiring soon, renew it before you apply. Official Job Offer Letter Your Canadian employer. This needs to be detailed: your role, salary, responsibilities, and the employer's full contact info must be clearly stated. LMIA Approval Letter Your Canadian employer provides this (if required). For most Employer-Specific permits, this is non-negotiable. It proves no Canadian could fill the role. Proof of Educational Qualifications Your university/polytechnic, WES (for evaluation). Include your degree certificate, transcripts, and any professional certifications relevant to the job. A WES evaluation adds a lot of credibility. Police Clearance Certificate Nigerian Police Force Criminal Investigation Department (CID), Alagbon, Lagos or Central Police Registry, Abuja. This can take time. Start the process early to avoid last-minute panic. Don't leave this till the end. Proof of Funds Your Nigerian bank. You'll need 6 months of bank statements. A reference letter from your bank stating your account balance and history is also a great addition. Digital Photograph Any professional photo studio. Make sure it meets IRCC’s specific photo requirements for size, background, and facial expression. They are very strict about this. Remember, the goal is to present a clear, consistent, and well-supported application. Every document should strengthen your case.
Pro Tip: When it comes to notarising documents, don't cut corners. A simple court affidavit might not cut it for Canadian immigration standards. Make sure you use a registered Notary Public. Paying for proper notarisation can save you from having your documents questioned later.
Conquering the IRCC Online Portal
Once you have all your documents scanned and ready to go, the next step is creating an account on the official Immigration, Refugees and Citizenship Canada (IRCC) website. This is where you’ll actually submit everything, and it’s also where many applicants make small but very costly mistakes.
Navigating the portal requires patience. The initial questionnaire is critical because it determines the exact forms and document checklist you'll get. Answer every question truthfully and carefully. A common mistake I see is people misinterpreting a question, which generates the wrong checklist and leads to an incomplete application from the start.
To avoid falling into this trap:
- Read every question twice. The wording can be tricky. Make sure you know exactly what they're asking before you select an answer.
- Upload files correctly. Ensure your scans are crystal clear, in the right format (usually PDF), and under the file size limit. A blurry or unreadable document is as good as a missing one.
- Double-check everything before submitting. Go over every single form to hunt for typos or inconsistencies. Your name must appear exactly as it does on your passport.
A well-written letter of explanation can be a powerful tool to clarify any grey areas in your application. For some solid guidance on how to structure this, you can learn more about crafting a compelling letter of intent for your visa application, as many of the principles are the same.
The Biometrics Process in Nigeria
After you’ve submitted your application and paid the fees online, you'll receive a Biometric Instruction Letter (BIL). You absolutely cannot book your appointment without this letter. Your biometrics—your fingerprints and photograph—have to be done in person at a Visa Application Centre (VAC).
In Nigeria, these centres are run by VFS Global, with the main ones located in Lagos and Abuja.
- Book it immediately. As soon as that BIL lands in your inbox, get on the VFS Global website to book your slot. Appointments can fill up really fast.
- What to bring with you. You’ll need your international passport, the Biometric Instruction Letter, and your appointment confirmation page.
- What happens at the VAC? The process itself is quick and painless. An official will scan your fingerprints and take a digital photo. You’re usually in and out in less than 30 minutes.
This is a mandatory step. Your application simply will not be processed until your biometrics are on file with IRCC.
Paying Your Application Fees
The last hurdle before your application officially enters the processing queue is paying the fees. This includes the work permit processing fee (currently CAD $155) and the biometrics fee (currently CAD $85).
Paying from Nigeria can be tricky because of the international transaction limits often placed on Naira cards.
- Use a Domiciliary Account. Honestly, this is the most reliable method. Pay with a VISA or MasterCard that's linked to a domiciliary account (USD is best).
- Try a Prepaid Dollar Card. Some Nigerian banks offer prepaid dollar cards which are specifically for international online payments and can work well here.
- Call Your Bank First. Before you even try to make the payment, give your bank a call. Ask about their current policy on international online transactions to avoid the frustration of a failed payment, which will only delay your submission.
Common Reasons for Refusal and How to Avoid Them
Getting that refusal letter after months of dreaming, planning, and hard work is devastating. It’s a major setback, but for many Nigerian applicants, it’s often an avoidable one. The first step to building an application that’s too strong to be denied is to understand exactly why they get refused in the first place.
Many rejections for Nigerians come down to a few key areas where the visa officer simply isn't convinced. These officers are trained to spot inconsistencies and potential risks. If your application raises even a single red flag, a refusal is almost guaranteed.
And the numbers don't lie. A significant chunk of applications just don't make the cut. In a recent eight-month period, a staggering 251,540 work permit applications were submitted from outside Canada. Out of these, 71,995 were refused—that's a refusal rate of about 28%. You can dig deeper into these work permit application trends and data. This statistic alone should tell you how critical it is to get your application perfect.
Weak Proof of Funds and Financial Instability
This is one of the biggest pitfalls. It’s not just about having enough money; it’s about the story your bank account tells. You have to prove to the visa officer that you can stand on your own two feet when you land in Canada.
A classic mistake I see all the time is "funds parking." This is when a huge, unexplained sum of money suddenly lands in your bank account right before you apply. To a visa officer, this screams "borrowed money," and it immediately undermines your credibility.
Your bank statements need to show a stable financial history, ideally for at least six months.
- Show a steady income: Make sure your salary is regularly paid into the account you're presenting. Consistency is your best friend.
- Explain large deposits: Did you sell a car or a plot of land? Great. Include the sales agreement and explain it clearly in your Letter of Explanation. Don't leave them guessing.
- Use your own account: While having a sponsor is fine, relying only on their account can weaken your case. It’s always stronger to show sufficient funds in an account with your own name on it.
A visa officer needs to be confident that you can manage your money and won’t become a financial burden before you even get your first Canadian paycheque. Think of your bank statement as your financial CV—it needs to tell a compelling story of stability.
Doubts About Your Ties to Nigeria
This is arguably the toughest hurdle for us Nigerians. The visa officer must be completely convinced that you will pack your bags and head home when your work permit expires. If there’s any doubt in their mind that you might overstay, your application is dead on arrival. We call this "demonstrating ties to your home country."
Your job is to paint a vivid picture of the life you have in Nigeria—a life you fully intend to return to. Strong family connections are a good start, but on their own, they are rarely enough.
Put yourself in the visa officer's shoes. A young, single applicant with no property, a modest job, and few family obligations has very little pulling them back home. Contrast that with someone who has a spouse and children staying behind in Nigeria, a mortgage to pay, and a senior role to return to. The second case is much more convincing.
To build a strong case for your ties, provide solid evidence of:
- Family Responsibilities: Include birth certificates for your children and your marriage certificate. If your spouse has a good job in Nigeria, include their employment letter and pay slips.
- Property Ownership: Title deeds for land or a house are golden. Even a tenancy agreement for your rented apartment shows you have a place you're committed to.
- Employment: A letter from your current Nigerian boss stating that you are on an approved leave of absence and are expected back is incredibly powerful evidence.
Incomplete or Inconsistent Paperwork
This is the most frustrating reason for a refusal because it is 100% preventable. Little mistakes, a single missing document, or contradictory information can sink your application before it gets a fair review.
For instance, your name must be spelled identically across every single document—your passport, your job offer, your bank statements, everything. A tiny typo creates an inconsistency that makes visa officers suspicious. Likewise, if your job offer letter states a salary of CAD $60,000 per year, but you entered CAD $55,000 on your application form, that's a major red flag.
The solution is to be meticulous. Create a checklist and physically tick off every document. Read every form three times before you even think about submitting it. Better yet, get a trusted friend or family member to review everything. A second pair of eyes can catch errors you’ve become blind to. A flawless, professionally organised application sends a strong signal that you are a serious, organised, and credible candidate.
Your Top Questions Answered: Nigerian Applicants Edition
When you're navigating the Canadian work permit process from Nigeria, a lot of specific, very practical questions pop up. Let's get straight into the most common ones we hear, with realistic answers to help you put together the strongest application possible.
How Much Money Do I Really Need for Proof of Funds?
This is always a top concern, and the honest answer is there's no single magic number set in stone by IRCC. What you're trying to do is prove you can easily cover your travel and support yourself until that first Canadian paycheque comes through.
For a single person, a good target to aim for is somewhere between CAD $3,000 and CAD $5,000. And remember, this doesn't include your flight ticket.
But here’s the real secret: the story your bank statements tell is more important than the final balance. You'll need to provide official statements for the last four to six months. A huge red flag for visa officers is seeing a large, unexplained sum of money deposited right before you apply. If you recently sold a car or a piece of land, that's perfectly fine—just make sure you include the sales agreement and explain it clearly in your Letter of Explanation. This proves the funds are genuinely yours and not just borrowed to make your account look good.
Can My Family Come with Me on a Work Permit?
Yes, absolutely. In many cases, your immediate family can join you in Canada, which is one of the best parts of getting a work permit for a skilled job.
If you land a job offer and get a work permit for a high-skilled role (that's anything under TEER 0, 1, 2, or 3), your spouse or common-law partner might be able to get an Open Work Permit. This is a game-changer because it lets them work for almost any employer in Canada. Your kids can also come along and apply for study permits to go to school.
We always recommend submitting all your family's applications together in one package. It gives the visa officer a clear, transparent picture of your plans. Just be sure you can show enough funds to support everyone, not just yourself.
What's a Realistic Processing Time from Nigeria?
Patience is a virtue here, because processing times can be unpredictable and they change all the time. The official IRCC website gives you an estimate, but you should prepare yourself mentally and financially for a wait of several months.
For applications coming from Nigeria, a realistic window is often between three to six months after you've done your biometrics. It can sometimes be shorter or even longer, depending on how busy IRCC is at that moment.
This is critical: do not make any major life changes based on an estimated timeline. Don't quit your job, sell your car, or end your lease in Nigeria until that visa is actually stamped in your passport. Acting too soon can put you in a very tough spot if there are unexpected delays.
What Are My Chances of Getting a Work Permit Without a Job Offer?
Let's be direct about this. For most Nigerians, the chances of getting a work permit without a job offer already lined up are extremely low. The entire Canadian system is built around filling specific gaps in the labour market, which is why the job offer is the foundation of almost every work permit application.
The main way to get a permit without a specific employer is through an Open Work Permit, but this isn't a general visa you can just apply for to come and look for a job. It's reserved for very specific situations, like:
- You're the spouse of an international student in Canada.
- You're the spouse of a skilled worker who already has a Canadian work permit.
- You've just graduated from a Canadian college or university and qualify for a Post-Graduation Work Permit (PGWP).
The idea of coming to Canada as a visitor and then hoping to find an employer to sponsor you is not a reliable strategy. It rarely works and can actually hurt your chances on future applications. Your focus should be 100% on securing a valid job offer from a Canadian employer before you even start the application process.
Planning your move to Canada can feel overwhelming, but you don't have to figure it all out alone. For instant, accurate answers to your immigration questions, check out JapaChat. Our AI-powered platform is designed just for Nigerians, offering clear guidance on visa requirements, documents, and personalized pathways. Sign up for free and start your journey with confidence.
-
A Guide to Visa Sponsorship Letters for Nigerians
At its core, a visa sponsorship letter is a formal document from a sponsor (an individual or a company in one country) to an embassy or high commission, confirming that they will accept full financial responsibility for a visa applicant's trip. Whether you're a Nigerian looking to bring a family member over for a visit, or a company in the UK wanting to hire a skilled worker from Nigeria, you're essentially telling the government, "I've got this person covered."
This isn't just a simple invitation. It's a legal and financial guarantee to the visa-issuing authority that the person you're sponsoring will be fully supported and won't become a public charge in that country. Honestly, getting this letter right is often the make-or-break moment for the entire visa application.
Why Your Sponsorship Letter Is So Important Now
If you think a quick, informal note will still do the trick, it’s time for a reality check. The days of casual letters for inviting a relative to the UK or a business partner to the US are long gone. Today, immigration officials scrutinise every word of that sponsorship letter.
This shift wasn't random. It’s a direct result of countries like the UK, Canada, and the US tightening their immigration policies. Your letter has evolved from a friendly gesture into a serious commitment with very real consequences if things go wrong.
The Game-Changing Immigration Rules
The main catalyst for this heightened scrutiny is the constant evolution of global immigration policies. Take the UK, for example. The recent changes to their immigration rules have significantly increased the salary thresholds for skilled workers and made family visa requirements stricter. Before these changes, many applications were rejected simply because of weak or vague sponsorship documents.
Just to give you an idea, data from various immigration advisory firms showed that a significant percentage of work and family-related visa applications were initially turned down due to poor sponsorship paperwork. Governments saw this and moved to tighten the requirements, making the sponsor's role far more official and legally binding.
Here's a quick look at how things have changed, which really underscores why your letter needs to be airtight now.
Visa Sponsorship Letters Then vs Now (Focus on UK/US)
Requirement Area Old System (A few years ago) Current System Sponsor's Identity Often informal, with minimal proof of identity required. Full legal name, address, and a copy of the sponsor's passport or residence permit is mandatory. Financial Proof A simple statement of support was sometimes sufficient. Sponsor must provide concrete evidence of financial capacity, like recent bank statements showing a specific minimum balance. Legal Standing The letter was seen more as a moral obligation. The letter is a legally binding document. The sponsor assumes liability for the visitor. Purpose of Visit Vague descriptions like "for a visit" were common. The purpose must be explicitly detailed (e.g., "to attend my graduation ceremony on [Date]"). Company Sponsorship A basic letter on company paper might have passed. Must be on official letterhead, include company registration number, and state acceptance of full immigration responsibility. As you can see, the bar is much higher. Stricter rules mean your letter has to be more detailed and persuasive than ever before.
This infographic gives a great visual summary of the core changes that directly affect how you should write your sponsorship letter.
Real-Life Scenarios and What Is at Stake
Let's ground this in reality for Nigerians. Think about the common situations where you'd need one of these letters. Each scenario has a different mission.
- Bringing Your Mother for Omugwo to the UK: You're in London and just had a baby. You want your mum from Lagos to come over to help. Your letter needs to prove you can comfortably house her, cover all her expenses, handle potential NHS costs, and guarantee she’ll return to Nigeria afterwards. It’s a deeply personal promise of her welfare.
- Inviting a Business Partner to the US: Your tech startup in Yaba needs a specialist from Silicon Valley for a critical three-week project. The sponsorship letter must come from your company, printed on official letterhead. It has to clearly outline the project, the consultant's specific role, and confirm that the company is taking on full financial and immigration responsibility during their stay in Nigeria.
- Sponsoring a Friend for Your Graduation in Canada: You're inviting your best friend from Abuja to be at your graduation ceremony in Toronto. Your letter has to convince the visa officer that your friend has strong ties to Nigeria (like a stable job, family, or property) and that you'll personally ensure they leave Canada right after the ceremony.
In every one of these cases, a poorly drafted letter can result in an instant visa denial. This means emotional stress, lost money on non-refundable flight tickets (which you shouldn't buy before the visa is approved!), and significant project delays for businesses. Global immigration is getting tougher everywhere—just look at the new UK immigration rules to see how this trend is playing out worldwide.
The real purpose of your letter is to build trust with the immigration officer. It has to erase any doubt about the visitor's intentions and your ability to be a responsible sponsor. Your word is your bond, and this letter is the official proof.
What You’re Really Signing Up For as a Sponsor
Before you put pen to paper on that sponsorship letter, you need to understand what you’re truly committing to. This is far more than a simple invitation for a friend’s graduation or a family visit for omugwo. You are formally telling a foreign government that you accept full legal and financial responsibility for another person for their entire time in that country.
This commitment is known as full immigration responsibility, and you can be sure that immigration authorities like the UK Home Office or US Citizenship and Immigration Services (USCIS) take it incredibly seriously. It’s your legal guarantee that your visitor will obey all the country's laws, leave when their visa expires, and won’t need to access public funds. It’s a serious promise that puts your own reputation and legal standing on the line.

What Happens When Things Go Wrong?
Let’s get practical about the consequences. Imagine you're a Nigerian in the UK and you sponsor a cousin for a visit. Your cousin then overstays their visa and starts working illegally.
Or, think about a Nigerian company sponsoring a foreign expert who then commits a crime. In both scenarios, the responsibility can fall back on you, the sponsor. The immigration authorities aren’t just going to focus on the visitor—they’re going to look at you, too.
The penalties can be severe and have a lasting impact:
- Heavy Fines: Authorities can hit you with significant financial penalties if your guest breaks their visa rules. We're talking about fines that can run into thousands of pounds or dollars.
- Getting Blacklisted: This is a big one. If you’re found to have sponsored someone who violates immigration laws, you could be blacklisted. This means you lose the privilege of sponsoring anyone in the future, whether for your business or your family.
- Legal Action: In the most serious cases, a sponsor could face prosecution. This is especially true for companies found to be careless with their sponsorship duties.
Why Sponsors Are Under the Microscope
You might be wondering why the process has become so strict. The simple truth is that the sponsorship system has been abused in the past, forcing immigration authorities to be much more thorough. They need to be absolutely certain that you are who you say you are and that you can actually back up your promises.
This is exactly why your application needs solid proof. For an individual, that means providing a copy of your passport data page, proof of your immigration status (e.g., UK Biometric Residence Permit), and recent bank statements. For a company, it means showing your official registration documents and business bank statements. For more details you can explore insights on Nigerian corporate immigration practices.
Immigration authorities operate on a “trust but verify” model. They are no longer just taking a sponsor’s word for it. Your documents need to paint a clear, undeniable picture of your stability, legitimacy, and financial capacity.
Ultimately, when you sign that letter, you become the first line of defence for that country's immigration system. It's a role with real weight, and understanding these responsibilities is the first and most crucial step to a successful application.
What Every Sponsorship Letter Must Include
When an immigration officer picks up your sponsorship letter, they’re not looking for a story; they’re hunting for facts. Think of it less like a friendly note and more like a binding statement. Every detail you provide serves one purpose: to build a rock-solid case of trust and erase any doubt about the visitor's intentions and your ability to sponsor them.
Let’s get into the absolute must-haves that make a letter persuasive. Missing even one of these can be the weak link that leads to a visa denial.
Sponsor’s Information: The Foundation of Your Credibility
This is your formal introduction to the immigration authorities. It's your one shot to establish that you're a legitimate, responsible person or company. Being vague here is a massive red flag.
You need to be precise. Include your:
- Full Legal Name: Exactly as it appears on your passport or ID. No nicknames.
- Full Residential Address: Where you actually live in the host country, not just a P.O. Box.
- Contact Information: A phone number and email address that you actively use.
- Legal Status in the Host Country: State clearly if you're a citizen or a legal resident (e.g., "a Nigerian citizen with Indefinite Leave to Remain in the UK"). You'll need to back this up with proof.
If you’re a company sponsoring an employee or business partner, the bar is even higher. You must include the official company name, registered office address, and your company registration number. This number is non-negotiable; it proves you're a legally recognised business.
Applicant's Details: A Clear, Unmistakable ID
Next up, you have to clearly identify the person you’re sponsoring. The officer needs to match your letter to the visa application in front of them instantly, leaving zero room for confusion.
Make sure you state the applicant's:
- Full Legal Name: As written on their international passport.
- Date of Birth: This helps avoid any mix-ups with people who might have similar names.
- Passport Number: This is the unique identifier that directly links your letter to their travel document.
- Relationship to You: Spell out your connection simply and clearly. Are they your mother, brother, a business partner, or a close friend? A simple sentence like, "I am writing to sponsor my mother, Mrs Funke Adebayo…" is perfect.
My Key Takeaway: Clarity and precision are everything here. The information in your letter must match the applicant’s visa forms and passport details perfectly. Any difference, no matter how small, can cast doubt on the whole application.
Purpose of Visit: The 'Why' Behind the Trip
This is probably the most heavily scrutinised part of the entire letter. Immigration officials need a solid, believable reason for the visit. Wishy-washy statements like "for a short visit" or "tourism" are weak and a common reason for rejection.
Get specific. For example:
- For a Family Event: "To attend my graduation ceremony on August 15, 2024, at the University of Manchester."
- For Business: "To attend a series of project planning meetings for a new software launch from September 1st to September 21st, 2024, at our London head office."
- For Omugwo: "To visit my husband and me in Canada following the birth of our first child and to assist with postpartum care (Omugwo) for six weeks."
Duration of Stay: The Timeline of Your Responsibility
Just as critical as the 'why' is the 'how long'. You have to give exact dates for the visit. This signals to the immigration officer that there's a clear plan and, crucially, a definite end to the trip.
State a clear start and end date, like "from October 5, 2024, to November 18, 2024." This specific timeline reinforces that the visit is temporary and that you'll ensure the visitor leaves on time. This is a vital detail, much like what's required when you write a letter of intent for a visa application, where clear timelines are essential.
The Financial and Accommodation Guarantee
Finally, you must make a clear, unambiguous statement taking full financial responsibility. This is the heart of your promise in the visa sponsorship letter. A conditional or weak promise here suggests you might not be fully committed.
Use direct language that leaves no room for misinterpretation. A strong statement looks like this:
"I, [Your Full Name], hereby confirm that I will be fully responsible for all of [Applicant's Full Name]'s expenses during their stay in the United Kingdom. This includes, but is not limited to, the cost of return flight tickets from Lagos to London, accommodation at my residence located at [Your Full Address], daily feeding, local transportation, and any potential medical emergencies."
This one paragraph does three vital things: it confirms financial support, specifies where they will live, and accepts liability for unexpected costs. By including these non-negotiable elements, you elevate your letter from a simple invitation to a powerful document that meets the strict standards of immigration authorities.
Seeing it in Action: Real-World Letter Examples
Knowing the theory behind a visa sponsorship letter is a good start, but nothing beats seeing how it all fits together in practice. Seeing real-world examples helps you move from "what should I include?" to "I know exactly how to write this."
Let's walk through a few complete sample letters covering the most common reasons Nigerians need sponsorship. Think of these less as rigid templates and more as annotated guides. I’ll show you why certain phrases work and how each letter is crafted to speak directly to the concerns of a visa officer. You can then take these structures and adapt them to your own specific needs.

Example 1: Sponsoring a Parent for Omugwo in the UK
This is probably one of the most frequent scenarios for Nigerians in the diaspora. Your main goal here is to establish a strong, genuine personal connection and show that you meet the financial requirements to support your parent's visit.
[Your Full Name]
[Your Full UK Address]
[Your Phone Number]
[Your Email Address][Date]
The Visa Officer,
UK Visas and Immigration
[Address of the relevant application centre, e.g., Sheffield]Subject: Letter of Sponsorship for a Family Visitor Visa: Mrs. [Mother's Full Name], Passport No: [Her Passport Number]
Dear Sir/Madam,
My name is [Your Full Name], a Nigerian citizen with Indefinite Leave to Remain in the UK (BRP No: [Your BRP Number]). I am writing to formally sponsor the visa application for my mother, Mrs. [Mother's Full Name], born on [Her Date of Birth].
The purpose of her visit is a very special one for our family. She is coming to the UK to assist with traditional postpartum care (omugwo) following the recent birth of our child and to spend quality time with her new grandchild. We would love for her to stay with us for a period of six weeks, from [Start Date] to [End Date].
During her entire visit, my mother will be staying with my family and me at my residence, located at the address above.
I want to confirm that I will be taking full financial responsibility for her entire trip. This covers her round-trip airfare from Lagos to London, accommodation, feeding, local transport, and any private medical needs that might arise.
To support her application, I have attached the following documents:
- A copy of my Nigerian passport data page.
- A copy of my UK Biometric Residence Permit (BRP).
- My bank statements for the last six months showing sufficient funds.
- My employment contract and recent payslips.
- A copy of our new child’s birth certificate.
My mother has strong family and financial ties to Nigeria, including her other children and property she owns in Lagos. She fully intends to return home at the end of her visit. Thank you for your time and for giving her application your favourable consideration.
Sincerely,
[Your Signature]
[Your Printed Full Name]Expert Tip: Notice the specific mention of "omugwo." Using culturally relevant terms like this adds a layer of authenticity that a visa officer will understand, especially when supported by a birth certificate. It shows the visit has a genuine, culturally significant purpose. Also, listing the documents you’ve attached is a small touch that makes the officer's job much easier.
Example 2: UK Company Sponsoring a Nigerian for a Skilled Worker Visa
When a UK company is the sponsor, the letter needs a different, highly professional tone. It must be printed on official company letterhead and focus on the job role and Certificate of Sponsorship (CoS).
[Official Company Letterhead with Logo, Address, and Companies House Number]
[Date]
The Entry Clearance Officer,
UK Visas and ImmigrationSubject: Letter of Sponsorship for Skilled Worker Visa: Mr. [Applicant's Full Name], Certificate of Sponsorship Ref: [CoS Number]
Dear Sir/Madam,
On behalf of [Your Company Name] (Sponsor Licence No: [Your Sponsor Licence Number]), I am writing to confirm our sponsorship of the Skilled Worker visa application for Mr. [Applicant's Full Name], a Nigerian citizen (Passport No: [Their Passport Number]).
We have assigned a Certificate of Sponsorship (CoS) with reference number [CoS Number] to Mr. [Applicant's Last Name]. He has been offered the full-time, permanent position of [Job Title] at our company, which corresponds to the SOC Code [SOC Code]. His proposed annual salary will be £[Salary Amount].
[Your Company Name] is an A-rated sponsor and we confirm that we will meet our responsibilities as a licensed sponsor. We also certify that we will maintain the applicant's maintenance funds for the first month of his employment, should it be required.
Mr. [Applicant's Last Name] is a highly skilled professional whose expertise will be invaluable to our team. We have conducted a thorough recruitment process and are confident he is the right candidate for this role.
We trust you will find everything in order for a positive consideration of his visa application.
Yours faithfully,
[Your Signature]
[Your Printed Full Name]
[Your Job Title, e.g., HR Manager]Example 3: Nigerian Company Sponsoring a Foreign Partner for a Business Visit
This is a common scenario for Nigerian businesses collaborating with international experts. The focus is on the benefit to the Nigerian company.
[Official Company Letterhead with Logo, Address, and CAC Number]
[Date]
The Visa Consular Officer,
[Embassy/High Commission Name, e.g., Embassy of the Federal Republic of Germany]
[Embassy/High Commission Address in Abuja or Lagos]Subject: Letter of Sponsorship for Business Visa – Mr. [Partner's Full Name], Passport No: [Their Passport Number]
Dear Sir/Madam,
On behalf of [Your Company Name] (CAC Registration No: [Your CAC Number]), I am writing to sponsor the business visa application for Mr. [Partner's Full Name], a citizen of [Their Country]. Mr. [Partner's Last Name] is a Senior Consultant with our technical partner, [Their Company Name].
His visit to Nigeria is essential for our company's upcoming project. He will be in Lagos to conduct critical on-site training for our engineering team on new industrial equipment. The visit is scheduled for two weeks, from [Start Date] to [End Date].
[Your Company Name] accepts full financial responsibility for Mr. [Partner's Last Name] throughout his time in Nigeria. This commitment covers his return flight ticket, accommodation at the Eko Hotel & Suites in Lagos, a daily allowance, and all business-related transportation.
For your review, we have attached the following corporate documents:
- A copy of our company's Certificate of Incorporation (CAC).
- Our corporate bank statements for the last six months.
- A copy of my Nigerian passport data page as the company's representative.
Mr. [Partner's Last Name] is a senior employee at [Their Company Name] and has strong ties to his home country. He will return immediately after completing his duties in Nigeria.
We trust you will find everything in order for a positive consideration of his visa application.
Yours faithfully,
[Your Signature]
[Your Printed Full Name]
[Your Job Title]Common Mistakes That Lead to Visa Rejection
Learning from the mistakes of others is one of the smartest ways to get your visa application right the first time. A single error in your sponsorship letter can cast a shadow over your entire case, leading to a frustrating rejection. These aren't just simple typos; they are red flags to a visa officer.
So many applicants make small but critical mistakes that get their applications tossed out. Let's walk through some of the most common pitfalls I've seen over the years. I'll use some real-world examples to show you exactly what goes wrong and how to make sure your letter is rock-solid.
Vague Language and Unclear Timelines
This is probably the number one mistake. A visa officer needs concrete details, not fuzzy promises. Using phrases like "for a short trip" or "to visit for a while" is an immediate red flag. It makes it seem like the trip isn't well-planned and instantly raises questions about the applicant's real intentions.
- What Went Wrong: A sponsor in Canada writes a letter for his friend from Nigeria, saying he's coming "for a visit sometime in the summer." The officer looks at this and sees no clear start or end date. How can they properly assess the trip?
- How to Fix It: Be specific. Always provide exact dates. Instead of that vague statement, write something like: "He will be visiting from July 10th, 2024, to July 24th, 2024, to attend my wedding ceremony." This is precise, verifiable, and leaves no room for doubt.
Forgetting to Attach Crucial Documents
Your letter makes promises, but your documents provide the proof. It’s one thing to say you'll cover all the costs; it's another to show the bank statements that prove you can. For UK visas, this often means showing specific amounts held for a minimum period.
A classic oversight is the sponsor forgetting to include proof of their own immigration status in the host country (like a copy of their BRP or passport). This single missing document can bring the whole process to a screeching halt, as it's the primary way to verify that you are a legitimate sponsor. To get a better handle on this, you can explore our in-depth article on the top reasons for visa rejection and how to avoid them.
Conflicting Information Across Documents
Consistency is everything. A visa officer is trained to cross-reference every piece of information you submit. The details in your sponsorship letter, the visa application form, your flight bookings, and all supporting documents must tell the same story.
Case Study in Confusion: A Nigerian company sponsors a foreign engineer, and the letter states the visit is for "technical training." But on the visa application form, the purpose is listed as "attending business meetings." This contradiction immediately raises suspicion. Is the engineer coming to work (which might need a different visa) or just for meetings? This kind of confusion often leads to a quick denial.
To avoid this mess, triple-check every document before you submit it. Make sure the applicant's name, passport number, purpose of visit, and travel dates are identical everywhere. Think of your application as a single, cohesive story—any contradiction shatters its credibility.
Your Top Sponsorship Questions Answered

Even after you've drafted what feels like the perfect letter, a few questions can still linger. Let's walk through some of the most common queries from Nigerians navigating the sponsorship process, so you can put those worries to rest.
What if I'm Self-Employed? How Do I Sponsor Someone?
A common misconception is that you need a monthly salary slip to be a viable sponsor. That's simply not true. If you're a self-employed Nigerian living abroad, your goal is to demonstrate that your business is legitimate, stable, and profitable enough to support the applicant.
Think of your business documents as the equivalent of an employee's payslips. You'll need to pull together a clear financial picture using things like:
- Your business registration documents (e.g., from Companies House in the UK).
- Your business's corporate bank statements, showing healthy activity for the last six to twelve months.
- A copy of your company’s most recent tax returns.
- A letter from your accountant confirming your annual income.
Together, these documents prove your financial standing just as effectively as a letter of employment.
Does the Court Need to Stamp My Letter?
This is a big point of confusion, especially rooted in Nigerian practices. For most visa applications to countries like the UK, US, or Canada, your sponsorship letter does not need to be notarised or sworn as a court affidavit. A well-written letter signed by you is typically all that is required.
The emphasis is on the supporting evidence (bank statements, proof of address, etc.), not on a legal stamp on the letter itself. The golden rule is to always check the specific requirements on the official government website for the country you're applying to. It’ll save you time, money, and a lot of unnecessary stress.
Can I Use One Letter to Sponsor Both of My Parents?
It might seem more efficient to just write one letter for both of them, but I always advise against it. Visa applications are assessed on an individual basis, even when family members are applying to travel together.
By providing an individual sponsorship letter for each parent, you make the consular officer's job much easier. Each applicant's file will have its own dedicated sponsorship document, which eliminates any confusion and reduces the risk of delays.
While a single, joint letter might get by in some situations, separate letters are always the safer, smarter choice. Anything you can do to streamline the process for the visa officer is a step in the right direction.
How Long is My Sponsorship Letter Good For?
There isn’t an official, hard-and-fast expiry date, but the unwritten rule is that a sponsorship letter is considered current for about three months.
You should always date your letter as close as possible to the visa submission date. If an officer sees a letter dated six months ago, their first thought will be, "Have the sponsor's circumstances changed?" That's a doubt you don't want to introduce into your application.
Ready to take the guesswork out of your immigration plans? JapaChat offers the clear, accurate answers you need for your entire relocation journey. Get instant guidance on visa requirements, documentation, and more, all designed for Nigerians. Start planning your move with confidence by signing up for free at https://japachat.com.
-
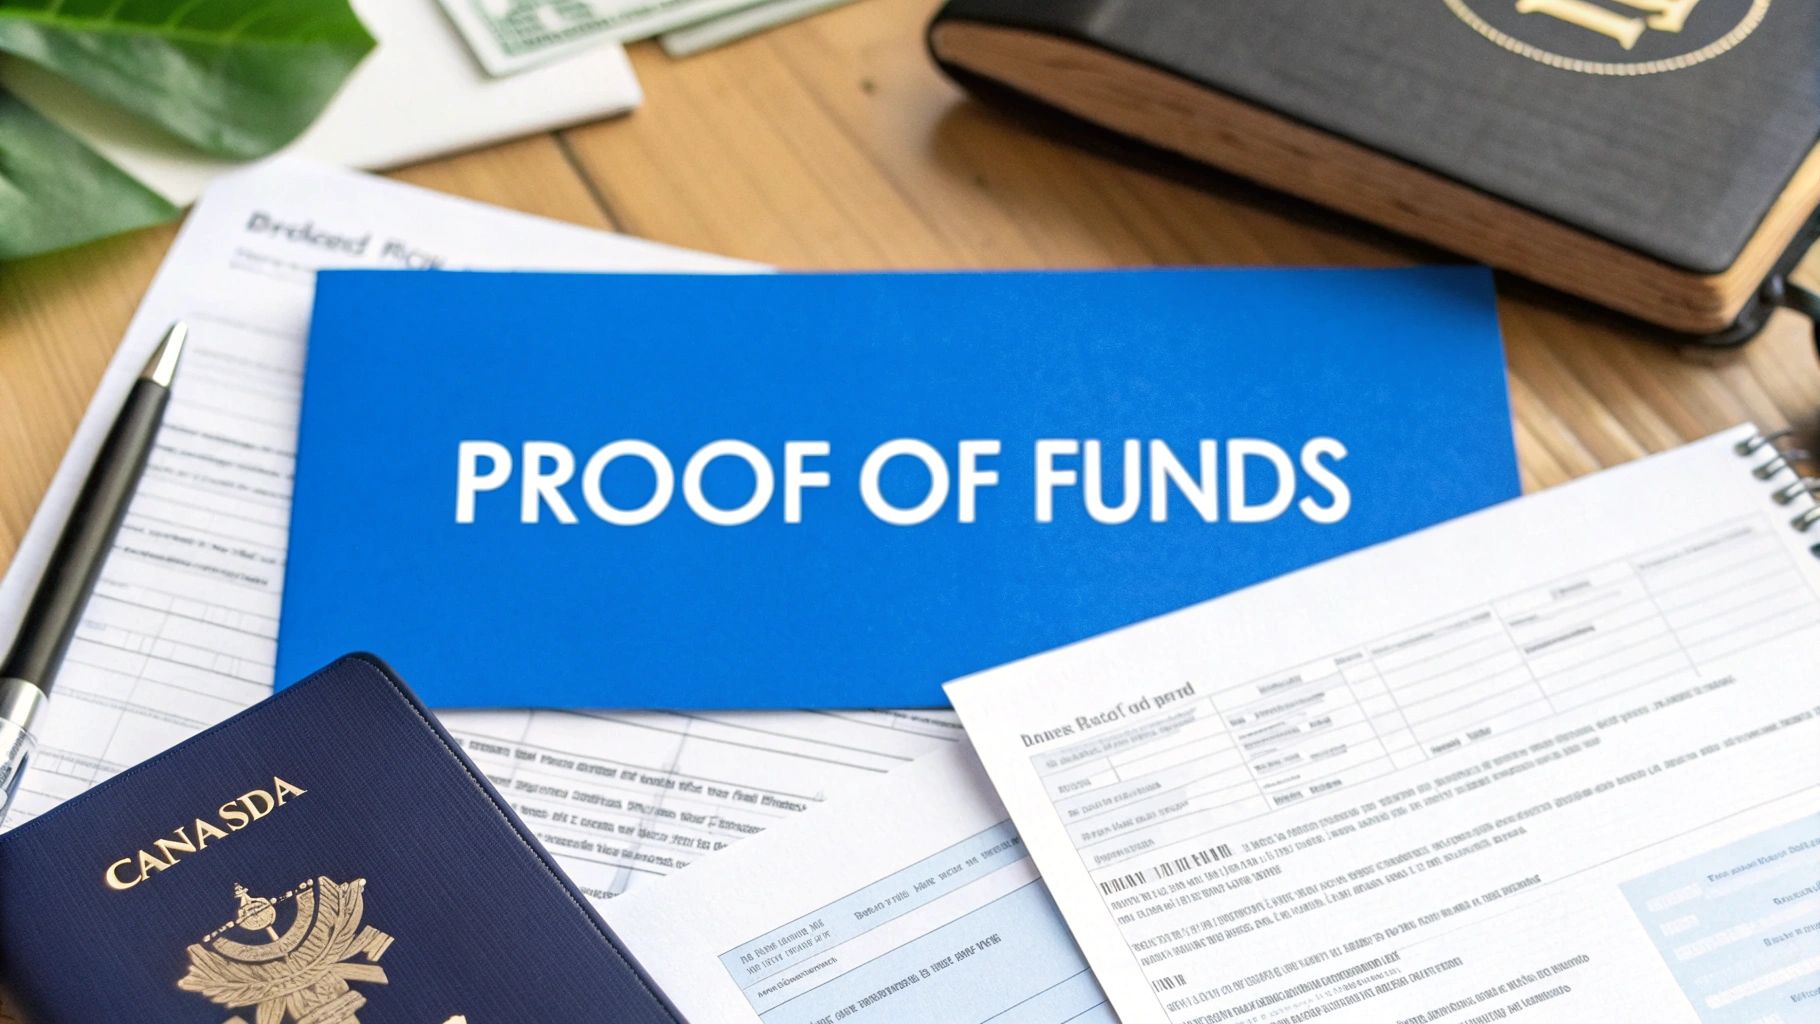
Proof of Funds for Student Visa Canada: A Nigerian Student’s Guide
So, you’ve landed that admission letter from a Canadian university – big congratulations! That’s a huge step. But before you start pricing flights out of Lagos or Abuja, there's a critical hurdle to clear: proving you have the money to support your studies. This is known as Proof of Funds (POF).
Essentially, you need to show the folks at Immigration, Refugees and Citizenship Canada (IRCC) that you have enough cash to cover your tuition, living expenses, and travel without hitting any financial snags. For Nigerian students, this is the make-or-break part of the application, designed to make sure you can truly focus on your education once you arrive.
Getting to Grips with Canada's Proof of Funds
Think of the proof of funds requirement as a financial handshake with the Canadian government. It's your way of saying, "I have planned for this, and my family has the resources to see me through." For students from Nigeria, this is arguably the most important piece of the puzzle after your letter of admission. It’s not just about having the money; it’s about presenting a clear, convincing picture of your financial stability.
The IRCC's main concern is simple: they want to be sure that international students won't find themselves in a tough spot financially or need to rely on public funds. They want to see that your priority will be your studies, not hustling to pay your rent or afford groceries. It's a rule that protects both you and the system.
Why This Rule Is a Game-Changer
Picture this: you land in Canada, thrilled to start your new life, only to realise you’re short on cash for your apartment deposit or next semester's textbooks. That's exactly the kind of stress the IRCC wants to help you avoid.
By requiring proof of funds, they ensure students are set up for success right from the get-go. This helps to:
- Prevent Financial Hardship: It confirms you can comfortably handle your living costs and tuition.
- Keep Your Focus on Your Studies: With your finances sorted, you can pour all your energy into your degree, not money worries.
- Maintain the Integrity of the System: It shows you’re a genuine student whose main goal is to learn, not someone who might need to work illegally out of desperation.
The New Financial Bar for Students
This is something every Nigerian family needs to pay close attention to: the financial goalposts have moved. As of January 1, 2024, the Canadian government hiked the required amount for living expenses to CAD $20,635 for a single student. That's a huge leap from the old CAD $10,000 requirement.
Keep in mind, this amount is in addition to your tuition fees and travel costs. When you factor in a typical first-year tuition (which can be anywhere from CAD $15,000 to $25,000, or even more) plus flights, the total you’ll need to show in your bank account could easily top CAD $40,000. That's over 40 million Naira, depending on the exchange rate. This adjustment is meant to give students a more realistic financial cushion for the true cost of living in Canada.
To get the full picture, you should learn more about the updated 2025 student visa financial requirements to prepare your application properly.
Calculating the Exact Funds You Need to Show
Alright, let's get down to the numbers. Figuring out the exact amount for your proof of funds isn't some complicated puzzle; it’s a straightforward calculation. But you have to get it right. Immigration, Refugees and Citizenship Canada (IRCC) uses a clear and strict formula:
Total Proof of Funds = First Year's Tuition Fee + Annual Living Expenses + Travel Costs
Think of it as three essential buckets you need to fill. You must prove you have enough cash to cover every single one for your first year in Canada.
This simple infographic gives you a bird's-eye view of how a solid proof of funds fits into your visa success story.
As you can see, getting this part right is a direct line to getting that all-important visa stamp.
Breaking Down the Living Expenses Component
The first big piece of your calculation is the cost of living. This isn’t a number you just pull out of thin air. The Canadian government sets a specific minimum to ensure you can cover basics like your accommodation, food, transport, and other daily needs without struggling.
It's crucial to remember that these figures are the absolute minimum. Visa officers always appreciate seeing a bit of a buffer.
To keep pace with inflation and the rising cost of living in Canada, these minimums are updated. The current minimum for a single student applicant outside Quebec is CAD $20,635 for living expenses. This change is designed to ensure students arriving from Nigeria have enough money for a stable start, without having to rely immediately on part-time work. You can read more about how Canada's financial requirements are changing for students.
And if you’re not travelling alone, the amount goes up. Bringing your spouse or children means you have to prove you can financially support them, too.
Minimum Required Living Expenses Outside Quebec
IRCC has set clear minimums for one year of living expenses. The total you need depends on how many people are included in your study permit application.
Number of People (Including You) Required Funds per Year (CAD) 1 (Student) $20,635 2 (Student + 1 Family Member) $25,690 3 (Student + 2 Family Members) $31,583 4 (Student + 3 Family Members) $38,346 These figures are non-negotiable, so make sure your funds meet or, ideally, exceed the amount that applies to your situation.
Adding Tuition and Travel Costs
Once you have your living expenses sorted, the next item to add is your first full year of tuition. This amount isn't an estimate; you'll find the exact figure on the official Letter of Acceptance from your Canadian school.
Finally, you need to factor in your travel costs. While IRCC doesn’t demand a specific number, you need to show you’ve thought about how you’ll get to Canada and back. A reasonable estimate for a return flight from Nigeria is a smart move. Budgeting between CAD $1,500 and CAD $2,500 is a safe bet. Including this shows the visa officer that you've planned your entire journey, right down to your eventual return home.
Putting It All Together: A Practical Example
Let’s walk through a real-world scenario. Imagine a Nigerian student named Funke who has just been accepted into a one-year graduate certificate programme at a college in Ontario. She’s applying to study alone.
Here’s how Funke would calculate her total proof of funds:
- First Year's Tuition: Her Letter of Acceptance clearly states her tuition is CAD $18,000.
- Annual Living Expenses: As a single student, she needs to meet the minimum requirement of CAD $20,635.
- Travel Costs: She budgets a sensible CAD $2,000 for her return flight ticket from Lagos.
Adding it all up gives us: $18,000 + $20,635 + $2,000 = CAD $40,635.
To be on the safe side, Funke’s family decides to show a little more—around CAD $45,000. This extra cushion demonstrates she's well-prepared for any unexpected costs and makes her application look much stronger. This simple, step-by-step calculation removes any doubt and presents a crystal-clear financial picture to the visa officer.
Approved Documents for Your Proof of Funds
When it comes to your student visa application, getting the documents right isn't just a box-ticking exercise—it's everything. Immigration, Refugees and Citizenship Canada (IRCC) is very particular about what they consider valid proof of funds for your student visa to Canada. A single misstep here can, unfortunately, lead to a quick refusal, so paying close attention to the details is non-negotiable.
Think of it like building a case for yourself. Each document is a piece of evidence, and your job is to tell a convincing and clear financial story to the visa officer. For applicants from Nigeria, this means every single document must be genuine and meet IRCC's standards perfectly.
Personal Bank Statements
This is probably the most popular way Nigerian students show they have the required funds. But here’s a common mistake: simply providing one statement with a large balance isn’t going to cut it. The visa officer is looking for the story behind the money.
You’ll need to submit official bank statements covering the past four to six months. This history is vital because it proves the funds are stable and truly yours for education, not just a lump sum borrowed from an aboki and deposited last week to pass the check.
When you get your statements from banks like GTB, Zenith, or Access Bank, make sure they tick these boxes:
- Official Bank Letterhead: They must be printed on the bank's official paper, complete with the bank's name, full address, and contact details.
- Account Holder's Name: The name on the account has to be an exact match to your name (or your sponsor's) on the application. Even a small difference can create doubt.
- Account Number: Your full account number must be clearly visible.
- Recent Statements: Don't submit old documents. The statements should be fresh, ideally no older than 30 days from when you submit your application.
Guaranteed Investment Certificate (GIC)
A Guaranteed Investment Certificate (GIC) is a powerful, highly-recommended option, particularly for Nigerian applicants. Think of it as prepaying your living expenses. You invest CAD $20,635 (the current minimum living expense figure) with a participating Canadian bank like Scotiabank or CIBC. In return, they give you a certificate to include with your application.
Why is this so effective? It shows the visa officer, without a shadow of a doubt, that your living expenses for your first year are already sitting safely in a Canadian bank. It just eliminates any questions about whether the funds are really available. Once you land in Canada, the bank releases the money to you in monthly or bi-monthly payments.
Education Loan Approval Letters
If a loan is financing your studies, the official approval letter is your proof. A letter that says you are "pre-approved" or that your loan is "being processed" won't be enough.
The letter needs to be on the financial institution's official letterhead and state clearly that the loan is fully approved and ready to be disbursed for your tuition. It must specify the total loan amount, the terms, and confirm the funds are accessible to you. Because it comes from a verified bank, it's considered very strong evidence. To see how this fits into the bigger picture, you can learn more about all the Canada student visa requirements.
Official Scholarship or Funding Awards
Did you earn a scholarship or grant? That's brilliant news! An official award letter is a fantastic form of proof of funds. You'll need to provide the formal letter from the university or organisation giving you the money.
Double-check that the letter clearly states:
- The name of the institution giving the award.
- The total monetary value of the scholarship, specified in Canadian dollars.
- How long the funding lasts (e.g., for the first year, or renewable for the entire degree).
- Any specific conditions you need to meet to keep the award.
Ultimately, presenting authentic, organised, and easy-to-understand documents is the surest way to build trust with the visa officer and make your application as strong as possible.
Presenting a Strong Sponsorship Case
For many Nigerian students, the dream of studying in Canada is a family project, funded by the hard work and support of a sponsor. This is perfectly normal and completely accepted by IRCC, but you have to present your case in a way that is clear, credible, and convincing.
Think of it this way: the visa officer needs to see a rock-solid link between you and your sponsor. They need absolute confidence that the sponsor can support you without putting themselves in financial trouble. A weak or poorly documented sponsorship is one of the fastest ways to get a visa refusal.
Who Counts as a Credible Sponsor?
Not just anyone can step in to be your sponsor. IRCC gives the most weight to sponsors who have a close, undeniable relationship with you. Why? Because it's understood they have a genuine interest in seeing you succeed.
The strongest and most easily accepted sponsors are:
- Parents (Father or Mother): This is the gold standard. The financial connection is natural and doesn't require a complicated explanation.
- Spouse: If you're married, your spouse is also a strong choice for a sponsor, as long as their financial standing is well-documented.
What about an uncle, aunt, or an older sibling? While it's possible, it gets a bit more complex. You'll need a very strong explanation for why your parents aren't the ones sponsoring you. You'll also need to show a history of this person supporting you financially. Honestly, sticking to your parents as sponsors makes the application much more straightforward.
Crafting a Powerful Letter of Sponsorship
The Letter of Sponsorship is the heart of your financial proof. It’s the document where your sponsor formally declares their commitment to covering all your educational and living expenses while you're in Canada. This letter gives a personal touch to your application, turning the numbers on a bank statement into a story of family support.
This isn't just a simple note; it's a formal document that must clearly state:
- Your sponsor's full name, address, and contact information.
- Their relationship to you (e.g., "my son," "my daughter").
- Their job and where they work.
- A clear, unconditional promise to cover your tuition, living costs, health insurance, and travel for your entire programme.
- An estimated total amount they are committing to your education.
This letter sets the stage for all the financial documents that follow. It’s your chance to make a crucial first impression.
The Essential Documents to Back Up Your Sponsor
Your sponsor’s letter is the promise; the documents are the proof. Every single document must be authentic, clear, and support the claims made in the letter. A complete package leaves no room for doubt or questions.
Here’s a checklist of the documents you absolutely must have:
-
Sponsor's Bank Statements: You need to provide four to six months of detailed bank statements. These must show a consistent, stable balance that can comfortably cover the required funds. Big, sudden deposits—what we call "lump sums"—are a major red flag and must be explained with solid proof, like a property sale agreement or a gift deed.
-
Letter of Employment: This should be an official letter from your sponsor's employer, printed on company letterhead. It must detail their job title, annual salary, start date, and the company's contact information so the details can be verified.
-
Pay Slips or Tax Records: Include recent pay slips (at least three to four months) or official tax clearance certificates. These documents prove that the salary mentioned in the employment letter is real and being earned consistently.
-
Business Documents (If Self-Employed): If your sponsor runs their own business, you'll need to provide official business registration documents (like CAC certificates), business bank statements, and tax documents for the business. This shows the business is legitimate and profitable enough to support you.
Putting all these documents together creates a complete financial picture of your sponsor. It shows not just that they have the money now, but that they have a stable income to keep supporting you. For more tips on putting your best foot forward, you can find great insights in our guide on writing a compelling letter of intent for your visa application.
Common Application Mistakes to Avoid
A tiny mistake in your proof of funds documentation can, unfortunately, bring your Canadian study dream to a screeching halt. The visa application process is incredibly detailed, and for Nigerian students, even a small error can lead to a refusal. Let's shine a light on the most common pitfalls and, more importantly, how you can sidestep them completely.

This isn't about scaring you; it's about preparing you. With Canada tightening its rules, the margin for error is smaller than ever. The competition is fierce, and your application needs to be flawless to stand out.
The Dreaded Lump Sum Deposit
This is probably the biggest red flag for a visa officer. A "lump sum deposit" is a large, unexplained chunk of money that suddenly materialises in your or your sponsor's bank account just before you apply. To an immigration officer, it looks like the money was borrowed just to pad the account and will likely vanish once the visa is issued.
Imagine your sponsor’s account normally hovers around ₦5 million, but a few weeks before you apply, a deposit of ₦30 million suddenly appears. That's going to raise immediate suspicion. The officer's first question will be: where on earth did this money come from?
The Solution: Be completely transparent. If a large deposit has a legitimate origin, you must prove it. For instance, if your parents sold a property in Lekki to fund your education, you'll need to include the official Deed of Sale, property registration documents, and clear evidence of the fund transfer from the buyer. If it was a gift, provide a notarised Gift Deed that explains the relationship and the reason for the gift.
Submitting Outdated or Incomplete Documents
Another classic blunder is providing bank statements that are too old. The financial information you present has to be current. It needs to give the visa officer a clear picture of your financial situation today, not what it looked like three months ago.
Similarly, submitting a sponsor’s employment letter without the company’s official letterhead, contact details, or salary information is a critical error. These omissions make the document look unofficial and almost impossible for them to verify.
To avoid these issues, run through this simple checklist:
- Bank Statements: Make sure they are no older than 30 days from the date you submit your application.
- Employment Letters: Double-check for official letterhead, company address, phone number, and a clear statement of your sponsor’s role and annual salary.
- All Documents: Ensure every name on every document perfectly matches the names on your passport and application forms. No exceptions.
Using a Sponsor with a Weak Financial History
Choosing the right sponsor is absolutely crucial. You might have an uncle who is willing to help and has the required amount in his account right now. However, if his financial history shows an unstable income or a bank balance that doesn't seem to match his declared earnings, it seriously weakens your application.
The visa officer needs to be convinced that your sponsor can comfortably support you without putting themselves in financial hardship. A sponsor whose own finances look shaky is a major red flag. This is just one of many issues that can lead to a refusal; you can explore other common visa rejection reasons to be fully prepared.
The Heightened Scrutiny in 2024
The need for a perfect application is more critical now than ever. In 2024, Canada has seen a significant rise in study permit refusal rates for Nigerian students. Contributing factors include the doubled proof of funds threshold and much stricter scrutiny of documents from Nigeria.
This trend makes one thing clear: you must prepare for tougher competition and ensure your financial proof is meticulously organised and completely verifiable.
Clearing Up Your Top Proof of Funds Questions
When it comes to proof of funds, the rules can feel confusing, and it's easy to get lost in the details. It's one of those areas where small mistakes can have big consequences. To help you get it right, I've answered some of the most common questions Nigerian students ask, based on what visa officers are actually looking for.
Let's break it down so you can move forward with total confidence.
Can I Use Money from Selling Land as Proof of Funds?
Yes, you can, but you have to be meticulous about the paperwork. You can't just drop a large sum of money from a property sale into a bank account and expect the visa officer to understand. To them, that’s a "lump sum deposit"—a huge red flag that needs a very clear explanation.
Think of it as telling a story with official documents. To make the story believable, you must provide:
- The Official Deed of Sale: This is the legal contract showing the sale price, date, and everyone involved.
- Property Registration Documents: This proves the land belonged to your family to begin with.
- Proof of Fund Transfer: You need a clear bank record showing the money moving from the buyer’s account directly into your sponsor’s account.
Without this paper trail, the money is just an unexplained deposit, which is one of the fastest ways to weaken your application.
How Long Should the Money Be in the Bank Before I Apply?
This is a make-or-break question. While IRCC doesn't give a hard and fast rule, the standard practice is to have the full required amount sitting in the account for at least four to six months before you hit submit on your application.
Why does this matter so much? It's all about stability. A consistent bank history shows the visa officer that these funds genuinely belong to your sponsor and are readily available for your studies. Money that suddenly appears a few weeks before you apply looks suspicious. It suggests the funds might have been borrowed just to pass the check, and that's a risk you don't want to take.
A stable, well-maintained bank balance over several months tells a far more convincing story than a large, last-minute deposit. This history builds trust and demonstrates true financial readiness.
Is Paying My First Semester's Tuition Enough Proof?
No, it's not. Paying your first semester’s tuition is a fantastic way to show you’re serious about your studies, but it doesn't meet the full requirement. Your proof of funds must cover your entire first year in Canada.
Remember the formula: First Year's Tuition + A Full Year of Living Expenses ($20,635 CAD) + Travel Costs.
Paying a portion of your tuition is a positive step, but the visa officer needs to be 100% sure you can support yourself for the whole first year without running into financial trouble. If you only show proof for one semester, you haven't met the minimum financial threshold, and that will likely lead to a refusal.
Can My Uncle or Aunt Be My Sponsor?
Technically, yes, but it makes your application much trickier. IRCC strongly prefers immediate family—your parents—as sponsors because the financial relationship is straightforward and easy to verify.
If you go with an uncle or aunt, you have a much higher mountain to climb to convince the visa officer. You’ll need to provide:
- A Powerful Sponsorship Letter: This letter has to explain exactly why your parents aren't sponsoring you and describe the close, long-standing relationship you have with your aunt or uncle.
- A History of Financial Support: Can you show that this relative has supported you financially in the past? Bank transfers for school fees or other records can establish a credible pattern.
- Perfect Financial Documents: Their bank statements and proof of income need to be flawless to overcome the visa officer’s natural scepticism.
Unless there's a very compelling reason, it’s always safer and more straightforward to have your parents as your sponsors. Their sponsorship is the gold standard and the easiest to get approved.
Planning your move to Canada can feel like a solo mission, but it doesn't have to be. JapaChat is Nigeria's first AI immigration expert, built to give you instant, reliable answers to all your pressing questions. Get personalised guidance on visa requirements, documents, and every step of the process.
Sign up for free and start planning your journey with an expert in your corner. Visit us at https://japachat.com to get started.
-
Documents Needed for Canada Visitor Visa: A Complete Guide for Nigerians
So, you're ready to apply for a Canada visitor visa from Nigeria. The key to a successful application isn't just filling out forms; it's about gathering the right documents that tell a convincing story to the visa officer. For Nigerian applicants, the focus is squarely on three things: a valid international passport, solid proof of funds, and undeniable ties to Nigeria.
Nailing these core elements from the get-go is the single most important step you can take.
Your Essential Canada Visa Document Checklist
Starting the application process can feel overwhelming, I get it. But breaking it down into a simple checklist turns a mountain into a series of manageable molehills.
Think of it like this: you're building a case. Each document you submit is a piece of evidence proving you are a genuine visitor who can afford the trip and, crucially, has every reason to return home to Nigeria. It's not about drowning the visa officer in paper; it’s about providing the right paper. For Nigerians, the spotlight on financial stability and ties to home is bright, so quality and credibility will always trump quantity.
To get organised, let's look at a quick summary of the documents you'll need to gather.
Quick Overview of Required Documents
This table breaks down the essential documents into categories, helping you see what you need and why it matters.
Document Category Specific Documents Purpose Mandatory Valid International Passport, Completed Visa Application Forms, Recent Passport Photos, Proof of Visa Fee Payment These are the non-negotiables. Your application is a non-starter without them. Financial Proof Bank Statements (6 months), Payslips, Employment Letter, Evidence of Assets To prove you can comfortably fund your entire trip without needing to work illegally. Proof of Ties Property Deeds, Family Documents (Marriage/Birth Certificates), Business Registration, Letter from Employer This shows you have strong reasons (family, job, assets) to return to Nigeria. Trip Purpose Flight Itinerary, Hotel Bookings, Letter of Invitation, Event Registration Explains exactly what you plan to do in Canada and shows your visit is temporary. This overview gives you a roadmap. Now, let's break down these categories to understand what each document truly represents in your application.
Understanding The Document Categories
To keep things simple, let's sort the paperwork into three logical groups. This will help you prioritise what to gather first and understand the specific job each document does.
-
Mandatory Documents: These are the absolute essentials. If any of these are missing, your application will likely be returned or refused outright. The cornerstone is your Nigerian international passport, which must be valid for your entire planned stay. If yours is getting close to its expiry date, you might want to check out our guide on how to renew your Nigerian passport online.
-
Supporting Documents: This is where you build your case and add credibility. These papers back up your claims. Think of things like bank statements to prove your financial stability or a hotel booking to show your travel plans are concrete.
-
Situational Documents: These are tailored to your specific reason for visiting. If you're heading to a business conference, a letter of invitation from the company in Canada is a must. If you're visiting your sister for her graduation, you'll need an invitation from her along with proof of her status in Canada.
Official guidelines from Immigration, Refugees and Citizenship Canada (IRCC) are clear: Nigerian applicants must provide strong evidence of their ties to Nigeria and a clear purpose for their visit. This means showing a valid passport, proof of financial support, and a detailed travel plan. Also, remember that providing your biometrics (fingerprints and a photo) is now a mandatory step for all Nigerian applicants.
Proving Your Unbreakable Ties to Nigeria

This is where so many Nigerian applications fall apart. The visa officer needs to be 100% convinced that you have compelling, undeniable reasons to come back home after your visit. This isn't just a friendly suggestion; it's a fundamental requirement for getting that Canadian visitor visa.
Think of it like this: you need to prove you're leaving behind valuable things that guarantee your return. Your documents must paint a vivid picture of a stable, established life in Nigeria—a life you would never dream of abandoning. The officer is trained to assess risk, and your job is to show them you're as low-risk as they come.
Let's ditch the vague advice and get into the specific, concrete documents needed for a Canada visitor visa that prove your deep roots in Nigeria.
Your Professional and Business Ties
For most of us, our job or business is our strongest anchor. You need to show that you have a career or a company that absolutely requires your presence back home. Just submitting a weak, generic letter is a classic mistake that often leads straight to a rejection stamp.
If you're an employee, your proof needs to be official and easily verifiable.
-
Official Letter from Your Employer: This is more than just a quick note saying you work there. It must be on official company letterhead, clearly state your position, your annual salary, and the date you were hired. Crucially, it must confirm your leave for the trip has been approved and state the exact date you're expected back at your desk.
-
Recent Payslips: Handing over your last three to six months of payslips demonstrates consistent employment and a steady income. This backs up your bank statements and paints a much stronger picture of your financial stability.
-
Official Leave Approval: A separate email or a formal memo showing your leave dates were approved by your manager or HR department adds a powerful layer of authenticity.
For business owners in Lagos, Abuja, or anywhere else in Nigeria, the proof looks a bit different but is just as vital.
-
CAC Registration Documents: Your Certificate of Incorporation or Business Name Registration is non-negotiable. This is the official document that proves your business is real and you're legally tied to it.
-
Tax Clearance Certificates: A recent tax clearance certificate is a golden ticket. It shows your business is compliant, active, and a legitimate, ongoing enterprise.
-
Business Bank Statements: Just like your personal ones, these statements reveal the financial health and daily activity of your business, proving it's a genuine, functioning company and not just a name on paper.
Your Family and Social Ties
Family is a powerful reason to return home, but you can't just say you have a family—you have to prove it with official documents.
For example, if you're married with children, these are some of the strongest ties you can have. You'll need to include:
- Marriage Certificate: The official certificate issued by the marriage registry.
- Children's Birth Certificates: These must clearly list you as a parent.
These documents establish legal and social responsibilities that a visa officer immediately understands as a strong reason to return to Nigeria. It shows you have dependents and a family unit you are fully committed to.
Key Takeaway: The visa officer is searching for a pattern of stability. All your documents, when viewed together, should tell a clear story of someone with significant responsibilities, assets, and connections in Nigeria—a story that makes leaving it all behind seem completely illogical.
Property and Asset Ownership
Owning property is another fantastic way to show you have strong ties. But this is an area where applicants often make critical mistakes. Submitting unverified or poorly documented proof of property can actually do more harm than good.
To prove property ownership the right way, you need official documents.
- Deed of Assignment or Certificate of Occupancy (C of O): In Nigeria, these are the gold standard for proving you own land or property.
- Verified Land Registry Documents: Whatever property document you submit, make sure it's properly registered and can be verified. A simple receipt from the seller often isn't strong enough.
A word of caution: avoid submitting documents for any property that is under dispute or has unclear ownership. This can raise a major red flag for the visa officer. Your goal is to present clean, undisputed evidence that you have significant assets in Nigeria you would never risk losing.
Demonstrating Your Financial Stability

Alright, you've shown your strong ties to Nigeria. What’s next? This is the big one: proving you have the money to fund your trip. The visa officer needs to be 100% sure you can pay for everything—flights, hotels, food, sightseeing—without even thinking about working illegally in Canada.
It’s not just about having a hefty balance in your account on the day you apply. It's about telling a convincing story with your finances. A history of stable, predictable income is far more powerful than an account that suddenly looks flush with cash.
This stage is absolutely critical. Nigerians are among the top applicants for Canadian visitor visas, but with approval rates sitting below 40% recently, your financial documents have to be rock-solid.
The Six-Month Bank Statement Rule
Your six-month bank statement is the foundation of your financial proof. This isn't just a random requirement; it gives the visa officer a window into your financial life, allowing them to see your regular income, your spending habits, and the overall health of your finances.
Put yourself in their shoes for a moment. If you're a salaried employee in Abuja, they expect to see a salary hitting your account like clockwork every month. If you’re a business owner in Lagos, they're looking for consistent cash flow from your business activities, not just a couple of massive, random payments. This history proves your financial standing is real and not just a temporary setup for the visa application.
Crucial Tip: Make sure you get an official statement directly from your bank. It must clearly show the bank's name and contact details, your full name and address, and every single transaction over the last six months. No shortcuts here.
The Problem with Sudden Large Deposits
One of the quickest ways to get your application flagged is to have a sudden, unexplained chunk of money appear in your account right before you apply. This is what's known as a "lump sum deposit," and it’s a massive red flag.
Imagine your account usually gets inflows of around N500,000 a month. Then, just a few weeks before you submit your visa application, a N5,000,000 deposit lands. The visa officer's first thought? You probably borrowed that money just to make your account look good, a trick called "funds parking." This completely shatters your credibility.
For a deeper dive into presenting your funds correctly, our detailed guide on proof of funds for Canada is a must-read.
But what if the money is legitimate? Maybe you sold a car, got a huge bonus, or received a gift from a parent. You absolutely have to explain it.
How to Explain Unusual Transactions
When it comes to your finances, honesty is always the best policy. If there's anything on your statement that looks out of the ordinary, explain it upfront in a Letter of Explanation. This isn't a complex legal document; it's a simple, clear letter you write to the visa officer to clarify where the money came from.
Let's take a practical example for a business owner in Lagos:
- The Situation: You sold some old office equipment and received a payment of N2,000,000, which now shows up as a large, one-off deposit.
- What You Do: Write a short letter explaining the transaction. Then, attach a copy of the sales receipt or invoice as proof. Just like that, a suspicious deposit becomes a perfectly normal, documented business transaction.
Scenarios for Different Nigerian Applicants
How you prove your financial stability will depend on your personal circumstances. The goal is always the same: provide evidence that is credible and makes sense for your situation.
-
The Salaried Professional: This is straightforward. You’ll need your six-month bank statement, your last six months of payslips, and a letter from your employer. The employer letter should confirm your job title, your salary, and that you're in good standing. The key here is consistency—your payslips should match the deposits in your bank account.
-
The Self-Employed Business Owner: You'll need to gather a bit more paperwork. Start with your personal and business bank statements for the last six months. Then, add your CAC registration documents and recent tax clearance certificates. You’re painting a picture of a healthy, active business that provides you with a reliable income.
-
The Sponsored Applicant: If a parent, spouse, or another close family member is paying for your trip, they are your sponsor. You must provide their six-month bank statement, a letter from their employer (if applicable), and a signed Letter of Sponsorship. This letter is vital—it must clearly state their relationship to you and officially promise to cover all your expenses while you're in Canada.
Ultimately, your goal is to present a financial picture that is transparent, consistent, and easy to understand. When you take the time to prepare these documents properly, you're sending a clear message to the visa officer: "I am financially responsible, and I can afford this trip without any issues."
Showing the Visa Officer Your Reason for Visiting
After proving you have strong ties back home and the money to fund your trip, this is where you bring it all together. You need to give the visa officer a clear, logical, and believable reason for wanting to visit Canada. This is the "why" of your application, and it has to make perfect sense with all the other documents you've submitted.
Think of it as telling a story. Whether you're coming for a holiday, to see family, or for a business conference, every document you provide should back up that story. Your goal is to paint a picture so clear and well-supported that it leaves no room for doubt.
Visiting Canada for Tourism
If you’re planning a holiday, just writing "tourism" on your application form won't cut it. You have to show you've actually planned this trip. Mentioning you want to see the CN Tower is a start, but a visa officer has seen that a thousand times. They want to see a real, credible plan.
This means putting together a realistic, day-by-day travel itinerary. Your plan needs to show that you've done your homework and understand the geography and logistics of getting around Canada.
- Flight Reservations: You need a flight itinerary, not a paid ticket. This is a crucial distinction. The itinerary shows your intended travel dates and route without you having to risk your money on a non-refundable ticket before your visa is approved.
- Hotel Confirmations: Go ahead and book hotels, but make sure they are fully refundable. These booking confirmations show the visa officer exactly where you plan to sleep each night, which adds a huge layer of credibility to your plans.
- A Daily Itinerary: Put together a simple document that outlines what you'll be doing. For example: "Day 1-3 in Toronto: Visit the CN Tower, Royal Ontario Museum, and Ripley's Aquarium. Day 4: Travel day to Niagara Falls. Day 5-6: Explore Niagara Falls and the Niagara-on-the-Lake area."
This kind of detail proves you're a serious tourist with a clear, temporary reason for visiting. It shows you're not just making things up.
Visiting Family or Friends in Canada
If your trip is to see a relative or friend, the Letter of Invitation becomes the single most important document for this part of your application. It’s the anchor that explains the entire purpose of your visit. A poorly written or vague invitation letter is a classic reason for a visa refusal.
The letter has to be written by your host in Canada, and it needs to be packed with specific details.
- About You (The Applicant): The letter must include your full name, date of birth, address, and how you're related to the person inviting you.
- About Your Host: It must state their full name, contact details, and address in Canada. Critically, they must also provide proof of their status in Canada. This could be a copy of their Canadian passport, permanent resident card, or even a valid work or study permit.
- Purpose and Duration of Visit: It should say exactly why you're visiting (e.g., to attend a wedding, celebrate a birthday, or just a family reunion) and list the exact dates you plan to be in Canada.
- Accommodation and Financials: The letter must spell out where you will be staying. If your host is going to cover your living expenses while you're there, they must say so clearly and provide their own financial documents—like a letter from their employer or recent bank statements—to prove they can actually afford to support you.
A strong invitation letter isn't just a formality. It's a personal testimony from someone in Canada who is vouching for you. It turns your application from a stack of papers into a story about real people and relationships, which can be very powerful.
To make it clearer, here's a look at how the required proof differs if you're a tourist versus visiting family.
Invitation Letter Checklist vs. Self-Planned Itinerary
Requirement Visiting Family/Friends (Invitation Letter) Tourism (Self-Planned Itinerary) Primary Document A formal Letter of Invitation from your host. A detailed day-by-day travel itinerary. Proof of Accommodation Stated in the invitation letter (e.g., "staying at my home"). Refundable hotel booking confirmations for the entire trip. Proof of Host's Status Copy of host's Canadian Passport, PR Card, or permit. Not applicable. Financial Support If the host is paying, they provide their financial documents. Your own bank statements and proof of funds. Trip Activities Mentioned in the letter (e.g., attending a family event). Listed in your personal itinerary (e.g., sightseeing, tours). This table shows how the focus of your evidence shifts based on your main reason for travelling. The key is to provide the right documents for your specific situation.
Attending a Business Conference or Event
For business trips, your purpose is purely professional. The main piece of evidence you'll need is the official invitation letter or registration confirmation from the event organisers in Canada.
This document absolutely must be on the organisation's official letterhead and include:
- Event Details: The official name of the conference or event, a brief description of its purpose, and the exact dates it's taking place.
- Your Role: It should confirm that you are registered to attend or explain why your presence is required (e.g., as a speaker or representative).
- Who's Paying: A clear statement on who is covering the trip's expenses—whether it's you, your employer in Nigeria, or the company in Canada hosting you.
This kind of official documentation proves your visit is tied to a legitimate professional activity, making your purpose crystal clear to the visa officer. For more advice on how to articulate your reasons for travelling, check out our detailed guide on writing a persuasive letter of intent for your visa application.
Navigating the Online Application and Biometrics
Alright, you’ve gathered all your paperwork. Now it’s time to tackle the tech side of things. The entire Canada visitor visa application for Nigerians is now handled online through the official Immigration, Refugees and Citizenship Canada (IRCC) portal. This also includes the mandatory step of providing your biometrics.
Don't let the technology scare you. Just think of the IRCC portal as your personal submission counter, and the biometrics appointment as the final handshake. If you follow the process step-by-step, you’ll get through this stage smoothly and can focus on what really matters—the quality of your application.
This infographic breaks down the initial flow based on why you're travelling, helping you picture that very first step in your online journey.

Whether you’re going for a holiday, visiting family, or attending a conference, the starting point online is the same. It just goes to show how central the digital-first approach is to the whole process.
Conquering the IRCC Portal
First things first, you need to create an account on the official IRCC secure portal. This is your command centre for filling out forms and uploading every single document we've talked about.
Here’s a simple breakdown of how to get it done:
- Create Your Account: Head over to the IRCC website. You'll have two options: sign in with a bank partner or create a unique IRCC login called a GCKey. Honestly, most Nigerians find setting up a GCKey is the more straightforward route.
- Fill Out the Forms: The main event here is the IMM 5257 (Application for Visitor Visa) form. Take your time with this. Every answer must perfectly match the information in your supporting documents.
- Upload Your Documents: This is the moment of truth. You’ll upload scanned copies of everything—your passport, bank statements, employment letter, you name it. Pay close attention to the required file sizes and formats (usually PDF or JPG). A very common mistake is trying to upload files that are too big, which will only lead to frustrating glitches.
Pro Tip: Before you even log in, scan all your documents and save them in a dedicated folder on your computer. Give each file a clear, logical name (e.g., "Bank_Statement_Jan_2025," "Passport_Bio_Page"). Getting organised now will save you a massive headache later.
Demystifying the Biometrics Process
Providing your biometrics—which is just a fancy way of saying your fingerprints and a photograph—is mandatory for all Nigerian applicants. This is a non-negotiable step.
The shift to digital processing is the new normal. Recent figures show that IRCC now handles over 95% of all Canadian visa applications online. For Nigerians, this means submitting everything electronically, but it also places huge importance on getting the biometrics step done right. In fact, IRCC data shows that incomplete biometrics are a leading cause of visa refusals for Nigerian applicants. You can get more insight into the latest trends in these 2025 Canada visa predictions on Praisenpam.com.
Here's exactly what you need to do:
- Pay the Fee: You must pay the biometrics fee (currently $85 CAD per person) at the same time you pay your main visa application fee online. Once you've paid, you'll receive a Biometric Instruction Letter (BIL).
- Book an Appointment: As soon as you get your BIL, you need to book an appointment at a Visa Application Centre (VAC). In Nigeria, the main VACs are in Lagos and Abuja. Do this immediately, as appointment slots can fill up very quickly.
- Attend Your Appointment: On the scheduled day, head to the VAC with your passport, your appointment confirmation, and your Biometric Instruction Letter. The process itself is quick and painless—they'll take your photo, scan your fingerprints, and you’ll be in and out in about 15-20 minutes.
Right, let's give this section a more human touch, as if it's advice from someone who's seen it all before.
Don't Let These Common Mistakes Derail Your Application
Learning from other people's blunders is by far the smartest way to get your application ready. After putting in all that effort to gather your documents, the absolute last thing you want is a simple, avoidable error getting you a refusal. This final check is all about flagging the most common reasons Nigerian applications get rejected, so you can catch and fix them first.
Imagine the visa officer is like a detective, and your application is their case file. They are searching for a consistent, believable story. If your application form claims you earn ₦400,000 a month, but your bank statements only show an average income of ₦250,000, that’s a massive red flag. Every single detail, from your date of birth to your job history, must match perfectly across every single document.
The Big One: Unexplained Large Cash Deposits
This is probably the single biggest pitfall for Nigerian applicants. Let's paint a familiar picture: I call it "The Case of the Last-Minute Gift from Uncle."
A month before you apply, your kind uncle in the village sends you ₦2,000,000 to help with your travel funds. This lump sum hits your bank account, which usually just sees your ₦500,000 monthly salary. To a visa officer, this looks exactly like you’ve borrowed money just to make your account look good for the application – a tactic they are specifically trained to spot.
- The Mistake: You don't explain where this sudden chunk of cash came from. The officer is left to assume the worst: that the money isn't really yours and you're in a tight spot financially.
- The Solution: Get ahead of their questions. Be completely transparent by writing a clear Letter of Explanation that details the source of the funds. You should also include a signed gift deed letter from your uncle explaining why he gave you the money and, if you can, provide proof that he could genuinely afford to gift it. This simple step transforms a suspicious transaction into a well-documented, legitimate family gift.
When you explain any unusual financial activity upfront, you control the story. You’re showing the visa officer that you have nothing to hide and that your finances are completely above board.
A Shaky Story and Weak Ties to Home
It's not just about the money. Other common slip-ups can easily sink what looks like a solid application. Before you even think about clicking that submit button, you need to review your entire package with a very critical eye.
Here are a few frequent errors to hunt down:
- A Vague Travel Plan: Just writing "tourism" on your application is lazy and unconvincing. A weak itinerary without any hotel bookings or a flimsy invitation letter makes it look like your trip isn't a serious, well-thought-out plan. This immediately raises doubts about your real reasons for wanting to travel.
- Weak Proof of Ties: A generic employment letter that doesn't mention your salary or show that your leave has been approved does very little to prove you have a stable job to come back to. In the same way, claiming you have family ties without providing marriage or birth certificates leaves your most important connections completely unproven.
This final review is your chance to be your own toughest critic. Go through every single document one last time. Make sure your story is consistent, believable, and doesn't leave the visa officer with any nagging questions. Catching these red flags yourself is the best way to stop them from catching you out.
Got Questions? We’ve Got Answers
After going through the main document checklist, a few common questions always seem to pop up for Nigerian applicants. Let's tackle some of the most frequent ones head-on to clear up any lingering confusion.
How Much is "Enough" for Proof of Funds?
This is the million-naira question, isn't it? The truth is, there's no magic number set in stone. The visa officer is looking for an amount that makes sense for your specific trip. A two-week holiday hanging out in Toronto is going to require a lot less cash than a six-week, cross-country tour.
As a rough guide, aim to have at least $200 CAD for each day of your stay, and that's after you've accounted for your flight and hotel costs. So, for a 10-day trip where you've already booked your accommodation, having the Naira equivalent of $2,000 CAD (which is around ₦3,000,000, give or take with the current exchange rate) is a strong starting point.
But remember, the story behind the money—how it got there and how long it's been there—often matters more than the final number on the statement.
Can a Friend Sponsor My Trip?
Technically, yes, but it throws a spanner in the works. When a sponsor isn't a close relative (like a parent, spouse, or sibling), it immediately raises a red flag for the visa officer. Their first question will be, "Why is this person willing to spend so much money on your trip?"
If you have no other choice, you'll need a rock-solid, notarised letter of sponsorship. This letter must clearly explain your relationship and the reason they're funding your visit. You’ll also have to submit all their detailed financial documents, which can be a big ask. Honestly, it's always smoother to be self-funded or to have an immediate family member sponsor you.
Should I Buy My Flight Ticket Before I Apply?
No, absolutely not! This is a classic, expensive mistake. You should never pay for a non-refundable flight ticket until you have the visa stamped in your passport.
Instead, what you need is a flight reservation or a detailed itinerary. You can get this from a travel agency or an airline, and it shows your planned travel dates and route without you having to pay for the actual ticket. This document proves you have a solid plan—it's one of the essential documents needed for a Canada visitor visa—and it protects your wallet.
A visa is never a sure thing. Handing over a flight reservation instead of a paid ticket shows the visa officer that you're a sensible planner who understands the process. It's a small detail that reflects well on your whole application. Always play it safe with your money.
Feeling a bit swamped by all the paperwork? Let an expert take the weight off. JapaChat is Nigeria's first AI immigration assistant, built to give you quick, reliable answers to all your visa questions. Stop the guesswork and start planning your trip with real confidence. Get started for free on JapaChat today!
-
-
How to Apply for a Canada Work Visa: A Nigerian’s Guide
So, you're looking to get a Canada work visa from Nigeria. The whole process boils down to a few key stages: figuring out if you're eligible, gathering a mountain of paperwork, submitting your application online, paying the fees, and getting your biometrics done.
It sounds straightforward, but let's break it down properly, with the realities on the ground for applicants in Nigeria.
Laying the Groundwork for Your Application
Before you even touch an application form, you need to get the basics right. This isn't just about wishing you were in Canada; it’s about meeting some very specific, non-negotiable requirements. For most Nigerians, the journey starts with one crucial question: which work permit pathway is actually for you?
Getting this right from the start is everything. It dictates your entire strategy and saves you from wasting time, money, and hope on a route that was never going to work for your situation.
Employer-Specific vs. Open Work Permits
For most people in Nigeria, the most direct path is the employer-specific work permit. Think of it this way: you have a golden ticket in the form of a job offer from a Canadian company. This isn't just any offer; it usually needs to be backed by a document called a Labour Market Impact Assessment (LMIA), which is the employer’s proof that they couldn't find a Canadian to fill the role.
Then you have the open work permit. This one is the dream—it lets you work for almost any employer in Canada. But it's also much, much harder to get. Open permits are typically reserved for very specific scenarios. For instance, you might qualify if you're the spouse of an international student or skilled worker already in Canada, or perhaps if you just graduated from a Canadian university. If you're in Nigeria without a job offer, getting an open work permit directly is nearly impossible.
Let's make this real. A software developer in Lagos who lands a job with a tech firm in Toronto will apply for an employer-specific permit. On the other hand, if your husband is in Vancouver on a study permit, you might be eligible to apply for an open work permit to go and join him and work.
Why a Job Offer Is Your Strongest Asset
Look at the recent numbers coming out of Canada—they tell a clear story. The government is prioritising applicants who already have jobs lined up.
In the first half of this year, Canada issued 302,280 work permits under the International Mobility Program (IMP). That sounds like a lot, but it's a huge drop from the 410,825 they issued during the same time last year. Meanwhile, permits under the Temporary Foreign Worker Program (TFWP)—the ones tied to specific employers and LMIAs—held steady. This tells us that employer-driven applications are the most reliable bet right now.
Honestly, the best thing you can do is pour your energy into securing a legitimate job offer. It’s not just a box to tick; it’s the single most powerful element that strengthens your application and shows a visa officer you’re serious. For a bigger picture on making the move, have a look at our complete guide on how to relocate to Canada from Nigeria.
Your Nigerian Document Checklist
Getting your documents in order is the foundation of a successful Canadian work visa application. I’ve seen too many promising applications get rejected simply because of a weak or incomplete file. Let's build a rock-solid checklist that goes beyond the generic advice you find online. Think of it as building a case so strong that you answer the visa officer's questions before they even have them.
First up, the non-negotiable: your international passport. It absolutely must be valid for the entire duration you plan to stay in Canada. If it’s cutting it close, don't risk it. Renew it before you start. We have a straightforward guide on how to renew your Nigerian passport online that can save you a lot of last-minute stress.
The path you take for your work permit hinges on whether you have a job offer lined up. This handy decision tree breaks it down clearly.
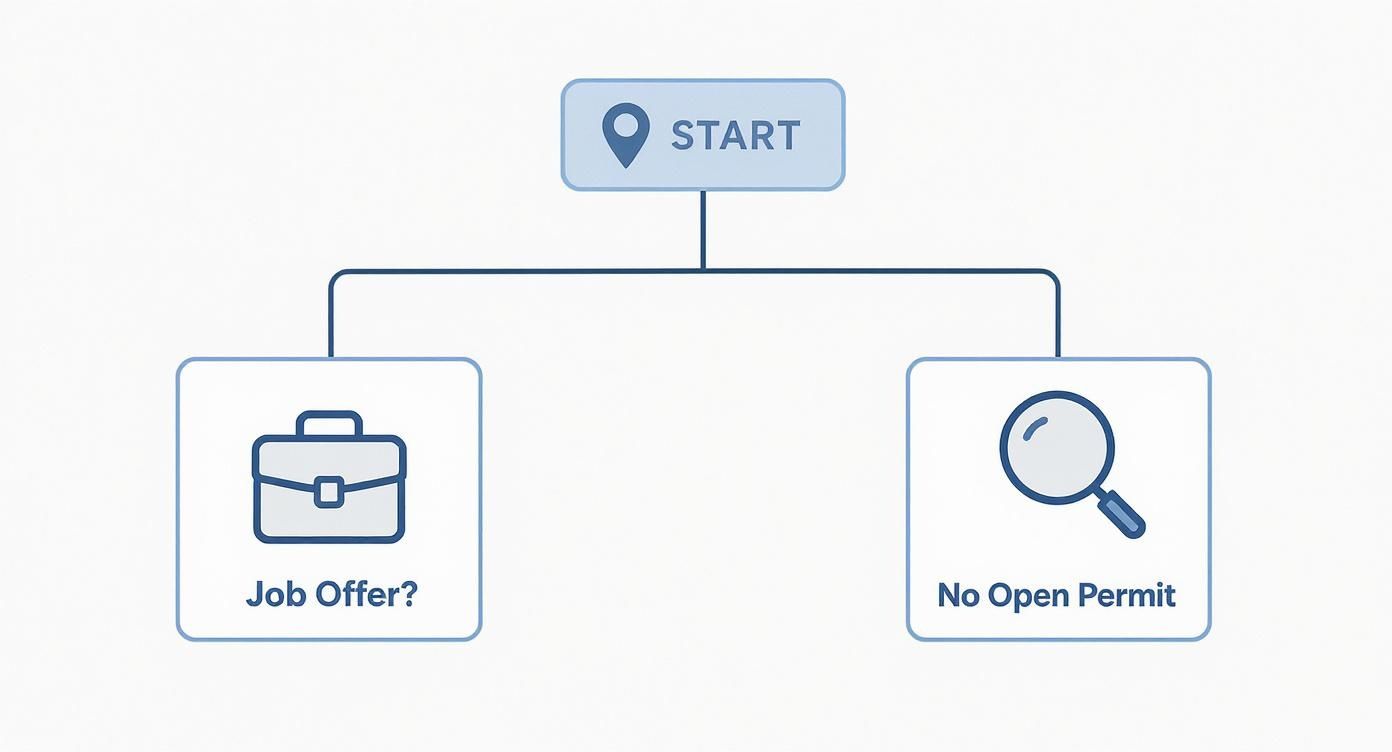
As you can see, securing a job offer puts you on the most direct route—the employer-specific work permit.
Before we dive into the nitty-gritty, here’s a quick-reference table to keep you on track. It covers the essentials and includes specific tips I’ve learned from helping countless Nigerians through this process.
Essential Document Checklist for Nigerian Applicants
Document Nigerian-Specific Tip Common Mistake to Avoid International Passport Check the expiry date! Ensure it’s valid for your entire intended stay. Renew if it's cutting it close. Applying with a passport that will expire shortly after you arrive in Canada. Proof of Funds Provide at least six months of detailed bank statements. A consistent savings history is better than a large, recent deposit. Submitting only a bank reference letter or a statement with a sudden, unexplained lump sum. Proof of Ties to Nigeria Include a letter from your current employer confirming you're on approved leave and expected back. Relying only on family ties. Property and employment are much stronger anchors for your application. Police Clearance Certificate Obtain it directly from the Nigerian Police Force CID headquarters in Alagbon, Ikoyi (Lagos) or Area 10 (Abuja). Don’t use third-party services that might provide invalid documents. Submitting a local police station report instead of the official certificate from the Force CID. Educational Credential Assessment (ECA) Start this process early! An ECA from a body like WES can take weeks or even months to process. Waiting until the last minute to request an ECA, causing major delays in your application submission. Now, let's break down some of the most critical areas where applicants often stumble.
Nailing Your Proof of Funds
When IRCC asks for "proof of funds," they want to see more than just a big number in your account. For a Nigerian applicant, this means showing a consistent, logical financial history. A sudden lump sum of ₦10 million appearing a week before you apply is a massive red flag for any visa officer. It just screams "borrowed funds."
You need to provide at least six months of bank statements. The flow of money should make sense—regular salary payments, documented business income, or other explainable deposits. If a family member is sponsoring you, they must provide their own bank statements plus a sworn affidavit of support, legally confirming they'll cover your expenses.
Here's a real-world tip: The visa officer is looking for the story of your money, not just the closing balance. A stable account with a consistent balance of ₦4 million over six months is far more convincing than an account that was empty last month and now mysteriously holds ₦8 million.
Proving Your Ties to Nigeria
This is arguably the most critical part of your application. The visa officer's primary concern is whether you will return to Nigeria when your work permit expires. You have to paint a clear picture of strong connections—or "home ties"—that you wouldn't just abandon.
So, what counts as a strong tie?
- Family: Of course, your marriage certificate and the birth certificates of your children are important. But you can strengthen this by including a letter explaining your responsibilities, especially if you care for elderly parents.
- Employment: A letter from your current Nigerian employer is gold. It should state that you are on approved leave and are expected back in your role. This is powerful evidence of your intention to return.
- Assets: This is huge. Documents proving you own property (like a C of O), have significant investments, or run a registered business in Nigeria all serve as a powerful anchor to your home country.
Essential Supporting Documents
Beyond funds and ties, a few other documents are non-negotiable.
You will need a police clearance certificate. Make sure you get this from the Nigerian Police Force Criminal Investigation Department (CID) headquarters in Alagbon, Ikoyi (Lagos) or Area 10 (Abuja). IRCC is very particular about the authenticity of this document, so only the official version will do.
Finally, if your job offer is in a skilled profession, you'll almost certainly need an Educational Credential Assessment (ECA). This is where an organization like World Education Services (WES) evaluates your Nigerian degrees and confirms their Canadian equivalent. This process isn't quick, so get started on it early. It's a small step that adds massive credibility to your qualifications and shows you're a serious, well-prepared applicant.
Navigating the IRCC Online Portal
With your documents organised and ready to go, it's time to face the main event: the IRCC online portal. For many Nigerian applicants, this is where tiny mistakes can snowball into huge headaches. The golden rule here is 100% consistency. Every single detail you type online must be a perfect match for the documents you’ve spent so much time preparing.
Your first move is to create a secure IRCC account. Think of this as your personal command centre for the entire application journey.
Here’s what the official sign-in page looks like. You'll come back here often to start your application, upload your files, and later on, to check for those all-important updates.
You'll notice two options: GCKey and Sign-In Partner. For almost everyone applying from Nigeria, the way forward is to register for a GCKey. This becomes your unique username and password for all of IRCC's online services, so guard it carefully.
Acing the Online Questionnaire
Once you're logged in, you'll be guided through an online questionnaire. Your answers here are absolutely critical because they automatically generate the personalised document checklist you'll need to follow. Be completely honest and accurate.
If you indicate you're married, the system will create an upload slot for your marriage certificate. If you mention previous travel, you’ll be expected to provide all the details. This isn't the place to be vague.
This is exactly where many people get into trouble. Don't even think about leaving out that short trip you took five years ago just to save time.
The IRCC system is built to spot inconsistencies. A visa officer will literally sit there and compare your travel history form against the stamps in your passport. If a trip to Dubai is clearly stamped in your passport but missing from your form, it immediately raises a major red flag about your credibility.
Common Pitfalls for Nigerian Applicants
From experience, I've seen certain sections of the online form trip up applicants from Nigeria more than others. Let’s break them down so you can avoid them.
- Family Information (IMM 5645): You are required to declare all your family members—parents, siblings, and children—whether they are travelling with you or not. Trying to hide a relative, even if you think it's not relevant, can lead to a finding of misrepresentation. That comes with a heavy penalty: a five-year ban from applying to Canada.
- Employment History: Be meticulous. List your job history chronologically and make sure there are no gaps. If you were unemployed for six months between two jobs, you need to state that clearly. Unexplained gaps can make a visa officer suspicious. Also, double-check that the job titles and duties you enter online are an exact match to what's on your reference letters.
- Travel History: Detail is your friend here. List every single international trip you have taken in the last 10 years. This includes that quick business trip to Ghana or a family holiday in the UK. Honesty is always the best policy.
Finally, when it's time to upload your digital photo, pay very close attention to the strict specifications. The background must be plain white, there can't be any shadows, and your facial expression must be neutral. A photo that gets rejected can cause completely unnecessary delays. Take the time to get it right the first time; it will help your application move forward without a hitch.
Handling Fees and Biometrics in Nigeria
Once you hit that ‘submit’ button on the IRCC portal, you’re immediately faced with your next two tasks: paying the fees and getting your biometrics done. These aren't just tick-box exercises; they're non-negotiable hurdles every Nigerian applicant has to clear. Nailing this part keeps your application on the right track from the get-go.
Right there on the portal, you'll be prompted to pay two distinct fees: the application processing fee and the biometrics fee. The only accepted payment methods are MasterCard or Visa, and crucially, your card must be enabled for international transactions. I’ve seen many applications stall here because a standard Nigerian Naira card gets rejected.
My advice? Don't leave this to chance. Your best bet is to use a card linked to a domiciliary account or a fintech card that’s known for handling international payments without a hitch. Get this sorted out before you even start your application to avoid any last-minute panic.
Booking Your Biometrics Appointment
After your payment goes through, you’ll receive a Biometric Instruction Letter (BIL) in your IRCC account. Think of this letter as your golden ticket. It's what you need to book an appointment at a Visa Application Centre (VAC). In Nigeria, the VACs are located in Lagos and Abuja.
As soon as that BIL lands in your inbox, book your appointment. I can't stress this enough. Don't put it off for a few days.
Why the rush? Well, Immigration, Refugees and Citizenship Canada (IRCC) is swamped. The temporary residence category, which covers work permits, has a staggering 42% backlog. This means nearly half of all applications are already taking longer than they should. Booking your biometrics promptly is one of the few things you actually have control over to prevent adding more delays to your timeline. You can get a clearer picture of the situation from the official IRCC inventory update.
Your Appointment Day at the VAC
When your appointment day arrives, you have to show up in person. The actual process is quite straightforward—they'll take a digital photograph and electronically scan your ten fingerprints. It's usually over pretty quickly, but your preparation is what makes the difference between a smooth visit and a frustrating one.
Here’s exactly what you need to have with you:
- Your International Passport: It must be the very same passport you used in your application. No substitutes.
- Biometric Instruction Letter (BIL): Bring a printed copy. A digital version on your phone won't be accepted.
- Appointment Confirmation Letter: You’ll also need to print the email or document confirming your appointment slot.
A final tip from experience: Plan to arrive about 15-30 minutes before your scheduled time. If you get there too early, you'll likely be asked to wait outside. Security at the VAC is tight, so leave any large bags, electronics, or food at home or in your car, as they aren't allowed inside. Getting this done and dusted is a huge milestone passed.
So, You’ve Submitted Your Application. What Now?
Hitting that 'submit' button brings a strange mix of relief and pure anxiety, doesn't it? The hard part is done, but now comes the waiting game, which can honestly be the most stressful part of the whole journey. Your application has officially entered the vast, complex world of Immigration, Refugees and Citizenship Canada (IRCC). Knowing what’s happening behind the scenes can help you keep your sanity.
After you get that submission confirmation, your very first move should be to link the application to your secure IRCC account if you applied through a representative or didn't start it there. This step is absolutely critical. It’s your direct line to real-time updates and messages from IRCC. Staying on top of things is everything, and you can get a full rundown on our guide to effective visa application tracking.
Decoding What IRCC is Telling You
As your file inches along, the status in your account will change. Seeing a new update pop up can make your heart jump, so let’s clear up what these common statuses actually mean.
- Submission Confirmed: This is simple. It just means they have your file. The real review hasn't started yet.
- Biometrics Completed: Good news. Your fingerprints and photo have been successfully attached to your application.
- Background Check in Progress: Don't let this one worry you. This is a routine part of the process where IRCC checks your history to make sure you're admissible to Canada. It’s standard procedure and doesn’t signal a problem.
It’s completely normal for your application to seem frozen on one stage for weeks, or even months. The backlogs are real, so try not to panic.
When IRCC Asks for More Information
It's possible you'll get a request from an IRCC officer during processing. This isn't automatically bad news. More often than not, it just means they need a bit more information to finalize their decision.
The most common requests are for a medical exam or for additional documents. Getting a medical request is often a great sign! They usually only ask for one when your application is getting close to the finish line. If they ask for more documents, respond quickly and provide exactly what they've requested. No more, no less.
The waiting game is tough, especially now. It's so important to set realistic expectations. For the most part, the days of getting a work permit approved in just a few weeks are long gone. You need to mentally prepare for a wait that could easily stretch into several months.
A Reality Check on Processing Times
For Nigerian applicants, the reality is that processing times have gotten significantly longer. Recent policy changes in Canada have made the work permit route more competitive. To give you some perspective, between January and August of this year, the number of new work permit holders in Canada was 16,890, a noticeable dip from previous periods.
This slowdown means every single application is under intense scrutiny. Your patience has never been more vital. You can dig deeper into these immigration statistics and trends directly from the source.
Your Top Questions Answered
Going through the Canada work visa process from Nigeria always brings up a few key questions. It's totally normal. Let's walk through the most common concerns I hear from applicants, so you can feel more confident about your own application.
How Much Money Do I Actually Need to Show?
This is probably the most asked question, and the real answer is, "it depends." There isn't a single magic number that works for everyone. What a visa officer is looking for is a figure that makes sense for your specific situation.
Think about it from their perspective. They'll consider a few things:
- Who's coming with you? If you're applying solo, you'll need far less than someone bringing their spouse and kids along.
- Do you already have a job lined up? With a confirmed job offer, you just need to prove you can handle your initial costs until that first paycheque comes in.
- Where in Canada are you headed? Your money needs to reflect the cost of living. Surviving in downtown Toronto is a world away from setting up in a smaller town like Saskatoon.
As a general benchmark, a single person with a solid job offer should probably aim to show something in the range of ₦3 million to ₦5 million.
But here’s the most important takeaway: how you show your funds is more critical than the final balance. A six-month bank statement with a steady, consistent savings history is a million times more convincing than a huge lump sum that mysteriously lands in your account a week before you apply.
My Application Was Refused. What Now?
Seeing that refusal email is gut-wrenching, I know. But it doesn't have to be the end of your Canadian dream. The absolute worst thing you can do is panic and reapply with the same documents. That's a classic mistake, and it almost guarantees a second refusal.
Your first move? Put on your detective hat. You need to order the Global Case Management System (GCMS) notes. These are the internal, detailed notes from the visa officer who handled your file. They spell out the exact reasons for the refusal.
For Nigerian applicants, refusals often boil down to a few common issues:
- Unconvincing ties to Nigeria (they aren't sure you'll return).
- Proof of funds that looks weak or isn't well-documented.
- Doubts about your job offer or your real intention to work in Canada.
Once you get those GCMS notes, you’ll see the real problem. The only way forward is to build a new application that directly fixes the concerns they raised. Just resubmitting the old stuff is a waste of your time and money.
Can My Family Come With Me on a Work Permit?
Yes, absolutely! Bringing your family is a huge part of the journey for many, but it isn't an automatic right. It all comes down to the skill level of your job in Canada.
Canada uses a system called the National Occupational Classification (NOC) to categorise jobs. Each job gets a TEER code (Training, Education, Experience and Responsibilities).
If your job is considered high-skilled—meaning it falls under TEER 0, 1, 2, or 3—your spouse is likely eligible for an open work permit. This is fantastic because it lets them work for nearly any employer in Canada. Your dependent children can also get study permits to enrol in school.
Just remember, you'll need to apply for their visas either at the same time as yours or right after your own permit is approved. And, of course, you'll need to show you have enough money to support everyone when you first arrive.
Stop guessing and start planning. For instant, accurate answers to your specific immigration questions, chat with Nigeria's first AI immigration expert. Get started for free with JapaChat at https://japachat.com.
-
Letter of Invitation Sample for Visa: A Practical Nigerian Guide 2025
Planning to travel abroad from Nigeria? Whether you're aiming to 'japa' for a new job, visit family in the UK for 'omugwo', or attend a conference in Canada, a powerful letter of invitation can be the deciding factor for your visa approval. A poorly written letter is a common reason for application delays and frustrating denials. This document is far more than a simple formality; it is your first and best chance to present a compelling case to the consular officer, proving the legitimacy of your trip and your intention to return home to Nigeria.
This guide is designed to demystify the process for you. We will break down exactly what makes a letter of invitation sample for visa successful. Forget generic templates that don't fit the Nigerian context. Instead, we offer practical, detailed examples covering various scenarios, from business trips and family visits to educational pursuits and medical treatments. We'll show you how to avoid common pitfalls and structure a letter that makes your application impossible to ignore. For those seeking even more tailored support, remember that specialised AI immigration tools like JapaChat can offer personalised guidance, helping you navigate these complexities with confidence and ease. Let's get your application right the first time.
1. Business/Employment Invitation Letter
A business or employment invitation letter is a formal document from a company or organisation inviting a Nigerian national to their country for business-related activities. This is one of the most crucial documents for securing a business visitor visa or even as part of an initial work permit application. For many Nigerian professionals attending conferences in Dubai, training in the UK, or final-stage interviews in Canada, this letter serves as the primary evidence of the visit's purpose.
The letter validates the trip's legitimacy to the consular officer, assuring them that you have a genuine reason to visit and are not seeking to remain in the country illegally. It essentially acts as a formal endorsement from a credible entity within the destination country.
Strategic Breakdown and Example
Imagine a Nigerian software developer from a tech hub like Yaba, Lagos, being invited by a company like Microsoft in Dublin for a week-long specialised training workshop. The invitation letter must be meticulously crafted to remove any doubt about the trip's intent.
Sample Snippet:
[Microsoft Ireland Official Letterhead]
Date: [Current Date]
To: The Visa Officer, Embassy of Ireland, Abuja, Nigeria
Subject: Letter of Invitation for Mr. Tunde Adebayo
Dear Sir/Madam,
This letter is to formally invite Mr. Tunde Adebayo, a Senior Software Engineer at TechSolutions Nigeria (Employee ID: TS-045), to attend a mandatory advanced cloud computing workshop at our headquarters in Dublin, Ireland. The training is scheduled from [Start Date] to [End Date].
During his stay, Microsoft Ireland will be fully responsible for all expenses incurred by Mr. Adebayo, including return airfare, accommodation at the Clayton Hotel, and a daily stipend for meals and local transport.
Mr. Adebayo is a valuable employee at his home company and is expected to return to his role in Nigeria immediately after the workshop concludes. We have attached the workshop agenda and his return flight itinerary for your review.
Should you require further verification, please do not hesitate to contact me.
Sincerely,
[Name of a Senior Manager/HR Head]
[Job Title]
[Direct Phone Number]
[Official Email Address]
Microsoft IrelandActionable Takeaways
- Use Official Letterhead: The letter must be printed on the company's official letterhead, complete with the registered address, phone number, and company registration details. This is non-negotiable for credibility.
- Specify Financial Responsibility: Clearly state who is covering the costs. A letter where the inviting company assumes all financial responsibility is significantly stronger. Mentioning specific details like accommodation and stipends adds serious weight.
- Establish Strong Ties to Nigeria: The letter should subtly reinforce the applicant's obligation to return. Phrases like "valuable employee" and "expected to return to his role" help build a case against any intention to abscond.
2. Family Sponsorship/Invitation Letter
A family sponsorship or invitation letter is a personal, yet crucial, document written by a legal resident or citizen of a country inviting a family member from Nigeria. This letter is fundamental for a family visitor visa, especially for Nigerians wanting to visit relatives in countries like the UK, Canada, or the USA for events such as weddings, holidays, graduations, or even to provide support during childbirth (omugwo).
This document serves as a personal guarantee to the consular officer, showing that the visitor has a genuine host, a place to stay, and often, financial support. It establishes a clear purpose for the visit, anchored in a verifiable family relationship, which helps to mitigate concerns about the applicant overstaying their visa.
Strategic Breakdown and Example
Consider a Nigerian-Canadian citizen in Toronto inviting her elderly mother from Enugu for a three-month visit to help with a new baby and attend the child's naming ceremony. The letter must convey warmth and personal connection while providing the factual evidence a visa officer needs.
Sample Snippet:
[Your Name]
[Your Full Canadian Address]
[Your Phone Number]
[Your Email Address]Date: [Current Date]
To: The Visa Officer, High Commission of Canada, Abuja, Nigeria
Subject: Letter of Invitation for my mother, Mrs. Nkechi Okoro
Dear Sir/Madam,
I, [Your Name], a Canadian citizen (copy of passport attached), am writing to invite my beloved mother, Mrs. Nkechi Okoro, residing at [Her Full Address in Nigeria], to visit me in Toronto, Canada. I would love for her to be with me from [Start Date] to [End Date].
The primary purpose of her visit is to be present for the birth of her first grandchild, due in [Month, Year], and to attend the child's naming ceremony. Her support and presence during this significant family milestone would mean the world to me and my husband.
During her stay, my mother will reside with my family at our home at the address listed above. I will be fully responsible for all her expenses, including her return flight ticket from Lagos to Toronto, accommodation, health insurance, and all daily living costs.
My mother has strong ties to Nigeria, including her husband, other children, and property, and she will return to Nigeria upon the conclusion of her visit.
Please feel free to contact me if you require any additional information.
Sincerely,
[Your Signature]
[Your Printed Name]Actionable Takeaways
- Prove the Relationship: Don't just state you are related; prove it. Attach copies of birth certificates or other official documents that clearly show the family link.
- Be Specific About Financial Support: Clearly outline every cost you will cover. Phrases like "fully responsible for all her expenses, including…" are much stronger than a vague offer of support. Attach your proof of funds, such as bank statements or a letter of employment.
- Emphasise Ties to Nigeria: The visa officer's main concern is that the applicant will return home. Mention the visitor's responsibilities, family, or assets back in Nigeria. This demonstrates a strong incentive to return after the visit, directly addressing potential 'japa' concerns.
3. Student/Educational Institution Invitation Letter
An educational institution invitation letter, often called a letter of acceptance, is an official document from a university, college, or language school confirming a student's admission into a programme. For Nigerian students dreaming of studying abroad, whether for a degree at the University of Toronto or a language course in Germany, this letter is the cornerstone of their student visa application. It’s the primary evidence that legitimises their reason for travelling.
This document serves as proof to the consular officer that you have a valid, non-immigrant intent: to study for a specific period and then return. It confirms you have been vetted and accepted by a recognised institution in the destination country, significantly boosting the credibility of your application.

Strategic Breakdown and Example
Consider a student from Port Harcourt who has gained admission to study for a Master's in Petroleum Engineering at the University of Aberdeen in Scotland. The letter of acceptance from the university must be comprehensive, leaving no room for ambiguity for the UK Visa and Immigration (UKVI) officer.
Sample Snippet:
[University of Aberdeen Official Letterhead]
Date: [Current Date]
To: The UK Visas and Immigration Officer, UK Visa Application Centre, Lagos, Nigeria
Subject: Unconditional Offer and Letter of Invitation for Miss Chioma Okoro (Student ID: 20249876)
Dear Sir/Madam,
This letter is to confirm that Miss Chioma Okoro has been offered unconditional admission into our full-time Master of Science (MSc) in Petroleum Engineering programme. Her student identification number is 20249876, and her Confirmation of Acceptance for Studies (CAS) number is E123456789F123G.
The programme is scheduled to commence on [Start Date] and has an expected completion date of [End Date]. Miss Okoro has been awarded the "Africa Future Leaders Scholarship," which will cover 50% of her tuition fees. She has provided evidence of funds to cover the remaining tuition and living expenses as required.
The University of Aberdeen is a registered sponsor under the UKVI Student Route. We expect Miss Okoro to return to Nigeria upon completion of her studies to contribute her skills to the Nigerian oil and gas sector.
Please find the official offer letter and CAS statement attached. For verification, please contact our international admissions office.
Sincerely,
[Name of Head of Admissions]
[Job Title]
[Direct Phone Number]
[Official Email Address]
University of Aberdeen, Scotland, UKActionable Takeaways
- Include Official Identifiers: The letter must contain your unique Student ID and, for the UK, your Confirmation of Acceptance for Studies (CAS) number. For the US, it would be the SEVIS ID from your I-20 form. These numbers are non-negotiable for verification.
- Clarify Financial Details: The letter should clearly state the tuition fees and mention any scholarships or financial aid awarded. This helps the visa officer assess your financial capacity and reduces the burden of proof on your bank statements.
- State Programme Duration and Type: Ensure the letter explicitly mentions whether the programme is full-time or part-time, along with the precise start and end dates. This defines the required duration of your visa.
4. Hotel/Accommodation Provider Invitation Letter
A hotel or accommodation provider invitation letter is a formal confirmation from a commercial lodging establishment verifying your booking for the duration of your trip. While not a traditional "invitation" from a person, this document is a mandatory requirement for many tourist visa applications, particularly for Schengen countries, the UK, and Canada. It serves as concrete proof of your accommodation arrangements.
For many Nigerians planning a holiday to Paris, a solo trip to explore London, or a family vacation in Toronto, this letter is a non-negotiable part of the visa application package. It demonstrates to the consular officer that you are an organised traveller who has secured a place to stay, which reduces the risk of you overstaying or having no fixed address.

Strategic Breakdown and Example
Consider a couple from Abuja planning a two-week anniversary trip to Rome, Italy. They have booked a stay at a well-known hotel. To satisfy the visa requirement, a simple booking confirmation email is often not enough. They need a formal letter from the hotel.
Sample Snippet:
[Hotel Roma Termini Official Letterhead]
Date: [Current Date]
To: The Visa Officer, Embassy of Italy, Abuja, Nigeria
Subject: Proof of Accommodation for Mr. Chinedu Okoro & Mrs. Adaobi Okoro
Dear Sir/Madam,
This letter serves to confirm that Mr. Chinedu Okoro (Passport No: AXXXXXXXX) and Mrs. Adaobi Okoro (Passport No: AXXXXXXXX) have a fully paid reservation at our establishment, Hotel Roma Termini.
The reservation details are as follows:
- Booking Reference: 8802-1507
- Guest Names: Chinedu Okoro and Adaobi Okoro
- Check-in Date: [Start Date]
- Check-out Date: [End Date]
- Room Type: Deluxe Double Room
- Reservation Status: Confirmed and Paid in Full
This booking covers the entire duration of their intended stay in Italy. We look forward to welcoming them.
Please feel free to contact us should you require any further verification of this reservation.
Sincerely,
[Name of Hotel Manager]
[Hotel Manager]
[Direct Hotel Phone Number]
[[email protected]]
Hotel Roma Termini, Rome, ItalyActionable Takeaways
- Request an Official Letter: Do not just rely on the automated email confirmation from Booking.com. Contact the hotel directly, either by phone or email, and specifically request a "visa invitation letter" or "proof of accommodation for visa application" on their official letterhead.
- Ensure Dates Match Precisely: The check-in and check-out dates on the hotel letter must align perfectly with the travel dates mentioned in your visa application form and your flight itinerary. Any discrepancy can lead to suspicion and potential refusal.
- Book Refundable Rates: To avoid losing money if your visa is delayed or denied, it's wise to book hotels that offer free cancellation. This gives you the flexibility to adjust your plans without financial penalty. Mentioning "Paid in Full" as shown in the sample is powerful, but only do so if you have this flexibility.
5. Government/Official Authority Invitation Letter
An invitation letter from a government body or an official authority is a highly formal document used for diplomatic missions, official state visits, cultural exchange programmes, or government-sponsored events. This type of letter carries significant weight with consular officers because it comes from a recognised, authoritative source within the destination country. For a Nigerian scholar invited to a UNESCO conference in Paris or a government official attending a summit organised by the Commonwealth Secretariat in London, this letter is the cornerstone of their visa application.
The letter serves as irrefutable proof of the visit's official nature and importance. It assures the embassy that the trip is sanctioned at a high level, effectively vouching for the applicant's credibility and the non-immigrant intent of their visit.
Strategic Breakdown and Example
Consider a scenario where a Nigerian curator from the National Museum in Lagos is invited by the British Council to participate in a month-long cultural heritage preservation programme in the United Kingdom. The invitation letter must be formal, precise, and leave no room for ambiguity.
Sample Snippet:
[The British Council Official Letterhead]
Date: [Current Date]
To: The Visa Section, UK Visas and Immigration, Lagos, Nigeria
Subject: Letter of Invitation for Ms. Chiamaka Okoro – Cultural Heritage Programme
Dear Sir/Madam,
On behalf of The British Council, we are pleased to formally invite Ms. Chiamaka Okoro, a Senior Curator at the National Museum of Nigeria (Staff ID: NMN-112), to participate in our international Cultural Heritage Preservation Programme. The programme is scheduled to run from [Start Date] to [End Date] in London, United Kingdom.
This programme is fully funded by The British Council. We will cover all associated costs, including return airfare from Lagos to London, accommodation at the Park Grand London Kensington, a daily subsistence allowance, and programme-related travel within the UK.
Ms. Okoro's expertise is vital to the programme's objectives of fostering UK-Nigeria cultural collaboration. She is expected to resume her senior duties at the National Museum immediately upon her return to Nigeria. We have attached the official programme schedule and confirmation of her enrolment.
For any additional information, please contact our Programme Director.
Sincerely,
[Name of Programme Director/Senior Official]
[Job Title]
[Direct Phone Number]
[Official Email Address]
The British Council, United KingdomActionable Takeaways
- Verify the Issuing Authority: Ensure the letter comes from the correct government department or official body. A letter from a general administrative office may not hold the same weight as one from a specific, relevant directorate.
- Emphasise Official Sanction: The letter must clearly state that the visit is officially sanctioned or sponsored. Phrases like "On behalf of The British Council" or "fully funded by the Government of Canada" provide powerful validation.
- Detail the Programme/Visit Purpose: A vague description is a red flag. The letter should specify the name of the programme, conference, or event and its duration. Attaching a detailed agenda or schedule strengthens the application significantly.
6. Healthcare/Medical Treatment Invitation Letter
A healthcare or medical treatment invitation letter is a formal document issued by a recognised hospital, clinic, or medical specialist. It invites a Nigerian national to their country specifically to receive medical care, undergo a procedure, or attend a consultation that is unavailable or of a higher standard than in their home country. This letter is the cornerstone of a medical visa application. For many Nigerians seeking specialised cancer treatment in Germany or complex surgeries in the UK, this document proves the visit's critical and non-immigrant nature.
This letter provides the consular officer with undeniable evidence of a legitimate, life-impacting reason for travel. It explains the medical necessity, the planned duration of treatment, and often, the financial arrangements, assuring the authorities that the applicant's sole purpose is to receive care and return home upon recovery.
Strategic Breakdown and Example
Consider a scenario where a Nigerian patient from Abuja with a complex cardiac condition has been referred to a specialised heart centre in a London hospital for surgery. The invitation letter from the UK hospital is pivotal for the visa application's success. It must be precise, authoritative, and leave no room for ambiguity.
Sample Snippet:
[King's College Hospital NHS Foundation Trust Letterhead]
Date: [Current Date]
To: The Visa Officer, UK Visas and Immigration, Lagos, Nigeria
Subject: Medical Invitation Letter for Patient: Mrs. Chiamaka Eze
Dear Sir/Madam,
This letter is to confirm that Mrs. Chiamaka Eze (Date of Birth: [Patient's DOB], Passport No: [Patient's Passport No]) has been accepted as a patient at the Cardiac Centre at King's College Hospital in London for a scheduled Coronary Artery Bypass Graft (CABG) surgery.
Following a review of her medical records submitted by her Nigerian cardiologist, Dr. Bamidele, our consultant, Dr. Emily Carter (GMC No: 1234567), has determined this procedure is medically necessary. The proposed admission date is [Start Date], with an estimated recovery and observation period concluding on [End Date].
The total estimated cost for the procedure and hospital stay is £[Amount], which has been paid in full by the patient's family. A copy of the receipt is attached. Mrs. Eze will be accompanied by her son, Mr. Emeka Eze, who will provide support during her recovery.
Mrs. Eze has strong family and community ties in Nigeria and is expected to return for her post-operative care as soon as she is medically cleared to travel.
For any further medical or administrative verification, please contact our International Patients Coordinator.
Sincerely,
[Name of Hospital Administrator/Consultant]
[Job Title]
[Direct Phone Number]
[Official Hospital Email Address]
King's College Hospital, LondonActionable Takeaways
- Provide Medical Justification: The letter must clearly state the diagnosis and the specific treatment or procedure required. Mentioning the consulting doctor's name and credentials (e.g., GMC number in the UK) adds significant authority.
- Clarify Financials and Duration: A strong letter of invitation sample for visa must detail the treatment costs and confirm how they will be covered, for example, pre-payment or sponsorship. Providing a clear treatment timeline with start and end dates demonstrates a well-planned, temporary visit.
- Justify Accompaniment: If a family member is travelling for support, the letter should explicitly mention this necessity. This helps justify the visa application for the accompanying individual and links their travel directly to the patient's care.
7. Conference/Event Organizer Invitation Letter
An invitation letter from a conference or event organiser is an official document inviting an individual to attend, speak at, or participate in a specific event like a seminar, workshop, or cultural festival. For many Nigerian academics, tech professionals, or artists aiming to attend global events like the Web Summit in Lisbon or an academic conference in Canada, this letter is the cornerstone of their visa application.
This document serves as irrefutable proof of the visit's purpose, demonstrating to the visa officer that the applicant has a legitimate, time-bound reason for travel. It distinguishes the applicant from a general tourist, positioning them as a participant with a clear agenda, which significantly strengthens their visa case.
Strategic Breakdown and Example
Consider a Nigerian doctor from a teaching hospital in Lagos who has been accepted to present her research at a major international medical conference in Toronto. The invitation letter from the conference organisers must be precise and authoritative to satisfy the requirements of the Canadian High Commission.
Sample Snippet:
[Official Conference Letterhead – e.g., World Health Summit]
Date: [Current Date]
To: The Visa Section, High Commission of Canada, Abuja, Nigeria
Subject: Invitation to Present at the 2024 Global Health Symposium for Dr. Chiamaka Okoro
Dear Visa Officer,
This letter is to formally invite Dr. Chiamaka Okoro, a Consultant Physician at the Lagos University Teaching Hospital, to be a presenter at the 2024 Global Health Symposium. The event will take place from [Start Date] to [End Date] at the Metro Toronto Convention Centre, Toronto, Canada.
Dr. Okoro's research paper, "Tackling Non-Communicable Diseases in Urban West Africa," was selected for a breakout session scheduled for [Date of Presentation]. Her participation is integral to the symposium's focus on global health challenges. Her registration (Confirmation ID: GHS2024-C789) has been fully paid.
While Dr. Okoro will be responsible for her travel and accommodation expenses, her conference fee has been waived in recognition of her contribution as a speaker. We have attached the official conference programme highlighting her session and her registration confirmation.
Dr. Okoro is a respected physician in Nigeria and is expected to return to her duties at the teaching hospital upon conclusion of the event. For verification of the event, please visit our official website: [Official Conference Website Link].
Sincerely,
[Name of Conference Chair/Head of Organising Committee]
[Job Title]
[Direct Phone Number]
[Official Email Address]
2024 Global Health SymposiumActionable Takeaways
- Provide Verifiable Details: The letter must include a registration or confirmation number, a link to the official event website, and a clear event schedule. This allows the visa officer to independently verify the event's legitimacy and your specific role in it.
- Specify Your Role: Clearly state whether you are an attendee, a speaker, a presenter, or a panellist. A letter for a speaker often carries more weight, so ensure this is prominently mentioned. Attaching the conference agenda with your name on it is a powerful piece of evidence.
- Use Official Channels: Always insist on the letter being on the event's official letterhead and sent from an official organiser's email address. A generic letter from a third party will raise immediate red flags. This is a critical part of a strong letter of invitation sample for visa preparation.
Comparison of 7 Visa Invitation Letter Types
Invitation Type 🔄 Complexity ⚡ Resources required ⭐ Credibility / Effectiveness 📊 Expected outcome 💡 Ideal use cases & key advantages Business / Employment Invitation Letter Moderate–High — formal authorization, verifiable company data Medium — company letterhead, registration, salary & sponsorship docs High ⭐⭐⭐⭐ — trusted by immigration for work/business visas Strongly improves visa credibility; can expedite processing Business visits, transfers, conferences — recognized, use official letterhead & contact info Family Sponsorship / Invitation Letter Low–Medium — personal proof of relationship required Low — kinship documents, host address, financial proof, accommodation details Medium ⭐⭐⭐ — valued but often scrutinized Supports family/tourist visas; strengthens genuine visit claims Family visits, weddings, reunions — easier to prepare; include birth/marriage certificates Student / Educational Institution Invitation Letter Medium — requires formal admission and institutional verification Medium–High — institutional letterhead, program details, tuition, accreditation Very High ⭐⭐⭐⭐⭐ — essential for student visa approvals Critical for student visas; significantly increases approval likelihood Degree programs, exchange students — include program codes, student ID and accreditation Hotel / Accommodation Provider Invitation Letter Low — simple booking confirmation and letterhead Low — reservation details, confirmation number, dates Low–Medium ⭐⭐ — useful but not decisive alone Demonstrates accommodation and travel plans; supportive for tourist visas Short stays and tourist visas — book in advance, ensure dates match visa application Government / Official Authority Invitation Letter High — formal channels, eligibility checks, official seals High — government letterhead, authorization, sponsorship details Very High ⭐⭐⭐⭐⭐ — highest credibility with immigration Often fast-tracks or guarantees visa approval for official purposes Diplomatic visits, cultural exchanges, official programs — apply via agency, allow extended processing Healthcare / Medical Treatment Invitation Letter Medium–High — detailed medical justification and privacy handling High — hospital letterhead, diagnosis, treatment plan, doctor credentials, cost estimate High ⭐⭐⭐⭐ — persuasive for medical visas Demonstrates medical necessity; often expedites medical visa processing Medical treatment & healthcare tourism — provide accredited facility docs, recent test results Conference / Event Organizer Invitation Letter Low–Medium — organizer verification and event proof Medium — event letterhead, registration, program, role confirmation High ⭐⭐⭐⭐ — strong when event is reputable Shows professional/academic purpose; supports participation visas Conferences, speaking engagements, workshops — include program, registration number and organizer contact Bringing It All Together for a Successful Application
Navigating the visa application process can feel like a complex puzzle, but as we've demonstrated, the letter of invitation is a critical piece you can control. The goal is not just to submit a letter; it's to submit a compelling, clear, and credible document that strengthens your entire application and leaves no room for doubt in the consular officer's mind.
Throughout this guide, we’ve analysed various letter of invitation sample for visa scenarios, from securing a business trip to visiting family or attending a conference. While each template serves a unique purpose, a common thread ties them all together: the power of clarity, honesty, and thorough documentation.
Core Principles for a Winning Invitation Letter
Remember, the letter is more than a formality. It’s a formal declaration from your host that validates the purpose of your trip and, in many cases, provides a guarantee of financial support and accommodation. To ensure your letter hits the mark, always return to these fundamental principles:
- Be Specific and Factual: Vague statements are a red flag. Instead of saying "for a short visit," specify "for a visit from 15th August 2024 to 30th August 2024 to attend my graduation ceremony." Precision is your ally.
- Establish Credibility: The letter must prove the host is a real person or a legitimate organisation. This means including verifiable details like their full name, address, contact information, and legal status in the host country (e.g., citizen, permanent resident).
- Demonstrate Strong Ties to Nigeria: This is non-negotiable. Your application, supported by the invitation letter, must paint a clear picture of your intention to return home. Highlight your stable employment, family commitments, property ownership, or ongoing studies in Nigeria.
From Sample to Submission: Your Actionable Checklist
You now have the templates and the strategy. Before you finalise your document, run through this last checklist to ensure you haven't missed anything crucial.
- Customise, Don't Just Copy: Select the sample that most closely matches your situation and personalise every detail. The consular officer has seen thousands of letters; a generic, copied-and-pasted template will be spotted immediately.
- Align All Documents: Ensure the dates, names, and purpose of visit mentioned in the invitation letter perfectly match the information on your visa application form, flight bookings, and other supporting documents. Consistency is key to a believable application.
- Proofread Meticulously: A simple spelling mistake or grammatical error can undermine the professionalism and seriousness of your application. Read the letter aloud or have someone else review it for you. This simple step can prevent avoidable rejections.
- Seek a Second Opinion: When in doubt, especially for complex situations like medical visits or long-term family sponsorship, getting expert advice is a wise investment. Don't risk a refusal over a preventable error.
Mastering the art of writing a powerful letter of invitation sample for visa is an essential skill in your travel journey. It empowers you to present a confident and well-prepared case, significantly boosting your chances of a positive outcome and bringing you one step closer to achieving your international goals.
Feeling unsure about a specific detail or need instant clarification on your visa letter? Don't leave it to chance. Get personalised, AI-powered guidance tailored for Nigerians on JapaChat, the smart assistant for your relocation journey. Sign up for free at JapaChat and get the expert answers you need to perfect your application today.
-

Nigerian Applying for US Visa: A Practical Guide
So, you're planning a trip to the United States. Getting that US visa from Nigeria can feel like a huge mountain to climb, but breaking it down into manageable steps makes it much less intimidating. It all starts with getting the basics right: picking the correct visa and gathering the right paperwork.
Your first move is figuring out if you need a non-immigrant visa. These are for temporary stays, like tourism (the famous B-2 visa), business trips (B-1), or heading off to school (F-1). Once you know which one fits your plans, you’ll dive into the DS-160 online form and get ready for your interview.
Your First Steps for a US Visa from Nigeria
Navigating the US visa application process from Nigeria can be a real headache. I've seen it time and time again. But if you know what to expect from the very beginning, you can turn that confusion into confidence. Think of this guide as your personal roadmap, built specifically for Nigerian applicants like you.
The single most important decision you'll make is choosing the right visa type. Seriously, getting this wrong is one of the fastest ways to get a denial, and you'll be out your time and money. Your choice here sets the stage for everything else—the documents you need, the fees you pay, and even the kind of questions the consular officer will ask.
Choosing the Right Visa Category
Take a moment and think about the main reason for your trip.
- Are you a software developer from Lagos heading to a tech conference in Austin? That's a classic B-1 (Business Visitor) visa situation.
- Is your plan to visit your brother and his new baby in Atlanta for a few weeks? You'll be applying for the B-2 (Tourist) visa.
- Just got your admission letter from a university in California? The F-1 (Student) visa is the one for you.
These categories are not interchangeable, and mixing them up is a mistake many people make. If you're going for a tourist visa, you might find this guide on How to Get a US Tourist Visa helpful for the initial requirements.
To make this even clearer, here’s a quick-glance table to help you identify the right visa based on your travel purpose.
Visa Category Purpose of Travel Common Nigerian Applicant Example B-1/B-2 Business meetings, tourism, medical treatment A business owner from Aba attending a trade show, a family from Ibadan visiting relatives, or someone from Port Harcourt seeking specialised medical care. F-1/M-1 Academic or vocational studies A student from Kano enrolled in a Master's programme at a US university or attending a technical college in Houston. J-1 Exchange visitor programme A lecturer from UNILAG participating in a research programme, an au pair, or a summer work-travel student. H-1B Speciality occupation worker An IT professional from Yaba, an engineer from Warri, or an architect from Abuja hired by a US company. This table should give you a solid idea of where you fit. Picking the right category from the get-go is half the battle won.
Setting Realistic Expectations
Once you've locked in your visa type, it’s crucial to understand what the road ahead looks like. This means checking current wait times for an interview and staying updated on any policy changes that could affect applicants at the US consulates in Abuja and Lagos. The wait times can be extremely long—sometimes over a year—so planning well in advance is no longer a suggestion, it's a necessity.
This simple flowchart breaks down the very first phases of your application journey.
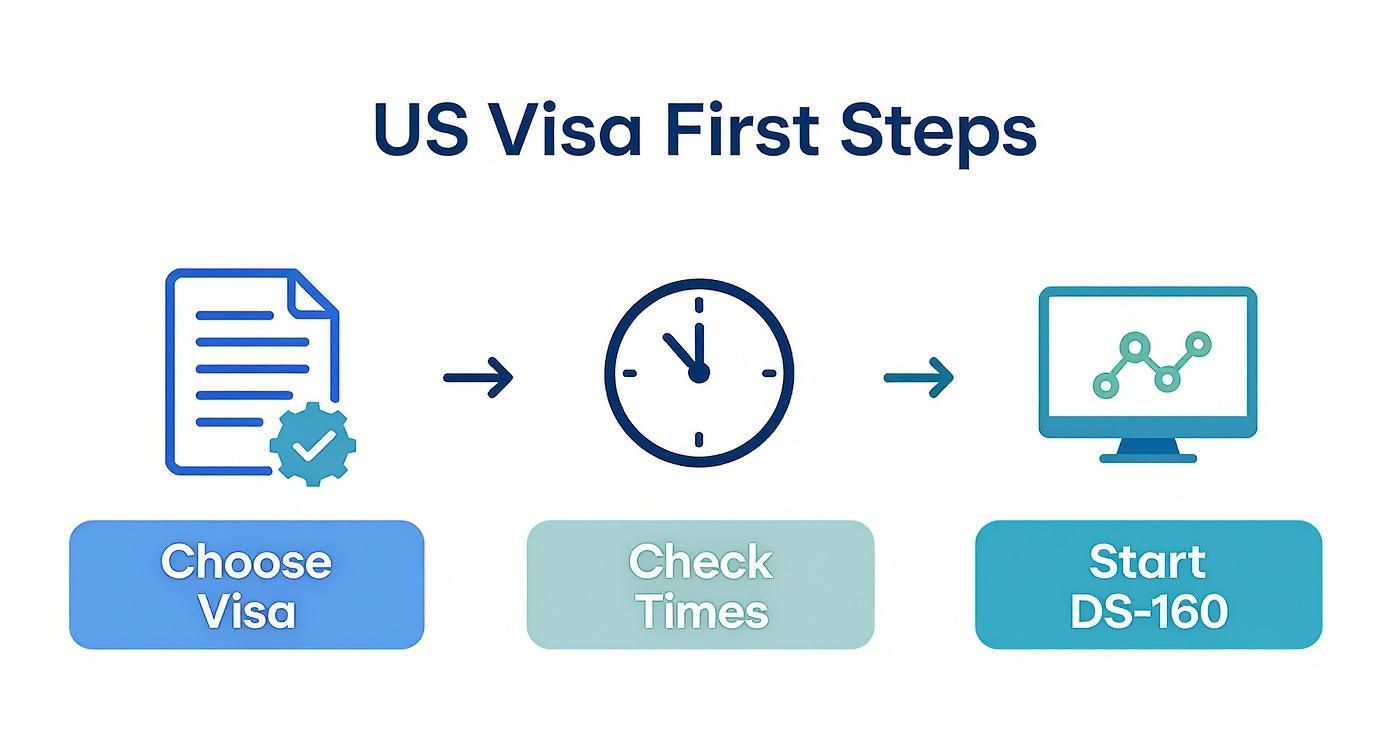
As you can see, it all starts with choosing your visa, then checking timelines, before you even think about starting that DS-160 form.
It's also important to be aware of the bigger picture. US visa policies can and do change. For instance, while B1/B2 visas issued to Nigerians are now typically valid for 5 years with multiple entries, this can vary. It's vital to check the latest reciprocity schedule on the U.S. Embassy in Nigeria's website before applying to know what to expect.
A successful US visa application from Nigeria isn't about luck—it's about meticulous preparation. Understanding what's required for your specific situation and presenting your case clearly and honestly is absolutely essential, right from the very first step.
This mindset will prepare you for the entire process. By taking your time with these initial stages, you're building a strong foundation for a successful application.
Getting Your US Visa Documents Together in Nigeria
Think of your visa application as telling a story, and your documents are the proof that makes your story believable. A successful application isn't about having a mountain of paperwork; it's about presenting a clear, consistent case to the consular officer that leaves no room for doubt.
The Must-Have Documents for Every Nigerian Applicant
Let's start with the absolute essentials. No matter what type of visa you're applying for, these are the non-negotiables you must have perfectly organised and ready to go.
- Your International Passport: It has to be valid for at least six months after your planned stay in the US. Also, check that you have at least one completely blank page for the visa stamp.
- DS-160 Confirmation Page: After you’ve submitted the DS-160 form online, you absolutely must print the confirmation page with the barcode. This is a critical piece of paper.
- Appointment Confirmation Letter: This is your ticket into the embassy or consulate. You won't get past security without it.
- Visa Fee (MRV) Receipt: You’ll pay this fee at a GTBank branch here in Nigeria. Guard that receipt; it's your proof of payment.
- One US Visa-Sized Photograph: It needs to be a recent colour photo (taken in the last six months) and must meet the strict US visa photo requirements. Don’t use an old picture from a previous application.
Getting these five items in order is the first big step. If even one is missing on your interview day, you're setting yourself up for serious delays or even an outright refusal to be seen.
Showing Financial Stability: The Nigerian Context
This is the part that makes many Nigerian applicants nervous, but it shouldn't be a source of stress. The consular officer isn't looking for a specific, magical amount in your bank account. What they want is to see a consistent and logical financial story.
A huge lump sum of cash that appears in your account a week before your interview is a major red flag. It looks suspicious and often leads to questions you don't want to answer.
A six-month bank statement from a recognised Nigerian bank is far more powerful. When it shows a steady salary coming in, regular day-to-day transactions (like buying airtime or paying for groceries), and a healthy closing balance, it tells a convincing story of stability. It’s much better than a one-off "miracle credit" from an unknown source.
To make your financial proof even stronger, you should also include:
- Payslips: Your last three to six months of payslips from your employer are solid evidence.
- Employment Letter: Get an official letter from your company that confirms your role, salary, and—importantly—that your leave for the trip has been approved.
- Business Documents: If you're a business owner, your CAC registration documents, tax clearance certificates, and your business bank statements are essential.
The goal here is simple: paint a clear picture of a financially responsible person with a stable life and career in Nigeria.
Customising Documents for Your Trip
Beyond the core list, the rest of your documents need to directly support the specific reason you want to visit the US. Tailoring your file helps you stand out for the right reasons.
Let's break down what this looks like for common visa types.
For Students (F-1 Visa)
- I-20 Form: This is your golden ticket. It's issued by the US school that accepted you and is the single most important document for a student visa.
- SEVIS Fee Receipt: You must show proof that you've paid the Student and Exchange Visitor Information System fee.
- Educational Transcripts & Certificates: Have your WAEC/NECO results, university transcripts, and any degree certificates ready to show.
- Sponsor's Financials: If someone else is paying for your education (e.g., your parents), you need their bank statements, a letter from their employer, and a formal letter of sponsorship. Sometimes, how this letter is written can make all the difference. For some great tips, check out our guide on how to write a compelling letter of intent for a visa application.
For Business Travellers (B-1 Visa)
- Letter of Invitation: This should be a formal letter from the company in the US you plan to visit. It must detail the purpose of your trip, how long you'll be there, and who is covering the costs.
- Company Profile: Bring information about your own company in Nigeria to prove it's a legitimate, operating business (think CAC docs, company brochure).
- Proof of Correspondence: It's a good idea to print out key emails or other communications you've had with the US company about your visit.
For Tourists (B-2 Visa)
- Detailed Travel Itinerary: Don't just say "visiting the US." Have a day-by-day plan. Which cities will you visit? Where will you stay? What sights do you plan to see?
- Hotel and Flight Reservations: You should not buy non-refundable tickets, but having flight and hotel reservations shows you've thought through your trip.
- Proof of Ties to Nigeria: This is crucial for tourist visas. Documents showing property ownership (like landed property documents), family ties (marriage and birth certificates), and even social commitments (like being a member of a church board or professional body) can demonstrate your strong reasons to return home.
Putting your documents together is more than just a task on a checklist. It’s the art of telling your true and compelling story—a story about who you are, why you're travelling, and why you will definitely be returning to Nigeria.
Getting the DS-160 Form Right
Think of the DS-160 form as the very first conversation you have with the consular officer. Before they even see your face, this document has introduced you. It’s their first impression, and believe me, in the world of US visa applications, that impression is everything.
This isn’t just about filling in blanks; it's about telling a clear, consistent, and honest story. A tiny mismatch between what's on this form and what you say at the interview can plant a seed of doubt. Our job is to make sure there’s no room for doubt, so let's walk through the tricky parts together.
Nailing the Personal and Travel Details
This section seems simple, but it's a minefield for small mistakes that cause huge headaches. Triple-check every letter in your name and every digit in your passport number. It sounds obvious, but a simple typo can derail your entire application.
When it asks for your travel plans, be specific but don't overdo it. If you're going for a B-2 tourist visa, don't just write "Tourism." That's too vague. A much better answer is something like, "To visit my sister in Atlanta, Georgia for two weeks and attend her graduation ceremony." This shows you have a clear, credible reason for your trip.
Crucial Tip: The DS-160 confirmation barcode (it starts with "AA") on your submitted form must be the exact same one you use to book your interview appointment. If they don't match, you won't be allowed into the embassy or consulate. You'll be turned away and forced to reschedule. Always, always book with your final, submitted DS-160.
And please, save your application constantly. The system is notorious for timing out, especially with Nigeria's internet. Write down your Application ID and your security question answer somewhere you won't lose it.
Describing Your Work and Income the Right Way
This is where many Nigerians, especially entrepreneurs and those in the gig economy, get tripped up. The form leans towards a traditional 9-to-5 structure, but that’s not the reality for many of us. The trick is to translate your reality into their language.
- For Business Owners in Lagos: Instead of putting "Businessman," be more descriptive. Try "Owner of a textile importation company" or "Managing Director of a digital marketing agency." When it asks for your monthly income, calculate a realistic average based on your business profits over the last 6-12 months.
- For Tech Bros & Freelancers: You are not "Unemployed." You are self-employed. Use titles like "Freelance UI/UX Designer" or "Self-Employed Content Strategist." State your average monthly earnings in Naira and make sure your bank statements back this up.
The goal here is simple: the job title and income you list must perfectly align with the financial documents you're bringing to the interview. Consistency is king.
Handling Social Media and Past Travels
Yes, the DS-160 asks for your social media handles from the past five years. Don't hide anything. They can and sometimes do check. Just list the platforms you actually use. Trying to hide an account is a massive red flag. Make sure your public profiles are clean and don't contradict your application.
When it comes to your travel history, be a detective. Pull out your old passports and list every single country you've been to. This helps paint a picture of you as a genuine global traveller, not someone looking for their first-ever trip out of Nigeria.
Common DS-160 Blunders to Avoid
- The "Agent" Trap: You can get help filling out the form, but you are 100% responsible for every single answer. Never let an agent submit it without you personally reviewing every word. Their mistake becomes your denial.
- Guessing Answers: If you can't remember an exact date (like a previous trip from 10 years ago), provide your best honest estimate. It's better than making something up or leaving a field blank.
- The Photo Fiasco: Your digital photo has to be perfect. The US Department of State has very strict rules for the background (plain white), size, and age (it must be taken within the last six months). A bad photo will get your form rejected before you even start.
Before you hit that final submit button, stop. Take a break for an hour, then come back and review everything from the beginning. Read your answers out loud. Does it all make sense? Is it an accurate reflection of your life? That final check can be the single thing that separates a smooth process from a frustrating rejection.
Booking Your Visa Interview Appointment
https://www.youtube.com/embed/UCvs-2VbqWM
Alright, you’ve wrestled the DS-160 into submission. Now comes the part that truly tests your patience: booking the visa interview. For Nigerians, this is often the biggest bottleneck. The demand for appointments in both Abuja and Lagos is incredibly high, and the available slots are few and far between.
Everything from here on out happens on the official CGI Federal/UStraveldocs portal. Your first task is to create a profile. Be meticulous here—every detail must perfectly match your passport and the DS-160 you just filled out. Even a small typo can cause major headaches later.
Once your profile is up, the system generates a payment slip for your MRV (Machine Readable Visa) fee. You’ll need to take this slip to any GTBank branch in Nigeria to pay. After payment, there's a bit of a waiting game. It can take a couple of business days for the receipt to activate in the system, so don't stress if it isn't instant. Only when that payment is confirmed will the appointment calendar unlock for you.
Navigating the Appointment Calendar
This is where the real "game" begins. You'll log in, ready to book, and will almost certainly be greeted by the infamous "No appointments available" message. Take a deep breath. This is completely normal. Securing a date is less about luck and more about strategy and persistence.
The embassy doesn't release appointment slots on a set schedule. They can pop up at any time, day or night. From the collective experience of countless applicants, certain windows seem to offer a better chance:
- Late at Night (Nigerian Time): Try checking between 11 PM and 3 AM. This often coincides with the close of business in the US, when they might push system updates.
- Very Early Morning: Logging on around 5 AM or 6 AM, before the system gets busy, has worked for many people.
- Random Mid-day Checks: Sometimes, a slot opens up when someone else cancels. A quick check during your lunch break could be your lucky moment.
The honest truth about booking an appointment is that it's a marathon, not a sprint. You will get frustrated seeing no available dates. The key is to keep checking without letting it discourage you. Persistence really is your best tool here.
This whole process—scheduling interviews at the U.S. Embassy in Abuja or the Consulate in Lagos—is designed to be structured. Applicants must meet all the criteria, have valid travel documents, and follow immigration laws precisely. It's all part of a larger effort to manage visa issuance and prevent overstays. You can get more official context on residency requirements for visa adjudication on the U.S. Embassy in Nigeria's website.
What About Emergency Appointments?
You’ll probably see an option for an "Expedited" or "Emergency" appointment. It might look like a tempting shortcut, but proceed with extreme caution. This is not a loophole. The criteria are incredibly strict and reserved for genuine, verifiable emergencies.
You would only be considered for an expedited appointment in a few specific scenarios:
- Urgent Medical Need: This applies if you or your minor child require life-saving medical care in the US. You'll need proof, like a detailed letter from your doctor in Nigeria and a confirmation from the US hospital.
- Death of an Immediate Family Member: If you need to travel for the funeral of a direct relative (parent, sibling, or child), you must provide a death certificate and other proof of the relationship.
- Urgent Business Travel: This isn't for a routine meeting or conference. It's for an unforeseen business crisis where your absence would cause a huge financial loss to a US or Nigerian company.
Requesting an emergency appointment without a qualifying reason won't just get denied; it could flag your application negatively. Unless your situation is a true life-or-death matter, your best bet is to stick with the regular booking process.
How to Ace Your US Visa Interview
This is it—the final, most personal hurdle. After all the forms, the bank drafts, and the long wait for an appointment, the interview is your chance to bring your application to life. In just a few short minutes, your mission is to connect with the consular officer and convince them of one simple thing: you have every reason to return to Nigeria after your trip.
Don't think of it as an interrogation. It's more like a very brief, very important conversation. The officer has seen your DS-160 and probably skimmed your key documents. Now, they want to see if the person standing in front of them matches the story on the paper. Your job is to connect those dots for them, clearly and confidently.
It's All About "Strong Ties"
The entire interview really boils down to one core concept: strong ties to Nigeria. This is the foundation of almost every question you'll be asked. "Strong ties" are just the compelling reasons—economic, social, and professional—that guarantee you'll come back home. It’s not enough to simply say you'll return; you have to prove it with your answers and your supporting documents.
Let’s break this down into real-world Nigerian scenarios:
- Your Job is Your Anchor: A stable, well-paying job at a reputable company in Lagos or Abuja is a massive tie. Be ready to talk about your role, how long you've been there, and what your future looks like at the company. A letter from your HR department confirming your position and approved leave is solid gold.
- Family is Everything: Your commitments to your family are incredibly powerful ties. Are you married? Do you have children in school here? Are you the primary caregiver for your elderly parents back in the village? These are significant responsibilities that root you firmly in Nigeria.
- Property and Investments: Owning property, whether it's a plot of land in Lekki or the family home in Kano, is a tangible asset that shows you have deep roots. Even significant investments or running your own registered business (with CAC documents to prove it) serves as a strong economic anchor.
- Ongoing Commitments: Are you in the middle of a professional certification programme or pursuing an MBA at a Nigerian university? This shows you have unfinished business and a clear plan for your future inside the country.
Your task is to figure out what your strongest ties are and have the documents ready to back them up, even if you're not asked for them. Organise your folder so you can pull out a payslip, a child's birth certificate, or a property deed in a matter of seconds if needed.
The key is showing, not just telling. To help you gather the right proof, think of it like building a case for your return.
Proving Strong Ties to Nigeria: A Practical Checklist
This table offers concrete examples of evidence you can use to demonstrate your binding connections to Nigeria.
Type of Tie Primary Evidence Supporting Documents Employment Letter from employer stating your role, salary, and approved leave. Recent payslips (3-6 months), company ID card, business card. Family Marriage certificate, birth certificates of children. Photos of your family, school fee receipts for your children. Financial Personal bank statements for the last 6 months. Fixed deposit statements, investment portfolio summary, statements of other assets. Business Certificate of Incorporation (CAC documents), business bank statements. Tax clearance certificates, contracts with clients, photos of your business premises. Property Deed of Assignment, Certificate of Occupancy (C of O), or other title documents. Recent utility bills in your name, property tax receipts. Education Letter of admission or student ID from a Nigerian institution. Recent tuition fee receipts, academic transcripts showing ongoing studies. Having these documents organised and ready to present sends a strong signal that you are a serious and credible applicant.
Answering the Most Common Interview Questions
While every interview is unique, the questions often circle back to the same core themes. They're designed to quickly figure out your purpose for travel and confirm your ties to Nigeria. Preparing thoughtful, honest answers is crucial. For a more exhaustive list, our guide on common visa interview questions and answers is a great place to start.
Here’s how to approach some of the classics:
"Why are you travelling to the United States?"
Your answer needs to be specific and perfectly match the visa type you applied for.- Weak Answer: "For tourism."
- Strong Answer: "I'm going to attend my younger sister's graduation from the University of Houston. I'll be staying with her for two weeks and we plan to visit the Space Center before I fly back to my job in Lagos."
"What do you do for a living?"
Be clear, proud, and specific about your work.- Weak Answer: "I am a businessman."
- Strong Answer: "I am the Managing Director of a software development firm in Abuja. We build mobile applications for local financial institutions. I've been running the company for five years."
"Who is paying for your trip?"
Be direct and have the proof ready to show.- Strong Answer: "I'm funding the entire trip myself from my personal savings. I have my six-month bank statement right here and a letter from my employer confirming my salary."
The Day of Your Interview: Logistics and Mindset
How you carry yourself on the day can matter just as much as what you say. Your appearance and demeanour create an immediate first impression.
- Dress Professionally: You don't need to wear a full three-piece suit, but smart, professional attire is a must. Think business casual—a clean, ironed shirt, smart trousers or a skirt. It's best to avoid flashy logos or overly casual clothes like jeans and t-shirts.
- Arrive on Time, But Not Too Early: Aim to get to the embassy or consulate about 15-30 minutes before your scheduled appointment. Arriving hours ahead of time won't get you in any faster and will likely just add to your nerves.
- Organise Your Documents: I always advise having two separate folders. The first should have your absolute essentials: your passport, DS-160 confirmation page, and appointment letter. The second should contain all your supporting documents, neatly arranged by category (financial, employment, family ties, etc.).
- Body Language Speaks Volumes: Stand straight, make eye contact, and listen carefully to the entire question before you start to answer. Speak clearly and with confidence, but never aggressively. A calm, respectful attitude goes a very long way.
Remember: The consular officer makes hundreds of these decisions. They are highly trained to spot inconsistencies and nervousness. Your best strategy is, and always will be, the truth—presented clearly, calmly, and confidently. All the preparation you do now will be your greatest asset once you're inside that interview room.
Common Questions from Nigerian US Visa Applicants
It’s completely normal to have a few nagging questions even after you’ve tackled the forms, paid the fees, and booked your appointment. In fact, this is the stage where specific worries often pop up for Nigerian applicants. We've been through this process with countless people, so we’ve put together the most common queries we hear, along with clear, no-nonsense answers.
Let's clear up those last-minute doubts so you can walk into your interview with confidence.
How Much Money Do I Really Need in My Bank Account?
This is the million-naira question, isn't it? The truth is, there’s no magic number. The US Consulate isn't looking for a specific figure like ₦5 million or ₦10 million in your account. What they're really looking for is financial stability and a story that makes sense.
A huge, last-minute deposit right before your interview is one of the biggest red flags you can raise. It just looks suspicious. What's far more convincing is a bank statement from the last six months that shows a steady, consistent flow of money—like your monthly salary coming in and regular bills going out. This tells a much stronger story: that you can comfortably afford your trip and have a stable financial life to come back to.
What Are the Top Reasons Nigerians Get Denied?
By a long shot, the number one reason for denial falls under Section 214(b) of US immigration law. Stripped of the legal jargon, it simply means the consular officer wasn't convinced you have strong enough ties to Nigeria to guarantee you'll return home.
Beyond that, other common pitfalls include:
- Contradictory Information: The answers you give in your interview don't line up with what you wrote on your DS-160 form. Consistency is key.
- Fake Documents: Trying to use fraudulent or altered documents is an instant denial and can get you permanently barred. Don't even think about it.
- Past Immigration Issues: If you've ever overstayed a visa before, whether in the US or another country, it will be a major hurdle to overcome.
Your best defence against a denial is to be honest, consistent across the board, and meticulously prepared.
At its core, a successful visa application is all about proving your intent to return. Every single document you submit and every answer you give must reinforce the strong, unbreakable ties you have to your life, family, and career back here in Nigeria.
Can I Reapply After a Visa Denial?
Yes, you absolutely can. But—and this is a big but—you have to understand why you were denied in the first place. Just resubmitting the exact same application is a waste of time and money; it will almost certainly be rejected again.
You should only consider reapplying once there's been a significant and positive change in your circumstances. Maybe you've landed a much better job, bought a property, gotten married, or your reason for travel is now more compelling and better documented. Your new application must directly or indirectly address the reasons for the previous refusal.
How Long Does It Take to Get My Passport Back?
If the consular officer says your visa is approved—congratulations!—they will keep your passport to affix the visa foil. From there, it gets sent to the DHL collection centre you selected during the application process.
You can typically expect an email or SMS notification that your passport is ready for pickup within 5 to 10 business days. This is crucial: never, ever book non-refundable flights or make solid travel arrangements until that passport, with the visa inside, is physically in your hands.
Feeling overwhelmed by the immigration process? JapaChat is here to help. As Nigeria's first AI immigration expert, we provide instant, accurate answers to your pressing questions about visa requirements, documentation, and travel logistics. Get the clarity you need to plan your journey with confidence. Sign up for free and start your informed journey today at https://japachat.com.
-
Guide: How Can I Get a Work Visa for Canada for Nigerians?
So, you're thinking about getting a Canadian work visa? It's a fantastic goal, but for most Nigerians, the first step is figuring out which pathway is the right one for your specific situation. It usually boils down to two main options: the Temporary Foreign Worker Program (TFWP) and the International Mobility Program (IMP).
Each one is designed for different types of workers and job offers, and knowing the difference is half the battle. This isn't just about paperwork; it's about strategy.
Your Canadian Work Journey Starts Here

For many of us dreaming of working in Canada, the process can seem overwhelming at first glance. It's easy to get lost in all the acronyms and paperwork. But once you break it down, it's a lot more straightforward than it looks.
The biggest difference between the TFWP and the IMP hinges on a single, crucial document: the Labour Market Impact Assessment (LMIA).
What on Earth is an LMIA?
Think of an LMIA as official proof from a Canadian employer. It essentially says, "We tried to hire a Canadian or permanent resident for this job, but we couldn't find a suitable candidate." This document is the heart and soul of the TFWP.
If your potential employer needs to get an LMIA, it's usually because they're trying to fill a labour shortage. This is a very common route for Nigerians in fields like long-haul truck driving, healthcare (especially caregiving roles), and skilled trades like welding or construction.
On the flip side, the IMP is for situations where your work benefits Canada in a different way. This could be because you're transferring within a multinational company from its Lagos office to its Toronto branch, or because you have highly specialised tech skills (like in AI or cybersecurity) that are in serious demand. These jobs are LMIA-exempt, which can often speed things up.
The path you take is decided by the job offer you get. An LMIA-based offer automatically puts you in the TFWP stream. An LMIA-exempt offer puts you in the IMP stream. Grasping this distinction from the start is absolutely critical for a smooth application.
Canada Work Visa Pathways at a Glance for Nigerians
To help you see the difference more clearly, I've put together a simple table. It breaks down the main visa types, what they require, and the typical processing times so you can figure out which path makes the most sense for you.
Pathway Key Requirement Best For Typical Processing Time Temporary Foreign Worker Program (TFWP) Positive LMIA from a Canadian employer Workers in occupations with proven labour shortages (e.g., healthcare, construction, truck driving) 4-8 months (including LMIA processing) International Mobility Program (IMP) LMIA-Exempt Job Offer Workers with specialised knowledge (e.g., IT specialists), intra-company transferees, or post-graduates 2-5 months As you can see, the timelines and requirements vary quite a bit. Your job offer is your ticket, and it dictates the entire process.
Choosing Your Pathway
Navigating these streams is the core of the work visa application for any Nigerian. It’s also worth remembering that Canada’s immigration policies are always being updated to manage the number of temporary workers while still meeting the country's economic needs. Because of this, having a clear strategy right from the beginning is your best bet for success.
For a much deeper dive into the entire relocation process, you might find our complete guide on how to relocate to Canada from Nigeria really helpful.
Confirming You're Eligible for a Canadian Work Visa
Before you spend a single Naira on application fees or invest weeks chasing down documents, let's have a frank chat. Thinking about getting a work visa for Canada starts with a hard look in the mirror to confirm you meet the basic, non-negotiable requirements. This isn't just about ticking boxes; it's about building a convincing story for the visa officer from the very beginning.
At the end of the day, the Canadian government needs to be sure of two things: you won’t become a burden on their system, and you will leave when your permit expires. Every single document you submit needs to back up these two points. Let's break down what this really means for you in Nigeria.
Demystifying Proof of Funds
This is where a lot of Nigerians get stuck. Canadian officials want to see that you can support yourself when you first land, long before your first Canadian paycheque comes in. There's no magic number, but a good rule of thumb is to have the equivalent of C$3,000 to C$5,000 ready.
At the current exchange rate, that's a significant amount of Naira. The key isn't just having the money—it's proving where it came from. A large, sudden deposit into your account right before you apply is a major red flag. It just looks suspicious. Think about it: if ₦5 million suddenly appears in your GTBank account from an unknown source, it raises questions.
Instead, you need to show a consistent financial history. Here’s how you can present your funds convincingly:
- Bank Statements: You'll need at least four to six months of official bank statements. Don't just print the transaction history from your banking app. Go to your bank and get the properly stamped, official documents.
- A Clear Narrative: It helps to include a short letter explaining your financial situation. Make the visa officer's job easier by converting your closing balance to Canadian dollars. If you have significant savings in a mutual fund or a fixed deposit account, provide statements for those too.
- Sponsorship: If a family member is sponsoring your trip, you'll need a formal letter of sponsorship from them, their own bank statements, and solid proof of your relationship (like a birth certificate).
This financial proof tells the visa officer you’ve planned your move properly and won’t be left stranded on arrival.
Proving Your Strong Ties to Nigeria
Honestly, this might be the most critical part of your entire application. You have to convince the visa officer that you have compelling reasons to return to Nigeria after your work permit expires. Think of it as leaving some serious collateral behind.
For Nigerians, these ties can be shown in very specific ways. Vague statements won’t cut it; you need concrete evidence.
Your goal is to paint a picture of a stable, established life in Nigeria that you fully intend to return to. The more evidence you provide, the stronger your case becomes. It's about showing you have too much to lose by not coming back.
Consider these powerful examples of ties:
- Family Responsibilities: Are you caring for elderly parents in Abuja? Are your spouse and children staying in Nigeria while you work abroad? Provide proof like birth certificates, marriage certificates, and a letter explaining your family situation.
- Property Ownership: Owning property is a massive anchor. If you own land or a house in Lagos, Port Harcourt, or anywhere else, include the title deeds or deed of assignment in your application.
- A Stable Job: A letter from your current Nigerian employer is excellent evidence. It should state that you are on an approved leave of absence and are expected to return to your position. This shows you have a career waiting for you back home.
- Business Ownership: If you run your own registered business, be sure to include your Corporate Affairs Commission (CAC) documents and business bank statements.
Navigating the Medical Examination
Finally, every applicant has to go through a medical examination. This is not something you can do with your family doctor down the road. You must book an appointment with a "panel physician" who has been approved by Immigration, Refugees and Citizenship Canada (IRCC).
There are several approved clinics in Nigeria, mostly located in Lagos and Abuja. The exam itself is pretty straightforward. It usually includes a physical check-up, blood tests, and a chest X-ray to screen for things like tuberculosis.
The best part? The results are sent directly to IRCC by the physician’s office, so you don't have to worry about submitting them yourself.
By carefully preparing your proof of funds, demonstrating strong ties to home, and getting your medicals done, you build a solid foundation for your Canadian work visa application.
How to Secure a Genuine Canadian Job Offer

For most Nigerians, this is where the real work begins. Getting a legitimate Canadian job offer is the single most critical step in the entire process, but you're up against some serious competition. Let's be honest, generic advice won't cut it. You need a solid game plan.
First things first, you have to completely overhaul your CV. The typical Nigerian CV format—the one with your date of birth, state of origin, and a headshot—is a non-starter in Canada. It will get your application binned almost instantly. Why? Canadian hiring practices are designed to prevent bias, so including these personal details is seen as unprofessional.
Your new CV needs to be a sharp, achievement-focused document. Stop listing your duties and start showcasing your accomplishments. Use real numbers to prove your impact. For instance, don't just say "Managed social media." Instead, write something powerful like, "Grew social media engagement by 45% in six months by developing and executing a new content strategy." See the difference?
Adapting Your CV for the Canadian Market
To get a Canadian recruiter to actually read your CV, you need to do more than just remove personal details. Think of it as translating your career story into a language they understand and respect.
- Lead with Your Strengths: Start with a punchy professional summary that highlights your top skills and biggest wins. Use bullet points and strong action verbs.
- Quantify Everything: Numbers are a universal language. Managed a team? How many people? Handled a budget? How much was it? Improved a process? By what percentage? Put a number on it.
- Customise Every Single Time: This is non-negotiable. Don't mass-send the same CV. Read the job description carefully and mirror its keywords and language. It shows you're serious and not just spamming applications.
This approach shows you understand the professional culture and you're ready to hit the ground running. It's also worth looking into proven strategies that can help expedite your job search and get your application noticed.
Leveraging the Right Job Search Platforms
Of course, you'll be using platforms like LinkedIn and Canada's official Job Bank. But your strategy needs to be smarter than just clicking "apply" on hundreds of listings. That’s a fast track to burnout. The real magic happens when you start building connections.
Reach out to other Nigerians who are already working in your industry in Canada. A simple, polite message on LinkedIn can be surprisingly effective. Don't ask for a job—ask for advice. People are often happy to share their journey, and these chats can lead to inside information on unadvertised roles.
The hidden job market is very real in Canada. Many of the best roles are filled through referrals. Networking with other Nigerian professionals who have successfully made the move is your most powerful strategy. They've walked the path you're on and can offer invaluable insights.
Identifying Legitimate Opportunities and Avoiding Scams
Sadly, where there's high demand, there are scammers. You have to learn how to spot the red flags from 'ghost consultants' and fake job offers to protect yourself.
A real Canadian employer will never ask you to pay for a job offer. They will also never ask you to cover the fees for a Labour Market Impact Assessment (LMIA). By law, those costs fall on the employer. If anyone asks you for money for a job, walk away. It's a scam, period.
On the flip side, a massive green flag is the mention of an LMIA. A genuine employer will know all about this process. If they can give you a positive LMIA number, you can feel confident the offer is legitimate. It's the Canadian government's stamp of approval, confirming the employer has permission to hire you.
Be sceptical of any offer that seems too good to be true, comes from a generic email address (like Gmail or Yahoo), or pressures you into a quick decision. Always do your research and verify the company's existence before you get your hopes up.
Your Nigerian Document Checklist for Canada
Getting your documents in order isn't just a step in the process; it's the very foundation of your application. Think of it this way: a single missing paper or a poorly filled-out form can bring your Canadian dreams to a screeching halt. Let's walk through the ultimate checklist, built from the ground up for the specific hurdles Nigerians face.
We’re going to break down every critical document. I won’t just tell you what you need, but I'll show you how to get it right by Canadian standards. This is about more than just ticking boxes—it's about building a rock-solid, convincing case for the visa officer reviewing your file.
The Essential Police Clearance Certificate
First up, the Police Clearance Certificate (PCC). Here in Nigeria, we call it the Police Character Certificate. This one is non-negotiable. It's your official proof to the Canadian government that you don't have a criminal record that would make you inadmissible.
You'll need to get this sorted through the Nigeria Police Force Criminal Investigation Department (CID). Your best bet is to apply at the police headquarters in your state or, if you're in Lagos, head to the Central Criminal Registry in Alagbon.
Here's what to expect:
- Biometrics: They will need to take your fingerprints.
- Required Documents: Make sure you have your valid Nigerian international passport, a few passport photos, and proof of your address.
- A Word of Advice: This process can take weeks, sometimes longer. Don't put it off. Apply for your PCC right at the start of your journey.
Getting Your Educational Credentials Assessed
That degree from the University of Ibadan or your HND from Yabatech is a massive achievement, but Canadian immigration needs to understand how it stacks up against their own system. That's where an Educational Credential Assessment (ECA) comes into play.
An ECA report from a designated organisation basically validates your Nigerian qualification, showing it's equivalent to a Canadian one. Most people use World Education Services (WES); it's the most recognized.
Honestly, the biggest headache for many Nigerians is getting their university to send transcripts directly to WES. This can be a painfully slow process. Contact your university's transcript office the moment you decide to apply. Some unis have improved, but many still operate on a timeline that requires you to plan far, far ahead.
A key takeaway for Nigerian applicants: The ECA process often takes much longer than anticipated due to transcript verification delays. Initiate contact with your university and your chosen ECA body (like WES) as soon as you decide to apply for a Canadian work visa.
Crafting a Compelling Reference Letter
Listen, a standard reference letter from a Nigerian employer often isn't good enough. Canadian visa officers are looking for very specific details that prove your work experience is a match for the job you've been offered. A generic letter saying you were a "hardworking employee" is completely useless.
Your reference letter absolutely must be on official company letterhead and include:
- Your full name and job title.
- The exact dates you worked there.
- Details on your salary and any benefits.
- A detailed list of your main duties, written with strong action verbs.
- The contact information for your manager or HR.
The duties you list must align perfectly with the lead statement and job description for your National Occupational Classification (NOC) code. This is how you directly prove you have the right experience for the job waiting for you in Canada.
This is also a good time to remember that Canada's approach to immigration is strategic. The path for Nigerians is heavily influenced by policy changes and targets set by IRCC. For example, Canada's Immigration Levels Plan shows a strong focus on bringing in skilled workers to fill economic gaps. This means more opportunities for Nigerians who can clearly prove their qualifications. You can find more insights on these plans over at CanadaVisa.com.
Proving You Have Sufficient Funds
We've touched on this before, but your bank documents are a make-or-break part of this checklist. You'll need to provide clear, stamped bank statements for the last four to six months. Any large, sudden deposits without a clear explanation are a huge red flag. Your financial story must be consistent and easy to follow.
For a complete breakdown of exactly what's required, check out our detailed guide on proof of funds for your Canada application.
Mastering the IRCC Online Application Portal
The official Immigration, Refugees and Citizenship Canada (IRCC) portal is your main gateway for the application. To be frank, it can feel a bit overwhelming at first. Think of this section as your personal walkthrough, here to help you sidestep the common pitfalls that can delay, or even deny, your work visa application.
We're going to break down how to set up your profile, tackle the key forms without errors, and upload your documents just right. The goal? For you to hit that "submit" button with total confidence.
Creating Your Profile and Navigating the Forms
First things first, you'll need to create a secure IRCC account. This is your personal dashboard for the entire process—it's where you'll submit everything, get messages from IRCC, and track your application's status.
Once you’re registered, the system will guide you through a questionnaire. Your answers will generate a personalised checklist and the specific forms you need to complete.
For anyone applying for a work permit from outside Canada, the main document is the IMM 1295 (Application for Work Permit Made Outside of Canada). My advice? Take your time here. Go over every single detail twice—your passport number, your date of birth, everything. A simple typo can cause a world of trouble down the line.
From my experience helping Nigerian applicants, a couple of sections often cause confusion:
- Travel History: You must be completely transparent here. List every single international trip you've taken in the past ten years. Been to the UK, US, or Dubai? It all needs to go in. Forgetting a trip can be seen as misrepresentation, which is a very serious offence in the eyes of IRCC.
- Family Information (IMM 5707): This is another critical one. You have to declare all your immediate family members—spouse, parents, kids, and siblings. This is required whether they are coming with you to Canada or not. Be meticulous with their details.
A Pro Tip I Always Give: Don't try to fill out the entire application in one go directly on the portal. It can time out and you might lose all your hard work. The smarter move is to download the PDF forms, save them to your computer, and fill them out offline. You can then upload the completed forms when you're ready.
Uploading Your Documents Correctly
After the forms are done, you’ll move on to the document upload stage. The portal will show you a personalised document checklist based on your earlier answers.
Pay very close attention to the technical requirements for each file. They usually need to be in PDF, JPG, or PNG format and, crucially, under 4MB in size. You'll likely need to use a free online tool to compress some of your larger files, like scanned passport pages or educational certificates.
This checklist gives a good overview of the core documents you'll need to get in order.
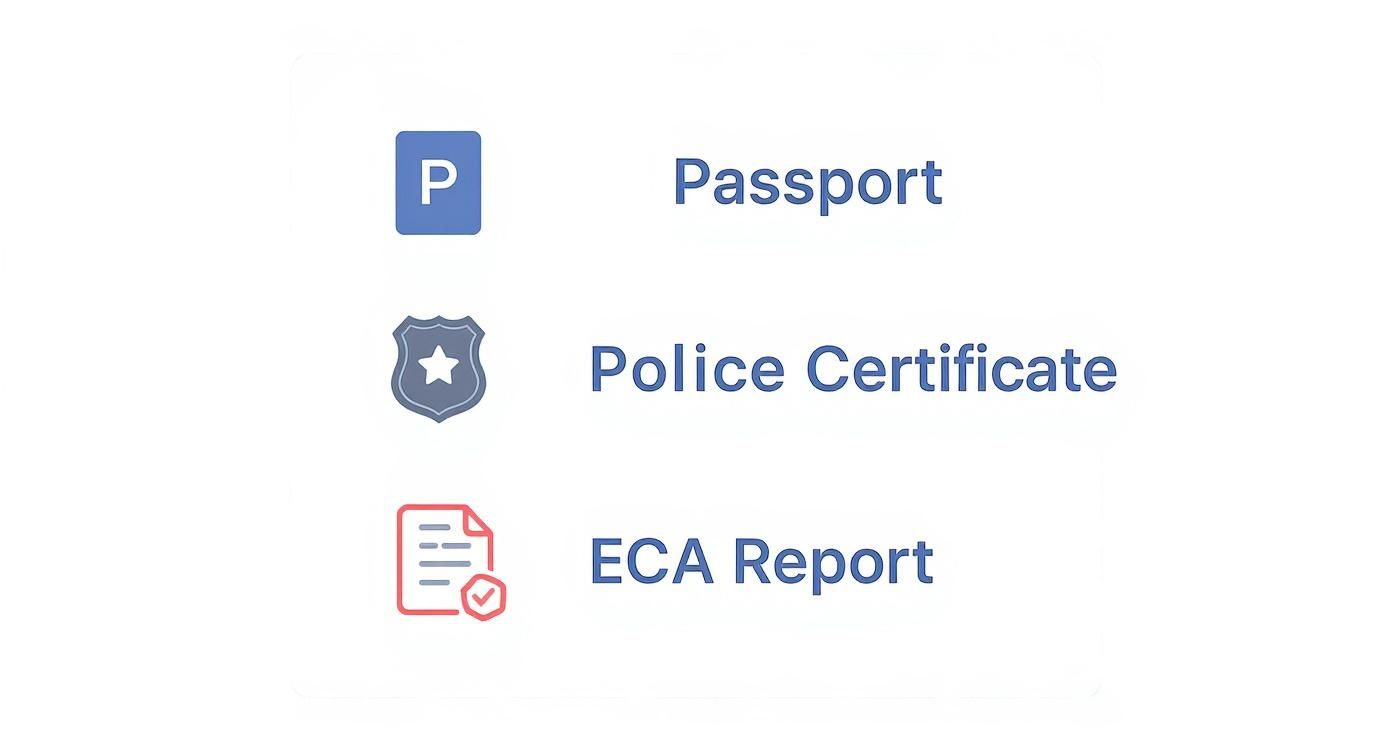
As you can see, critical paperwork like your passport, police certificate, and ECA report are the foundation of your application. Having these scanned and ready in the right digital format before you even start filling out the forms will save you a lot of stress.
The Biometrics Process in Nigeria
Once you've submitted your application online and paid all the necessary fees, you'll receive a Biometric Instruction Letter (BIL) in your IRCC account. This is not an optional step; it's mandatory.
With your BIL in hand, you must book an appointment at a Visa Application Centre (VAC). In Nigeria, the only two locations are in Lagos or Abuja.
These appointments can get booked up weeks in advance, so don't delay. As soon as that BIL arrives, get online and book your slot.
On the day of your appointment, you will need three things:
- Your valid international passport.
- The Biometric Instruction Letter (BIL) you printed out.
- Your appointment confirmation letter.
The process at the VAC is usually very efficient. They'll take your fingerprints and a digital photograph, and that's it. This information is then automatically linked to your online application. From this point on, the real waiting game begins. It's worth remembering that while Canada has ambitious immigration targets, the number of work permits issued can fluctuate with policy changes. You can see these immigration statistics and trends on Canada.ca, which underscores why a perfectly submitted application is more important than ever.
So, you’ve hit submit. What now?
This is where the real waiting game begins, and honestly, it can be the most stressful part of the entire journey. It helps to have a clear picture of what’s happening on the other side. Right now, your entire file is with an Immigration, Refugees and Citizenship Canada (IRCC) officer.
First, they'll do a quick check to make sure everything is there. They call this a "completeness check." If you've missed a major document, they might just send the whole application back to you, unprocessed. Assuming it passes that first hurdle, it officially enters the queue for a detailed review. Processing times can be all over the place, so your best bet is to keep an eye on the official IRCC processing times tool for the latest estimates for applications from Nigeria.
Keeping Tabs on Your Application
The easiest way to see what's going on is through your secure IRCC online account. The status updates are usually pretty simple – you’ll see it go from "submitted" to "under review," and then, eventually, to a final decision.
It’s completely normal for the status to sit unchanged for weeks at a time, so try not to worry. What you do need to act on quickly is any communication from IRCC. They might send a request for more information – maybe a clearer copy of a bank statement or an extra form. Don't see this as a bad sign. It just means they're doing their due diligence and need a little more from you. Get them exactly what they’ve asked for as soon as you can.
Understanding a Potential Refusal
It's wise to prepare for any outcome, and unfortunately, refusals do happen. Knowing the common reasons why applications from Nigeria are rejected can help you avoid these pitfalls from the start.
Some of the most common reasons I’ve seen include:
- Weak ties to Nigeria: This is a big one. The officer wasn't convinced you have compelling reasons to return home after your work permit ends. Think family, property, a stable career path to come back to.
- Insufficient proof of funds: Your financial documents didn't paint a clear enough picture that you can support yourself when you first land in Canada.
- Misrepresentation: This is the most serious. It means you either provided false information or omitted something critical, like a past visa refusal from the UK or US. Honesty is non-negotiable here.
A visa refusal isn't necessarily the end of your Canadian dream. The refusal letter is your most valuable piece of feedback. It will have the officer's notes explaining precisely why they said no. This is your roadmap for what to fix.
If you face a refusal, you have a couple of options. You can take the officer's feedback, gather stronger evidence to address their concerns, and re-apply with a much-improved application. Alternatively, you could take a step back and see if another immigration pathway might be a better fit. The goal is to learn from the decision and build a stronger case for next time.
Answering Your Top Canada Work Visa Questions
Let's get straight to it. You’ve got questions, and I’ve heard them all before from fellow Nigerians navigating this process. Here are the answers to the most common concerns.
Can My Family Come with Me to Canada?
Absolutely, this is a very common and achievable goal. If you land a work permit for a skilled position (that’s any job falling under NOC TEER 0, 1, 2, or 3), your spouse or partner is often eligible for an open work permit. This is fantastic because it means they can work for almost any employer in Canada without needing a separate job offer.
Your dependent children can also come along and are typically able to enrol in Canadian schools. The key is proving you have enough money to support everyone when you first arrive.
How Much "Proof of Funds" Do I Actually Need?
There’s no magic number set in stone by IRCC, but from experience, you need to show you can handle your initial expenses without immediately needing to earn. A solid benchmark for a single applicant is to have the equivalent of C$3,000 to C$5,000.
At the current exchange rate, that's roughly ₦3 million to ₦5 million. This isn't just about having the money; it's about showing it's genuinely yours. The funds should be in an account you've actively used for at least a few months. For a family, you'll need to show considerably more.
What if My Work Visa Application is Rejected?
A rejection stings, but it's rarely a dead end. The first thing you must do is stop and carefully read the refusal letter. The visa officer will state the exact reasons for the denial—this is your guide on what to fix.
A rejection is disappointing but not always the end. First, carefully read the refusal letter to understand why. This is your roadmap for what to fix.
For many Nigerians, common reasons are failing to prove strong ties to home, not showing sufficient funds, or the officer having doubts about the authenticity of the job offer.
Once you understand the problem, you can gather stronger evidence to address those specific points and re-apply. A second application that directly fixes the previous refusal's weak spots has a much better chance. Only in very rare cases, where you're certain the officer made a legal mistake, should you consider a judicial review. For most of us, strengthening the application and trying again is the way forward.
Feeling overwhelmed? Get instant, accurate answers to your personal immigration questions. JapaChat is Nigeria’s first AI immigration expert, designed to give you the clarity you need. Start planning your journey with confidence today at https://japachat.com.