Author: JapaChat
-
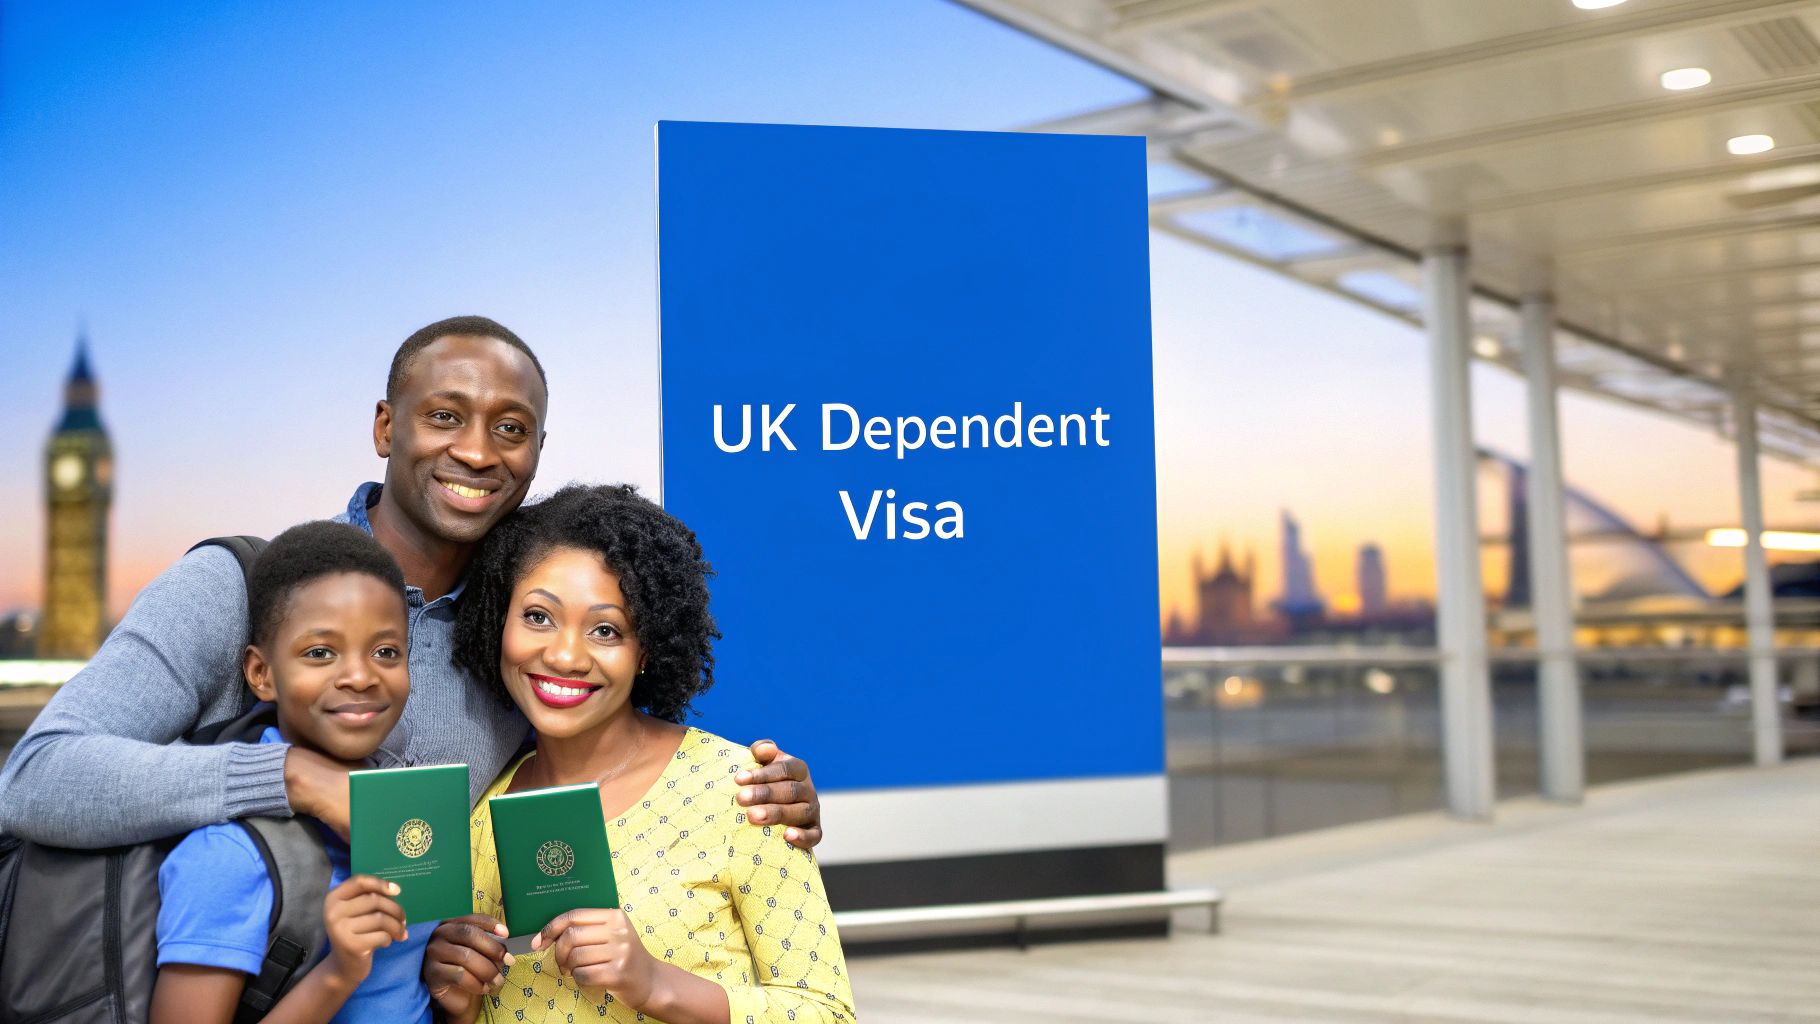
UK Dependent Visa UK Guide for Nigerian Families
Deciding to move to the UK from Nigeria for work or study is a massive, exciting step. But it almost always comes with one huge question: "Can my family come with me?" The answer, in many cases, is a resounding yes, thanks to the UK Dependent Visa. Think of it as the bridge that connects your new life in the UK with the people who matter most—your spouse, partner, or children.
Bringing Your Family to the UK from Nigeria
Planning a move from Nigeria to the UK is a huge undertaking, and it gets even more complex when your family is part of the equation. This guide is here to cut through the noise and confusion, explaining the UK Dependent Visa process in a way that makes sense for someone applying from Nigeria.
Let’s paint a picture. Maybe you’re a software developer from Lagos who's just landed a fantastic job in Manchester. Or perhaps you're a postgraduate student from Abuja, accepted into a world-class university in London. The dependent visa is what makes it possible for your family to live, and often work or study, right there with you.
Your Journey to Family Reunion
This visa isn't just about paperwork; it's the key to keeping your family together during one of life's biggest transitions. It means you don't have to face the impossible choice between your career or education and your family. You, as the main visa holder, are the 'anchor', and your family’s applications are linked directly to your own.
We’ll walk you through every stage, focusing on the real, practical steps you need to take from Nigeria. This includes:
- Understanding Who Qualifies: We'll break down exactly which family members the UK Home Office considers ‘dependants’.
- Meeting the Financial Rules: I'll explain the proof of funds requirements clearly, so you know exactly what's needed in Naira and pounds.
- Navigating the Application: We'll cover everything from filling out the online forms to what to expect at your biometric appointment in Lagos or Abuja.
Let's be upfront: UK immigration rules have been getting tighter. But don't let that discourage you. With the right information and careful preparation, getting through it is completely achievable. This guide gives you clear, actionable advice to help you confidently meet the requirements and bring your family to the UK. For a wider view, it's always a good idea to understand the different UK visa types available.
The goal is simple: to turn a complex process into a manageable journey. By understanding the rules and preparing your documents correctly, you can focus on the exciting prospect of starting your new life in the UK with your family by your side.
Once the visa applications are in motion, you can start the fun part—looking for a place to live. For bigger families, you might start exploring options like this 4-bed flat in Hackney to get a feel for what's out there. This guide is designed to give you the knowledge you need to make it all happen.
Who Qualifies as a Dependant?
The very first hurdle in bringing your family to the UK is figuring out if they actually qualify as dependants in the eyes of the Home Office. Before you even think about filling out forms or paying fees, you need to be certain that the UK’s definition of a dependant matches your family situation.
The rules are quite specific, but they’re not as complicated as they might seem. At its core, the UK government sees a dependant as either your partner or your child. Let’s break down exactly what that means for a family applying from Nigeria.
Defining Your Partner for the Visa
The word 'partner' is more flexible than you might think. UK immigration law acknowledges that families come in different forms, so it covers three main types of relationships.
-
Spouse or Civil Partner: This is the most straightforward. If you are legally married or in a civil partnership recognised in Nigeria, your partner is eligible. Your official marriage certificate from the registry is the key piece of evidence here.
-
Unmarried Partner: This is where the details really matter. If you’re in a serious, long-term relationship but aren't married, your partner can still join you. The golden rule is that you must prove you’ve been living together in a relationship that’s like a marriage for at least two years just before you apply.
You can't just say you've been together; you have to prove it with solid evidence. Think of it as building a file that tells the story of your shared life.
For Nigerian couples, this means gathering official documents that show you share a home and responsibilities. The Home Office isn't interested in how long you've been dating; they want to see clear proof that you've lived together.
Let’s take a real-world example. Imagine Ade, a Lagos-based software developer, gets a job offer and a Skilled Worker visa. He wants to bring his long-term girlfriend, Funke, with him. They aren’t married but have shared a flat in Lekki for the last three years. To prove their relationship, they would need to gather things like:
- A joint tenancy agreement for their apartment showing both their names.
- Utility bills (like EKEDC or LAWMA) addressed to both of them at the same address over the two-year period.
- Bank statements from a joint account showing shared financial responsibilities.
- Official letters from employers or doctors that confirm they live at the same address.
The more official proof you have, the stronger your application becomes. It's all about painting a clear and undeniable picture of your life together.
Understanding Who Counts as a Dependant Child
The rules for children are very clear-cut. For a child to qualify for a dependant visa, they must be under the age of 18 when the initial application is submitted.
This is a critical detail that trips up many families. If your child is 17 when you apply from Nigeria, they are eligible. But if they have their 18th birthday before the application goes in, they generally can no longer be included as your dependant—even if you still support them financially.
This infographic gives you a simple visual breakdown of the family hierarchy for a visa application.
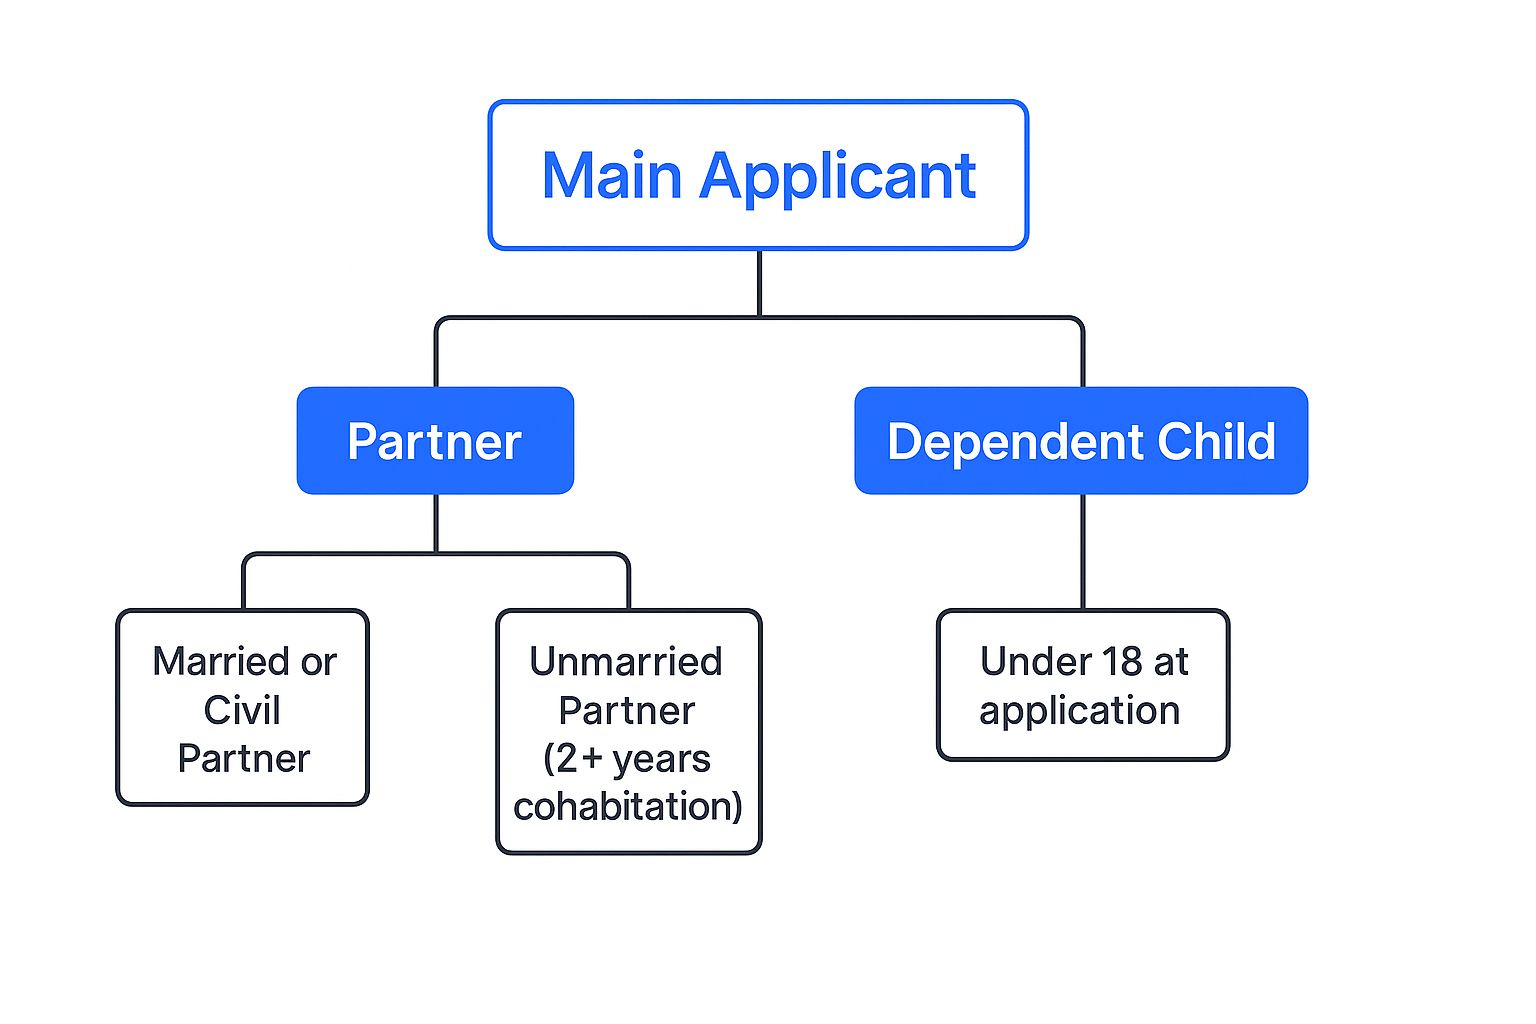
As you can see, the main applicant is at the top, with their partner (married or unmarried) and any children under 18 branching off as eligible dependants.
Linking Dependant Eligibility to Your Visa Route
This is probably the most important part: your ability to bring family is completely tied to the type of UK visa you have. Not every visa route allows you to bring dependants, and recent rule changes have made this landscape much stricter.
For example, the Skilled Worker visa remains one of the most popular routes for Nigerian professionals, and it absolutely allows you to bring your qualifying partner and children. The Health and Care Worker visa also has provisions for dependants.
However, the situation for students has changed dramatically. As of early 2024, only international students enrolled in postgraduate research programmes (like a PhD) can bring dependants. If you're coming to the UK for a Bachelor’s degree or a standard taught Master’s, you can no longer bring your family with you on a dependant visa. This was a major policy shift designed to reduce overall immigration numbers.
To help you see this at a glance, here’s a quick guide to some of the visa routes commonly used by Nigerians and what they mean for your family.
Quick Guide to UK Visa Routes and Dependant Eligibility
This table provides a simple reference for some of the most common UK visa types for Nigerians, outlining whether you can bring your family.
Main Applicant's Visa Route Can Spouse/Partner Join as a Dependant? Can Children Under 18 Join as a Dependant? Key Considerations for Nigerian Applicants Skilled Worker Visa Yes Yes This remains the most reliable work route for bringing your family with you to the UK. Health and Care Worker Visa Yes Yes While dependants are still allowed for nurses and doctors, care workers can no longer bring dependants as of March 2024. Student Visa (PhD/Research) Yes Yes Eligibility is now very narrow, restricted only to postgraduate students on research-based courses. Student Visa (Taught Master's) No No This is a significant recent change. Taught Master's students can no longer bring dependants. This makes it clear just how vital it is to check the specific rules for your visa category on the official GOV.UK website before you begin. The immigration rules can and do change, and staying up-to-date is the best way to ensure your family’s application is successful.
Navigating the Financial Requirements

Let's be direct. This is often the part of the UK dependent visa application that causes the most sleepless nights. The ‘proof of funds’ or maintenance requirement is where the UK Home Office needs you to prove, in black and white, that you have enough money to support your family when they first arrive, without needing to lean on public funds.
For many Nigerians, this is the biggest hurdle. The figures can seem huge when converted to Naira, but once you break them down, the goal becomes much clearer.
Understanding the Maintenance Funds
For most work routes, like the Skilled Worker visa, you have to show a specific amount of money for each family member you're bringing. It's important to remember this is completely separate from the funds you need to show for yourself as the main applicant.
Here’s the breakdown of what you need to have saved for your dependants:
- For your partner: You'll need to show £285.
- For your first child: You need an additional £315.
- For each extra child: You'll need a further £200 for each one.
This money is to show you can cover your family's living costs for their first month in the UK while you all get settled.
The All-Important 28-Day Rule
Now, this rule is non-negotiable and catches a lot of people out. You can’t just have the money in your account on the day you apply.
You must hold the total required funds in your bank account for at least 28 consecutive days. The closing balance on your bank statement cannot be more than 31 days old on the date you submit your online application.
This means the money has to sit there, untouched, for that entire period. A sudden large deposit just before you apply will almost certainly raise a red flag. The Home Office needs to see that these are genuine savings, not a last-minute loan from a friend or family member.
Let’s walk through a practical example.
Case Study: The Adewale Family
- Main Applicant: Dr. Adewale, a healthcare worker from Ibadan moving to the UK on a Health and Care Worker visa.
- Dependants: His wife and their 7-year-old child.
Let’s calculate the total maintenance funds they need for the dependants:
- For his wife: £285
- For his child: £315
- Total required for dependants: £285 + £315 = £600
At a typical exchange rate, £600 could easily be well over ₦1,000,000. The Adewale family must hold at least this amount in their Nigerian bank account every single day for 28 days straight before they can hit ‘submit’ on their application.
The Stricter Rules for Family Visas
It’s absolutely crucial to distinguish between dependants on work or study visas and those applying for a Family Visa (often called the partner or spouse route). The financial rules for Family Visas are much, much stricter and have recently become even tougher.
Previously, the UK sponsor needed to earn £18,600 per year. In April 2024, this was hiked up significantly to £29,000. And the plan is for this threshold to rise even further.
This change has had a real impact. For instance, recent data shows that after the UK government raised the minimum income requirement, partner visa applications fell by over 25%, making it much harder for many families to meet the new standards. You can discover more insights about these immigration statistics and their impact.
Meeting this higher income threshold requires a different kind of proof altogether. You’ll be asked to provide documents like:
- Payslips covering at least the last six months.
- Bank statements that clearly show the salary being paid into your account.
- A letter from your employer confirming your role, salary, and contract type.
If you are self-employed or have income from other sources like property rental, the evidence rules get even more complex. The focus here is on proving a stable and sufficient income, not just having a lump sum in savings. This shift has made careful financial planning more essential than ever for anyone on the family visa route.
Your Step-by-Step Application Guide from Nigeria
Right, so you’ve confirmed you're eligible and have your finances sorted. Now for the main event: the visa application itself. It can look like a mountain of paperwork from the outside, but if you break it down into simple, logical steps, it's far less daunting. Think of it as following a recipe – get the steps right, and the result will be what you hope for.
To make this real, let's follow a Nigerian family, the Okoros, from Abuja. Mr Okoro has just landed a great engineering job in Birmingham on a Skilled Worker visa. Now, it's time to get his wife and young daughter’s dependent visas sorted so they can all move together.
Step 1: Tackling the Online Application Form
Your first and only stop is the official GOV.UK website. Don't be tempted by other sites; this is where it all happens. You need to fill out a separate online application for each person – one for Mrs Okoro and another for their daughter.
The most crucial part here is linking everyone together. The form will ask for the main applicant's reference number, which could be a Unique Application Number (UAN) or a Global Web Form (GWF) number. This single number is what tells the Home Office, "we're a family, look at us together." Getting this number wrong is a classic mistake that can cause massive delays, so be meticulous.
A Quick Tip for Nigerian Applicants: Go over every single detail before you hit submit. A tiny typo in a name or a date of birth can create a world of hassle later. It’s worth spending an extra ten minutes checking everything to save yourself weeks of stress.
Step 2: Paying the Visa and Health Surcharge Fees
After you've triple-checked the forms, you'll land on the payment page. Here, you'll need to pay two non-negotiable fees for each dependant.
-
The Visa Application Fee: The cost depends on the main visa holder's route and how long it's for. In the Okoros' case, with a 3-year Skilled Worker visa, the fee for each dependant is £719.
-
The Immigration Health Surcharge (IHS): This is the fee that grants your family access to the UK's National Health Service (NHS). It’s not optional. The current rate is £1,035 per year for adults and £776 per year for children under 18.
Let's do the maths for the Okoros. For Mrs Okoro's 3-year visa, the IHS comes to £1,035 x 3 = £3,105. For their daughter, it’s £776 x 3 = £2,328. You'll pay all these fees online in one go with a credit or debit card. Bear in mind the total in Naira will be significant, so make sure your bank card is cleared for large international payments.
Step 3: Booking Your Biometrics Appointment
Once your payment is confirmed, the system will hand you over to the website of TLScontact, the official partner for the Home Office in Nigeria. This is where you'll book an appointment to give your "biometrics" – basically, your fingerprints and a digital photo.
TLScontact has visa application centres in both Lagos (Victoria Island) and Abuja. Every single person applying needs their own appointment slot, and that includes babies and young children. The Okoros will need to book three separate appointments, one for each member of the family.
Step 4: Attending the Appointment and Submitting Your Documents
When the day comes, get to the centre a little early with your passports and the appointment confirmation printout. The actual biometrics part is quick and painless – a staff member will scan your fingerprints and take a digital photo.
You'll also need to submit all your supporting documents. You've got two main options for this:
- Self-Upload: This is the best and cheapest way. You scan and upload all your documents to the TLScontact portal yourself before you go to the appointment.
- Assisted Scanning: If you're not comfortable with the tech, you can pay an extra fee at the centre, and the staff will scan and upload everything for you.
For the Okoro family, this is the point where they upload their marriage certificate, their daughter’s birth certificate, their proof of funds, and their TB test results. Honestly, making sure every required document is present and correctly uploaded is probably the single most important part of this whole process. Once your biometrics are captured and your documents are in the system, your application is officially on its way to a decision-maker.
Gathering Your Essential Documents

Think of your paperwork as the evidence you're presenting in court. If a key piece of evidence is missing or doesn't look right, your entire case can fall apart. A single missing document is one of the most common reasons for a UK dependent visa refusal, so getting this part right isn't just important—it's everything.
To make sure you've got all your bases covered, we’ll break down the necessary documents into logical groups. This step-by-step approach helps you build a solid, convincing application that leaves no room for doubt.
Core Documents for Every Dependant
These are the non-negotiables. Whether you're applying for your partner or your child, every single applicant from Nigeria needs these two items.
- Valid International Passport: This might seem obvious, but it’s crucial. Your passport must be valid for the entire time you plan to be in the UK. No exceptions.
- Tuberculosis (TB) Test Certificate: This is a mandatory health requirement for anyone coming from Nigeria. You have to get this test done at a Home Office-approved clinic in Nigeria. Keep in mind the certificate is only valid for six months, so you'll need to time your test carefully with your application.
Documents for a Dependant Partner or Spouse
This is where you prove your relationship is the real deal. The Home Office needs to see undeniable proof that your connection is genuine and ongoing, not just a relationship on paper.
Your most critical document is your marriage certificate. If you're applying from Nigeria, this has to be the certified original from the official Marriage Registry. A certificate from a church or traditional ceremony often isn't enough on its own—the legally recognised document is what counts.
Proving a genuine and subsisting relationship goes far beyond a single certificate. You need to tell a story with your evidence. The visa officer needs to be completely convinced that your relationship is real and not just a means to get a visa.
So, how do you tell that story? You gather evidence that paints a picture of your shared life. Think of it like creating a relationship timeline with official papers and personal mementos. Great examples include:
- Photographs Together: A collection of photos showing your journey as a couple—from when you were dating, your traditional wedding, the registry, and just everyday life with family and friends.
- Communication Records: Screenshots of call logs from your mobile network or WhatsApp, along with chat histories that show you're in regular contact, which is especially vital if you've been living apart.
- Financial Ties: Proof of money transfers between you (using services like Western Union or simple bank transfers) or, even better, statements from a joint bank account if you have one.
- Shared Responsibilities: Documents like a tenancy agreement or utility bills with both of your names on them are powerful proof of a shared life.
Documents for Dependant Children
When applying for your children, the main objective is to clearly establish their relationship to you and the main visa holder.
The most important document here is their birth certificate. It must be the original certificate issued by the National Population Commission (NPC), clearly showing the names of both parents. Make sure the document is clean, legible, and officially stamped.
It's also worth noting that if only one parent is travelling with the child, you’ll need a signed letter of consent from the parent who is staying behind. This letter must clearly state they give full permission for the child to travel to and live in the UK. For a more detailed look at the general paperwork involved, have a look at our comprehensive guide on UK visa requirements for Nigerian citizens.
Documents from the Main Visa Holder
Since your family's application is directly linked to your visa, you need to provide documents that prove your status in the UK.
- Proof of Your Visa Status: This can be a copy of your Biometric Residence Permit (BRP), the visa vignette (the sticker in your passport), or the official visa approval letter you received.
- Financial Evidence: These are the same bank statements you used to show you have the required maintenance funds, clearly demonstrating the money has been in the account for at least 28 consecutive days. If your employer is covering your dependants' maintenance costs, you'll need an official letter from them stating this.
Your best strategy is to be meticulous. Create a separate folder for each family member and use this guide as a checklist. A complete, well-organised set of documents makes a powerful impression and goes a long way toward securing a positive outcome.
Understanding Recent UK Immigration Changes
If you're planning to bring your family to the UK from Nigeria, you've probably noticed that the ground is constantly shifting under your feet. It's not just you. The rules for UK dependent visas have seen some massive changes recently, and it’s vital to know exactly where things stand.
These aren't just minor tweaks. The UK government has made a clear strategic move to bring down net migration numbers. For Nigerian families, this means the path to relocating together has become narrower and requires a much more clued-up approach.
The New Reality for Students
One of the biggest shake-ups has been for international students. It used to be fairly common for Nigerians coming over for a Master's degree to bring their spouse and children along. That all changed at the start of 2024.
The UK has now slammed the door on dependants for most postgraduate students. The only exception is for those enrolled in postgraduate research programmes, like a PhD or a research-based Master's.
So, if your plan was to do a one-year taught MSc and have your family join you, that route is unfortunately no longer an option. This change was specifically designed to reduce the number of dependants coming in on student visas, forcing many to completely rethink their plans.
Tighter Rules for Health and Care Workers
The Health and Care Worker visa, once a popular route for many Nigerians, has also been hit with stricter rules. While skilled professionals like doctors and nurses can still bring their families, the door has been shut for care workers. As of March 2024, care workers and senior care workers are no longer permitted to bring dependants to the UK.
The impact was immediate and dramatic. After a significant peak, applications for dependant visas tied to the Health and Care route plummeted. The numbers tell a stark story: grants for dependant visas on sponsored study routes fell by a jaw-dropping 81% in the year following these new restrictions.
These updates show just how critical it is to check the very latest rules for your specific visa before you make any moves. For a more detailed look into these policy shifts, it's worth reading about the new UK immigration white paper and what every Nigerian should know.
Common Questions from Nigerian Applicants
Trying to figure out the UK dependent visa process from Nigeria can feel like putting together a puzzle. It's only natural to have a lot of questions. Let's walk through some of the most common ones to give you a clearer picture and help you plan your family's move.
Can My Dependant Partner Work in the UK?
This is a big one, and the answer is usually yes. For most of the popular visa routes, like the Skilled Worker visa, a dependant partner generally gets full permission to work. This means they can take on almost any job without many restrictions.
However, the real proof is in the pudding. When your partner arrives in the UK, they'll receive a Biometric Residence Permit (BRP). This card is the official document that spells out exactly what they can and can't do for work, so always check it carefully.
What Happens if the Main Visa Application Is Refused?
This is a crucial point to understand: a dependant’s visa is completely linked to the main applicant's. If the primary application gets refused, any dependent applications tied to it will automatically be refused as well.
Should this happen, you'll get an official refusal letter that explains exactly why the decision was made. This is precisely why it’s so important to make sure the main applicant's case is as strong and error-free as possible—the whole family's plan depends on it.
The refusal notice will also tell you what you can do next. It might suggest an administrative review or point out issues you need to fix before submitting a fresh application. Reading and understanding this letter is your first step to getting back on track.
How Long Does the Visa Process Take from Nigeria?
Officially, the standard processing time for a dependent visa UK application from Nigeria is about three weeks after you’ve given your biometrics. Think of this as a guideline, though, because timings can easily stretch out, especially during busy periods like summer holidays or the run-up to Christmas.
If you're in a hurry, UKVI does offer priority services for an extra fee. This can slash the waiting time down to around five working days. Before you book flights or make any solid plans, it's always a good idea to check the very latest processing times on the GOV.UK website.
Once the visa is sorted, thoughts often turn to settling in and securing your family's future. For that next stage of planning, you might find this ultimate guide to life insurance for parents in the UK to be a really useful resource.
Feeling overwhelmed by the immigration process? Let JapaChat be your guide. As Nigeria's first AI immigration expert, we provide instant, reliable answers to your visa questions, helping you plan your move with clarity. Start for free at https://japachat.com and join over 10,000 Nigerians moving abroad with confidence.
-
A Nigerian’s Guide to Proof of Funds for Canada
So, you're planning your move to Canada. One of the most critical steps you'll face is showing your "Proof of Funds," or POF. What is it, really? Simply put, it's the evidence you provide to the Canadian government that you have enough money to settle in and support yourself and your family when you first arrive.
For anyone coming from Nigeria, think of it this way: it’s your financial welcome mat, your "settlement savings" to show you can cover your initial living costs in cities like Toronto or Calgary before you start earning in Canadian Dollars.
Understanding Proof Of Funds For Your Canadian Dream

Let's call Proof of Funds your "settlement savings." This is the money that Immigration, Refugees and Citizenship Canada (IRCC) needs to see to be confident that you can manage life in Canada right from the start. It’s not about proving you're rich; it's about proving you're prepared.
Picture this: you're moving from Abuja to Lagos for a new opportunity. You'd need money set aside for your first month's rent, transportation, and feeding before that first salary comes in. The proof of fund for Canada works on the exact same principle, just scaled for a new country. It’s your financial safety net for those first few crucial months.
More Than Just Naira in The Bank
The IRCC isn’t just glancing at your final bank balance. They're digging a bit deeper to check for two very important things: legitimacy and availability.
- Legitimacy: Where did this money come from? You have to show its origin. A large, unexplained lump sum of several million Naira appearing in your account right before you apply will raise immediate red flags.
- Availability: How quickly can you get to this money? Funds locked away in real estate in Lekki, vehicles, or complex business shares don't count. The money needs to be liquid and accessible for you to pay for rent or groceries tomorrow.
This requirement is a cornerstone of many immigration programs. For those learning how to apply for Express Entry Canada, getting the proof of funds right is absolutely essential for most streams. The idea is to present a stable financial picture that tells the visa officer you’re a responsible and well-prepared candidate.
The core idea behind POF is straightforward: Canada wants to be sure new immigrants can get on their feet without facing immediate financial distress. It's a practical measure of your readiness for this new chapter.
Why It’s A Non-Negotiable Step
Getting the POF wrong is, unfortunately, one of the most common reasons a Canadian permanent residency application is rejected. The Canadian government needs assurance that you can support yourself and anyone coming with you. For immigration streams like Express Entry, you must show you have enough unencumbered funds to cover basic living expenses.
The exact amount you need is tied directly to the size of your family. With a bit of foresight and the right documents, this is a perfectly manageable part of your journey that helps pave the way for your new life.
Calculating Your Required Settlement Funds
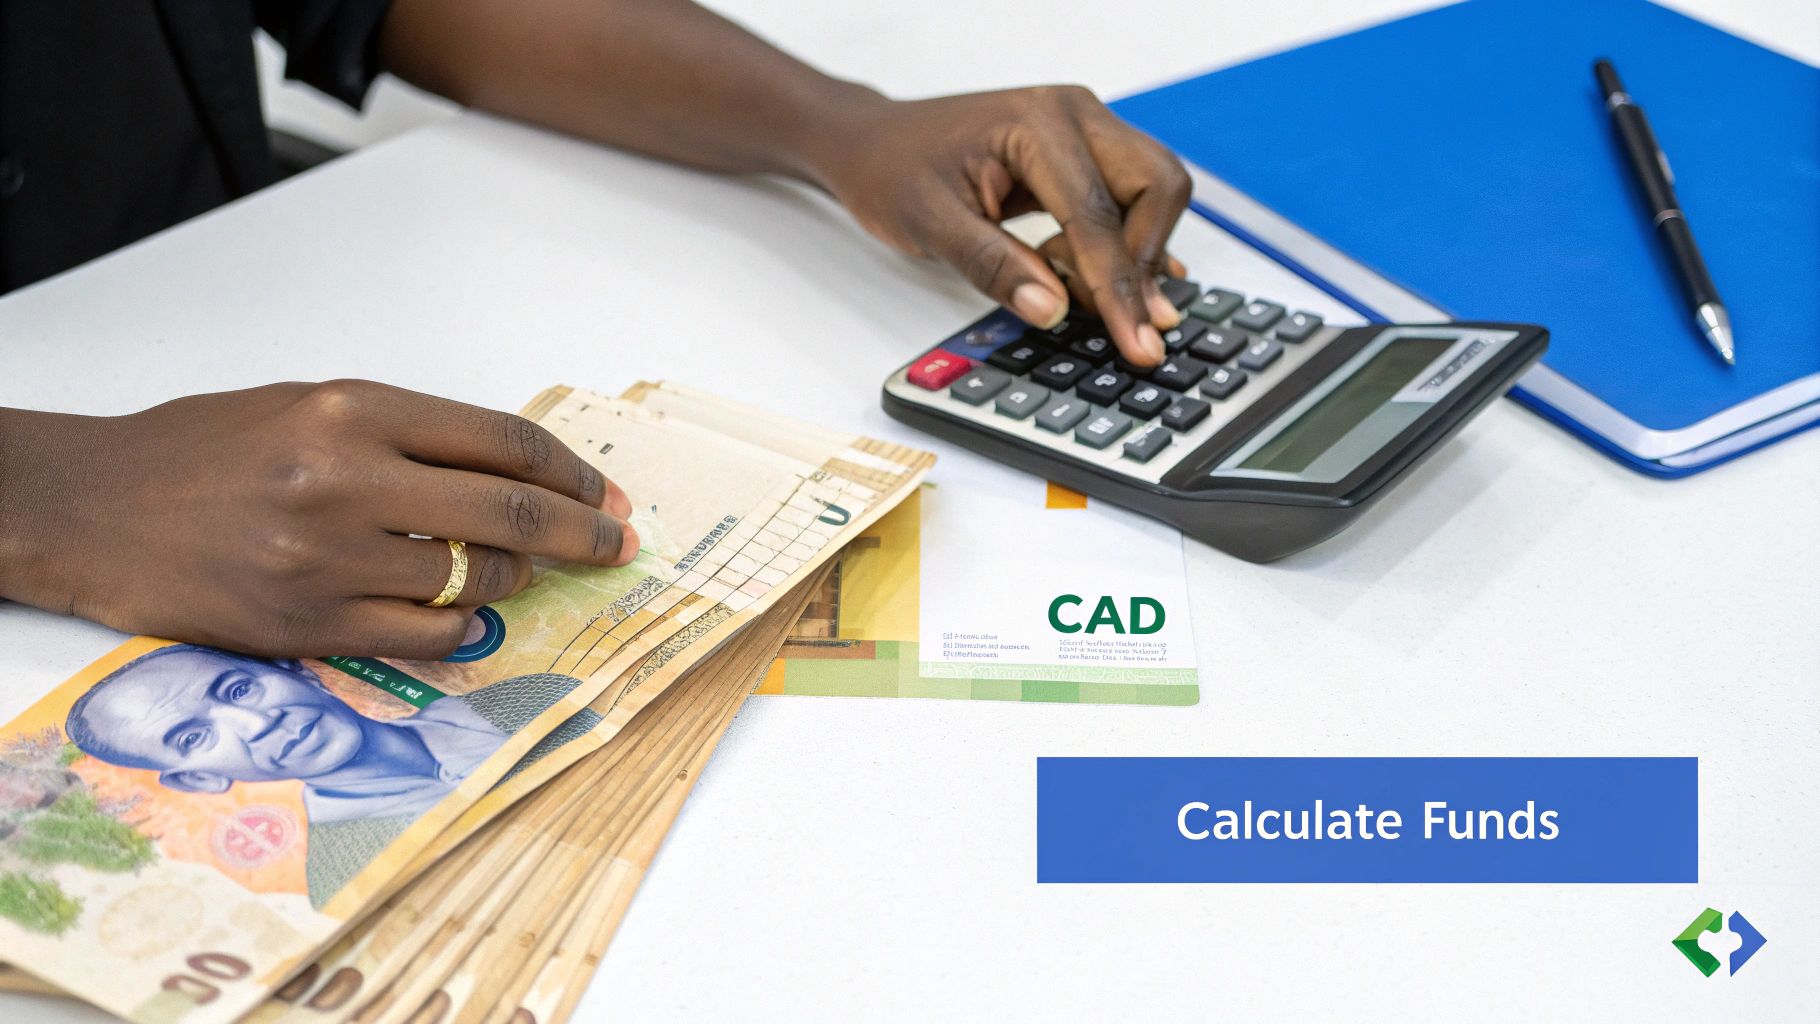
Alright, let's get down to the numbers. Figuring out exactly how much money you need to show is where your planning really begins. This isn’t just a random figure—it’s a specific amount set by Immigration, Refugees and Citizenship Canada (IRCC), and it’s tied directly to the size of your family.
Nailing this calculation from the get-go is essential. It helps you avoid any last-minute financial chaos and ensures you confidently meet one of the most critical requirements when it's time to submit your application.
Who Counts as Family?
First things first, we need to be clear on who IRCC considers "family" for this purpose. It’s not just about who is physically moving with you. The count includes:
- You (the main applicant)
- Your spouse or common-law partner
- Your dependent children
- Your spouse's or partner's dependent children
Here's a detail that often trips people up: you must include these family members even if they aren't coming to Canada with you. So, if you're married with two kids but you're planning to immigrate alone initially, you still need to prove you have enough funds to support a family of four.
Real-World Examples for Nigerian Applicants
Let's put this into perspective with a few common scenarios you might find yourself in. Remember, IRCC sets these figures in Canadian Dollars (CAD), so you'll be working with the Naira equivalent.
- The Single Professional: Imagine Ade, a banker from Lagos, moving to Toronto on his own. He only needs to show funds for one person. If the current requirement is CAD $14,690, his goal is to have the Naira equivalent of that amount ready.
- The Young Couple: Bisi and Tunde from Abuja are recently married and embarking on this journey together. They need to calculate their funds for a family of two. If the threshold is CAD $18,288, that’s the magic number they need to hit.
- The Family of Four: The Okoro family from Port Harcourt—a couple with their two children—are all making the move. They must show proof of funds for four people, which, based on current figures, would be around CAD $28,183.
These numbers are updated every year, so it's vital to check the official IRCC website for the latest requirements before you finalise anything. As you move forward, creating an Express Entry profile is a major milestone, and having a clear picture of your required funds is a huge part of being ready.
The Naira Exchange Rate and Your Financial Buffer
For anyone in Nigeria, the Naira-to-CAD exchange rate is a huge variable you can't ignore. The Naira’s value can be volatile, which introduces a level of risk to your application. One day your funds might be comfortably above the required amount, but a sudden dip in the exchange rate could push you below the line without warning.
To guard against this, a smart move is to keep 10-15% more than the minimum required amount in your account. This extra cushion is your financial safety net.
Think of this buffer as your insurance policy. It protects you from:
- Sudden Naira Devaluation: A sharp drop in the Naira's value won't put your application in jeopardy.
- Bank and Transfer Fees: When you eventually move your money, international transfer fees and bank charges will eat into the total.
- Unexpected Delays: If your application process drags on, this buffer ensures your funds remain compliant over time.
Taking this small extra step can save you a world of stress. It shows the visa officer that you're not just scraping by but are a financially responsible candidate who is truly prepared for a new life in Canada.
What IRCC Accepts as Valid Proof of Funds

Now that you know how much money you need, let's get into the part where the details really matter: what kind of proof will IRCC actually accept? Getting this wrong can unfortunately bring your entire application to a halt, so it’s vital to get it right from the start.
The golden rule from Immigration, Refugees and Citizenship Canada (IRCC) is that your settlement funds must be liquid and readily accessible. Think of it this way: you need to be able to use this money the moment you land in Canada for things like your first month's rent or a trip to the grocery store. It can't be tied up in anything that takes time to sell or convert into cash.
The Official Bank Letter: Your Most Crucial Document
The single most important document you’ll submit is an official letter from your Nigerian bank, printed on the bank's letterhead. This isn’t your everyday account statement. It’s a specific document that must contain very precise information for the visa officer.
Your letter must clearly show the following:
- The bank's full contact information (address, phone number, and email).
- Your full name and address.
- A list of all your current or savings accounts, along with the account numbers.
- The date each account was opened.
- The current balance of each account.
- The average balance for the past six months.
That last point—the six-month average balance—is extremely important. It shows the visa officer that the money has been sitting in your account for a while and wasn't just borrowed and deposited yesterday to meet the requirement. It’s all about demonstrating a stable financial history, which builds trust and credibility.
What Absolutely Does Not Count as Proof of Funds
It’s just as crucial to know what IRCC will flat-out reject. Many of us in Nigeria have our wealth tied up in various assets, but for immigration purposes, most of these won't work because they aren't liquid.
Do not try to use any of the following as your proof of funds for Canada:
- Real Estate: Land, houses, or any other type of property.
- Vehicles: The value of your car or other vehicles is not accepted.
- Company Shares or Stocks: These are investments and are not considered liquid enough.
- Cryptocurrency: Digital currencies like Bitcoin are too volatile and are not recognised as settlement funds.
- Borrowed Money: This is an immediate red flag. Loans from family, friends, or banks just for your proof of funds are strictly forbidden and can lead to a misrepresentation finding, which carries severe consequences.
The core principle is simple: if you can't quickly and easily access it as cash to pay for your living expenses in Canada, it doesn't count. Your proof of funds must be unencumbered money that you personally control.
Using Joint Accounts and Other Things to Keep in Mind
What if the money is in a joint account with your spouse? That's perfectly fine, as long as your name is on the account. You have legal access to the funds, which is exactly what IRCC needs to see. If your spouse isn’t coming with you to Canada, it’s a good idea to include a signed letter from them authorising you to use the money for your settlement.
The rules are strict for a reason—they ensure a transparent and fair process. Nigerian applicants must provide bank statements covering at least 6 months, supported by that official letter we talked about. Your bank must confirm the account opening date, current balance, any outstanding debts, and those all-important average balances. This is all part of Canadian law to prove you legally own and can access the funds.
Beyond just the type of funds, you should also be aware of any relevant foreign asset reporting requirements that might apply to ensure you’re being fully transparent about your global financial situation. At the end of the day, your goal is to present a clear, legitimate, and accessible financial picture.
How to Properly Document a Gift Deed
https://www.youtube.com/embed/SRaxYRj9L3I
In Nigeria, it's common for family—parents, aunties, or uncles—to support our biggest dreams. Getting a financial gift to help with your proof of funds for Canada is a perfect example. But here's the catch: to an IRCC officer, a large sum of money suddenly appearing in your account looks like a major red flag. A simple bank transfer won't cut it; you have to prove it's a genuine gift, not a loan you have to pay back.
This is where a Gift Deed becomes absolutely essential. It’s a formal, sworn document that creates a solid paper trail, proving the money is yours to keep, with no strings attached. If you skip this step, the visa officer might think the money is just a loan in disguise or that it was temporarily "parked" in your account to meet the requirement. That suspicion could put your entire application at risk.
Crafting an Airtight Gift Deed Letter
A proper Gift Deed isn't just a casual letter; it's a legal affidavit. In Nigeria, this means it needs to be sworn before a legal authority, like a Notary Public at a court. This simple act adds a layer of authenticity that IRCC takes very seriously. Remember, the letter must be written by the person giving you the money (the "donor").
Here’s exactly what the donor needs to put in the letter:
- Donor's Full Details: Their complete name, address, and how they're related to you (e.g., "Father," "Aunt").
- Your Full Details: Your full name and relationship to them.
- The Gift Amount: The exact amount of money given, clearly stated in both Naira and Canadian Dollars.
- The "No Repayment" Clause: This is the most important part. The letter must state very clearly that the money is an irrevocable gift and there is no expectation of repayment whatsoever.
- Donor's Signature: The letter has to be signed and dated by the donor.
This infographic breaks down the most common reasons IRCC rejects gift deed documents, showing just how crucial each piece of the puzzle is.
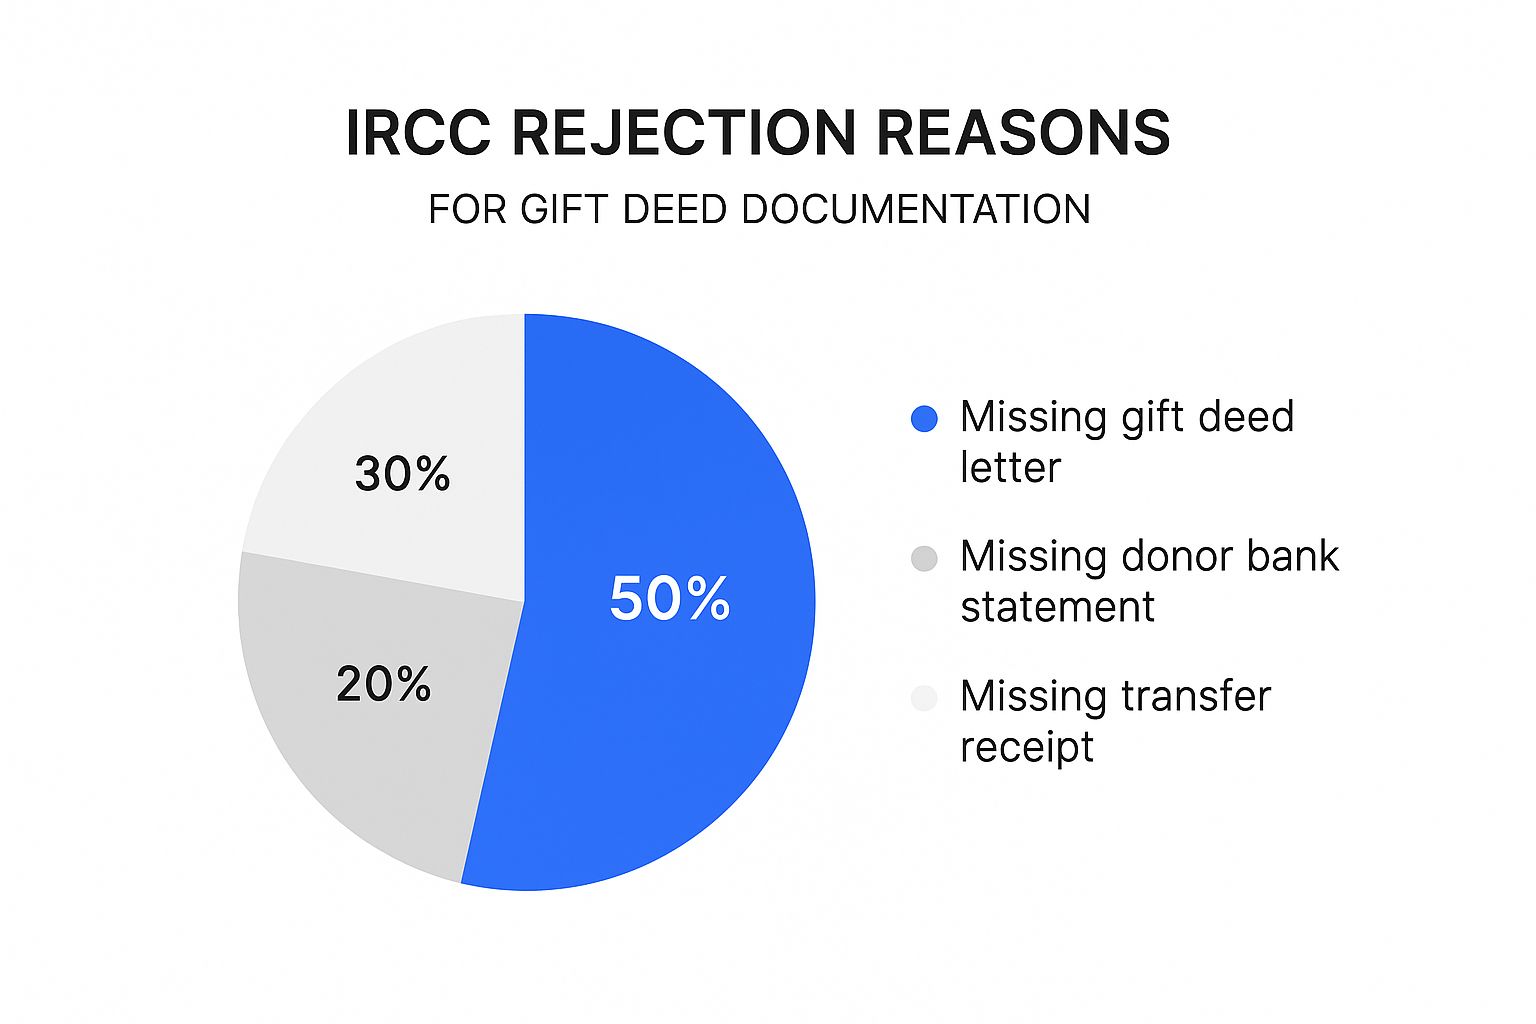
As you can see, a staggering 50% of rejections happen simply because the gift deed letter itself is missing. That makes it the single most critical document you need to get right.
Completing the Paper Trail
The sworn letter is the star of the show, but it can't stand alone. To give the visa officer the full picture, you need to show the money's complete journey from the donor to you. This means the donor has to provide their own supporting documents too.
Think of it like a detective story where you have to provide all the clues. The Gift Deed is the confession, and the bank statements are the forensic evidence that backs it up, leaving no room for doubt.
Your donor must provide a copy of their bank statement showing the funds leaving their account. This transaction must perfectly match the amount written in your Gift Deed. Finally, you'll include the receipt or proof of transfer showing the money landing in your account.
When you put these three things together—the sworn Gift Deed, the donor's bank statement, and the transfer receipt—you create a transparent, undeniable record. This kind of thoroughness eliminates suspicion and makes your proof of funds solid, showing IRCC that you're a serious, well-prepared applicant.
Common POF Mistakes Nigerian Applicants Make (And How to Fix Them)
Learning from other people's mistakes is one of the smartest things you can do on your journey to Canada. When it comes to your proof of funds, a few common errors trip up Nigerian applicants time and time again, leading to frustrating delays or even application refusals.
Let's walk through these common pitfalls. Knowing what they are beforehand will help you put together a financial profile that is clear, credible, and exactly what the Canadian immigration officers are looking for.
Sudden Large Deposits Out of Nowhere
This is probably the biggest red flag you can raise. Picture this: your bank account has been sitting at around ₦2 million for months, then—boom!—a deposit of ₦15 million lands just a week before you ask for your proof of funds letter. To an immigration officer, this looks like you borrowed the money just to meet the requirement, a practice they call "funds parking."
Often, this money is completely legitimate. Maybe you sold a plot of land in Lekki or your car to gather the funds. The money is truly yours, but without the right paperwork, it looks suspicious.
To an immigration officer, undocumented money has no history. Your job is to provide a clear, verifiable story for every large sum that enters your account, transforming suspicion into confidence.
You have to create a solid paper trail for any unusually large deposit.
- Sold a car? You'll need the signed Deed of Assignment (or deed of sale), the change of ownership papers, and proof of payment from the buyer.
- Sold property? Make sure you have the executed Deed of Assignment, evidence of the buyer's payment, and any other relevant sales documents.
Letting Your Balance Dip Below the Minimum
This is a critical error that can torpedo your application. The proof of funds requirement isn't just a one-time thing; you need to keep that minimum balance from the day you submit your application right up until you land in Canada.
Life happens, we all know that. An emergency might pop up. But if your balance drops below the required amount—even for a single day—your application could be refused if IRCC happens to request an updated statement at that exact moment.
A good rule of thumb is to always keep a buffer of about 10-15% over the minimum required amount. This protects you from currency swings and unexpected costs, and it shows the officer that you’re financially stable, not just scraping by.
Using Funds That Aren't in Your Name
The rule here is simple: the money has to be in an account that belongs to you or you and your spouse jointly. You can't just use a bank statement from your parents, siblings, or a friend, even with their permission. The money has to be legally yours and available to you at all times.
If a family member gives you money as a gift, it must be properly documented with a legal Gift Deed, as we've covered. The money must then be transferred into your personal bank account to be counted. Submitting someone else's bank statement is an automatic non-starter.
Submitting an Incomplete Bank Letter
A lot of Nigerian banks use a standard template for reference letters, but these often miss the specific details that IRCC requires. Handing in one of these incomplete letters is an easy mistake to make and just as easy to avoid.
A basic letter showing only your current balance won't cut it. You need to politely (but firmly) insist that your bank includes every single one of the following details on their official letterhead:
- Your full name and the bank's contact information
- A list of all your account numbers
- The date each account was opened
- The current balance of each account
- The average balance over the last six months
If your bank manager seems unsure, it's a good idea to bring a sample letter showing them exactly what's needed. An incomplete letter forces the visa officer to fill in the blanks, and they won't bother—they'll just move to reject the application.
To help you spot these issues early, here’s a quick guide to some of the most frequent errors we see and how to handle them.
Common Proof of Fund Errors and Solutions
Common Mistake Why It's an IRCC Red Flag How to Avoid or Fix It "Funds Parking" A large, sudden deposit without explanation suggests the money might be borrowed and not genuinely yours. Provide a complete paper trail for every large transaction: sales agreements, deeds of sale, or gift deeds. Balance Drops Below Minimum Shows financial instability and failure to meet the requirements throughout the application process. Maintain a 10-15% buffer above the minimum required amount to cover currency changes and small expenses. Funds Not in Applicant's Name The money is not considered accessible to you, even with permission from the account holder. Funds must be in your name or a joint account with your spouse. If gifted, it must be legally transferred to your account with a Gift Deed. Missing 6-Month Average The officer cannot see your financial history or verify that the funds have been stable over time. Insist your bank includes the 6-month average balance for each account in the official proof of funds letter. Using Unacceptable Assets Assets like real estate, vehicles, or cryptocurrency are not considered liquid and cannot be used for settlement. Liquidate these assets and deposit the cash into your bank account well in advance. Keep all documentation of the sale. Taking the time to double-check these details ensures that your proof of funds is strong, clear, and meets every one of IRCC's requirements, paving the way for a much smoother application process.
Your Final Proof of Funds Checklist
Alright, this is it. Your final action plan before you hit that submit button. I've boiled down everything we've covered into a simple checklist you can scan through. Let's use this to give every single document one last look.
Think of this as the final once-over to make sure your financial profile is not just good, but completely convincing. Getting this part right is a massive step toward your new life in Canada.
The Essential Pre-Submission Review
Before you even dream of uploading a single file, run through these foundational checks. Trust me, spending a few minutes here can save you from common slip-ups that lead to frustrating delays.
- Confirm the Latest Fund Requirements: Head straight to the official IRCC website. Double-check the current settlement fund amounts required for your specific family size. These numbers can and do change, so don't ever rely on old information.
- Calculate Your Buffer Zone: Do you have at least 10-15% more than the minimum? This buffer is your safety net against currency fluctuations (hello, Naira!) and it demonstrates good financial planning to the visa officer.
- Verify Account Holder Names: Make sure every single account is in your name, or a joint account with your spouse if they are coming with you. Money in your parent's, sibling's, or friend's account simply won't be accepted.
Your Document Checklist
With the basics squared away, it’s time to get your hands on the paperwork. Every document you submit tells a piece of your financial story. Your job is to make sure that story is complete, clear, and consistent.
Think of your submission like an exam where you have to show all your work. A missing document is like an incomplete answer—it can lead to a failing grade on your application.
Here is your final document checklist:
- The Official Bank Letter: Does your letter from the bank have everything? I’m talking about your name, the bank’s contact info, all account numbers, the date each account was opened, the current balance of each account, and the six-month average balance. If any of these are missing, it's not ready.
- Six Months of Bank Statements: Have you gathered a complete, unbroken set of statements for the last six months? No gaps, no missing pages.
- Documentation for Large Deposits: Got any large, unusual sums of money that showed up in your account? You need a clear paper trail. This could be a signed Deed of Assignment for a car or property sale, or a sworn Gift Deed.
- Gift Deed Paper Trail (If Applicable): If a gift is part of your funds, you need all three pieces of the puzzle:
- The sworn Gift Deed letter from the person who gave you the money.
- The donor's bank statement showing the funds leaving their account.
- The transfer receipt confirming the money landed in your account.
Ticking off every item on this list will give you the confidence that your proof of funds is rock-solid. For more guidance on the entire journey, you can relocate to Canada from Nigeria with a clear roadmap.
Got Questions? We’ve Got Answers
When it comes to proving your settlement funds, a few common questions always seem to pop up. Let's tackle some of the most frequent ones we hear from Nigerian applicants so you can navigate these specific issues with confidence.
Can I Use My Nigerian Pension Funds?
This is a big one. Many people wonder if their pension savings can count as proof of funds. The straightforward answer is almost always no.
IRCC needs to see funds that are liquid and completely accessible to you from day one in Canada. Your pension is locked away until retirement, so it doesn't meet this standard. The only exception is if you’ve recently withdrawn a lump sum from your pension. In that case, you can use the money, but you’ll need to provide rock-solid documentation of the withdrawal to show exactly where that large deposit came from.
What If My Bank Won't Give Me the Right Letter?
It's a frustrating but common scenario in Nigeria. You ask for a proof of funds letter, and your bank hands you a generic reference that's missing half of what IRCC needs to see. Don't just accept it.
You need to be persistent. The best approach is to prepare your own sample letter listing every required detail: your full name, all account numbers, the date each account was opened, the current balance, and the all-important six-month average balance. Bring this with you, speak directly with the bank manager, and politely insist they reproduce it on official letterhead. They may have to calculate the average manually, but an incomplete letter is a huge risk for your application.
Do not walk out of that bank with a letter that doesn't tick every single box for IRCC. A missing detail like the six-month average balance is one of the most common—and completely avoidable—reasons applications get delayed or even rejected.
How Long Does the Money Need to Stay in My Account?
This is critical, so listen up: the required funds must stay in your account from the moment you submit your application all the way through to the moment you land in Canada.
Immigration officers can ask for an updated proof of funds at any stage of the process, including when you arrive at the airport. If you've spent the money, they can refuse your application or, in the worst-case scenario, turn you away at the border. The money is for your settlement, so don't touch it until you've settled.
Can I Use My Spouse’s Account If They Aren't Coming with Me?
If the money is in a joint account that has both your names on it, you're good to go. Because your name is on the account, you have legal access to the funds. That said, it's a smart move to also get a signed letter from your spouse confirming you have their permission to use the full amount for your move to Canada.
However, using an account that is only in your spouse's name is a bad idea. It just adds a layer of complication that you don't need. Keep it simple: make sure the settlement funds are in an account with your name on it, whether it's yours alone or a joint one.
Planning a move to Canada is a massive undertaking, and getting reliable information is key. That's where JapaChat comes in. As Nigeria’s first AI immigration expert, it's built to give you instant, accurate answers to your questions. Forget relying on secondhand advice. Get the clarity you need to plan your journey with confidence. Sign up for free on JapaChat today and take control of your immigration process.
-

How to Get Canadian PR: A Guide for Nigerians
For many Nigerians dreaming of a new life in Canada, securing Permanent Residency (PR) can feel like a huge, complicated puzzle. But it's far more straightforward than you might think. The secret isn't a secret at all—it’s about understanding the official, proven pathways like the Express Entry system and the various Provincial Nominee Programs (PNPs).
With a clear strategy, that dream becomes a concrete plan.
Your Realistic Path to Canadian PR from Nigeria

Let's be direct. The journey to Canadian PR from Nigeria isn’t about finding some hidden back door or paying an agent who promises guaranteed success. It’s a structured process that rewards people who have the skills and qualifications Canada is actively looking for.
Think of it like planning a major project, say, building a house in Lekki. You wouldn't just start digging without a detailed blueprint, a solid budget, and a step-by-step plan. Your PR application is no different; it needs a solid strategy built around your unique profile.
Finding Your Best Fit: The Main Immigration Routes
The Canadian government has created several immigration programmes to attract skilled professionals. For most Nigerians, the journey boils down to two main options.
A great starting point is to see how these popular pathways compare. Each one is designed for a slightly different type of candidate, so finding the right fit is crucial.
Top Canadian PR Pathways for Nigerian Applicants
Pathway Best For… Key Requirement Processing Time (Average) Express Entry Highly skilled professionals with strong CRS scores (age, education, language, work experience). Meeting the 67-point eligibility threshold for FSWP; high CRS score. 6-8 months after ITA. Provincial Nominee Programs (PNPs) Applicants with skills needed in a specific province, or those with lower CRS scores. A nomination from a Canadian province or territory. 15-19 months (includes provincial nomination stage). Atlantic Immigration Program (AIP) Skilled workers with a job offer from an employer in one of the four Atlantic provinces. A valid job offer from a designated employer. ~6 months. Rural and Northern Immigration Pilot (RNIP) Individuals who want to live and work in smaller, participating communities. A job offer from an employer in a participating community. 12-18 months. Looking at this table, you can see how your strategy might shift. A software developer from Lagos with a Master's degree and a high IELTS score might go straight for Express Entry. It's fast, direct, and highly competitive.
On the other hand, a nurse from Abuja might discover a quicker path through a PNP. A province like Nova Scotia or Saskatchewan might be actively searching for healthcare professionals, making a provincial nomination a very smart move. A nomination adds 600 points to your Express Entry score, which almost guarantees an invitation to apply for PR.
My Advice: Don't just follow the crowd into the main Express Entry pool without a second thought. Your best strategy is to pinpoint the immigration programme that truly aligns with your professional background and qualifications. Success often comes from choosing the smartest route for you, not just the most talked-about one.
Don't Fall for These Common Myths
Many misleading stories circulate in Nigerian forums and WhatsApp groups that can seriously derail your application. It is absolutely vital to get your information from official sources like the Immigration, Refugees and Citizenship Canada (IRCC) website.
Here are a couple of myths I see all the time:
- Myth: "You need to hire an agent to have any chance of success."
- Reality: This is completely false. The entire system is designed for you to navigate yourself. While some people choose to hire a consultant for peace of mind, it is absolutely not a requirement for a successful application.
- Myth: "You must have a Canadian job offer before you can apply."
- Reality: A job offer is a massive advantage—it adds a lot of points. However, thousands of Nigerians receive their PR invitations every single year based on their skills, education, and experience alone.
By focusing on the facts and building your strategy around the proven pathways, you put yourself in the best possible position for a smooth and successful journey to Canada.
Calculating Your CRS Score: A Nigerian Perspective
If you're aiming for Canadian PR through Express Entry, there's one number that matters above all else: your Comprehensive Ranking System (CRS) score. Think of it as your official rank in a massive, highly competitive queue. The higher your score, the better your chances of getting that life-changing Invitation to Apply (ITA) for permanent residency.
Honestly, getting a handle on how this score is calculated is the single most important part of your planning. It’s not just about ticking boxes; it’s about strategy. This is where you see exactly where you stand and, more importantly, what you can do to improve. For us Nigerians, it’s about making sure our hard-earned education and professional experience translate into the points Canada values.
Deconstructing the CRS Score
Your CRS score is a tally of points based on your entire profile, with a maximum possible score of 1,200. Every detail, from the university you graduated from in Nigeria to your English test results, adds up.
Let's break down where the points come from:
- Core/Human Capital Factors: This is all about you – your age, level of education, language skills (English and/or French), and any work experience you might have in Canada.
- Spouse or Common-law Partner Factors: If you’re applying with your spouse, their credentials matter too. Their education, language proficiency, and Canadian work experience can add valuable points to your combined score.
- Skill Transferability Factors: This is where things get interesting. The system rewards powerful combinations. For instance, having a high level of education plus excellent language scores gets you more points than just having one or the other. The same goes for foreign work experience paired with strong language skills.
- Additional Points: These are the real game-changers. A provincial nomination can net you a massive 600 points, almost guaranteeing an invitation. You can also get a nice boost for having a valid Canadian job offer, Canadian study experience, or even a sibling living in Canada.
This infographic really simplifies how the most important elements work together.
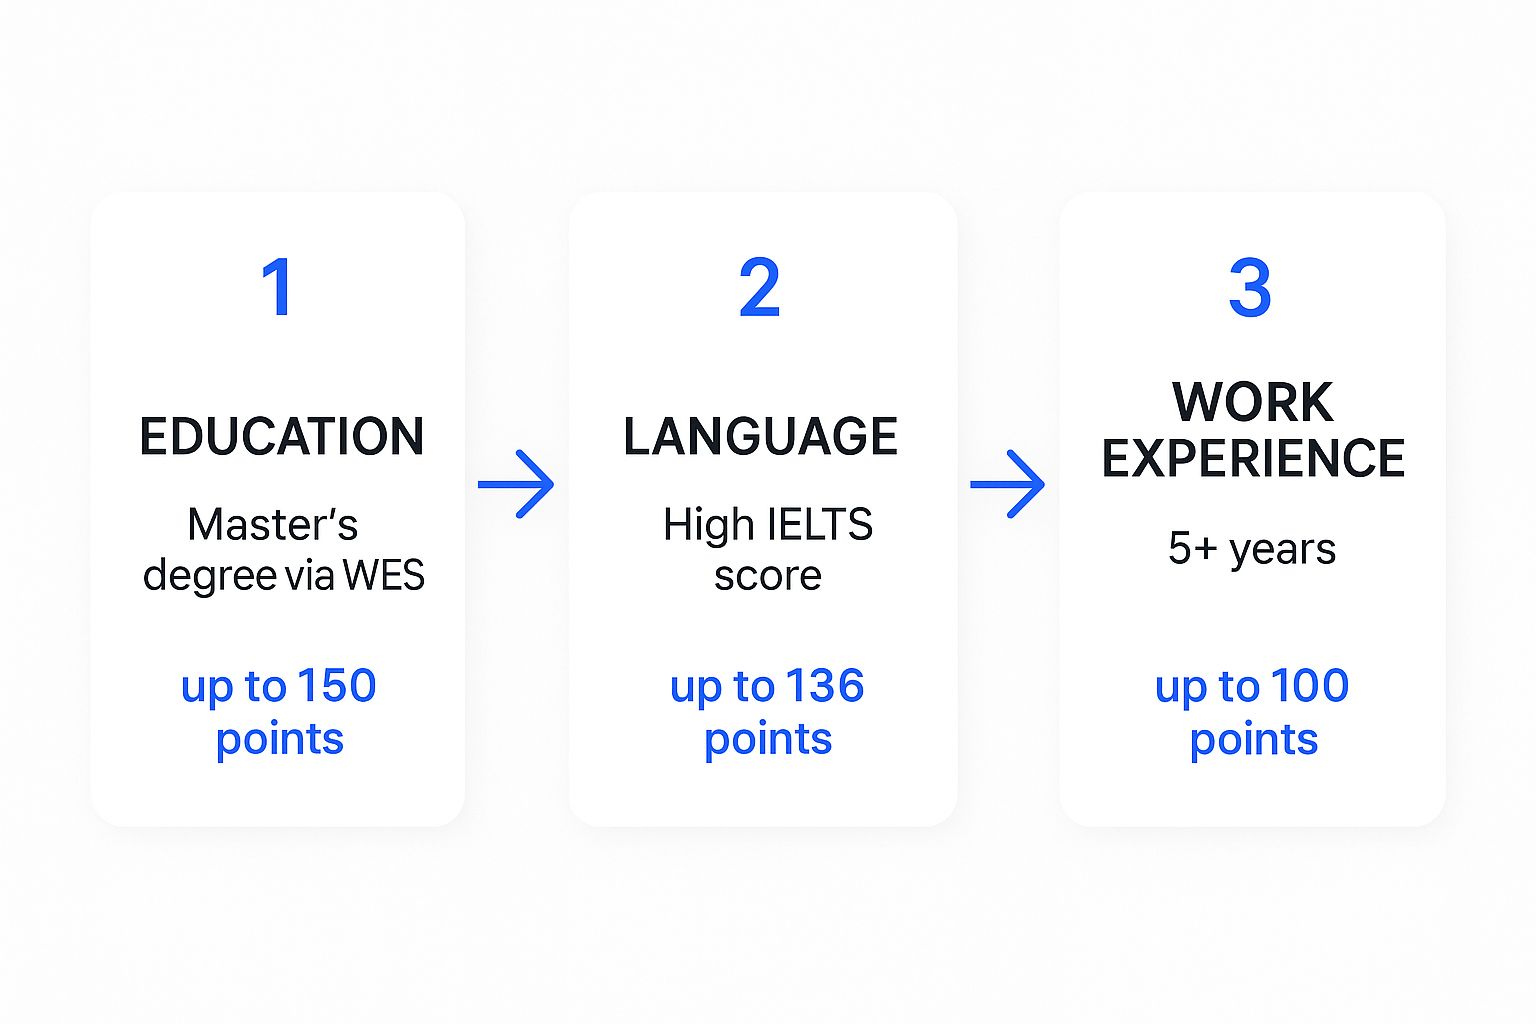
As you can see, nailing these three areas—your education, your language test, and your work history—is the bedrock of a strong CRS score.
A Practical Nigerian Example
Let's move away from abstract numbers and look at a real-world scenario.
Meet Funke, a 32-year-old marketing manager from Lagos. She's single and ready to start her PR application.
- Age: At 32, Funke is in a strong age bracket for points.
- Education: She holds a Master's degree from Covenant University. Crucially, she's already had it assessed by World Education Services (WES), and they've confirmed it's equivalent to a Canadian Master's degree.
- Work Experience: She has five solid years of full-time experience as a marketing manager in Nigeria.
- Language Skills: Funke really put in the work for her IELTS General Training test and it paid off. She scored: Listening 8.5, Reading 8.0, Writing 7.5, and Speaking 7.5. This gives her a Canadian Language Benchmark (CLB) level of 10 for Listening and 9 for the other three skills.
So, what does this all mean in terms of points?
Your degree from a top Nigerian university like UNN, UI, or Unilag is incredibly valuable, but only once it has been assessed by an approved body like WES. This Educational Credential Assessment (ECA) is non-negotiable, and trust me, it’s one of the very first things you should get started on.
Tallying Funke's Points
Let's do a quick calculation based on her profile:
Factor Funke's Profile Estimated CRS Points Age 32 years old 95 Education Master's Degree (WES confirmed) 135 First Language (IELTS) CLB 9/10 124 Skill Transferability (Education + Language) Master's + CLB 9 50 Skill Transferability (Work + Language) 5 years foreign work + CLB 9 50 Total Estimated Score 454 With a score of 454, Funke is in a very good position. While the minimum scores for invitations (known as draw scores) go up and down, a score in this range has historically been quite competitive.
You can play around with different scenarios and get a precise breakdown when you calculate Canada PR points with an online tool.
This example makes it crystal clear where the big points are. A top-tier IELTS score is an absolute must-have; it doesn't just give you points for language, it also massively boosts your "Skill Transferability" points—a double win. In the same way, getting your Master's degree properly evaluated unlocks a huge chunk of points. Once you understand how these pieces fit together, you can look at your own profile and figure out exactly what to work on to give yourself the best possible shot.
Express Entry vs PNPs: Choosing Your Best Route

Alright, you've got your Comprehensive Ranking System (CRS) score. Now for the real strategy. This is where you decide which queue to get into. Do you jump straight into the massive, hyper-competitive federal Express Entry pool, or do you take a more targeted approach through a Provincial Nominee Program (PNP)?
Think of it like this: Express Entry is the direct flight from Lagos to Toronto—it's fast, efficient, and everyone is scrambling for a seat. PNPs, on the other hand, are more like a connecting flight. That brief stopover in another city might seem like a detour, but it could be the very thing that guarantees you get to your final destination.
The Direct Route: Express Entry
Express Entry is Canada’s main engine for bringing in skilled workers. It's a pure points game where you’re ranked against a global pool of applicants. If your CRS score is impressive, this is often the fastest way to land your Permanent Residency.
The process itself is quite direct. You start by creating an Express Entry profile, enter the pool, and wait for the draws that happen every few weeks. If your score is above the cut-off, you get that golden ticket: an Invitation to Apply (ITA). This path is tailor-made for people with high scores in age, education, language tests, and skilled work experience. Once you get an ITA, the government aims to process your application in about six months.
The Strategic Alternative: Provincial Nominee Programs
So, what happens if your CRS score is good, but maybe not in that elite 490-500+ range that consistently gets a direct invite? This is where PNPs become your secret weapon.
Provinces and territories run their own immigration programs (PNPs) to fill specific gaps in their local economies. In simple terms, a province can "nominate" you if your skills are exactly what they need. And this nomination is a game-changer.
Getting a provincial nomination instantly adds 600 bonus points to your Express Entry CRS score. This massive boost all but guarantees you’ll receive an Invitation to Apply in the very next draw.
For many Nigerians, this is the smartest and most realistic path. Your skills might be desperately needed in a particular province, even if your overall CRS score isn’t hitting the top federal numbers.
Real-World Scenarios for Nigerians
Let’s bring this home with a few examples that Nigerian professionals can relate to.
- The Civil Engineer from Port Harcourt: Your CRS score is a solid 440. It's a good score, but it’s probably not high enough to get a direct federal invitation. But then you discover that Saskatchewan's Immigrant Nominee Program (SINP) has an "occupation-in-demand" stream, and civil engineers are right there on the list. By applying to them, you could get a nomination, pocket the 600 bonus points, and cruise to PR.
- The Nurse from Abuja: As a registered nurse, your CRS is 460. It’s competitive, but you notice that Nova Scotia is actively recruiting healthcare workers to deal with major shortages. Their immigration priorities clearly target people with your skills. Instead of just waiting in the main Express Entry pool, applying through their PNP stream is a much faster and more certain bet.
- The Tech Bro from Yaba: With a CRS of 485, you have a strong profile as a software developer. You could definitely wait for a general federal draw. But why wait? British Columbia's Tech Pilot is designed specifically for people like you. By creating a profile with the BC PNP, you stand an excellent chance of being picked in one of their frequent, tech-focused draws.
These examples make it clear: the best approach isn't always the most obvious one. It’s about doing your homework and finding out which province needs you most.
How to Choose Your Path
Deciding between Express Entry and a PNP really boils down to a clear-eyed look at your profile. Here's a quick way to think about it.
Pathway Choose This If… Key Consideration Direct Express Entry Your CRS score is consistently above the recent draw cut-offs (usually 490+). You aren't tied to a specific province and just want the fastest route. This is the big leagues. Draw scores can jump around, so you need a very high score to feel confident. Provincial Nominee Program (PNP) Your CRS score is in the 400-480 range. Your job is in high demand in a specific province. You're happy to settle in that province for a while. Research is everything. You must find a provincial stream that is looking for your National Occupational Classification (NOC) code. Ultimately, you don't have to choose just one. The best strategy is often to pursue both at the same time. Keep your Express Entry profile active while you also apply to relevant PNPs. This gives you two shots at the target, doubling your chances of getting that life-changing Invitation to Apply.
The Essential Nigerian Document Checklist for PR

Okay, let's get into the real nitty-gritty. Gathering your documents is easily the most hands-on, and often most stressful, part of the entire PR journey. For us Nigerians, it comes with a unique set of hurdles.
Think of this section as your battle plan. It’s not just about what you need, but how to get it in a way that satisfies the famously high standards of Immigration, Refugees and Citizenship Canada (IRCC). Every document tells them a piece of your story, and we need to make sure it's the right one, told correctly.
Start Your ECA Immediately
I can't stress this enough. If there's one thing that consistently delays Nigerian applicants, it's getting academic transcripts for their Educational Credential Assessment (ECA). We've all heard the stories—waiting six, eight, even ten months for a transcript from a Nigerian university isn't uncommon.
Don't let this be you. Before you even think about creating your Express Entry profile, you should have already started the ECA process with a designated organisation like World Education Services (WES). This single step can save you months of anxiety and put you way ahead of the game.
Nailing the Proof of Funds
Your Proof of Funds (POF) will be under a microscope. This is a major point of scrutiny for IRCC, and they’re looking for more than just a specific number in your bank account. They want to see a clean, clear history of how that money accumulated. A sudden, massive deposit from an uncle in the UK, for instance, is a massive red flag.
To get this right, your documentation has to be perfect.
- Official Bank Letters: You'll need official, signed letters on bank letterhead (think GTBank, Zenith, Access). The letter must show the bank's contact info, your name, all your account numbers, and the current balance in each.
- Six-Month Statements: Get at least six months of detailed bank statements. The final closing balance must be equal to or more than the minimum POF required for your family size.
- Source of Funds: If you have any large or unusual deposits, be ready to explain them. This means providing evidence like a gift deed, a property sale agreement, or inheritance documents. Transparency is everything here.
Crucial Tip: Keep your settlement funds in a personal bank account that you have sole control over. Joint accounts, even with a spouse or parent, can create unnecessary complications. The funds must be readily available to you, not tied up in debt or investments.
For a much deeper dive, you can check out our detailed guide on how to properly present your proof of funds for Canada to make sure you tick every single box.
Getting the Nigerian Police Certificate Right
The Nigerian Police Clearance Certificate (PCC) is another absolute must-have. You have to apply for this in person at the Central Criminal Registry (CCR) at Alagbon in Lagos, or at a state police command headquarters.
The process involves getting your fingerprints taken and submitting the application. Honestly, you should expect delays here too. Apply for it well in advance, especially if you’ve lived in other countries for more than six months since you turned 18. You'll need a police certificate from each of those countries as well.
Crafting the Perfect Work Reference Letter
Your work reference letter needs to be rock-solid. A simple "Yes, they worked here" from a Nigerian employer won't cut it. IRCC has a very specific checklist, and if your letter misses even one point, all that valuable work experience could be disqualified.
Make sure every reference letter is:
- Printed on official company letterhead.
- Includes the company's full address, phone number, and official email.
- Signed by your direct supervisor or an HR manager.
- Clearly states your job title, salary, and weekly hours.
- Most importantly, it must have a detailed list of your main duties and responsibilities.
Cross-reference the duties you list with the lead statements for the National Occupational Classification (NOC) code you're claiming. This alignment is absolutely critical for getting your points. To keep all these documents straight, using a free document management system can be a lifesaver. Staying organised is key to a smooth application.
You’ve done the hard yards, and finally, that magic email lands in your inbox: the Invitation to Apply (ITA). It’s a massive moment, but don't celebrate for too long. The clock is now officially ticking. You have a strict 60-day window to get your full application submitted, and honestly, this is where the real pressure kicks in.
This final stage is all about meticulous accuracy. You’ll be navigating the IRCC online portal, filling out form after form covering your entire life story—personal history, travel, family, you name it. Every single detail you enter here must perfectly mirror the documents you've so carefully collected.
The Final Push to Submit
Think of this as the final exam. The online forms are surprisingly detailed, so this is not something you can rush through on a lunch break. Block out some serious time to fill them out, review every entry, and then—I can't stress this enough—get a second pair of trusted eyes to go over it with you. A simple typo can cause major headaches down the line.
After the forms, it’s time to upload all your supporting documents. Make sure every file is clearly named, in the correct format (PDF is your best friend here), and perfectly legible. A blurry police certificate or a badly scanned proof of funds is an easy way to get your application delayed or, worse, returned.
Getting Past the Payment Blockade
For many Nigerians, this is one of the most unexpected and stressful hurdles: paying the application fees. The IRCC payment portal is notorious for declining Nigerian bank cards, both debit and credit, due to international spending limits and other banking restrictions.
When that dreaded "Payment Failed" notification pops up, don’t panic. This is a common problem with a few reliable workarounds.
- Try a Domiciliary Account Card: A Visa or Mastercard linked to a USD or Euro account has a much better chance of going through successfully.
- Ask for Help from Abroad: This is the go-to solution for thousands of applicants. If you have a trusted friend or family member in Canada, the US, or Europe, they can often pay on your behalf with their card without any issues.
- Look into Prepaid Cards: Some internationally-enabled prepaid cards can work in a pinch. Just double-check that they're cleared for international online payments and loaded with more than enough to cover the fees.
My Two Cents: Don't wait until day 59 to figure out the payment. Try your primary card as soon as you start filling out the forms. If it fails, you’ll have plenty of time to sort out one of the backup plans without the last-minute stress.
What Happens After You Click 'Submit'
The moment you hit that submit button and the payment goes through, you enter a new phase: the waiting game. Almost immediately, you should get an Acknowledgment of Receipt (AOR). This is a crucial automated email and PDF letter confirming your application is officially in the IRCC system. Save it somewhere safe.
From this point on, your application moves through several key stages:
- Biometrics Instruction Letter (BIL): This usually comes soon after your AOR. It's a formal request for your fingerprints and a photo. You’ll need to book an appointment at a Visa Application Centre (VAC) in Lagos or Abuja to get this done.
- Medical Examination: You might be asked to complete a medical exam. IRCC will send instructions on how and where to do this with an approved panel physician.
- Background Checks: This is the longest and least transparent part of the journey. IRCC and its partner agencies will be verifying everything you've claimed, from your work experience to security checks.
Processing times can feel unpredictable. While IRCC aims for a six-month standard for Express Entry, this isn't set in stone. Knowing what to expect at each stage is the best way to manage your expectations and keep the anxiety at bay while you wait for that golden email.
Got Questions? Let's Get Them Answered
As you get deeper into the Canadian PR process, you're bound to have some very specific questions. These aren't just hypotheticals; they're the real, practical concerns that keep applicants up at night. We've heard them all from Nigerians just like you, so let's tackle the most common ones head-on.
"How Much is Really Enough for Proof of Funds in Naira?"
This question is easily the number one source of stress for most people. While Immigration, Refugees and Citizenship Canada (IRCC) gives you the required settlement funds in Canadian dollars, you can't just do a simple currency conversion and call it a day. The Naira is too volatile for that.
Here’s a practical tip from experience: always aim for 10-15% more than the official requirement. For instance, if the minimum for a single person is CAD $14,690 (as of 2024), don't just have the direct Naira equivalent in your account. Instead, you should be looking at having the equivalent of CAD $16,000 to $17,000. That extra buffer is your insurance against a sudden drop in the Naira's value right when you need to generate your bank statements.
It's not just about the final number, though. The history of your account is what gets the most scrutiny. An IRCC officer wants to see a steady, believable accumulation of funds over six months. A huge, unexplained lump sum that appears a month before you apply is a massive red flag and a common reason for rejection.
"Should I Use an Agent or Just Do It Myself?"
Ah, the classic dilemma. Do you pay for an agent or brave the process on your own? There’s no single right answer, but let's be clear about one thing: you absolutely do not need an agent to get your PR. The entire Canadian immigration system is designed to be used by applicants directly.
That said, here's how to decide what's right for you:
- Going the DIY Route: This is the cheapest option, by far. It just means you have to be your own project manager—meticulous, organised, and ready to spend a lot of time reading the official IRCC website. The upside is you have total control.
- Hiring a Regulated Consultant: If you have a demanding job or just feel completely swamped by the details, a licensed Canadian immigration consultant can be worth the investment for peace of mind. They know the common pitfalls and can guide you. But remember, they can't guarantee you'll be successful or make the process faster. Whatever you do, never use an unlicensed "agent" who promises you a visa or claims to have special connections.
Ultimately, it comes down to your budget, your personality, and how much time you can realistically commit.
"Can I Include My Parents in My Application?"
The short answer here is a straightforward no. When you first apply for PR through a program like Express Entry or a PNP, you can't include your parents or other relatives. The application only covers you, your spouse or common-law partner, and your dependent children.
However, once you're a permanent resident and settled in Canada, you can look into the Parent and Grandparent Program (PGP). This is a totally separate sponsorship application. Be warned, though—it's incredibly popular and works like a lottery, so it's more of a long-term goal than something you can count on immediately.
"What are the Most Common Reasons Nigerians Get Rejected?"
Besides the proof of funds issues we already talked about, a few other things frequently trip people up. Here are the big ones:
- Sloppy Forms: It sounds simple, but tiny mistakes like a wrong date of birth or an unexplained gap in your personal history can get you a refusal. You need to double-check, and then triple-check, every single field.
- Vague Reference Letters: Your employment reference letters are critical evidence. If a letter doesn't clearly list job duties that align with your chosen NOC code, it's not going to fly. Be specific.
- Misrepresentation: This is the most serious mistake you can make. If you intentionally hide something—like a previous visa refusal from the US or UK—you could be hit with a five-year ban from applying to Canada. Honesty is non-negotiable.
Canada continues to welcome a high number of immigrants to support its economy and communities, even as specific targets get adjusted. Immigration levels vary across the country, but nearly all provinces and territories rely on newcomers to fill labour gaps and grow their populations. For a closer look at these trends, you can explore recent demographic data to see how these policies play out in different regions.
Planning your move to Canada can feel overwhelming, with a new question popping up at every turn. Get instant, reliable answers tailored to your specific situation with JapaChat, Nigeria's first AI immigration expert. Stop guessing and start planning with confidence. Sign up for free on JapaChat today and make your Canadian dream a reality.
- Myth: "You need to hire an agent to have any chance of success."
-
How to Apply for a Work Permit in Canada: A Nigerian’s Ultimate Guide
Applying for a Canadian work permit from Nigeria is a multi-step journey. It starts with a valid job offer and then moves into gathering the right documents and navigating the Immigration, Refugees and Citizenship Canada (IRCC) portal. The path you take really depends on whether your job offer needs a Labour Market Impact Assessment (LMIA) and which type of permit—Employer-Specific or Open—is right for your situation.
Understanding Your Canadian Work Permit Options

Before you start dreaming of life in Toronto or Calgary, it's crucial to know that not all Canadian work permits are the same. Your personal circumstances, the job you’ve been offered, and even your spouse's status in Canada will point you toward the correct application path.
The two main categories you'll come across are:
- Employer-Specific Work Permit: This is the most common route for Nigerians. As the name suggests, it ties you to working for one specific employer, in a designated location, for a defined period. If a tech company in Waterloo offers you a position as a software developer, this is the permit you'll be applying for.
- Open Work Permit: This one offers incredible flexibility, letting you work for nearly any employer anywhere in Canada. However, qualifying for it is much tougher. Usually, you become eligible through a specific connection—for instance, being the spouse of an international student or a skilled worker already in Canada.
Which Canadian Work Permit is Right for You?
Here’s a quick comparison of the two main work permit types to help you decide your path.
Feature Employer-Specific Permit Open Work Permit Employer Restriction Tied to one specific employer. Can work for almost any employer in Canada. Job Location Limited to the location specified in the job offer. No location restriction; you can work anywhere. Common Requirement Usually requires a Labour Market Impact Assessment (LMIA). LMIA is not required. Who It's For Most foreign workers with a specific job offer from Nigeria. Spouses of certain visa holders, post-graduate students, and others. Flexibility to Change Jobs Low. Changing jobs means applying for a new work permit. High. You can switch employers without a new application. Choosing the right permit is the first major step. Your job offer will usually dictate which one you need, but knowing the difference helps you understand your limitations and opportunities once you arrive.
What is an LMIA, Really?
For many Nigerian applicants, the term Labour Market Impact Assessment (LMIA) sounds complicated, but the idea is quite simple. An LMIA is a document a Canadian employer might need to get before they can hire you.
Essentially, the employer has to prove to the Canadian government that there were no Canadian citizens or permanent residents available to fill the position. It’s the government’s way of ensuring the local job market is protected. If your job offer letter includes a positive LMIA number, it means your employer has already cleared this significant hurdle, which makes your application process much more straightforward.
Recent Changes You Should Know About
Canadian immigration rules are not set in stone; they change based on the country's economic needs. It's worth noting that in the first half of a recent year, Canada issued 302,280 International Mobility Program (IMP) work permits. This was a notable drop of about 26% from the 410,825 issued during the same time the previous year.
This shift indicates that the government is tightening its controls, which can affect applicants from countries like Nigeria. To get a better sense of these trends, you can discover more insights about these immigration changes and what they could mean for your application.
Key Takeaway: Grasping the difference between an employer-specific and an open work permit, and understanding the role of the LMIA, is your first and most critical task. This knowledge helps you focus your job search and ensures you start preparing the correct application right from the get-go.
Your Essential Document Checklist for Nigerians
Getting your documents in order is arguably the most critical part of your work permit application. A single missing paper or an incorrectly formatted letter can lead to frustrating delays or even an outright refusal. This isn't just about ticking boxes; it's about building a solid, credible case for the Canadian visa officer reviewing your file.
Think of this section as your personal guide, built from experience and tailored to the specific requirements Nigerian applicants face.
Core Personal Documents
Let's start with the absolute basics. Every application hinges on these, so make sure they are current and you have high-quality digital copies ready to go.
- Valid Passport: Your Nigerian international passport is non-negotiable. The first thing you should do is check the expiry date. It absolutely must be valid for the entire length of your planned stay in Canada. If it's even close to expiring, renew it before you start anything else.
- Passport-Sized Photographs: You’ll need two recent photos, and they must meet IRCC's very specific standards for size, background colour, and even your facial expression. Don't try to use an old picture; just go get new ones taken at a proper studio. It's not worth the risk.
Proving Your Professional Value
Next up, you have to show that you're the right person for the job. This goes way beyond just showing them your NYSC certificate.
Educational Credential Assessment (ECA)
Getting an ECA is a smart, proactive move that seriously strengthens your application. An ECA report from a designated organisation like WES (World Education Services) officially validates your Nigerian degree or diploma, showing it's equivalent to a Canadian one. Trust me, start this process early. It can easily take a few months to get the report back.Employer Reference Letters
These are incredibly important. A simple letter saying "this person worked here" just won't cut it. Your reference letters need to be detailed and structured correctly. They should always be on official company letterhead and must include:- Your specific job title and a detailed list of your duties.
- The exact dates you were employed.
- Your salary and any benefits.
- The direct contact information of your manager or the HR department.
Pro Tip: When listing your duties, make sure they align closely with the lead statement and main duties described in the National Occupational Classification (NOC) code for your job. This is a detail that visa officers specifically look for—it shows you understand the role in a Canadian context.
Demonstrating Financial Stability
For many Nigerian applicants, proof of funds is where applications get heavily scrutinised. You have to convince the visa officer that you can support yourself when you first arrive in Canada, before you even get your first paycheck.
This means providing clear bank statements going back several months. A large, unexplained deposit dropped into your account right before applying is a major red flag. Be ready to explain the source of all your funds with supporting documents, like pay slips from your job in Lagos, an official letter from your employer, or even property sale documents.
For a much deeper dive into getting this right, you might find our detailed guide on how to prepare your proof of funds for Canada really helpful.
Essential Nigerian-Specific Requirements
Finally, there are a couple of documents required specifically because you're applying from Nigeria. Don't overlook these.
Police Clearance Certificate
You will need to get a Police Character Certificate from the Nigeria Police Force Criminal Investigation Department (CID). This isn't something you can get overnight, so plan ahead and start the process well in advance.Medical Examination
You can't just go to your local clinic for this one. The medical exam must be done by a panel physician in Nigeria who has been officially approved by IRCC. You can find the list of these approved doctors in cities like Lagos and Abuja right on the official IRCC website. The results are only valid for 12 months, so timing is key. You don't want to do it too early, but you also don't want to be scrambling at the last minute.Finding a Job and Securing an LMIA in Canada
Getting your documents ready is a huge step, but the real game-changer is landing a valid Canadian job offer. For most Nigerians, this is the key that unlocks the entire work permit process. The thing is, finding Canadian employers who are open to hiring from overseas can feel like an impossible task.
The secret isn't to just spam out hundreds of applications. It's about changing your approach and positioning yourself as the perfect international hire. Your CV is the very first impression a Canadian recruiter will have, so it absolutely must meet their expectations.
This means you’ll need to adapt your CV to the standard Canadian format, which is quite different from what we typically use in Nigeria. You'll need to leave out things like your photo, date of birth, state of origin, and marital status. To learn how to create a CV that will get you noticed, check out our detailed guide on the international CV format.
Why the LMIA is a Big Deal for Employers
The Labour Market Impact Assessment (LMIA) is usually the biggest roadblock. Think about it from the employer's perspective: they have to prove to the Canadian government that they couldn't find a Canadian or permanent resident to do the job before they can hire you. This process involves advertising the job for a set period and paying a hefty application fee.
It's no surprise that many employers would rather hire someone who's already in Canada. Your mission is to make the extra effort and cost of hiring you completely worthwhile. You do this by tailoring every single application to show exactly how your unique skills solve their specific problems. You have to make yourself an irresistible candidate.
A powerful, well-crafted application that speaks directly to the job's requirements can convince an employer that you are the one-of-a-kind talent they’ve been searching for, making the LMIA process a smart investment for them.
Target Your Job Search Like a Pro
You'll have much more success if you focus your search on industries and provinces that are crying out for foreign workers. Don't waste your time and energy applying for roles in markets that are already flooded with local talent. Go where the real opportunities are.
Many provinces have specific needs and use their Provincial Nominee Programs (PNPs) to fill those gaps. These programs can often be a much faster route to securing a work permit and even permanent residency.
For instance, Nova Scotia often targets professionals in healthcare (like nurses), social assistance, and construction to meet urgent local labour shortages. While New Brunswick recently paused its Atlantic Immigration Program (AIP), it was given 1,500 extra spots for its PNP, which shows a clear and ongoing demand for skilled workers. This kind of targeted approach creates a direct pathway for Nigerian professionals. You can discover more insights about Nova Scotia's priorities on their official site.
Practical Tips for Your Job Hunt
Simply applying for jobs isn't enough. You need to be proactive and start building connections.
- Make Your LinkedIn Profile Shine: Think of it as your professional billboard. It needs a sharp, professional photo, a compelling summary, and skills that match Canadian job descriptions. Join Canadian industry groups and start contributing to conversations.
- Use the Right Job Boards: Stick to platforms that are popular in Canada, like Indeed Canada, Job Bank, and Eluta.ca. A great tip is to use filters to search for jobs that specifically mention "LMIA available" or are open to hiring temporary foreign workers.
- Network the Smart Way: Find Nigerians who are already working in your field in Canada and connect with them. Their advice and potential referrals are pure gold. Instead of just asking for a job, ask them about their journey and for advice.
By being strategic and focusing your efforts where they count, you can dramatically boost your chances of getting that life-changing job offer. For more great tips, you can find valuable insights on job search strategies and career advice by exploring their resources.
Getting to Grips with the IRCC Online Application Portal
This is where the rubber meets the road. The official Immigration, Refugees and Citizenship Canada (IRCC) online portal is where you'll bring your application together. It's designed to be user-friendly, but let's be honest, it can feel a little intimidating the first time you log in. Think of it like an open-book exam after weeks of studying (gathering your documents). The keys to success? Precision and complete honesty.
First things first, you need to create a secure IRCC account. This isn't just a one-time thing; it becomes your personal dashboard for the entire journey, from submission to getting updates from the Canadian government.
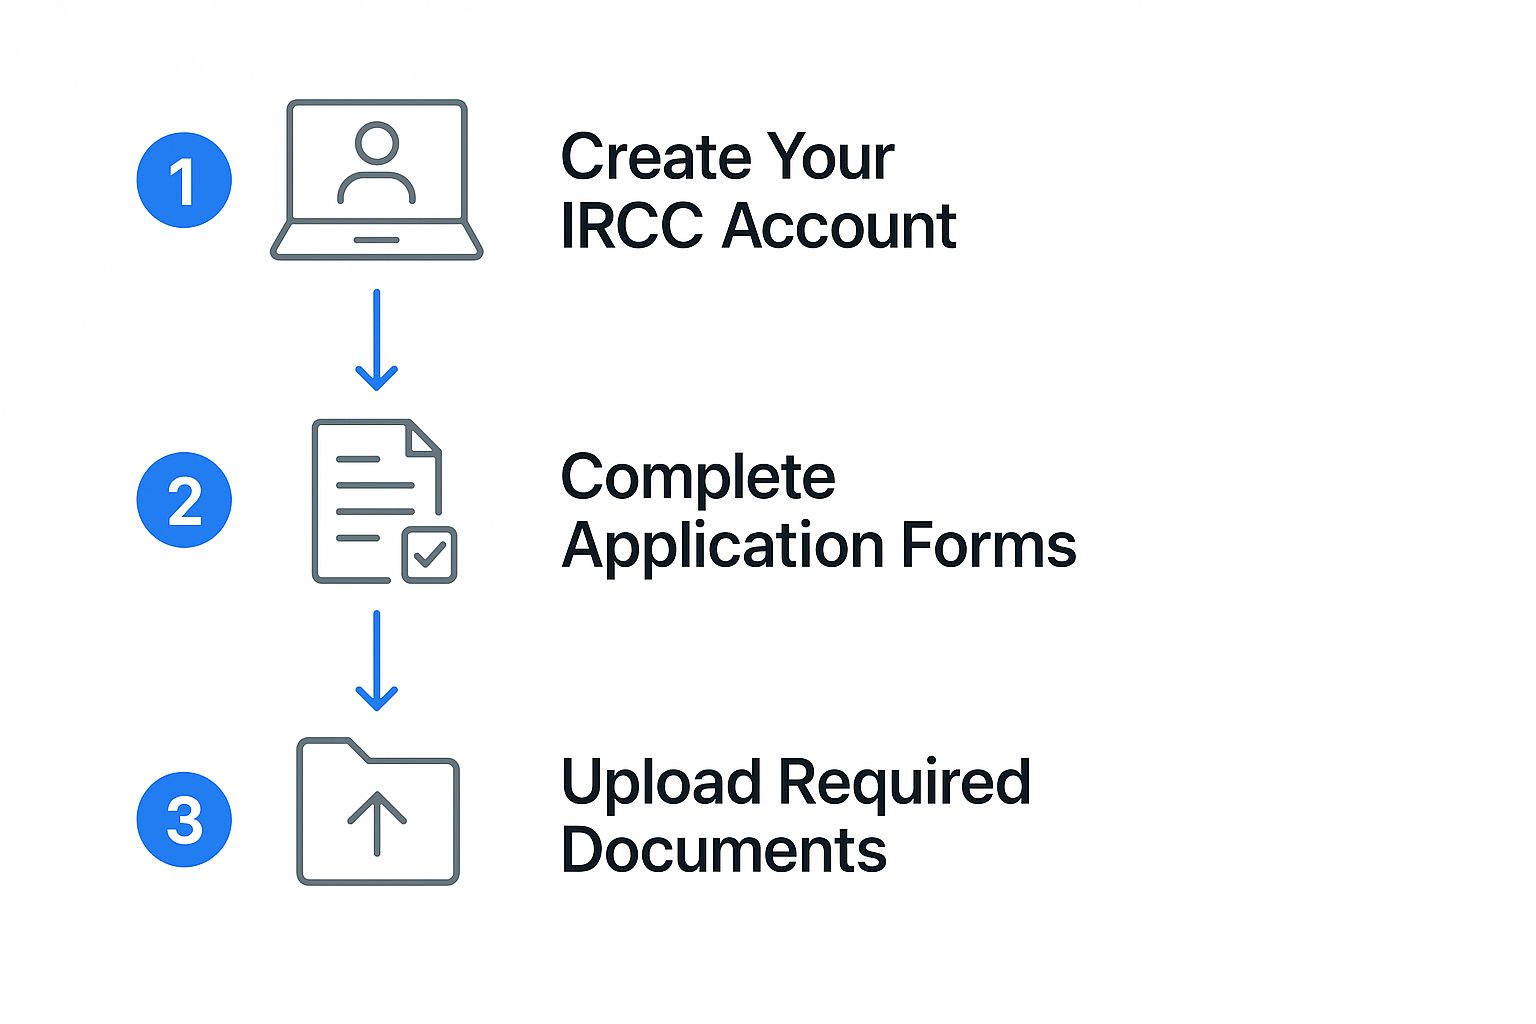
As you can see, you can sign in with a GCKey or a Sign-In Partner. For almost everyone applying from Nigeria, the GCKey is the way to go. It’s simply a unique username and password that you create for yourself to access government services.
Filling Out Your Application Forms
Once you're logged in, the system walks you through a series of online forms. This is where you'll input all your personal details, your entire work history, and the specifics of your Canadian job offer. Be meticulous here. Every single question needs a truthful answer, and that answer must perfectly match what’s in your supporting documents. A tiny mismatch, like getting a date wrong on a reference letter, can be a red flag for a sharp-eyed visa officer.
As you fill out the forms, the portal cleverly generates a personalised document checklist just for you. This is a brilliant feature because it tells you exactly what you need to upload based on your unique situation.
A Word of Advice from Experience: Hit that "save" button often! The portal can, and will, time you out. The last thing you want is to lose an hour of painstaking data entry. Take your time, double-check every single field, and only move on when you're 100% sure everything is correct.
Nailing the Make-or-Break Questions
From my experience, two sections cause the most anxiety for Nigerian applicants and receive the most scrutiny from visa officers: 'purpose of travel' and 'ties to home country'. Why? Because the officer needs to be completely convinced that you intend to leave Canada when your work permit expires.
Here’s how to handle them:
- Purpose of Travel: Be direct and professional. State clearly that your purpose is to work temporarily for your named Canadian employer in the specific role you were hired for. It’s also a good idea to mention the valuable skills you expect to gain and how they fit into your long-term career plans back in Nigeria. No vague, wishy-washy answers.
- Ties to Home Country: This is where you prove you have compelling reasons to return. Don't just say you have family; provide evidence of your responsibilities to a spouse, children, or elderly parents. Do you own property or land in Nigeria? Do you have a business or significant investments? These are the strong, tangible ties they want to see.
Finalising and Submitting Your Application
Once you’ve filled everything out and uploaded all your documents—making sure they're in the right format, usually PDF—it’s time to pay. You’ll need to settle both the work permit application fee, which is C$155, and the biometrics fee of C$85. This is all done online with a credit or debit card (like a UBA Dollar Prepaid Card, for example).
After your payment is confirmed, you can take a deep breath and hit that final 'submit' button. You'll get an automated confirmation in your IRCC account almost instantly. Within about 24 hours, you should receive a very important document: the Biometric Instruction Letter (BIL). This letter is your official invitation to the next critical phase of the process.
So You've Submitted Your Application… Now What?

Hitting that submit button feels amazing, doesn't it? Take a moment to breathe, but don't get too comfortable just yet. The next crucial step is just around the corner. Within about 24 hours, you should see a Biometric Instruction Letter (BIL) pop up in your IRCC account. This is your green light for the biometrics phase.
Once that letter is in hand, you need to book an appointment at a Visa Application Centre (VAC). In Nigeria, the main ones are in Lagos and Abuja. Don't make the mistake of just walking in – appointments are mandatory and slots get snapped up fast. My advice? Book it the same day you get your BIL.
Your Biometrics Appointment
The appointment itself is pretty quick and painless. They’ll take your fingerprints and snap a photo to verify your identity. Just make sure you come prepared.
On the day, you’ll absolutely need these three things:
- Your original Nigerian international passport.
- A printed copy of your Biometric Instruction Letter (BIL).
- The letter confirming your appointment.
The Waiting Game: Tracking and What to Expect
With your biometrics done, the real waiting begins. This is often the hardest part of the process. Processing times can be long and unpredictable, so it's a good idea to check the official IRCC website for the latest estimates for Nigerian applicants to manage your expectations.
You can follow along with your application’s progress through your secure IRCC account. If you're wondering what all the different status updates mean, we have a guide that breaks it all down. You can learn more about how to track your visa application status to make sense of the jargon.
A Quick Tip from Experience: Don't be alarmed if IRCC requests more information. It happens all the time. A visa officer might ask for an extra document or clarification on something you submitted. The key is to respond quickly and provide exactly what they're asking for. Delays here can really slow things down.
It's also interesting to see how labour demands across Canada affect these applications. In one recent year, Canada welcomed a massive 483,595 permanent residents. A surprising 8.2% of them went to Atlantic Canada, with provinces like New Brunswick and Nova Scotia seeing a huge influx. These numbers often signal where the jobs are and, consequently, where work permits are being processed to meet local needs. You can dig deeper into these regional immigration trends to get a better sense of the landscape.
Common Questions from Nigerian Applicants
Going through the Canadian work permit process from Nigeria, you're bound to have a ton of questions. It's totally normal. Let's break down some of the most frequent concerns I hear from applicants, so you can feel more confident about your own application.
How Much Money is "Enough" for Proof of Funds?
This is probably the number one question on everyone's mind. The truth? There's no single magic number that guarantees approval. What Immigration, Refugees and Citizenship Canada (IRCC) really wants to see is that you can comfortably handle your initial costs without struggling. Think about your flight ticket, a deposit for an apartment, and enough cash to live on until you get that first Canadian paycheque.
More important than the final balance is the history of your funds. A large, unexplained deposit right before you apply is one of the biggest red flags for a visa officer. You need to show them the money's story.
- Bank Statements: You'll need to provide statements covering the last four to six months. Don't just submit the final page.
- Supporting Proof: Back up your statements. Include recent payslips, a letter from your employer confirming your salary, or even official documents from a property sale. Anything that explains where the money came from is crucial.
Think of it this way: the visa officer is piecing together your financial story. A steady pattern of income and savings over several months looks far more reliable than a sudden lump sum from an unknown source. Your job is to give them a clear, believable paper trail.
Can My Family Come to Canada With Me?
Absolutely. This is a huge relief for many, and the Canadian system is quite family-friendly. If you’ve landed a job offer in a skilled role (specifically, what's known as NOC TEER 0, 1, 2, or 3), you can typically bring your immediate family along.
Your spouse or common-law partner can often apply for an open work permit. This is a fantastic advantage, as it means they can work for almost any employer in Canada, giving your family more financial flexibility. Your dependent children can also come with you on study permits, allowing them to enrol in Canadian schools. It's often best to submit everyone's applications together to be processed as a family unit.
What are the Main Reasons Nigerians Get Refused?
Knowing why others get denied is the best way to strengthen your own application. For applicants from Nigeria, visa officers tend to focus on a few specific areas.
A major one is weak "ties to your home country." You have to convince the officer that you have strong reasons to return to Nigeria after your work permit expires. This isn't just about saying you'll come back; you need to prove it. Evidence could include property you own, significant family responsibilities (like being the primary caregiver for ageing parents), or a clear career path you plan to resume in Nigeria.
Other common deal-breakers are insufficient proof of funds or, just as often, funds that are poorly documented. Finally, make sure every single document is complete and tells the same story. Any inconsistencies, even small ones, can damage your credibility and lead to a refusal.
Ready to start your immigration journey with expert guidance? JapaChat is Nigeria's AI-powered immigration expert, designed to give you instant, accurate answers for your move. Sign up for free and get the clarity you need at https://japachat.com.
-
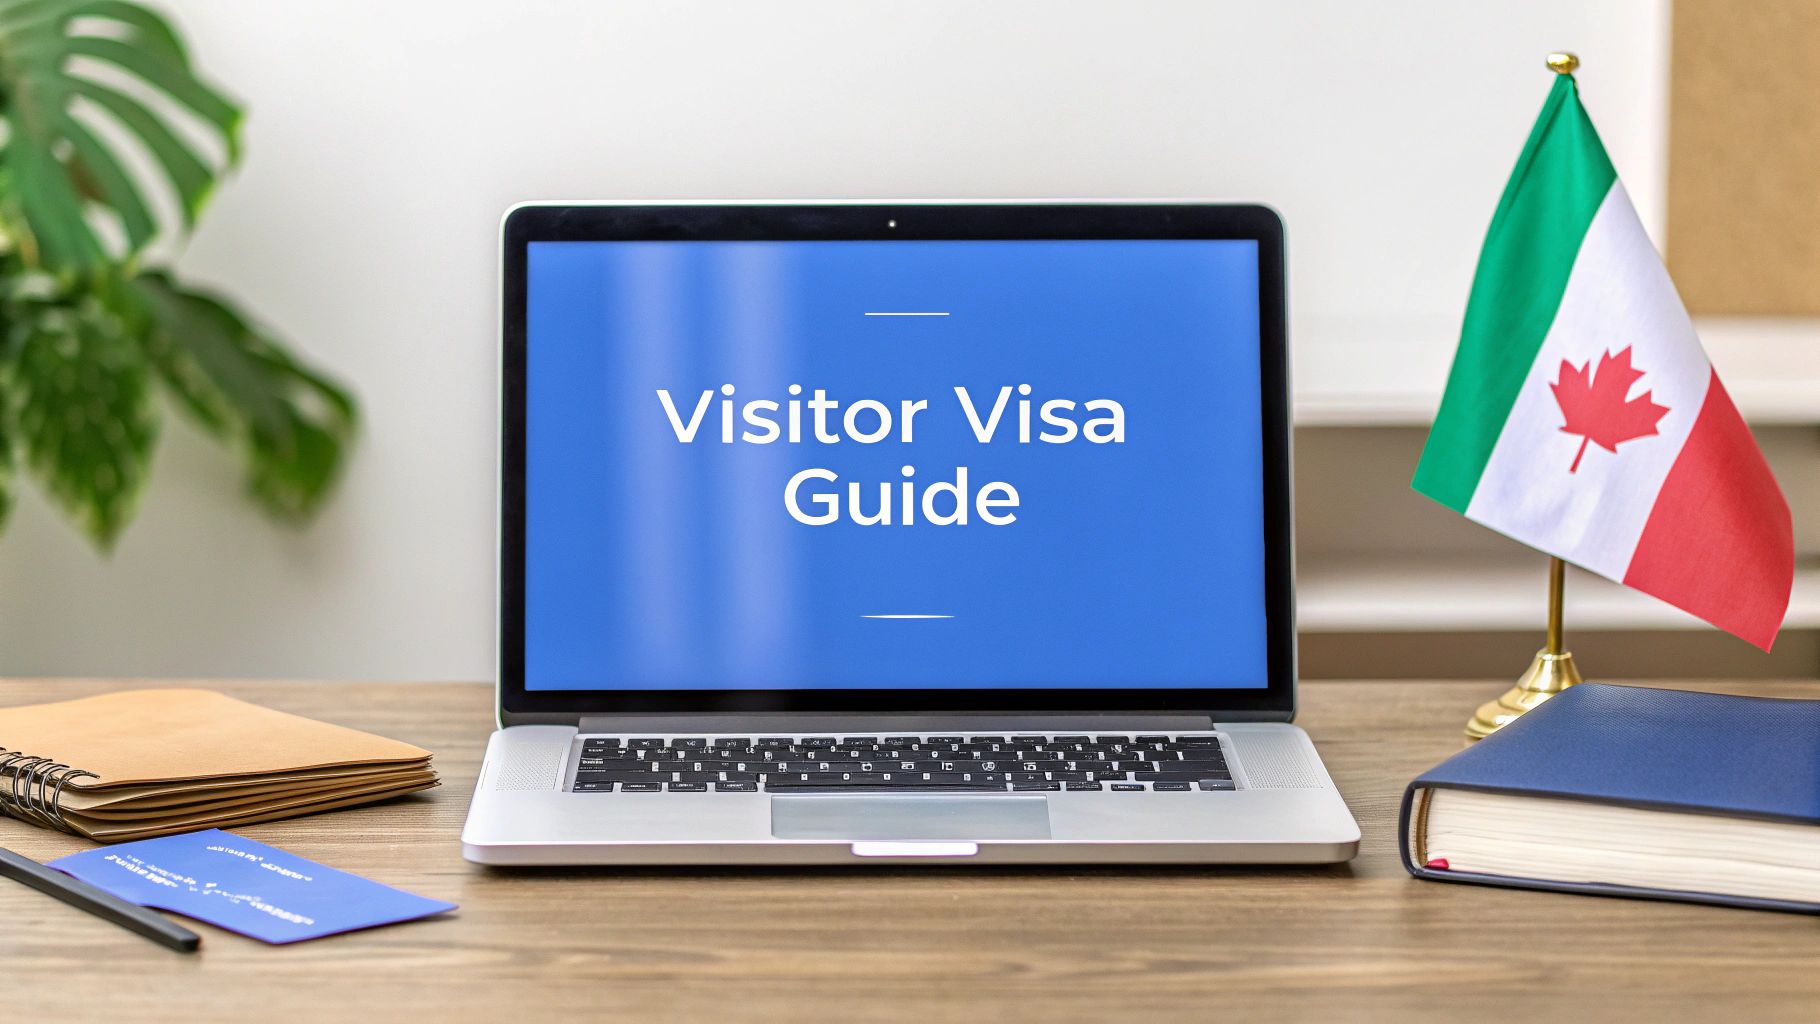
How to Apply for Canadian Visitor Visa from Nigeria | Simple Guide
So, you're planning a trip to Canada from Nigeria. It’s a fantastic goal, but getting the visa requires some serious preparation. The whole process boils down to proving a few key things to Immigration, Refugees and Citizenship Canada (IRCC): that you have a legitimate reason to visit, you can afford your trip, and most importantly, you have every intention of returning to Nigeria.
Let's be clear: convincing a Canadian visa officer that you'll leave at the end of your authorised stay is the single most important part of your application.
Getting Started: The Canadian Visa Journey for Nigerians
Whether you’re aiming to visit family in Toronto, attend a business conference in Calgary, or just see the sights, it all begins with a strong visa application. For Nigerians, this isn't just a box-ticking exercise; it's about building a solid, believable case for yourself.
First things first, you need to be sure about who needs a visitor visa for Canada. As a Nigerian passport holder, there’s no grey area—a visitor visa, officially called a Temporary Resident Visa (TRV), is mandatory.
The Core of a Successful Application
Every piece of paper you submit must tell a consistent story: your visit is temporary. You need to show the visa officer you have strong reasons to come back home. Let’s face it, applications from Nigeria are looked at very closely, so your preparation has to be top-notch.
From my experience, you should zero in on these three pillars right from the start:
- A Clear Purpose for Your Visit: Are you a tourist? Visiting your sister? Attending a trade show? Your reason needs to be crystal clear and backed up with real evidence, like a detailed travel plan or an official invitation letter.
- Solid Financial Proof: This isn't just about showing a fat bank account. It’s about demonstrating a stable financial picture over time. The visa officer wants to see that you can comfortably pay for your trip without any temptation to work illegally in Canada.
- Strong Ties to Nigeria: This is often the make-or-break factor. You have to prove you have compelling reasons to return—think stable employment, family commitments, property ownership, or an established business.
Here's a common mistake I see all the time: people get a sudden "loan" from a friend to pump up their bank balance right before applying. Visa officers are trained to spot these large, unexplained deposits. They are far more impressed by a consistent history of income and savings.
Do You Need a Tourist, Family, or Business Visa?
While it’s all under the same "visitor visa" umbrella, the specifics of your trip will shape the documents you need. For example:
- Tourism: You’ll need a day-by-day itinerary, proof of hotel bookings, and sometimes flight reservations.
- Visiting Family or Friends: A powerful, detailed letter of invitation from your host in Canada is non-negotiable.
- Business: You’ll need a formal invitation from the Canadian company, plus documents proving your own business credentials in Nigeria.
Getting these fundamentals right lays the groundwork for a much stronger application. Now, let’s look at exactly what you'll need.
Canadian Visitor Visa Key Requirements for Nigerians
To make things easier, here's a quick summary of the essential documents and what they mean for a Nigerian applicant. Think of this as your starting checklist.
Requirement What It Means for a Nigerian Applicant Example Document Proof of Identity A valid Nigerian international passport with at least one blank page and a validity that covers your intended stay. Your current Nigerian Passport Bio-Data Page. Financial Support Evidence you can cover all your expenses. This is about showing a stable financial history, not just a one-time large deposit. Bank statements for the last 6 months showing consistent income (e.g., your salary). Purpose of Visit Clear, documented reason for your trip. Your story must be logical and consistent across all documents. For tourism, a detailed itinerary; for a family visit, a Letter of Invitation. Ties to Nigeria The most critical part. Proof that you have strong reasons to return home after your visit. Employment letter, proof of property ownership (C of O), or family ties (marriage certificate). Application Forms Correctly and completely filled-out official IRCC forms. No mistakes or omissions. IMM 5257 (Application for Visitor Visa). Having these core documents in order is the first major step. A well-prepared file shows the visa officer that you are a serious, organised, and genuine applicant.
Proving Strong Ties to Nigeria for Visa Success

Let's get straight to the point: this is the make-or-break part of your application. If there's one area where Nigerian applications get the most scrutiny, it’s in proving you have strong, undeniable reasons to come back home. You have to paint a picture for the Canadian visa officer of a life in Nigeria so compelling that leaving it behind for good is simply unthinkable.
You need to get into their mindset. A visa officer is trained to assume everyone is a potential immigrant until proven otherwise. Your job is to overwhelm that assumption with so much concrete evidence that they can only conclude one thing: your trip is temporary.
The reality on the ground is tough. Getting a Canadian visitor visa has become much harder, with refusal rates for Nigerians being quite high. For us, the biggest hurdle is, and always has been, proving our deep roots in Nigeria and showing we have every intention of returning.
This means every piece of evidence you submit has to be specific, well-organised, and powerful.
Your Professional Life as an Anchor
Whether you're a banker in Lagos, a tech bro in Abuja, or running your own business in Port Harcourt, your job is your primary anchor to Nigeria. Just saying you're employed isn't enough. You have to prove it with documents that leave no room for doubt.
For Employees:
Your number one tool is a solid Letter of Employment. This can't be a lazy, one-line note. A strong letter, printed on official company letterhead, needs to cover all the bases:- Your full name and your specific job title.
- The date you started working there and your annual salary.
- A clear statement confirming your leave has been approved for the exact dates of your trip.
- An explicit sentence stating you are expected back at your desk on a specific date.
- Your manager’s direct contact information for any verification.
Back this up with your last six months of payslips and your work ID card. Together, these documents show a stable, ongoing career that you wouldn’t just walk away from.
For Business Owners:
If you're your own boss, your proof has to be even more watertight. The stability of your business is a direct reflection of your own stability.- CAC Documents: Get your Certificate of Incorporation and other registration papers ready. This is non-negotiable proof that your business is legitimate.
- Business Bank Statements: Just like your personal account, these need to show consistent business activity over the last six months.
- Tax Clearance Certificate: This is a golden ticket. It shows you’re a responsible business owner who meets their obligations to the Nigerian government.
Financial Stability Is More Than a Bank Balance
Honestly, a visa officer cares less about the total amount in your account and more about how it got there. Your bank statements need to tell a clear, consistent story. A huge, unexplained lump sum that appears right before you apply is the biggest red flag you can raise and a classic reason for refusal.
The goal is to show a steady build-up of funds from a legitimate source, like your salary or business income. Six months of stamped bank statements showing your monthly salary coming in and your savings growing is far more convincing than a fat balance that appeared out of nowhere.
Key Takeaway: The story your money tells is what matters. A consistent salary of ₦500,000 a month building up to a stable balance of ₦4 million is much stronger than an account that magically jumps from ₦200,000 to ₦5 million a week before your application.
Family and Community: The Ties That Bind
Don't ever underestimate the power of your social and family connections. These are the non-financial ties that root you firmly in Nigeria.
- Immediate Family: If you're married or have kids, provide your marriage and birth certificates. These documents clearly show you have dependents and responsibilities waiting for you back home. If you're looking after elderly parents, a doctor's letter or an affidavit of dependency can add serious weight to your application.
- Community Involvement: Are you an active member of your church or mosque? Do you belong to a professional body like the Nigerian Bar Association or a local rotary club? A letter from a leader in one of these groups can speak volumes about your character and how embedded you are in your local community.
Assets and Investments: Proof You’re Building a Future in Nigeria
Owning property or having significant investments is a powerful statement. It shows you're not just living for today; you're building a long-term future right here in Nigeria. These are things people don't just abandon.
Pull together clean, legible copies of:
- Property Deeds or Landed Documents: If you own a house or land, the official Certificate of Occupancy (C of O) or deeds registered in your name are crucial.
- Vehicle Ownership Documents: While not as strong as property, it adds another layer to the overall picture.
- Investment Statements: Proof of stocks, mutual funds, or other financial investments demonstrates you're actively growing your wealth in Nigeria.
All of these pieces come together in your letter of intent, where you explain why you want to visit Canada. Our guide on how to write a compelling letter of intent for a visa application can give you the structure you need. Ultimately, you’re trying to build an undeniable profile of a person with a stable, fulfilling, and promising life in Nigeria who is just looking to take a well-deserved trip abroad.
Your Nigerian Document Checklist for the Canada Visa
Once you've established your strong ties to Nigeria, it’s time to gather the documents that will make up the heart of your application. Think of yourself as building a case file for the visa officer. Every single piece of paper needs to be crystal clear, perfectly legible, and serve a specific purpose. A missing document or a blurry copy can create needless doubt and slow everything down.
This isn't just a box-ticking exercise. It's about presenting a professional, organised, and easy-to-understand story of who you are and why you plan to visit Canada. Let’s break down exactly what you’ll need, paying close attention to the areas where Nigerian applicants are often scrutinised the most.
This infographic gives you a bird's-eye view of the document gathering process, from your personal ID to the evidence backing up your trip.
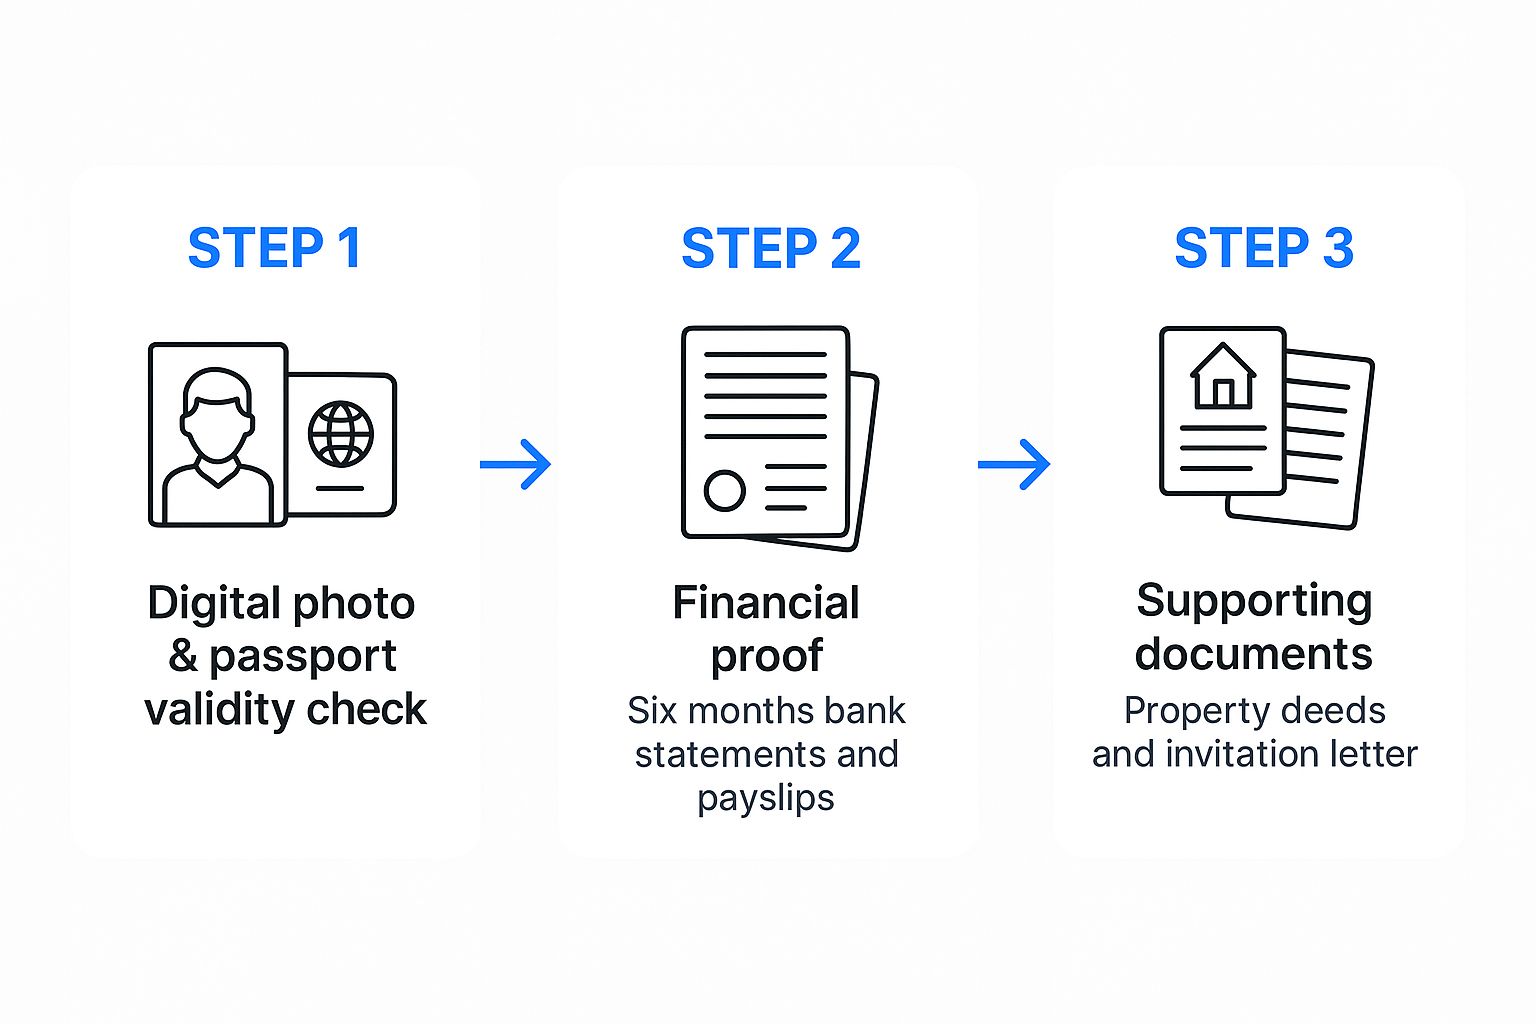
As you can see, the flow is logical. It starts with proving who you are, moves on to showing you can fund your trip, and ends with the evidence that supports your travel purpose and confirms you'll be coming back home.
Core Identity and Travel Documents
These are the absolute non-negotiables. Getting these fundamentals wrong is the fastest way to have your application returned without even being properly reviewed.
- Your Nigerian International Passport: This is your primary ID. Before you do anything else, check that it has at least six months of validity left after the date you plan to leave Canada. You’ll also need at least one completely blank page (not the last page) for the visa sticker. You must submit a high-quality, colour copy of the bio-data page—the one with your photo and personal details.
- A Recent Digital Photograph: Canada is extremely particular about this. You can't just reuse your passport photo. It must be a recent digital picture (taken within the last six months) against a plain white background. You need to be looking straight at the camera with a neutral expression. No smiling!
- Proof of Previous Travel (If You Have It): Got any old passports with visas or stamps from places like the UK, USA, or Schengen countries? Make clean copies of those pages. This is powerful stuff—it shows a track record of you respecting other countries' immigration laws.
Proving Your Financial Capacity
After home ties, this is arguably the most critical part of your application. The goal isn't just to show you have money, but to prove you have a stable and legitimate financial life.
You’ll need to provide six months of bank statements from your main personal account. But how you present them matters immensely.
First, don't just print them off your banking app. Walk into your bank branch and ask them to print, stamp, and sign every single page. This makes the document official in the eyes of the visa officer.
Second, the numbers need to tell a logical story. The statement should show a consistent pattern, like your monthly salary coming in or regular payments from your business. A huge, unexplained lump sum of millions of Naira dropped into your account right before applying is a massive red flag and a classic reason for visa refusal.
Finally, your bank statement doesn't stand alone. You need to show where that money comes from.
- If you're an employee: Provide your official payslips from the last six months.
- If you own a business: Include copies of your business's CAC registration documents, your most recent tax clearance certificate, and the business's own bank statements.
To help you get this right, here’s a quick guide on what to do and what to avoid when presenting your financial documents.
Financial Documents Do's and Don'ts for Nigerian Applicants
Action Do This (Correct Approach) Don't Do This (Common Mistake) Bank Statements Provide 6 months of statements, officially stamped and signed by your bank on every page. Submitting an unstamped online printout or just a letter of account balance. Source of Funds Include payslips, employment letter, or business CAC documents to explain the income. Having a large, unexplained deposit just before applying (e.g., "borrowed funds"). Consistency Ensure the inflow/outflow aligns with your stated salary or business activities. Showing erratic transactions that don't match your job or business profile. Sponsorship If sponsored, include the sponsor’s bank statements, job letter, and a formal affidavit of support. Simply stating "my uncle will pay for my trip" with no supporting financial proof from the uncle. Submitting a simple closing balance letter from your bank is practically useless. A visa officer needs to see the full six-month transaction history to get a real picture of your financial stability.
Key Supporting Documents
These are the documents that add extra weight and credibility to your application. They answer the "why" and "how" of your trip and reinforce your promise to return to Nigeria. While we're focused on Canada here, understanding the principles of general travel document preparation can give you a better overall perspective.
- Letter of Invitation (If Visiting Someone): If you're visiting family or friends, they need to write a detailed invitation letter. It should include their full name and address, proof of their status in Canada (like a copy of their passport or permanent resident card), and details on how they might support you during your stay.
- Approved Leave Letter (For Employees): This is a must. Get a formal letter from your HR department on company letterhead. It needs to confirm that your leave for your specific travel dates has been approved, state your job title and salary, and explicitly mention your expected return-to-work date.
- A Detailed Travel Itinerary: Don’t just write, "Visiting Toronto for two weeks." Show them you’ve actually planned your trip. Create a simple day-by-day plan. For example: "Day 1-3: Arrive in Toronto, explore CN Tower and Ripley's Aquarium. Day 4: Day trip to Niagara Falls." You should also include hotel reservations (book ones with free cancellation) and a flight itinerary (this is a reservation, not a purchased ticket).
- Proof of Assets: This is a powerful way to demonstrate strong ties to Nigeria. Gather clear copies of any property deeds, land documents, or car ownership papers that are registered in your name.
Diving Into the IRCC Online Application Portal
Alright, you’ve gathered and scanned your documents. Now it’s time to tackle the official IRCC online application portal. It can look a bit intimidating at first, but I promise it's more straightforward than it seems once you get the hang of it.
This is where all your preparation pays off. Applying online is really the only way to go these days—it's faster, you can upload documents instantly, and you get updates directly to your account. Your first step is to create a secure online account. You'll see two options: GCKey or Sign-In Partner. For nearly everyone applying from Nigeria, GCKey is the correct choice.
Setting Up Your GCKey Account
Think of your GCKey as your unique digital key to Canada’s immigration system. It's a specific username and password that keeps your application safe and private.
Getting it set up is simple:
- Head to the official IRCC website and find the option to "Sign in or create an account."
- From there, choose the "GCKey" button.
- Click "Sign Up" and just follow the on-screen instructions. You'll create a username, a password, and a few security questions.
My Personal Advice: Please, write down your GCKey username, password, and the answers to your security questions. Keep them somewhere safe but accessible. I've heard too many stories of people getting locked out and having a massive headache trying to regain access just to check their application status. A password manager or even a dedicated notebook works wonders.
Once you’re in, you’ll land on your main dashboard. This is your command centre for starting the actual visa application.
The All-Important Eligibility Questionnaire
Before you get to the main forms, the system will walk you through an eligibility questionnaire. It asks basic questions about your nationality, age, why you want to visit, your family ties, and your financial standing. Honesty and consistency here are absolutely critical. Your answers must match the story your documents tell.
For instance, when the system asks for the main purpose of your visit, don't guess. If your strongest document is an invitation from your sister, select "Visit family." If you've built a detailed tourist itinerary and booked hotels, "Tourism" is your answer.
Based on what you input, the portal generates a personal document checklist code. This code is gold. It creates a personalised application package for you, showing every single form and document you're required to upload.
Filling Out the Application Forms—No Mistakes!
The big one you'll face is the Application for Visitor Visa (IMM 5257). Go through this form slowly and double-check everything. A tiny typo or a missed detail can cause unnecessary delays.
A section that often catches Nigerian applicants out is "Travel History." You need to be meticulous here. List every international trip you've taken in the past 10 years. That short trip to Ghana or Benin Republic? It counts. Don’t leave anything out, and make sure you have the corresponding visa copies and entry/exit stamps to back it up. A blank travel history when you’ve clearly travelled before is a major red flag for visa officers.
Another crucial part is the "Purpose of Visit." Be detailed but straight to the point. Give a clear, concise summary of your plans that perfectly aligns with your itinerary or invitation letter.
Uploading Documents and Paying the Fees
After the forms, you’ll land on the document upload page. You'll see a specific slot for every item on your checklist. This is where file preparation matters.
- File Format: Stick to the accepted formats, which are usually PDF, JPG, or PNG. I find PDF is best for multi-page documents like bank statements.
- File Size: Be mindful of the 4 MB maximum size per file. If your bank statement is a huge file, use a free online tool to compress it before uploading.
Finally, payment. The portal will calculate your total fees, which include the application fee (CAN$100) and the biometrics fee (CAN$85). You'll pay directly online with a Visa or MasterCard.
From my experience, most Nigerian Naira-denominated bank cards work, but sometimes they get declined. Don’t panic if this happens. First, call your bank to confirm that international online payments are enabled on your card. If it still fails, simply try another card. Once the payment goes through, you’re ready to hit that final "Submit" button. Congratulations
Getting Your Biometrics Done at the VAC in Nigeria
So, you've submitted your application and paid the fees. What’s next? You’ll need to keep a close eye on your IRCC account for a very important document: the Biometric Instruction Letter (BIL). This is the official go-ahead you need for the final preliminary step.
Think of the BIL as your green light from IRCC. It confirms they have your application and now need your fingerprints and a photo. The letter is typically valid for just 30 days, so you really can't afford to sit on it. Your application is basically on hold until this is done. It’s a mandatory step for almost all Nigerian applicants, specifically anyone between 14 and 79 years old.
Booking Your Slot in Lagos or Abuja
With your BIL in hand, it's time to book an appointment at a Visa Application Centre (VAC). In Nigeria, your choices are Lagos or Abuja. A critical point here: you absolutely must book your appointment online through the official VAC website. Walk-ins are not an option.
These appointment slots are like gold dust—they get snapped up incredibly fast. My best advice is to book your appointment the very same day you receive your BIL. Don't delay.
When you go for your appointment, you’ll need to have three things with you, no exceptions:
- Your original Nigerian International Passport (not a copy).
- A printed copy of your Biometric Instruction Letter (BIL).
- Proof that you have an appointment, like the confirmation email.
A bit of practical advice from experience: plan to get to the VAC at least 15-20 minutes before your scheduled time. These centres are always buzzing with people. Arriving early saves you from the stress of security checks and queues. If you’re late, you risk losing your slot and having to start the booking process all over again.
What Happens on the Day
The biometrics process itself is surprisingly quick. First, a staff member will verify your passport, BIL, and appointment confirmation. After that, you'll be called in to have a digital photo taken and your fingerprints scanned. It’s all done electronically.
The staff are there simply to collect your data, not to grill you about your travel plans, so don't worry about being quizzed. Their role is purely administrative. Once you’re done, they’ll give you a stamped receipt. Hold onto this receipt—it’s your proof that you’ve completed this crucial stage.
Here’s something many people get wrong: the official processing time for your visa doesn't start when you submit the online form. The clock only starts ticking after your biometrics are in the system. Given the current pressure on Canada's visa system and the significant backlogs from high-demand countries like Nigeria, it’s wise to be patient. You can get a better sense of the situation by reading up on IRCC's processing challenges and backlogs.
The Waiting Game: Tracking Your Application and What Comes Next
So, you’ve done your biometrics. This is often the hardest part – the waiting. Your application is in the hands of an IRCC officer, and it's completely normal to feel a bit on edge. Knowing what happens now can make the wait a little more bearable.
Your GCKey account is your main window into the process. Keep an eye on it. You won't see updates every day, but any change is a good sign that your file is moving along. For a deep dive into what each status update really means, we've put together a complete guide on how to stay on top of visa application tracking.
Making Sense of the IRCC Status Updates
The messages in your IRCC account can be a bit cryptic. Here’s a quick translation of what you'll likely see:
- Application Received: This is just the system saying, "We've got it." Your journey has officially begun.
- Biometrics Completed: This usually pops up a few days after your VAC appointment. It means your fingerprints and photo are successfully linked to your file.
- Medical Results Received: If you had to do an upfront medical exam, this confirms IRCC has received the report from the panel physician.
- Background Check: This is where the real work happens, and it's often the longest stage. An officer is now going through your documents with a fine-tooth comb, verifying everything you submitted.
Let's be realistic for a moment. IRCC is currently dealing with a huge number of applications worldwide. Because of this, applications from countries like Nigeria are under a microscope, which can stretch out the processing times. They are looking at every single detail very, very carefully.
The Final Decision: What to Expect
Eventually, your application status will change one last time. It's the moment of truth, and it can go one of three ways.
Whatever the outcome, the absolute key is to stay calm. A decision—good or bad—gives you a clear direction. A level head is your best asset for figuring out what to do next.
If it's an approval, fantastic news! You'll receive an "Original Passport Request" (OPR) letter in your account. This is the official instruction to submit your passport to the VAC in Lagos or Abuja so they can place the visa inside.
If the application is refused, you'll get a letter explaining exactly why. Read the officer's notes carefully. They will highlight the specific issues, whether it was proof of funds, weak home ties, or something else. This feedback is gold; it’s your guide to building a much stronger application if you choose to reapply.
Your Top Questions Answered: Canadian Visa Tips for Nigerians
Going through the Canadian visitor visa process from Nigeria often brings up a ton of questions. Let's tackle some of the most common ones I hear from applicants, with some straight-up, practical advice.
How Much "Show Money" Is Actually Enough?
This is the big one, isn't it? While there’s no official figure from IRCC, a good rule of thumb is to have a stable balance of at least ₦3 million to ₦5 million for a standard two-week visit.
But here's the real secret: it’s not just about the final number. Stability is what the visa officers are looking for. A bank statement that shows a consistent flow of money, like your salary coming in and your savings growing over time, is far more convincing than a huge lump sum that just appeared last week.
Think about it from their perspective. That ₦10 million you borrowed from your cousin looks suspicious. It screams, "This isn't my money, and I might not have the funds to actually travel." Your bank history should tell a clear story of your financial life.
A visa officer is trying to answer one question: can you genuinely afford this trip without needing to work illegally in Canada? Consistent savings from a legitimate source will always beat a large, unexplained deposit.
I Got Refused. Can I Try Again?
Yes, you can, and many people do successfully. A refusal is a setback, not a permanent ban.
The most important thing is not to rush and reapply with the exact same documents. Take a deep breath and carefully read the refusal letter. The visa officer will tell you exactly why they weren't convinced.
Your next application needs to directly fix those problems. If they questioned your financial standing, you need to provide stronger proof of funds and more consistent bank statements. If they doubted you'd return to Nigeria, you need to show even stronger ties to home—like a stable job, property, or family commitments. Just resubmitting without making significant changes is a recipe for another refusal.
Should I Pay for My Flight Ticket Before I Apply?
Absolutely not. In fact, IRCC specifically warns against this. Don't book any flights or make other non-refundable travel plans until you have the visa stamped in your passport. It's a massive financial risk.
So, what should you do? Get a detailed flight itinerary or reservation from a travel agent. This document shows your intended travel dates and flight path without you having to pay the full amount upfront. Combine this with hotel bookings that have a free cancellation policy. This shows you have a solid plan without putting your money on the line.
Still feeling a bit stuck? The immigration process can be a maze, but you don't have to navigate it on your own. For quick, clear answers to your specific questions, check out JapaChat. It's designed to help you plan your journey with confidence. Get the support you need at https://japachat.com.
-

Schengen Visa Nigeria: Your Practical Guide to Getting that Approval
So, you're dreaming of that European holiday? Maybe it's a trip to see the Eiffel Tower in Paris, explore Rome's history, or just chill in a café in Amsterdam. Your key to unlocking this adventure is the Schengen visa, a single travel document that gives you access to 29 different European countries. For us Nigerians, however, getting that stamp of approval is often a major hustle that demands serious preparation.
What a Schengen Visa Really Means for Nigerian Travellers

Picture this: you land in Paris, hop on a train to Brussels, and then catch a flight to Rome, all without needing to show your passport at every border. That’s the beauty of the Schengen visa. It's one permit for a massive, border-free zone, perfect for tourism, business trips, or visiting family scattered across Europe.
But let's be real—securing this visa from Nigeria is no small feat. The application process is notoriously strict. Consular officers will comb through every document, looking for solid proof that you intend to come back home after your trip. For them, it's about controlling illegal immigration. For you, it’s about convincingly showing your strong ties to Nigeria—your job, your family, your life here.
The Tough Reality of Rejection Rates
Let's be blunt: the chances of getting a "no" are high. I've seen countless genuine travellers get their applications turned down because of small, avoidable mistakes or simply not making a strong enough case.
The numbers don't lie. Recent data shows Nigeria has one of the highest Schengen visa refusal rates in the world, hovering around 45.9%. That means almost one in every two applications from Nigeria gets denied, and this rate has been climbing. You can check out the official reports to see the full picture. This isn't to scare you, but to stress just how important a perfectly prepared application is.
A Schengen visa rejection isn’t just a simple "no." It means lost time, non-refundable fees (your hard-earned cash!), and a dent in your travel history that could cause issues with future applications. Your goal should be to get it right on the very first try.
Before you even start gathering documents, it's helpful to know the key details.
Schengen Visa Quick Facts for Nigerian Applicants
Here's a quick summary of the essential information every Nigerian applicant should know before starting.
Aspect Key Information Why It Matters for You Visa Fee €90 for adults, €45 for children (6-12), Free for children under 6. This fee is non-refundable. You don't get your money back, even if your application is denied. Processing Time Officially 15 calendar days, but can stretch to 45 days if they need to check things. Plan well in advance. Last-minute applications are a recipe for stress and potential disappointment. Don't book that non-refundable flight yet! "Main Destination" Rule You must apply to the embassy of the country where you'll spend the most time. Applying to the wrong embassy is a common mistake that leads to automatic rejection. Don't waste your time and money. Proof of Funds Varies by country, but expect to show €60-€120 per day of your stay. Your bank statements must show consistent financial stability, not just a last-minute cash deposit from an "uncle". Travel Insurance Mandatory coverage of at least €30,000 for medical emergencies. Your policy must be valid for the entire Schengen Area for your whole trip. No exceptions. Getting these basics right from the start puts you in a much stronger position for the rest of the process.
Understanding the Schengen Zone
The Schengen Area is basically a club of European countries that have agreed to remove border controls between them. It’s crucial to know who's in this club before you book anything. The zone includes:
- Most EU big names like Germany, France, Italy, and Spain.
- A few non-EU countries, such as Switzerland, Norway, and Iceland.
- Newer members like Bulgaria and Romania (currently for air and sea travel only).
This unified system is why you must apply to the embassy of your main destination. For example, if you plan to spend two weeks exploring Italy but will first land in Amsterdam for a two-day stopover, you must apply at the Italian embassy. It’s a simple rule, but one that confuses so many applicants. Nailing these fundamentals is the first step to getting your Schengen visa from Nigeria and making that European dream happen.
Building Your Bulletproof Document Checklist

Let's be clear: your visa application isn't a friendly chat. It's a pile of paper that has to speak for you. When it comes to getting a Schengen visa in Nigeria, your success depends almost entirely on how solid and complete your documents are. One missing paper or a flimsy statement can be the difference between planning your trip and getting that dreaded rejection email.
Think of it this way: the consular officer is a judge, and your file is the evidence. Your job is to make those documents tell a clear, convincing story. The story should say: "I'm a genuine visitor with a good reason to travel, I can pay my way, and most importantly, I have every reason to come back home to Nigeria."
The Foundation: Passport and Application Form
First things first, let's get the basics right. Your international passport is your ID. It absolutely must be valid for at least three months after you plan to leave the Schengen Area. It also needs at least two completely blank pages for the visa sticker. No space, no visa—it's an instant dead end.
Then you have the Schengen visa application form. Fill this out with 100% honesty. Every single detail must match your supporting documents. A classic mistake is putting down one hotel on the form but booking another. That kind of inconsistency screams "red flag" to the visa officer and makes them doubt everything else.
Proving You Can Fund Your Trip
This is a major hurdle where many Nigerian applications fail. The embassy needs to be completely sure you can afford your trip without needing to hustle illegally or become a problem for them. It's not just about having money; it's about proving where it came from and that it's stable.
- Bank Statements: You'll need your personal bank statements for the last three to six months. They are looking for a consistent flow of cash, like your salary landing in the account every month, and a healthy closing balance that covers your trip.
- The 'Magomago' Trap: A huge, sudden deposit just before you apply is the biggest red flag. It looks like you borrowed money to package your account and can lead to an instant rejection.
- Payslips: Your payslips for the same period must match the salary credits in your bank statements. This is your proof of stable, legitimate employment.
- A Solid Employment Letter: Get a letter from your employer on official letterhead. It needs to state your position, salary, how long you've worked there, and confirm your leave for the trip is approved. Crucially, it must also state that your job is waiting for you when you return.
Your goal is to paint a clear picture of financial stability and a solid career in Nigeria. The visa officer must be convinced that you have too much to lose back home to even think of overstaying.
The Heart of Your Application: Your Purpose of Travel
So, why are you going? Your documents must answer this question without any doubt. This is where you connect your plans to your paperwork.
A well-written cover letter is your chance to "speak" directly to the officer. Keep it short and sharp. Introduce yourself, state exactly why you're travelling (e.g., tourism, business, visiting family), your travel dates, and a brief day-by-day itinerary.
Your other documents need to back this up perfectly.
- Flight Itinerary: A confirmed round-trip flight reservation. Please, do not pay for the full ticket before the visa is approved! A reservation is all they need.
- Hotel Bookings: You need confirmed accommodation for every single night you'll be in the Schengen zone.
- Leave Approval: The letter from your employer (or school) confirming you have permission to be away for those dates.
Demonstrating Strong Ties to Nigeria
This is probably the most important part of the puzzle for a Nigerian applicant. The embassy's biggest fear is that you won't come back. You have to prove that you will.
Think about what truly anchors you to Nigeria. These are your "home ties":
- Family: Your marriage certificate and your children's birth certificates are powerful evidence of your roots.
- Property: Do you own land or a house? Include the title deeds or proof of ownership.
- Business: If you're a business owner, your CAC registration documents, business bank statements, and tax clearance certificates are essential.
Finally, every application must include proof of comprehensive travel insurance. This isn't just a formality; it shows you're a responsible traveller. The policy must cover medical emergencies for at least €30,000 and be valid in all Schengen countries for your entire stay. It tells the embassy you won't become their problem if something goes wrong.
Securing Your Visa Appointment and Submitting Your Application
Alright, you’ve gathered every last document and arranged them perfectly. Now comes what many Nigerians find is the real challenge: booking that visa appointment. This part of the process can be incredibly frustrating, as appointment slots often feel like gold dust—here one minute, gone the next. But with a bit of strategy, you can get through it.
Before you even think about booking, you have to be crystal clear on where you’re applying. This isn’t about picking the embassy with the earliest date. There's a strict rule: you must apply to the embassy of your main destination.
This means if your trip is five days in France and three in Spain, you must apply to the French embassy. Getting this wrong is a rookie mistake, and it leads to an automatic refusal before a visa officer even looks at your bank statement.
Navigating the VFS Global Portal
For most Schengen countries, you won't deal with the embassy directly for your appointment. Instead, you’ll go through an official partner like VFS Global, which is the main one for Nigerians. This is the website where you'll create an account, fill in your details, and hunt for that elusive submission slot.
A word of caution: be very careful when filling out your details on the VFS website. Every single letter and number must match your passport and application form exactly. A small typo can cause big problems on your appointment day. Slow down, double-check, and then check again before you click confirm.
The main struggle, as many will tell you, is finding an open slot. They are famously scarce and get snatched up within minutes.
Pro Tip from Fellow Nigerians: Don't just check the VFS portal randomly. Many people have found slots by logging on very early in the morning (between 4 AM and 7 AM) or late at night. Some embassies release new slots on specific days, so it pays to do some research on forums to see if you can spot a pattern.
This infographic breaks down the essential steps, from picking the right country to showing up for your appointment.

While the flow looks simple, the real test is securing that VFS booking. It’s often the biggest headache in the entire journey.
Strategies When No Appointments Are Available
So, what happens when you log in day after day and the VFS portal just says "no slots available"? It's a common, gut-wrenching situation.
First off, take a deep breath. Don't fall for the unofficial "agents" on social media who promise to get you a slot for an outrageous fee—they are almost always scams. The key here is to be persistent and smart.
- Check Constantly: Make it a daily routine. Check the portal several times a day, especially during those early morning hours when new slots might be released.
- Be Flexible: If your travel dates aren't set in stone, you'll have a much better chance. Being open to applying a bit earlier or later can make all the difference.
- Look at Other VFS Centres: If you can travel, check for appointments at different VFS locations. Slots in Abuja might open up when Lagos is fully booked, or vice versa.
Honestly, persistence is your best weapon here. The system is first-come, first-served, and you never know when a cancelled slot will pop up. You just have to be ready to grab it the second you see it.
Your Submission Day Experience
Congratulations, you got an appointment! Now, what should you expect? Plan to arrive at the VFS centre about 15-20 minutes before your scheduled time. Don't show up hours early; they won't let you in.
Make sure you have all your original documents plus one complete set of clear photocopies. The VFS staff will review your paperwork to ensure everything is in order before they accept it. They are not visa officers and have no say in the decision, but they will turn you away if you're missing important documents.
Once your papers are checked, you'll move on to biometrics. This is where they scan your fingerprints and take a digital photo. This data is saved in the Visa Information System (VIS) and is valid for 59 months, so you won't have to do it again for subsequent applications within that period.
Finally, you’ll pay the visa and service fees. You'll then be given a receipt with a crucial piece of information: your tracking number. To learn how to keep tabs on your application's progress, you can read our guide on effective visa application tracking. It will help you know exactly when your passport is back and ready for collection.
Understanding Why So Many Nigerian Schengen Visa Applications Get Denied

There’s nothing quite like the sting of a visa rejection letter, especially after you've poured weeks of effort and your hard-earned money into the application. For many Nigerians dreaming of a trip to Europe, this is a painful and common reality.
The official reasons on the rejection notice can be vague, leaving you wondering where things went wrong. To get it right next time, you need to think like a consular officer. Their main job is to identify risks, and your application must be so solid that it gives them every reason to say "yes."
Let's be clear: the competition is stiff. Since 2009, Nigerians have submitted over 1.1 million Schengen visa applications. Of those, a staggering 491,844 were rejected, putting the refusal rate at about 42.1%. This shows just how closely every detail of your application will be examined.
So, what are the most common reasons for rejection? Let's break them down.
Reason 1: "Justification for the Purpose and Conditions of the Intended Stay Was Not Provided"
This is a classic. It’s official-speak for "your story doesn't make sense." This rejection happens when your application seems inconsistent or poorly planned.
Imagine this: you claim you’re visiting Italy for two weeks, but your hotel reservation only covers three nights. Or your flight itinerary shows you flying into Paris but flying out of Berlin, with no train tickets or explanation for how you'll travel between them. These gaps create doubt.
Another common mistake is submitting a generic cover letter without a clear day-by-day plan. To avoid this:
- Craft a Detailed Itinerary: Show them you've planned your trip. What will you do each day? Where will you go? It proves you’re a genuine tourist, not just trying to enter the country.
- Align Your Bookings: Your flight reservation and hotel bookings must match and cover the entire duration of your stay. No gaps.
- Provide Supporting Documents: If it's a business trip, attach the invitation letter from the European company. If you're visiting your sister, include her invitation and proof of her legal status in that country.
Reason 2: "Your Intention to Leave the Territory Before the Visa Expires Could Not Be Ascertained"
This is the big one. It’s the polite way of saying, "We don't believe you'll come back to Nigeria." This is the number one concern for visa officers, and they are trained to look for strong ties to your home country.
Anything that suggests you might not return can be a red flag: a new job, a low bank balance, being single with no dependents, or owning no property. The officer needs to see that you have a life in Nigeria you are committed to returning to.
Insider Tip: Think of your application as building a case for your return. Every document—your employment letter showing a stable job, property deeds, marriage certificate, children’s birth certificates—is a piece of evidence. Each one strengthens your argument that you have deep roots in Nigeria.
Your finances are also under a microscope here. A bank account with a small balance or a sudden, huge deposit just before applying (officials are wise to the 'magomago' deposit) looks suspicious. They want to see a consistent history of income and savings over time.
Reason 3: "You Have Submitted False or Forged Documents"
This is the most serious offence and an absolute deal-breaker. Submitting a fake hotel booking, a photoshopped bank statement, or a made-up letter from an employer is a guaranteed denial.
But it gets worse. This isn't just a rejection; it's considered visa fraud. It can get you banned from applying for a Schengen visa for several years. That black mark on your record can also ruin your chances of getting visas for other countries like the UK, the US, or Canada.
If you're unsure what counts as fraud, our guide on visa application misrepresentation provides a deeper look into the issue and how to stay on the right side of the law.
The golden rule is simple: always be truthful. If a part of your application is weak, the solution is to strengthen it legitimately, not to fake it. Your integrity is not something to play with in this process.
Counting the Cost: What Your Schengen Visa Application Really Costs
Let's talk money. Applying for a Schengen visa from Nigeria isn't just about filling out forms; it's a serious financial commitment. And here's the tough part: every single Naira you spend is gone for good, whether you get the visa or not. Knowing the real costs upfront helps you plan and highlights why getting your application right the first time is so important.
Your first cost is the official visa fee, currently €90 for adults. You'll pay this in Naira at the VFS centre, and the amount will depend on the exchange rate that day. This is a fixed, non-refundable cost.
But paying this fee doesn't guarantee you a visa. It only pays for a decision. For Nigerians, this is a painful reality. Across Africa, it's estimated that rejected applications lead to a staggering €60 million in lost fees in just one year. That figure shows just how high the financial stakes are. You can read more about the financial impact of visa denials for African travellers.
Breaking Down All The Non-Refundable Fees
The €90 fee is just the start. Several other mandatory costs will quickly add up. It's vital you budget for everything.
- VFS Global Service Fee: VFS is the middleman that handles the logistics, and they charge for their services. Expect this fee to be somewhere between ₦30,000 and ₦40,000. It covers their work collecting your documents, taking your fingerprints, and sending everything to the embassy.
- Mandatory Travel Insurance: You can't submit your application without it. You need a valid travel medical insurance policy covering a minimum of €30,000 for emergencies and valid across the entire Schengen zone. Depending on your trip's length, this will cost between ₦15,000 and ₦50,000.
When you add it all up, you're looking at a minimum upfront cost that can easily exceed ₦150,000. If your application is rejected, that money is gone.
The Unspoken Rule of 'Proof of Funds'
This is where so many people get it wrong. While there’s no official magic number, the embassy needs to be convinced you can comfortably fund your trip. More than the final balance, they want to see a stable financial history, not an account that was suddenly pumped with cash.
This leads us to the most common—and most fatal—mistake: the last-minute “magomago” deposit. Dumping a huge sum of money into your account right before applying is the biggest red flag. It screams that you borrowed the funds just for show, and it instantly destroys your credibility.
Your bank statement needs to tell a story of consistency. It should show your salary coming in regularly and sensible spending over the last three to six months. A lower, consistent balance is always better than a large, suspicious lump sum that just appeared from nowhere.
So, what’s a safe amount to have? A good rule of thumb is to have enough to cover your flight and hotel bookings, plus an extra €100-€150 (roughly ₦150,000 – ₦225,000) for each day you plan to stay. This proves you can handle your daily expenses without issues.
Getting a firm grip on these financial requirements is your first line of defence. A strong application isn't just about getting a visa; it's about protecting the significant amount of money you've invested.
Got Questions About Your Schengen Visa? We've Got Answers
The Schengen visa process can feel complicated, and it's normal to have a lot of questions. Getting the right answers is key to putting together a winning application. We’ve gathered some of the most common questions from Nigerian applicants and answered them with straightforward, practical advice.
How Much "Show Money" Is Actually Enough?
This is the number one question, but the truth is, there’s no magic number. Instead of focusing on a specific figure, you need to show the embassy that you can genuinely afford your trip.
A good rule of thumb is to have the equivalent of €100-€150 per day (about ₦150,000 – ₦225,000 daily at current rates) available for spending after you've accounted for flights and accommodation. But honestly, the history of your bank account is far more important than the closing balance. They want to see a steady flow of income, like your salary, and normal spending over the last three to six months.
A huge, last-minute deposit is one of the biggest red flags. It screams "borrowed funds" to a consular officer and kills your credibility instantly. A stable account with a more modest balance is always better than one that suddenly got a massive cash injection.
I'm Self-Employed. Can I Still Get a Visa?
Of course! But you have to be extra careful with your documents. Since you don’t have an employer writing a letter for you, the responsibility is on you to prove that your business is legitimate, profitable, and a strong reason for you to return to Nigeria.
This means your documentation has to be more detailed. You’ll need to provide:
- Your Corporate Affairs Commission (CAC) registration documents.
- Your business bank statements for at least the last six months, showing consistent activity.
- Proof of your work—like client invoices, signed contracts, or a portfolio.
- Both personal and business tax clearance certificates.
A well-written cover letter is your chance to explain what your business does, your role, and why the trip is important. You want to paint a clear picture of a successful business that ties you firmly to Nigeria.
What Do I Do If My Visa Is Rejected?
First, don't panic. Take a moment, then read the rejection letter very carefully. It will give a reason or a code that explains why they said no. From here, you can either appeal the decision or submit a fresh application.
An appeal really only makes sense if you’re certain the embassy made a clear mistake—like misreading a document. For most people, reapplying is the more practical and faster option.
But before you reapply, you must fix the specific reason for the denial.
- Insufficient funds? You need to build a stronger financial history before trying again.
- Purpose of travel unclear? Draft a much more detailed day-by-day itinerary and strengthen your cover letter.
- Doubted your intention to return? Find more proof of your ties to Nigeria, like property deeds, family responsibilities, or business contracts.
Just resubmitting the same application without any changes is a sure way to get another rejection. Address the weakness they pointed out directly to give your next application a real chance.
Is There an "Easiest" Schengen Country to Get a Visa From?
Let's be clear: there's no such thing as an "easy" Schengen country. All 29 member states follow the same visa rules. The internet is full of rumours about which embassy is supposedly more lenient, but most of it is just gist.
The best strategy isn't to look for a shortcut. It's to apply to the correct country based on your travel plans. This must be either:
- Your main destination (where you'll spend the most nights).
- Your first port of entry if you're splitting your time equally between several countries.
A logical, well-prepared application sent to the right embassy has a much better chance of success than a weak one sent to a random country you think might be an easy pass. Spend your energy on building a solid application, not on chasing a loophole that doesn't exist.
Planning a trip abroad can be a serious headache, but you don't have to figure it all out alone. JapaChat is Nigeria's first AI immigration expert, built to give you instant, reliable answers to your toughest questions about visas and relocation. Sign up for free and get personalised checklists and clear guidance from our AI. Stop guessing and start your journey with confidence by visiting https://japachat.com.
-
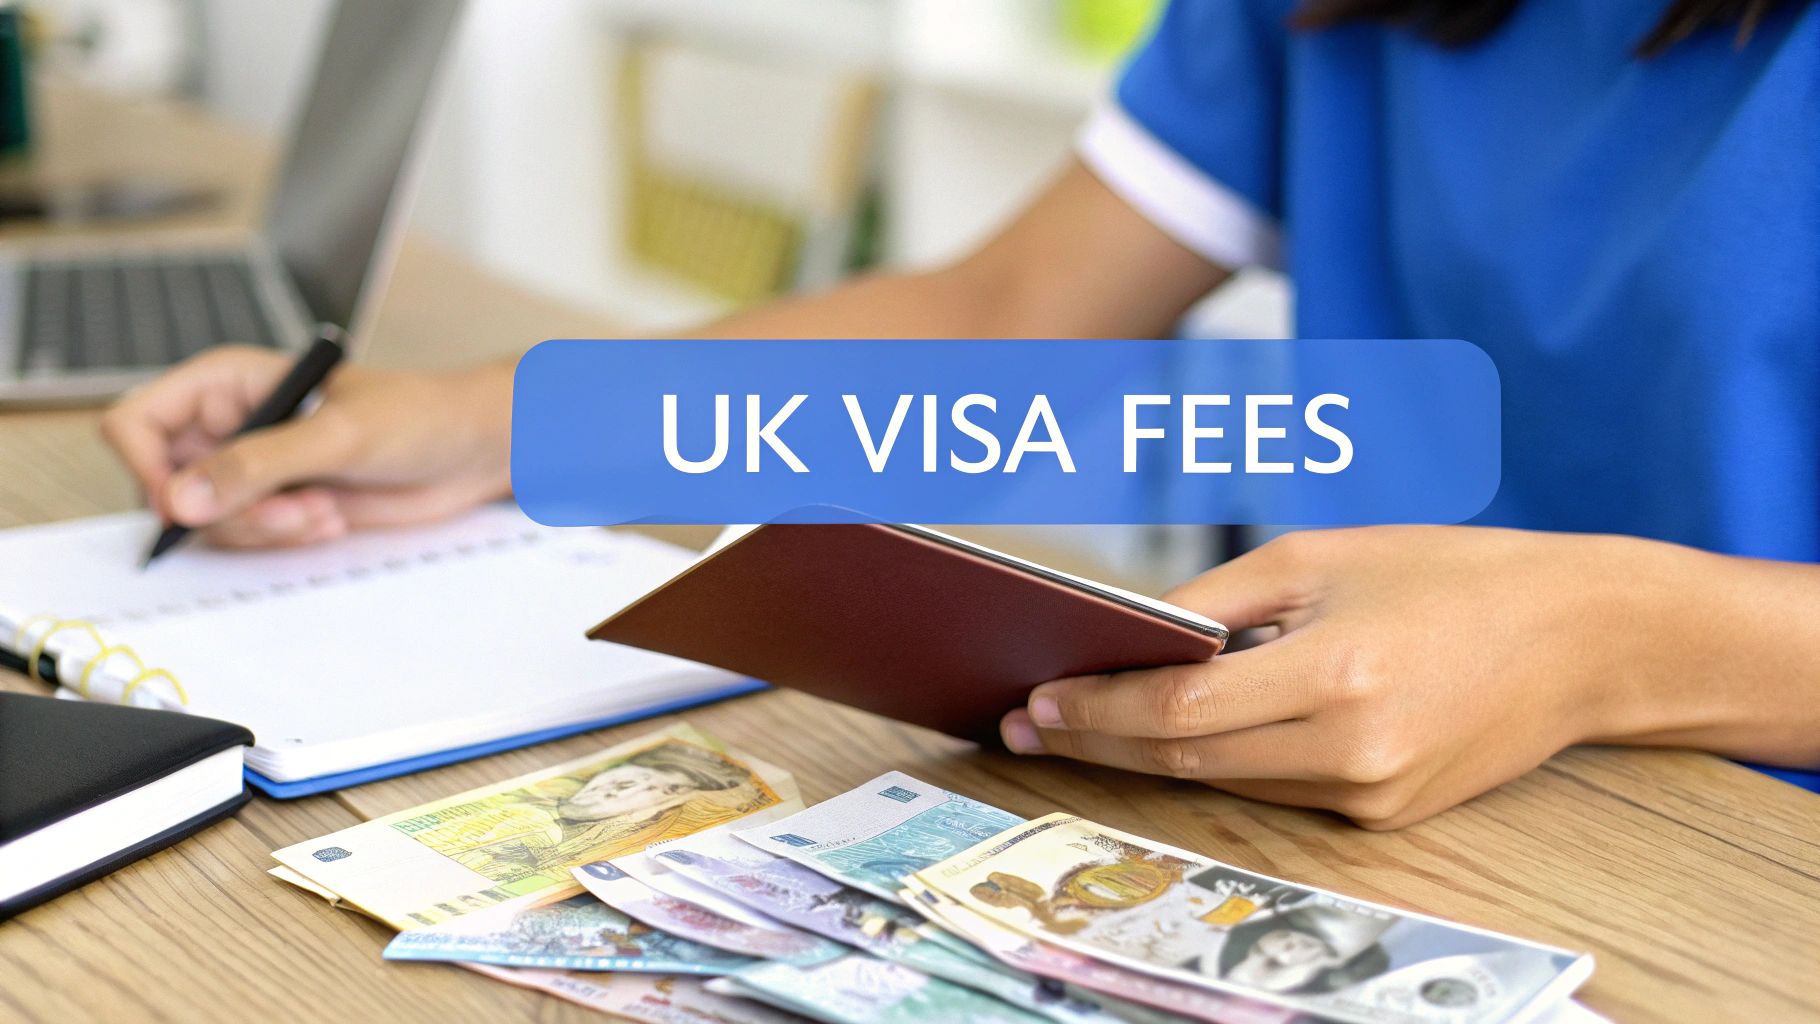
A Nigerian’s Guide to UK Student Visa Fees: The Real Cost in 2024
So, you're planning to study in the UK and need to figure out the UK student visa fee in Nigeria? Let's get straight to the point. The first and most important fee you must budget for is the main application fee, which is £490.
This is the standard, non-negotiable charge from the UK government just to process your application. Think of it as the 'gate fee' for your study abroad journey—it’s the very first cost you'll have to pay.
Of course, since the fee is in British Pounds, the amount you actually pay in Naira will change with the daily exchange rate. What costs you around ₦880,000 today might be slightly different tomorrow, so it’s smart to check the latest rates as you get ready to pay.
Understanding the Core Application Fee
Before we dive into other costs, it's crucial to understand this foundational fee. Every single Nigerian student applying from outside the UK has to pay it. It's the starting point for your entire visa budget.
This fee covers the administrative work done by the UK Visas and Immigration (UKVI) department to assess your application documents and decide on your visa.
Why Did the Fee Go Up?
If you've been researching this for a while, you might have noticed the price has changed. You're not imagining things. In October 2023, the UK government increased this fee by almost 35%, taking it from £363 up to the current £490.
This was a big jump, part of a wider UK policy to adjust immigration and nationality fees. Knowing this helps you understand why the costs are what they are today and allows you to budget more accurately. It wasn't a small change, and it affects every new student from Nigeria.
To give you a clearer picture, let's break down the primary costs you can expect.
Core UK Student Visa Costs At a Glance
Here's a quick summary of the main, unavoidable fees you'll face when applying for your student visa from Nigeria.
Fee Component Cost in Pounds (£) Estimated Cost in Naira (₦) Student Visa Application Fee £490 Varies daily, but budget around ₦850,000 – ₦900,000 This table shows the starting line for your budget. Remember, the Naira figure is an estimate and will be finalised when you make your payment. The exchange rate used by the payment portal is often higher than the market rate.
Keep in mind, this £490 is just one piece of the financial puzzle. You’ll also need to account for the Immigration Health Surcharge (IHS) and biometric appointment fees, which we’ll cover next.
For those curious about other UK immigration routes, you might find it helpful to compare this with the breakdown of UK work visa costs from Nigeria. It gives a broader view of what it costs to move to the UK.
Understanding the Mandatory Immigration Health Surcharge
Right, let's talk about a cost that often catches Nigerian students off-guard: the Immigration Health Surcharge (IHS). This isn't some optional add-on; it's a compulsory fee you have to pay on top of your main visa application charge.
Think of it as your contribution to the UK’s National Health Service (NHS). By paying the IHS upfront, you gain access to doctors and hospitals in the UK for free when you need them, just like a UK resident. It’s like paying for a full health insurance plan before you even pack your bags.

How Much Will the IHS Cost Me?
This is where you need to get your calculator out. The IHS isn't a single, flat fee. It’s calculated based on the total length of your visa, and the current rate for students is £776 per year.
One crucial detail: if your course duration includes part of a year (say, six months and one day), you'll be charged for the next full year. You can get more details on the complete cost breakdown for Nigerian students on AECC Global.
Let’s run through a couple of practical examples for Nigerian students:
- You're doing a 1-year Master's Degree: Your visa will usually be granted for the length of your course plus a few extra months at the end. For this, you’ll typically pay for 1.5 years. The total would come to about £1,164 (£776 for the first year + £388 for the extra 6 months). In Naira, that's a huge chunk of money—over ₦2 million.
- You're starting a 3-year Bachelor's Degree: This is more straightforward. You’ll be charged for the entire three years, making your total IHS fee £2,328 (£776 multiplied by 3). That’s over ₦4 million you need to have ready.
The most important thing to remember is that you must pay the entire IHS fee for your whole course duration at once, when you submit your visa application. This can be a substantial lump sum, so it's absolutely vital to factor it into your budget from day one to avoid any nasty financial surprises.
Navigating Visa Payments From Nigeria
Knowing the fees is one thing; actually getting the money paid from Nigeria can be a whole different ball game. Let’s break down how you can pay your UK student visa fee, focusing on what actually works for Nigerian applicants and how to get around common banking roadblocks.
Think about it from the perspective of a student, let's call her Chioma from Abuja. She’s got her application sorted, but now she’s at the payment gateway. The fees are listed in British Pounds (£), but her bank account is in Naira (₦). This is where the real headache can start.
Accepted Payment Methods
The most straightforward way to pay your visa and IHS fees is online with a debit or credit card. But here's the catch: due to banking restrictions on international transactions in Nigeria, your regular Naira card is almost certain to be declined due to the low monthly spending limits (often just $20).
This leaves you with two reliable options that most successful applicants use:
- USD Domiciliary Account Card: This is, by far, the best way to go. If you have a dollar account with a Nigerian bank, your linked debit card can handle international payments without the frustratingly low limits imposed on Naira cards. So, Chioma could simply fund her domiciliary account and use her dollar card to pay the £490 visa fee and IHS without any issues.
- Payment at a Visa Application Centre: You can also choose to pay in person at a visa application centre, like TLScontact in Lagos or Abuja. They accept payments, usually via Point of Sale (POS), and this serves as a great backup plan if your online payment just won't go through.
A Warning About Unofficial Agents
You’ll see plenty of "agents" on Nairaland, WhatsApp, and offline offering to pay your visa fees for you, often for what seems like a small extra charge. Tread very, very carefully here. Giving your application login details and payment information to an unverified third party is a massive risk.
Using an unofficial agent doesn't just open you up to potential fraud; it can also lead to mistakes being made in your application that you'll have to answer for. It's always safer to manage the payment yourself through official channels—either the UKVI portal or at a TLScontact centre. That peace of mind is worth far more than any convenience they promise.
What About Form A?
It's a common question, but it’s crucial to know that Form A is not for paying your visa application fees. The Central Bank of Nigeria's Form A process is specifically for large-scale foreign currency transactions, like your university tuition and accommodation deposits.
For the visa and IHS fees, you need to stick to the card payment methods we've covered.
Planning ahead is key. If you can, get a domiciliary account set up and funded well in advance. This one step can make the payment process incredibly smooth, ensuring your application isn't held up by a declined transaction and getting you one step closer to your UK study goals.
Calculating Your True Visa Budget
To get a real sense of what your UK student visa will cost, you need to look past the big-ticket items like the application fee and the IHS. Think of those as the starting price; the final bill includes several other costs, both mandatory and optional, that are part of the process for every Nigerian applicant.
Getting these smaller, yet absolutely crucial, expenses into your budget from day one is the key to a stress-free application. They aren't just suggestions—they are non-negotiable steps you'll have to take.
Mandatory Extra Costs
Before you even hit 'submit' on your main visa application, you'll have to pay for a couple of essential services right here in Nigeria. These fees aren't paid to the UK government, but you can't move forward without them.
There are two main costs you simply can't sidestep:
- Tuberculosis (TB) Test: As a Nigerian applicant, you are required to get a TB test from a clinic approved by the UK Home Office in Lagos or Abuja. This health check is mandatory, and you'll need the certificate it provides to complete your visa application.
- Biometric Appointment Fee: You’ll need to visit a visa application centre, like TLScontact in Lagos or Abuja, to have your fingerprints and photograph taken. There's an administrative fee that comes with this appointment.
This infographic gives you a clear picture of what these services typically cost.
As you can see, these local costs can add a hefty sum to your overall budget before you've even paid the main visa fee itself.
Optional Services to Consider
On top of the required costs, there are a few optional services you can choose to pay for. These are mostly about making the process faster or more convenient.
For instance, if your university resumption date is just around the corner, the Priority Visa service might be worth considering. It comes with an extra charge, but it’s designed to get you a decision in about five working days, which can be a real lifesaver. Other optional add-ons include things like document scanning or paying for a courier to safely return your passport.
While these services are technically optional, it's wise to at least budget for the courier service. Factoring in these smaller amounts from the beginning helps you avoid the headache of surprise bills when you're already feeling the pressure.
For anyone looking to ease the financial burden, exploring avenues like Grants to Pay Off Student Loans can make a real difference to your overall budget.
To help you keep track of everything, here’s a complete breakdown of all the potential costs you might face.
Your Complete UK Visa Application Cost Checklist
This table pulls together every potential expense, from the big application fee to the smaller local charges, giving you a clear, all-in-one view of your total budget.
Expense Item Is it Mandatory? Estimated Cost Range (₦) Main Visa Application Fee Yes ₦880,000 (Approx. £490) Immigration Health Surcharge (IHS) Yes ₦1,390,000 per year (Approx. £776) Tuberculosis (TB) Test Fee Yes ₦57,800 – ₦115,600 Biometric Appointment Fee Yes ₦12,000 – ₦25,000 Priority Visa Service No ₦500,000+ Super Priority Visa Service No ₦1,000,000+ Document Translation No (if needed) ₦5,000 – ₦20,000 per document Passport Courier Return No ₦5,000 – ₦15,000 By using this checklist, you can confidently plan your finances and ensure there are no unexpected surprises along the way.
Mastering the Proof of Funds Requirement
https://www.youtube.com/embed/eonRdEySFhw
Alright, let's talk about the big one: Proof of Funds, or what many Nigerian students call 'show money'. This isn't a fee you actually pay to anyone; it's the money you must prove you have in your bank account for your studies in the UK.
Think of it this way: the UK government wants to be sure you can pay your school fees and 'sort yourself out' for your first year without struggling. It’s their way of making sure you’re genuinely coming to study and can support yourself financially.
How to Calculate Your 'Show Money'
The UKVI has a very clear formula for this, leaving no room for guesswork. You need to show you have enough money to cover two main things:
- Your outstanding tuition fee for the first academic year. This is the balance of your first year's fees after paying your initial deposit. You'll find this exact figure on your Confirmation of Acceptance for Studies (CAS) from your university.
- A fixed amount for living costs to cover your accommodation, food, and other day-to-day expenses.
The living cost part is where location comes into play. The UKVI sets two different rates:
- £1,334 per month for students studying in London.
- £1,023 per month for students studying anywhere else in the UK (outside London).
You need to prove you have these funds for a maximum of nine months. This means the total living expenses you must show are £12,006 for a course in London or £9,207 for a course outside London.
Let’s break it down with a realistic example. Imagine Tunde is going to Coventry University (outside London). His first-year tuition is £16,000 and he has paid a £4,000 deposit. He would need to show:
(£16,000 – £4,000) Outstanding Tuition + £9,207 Living Costs = £21,207 total in his account.
The All-Important 28-Day Rule
Now, here’s a detail that trips up many applicants. It's not enough to just have the money. The UKVI needs to see that the full amount has been held in your bank account (or your parents' account) for a minimum of 28 consecutive days.
The closing balance on any given day during that 28-day period must not drop below the required total. The bank statement you submit with your application must also be no more than 31 days old. Getting this timing wrong is one of the most common reasons for a visa refusal, so be meticulous with your dates!
For a more comprehensive look at all the paperwork involved, be sure to read our guide on UK student visa requirements.
Answering Your Top Questions About UK Visa Fees
Let's dive into some of the most pressing questions Nigerian students ask about paying for their UK student visa. Getting these details straight can save you a lot of stress down the line.
Can I Pay My Visa Fee in Naira?
Yes and no. While the money will come from your Nigerian account, the official visa fee is set in British Pounds (£). When you pay online, the system converts the amount to Naira using its own exchange rate for that day.
Be warned: this rate is often not as favourable as the parallel market rate. Because of this, and the frustratingly low spending limits on most Naira cards (e.g., $20/month), it is much easier and safer to pay using a card linked to a USD domiciliary account. It just makes the process smoother and avoids payment failures.
What Happens if My Visa Is Refused?
This is the big fear, and it's a valid worry for many. If your visa application is refused, unfortunately, the main £490 application fee is non-refundable. The UK government keeps this to cover the administrative costs of reviewing your file.
But it's not all bad news. The hefty Immigration Health Surcharge (IHS) you paid upfront will be fully and automatically refunded. You should see the money returned to the card you paid with, usually within about six weeks of getting the refusal notice.
Is the Priority Visa Service Worth the Extra Cost?
This really boils down to your personal timeline and how close you are to your school's resumption date. The Priority Visa service is an add-on that promises a much faster decision, typically within about five working days. If your course starts in a few weeks, this service can be an absolute lifesaver.
However, if you've applied with plenty of time to spare (say, two or three months before your course starts), the standard service is perfectly fine and will save you a good chunk of money. To get a better feel for how the rules are changing, you might want to read up on the new UK immigration white paper and how it affects students.
Feeling a bit lost in the immigration maze? Let JapaChat point you in the right direction. As Nigeria’s first AI immigration expert, we give you instant, reliable answers on everything from visa fees to proof of funds. Plan your move with clarity. Get started for free at https://japachat.com.
-
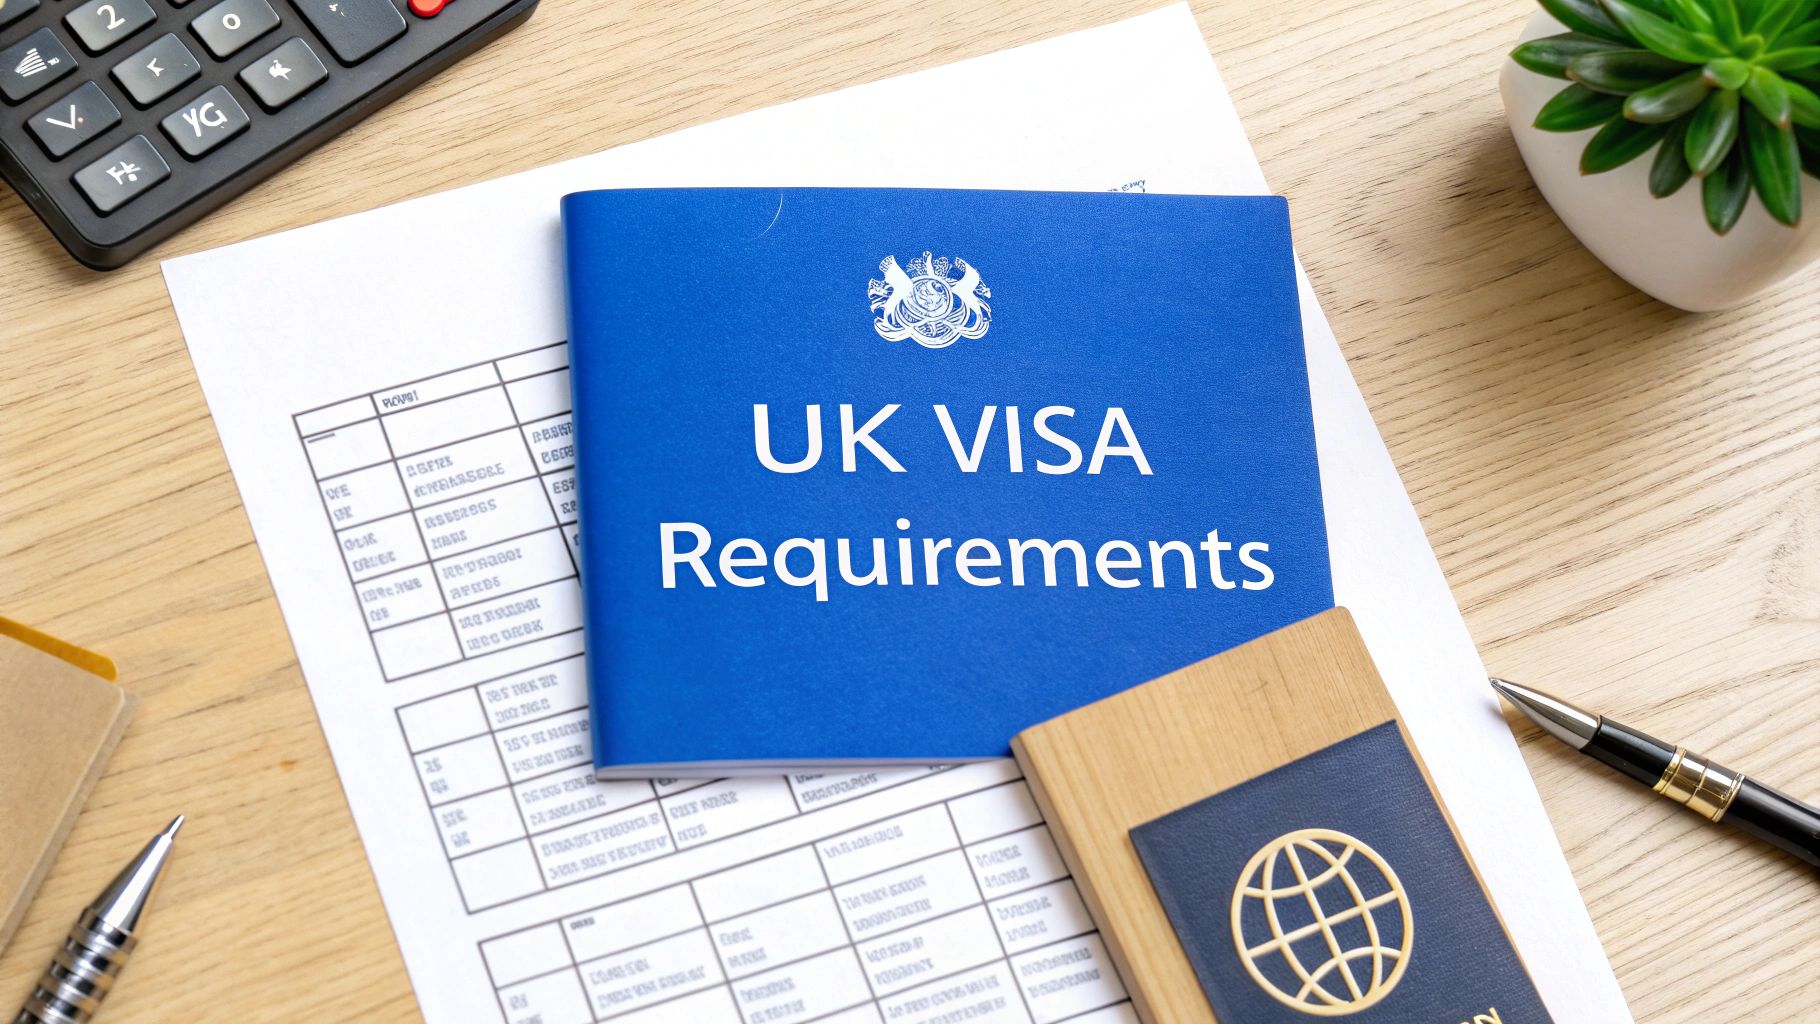
UK Visa Requirements for Nigerian Citizens | Easy Application Guide
Getting a UK visa from Nigeria hinges on a few core things: having a valid international passport, proving you have enough money for your trip, and showing you have strong reasons to come back home. Nail these basics from the get-go, and you've laid the groundwork for a solid application.
Your Essential UK Visa Checklist from Nigeria
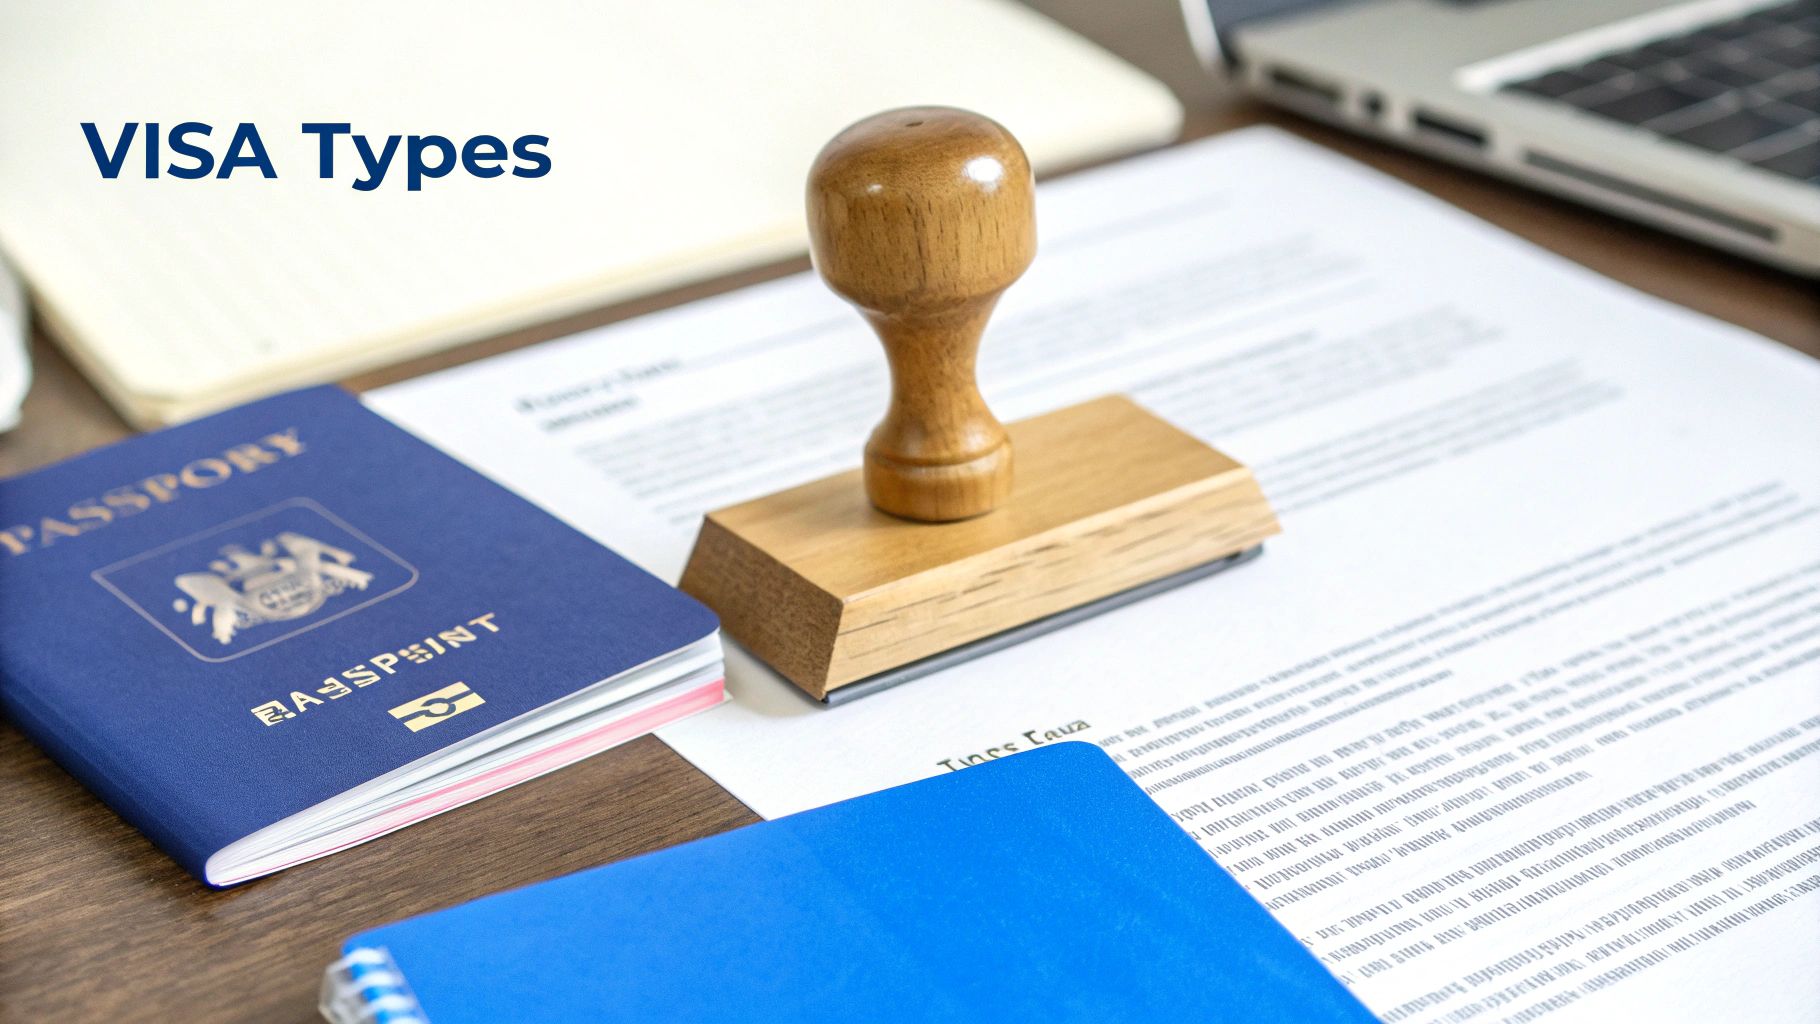
Starting your UK visa application can feel overwhelming. With so many forms and rules, it's easy to get lost. The trick is to break it all down into a simple, step-by-step checklist. Think of it as your game plan; getting these fundamental pieces right makes everything else fall into place.
No matter why you're going—for a holiday, to study, or for work—every Nigerian applicant has to provide a core set of documents. These aren't just papers to collect; they're your evidence. You're using them to convince a UK visa officer that you're a genuine visitor who will play by the rules.
The Three Pillars of Your Application
At its core, a strong application is built on three main pillars. You have to prove who you are, show you can pay for your trip without asking for help, and convince the officer you have every reason to return to Nigeria.
-
Your Identity: Your valid Nigerian international passport is non-negotiable. It must have at least six months left on it from the day you plan to travel and a minimum of one completely blank page for the visa itself.
-
Your Financial Capacity: You've got to show you have the cash to cover everything—flights, a place to stay, and your daily spending. This isn't just about having a lump sum in your account; it’s about showing a consistent and stable financial situation. Think of it as showing your "financial character."
-
Your Ties to Nigeria: This is often the part they look at the hardest. The UK Home Office needs to be confident that you have deep roots in Nigeria—your job, family, property—that will pull you back home after your visit. This is what they call "home ties."
Due to high demand and recent policy shifts, the visa process for Nigerians can be quite tough. The standard 6-month visitor visa costs around £127, and you can expect a decision in about three weeks. This strictness means you have to be meticulous with your application. For a deeper dive, you can explore a complete guide to the UK standard visitor visa.
Putting Together Your Proof
Before you even start filling out the online form, gathering your core documents is the first step. Think of these as the foundation of your entire case. Each one tells a small part of your story, and together, they should paint a clear picture of a genuine applicant.
The table below summarises the absolute must-haves for nearly every type of UK visa application submitted from Nigeria.
Core Documents for Your UK Visa Application
Document Type Why It Is Important Nigerian Example International Passport This is your primary identity document. It must be valid for at least six months beyond your travel date. A current, valid Nigerian passport booklet with at least one blank page. Your data page must be clear. Bank Statements They prove you can afford the trip. Statements should show a steady income and savings, not a sudden large deposit. Official bank statements for the last 6 months from a Nigerian bank (e.g., GTBank, Access Bank, Zenith) showing your salary coming in consistently. Proof of Employment/Studies This shows you have a stable life and a compelling reason to return to Nigeria. A signed letter from your employer in Lagos on company letterhead, or an official admission letter from your Nigerian university. Ties to Nigeria This evidence convinces the visa officer you won't overstay. It can be economic or familial. Documents for property you own (e.g., a Deed of Assignment for land in Lekki), or birth/marriage certificates for your family in Nigeria. Accommodation Details Shows you have a credible plan for where you will stay during your visit. A hotel booking confirmation or a formal invitation letter from a family member in the UK, including a copy of their passport and proof of their UK address. Getting these documents in order is more than half the battle. When they're clear, consistent, and tell a believable story, you're in a much stronger position for a successful outcome.
Building a Credible Case from Lagos
Let's make this real. Imagine you're a marketing manager at a tech firm in Yaba, planning a two-week holiday to see the sights in London. Your application needs to paint a clear, believable picture of your life here in Nigeria.
To show you're financially stable, you’d submit six months of your personal bank statements. They need to clearly show your monthly salary hitting the account from your employer. A sudden, unexplained deposit of several million Naira right before you apply is a massive red flag, unless you have solid proof of where it came from, like a deed of sale for a car you just sold.
To prove your strong ties, you would need things like:
- A letter from your job confirming your position, salary, and that your holiday leave has been approved by your manager.
- Proof that you own property in Nigeria, such as land documents or a Certificate of Occupancy (C of O).
- Evidence of your immediate family, like birth certificates for your children or your marriage certificate.
The goal is to build a narrative. Your documents should tell a story of a stable, employed individual with a good life in Nigeria who simply wants to visit the UK and will definitely return. Every document should support this central claim.
Choosing the Right UK Visa Type

Let's be clear: picking the right visa is the most critical decision you'll make. Get this wrong, and your application is dead on arrival. It’s a guaranteed refusal that costs you time, money, and a whole lot of stress.
The UK immigration system is built on specific pathways for different purposes. Your reason for travelling must align perfectly with the visa you choose. Think of it like this: you wouldn't apply for Jamb with WAEC results if you want to study for a Master's. In the same way, you can't apply for a Visitor Visa if your real plan is to do a Master's degree. Every visa category has its own unique checklist of requirements for a UK visa, and you have to tick every single box.
Comparing Two Common Scenarios
To see how this plays out in real life, let's look at two very different but common scenarios for Nigerians. By understanding their goals, we can see exactly why they need different visas and what that means for their application process.
Scenario 1: The Ambitious Graduate
First, meet Amara. She's a brilliant Computer Science graduate from the University of Lagos (UNILAG) and has just landed an offer to study for a Master's in Artificial Intelligence at the University of Manchester. Her goal is straightforward: study in the UK for one year.Scenario 2: The Experienced Professional
Now, let's turn to David, a senior software developer from Abuja with a decade of experience. A London tech company has offered him a job as a lead engineer and wants to sponsor his work visa. His goal is to move to the UK for a long-term career.Amara and David are both heading to the UK for professional reasons, but their journeys couldn't be more different. Amara needs a Student Visa. David needs a Skilled Worker Visa.
Student Visa: A Path for Education
For Amara, everything starts with her Confirmation of Acceptance for Studies (CAS) number. This is a unique reference code from her university, and it's the absolute cornerstone of her application. It's the official proof that she's a genuine student.
Her application will hinge on a few key things:
- Proof of Funds: She must prove she has enough money to cover her entire first year's tuition fees plus living expenses. Crucially, this money must have been in her (or her parents') bank account for at least 28 consecutive days.
- English Language Proficiency: Since her UNILAG degree was taught in English, this may satisfy the requirement. However, she must double-check if her university is on the approved list to avoid needing an IELTS test.
- Academic Documents: She'll need to submit her original degree certificate and academic transcripts.
The Student Visa is for one thing and one thing only: education. While it allows for some part-time work, its primary purpose is study. The visa officer must be completely convinced that Amara's main intention is to get her MSc and nothing else.
Skilled Worker Visa: A Route for Employment
David's application, on the other hand, is all about his job offer. His UK employer must first give him a Certificate of Sponsorship (CoS). This is the work equivalent of Amara's CAS; it’s the document that officially ties him to a specific, government-approved employer.
His application will focus on:
- Certificate of Sponsorship (CoS): This document details his job title, salary, and confirms the role meets the necessary skill level.
- Appropriate Salary: The salary he's been offered must meet the minimum threshold set by the UK Home Office for that specific job.
- Proof of Identity and Knowledge of English: Just like Amara, David will need to prove his identity and his ability to speak English, which might be waived if he has a degree taught in English.
To get a full picture of all the available routes, you can learn more about the different https://blog.japachat.com/uk-visa-types/ in our detailed guide. Getting this first step right is the secret to a successful application.
Proving Your Financial Stability as a Nigerian
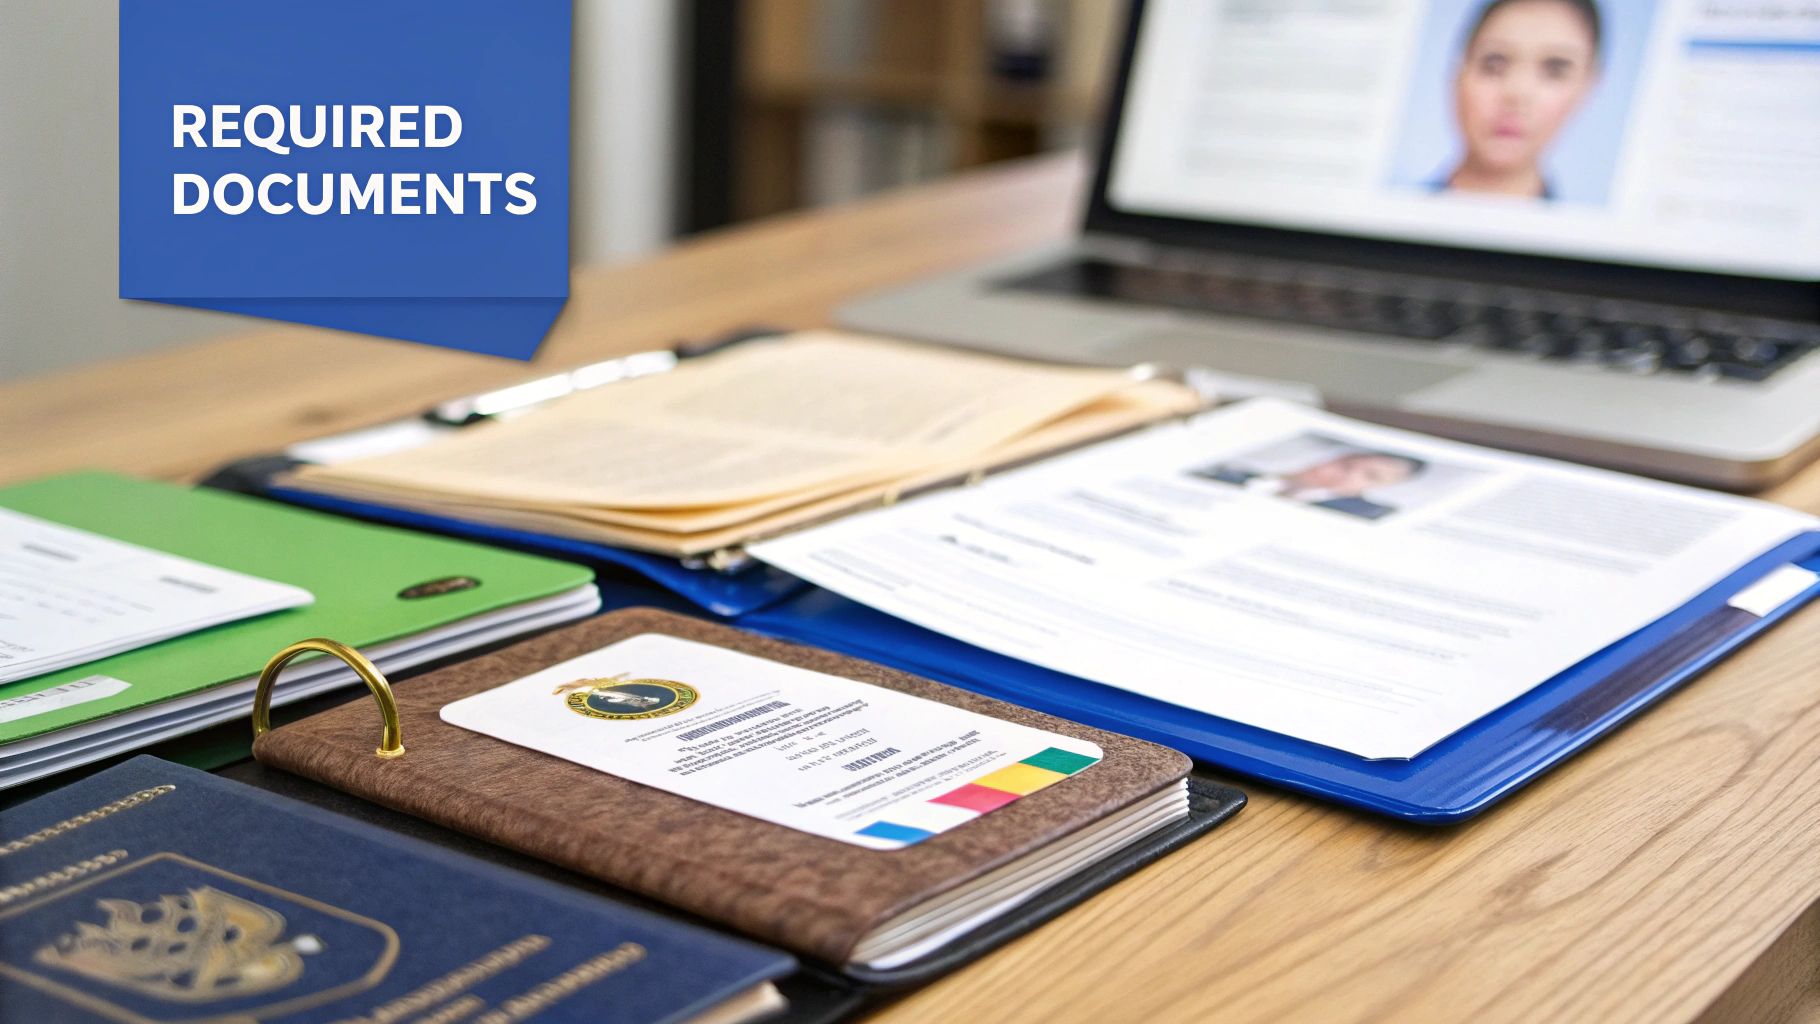
For most Nigerian applicants, the proof of funds is where the real stress begins. It's often the single biggest hurdle and, frankly, the most common reason for a visa refusal. The UK Home Office needs to see, without a shadow of a doubt, that you can fully support yourself during your stay without touching their public funds. This isn't just about having money; it's about proving where it came from and that it's genuinely yours.
Think of your bank statements as the financial story of your life. The visa officer sifting through your application is looking for a consistent, logical narrative. They want to see your salary hitting the account like clockwork and your savings building up over time.
The Dreaded Red Flag of "Funds Parking"
One of the quickest ways to get a rejection is something called "funds parking." This is when a large, unexplained sum of money suddenly appears in your account just before you apply. To a visa officer, this screams "borrowed money" and immediately casts doubt on your entire application.
Imagine your account has been hovering around ₦500,000 for months. Then, two weeks before you apply, ₦5 million lands in it out of the blue. The first question in the visa officer’s mind will be: where did that come from? Is it a loan from an uncle to pad your account? Did you take on debt just for the application? This kind of activity creates suspicion, and suspicion leads to refusal.
Every significant deposit needs a clear paper trail. If you sold a car, show the sales agreement. If you received "Ajo" or "Esusu" contribution, you must have meticulous records. When it comes to your money, transparency is your absolute best friend.
Building a Credible Financial Profile
To meet the UK's tough financial requirements for a UK visa, you need to build a profile that screams reliability. Your job is to paint a clear, honest, and verifiable picture of your financial situation.
Here's what you need to nail down:
- Consistent Savings History: Your bank statements must show at least six months of activity. This isn’t just about the final balance; it's about demonstrating a pattern of responsible saving and spending.
- Source of Funds: Be ready to explain any large or out-of-the-ordinary transactions. If your uncle gave you a substantial cash gift for your studies, you'll need a signed gift deed from him, plus evidence of his own financial standing and your relationship to him (e.g., birth certificates).
- Sufficient Balance: The exact amount you need varies wildly depending on your visa type. For a visitor visa, you must show you can cover your flight, accommodation, and daily spending. For a student visa, it’s much stricter: you need to prove you have one full year of tuition fees plus a set amount for living costs.
It's also crucial to calculate the required amount in Naira correctly. The Home Office often uses the OANDA exchange rate, so check this at the time of your application. Make sure your Naira balance is comfortably over the required amount in pounds sterling, as even small shortfalls can result in an automatic rejection.
Handling Sponsorship from Family
Many applicants, especially students, lean on their parents or other close family members for sponsorship. This is completely fine, but the documentation has to be perfect. Just having the money in your sponsor's account is not enough.
You must provide watertight evidence that proves two key things:
- The Relationship: You’ll need your birth certificate to officially prove the link between you and your sponsor (e.g., your parent).
- The Sponsor's Consent: Your sponsor must write a formal letter of sponsorship. This isn't just a casual note; it must state their relationship to you, confirm they are funding your trip or studies, and specify the exact amount they are providing.
On top of that, your sponsor must also provide their own bank statements for the last six months. These statements need to show that the funds have been in their account for a sustained period and are available for you to use. In short, their financial story has to be just as solid as yours. Understanding the full scope of expenses is vital, so it's a good idea to review guides on the complete UK work visa cost to help you budget properly.
The goal is to leave no room for questions. Every single Naira must be accounted for, and your financial story must be logical and easy for the visa officer to follow. If you prepare your documents with this level of care, your proof of funds will go from being a potential weakness to a cornerstone of a successful application.
Navigating the Family and Spouse Visa Labyrinth
Bringing your family to join you in the UK is one of the most personal and high-stakes visa routes there is. Let's be frank: the requirements for a UK visa in this category are more than just a paper-filling exercise. The process is a deep dive into your most intimate relationships, and for Nigerian families, it often means preparing for a level of scrutiny that can feel overwhelming. But with careful preparation, it's a hurdle you can absolutely clear.
Think of the application as a journey with several key milestones. This diagram breaks down the typical flow, from the moment you start gathering evidence right through to getting that final decision.
As you can see, everything hinges on how well you prepare your documents from the very beginning. Getting this first stage right is the most critical part of the entire process.
The Minimum Income Requirement Explained
For most couples, the biggest challenge is the Minimum Income Requirement. In simple terms, this rule demands that the partner already in the UK (the sponsor) must earn a specific amount of money each year. The government wants proof that you can support your family without needing to rely on public funds.
This financial threshold saw a major increase in early 2024. The sponsor now needs to earn a minimum of £29,000 per year. If you're a Nigerian sponsor earning in Pounds and sending support back home, that's your magic number. But for families who depend on Naira-based income to build up savings, it means you'll need to do some serious long-term financial planning and careful currency calculations.
Make no mistake, this rule is completely rigid. If the sponsor's income is even one pound short of the requirement, the application will be refused.
Proving Your Relationship is Genuine
Once you've cleared the financial hurdle, you have to prove your relationship is ‘genuine and subsisting’. This is where the Home Office essentially becomes a detective, sifting through your evidence to be sure your connection is real and ongoing—not a marriage of convenience.
Your job is to build a compelling case file for your love story. The visa officer reviewing your application has never met you, so your documents have to paint a vivid picture for them. You need to pull together a wide range of evidence that proves you are a real couple sharing a life, even if you’re thousands of miles apart.
This is where you need to get organised and be thorough. Gather evidence that tells the story of your shared life:
- Communication Logs: Show them your connection is constant. This could be screenshots of your WhatsApp chats, call logs showing frequent calls across time zones, or records of your video calls. Don't just show a single week—provide a solid history that spans several months.
- Financial Support: This is powerful proof. Collect records of money sent from the UK sponsor to the Nigerian partner through services like WorldRemit or via direct bank transfers. This demonstrates shared financial responsibility.
- Visits and Time Together: Did the UK partner visit Nigeria for the traditional wedding? Or did you meet elsewhere? Find the flight tickets and passport stamps. More importantly, include photos from these visits—pictures with family at the engagement, on holiday, or just enjoying everyday life together.
- Shared Responsibilities: If you have children together, their birth certificates are essential. If you jointly own property in Nigeria, the ownership documents are another strong piece of evidence.
You are the narrator of your own story. Your evidence—from a simple money transfer receipt to a photo at a family gathering in Lagos—are the chapters that make your relationship believable and undeniable to a stranger.
Recent policy changes have made this process even more challenging. After the stricter income thresholds were introduced in April 2024, partner visa applications dropped by over 25%. The ripple effect was clear, with overall family visa grants falling by 15% to around 71,000 annually in the UK. This shows just how much these financial rules impact applicants from Nigeria, who now face a higher bar for both income and documentation. To see the trends for yourself, you can read the full government statistics about monthly entry clearance visa applications.
The Final Steps: Biometrics and Submission
You’ve done the hard part—gathering your documents and checking every detail. Now it’s time for the final piece of the puzzle: submitting your application and providing your biometrics. This all happens at a Visa Application Centre (VAC), usually run by TLScontact in Lagos or Abuja. It can sound a bit official, but once you know what’s coming, you’ll see it’s just a straightforward administrative step.
https://www.youtube.com/embed/A9a_KgXt4eA
After you've filled out your online application and paid the visa fee, the system will prompt you to book an appointment at a VAC. This is a non-negotiable step for nearly every visa category. The whole point is to officially confirm who you are and hand over your documents.
What to Expect at Your VAC Appointment
First things first, your appointment is not a visa interview. You won't be grilled by a visa officer. The staff there are from a commercial partner hired by the UK Home Office, and their job is simply to collect your information and send it securely to the decision-makers in the UK.
On the day, make sure you have your appointment confirmation letter and your original international passport. The process is pretty simple and breaks down into two main parts:
- Handing Over Documents: You’ll submit your passport and any other original documents the application required. Pro tip: keep everything neatly organised in a folder. It just makes the process smoother for everyone.
- Giving Your Biometrics: This part is quick and painless. They’ll take a digital photo of your face (no smiling!) and then scan all ten of your fingerprints using an electronic scanner.
Think of your biometrics as your unique digital ID card for the UK visa system. Your photo and fingerprints are tied directly to your application, giving the UK Home Office a secure way to verify it’s really you, both now and in the future.
How Fast Do You Need a Decision?
One of the big choices you'll make at the VAC is how quickly you want your application processed. The UK visa service in Nigeria offers a few tiers, each with its own price tag and timeline. This is a critical part of meeting the requirements for a UK visa, as it determines when you'll get an answer.
- Standard Service: This is the default, no-frills option. The Home Office aims to make a decision within 15 working days (that’s about three weeks), but this can sometimes stretch during busy periods.
- Priority Visa (PV) Service: If you're in a hurry, you can pay an extra fee for this service. It speeds things up considerably, with a decision typically made within 5 working days. It’s a very popular choice for anyone with tight travel deadlines.
- Super Priority Visa (SPV) Service: Need an answer yesterday? This is the fastest—and most expensive—option available. It’s designed for genuine emergencies and aims for a decision by the next working day.
Which one is right for you? It all comes down to your budget and how urgently you need to travel. If you've planned your trip well in advance, the standard service will likely be fine. But if a last-minute business opportunity or family event pops up, paying for a faster service could be a lifesaver.
Before you decide, always double-check the latest fees and service availability on the official TLScontact booking portal when you schedule your appointment.
To help you visualise the entire journey, here’s a simplified breakdown of the process.
UK Visa Application Stages for Nigerians
This table gives you a bird's-eye view of the application journey, from starting your form to getting your passport back.
Stage What You Need to Do Key Tip for Nigerians 1. Online Application Fill out the official UK visa application form on the GOV.UK website. Be 100% honest and accurate. Any inconsistencies can lead to a refusal. 2. Document Gathering Collect all the required supporting documents (bank statements, letters, etc.). Check the specific document list for your visa type. Don't assume anything. 3. Fee Payment Pay the visa application fee and Immigration Health Surcharge (IHS) online. Have your card ready. The payment confirms your initial application submission. 4. VAC Appointment Book an appointment at a Visa Application Centre in Nigeria (e.g., TLScontact in Lagos or Abuja). Book as early as possible, as slots can fill up quickly, especially during peak seasons like summer and December. 5. Biometrics & Submission Attend the VAC appointment to submit your passport and provide your photo and fingerprints. Arrive a little early, but not too early. Bring your passport and appointment letter. 6. Waiting for a Decision Your application is sent to the UK for a decision by a Home Office caseworker. This is the hardest part! You can track your application status online. 7. Passport Collection You will be notified when a decision has been made and your passport is ready for collection. You'll receive an email or SMS. Go back to the VAC to pick up your passport. Following these stages in order will help keep your application organised and reduce the chances of making a mistake. The key is to be methodical and pay close attention to every detail.
Common Mistakes to Avoid in Your Application
A visa refusal is heartbreaking, especially when it’s down to a small, preventable error. I’ve seen so many Nigerian applicants work incredibly hard to meet the UK visa requirements, only to be tripped up by a simple mistake. Let's walk through those common pitfalls so you can avoid them.
Getting your application right the first time is everything. We'll break down the top reasons for rejection and give you clear, practical strategies to make sure your submission is solid.
Inconsistent Information and Dates
One of the fastest ways to raise a red flag is having mismatched information across your documents. It might seem small, but it immediately creates doubt.
Imagine your application form says your trip is from 1st to 15th June, but your hotel booking shows 2nd to 16th June. A tiny slip like this makes the visa officer wonder which date is correct and if you've paid attention to the details. Always double-check and then triple-check every single date, name, and number. Your application form, invitation letters, flight bookings, and hotel reservations must all tell the exact same, consistent story.
Weak Proof of Ties to Nigeria
The UK Home Office needs to be completely convinced that you have every reason to return to Nigeria after your visit. Just saying you have a job or family isn't enough; you have to prove it with strong, verifiable evidence. Honestly, this is where many applications fall short.
To get this right, you need to build a powerful case for your life back home.
- Employment: Don’t just submit a generic employment letter. Include recent payslips and a letter from your HR department confirming your role, salary, and—crucially—your approved leave for the trip.
- Property: If you own property, provide the official documents, like a Deed of Assignment or Certificate of Occupancy. This shows tangible assets you won't abandon.
- Family: Show your deep family commitments. Include birth certificates for your children and your marriage certificate to demonstrate responsibilities that require your return.
The visa officer is looking for compelling reasons that you must come back home. Your job is to provide undeniable proof of your deep roots in Nigeria.
Suspicious Financial Documents
Your financial evidence has to be crystal clear and easy to follow. A very common mistake is submitting bank statements that show sudden, large deposits just before you apply. This is a massive red flag—it’s often called "funds parking"—and suggests the money might not genuinely be yours.
For instance, if you sold a piece of land to fund your trip, don't just let a large sum of money suddenly appear in your account. You absolutely must provide the official deed of sale as concrete proof of where that deposit came from. Transparency is key.
Submitting information that seems misleading can have severe consequences, so it's vital to understand the risks of visa application misrepresentation. Always be upfront and document the origin of every significant credit in your account. It’s all about building trust and credibility.
Frequently Asked Questions
Going through the UK visa process often throws up a few tricky questions. Let's walk through some of the most common ones we hear from applicants in Nigeria, so you can get a clearer picture of what's really required.
How Long Does the UK Visa Process Take in Nigeria?
Officially, the Home Office aims to process standard visitor or student visas within 15 working days. That's roughly three weeks from the day you have your biometric appointment at the Visa Application Centre (VAC).
But that's just a guideline. Think of it as a best-case scenario. During peak seasons—like right before summer or the big student rush in August/September—things can slow down considerably. If you're in a hurry, you can always pay for the Priority Visa service, which usually gets you a decision in about 5 working days.
What Are "Strong Ties" to Nigeria and How Can I Prove Them?
This is a big one. "Strong ties" are simply the compelling reasons you have to come back home to Nigeria after your visit. The visa officer needs to be confident that you have a life here you’re committed to returning to.
So, how do you show this? You build a case with solid evidence. Things like:
- A steady job: A letter from your employer, your last few payslips, and a letter approving your leave for the trip are golden.
- Family commitments: This is where you include your marriage certificate or your children's birth certificates.
- Property ownership: Got land or a house? Documents like a Deed of Assignment or a Certificate of Occupancy are powerful proof.
- Running a business: If you're an entrepreneur, your business registration documents from the Corporate Affairs Commission (CAC) are essential.
Essentially, you're painting a clear picture of a stable, established life in Nigeria that you wouldn't just abandon.
Can I Apply for a UK Visa if I've Been Refused Before?
Yes, absolutely. A previous refusal isn't a life sentence or a permanent ban. You can always apply again.
The key, however, is to understand exactly why you were refused the first time. The refusal letter is your most important tool here; it will spell out the reasons. Before you even think about reapplying, you need to tackle those specific issues head-on. For instance, if the refusal was due to weak financial evidence, your next application must include much stronger, clearer, and more organised bank statements.
What Is the 28-Day Rule for Proof of Funds?
This rule is a crucial part of the Student Visa application. It's quite specific: you must show that you've held the required funds (enough for your tuition and living costs) in your bank account for at least 28 consecutive days.
The clock doesn't just stop there. The final day of that 28-day period must be within 31 days of when you submit your application. This is the UK government's way of making sure the money is genuinely yours and hasn't just been dropped into your account for the sake of the application.
Planning a move abroad has its challenges, but you don't have to figure it all out on your own. JapaChat is Nigeria's first AI immigration expert, built to give you quick, reliable answers to all your visa and relocation questions. Start planning your journey with a bit more confidence.
Get started for free on JapaChat -
-
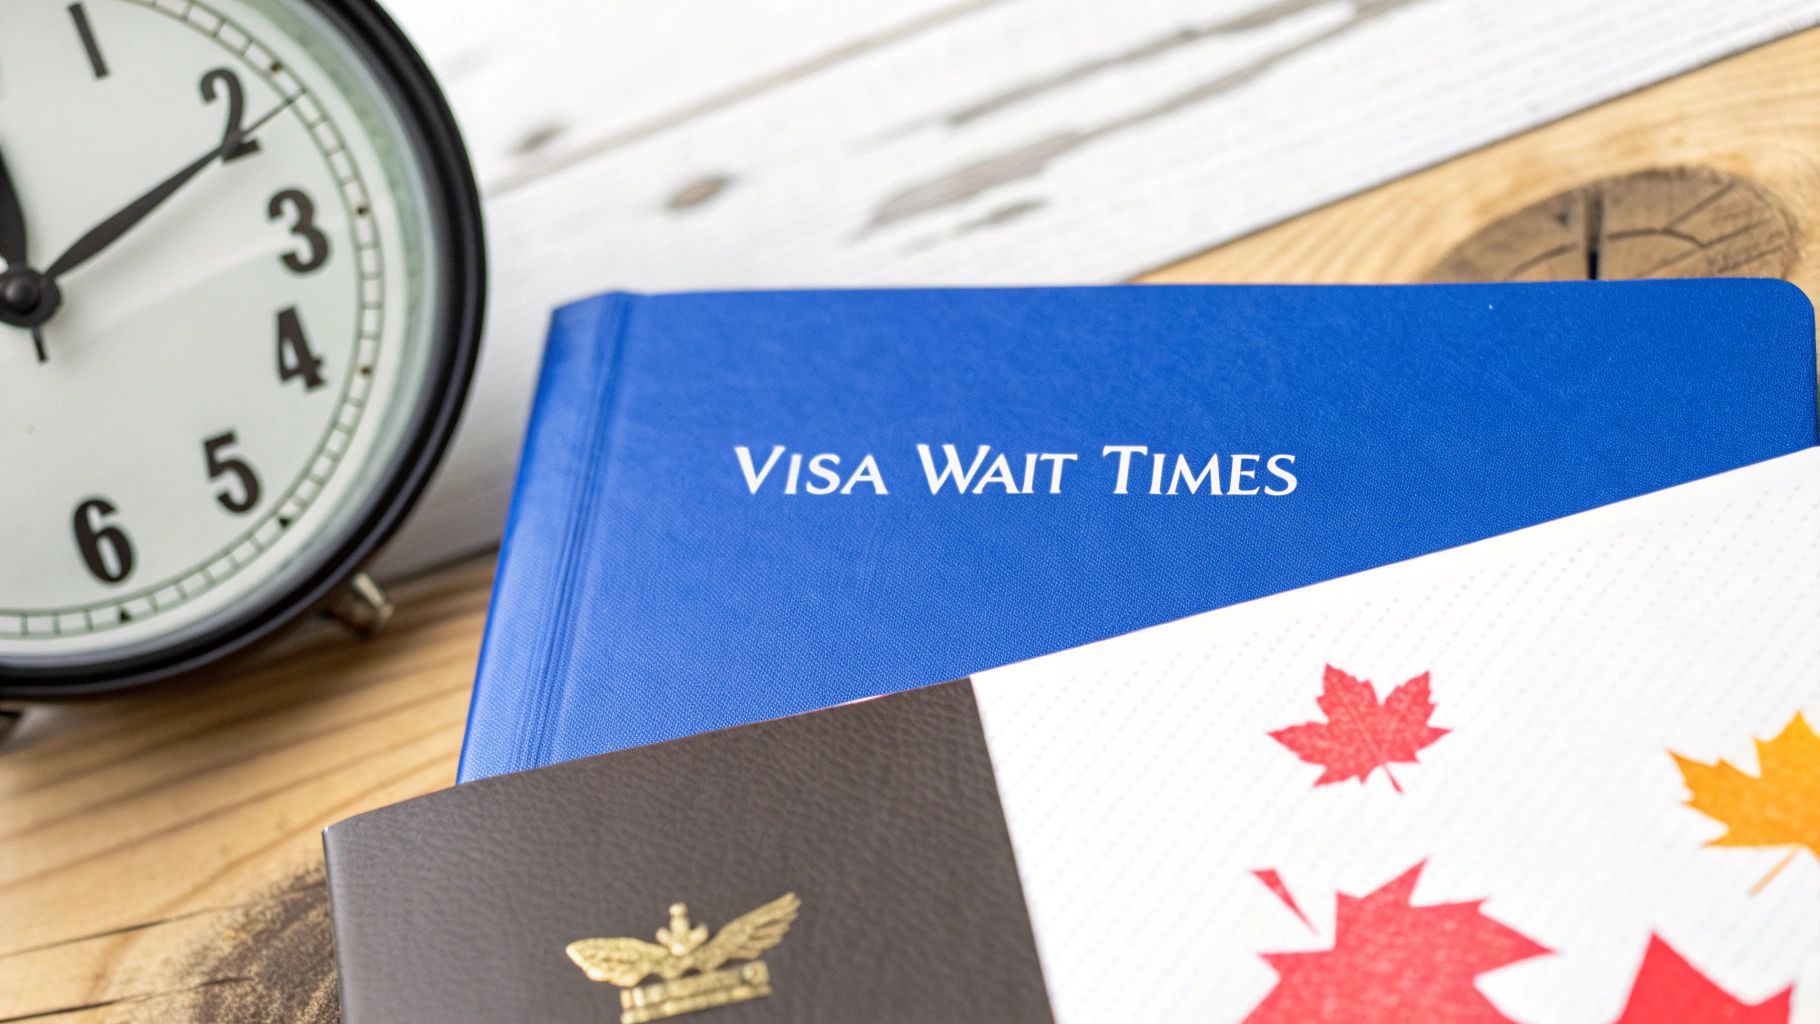
Canada Visa Waiting Time Explained for Nigerians
Waiting for a decision on your Canadian visa application can feel like it's taking forever, but getting a handle on the current timelines is the first step to managing the anxiety.
For Nigerians, the wait time for popular visas like visitor or study permits can be anything from a few weeks to several months. A lot of it comes down to how well-prepared your application is and just how many other people are applying at the same time.
A Realistic Look at Canada Visa Waiting Times
The path to Canada is an exciting one, but let's be honest—the visa waiting game can be incredibly stressful for Nigerians. It’s a period filled with compulsively checking your email and refreshing the IRCC portal, just hoping for some good news.
This feeling of uncertainty is something most Nigerian applicants share, whether you're a student trying to get to Toronto for your first semester, a professional with a job offer in Calgary, or just hoping to visit family.
Understanding why it takes this long really helps. Picture it like the queue at a popular embassy in Lagos or Abuja on a Monday morning. The sheer volume of applications means the processing centre has to meticulously check every single one. This guide is designed to cut through that anxiety and give you a clear, realistic picture of what to expect.
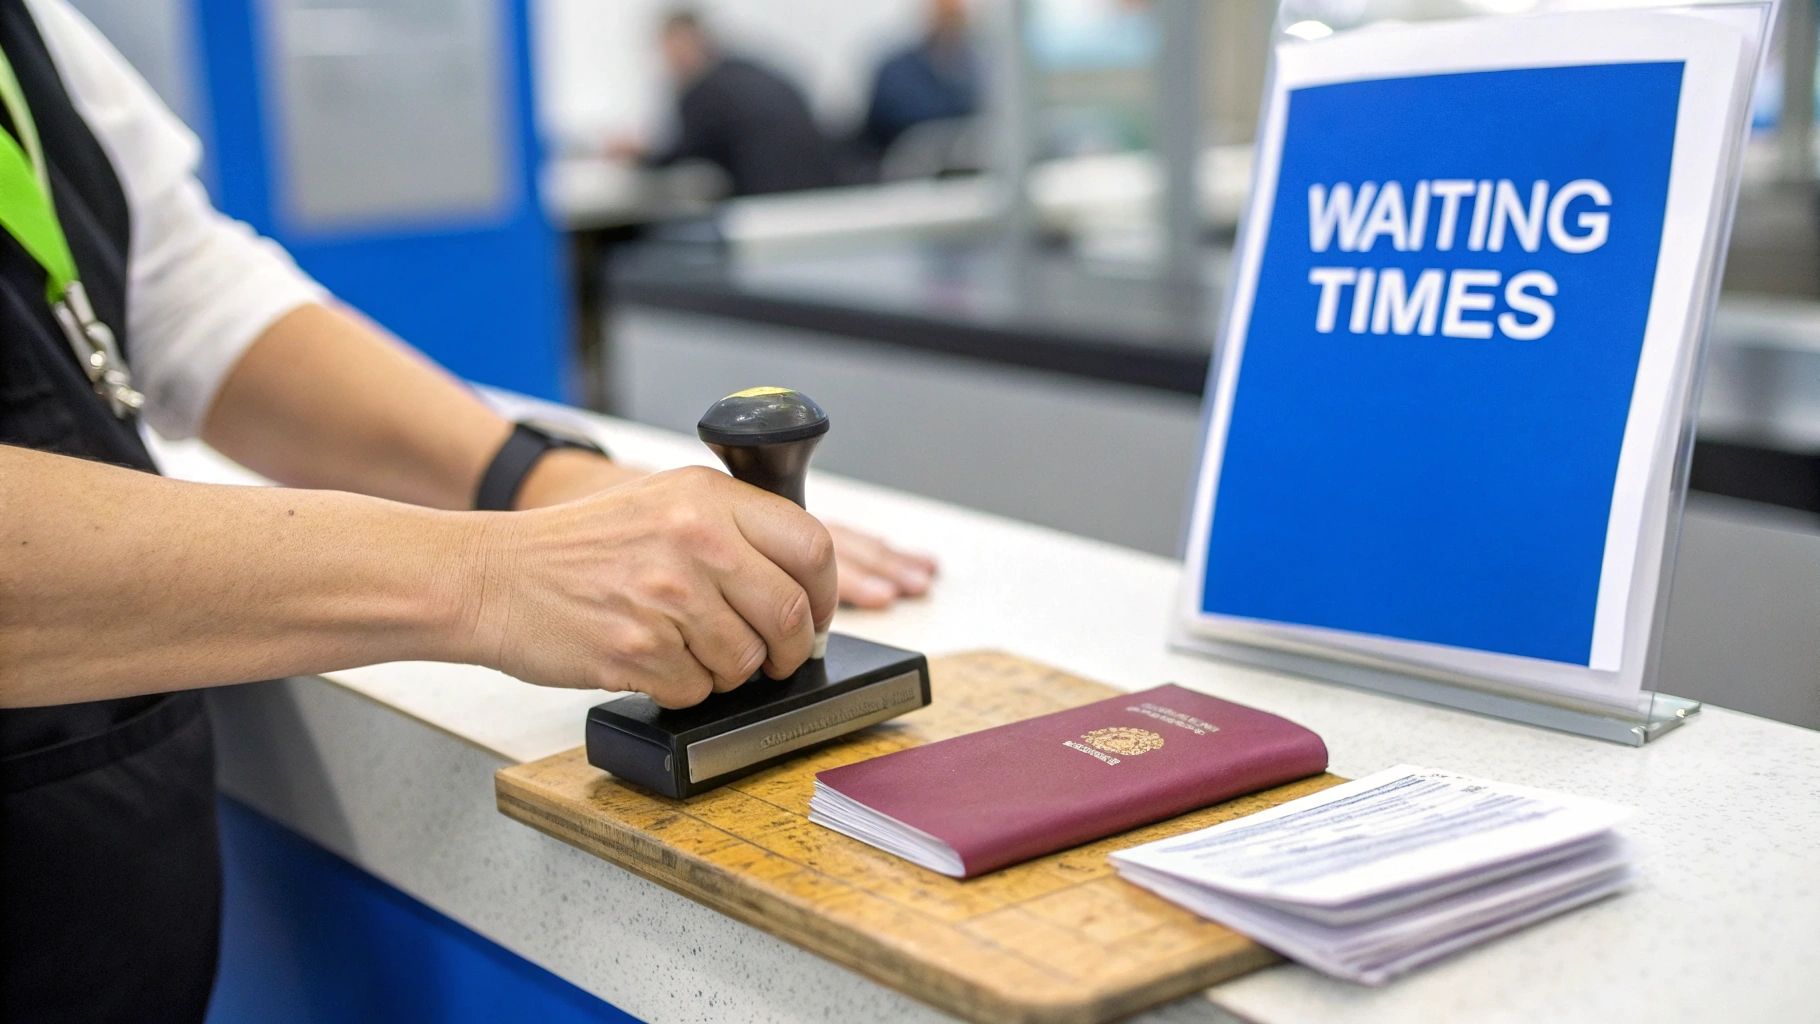
Key Timelines for Nigerians
To give you a better idea, here’s a quick breakdown of what you can generally expect for the most common visa types:
- Visitor Visas: These timelines can swing wildly, often depending on peak travel seasons like summer or Christmas.
- Study Permits: Timing is often tied to the school calendar, so applying well ahead of the September or January intake is crucial.
- Work Permits: The wait here depends heavily on your job type and whether your employer needs a Labour Market Impact Assessment (LMIA).
The good news is that we've seen some real improvements in processing times for Nigerian applicants lately. For example, as of late 2023, the average processing time for a Canada visitor visa from Nigeria is hovering around 28 to 31 days. That’s a huge improvement from previous years when it wasn't uncommon to wait over 80 days. You can always check the latest updates on platforms like CIC News.
The most powerful tool you have to manage the waiting period is a perfectly prepared application. A file that is clear, complete, and easy for a visa officer to understand is a file that gets processed faster. No long story.
For a comprehensive walkthrough of the entire journey, our guide on how to relocate to Canada from Nigeria is a fantastic resource.
Canada Visa Processing Time Snapshot for Nigerians
Here's a quick summary table to give you an at-a-glance view of what to expect for some of the most sought-after visa categories.
Visa Category Estimated Average Waiting Time Key Consideration Visitor Visa 28 – 31 days Highly variable; depends on application volume and season. Study Permit ~8 weeks Apply months before your school's start date to avoid issues. Work Permit ~10 weeks Can be longer if a Labour Market Impact Assessment (LMIA) is required. Express Entry ~6 months This is post-ITA (Invitation to Apply); the initial profile stage varies. These figures are just averages, of course. Your individual experience could be shorter or longer depending on the specifics of your case and how busy the visa office is.
Why Do Canadian Visas Take Longer to Process from Nigeria?
Ever submitted your application and then watched a friend from another country get their decision weeks, or even months, before you? It's a common and frankly, frustrating experience for many Nigerian applicants. But the reasons behind the longer Canada visa waiting time aren't personal; they're based on some very practical, on-the-ground realities. Getting a handle on these factors can help set your expectations for the long wait ahead.

A few key operational factors come into play, and they all add up. The simple truth is that the Canadian visa offices that handle applications from Nigeria are some of the busiest on the planet.
The Sheer Volume of Applications
Picture the visa office in Lagos like the most popular branch of GTBank on the last banking day of the month. The queue snakes out the door, and every single person's transaction has to be handled with care. That's a pretty good picture of what's happening with visa applications.
Nigeria consistently ranks among the top countries for the number of applications submitted to Canada each year for tourism, study, and work. This massive volume creates a natural backlog, meaning visa officers have a literal mountain of files to work through before they even get to yours. And each one requires careful, individual attention.
A high volume of applications doesn't just mean a longer queue; it means every single application in that queue is subject to the same high level of scrutiny, which simply cannot be rushed.
This is exactly why you see such a noticeable difference in the official processing time data. For example, at certain times, the average visa processing for Nigerian applicants hovers around 85 calendar days. Compare that to applicants from India (around 24 days) or the United States (about 20 days), and the difference is stark. You can explore more insights about these global processing time comparisons to see the bigger picture.
Meticulous Document Verification
Another huge piece of the puzzle is the intense verification process for every document submitted. Visa officers have to be absolutely certain that every piece of paper you provide is legitimate. This isn’t just a quick look-over; it's a deep dive.
They need to be confident that:
- Your bank statements are genuine and show a consistent financial history, not just a sudden, large deposit made last week to "package" your account.
- The employment letter you submitted is from a real, verifiable company and that you are an actual employee.
- Your proof of ties to Nigeria, like property deeds or family records, are authentic and compelling.
This verification often involves cross-checking information with various Nigerian institutions, which can add days or even weeks to your timeline. It’s a crucial step for maintaining the integrity of Canada's immigration system, but it’s also a direct cause of the extended Canada visa waiting time for applicants from Nigeria.
Understanding Processing Times for Each Visa Type
Not all visa applications move at the same speed. Just like sending a letter versus a large parcel, the canada visa waiting time changes a lot depending on whether you're applying for a quick visit, to study, or to work long-term. Getting a handle on these differences is the first step to setting realistic expectations for your journey.
Each visa category comes with its own specific set of checks and balances, and this directly affects how long you'll be waiting for a decision. A straightforward visitor visa, for example, might be processed relatively quickly. A study permit, on the other hand, requires the visa officer to verify your admission letter and carefully scrutinise your proof of funds, adding extra steps to the process.
This visual breakdown gives you a snapshot of the average processing times for three of the most popular visa routes for Nigerians.
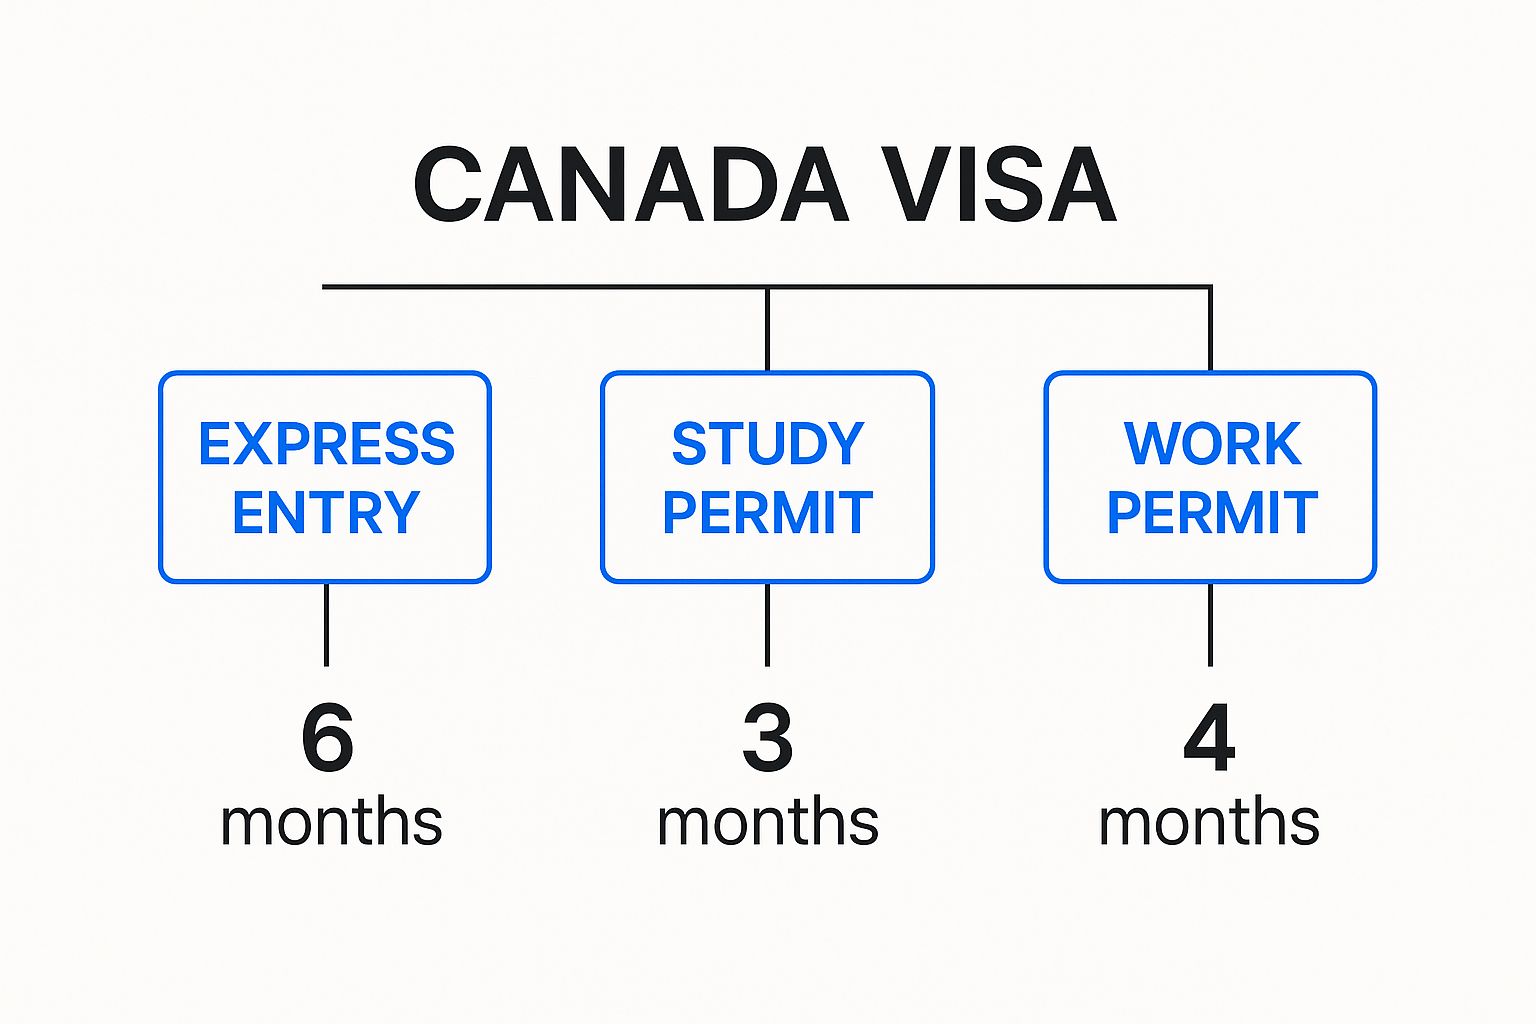
As you can see, Express Entry applications tend to have the longest timeline. This makes sense when you consider the detailed checks involved in granting someone permanent residency. Study permits, while still thorough, are often processed more quickly.
Let's dive deeper into the specifics for each category to give you a clearer picture of what to expect.
Detailed Processing Timelines by Visa Category
The table below offers a comprehensive look at the various stages and total estimated wait times for different Canadian visa applications from Nigeria. It highlights not just the average duration but also some of the unique hurdles that can influence how long each one takes.
Visa Type Average Processing Time Factors Unique to this Visa Visitor Visa 4-6 weeks High volume of applications, especially during peak travel seasons, can cause delays. Study Permit 8-12 weeks Requires verification of Letter of Acceptance (LOA) and detailed financial review. Work Permit (with LMIA) 4-6 months The Labour Market Impact Assessment (LMIA) process itself adds significant time before the visa application is even submitted. Express Entry (CEC/FSWP) 5-6 months (post-ITA) Dependent on the complexity of your work history and document verification. Express Entry (PNP) 7-8 months (post-ITA) The provincial nomination stage adds an extra layer of processing before the federal stage. Non-Express Entry PNP Up to 19 months This is a much longer, paper-based process that involves both provincial and federal government reviews separately. These numbers are a good starting point, but remember they're just averages. Your personal situation will always play a huge role in the final timeline.
Timelines for Study and Work Permits
For the many Nigerians heading to Canada for school, the study permit application is a massive milestone. The process isn't just about filling out a form; Immigration, Refugees and Citizenship Canada (IRCC) needs to be absolutely sure your Letter of Acceptance from a Designated Learning Institution (DLI) is legit. They also need to be convinced you have the financial muscle to support yourself without issues. These layers of verification are what contribute to a typical wait time of several weeks.
Work permits are another popular pathway. The timeline here often hinges on whether your employer needs a Labour Market Impact Assessment (LMIA). An LMIA is a document that proves they tried, and failed, to find a Canadian citizen or permanent resident to fill the job. If your job offer requires an LMIA, that step alone can add months to your overall wait before you even get to submit your own application. For a complete walkthrough, it’s worth exploring the specifics of the Canada work visa permit process.
Key Takeaway: The more complex the verifications needed for your visa—like confirming a school admission or an employer's legitimacy—the longer you should expect your application to take. Simple as that.
A Closer Look at Express Entry Streams
If your goal is permanent residence in Canada, the Express Entry system is almost certainly your main route. But even within this system, the canada visa waiting time can be drastically different from one stream to another. Think of it like different toll lanes on a highway; some are automated and fast, while others require manual checks and move much slower.
As of early 2024, data shows that streams like the Canadian Experience Class (CEC) and the Federal Skilled Worker Program (FSWP) both have an average processing time of about 5 to 6 months after you receive an Invitation to Apply (ITA).
Provincial Nominee Programs (PNPs), however, are a different story. An Express Entry-linked PNP application might take 7 to 8 months, but a non-Express Entry PNP application could stretch out as long as 19 months to process. The difference is huge, so it pays to know which lane you're in.
How to Check Your Visa Application Status Online
Once you've hit 'submit' on your application, the waiting game begins. It’s easy to feel like your file has disappeared into a black hole, but thankfully, you don't have to stay completely in the dark. Immigration, Refugees and Citizenship Canada (IRCC) gives you a direct line of sight into your file's progress, which can help you make sense of the Canada visa waiting time for your specific situation.
Keeping tabs on your status is the best way to manage the stress of waiting. The process is pretty straightforward and gives you a clear picture of where things are at. It helps you know if your application is moving along as it should or if there might be a hiccup.

A Step-by-Step Guide to the IRCC Portal
To get started, you'll need the same login details you used when you first submitted your application online. It’s a simple process.
- Head to the Official IRCC Website: Go directly to the secure portal where you originally applied.
- Log In to Your Account: Enter your GCKey or Sign-In Partner credentials to get to your dashboard.
- Find Your Application: After logging in, you'll see a list of applications you've submitted. Just click on the specific one you want to check.
- View Your Status: The portal will show you the most current status of your application.
Doing this simple check can offer a lot of peace of mind. If you want to dive deeper into monitoring your file, you might find our guide on visa application tracking helpful, as it explores different tools and platforms.
What Do the Status Updates Really Mean?
Let's be honest, the terms IRCC uses can be a bit confusing. It's incredibly common for Nigerians to see their application marked "In Progress" for weeks, or even months. This doesn't automatically mean there's a problem.
"In Progress" is just a catch-all term. It covers everything from the initial eligibility check right through to the final background verifications. Think of it as a sign that your application is in the queue and being actively handled, not a red flag.
Here’s a quick breakdown of what you'll typically see:
- Submitted: This confirms IRCC has successfully received your application.
- In Progress: An officer is reviewing your file and the documents you provided.
- Final Decision: A decision has been reached. You will get a separate message or letter detailing the outcome, whether it's an approval or a refusal.
What if your application sails past the standard processing time for your visa category with no decision? In that case, and only after the official waiting period has passed, you can use the IRCC web form to send a formal enquiry for an update.
Practical Steps to Avoid Unnecessary Application Delays
While you can't control the massive volume of applications hitting an officer's desk, you absolutely can control the quality of your own. Your best strategy for cutting down the Canada visa waiting time is to submit a file so clean, logical, and complete that it’s easy for them to say yes.
Think of it this way: you want to hand them a decision-ready application. Many of the frustrating delays Nigerian applicants face boil down to common, and entirely avoidable, mistakes. By getting ahead of these potential problems, you make the visa officer's job easier, which can only help your case. Though it's from a different field, looking into strategies for reducing process duration can offer a fresh perspective on making any process more efficient.
Master Your Proof of Funds
One of the biggest red flags for a visa officer is a messy financial history. It’s not just about showing you have the money; it’s about proving that money is legitimately yours and didn't just appear overnight.
A classic mistake is a large, unexplained sum of money landing in your account right before you apply. Let's say your uncle transfers ₦5 million into your account a week before you print your bank statement. That's going to raise immediate questions and almost guarantee a delay while they investigate. It looks like you borrowed the money just to pass the review.
Here’s how to get it right:
- Build a History: Present a bank statement from an account that clearly shows you saving consistently over the last six months or more.
- Explain Large Deposits: If you did receive a large sum legitimately—maybe you sold a car or received a formal gift—provide the proof. Include the official deed of sale or a notarised gift deed to explain exactly where the money came from.
- Keep it Clean: Avoid shuffling large amounts of cash between different accounts right before you apply. Your financial story should be simple and easy to follow.
Secure Key Documents Well in Advance
Some documents just take a long time to obtain. Waiting until the last minute to request them is a recipe for derailing your entire application timeline. For Nigerian applicants, the Police Character Certificate (PCC) is a perfect example; the process can easily stretch over several weeks.
Don't wait until you get an Invitation to Apply (ITA) or a letter of admission to start gathering these crucial documents. Kick off the process for things like your police certificate and academic transcripts as early as you possibly can. That little bit of foresight can save you weeks of stress.
Write a Compelling Statement of Purpose
Your Statement of Purpose (SOP) or Letter of Explanation is your one chance to talk directly to the person deciding your fate. A vague letter full of clichés only creates questions, and questions cause delays. You need to be specific, clear, and persuasive.
Don’t just write, "I want to study in Canada for better opportunities." That tells them nothing. Instead, paint a clear picture. For example: "My goal is to complete the Master of Data Science programme at the University of British Columbia to gain expertise in machine learning. I plan to apply these skills to solve specific challenges within Nigeria's growing fintech sector upon my return."
This kind of statement shows you have a clear plan, strong intentions, and solid ties to your home country. It answers the officer’s questions before they even have to ask them, helping them make a faster, more confident decision.
What to Do When Your Application Is Taking Too Long
When your Canada visa waiting time drags on for months, blowing past the official average, it’s easy to feel helpless. The silence from IRCC can be incredibly frustrating, but now is the time for a calm, measured approach, not panic. You have concrete steps you can take to get some clarity.
Instead of just waiting and worrying, your first official move should be to use the IRCC web form. This isn't just a suggestion box; it’s a formal channel for requesting a status update on your file. A word of caution, though: only use this tool if your application is genuinely beyond the standard processing time. Contacting them too early will just get you a template response and won’t speed anything up.
Digging Deeper for Answers
If the web form doesn't yield a helpful answer, your next, more powerful move is to order your GCMS notes.
Think of GCMS (Global Case Management System) notes as the detailed logbook for your application. They contain everything—from the moment your file was opened to every single action taken and every comment an officer has jotted down. This is the most direct way to find out exactly what the hold-up is.
For a small fee, you can request these notes through an Access to Information request. It’s like getting a look behind the curtain, revealing whether there's a specific document they're struggling to verify or if your file is simply stuck in a long security check queue. This information is pure gold because it points you to the exact problem.
When to Bring in Extra Help
If the delay becomes extreme and you’ve exhausted the other options, there are two other avenues you can explore.
- Contacting a Member of Parliament (MP): Your local MP's office in Canada can make an enquiry to IRCC on your behalf. This works best when you have a pressing reason for the delay causing real hardship, like a firm job offer with a start date or an approaching school semester. An enquiry from an MP's office often gets a more detailed response from the visa office than you would get on your own.
- Legal Action: In rare and truly prolonged cases, some people consider a "writ of mandamus." This is a serious legal step to compel IRCC to make a final decision on an application that has been unreasonably delayed. It's an expensive and complex route, and it should only ever be considered a last resort after getting advice from an experienced immigration lawyer.
Your Top Questions Answered
When you're navigating the Canadian visa process, it's natural for questions to pop up, especially about how long you'll have to wait. We've compiled some of the most common questions we hear from Nigerian applicants to give you the clear, straightforward answers you need.
Can I Pay Extra to Speed Things Up?
This is probably one of the most frequent questions we get: can you pay a fee to fast-track your canada visa waiting time? The answer, in short, is no. Immigration, Refugees and Citizenship Canada (IRCC) simply doesn't offer a paid priority service for standard visa applications coming from Nigeria.
The best—and only—way to get a quicker decision is to give them an application that’s so complete and easy to understand that the visa officer can make a decision without any back-and-forth. Be very cautious of anyone claiming they can speed up your application for an extra fee. It’s not a legitimate service.
Will a Past Visa Refusal Slow Me Down?
It's a common worry for many Nigerians: if you've been refused a visa for another country like the US or UK, will it automatically delay your Canadian application? While it doesn't necessarily add to the waiting time, it definitely means your application will be looked at more closely.
You absolutely must declare any previous refusals. The visa officer will want to understand exactly why you were denied before to see if those same issues might still be a concern. Trying to hide a refusal is a huge red flag; it's considered misrepresentation and will almost certainly lead to another refusal and could even get you banned from applying to Canada for several years.
Transparency is key. It's always better to explain a past refusal honestly than to have it discovered later. A hidden refusal destroys your credibility and your chances of getting approved.
What Does "In Progress" Actually Mean?
It can be nerve-wracking to see your application status stuck on "in progress" for weeks, or even months, without an update. This is incredibly common and usually isn't a sign that something is wrong. That status is a catch-all term for everything happening behind the scenes, from initial eligibility checks to in-depth background verifications.
Considering the sheer volume of applications from Nigeria, these long stretches are pretty normal. The time to start getting concerned is when your application has gone well beyond the official average processing time for your specific visa category. If that happens, the first thing you should do is raise an inquiry through the official IRCC web form.
Feeling overwhelmed by the immigration process? JapaChat is here to help. Get instant, reliable answers to your specific questions about relocating to Canada. Plan your journey with confidence and avoid costly mistakes. Sign up for free and start chatting with our AI immigration expert today at https://japachat.com.
-
How to Apply for Canada Work Permit from Nigeria: A Step-by-Step Guide
So, you're looking to get a Canadian work permit. It's a goal for many Nigerian professionals, but let's be honest, the process can feel like a maze. The good news? It's completely doable once you understand the path.
This guide is built for you, breaking down the application process into clear, manageable steps. Your journey starts with figuring out which of the two main streams you fall into.
Your Pathway to Working in Canada
Your application for a Canadian work permit will almost certainly go down one of two roads: the Temporary Foreign Worker Program (TFWP) or the International Mobility Program (IMP).
The TFWP is the most common route for Nigerians. It’s what we call 'employer-driven,' meaning your Canadian employer has to do some legwork first. They usually need something called a Labour Market Impact Assessment (LMIA). This is basically a document that proves they tried to hire a Canadian or permanent resident for the job but couldn't find anyone suitable. Think of roles in tech, healthcare, or skilled trades where Canada has a shortage.
On the other hand, the IMP is for situations that are exempt from the LMIA. A common example is an intra-company transfer—if you work for a multinational company in Lagos or Abuja, like an international bank or tech firm that also has an office in Canada, this might be your route.
Understanding which program applies to your job offer is absolutely crucial because it dictates the documents and steps you'll need to follow.
TFWP vs IMP: Which Path is Right for You?
To help you see the difference more clearly, here’s a quick comparison of the two main work permit streams. This should help you pinpoint which one fits your situation.
Feature Temporary Foreign Worker Program (TFWP) International Mobility Program (IMP) Main Purpose To fill labour shortages when no qualified Canadians are available. To support Canada's broad economic, social, and cultural interests. LMIA Required? Yes, in most cases. The employer must prove the need to hire a foreign worker. No, this is the key difference. The position is LMIA-exempt. Who Drives It? Employer-driven. The employer starts the process by applying for an LMIA. Can be applicant or employer-driven, depending on the specific stream. Common Examples Skilled trades, caregivers, agricultural workers, tech roles where there's a talent gap. Post-Graduation Work Permit (PGWP), spousal open work permits, intra-company transfers. Employer Compliance Employers face strict conditions and compliance reviews to protect workers. Employers still have compliance obligations, but the process is generally less complex. Ultimately, your job offer letter should give you a clue. If it mentions an LMIA number, you're on the TFWP track. If not, you're likely in the IMP category. For a deeper dive into all the relocation steps, our complete guide on how to relocate to Canada from Nigeria is a great resource.
What Are Your Chances of Success?
It's natural to wonder, "What are my actual chances?" Well, let's look at realistic, up-to-date figures.
Based on recent data, the approval rate for Canadian work permits for Nigerian applicants has seen some fluctuation, but with a strong application, your chances are favourable. In recent quarters, well-prepared applications have seen significant success.
Even better, the TFWP—that common, employer-led route—boasted a success rate of over 90% globally. This tells us that once an employer secures an LMIA, the path for the applicant from Nigeria is significantly smoother.
One of the most critical parts of your application is proving you can support yourself (and your family, if they're coming with you). This is where the 'proof of funds' comes in, or what many Nigerians call "show money".
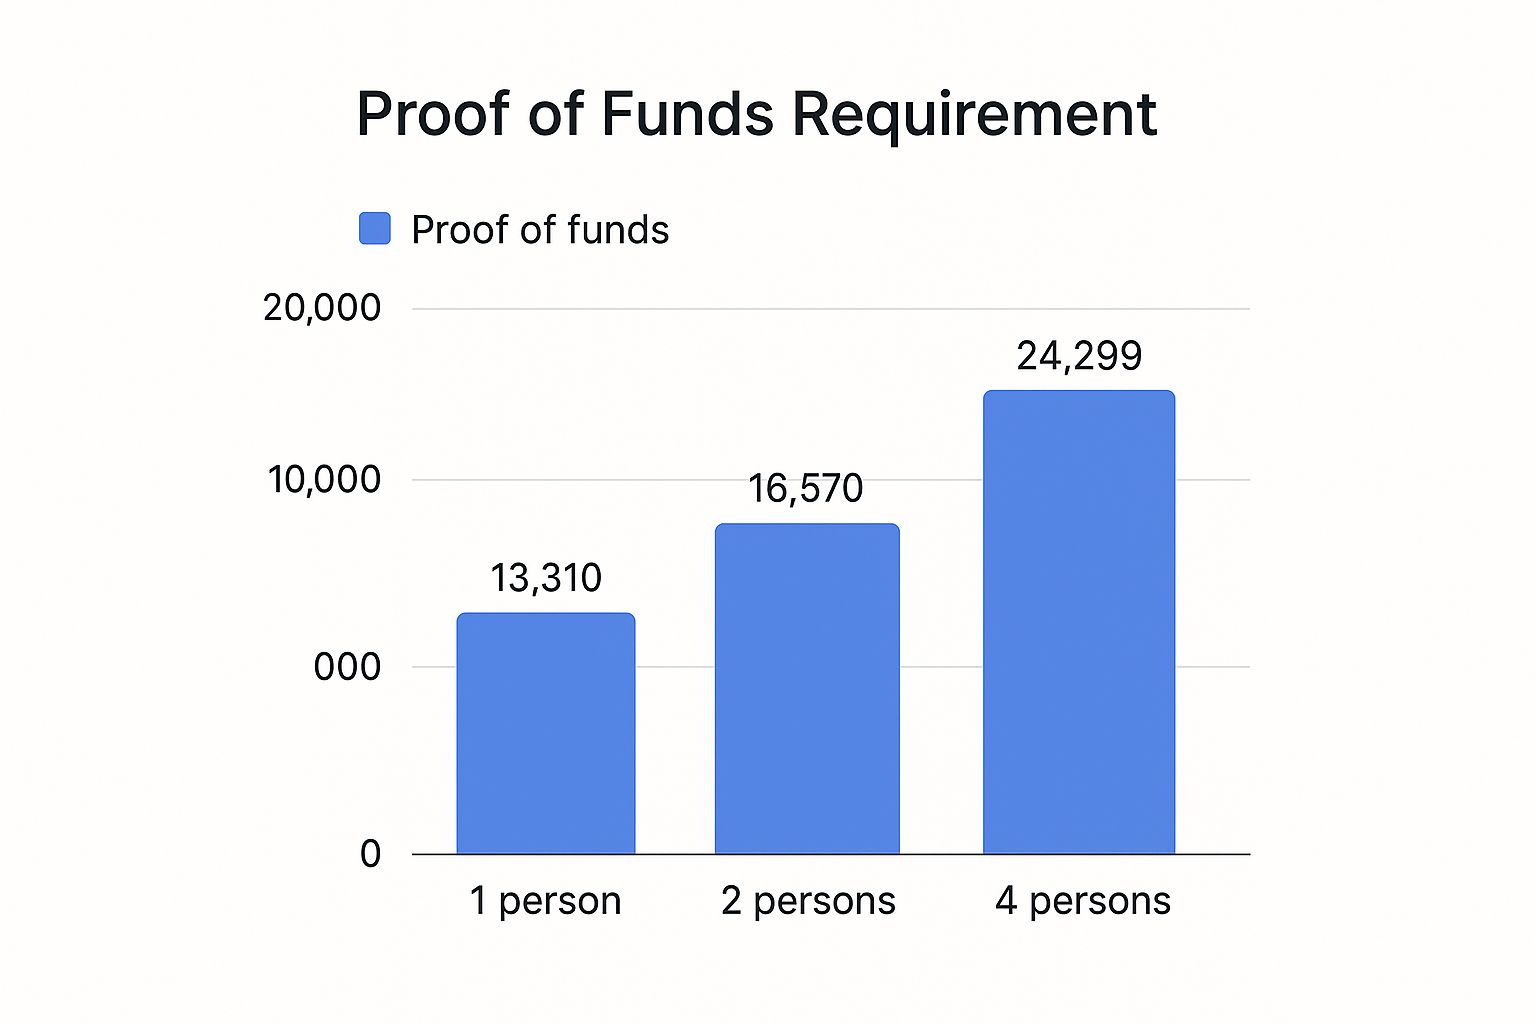
As you can see, the required amount goes up quite a bit for each family member. It's essential to get this right, as insufficient or questionable funds is a very common reason for refusal for Nigerian applicants.
Confirming Your Eligibility for a Canadian Work Permit
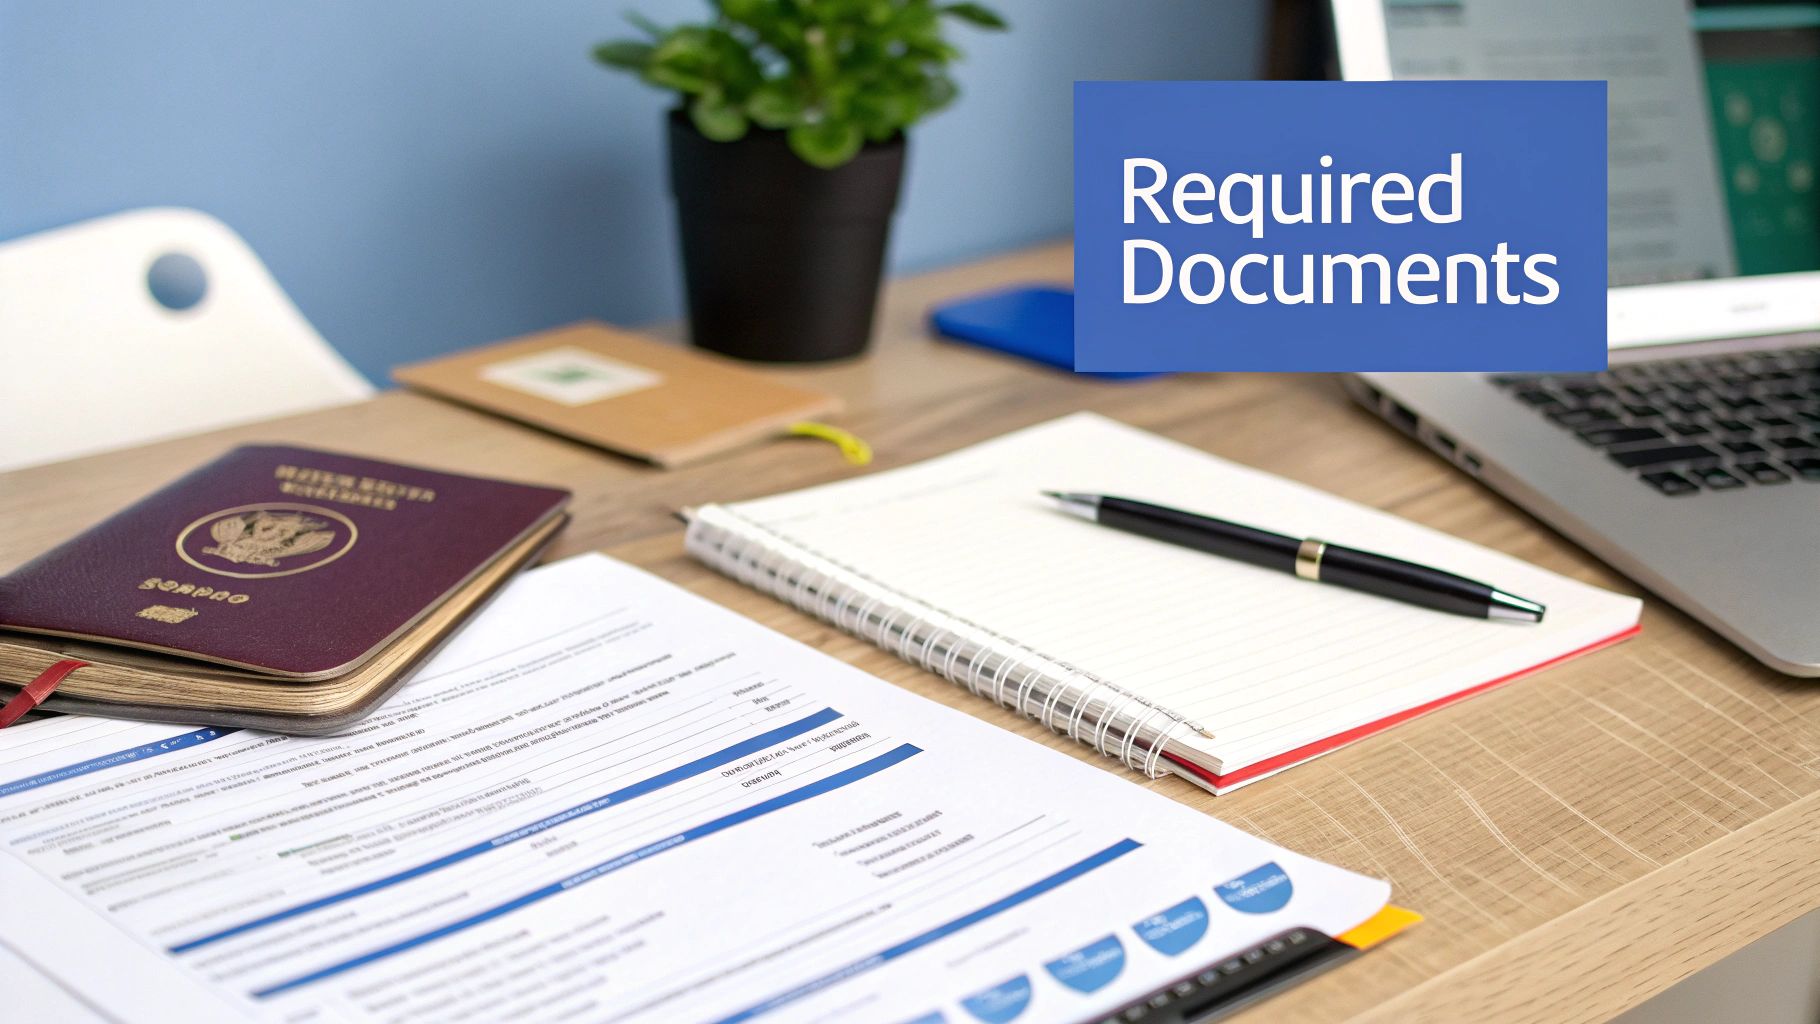
Before you even think about paying application fees or chasing down documents, take a moment for a serious reality check. The very first step—and honestly, the most important one—is figuring out if you actually meet Canada's requirements for a work permit. This is more than just a checklist; it's about building a strong case that you're a genuine temporary worker who will leave when your permit is up.
For many Nigerians, this is the biggest challenge: convincing a visa officer that you have every intention of returning home. Canada needs to see solid proof that you have strong ties pulling you back to Nigeria.
Demonstrating Your Ties to Nigeria
Think of it like you're a lawyer building a case. Your goal is to prove, with concrete evidence, that your life is firmly planted in Nigeria. Vague promises just won't cut it.
So, what does real proof look like? Here are some examples of what visa officers find convincing:
- Family Responsibilities: Are you married? Do you have children? Provide their birth certificates and your marriage certificate. If you're the main person caring for your elderly parents, get documents to show that, like a sworn affidavit. These are powerful ties.
- Property Ownership: Owning land or a house in Nigeria is a massive plus. Have your Certificate of Occupancy (C of O), deeds, and property documents ready. It shows a significant financial and personal investment back home.
- A Job to Return To: A letter from your current Nigerian employer can be your strongest piece of evidence. It needs to state clearly that you’re on an approved leave (like a sabbatical) and that your job is waiting for you when you get back.
A huge mistake people make is thinking that a Canadian job offer is the only thing that matters. Visa officers are trained to look for immigration intent. Your reasons for returning to Nigeria are just as important as your reasons for going to Canada.
Getting the Proof of Funds Right
Your financial situation is under a microscope. When you submit your bank statements, the visa officer isn't just looking at the final balance. They're looking for a stable, consistent financial history.
A large sum of money that suddenly appears in your account right before you apply is a major red flag. It screams "borrowed funds," maybe from a family member just to "show money," and it can sink your application. What they want to see is a steady pattern of savings and income over several months. This proves you can actually support yourself and builds trust.
Proving You’re Admissible to Canada
Finally, you have to be considered "admissible" to enter Canada. For Nigerian applicants, this boils down to two non-negotiable checks: a medical exam and a police clearance certificate.
You can't just walk into any clinic for the medical exam. It must be done by a panel physician in Nigeria who has been approved by Immigration, Refugees and Citizenship Canada (IRCC). You'll find approved centres in places like Lagos and Abuja.
Likewise, you’ll need to get a police clearance certificate from the Nigeria Police Force Criminal Investigation Department (FCID) in Alagbon, Lagos or the Central Criminal Registry in Abuja to show you don’t have a criminal record that would prevent you from entering the country. These aren't optional steps; they're essential for meeting Canada's health and security standards. For those who may have studied in Canada previously, understanding the eligibility for a Post-Graduation Work Permit can also provide useful context on Canadian immigration requirements.
Putting Your Application Together: The Nigerian Document Checklist
A solid Canadian work permit application is all about the paperwork. Think of it as building a case for yourself—every document is a piece of evidence. When you put them all together correctly, you paint a clear, convincing picture for the visa officer. Getting this right isn't just a matter of checking off a list; it’s about making your application undeniable.
Your first step is getting all your documents in order. Seriously, don't even think about hitting that 'submit' button until every single piece of paper is perfectly prepared.
The Absolute Must-Haves
Let's start with the non-negotiables. These are the core documents every applicant needs, but I'll add a few tips specifically for those applying from Nigeria.
-
Your International Passport: This is your golden ticket. Make sure it has at least two blank pages and won't expire anytime near your planned stay in Canada. If it's cutting it close, just renew it now. You don't want your work permit issued for a shorter period just because your passport is about to expire.
-
Application Forms: You’ll be filling out a few of these, including the main one, IMM 1295 (Application for Work Permit Made Outside of Canada). It’s best to fill them out on your computer, validate them (this creates the barcodes), and then print. Be completely honest and make sure your answers are consistent across every form.
-
Passport Photographs: IRCC is incredibly picky about photos. The size, the white background, even your facial expression—it all has to be perfect. Don't just pop into any photo studio; find one that explicitly states they know the Canadian visa photo specs. This isn't the time for a casual picture. Remember, official applications demand a professional look. For some great examples of what a polished photo should look like, you can check out these professional AI headshot examples.
To give you a clearer picture, here’s a quick rundown of the essential documents you’ll need to gather.
Essential Document Checklist for Nigerian Applicants
Document Category Required Item Nigerian-Specific Tip Personal Identification International Passport Ensure at least 6 months validity beyond your intended stay. Application Forms IMM 1295, Family Information Form, etc. Fill digitally, validate to generate barcodes, then print and sign. Photographs Two recent passport photos Use a studio familiar with Canadian visa specs (35mm x 45mm, white background). Proof of Financial Support Bank Statements (6 months) Include a reference letter from your Nigerian bank. Explain any large, recent deposits. Employment Documents Job Offer Letter, LMIA (if applicable) The offer letter must be on official letterhead with all job details. Proof of Ties to Nigeria Property documents (C of O), family ties (birth/marriage certs), letter from your Nigerian job. This is crucial to show you intend to return after your work permit expires. This table covers the basics, but remember that every application is unique, so you might need additional documents depending on your specific situation.
Proving Your Finances and Other Key Evidence
Beyond the basics, you have to back up everything you claim, especially when it comes to money and your promise to return to Nigeria. This is where a lot of people stumble.
Your bank statements need to tell a story of stability, not just show a healthy closing balance. You'll need at least six months of statements that show a consistent, explainable flow of money. We've actually put together a more in-depth guide on how to build a strong proof of funds for a Canada application.
Pro Tip: Got a huge, sudden deposit in your account? Maybe from selling a car or a cash gift from a relative? Don't just leave it there for the visa officer to question. Get ahead of it. Explain it clearly in your Letter of Explanation and attach proof, like a receipt of sale or a signed gift deed with a sworn affidavit.
The Power of a Well-Written Letter of Explanation
Your Letter of Explanation (LOE) is your one chance to talk directly to the person reviewing your file. This is where you connect the dots for them. It’s where you explain any potential red flags and really drive home your strong ties to Nigeria.
Think of your LOE as the place to address things like:
- Gaps in Your Employment: If you were out of work for a bit, briefly and honestly explain why.
- Your Reason for Going: Clearly state why you want this specific job in Canada and how the experience will boost your career when you return to Nigeria.
- Your Ties to Home: Talk about your family, property, business, or other commitments that guarantee you'll come back.
And if you already have a job offer, the documents from your Canadian employer are just as important. Your offer letter needs to be on official company letterhead, spelling out your salary, duties, and all the terms of your employment. If the job required a Labour Market Impact Assessment (LMIA), you absolutely must include a copy of that positive LMIA confirmation letter and the official number.
Getting Your Application Sorted on the IRCC Portal
Alright, this is the big moment. You’ve put in the hard yards gathering every single document, and now it’s time to submit everything through the official Immigration, Refugees and Citizenship Canada (IRCC) secure portal. This is where your application for a Canada work permit really kicks off, but let's be honest, the online system can be a bit of a maze if you're going in blind.
First things first, you'll need to set up your secure IRCC account. Think of this as your personal command centre for this application and any others you might have down the line. The portal will guide you through a set of questions to create a document checklist just for you. Take these questions seriously—your answers dictate exactly which forms and documents you’ll need to upload, so accuracy is everything.
Tackling the Online Forms Without Mistakes
Once you're logged in, you’ll face the digital application forms. Some of these are quite long, and from my experience, a few sections consistently trip up Nigerian applicants. The key here is to move slowly and check everything twice.
A major hurdle is often the travel history section. IRCC wants a complete record of every trip you've taken outside Nigeria in the past 10 years. Don't estimate or skip anything. Dig out your old passports and list every single trip, even that weekend visit to Cotonou. They cross-reference this information, so being consistent is non-negotiable.
Another section to be extra careful with is your employment history. You need to account for the last 10 years without leaving any unexplained gaps. If you were between jobs for a few months, you must declare it. Just state the period you were unemployed and provide a brief, honest explanation in your Letter of Explanation.
Let this sink in: the online portal is your one shot to make a good first impression. Even small inconsistencies between what you type in the forms and what’s in your uploaded documents can cause serious delays or, worse, a flat-out refusal. Check every entry before you click 'next'.
How to Upload Your Documents the Right Way
After you've filled out all the forms, it's time to upload your documents. This part is more technical than you might think, and it's easy to get it wrong. IRCC is very particular about file formats and sizes.
- File Type: For most of your documents, like your passport pages or bank statements, they need to be scanned and saved as PDFs. Your passport photo, however, must be a JPEG.
- File Size: Here's the kicker – each file has a strict limit of 4 MB. If your scanned bank statement is too big, you'll have to compress it. There are plenty of free online tools that can shrink the file size without making it blurry.
- Clarity: Make sure every single scan is crystal clear. A fuzzy or poorly scanned document is an instant red flag and will get your application pushed to the back of the line.
Don’t Forget Your Biometrics Appointment
You’ve paid the fees and hit the submit button. You're done, right? Not quite. The final crucial step is biometrics.
Within about 24 hours, you should see a Biometric Instruction Letter (BIL) pop up in your IRCC account. You absolutely need this letter to book your biometrics appointment.
In Nigeria, you’ll do this at a Visa Application Centre (VAC), with the main ones located in Lagos and Abuja. As soon as that BIL lands in your account, get online and book your appointment. Slots can fill up fast.
When you go for your appointment, you’ll need to have three things with you:
- Your valid international passport.
- A printed copy of your Biometric Instruction Letter (BIL).
- The confirmation letter for your appointment.
At the VAC, they'll take your fingerprints and a photo. Once that’s done and submitted, your application is officially complete and in the queue, waiting for a visa officer to review it. Now, the waiting game begins.
So, You've Submitted Your Application. What Now?
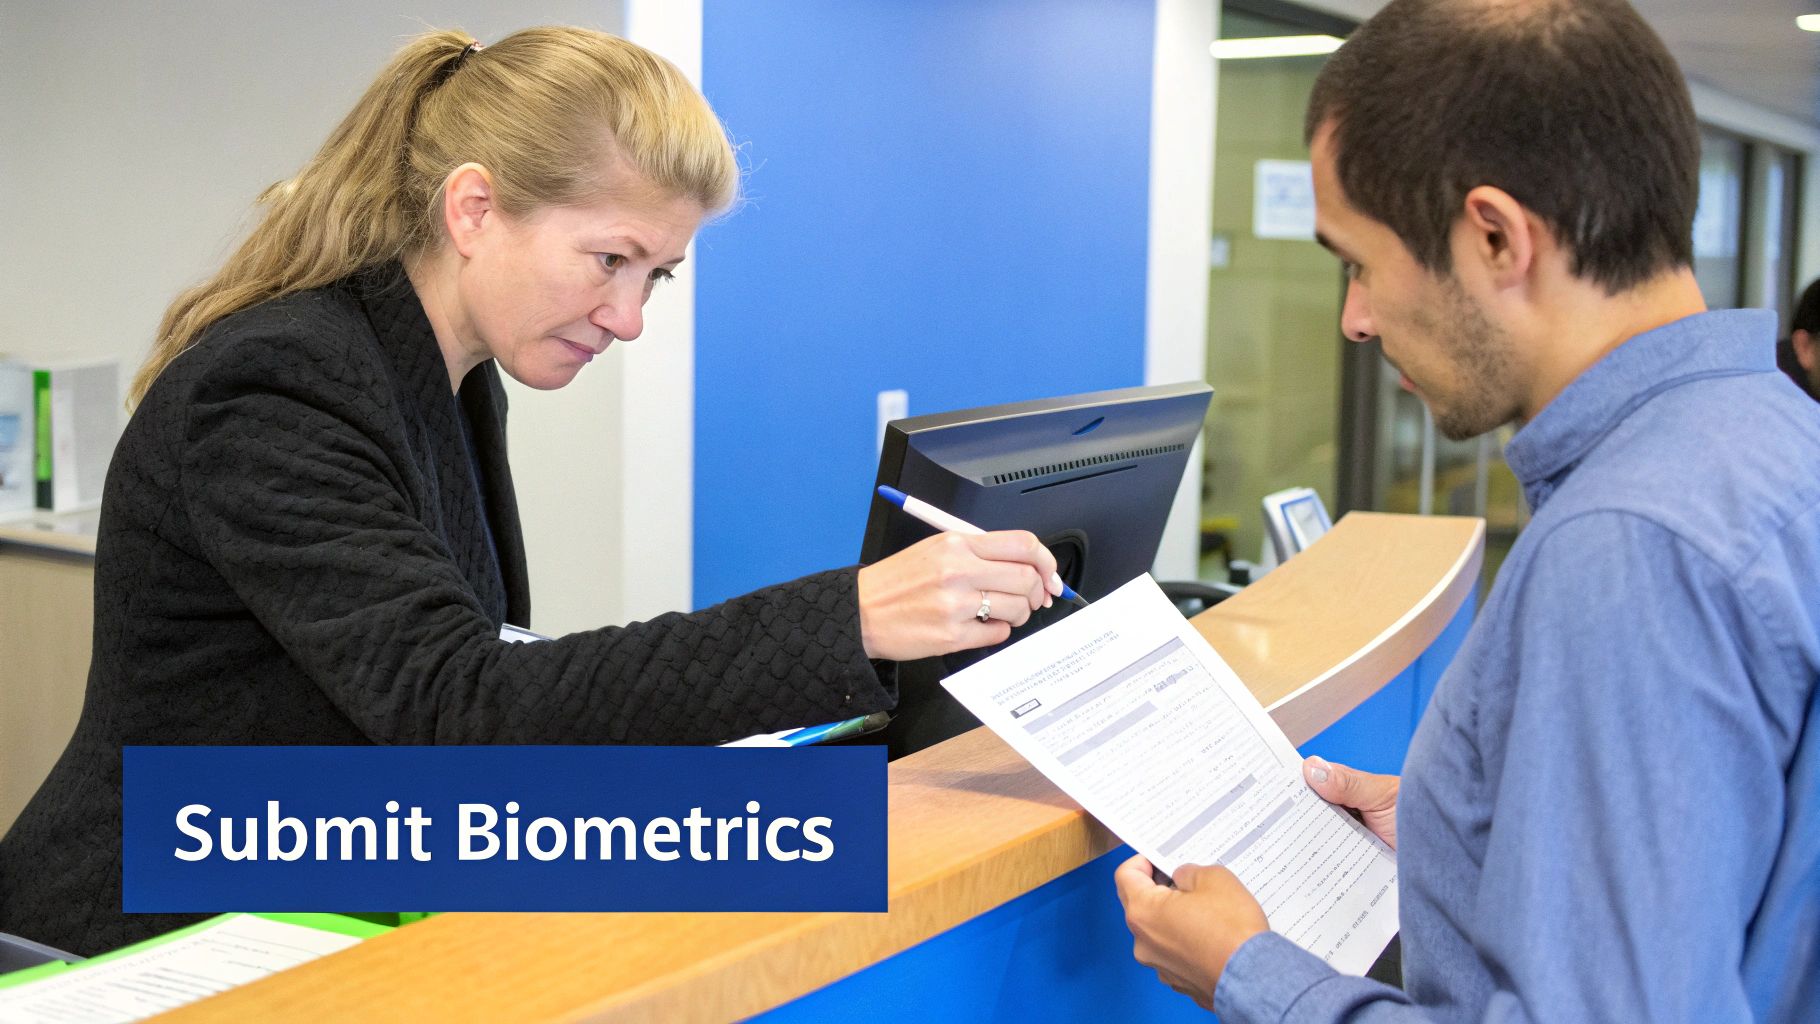
You’ve hit submit and your biometrics are done. Now comes the hard part—the wait. It’s completely normal to feel anxious and want to refresh your IRCC account a dozen times a day. But knowing a bit about what goes on behind the scenes can really help ease your mind.
First things first, processing times for applications from Nigeria can be a bit of a rollercoaster. They change based on how many applications the visa office is dealing with at any given time. My best advice? Try to stay patient and use your account for official updates. Don't get caught up in the unofficial timelines floating around on Nairaland forums; they'll only stress you out.
Keeping Tabs on Your Application
Your secure IRCC account is your direct line to the visa office. This is the only place you'll see genuine progress or requests for more information about your file.
Make it a habit to check your inbox within the portal. It’s actually quite common for an officer to ask for an extra document to clear something up. If you get a message, act on it immediately. A slow response can put your entire application on hold.
Key takeaway: The demand for workers in Canada is real and growing. As of mid-2025, there were 1,494,905 people on work permits alone, up from 1,230,460 at the end of 2023. This shows just how much Canada needs skilled individuals like you. You can find more about Canada's foreign worker statistics and see the bigger picture.
What if They Call You for an Interview?
Honestly, interviews for work permits aren't very common, but they do happen. A visa officer might want to chat if they have questions that your paperwork can't quite answer.
So, what might trigger an interview?
- They might have doubts about whether your job offer is genuine.
- Something in your past travel or immigration history might need clarification.
- They may want to be more certain that you plan to return to Nigeria when your work permit is up.
If you get that interview call, don't panic. The officer just wants to verify the details you’ve already provided. Take some time to go over your entire application again, be ready to answer questions truthfully, and make sure you have copies of all your documents with you.
The Final Decision
One day, you'll log in and see your status has changed to "Final Decision." This is it.
If it's good news, a massive congratulations is in order! You'll receive a Passport Request Letter (PPR) in your account. This letter will give you precise instructions on how to get your passport over to the Visa Application Centre (VAC) in Nigeria for that all-important visa stamp.
On the other hand, if your application is refused, you'll get a letter explaining why. It’s a tough pill to swallow, but don't lose hope. Read the reasons carefully—they are the roadmap to a stronger application. In many cases, you can address the specific points the officer raised and reapply with a much better chance of success.
Questions Nigerian Applicants Often Ask
Going through the Canadian work permit process can feel like a maze, and it’s completely normal to have a lot of questions. I’ve put together answers to some of the most common things I hear from Nigerian applicants, aiming to give you clear, practical advice for what’s on your mind.
Do I Need a Job Offer Before Applying for a Work Permit?
For nearly everyone applying from Nigeria, the short answer is yes. Most of the time, you'll be applying through the Temporary Foreign Worker Program (TFWP), which means you absolutely need a confirmed job offer from a Canadian employer. That offer usually needs to be supported by a Labour Market Impact Assessment (LMIA).
Now, there are a few exceptions. Certain high-skill jobs might fall under the LMIA-exempt International Mobility Program (IMP). Another route is an open work permit, but these are quite specific. You typically only qualify if you’re, say, the spouse of an international student or a skilled worker who is already in Canada. Trying to get an open work permit from Nigeria without one of these special connections is almost unheard of.
How Much "Show Money" Is Actually Enough?
There's no single magic number that works for everyone. The goal is to prove you can easily cover three key costs: your flight to Canada, your living expenses for the first few months before you get paid, and your flight back home to Nigeria. While a figure like C$10,000 for a single applicant is a decent guideline, what really matters to the visa officer is the story behind your money.
Think of it this way: a visa officer is looking for financial stability, not a sudden windfall. A huge chunk of cash appearing in your Nigerian bank account right before you apply is a massive red flag. It immediately makes them think the money is borrowed, which is a fast track to a refusal.
The real power of your proof of funds is in its history. A consistent pattern of savings over several months, coming from a clear source like your salary, is infinitely more believable than a large lump sum that just showed up.
What are the Main Reasons Nigerians Get Refused?
The number one reason, hands down, is failing to convince the visa officer that you'll actually leave Canada when your permit is up. This all comes down to showing you have strong "ties to home."
Beyond that, other common tripwires include:
- Weak Proof of Funds: Either the amount is too low, or the source of the money looks suspicious.
- Questionable Job Offer: The officer isn't convinced the job is real or that you're the right person for it.
- Sloppy Application: Missing documents or details that don’t match up across your forms can doom an otherwise good application.
This is why building a strong case that you have deep roots and responsibilities in Nigeria—like family, property, or a career to return to—is so vital for your application's success.
How Long Does It All Take?
Processing times are a moving target. They change all the time, depending almost entirely on the workload at the visa office handling applications from Nigeria. You could be looking at a few weeks or many months.
Your best bet for a current estimate is the official IRCC processing times tool, which they update frequently. Trying to rush your application won't make it go any faster. In my experience, the only sure way to avoid delays is to get it right the first time with a perfectly complete and well-organised application package.
Ready to take the guesswork out of your Canadian immigration journey? JapaChat provides instant, accurate answers to your questions, helping you build a stronger application with confidence. Plan your move the smart way by visiting us at https://japachat.com.
-
How to Apply for Canadian Visa from Nigeria
So, you're ready to start your journey to Canada from Nigeria. The very first thing you need to do is figure out which visa you're actually applying for. This might sound obvious, but it’s where many applications go wrong right from the start.
You’ll be applying online through the official Immigration, Refugees and Citizenship Canada (IRCC) portal. The process involves picking your visa type, gathering a specific list of documents, paying the necessary fees in Naira via your card, and then booking an appointment to give your biometrics here in Nigeria, either in Lagos or Abuja.
Getting to Grips with Your Canadian Visa Options
Before you even dream of filling out a form, take a step back. The single most important decision you'll make is choosing the right visa pathway for your trip. Picking the wrong category is a surefire way to get a rejection, so it's absolutely vital to get this right.
Canada has a visa for just about every purpose, and each one comes with its own rulebook. For Nigerians, the most popular routes are typically visitor visas, study permits, and work permits. Your reason for travelling will point you to the correct one.
Let's put this into a real-world context. Say you're a tech founder from Lagos heading to the Collision Conference in Toronto. You’d need a visitor visa, specifically under the business stream. On the other hand, if you just got your admission letter from Covenant University's partner school, the University of British Columbia, you're not a visitor—you need a study permit. The distinction is critical.
The Main Visa Categories for Nigerians
Let's break down the big three to help you find your lane. Understanding the nuances between them can save you a world of time and stress.
- Visitor Visa (Temporary Resident Visa – TRV): This is for short trips. Think tourism, visiting family in Brampton, attending a business conference, or even just passing through a Canadian airport. You can't work or study long-term on this visa.
- Study Permit: This is your ticket if you’ve been accepted to a Designated Learning Institution (DLI) in Canada. Whether it's for a diploma, a degree, or another formal course, this is the permit you need.
- Work Permit: Got a job offer from a Canadian company? This is your route. In most cases, your employer will need something called a Labour Market Impact Assessment (LMIA) to prove that a Canadian couldn't fill the position.
Choosing the right visa isn't just a formality. It’s about telling the visa officer a clear and believable story that aligns perfectly with the purpose of your chosen visa category. This is the foundation of a successful application.
Your main resource will be the official Canadian immigration website. Get familiar with it.

As you can see, the site is designed to point you in the right direction from the get-go, whether you plan to visit, immigrate, study, or work. Always start in the correct section.
Canadian Visa Types at a Glance for Nigerian Applicants
To make it even clearer, here's a quick comparison of the most common visa types people from Nigeria apply for. This should help you pinpoint which one fits your situation best.
Visa Type Primary Purpose Best For (Nigerian Context) Key Consideration Visitor Visa (TRV) Tourism, family visits, business meetings Attending conferences, visiting relatives in Toronto, short business trips. Proof of strong ties to Nigeria (job, family, property) is crucial to show you'll return. Study Permit Post-secondary education at a DLI University/college students with an acceptance letter. Requires proof of funds to cover tuition and living expenses for the first year. Work Permit To work for a specific Canadian employer Professionals with a valid job offer, often in high-demand fields like tech or healthcare. Usually requires a positive Labour Market Impact Assessment (LMIA) from the employer. Super Visa Extended visits for parents/grandparents Parents or grandparents of Canadian citizens or permanent residents who want to stay longer. Requires proof of medical insurance from a Canadian company and a letter of invitation. This table is a starting point. Always check the official IRCC website for the most detailed and up-to-date requirements for your specific situation.
So, Which Visa Has a Better Shot at Approval?
It's smart to know the numbers. Recent data from IRCC gives us a good picture of approval rates for Nigerian applicants. For instance, the approval rate for Nigerian study permit applicants has faced challenges, hovering around 20-25% in recent periods. Work permits generally have a higher success rate, but this is highly dependent on having a valid job offer and LMIA.
Meanwhile, visitor visas have varying success rates, often influenced by the strength of the applicant's ties to Nigeria. Applications clearly tied to a specific job or close family connections (like a Super Visa) tend to get a more favourable look.
For a deeper dive into moving to Canada, our comprehensive guide on how to relocate to Canada from Nigeria has you covered. Making the right choice at this stage is the bedrock of your entire application.
Your Essential Nigerian Document Checklist
Think of your visa application as building a case. Every single document you submit is a piece of evidence that tells the visa officer your story. A complete, clear, and compelling package is your strongest argument for getting that stamp of approval. Getting this part wrong is, frankly, one of the most common reasons for refusal, so let’s nail it from the get-go.
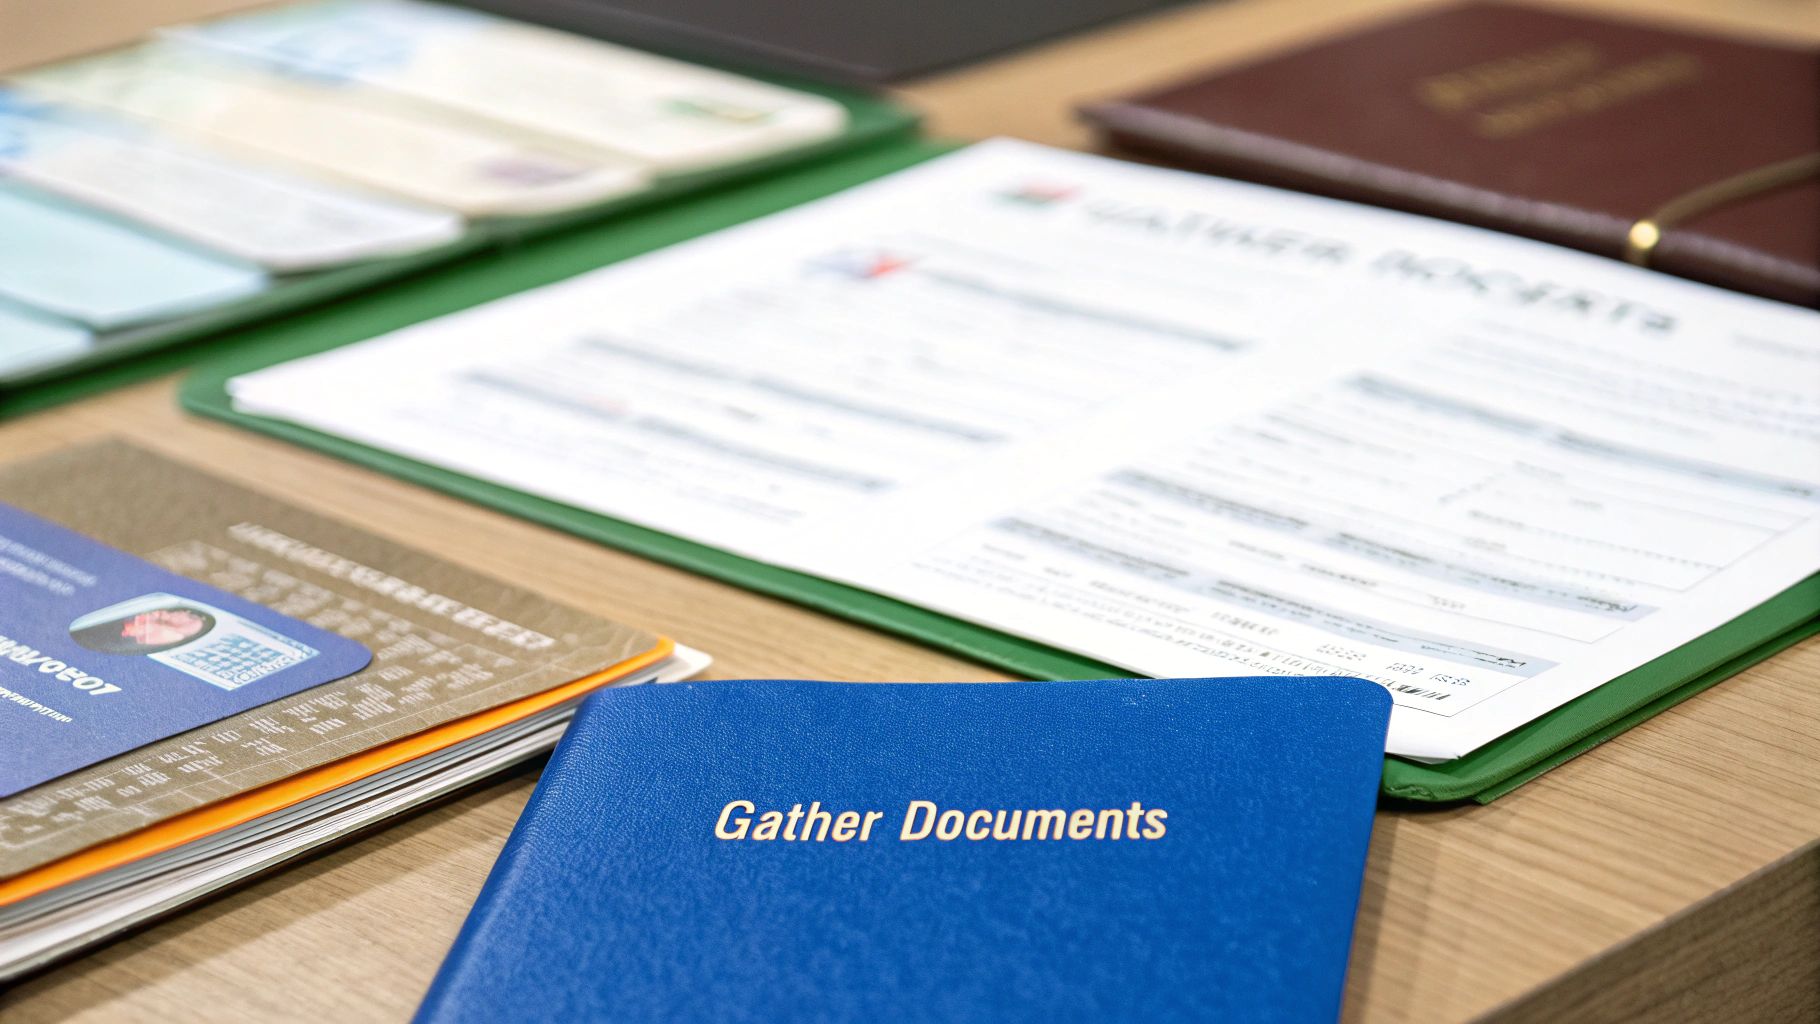
This isn't just about ticking boxes on a form. It's about providing high-quality proof that supports why you want to go and why you'll come back. Blurry photocopies, documents with conflicting information, or missing pages immediately create doubt in a visa officer's mind. Your goal is to make their job easy by presenting a professional and straightforward file.
Core Identity and Travel Documents
These are the absolute non-negotiables. They form the foundation of your application, and any slip-up here can bring the whole process to a screeching halt.
-
International Passport: This is your primary ID. First thing to check: is it valid for at least six months beyond the date you plan to leave Canada? You'll need to provide a clear scan of the bio-data page (the one with your photo) and every single page that has a visa or stamp from previous travels. If you’ve just renewed your passport, our guide on how to renew your Nigerian passport online might come in handy.
-
Passport Photographs: Canada is famously strict about this. The photos must be recent (taken within the last six months), set against a pure white background, and show a neutral facial expression. Seriously, don't use that great picture from your last birthday party. Go to a proper photo studio in Ikeja or Wuse and tell them you need it for a Canadian visa application; they'll know the exact specifications.
-
Proof of Financial Support: This is where many Nigerian applications, unfortunately, fall short. You need to prove you can comfortably fund your trip. Simply having a lump sum of money appear in your account right before applying looks suspicious. Visa officers want to see a stable financial history. You should provide at least six months of your Nigerian bank statements showing a consistent flow of income (like your salary) and savings. If someone else is sponsoring your trip, you'll need their bank statements, a formal letter of sponsorship, and proof of your relationship to them (e.g., a birth certificate).
Proving Your Ties to Nigeria
The visa officer’s main concern is: will you return to Nigeria after your visit? This is perhaps the most crucial part of a visitor visa application. Your task is to paint a vivid picture of your life, commitments, and responsibilities back home.
A classic mistake is focusing entirely on the exciting trip to Canada while forgetting to prove the solid reasons you have for coming back. Your ties to Nigeria are just as important as your reasons for visiting Canada.
To build a strong case, you'll need a combination of the following:
- Employment Letter: Get a letter from your employer in Nigeria, printed on official company letterhead. It must state your position, salary, start date, and—most importantly—confirm that your job will be waiting for you when you return.
- Property Documents: If you own land or a house in Nigeria, this is powerful proof. Include the Certificate of Occupancy (C of O) or Deed of Assignment. While not cash in the bank, these documents show significant assets and deep roots in the country.
- Family Ties: Show your connections. Provide birth certificates for your spouse and any children who are staying behind in Nigeria. If you're married, your marriage certificate is essential.
- Business Documents: For business owners, this is your equivalent of an employment letter. Include your CAC registration documents, recent tax clearance certificates, and your business bank statements.
The Letter of Explanation
This is your one chance to speak directly to the visa officer. Use this letter to connect all the dots and clarify anything that might seem confusing in your documents. For example, if you recently received a large sum of money as a gift from a relative, this is where you explain its source and attach a gift deed.
Keep your letter concise, professional, and completely honest. Clearly state the purpose of your trip, outline your itinerary, and briefly summarise how your documents demonstrate your financial capacity and your undeniable ties to Nigeria. A well-written, persuasive letter can truly be the deciding factor in a borderline case.
Tackling the IRCC Online Application Portal
Alright, with your documents sorted and ready to go, it’s time to face the main event: the online application. Everything happens on the Immigration, Refugees and Citizenship Canada (IRCC) portal, from filling out your forms to uploading all the proof you’ve gathered. It can look a bit overwhelming at first, I get it, but it's actually quite logical once you get the hang of it.
The good news is that the whole process is online. This is a huge plus because you avoid the snail's pace and nail-biting uncertainty that comes with sending paper applications all the way from Nigeria. The very first thing you'll need to do is create a secure IRCC account. Think of this as your personal command centre for this application and any others you might submit down the road.
Getting Your Secure IRCC Account Set Up
Treat your IRCC account like you would your online banking login—keep those details under lock and key. You’ll see two options for signing in: GCKey or a Sign-In Partner. For most applicants in Nigeria, the GCKey is the way to go.
- GCKey: This is simply a unique username and password that you create yourself. During setup, you'll be prompted to create several security questions. Don't rush this part. Choose questions and answers you'll definitely remember, as you'll need them every single time you log in. My advice? Write them down and keep them somewhere safe.
Once your account is active, the portal will walk you through a quick eligibility questionnaire. This tool is designed to figure out exactly which visa you need by asking about your nationality, age, why you want to visit, and your financial situation. It then generates a personalised document checklist just for you. Be completely honest and accurate here; your answers dictate the specific forms you'll need to complete.
Filling Out the Application Forms Correctly
After the questionnaire, you'll be directed to the online forms. This is the heart of your application. This is where you put down all your personal details, and you need to be meticulous. Take your time and double-check every single entry. A simple typo in your name or passport number can cause major headaches later.
From my experience, a few sections tend to trip up Nigerian applicants more than others:
- Address History: You need to be precise. If you lived at No. 5 Adeola Odeku Street, Victoria Island, Lagos, write it out in full. Don't use abbreviations and make sure there are no gaps in the timeline for the required period (which is usually the last 10 years).
- Family Information (IMM 5645): This is a big one. You must declare all your immediate family members—that means your spouse, parents, siblings, and children—whether they are travelling with you or not. Trying to hide this information is a massive red flag for any visa officer.
A great feature of the online portal is that it saves your progress automatically. You don't have to get it all done in one go. It’s far better to take a break and come back with fresh eyes than to rush through and make a silly mistake. Trust me, small errors on these forms can lead to very big delays.
The Smart Way to Upload Your Documents
This is where all your hard work organising your documents really pays off. The portal gives you a specific upload slot for each document on your checklist. Please, don't just upload files named "scan_001.pdf" or "document2.jpg." It just makes the visa officer's job harder, which is never a good thing.
Instead, get into the habit of using a clear and consistent naming convention. Something like this:
Adekunle_Passport.pdfAdekunle_BankStatement_GTB.pdfAdekunle_EmploymentLetter.pdf
This simple step shows you’re organised and makes your application much easier for them to process. Also, keep an eye on the file size limits. It's usually 4 MB per file. You might need to compress some of your PDFs, but always check that they are still perfectly clear and easy to read. A blurry document is just as bad as a missing one.
This infographic gives you a quick visual summary of the steps you'll follow inside the portal.
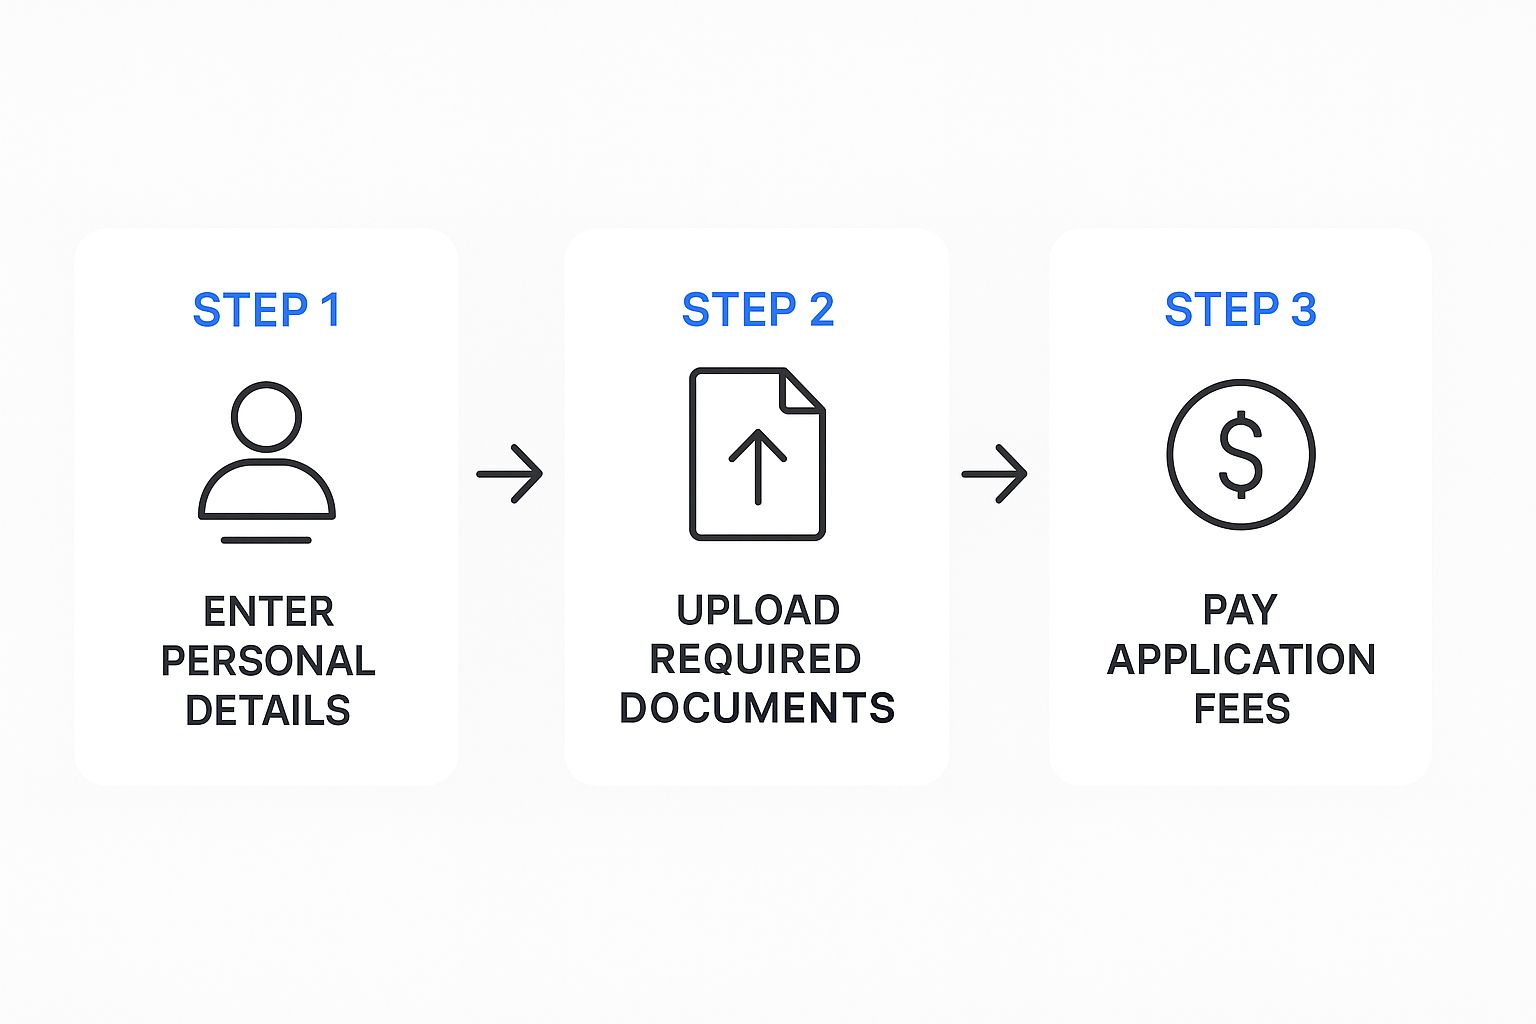
As you can see, the flow is straightforward: you enter your personal data, upload your supporting proof, and then make the payment. After you’ve carefully filled everything in and uploaded your neatly named files, the last hurdle is paying the application and biometrics fees. You can do this directly on the portal using a valid credit or debit card.
Mastering Proof of Funds and Biometrics
For so many Nigerians dreaming of Canada, two hurdles cause the most sleepless nights: proving you have enough money and getting your biometrics done. Let's be real, these are the stages where even a strong application can fall apart. But if you know what the visa officers are looking for, you can handle them with confidence.

This isn’t just about having a specific amount of cash in your Zenith or GTB account on the day you click "submit." It’s about presenting a clear, believable story of your financial stability. Likewise, biometrics is a simple but non-negotiable step you have to get right the first time.
The Real Story Behind Proof of Funds
When an IRCC officer in Ottawa opens your bank statement, they're not just glancing at the closing balance. They're reading it like a detective, looking for clues. What they need to see is a history of stable, legitimate funds—not a sudden cash injection that appeared out of thin air a week before you applied.
Picture this: you have ₦10 million in your account. Fantastic. But if ₦8 million of that just landed from an uncle last Tuesday, that's a huge red flag. This is called "funds parking," and visa officers are trained to spot it instantly. They will likely question the legitimacy of the funds and refuse the application.
The consistency of your financial history is far more persuasive than the size of a last-minute deposit. A steady salary coming in every month and regular savings are more convincing than a large, unexplained lump sum.
If you do get a large gift from a family member, you have to document it meticulously. Let's say your mother gifts you ₦5 million for your school fees. You'll need to provide a paper trail:
- A formal Gift Deed, properly signed by both of you.
- Your mother’s bank statement showing the money leaving her account.
- A short, clear letter from her explaining the gift and confirming your relationship.
This kind of transparency turns what could be a deal-breaker into a well-supported part of your financial narrative. For a deeper dive into building this financial picture, our detailed guide on Proof of Funds for Canada is a must-read.
To give you a clearer picture, here’s a practical breakdown of how a Nigerian student might present their funds for a one-year programme in Ontario.
Sample Breakdown of Financial Requirements for a Nigerian Student
Expense Category Estimated Cost (CAD) Equivalent in Naira (Approx.) Recommended Documentation First-Year Tuition $18,000 ₦23,400,000 Letter of Acceptance, Tuition Receipt (if paid) Living Expenses (GIC) $20,635 ₦26,825,500 GIC Certificate from a participating Canadian bank Flight & Travel Costs $1,500 ₦1,950,000 Six-month personal bank statement Miscellaneous/Buffer $2,000 ₦2,600,000 Six-month personal bank statement Total Funds to Show $42,135 ₦54,775,500 Combination of all documents listed above This table shows how different pieces of evidence come together to meet the total requirement. It’s not about having all the money in one place, but proving you have access to it through legitimate sources.
Using Property and Other Assets
While cash in the bank is king, don't underestimate the power of your other assets in Nigeria. Do you own a plot of land in Lekki or a flat in Abuja? These are powerful signals of your financial stability and, just as importantly, your strong ties to home.
You can't pay for your flight with a Certificate of Occupancy (C of O), so property documents can't replace the required cash funds. However, you should absolutely include them as supplementary proof. Get a professional valuation report done to show the current market value in Naira. This proves to the visa officer that you have substantial assets and roots in Nigeria that you wouldn't just abandon.
A great tip for organising your financial documents is to convert bank statement to Excel; it helps you track and explain large transactions much more clearly.
Handling Your Biometrics Appointment
After you've submitted your application and paid your fees online, you'll get a Biometric Instruction Letter (BIL) in your IRCC account. This is your cue for the next critical step, and you can't afford to delay. You have exactly 30 days from the date on the BIL to give your fingerprints and photograph at a Visa Application Centre (VAC).
In Nigeria, the VACs are in Lagos (Victoria Island) and Abuja (Maitama). You must book an appointment online beforehand—you can’t just show up.
Here’s a quick rundown of what to do:
- Book Your Slot: As soon as that BIL arrives, head to the official VFS Global website for Nigeria. Appointment slots, especially in busy seasons, get snatched up fast.
- Get Your Documents Ready: On the day of your appointment, you’ll need three things: your international passport, the appointment confirmation letter, and the Biometric Instruction Letter itself.
- Arrive on Time: Plan to be at the VAC about 15-20 minutes early. Security is strict, and they usually won’t let you in with large bags or most electronics.
- The Process: The actual biometrics capture is surprisingly quick. An official will verify your documents, and then you'll be called in to have a digital photo taken and your fingerprints scanned. The whole thing often takes less than 15 minutes.
You typically pay the biometrics fee when you pay for your visa application. As of early 2024, it's CAD $85 per person, which you'll pay in Naira at the current exchange rate. Once this is done, your part is over. Now, the waiting begins.
So, You've Hit Submit. What Happens Now?
You’ve done it. You’ve scanned, uploaded, double-checked every single detail, and finally clicked that submit button on the IRCC portal. The feeling is a unique mix of relief and pure anxiety that almost every Nigerian applicant experiences. This waiting game can feel like the toughest part of the whole process, but knowing what’s going on behind the scenes helps a lot.
Once your application is officially in the system, it joins a queue, waiting for an IRCC officer to pick it up. Your only job now is to practice patience and keep a close eye on your IRCC secure account. That’s your one and only source for official communication.
How to Track Your Application (and Keep Your Sanity)
Forget refreshing your email every two minutes. The only place you need to be looking is your IRCC portal. The status updates can be a bit cryptic, so it helps to understand the lingo.
Here’s a quick rundown of what you’ll likely see:
- Submitted: This is just confirmation that they’ve received your application. It’s the starting line.
- Biometrics Completed: This pops up after you’ve been to the VAC in Lagos or Abuja and they've successfully linked your fingerprints to your file.
- In Progress: Get comfortable, because this is usually the longest phase. It simply means an officer is looking at your file. Don't start worrying if it stays like this for weeks or even months—that's completely normal.
- Correspondence/Update: Pay close attention to this one. It means IRCC has sent you a message or needs more information. Log in and check your messages immediately.
Remember, processing times for applications from Nigeria can be all over the place. They depend on the type of visa and how busy IRCC is at that moment. You can check the official IRCC processing times tool, but treat those dates as a rough guide, not a guarantee.
"We Need More Information" – Don't Panic!
Every now and then, an IRCC officer needs a bit more clarity. You might get a request for an extra document, like a more recent bank statement or a letter of employment on a proper letterhead. If this happens to you, don't take it as a bad sign. In fact, it's a good thing! It means a human is actively reviewing your application and giving you a chance to make it stronger.
Your response should be fast and precise. If they ask for six months of bank statements, give them exactly that—no more, no less. Adding extra documents you think might help can actually complicate the review and slow things down. Upload exactly what they've asked for, well before the deadline.
A request for additional information isn't a red flag; it's an opportunity. A quick, accurate response shows the visa officer you're organised, cooperative, and serious about your application.
The Final Decision: Approval or Refusal
At the end of this long wait, it all comes down to one of two outcomes. It’s best to be mentally prepared for either possibility.
Approval and the Golden "PPR" Email
This is the moment you've been dreaming of! The best possible update is the "Passport Request" (PPR) letter appearing in your IRCC account. This is the official confirmation that your application has been approved. Now, they just need your physical passport to put the visa inside.The PPR letter will contain very specific instructions on how to get your passport to the VAC. Follow them perfectly. Once you submit it, you can expect to get it back—with that beautiful Canadian visa inside—within a couple of weeks.
Dealing with a Refusal
Getting a refusal is gut-wrenching, but it doesn't have to be the end of your Canadian dream. The very first thing you must do is read the refusal letter carefully. It will state the specific reasons why the visa officer wasn't convinced. For Nigerian applicants, common reasons often circle back to insufficient proof of funds, an unclear purpose of visit, or not enough proof of ties to Nigeria.Whatever you do, don't just reapply with the exact same documents. You need to tackle the reasons for refusal head-on with new, stronger evidence. The Canadian immigration system is competitive. For a bit of perspective, while the 2024-2026 immigration plan is ambitious, you can learn more about the IRCC's departmental plan. This just goes to show how critical it is to submit the strongest, most convincing application possible the first time.
Your Top Questions Answered by the Experts
After helping thousands of Nigerians navigate their Canadian visa applications, we've seen it all. Certain questions and worries come up again and again. So, let's cut through the noise and get straight to the answers you need for some of the most common concerns we hear from applicants just like you.
Can I Use My Property in Nigeria as Proof of Funds?
This is a fantastic and very common question. The short answer is no, not directly. You can't just submit the Certificate of Occupancy (C of O) for your plot in Ibeju-Lekki and expect it to count as your primary proof of funds. The visa officer needs to see liquid cash—money you can access immediately to cover your trip. A property deed isn't cash.
However, and this is crucial, those property documents are absolute gold as secondary evidence. They are one of the most powerful tools you have to demonstrate your financial stability and, more importantly, your strong ties to Nigeria. Including them paints a clear picture: you're a person with significant assets and a life you fully intend to return to.
To make this work for you, don't just scan the C of O. Go a step further and get a professional valuation report from a registered estate surveyor. This document puts a concrete market value in Naira on your property, giving the visa officer a real number to work with. It's the perfect complement to your bank statements, showing you have both available cash and long-term wealth.
How Many Months of Bank Statements Should I Really Provide?
While the official guideline often mentions a minimum of four months, our experience with Nigerian applicants shows that six months is the benchmark you should aim for. Why? Because the visa officer is doing more than just glancing at your final balance; they are reading the story your financial history tells.
One of the biggest red flags we see is a sudden, massive deposit right before an application. Imagine ₦7 million landing in your account out of the blue. The immediate assumption is that the money was borrowed simply to meet the requirement. It looks suspicious.
A consistent, healthy account history over several months is far more convincing than a large, last-minute lump sum. It proves genuine financial stability, which is precisely what they need to see.
It's much better to show the steady flow of your salary from your job in Abuja, regular savings, and normal transaction patterns. If you do have a legitimate large deposit – maybe you sold a car or received a dividend payout – you absolutely must explain it. Provide the supporting paperwork, like the car's sales agreement or the dividend certificate, and clearly explain the source of the funds in your letter of explanation. Transparency is key.
What's the Best Way to Prove My Ties to Nigeria?
This is the heart of your application. Proving your deep-rooted, unbreakable ties to Nigeria is how you convince the visa officer that you are a genuine visitor with every reason to go back home. You need to build a compelling case that rests on three essential pillars.
-
Your Family: This is about your most immediate and important relationships. You'll want to include the birth certificates of your children and spouse (if they are staying behind) and, of course, your marriage certificate. These documents are non-negotiable proof of your responsibilities at home.
-
Your Career: A stable job is one of the strongest anchors you can have. Get a detailed letter from your employer, printed on official company letterhead. This letter must confirm your role, salary, and start date, but most importantly, it needs to explicitly state that your job is secure and will be waiting for you when you return from your trip.
-
Your Assets: This is where you showcase everything that financially and materially ties you to Nigeria. Include your property documents (with those valuation reports we talked about!), your business registration certificates from the CAC if you're an entrepreneur, and even statements for any local investments you hold. The goal is to paint an undeniable picture of a life you would never abandon.
My Application Was Refused. Should I Reapply Right Away?
I know how disheartening a refusal can be. But the answer to this is a firm and absolute no. Rushing to reapply with the exact same information is the fastest way to get a second rejection. The very first thing you need to do is pause and carefully analyse what went wrong.
Read the refusal letter from IRCC word for word. It will detail the specific reasons they weren't convinced. For Nigerian applicants, the most common reasons are often insufficient proof of funds, an unclear purpose for the visit, or—the most frequent culprit—weak ties to home.
Before you even dream of hitting that 'submit' button again, your mission is to find new, much stronger evidence that directly tackles the issues they raised. If your finances were the problem, you need to build a better account history or find a more credible sponsor. If your ties to Nigeria were questioned, you must dig deeper to provide more compelling proof. A rushed reapplication is a wasted application fee. Take your time, build a stronger, undeniable case, and then you can reapply with confidence.
Navigating the Canadian immigration system can feel overwhelming, but you don't have to do it alone. For instant, clear answers tailored to your specific situation, check out JapaChat. Our AI-powered platform is designed to help Nigerians plan their journey with confidence. Get started for free at https://japachat.com.
-

8 Unskilled Jobs in Canada with Visa Sponsorship for 2025
Are you a Nigerian seeking a pathway to live and work in Canada without a university degree or specialised certifications? The dream of 'japa-ing' to Canada is often associated with high-skilled professions like tech and medicine, but a significant demand exists for dedicated workers in essential roles. This guide is designed specifically for you, cutting through the complex information to provide a clear, actionable list of unskilled jobs in Canada with visa sponsorship.
This article will break down realistic opportunities available right now. We will explore specific job categories, from agricultural work to hospitality and construction, detailing what each role involves, the typical salary you can expect, and, most importantly, how employers can support your visa application process. We move beyond generic advice to give you practical steps and insights relevant to your situation as a Nigerian applicant. You'll learn about the Labour Market Impact Assessment (LMIA) process and how it can be your key to securing a work permit.
Planning a move involves more than just finding a job; it requires careful financial preparation. As you plan your move, it's also wise to consider broader financial planning; for instance, understanding financing options for foreign nationals can be important for future needs. Let's explore the roles that can make your Canadian dream a reality.
1. Agricultural Worker with Work Permit
Canada's vast agricultural sector has a constant demand for dedicated workers, particularly during peak planting and harvesting seasons. This creates a significant opportunity for Nigerians seeking unskilled jobs in Canada with visa sponsorship. Positions range from farm labourers and crop harvesters to greenhouse workers and livestock caretakers, offering a direct pathway to gaining Canadian work experience.

Canadian employers heavily rely on programmes like the Seasonal Agricultural Worker Program (SAWP) and the Temporary Foreign Worker Program (TFWP) to fill these labour gaps. This means many farms are already set up to handle the visa sponsorship process, making it a more streamlined option for international applicants. Think of it like this: these farms need you as much as you need the job.
Why This is a Top Opportunity
The primary advantage is the high demand and the established visa sponsorship framework. Unlike other jobs where sponsorship is discretionary, many agricultural roles are specifically advertised for foreign workers. The work is physically demanding, but it provides a stable income and a valuable foothold in the Canadian workforce. Provinces like Ontario, British Columbia, and Quebec are hotspots for these roles, offering diverse opportunities from fruit orchards to large-scale dairy farms.
Actionable Tips for Success
- Highlight Relevant Experience: Even if you haven't worked on a commercial farm, showcase any experience with physical labour, gardening, or animal care. If you helped on a family farm back home or have a small garden, mention it. This demonstrates your capacity for the demanding nature of the work.
- Use Recognised Channels: Apply through official government programmes or reputable recruitment agencies that partner with Canadian farms. Be wary of agents who demand large upfront fees for job placement—that’s a major red flag.
- Prepare Your Documents: Be ready for medical examinations and police background checks, as these are standard requirements for agricultural work permits. Start gathering these early.
- Research Provincial Needs: Different provinces have different agricultural specialities. Researching whether you prefer working with crops in the Prairies or in greenhouses in British Columbia can help you target your applications effectively. This detailed approach can be a key part of your journey to relocate to Canada from Nigeria.
2. Food Service Worker with LMIA Support
Canada’s bustling hospitality industry presents a steady stream of opportunities for food service workers, creating a reliable pathway for Nigerians seeking unskilled jobs in Canada with visa sponsorship. Roles such as kitchen helpers, dishwashers, food counter attendants, and servers are consistently in demand, especially in major cities and tourist destinations. Many employers in this sector actively use the Temporary Foreign Worker Program (TFWP) and obtain a Labour Market Impact Assessment (LMIA) to prove they need to hire from abroad.

This employer-driven process means that businesses, from large fast-food chains like Tim Hortons to exclusive resort hotels in Banff, are prepared to sponsor qualified candidates. For many Nigerians, this sponsorship is the critical first step to securing a work permit and beginning a new life in Canada. The process is well-established, making it a viable and structured route to employment.
Why This is a Top Opportunity
The key advantage here is the widespread and continuous need for labour in the food service sector across Canada. Unlike highly specialised fields, these positions are available in almost every province, particularly in urban centres like Toronto and Vancouver and tourist hotspots like Whistler. This high turnover and consistent demand mean employers are frequently looking for dependable workers and are often willing to manage the LMIA and visa paperwork to fill their vacancies. Gaining this Canadian experience can also open doors to permanent residency pathways later.
Actionable Tips for Success
- Obtain Food Safety Certification: Proactively completing a Canadian food handler certification online (like FoodSafe) can make your application stand out and show employers you are serious. It shows you're ready to hit the ground running.
- Highlight Customer Service Skills: Emphasise any experience you have in retail, hospitality, or any role involving customer interaction. Did you ever work in a shop or help at a family business? That counts! Canadian employers highly value strong communication and service skills.
- Target Employers with LMIA History: Focus your job search on companies known for hiring foreign workers. Check Canada's Job Bank and filter for jobs with an "LMIA approved" status.
- Be Flexible: Be open to various shifts, including nights, weekends, and holidays, and consider seasonal resort positions. This flexibility significantly increases your chances of getting hired quickly. Understanding the specifics of the application can be complex, so you might want to learn more about how to apply for a work visa.
3. Hotel Housekeeping and Maintenance Staff
Canada's booming tourism and hospitality industry creates a steady demand for reliable housekeeping, cleaning, and maintenance staff. This presents a prime opportunity for Nigerians looking for unskilled jobs in Canada with visa sponsorship. Major hotel chains and independent properties, especially in tourist hotspots, frequently use the Temporary Foreign Worker Program (TFWP) to fill these essential roles due to local labour shortages.
From international brands like Marriott and Fairmont in cities like Toronto and Vancouver to smaller lodges in tourist towns like Banff or Niagara Falls, employers are often experienced in sponsoring foreign workers. These roles are the backbone of the hospitality sector, ensuring guests have a clean, safe, and pleasant stay, making them non-negotiable hires for any hotel.
Why This is a Top Opportunity
The key advantage here is the year-round demand and the high volume of positions available across the country. Unlike seasonal jobs, hotels require staff throughout the year, offering more stability. Furthermore, many of these roles do not require advanced degrees, making them highly accessible. The work provides a direct entry into the Canadian service industry and often comes with the potential for overtime hours during peak tourist seasons, boosting your earning potential.
Actionable Tips for Success
- Emphasise Reliability and Detail: In your CV, highlight your dependability, attention to detail, and ability to work independently. These are the most valued traits for housekeeping and maintenance roles, more so than previous hotel experience. If you are known for being meticulous, let them know.
- Target Tourist Hubs: Focus your job search on areas with high tourist traffic, such as British Columbia, Alberta (especially near the Rocky Mountains), and Ontario. Employers in these regions are more likely to have approved Labour Market Impact Assessments (LMIAs) ready for foreign hires.
- Showcase Communication Skills: While fluency isn't required, demonstrating basic English proficiency is crucial for understanding instructions and communicating with team members. Mention any language certificates you may have.
- Apply Before Peak Seasons: Hotels often hire in the months leading up to their busiest seasons (summer and winter holidays). Submitting applications during these periods can significantly increase your chances of securing a sponsored position. This proactive approach can be a vital step in your plan to relocate to Canada from Nigeria.
4. Warehouse and Factory Worker
Canada's manufacturing and e-commerce sectors are booming, creating a steady stream of unskilled jobs in Canada with visa sponsorship for warehouse and factory roles. From large urban centres to smaller industrial towns, companies require reliable individuals for tasks like operating production lines, packaging goods, and managing inventory in warehouses. This consistent need makes it a practical pathway for Nigerians looking to secure sponsored employment.
Many large-scale employers, such as Amazon fulfillment centres and major food processing plants, have well-established processes for hiring through the Temporary Foreign Worker Program (TFWP). They often need to fill multiple positions and are experienced in handling the Labour Market Impact Assessment (LMIA) and visa paperwork, which simplifies the process for applicants from countries like Nigeria.
Why This is a Top Opportunity
The high volume of available positions and the wide geographical spread are major advantages. Unlike some specialised jobs, warehouse and factory roles are found across nearly every province, giving you more options. These jobs often come with predictable shift schedules, opportunities for overtime pay, and a clear path to gaining valuable Canadian work experience that can support a future permanent residency application.
Actionable Tips for Success
- Emphasise Reliability: Punctuality and a strong work ethic are highly valued. Highlight your attendance record and commitment in your CV and cover letter, as employers need people they can count on for shift work. Nigerians are known for their hustle—show that.
- Showcase Relevant Skills: Any experience with physical work, inventory management (even in a small shop in Lagos or Abuja), or operating basic machinery should be mentioned. This shows you can adapt to the factory environment.
- Be Open to Different Shifts: Many factories and warehouses operate 24/7. Being flexible and willing to work night or weekend shifts can make your application much more attractive to employers with urgent staffing needs.
- Target High-Demand Industries: Focus your job search on food processing, automotive parts manufacturing (especially in Ontario), and e-commerce fulfillment centres, as these industries consistently seek foreign workers.
5. Construction Laborer and Helper
Canada's booming construction industry, fueled by urban expansion and infrastructure projects, has a persistent need for general labourers and helpers. This creates a prime opportunity for Nigerians looking for unskilled jobs in Canada with visa sponsorship. These roles involve assisting skilled tradespeople, site preparation, and material handling on both residential and commercial projects.

Many Canadian construction companies actively use the Temporary Foreign Worker Program (TFWP) to find reliable workers, especially in high-growth areas. Employers in provinces like Ontario, British Columbia, and Alberta often struggle to find enough local workers to meet project deadlines, making them more willing to sponsor international applicants for entry-level positions.
Why This is a Top Opportunity
The high demand and excellent wages make this a standout option. Construction labour jobs often pay well above minimum wage and can lead to apprenticeships and a career in skilled trades like carpentry or plumbing. It is a direct route to gaining valuable Canadian work experience in a thriving sector. Major projects, from new housing developments in the Greater Toronto Area to large-scale infrastructure work in Western Canada, constantly require a steady stream of hardworking labourers.
Actionable Tips for Success
- Highlight Physical Fitness: Emphasise your physical stamina, strength, and ability to work in various weather conditions. If you can handle the Nigerian heat, you can adapt to Canadian weather. This is a key requirement that employers look for on a CV.
- Show Eagerness to Learn: While no specific skill is needed, a demonstrated willingness to follow instructions, learn on the job, and adhere to strict safety protocols is highly valued. A "can-do" attitude goes a long way.
- Obtain Basic Safety Certifications: Consider getting an online safety certification like WHMIS (Workplace Hazardous Materials Information System). This shows initiative and an understanding of Canadian workplace safety standards.
- Target High-Demand Regions: Focus your job search on companies located in rapidly growing cities like Vancouver, Calgary, and Toronto, as well as regions with major government infrastructure projects, as this is where sponsorship is most common.
6. Cleaning Services and Janitorial Work
The demand for cleaning and janitorial services in Canada is constant and widespread, creating numerous opportunities for Nigerians looking for unskilled jobs in Canada with visa sponsorship. Commercial cleaning companies, office towers, schools, and especially healthcare facilities, are in continuous need of reliable staff. These positions are essential for public health and safety, ensuring employers are often willing to sponsor foreign workers to fill persistent vacancies.
Many large organisations and facility management companies, such as GDI Integrated Facility Services, have established processes for hiring through the Temporary Foreign Worker Program (TFWP). They often need to fill less desirable evening and night shifts, which presents a significant opening for international applicants prepared to be flexible. This makes it a dependable route to securing a Canadian work permit.
Why This is a Top Opportunity
The key advantage is the non-seasonal, year-round demand for these roles across every Canadian city. Unlike some labour jobs that are dependent on weather, cleaning services are always required. This stability, combined with many employers already having experience with the Labour Market Impact Assessment (LMIA) process, makes it a highly accessible option. The work provides a steady income and can be a great entry point into the Canadian job market, often with opportunities for advancement into supervisory roles.
Actionable Tips for Success
- Demonstrate Reliability: Emphasise your trustworthiness and consistent work ethic in your application. For many Nigerians, highlighting a history of dependability in previous roles, even outside of formal cleaning, can be very effective. Your word is your bond—show them that.
- Highlight Attention to Detail: Cleaning is a job where precision matters. Mention any past experience that required a meticulous approach, showing you understand the importance of thoroughness.
- Be Flexible with Shifts: Clearly state your willingness to work evenings, nights, and weekends. This flexibility is a major selling point for employers struggling to fill these specific shifts and significantly increases your chances of sponsorship.
- Consider Specialised Training: Look into obtaining basic safety certifications online, such as WHMIS (Workplace Hazardous Materials Information System). Having this credential can make your application stand out and shows proactive initiative to a Canadian employer.
7. Retail Sales Associate and Cashier
Canada's thriving retail sector offers numerous opportunities for Nigerians seeking entry-level work. Major retail chains and independent stores frequently sponsor foreign workers for sales associate, cashier, and customer service roles. This is especially true in smaller towns or rapidly growing communities where the local labour supply struggles to keep up with demand from new stores and shopping centres.
Employers in this sector often seek visa sponsorship through the Temporary Foreign Worker Program (TFWP) when they can prove a labour shortage. They value the strong work ethic and diverse skill sets that international workers bring, including multilingual abilities which can be a huge asset in Canada's multicultural cities. Roles at retailers like Walmart, Canadian Tire, or grocery chains such as Loblaws and Metro are common entry points.
Why This is a Top Opportunity
The high volume of positions and the relatively low barrier to entry make retail an accessible option for many. Unlike highly specialised fields, customer service and sales skills are transferable from experiences in Nigeria. These roles provide a fantastic platform to improve your English or French, understand Canadian workplace culture, and build a network. The constant interaction with the public sharpens communication skills, which are valuable for any future career path in Canada.
Actionable Tips for Success
- Emphasise Customer Service: Highlight any past experience dealing with customers, even if it wasn't in a formal retail setting. This could be from helping at a family business, a market stall in Balogun, or even a volunteer role.
- Showcase Language Skills: If you speak Pidgin or other Nigerian languages, mention this alongside English. In diverse communities, being able to connect with a wider range of customers is a significant advantage.
- Be Flexible: Retail operates outside of typical 9-to-5 hours. Showing you are available for evenings, weekends, and holidays makes you a much more attractive candidate to employers needing to fill shifts.
- Target Labour Shortage Areas: Focus your job search on smaller towns or provinces experiencing economic growth, as they are more likely to be hiring and sponsoring through programmes like the Rural and Northern Immigration Pilot. Your CV must be tailored to catch their attention; get tips on crafting the perfect international CV format to stand out.
8. Healthcare Support and Personal Care Aide
Canada's aging population is driving a powerful and consistent demand for compassionate care providers. This has opened up numerous opportunities for Nigerians seeking unskilled jobs in Canada with visa sponsorship in roles like healthcare aides, personal support workers, and long-term care assistants. These positions are crucial for supporting the elderly and individuals with health challenges in hospitals, retirement homes, and private residences.
Many Canadian healthcare facilities and home care agencies actively use immigration programmes, such as the Temporary Foreign Worker Program (TFWP) and specific Provincial Nominee Programs (PNPs), to fill these essential roles. Employers in this sector are often experienced in the sponsorship process, making it a more accessible pathway for qualified international applicants.
Why This is a Top Opportunity
The critical need for care workers makes this a highly stable and in-demand field. Unlike many other sectors, healthcare support roles are less affected by economic downturns, offering long-term job security. The work is deeply rewarding and provides a direct route into Canada's regulated healthcare industry. Provinces like Ontario, British Columbia, and Alberta have a particularly high demand due to their large and aging populations, with employers frequently looking abroad to find dedicated staff.
Actionable Tips for Success
- Obtain Relevant Certifications: While a degree is not needed, completing a short certificate course as a Personal Support Worker (PSW) or Health Care Assistant (HCA) in Nigeria can significantly boost your profile.
- Highlight Soft Skills: Emphasise qualities like compassion, patience, reliability, and excellent communication skills in your CV. Provide examples of how you've demonstrated these, perhaps by caring for an elderly family member, which is a common experience in Nigeria.
- Research Provincial Requirements: Each province has slightly different regulations for care aides. Research the requirements for the specific province you're targeting to ensure you meet their standards.
- Showcase Commitment: Employers want to see a genuine interest in caring for others. Your cover letter should reflect your passion for helping vulnerable people, which is a key factor for success as you plan to relocate to Canada from Nigeria.
Visa Sponsorship Comparison of 8 Unskilled Jobs in Canada
Job Title Implementation Complexity 🔄 Resource Requirements 💡 Expected Outcomes 📊 Ideal Use Cases 💡 Key Advantages ⭐⚡ Agricultural Worker with Work Permit Moderate: Seasonal work, employer support 🔄 Moderate: Physical stamina, basic training 💡 Seasonal employment, pathway to PR 📊 Seasonal farms, rural areas, various crops 💡 High demand, employer housing, contract renewals ⭐ Food Service Worker with LMIA Support Moderate-High: LMIA process needed 🔄 Moderate: Food safety training, flexible hours 💡 Year-round work, customer service skills 📊 Restaurants, hotels, tourist regions 💡 Quick hiring, flexible shifts, tips income ⚡ Hotel Housekeeping and Maintenance Staff Moderate: Entry-level with hospitality training 🔄 Moderate: Certifications and reliability 💡 Stable employment, career growth opportunities 📊 Hotels, resorts, tourist destinations 💡 Strong job security, benefits, professional development ⭐ Warehouse and Factory Worker Moderate: Shift work, unionized environments 🔄 Moderate: Safety training, physical endurance 💡 Full-time with advancement, higher wages 📊 Manufacturing, distribution centers 💡 Higher wages, union benefits, skill development ⭐ Construction Laborer and Helper High: Safety training and on-the-job learning 🔄 High: Physical fitness, safety gear 💡 Skill development, potential trades certification 📊 Urban construction sites, infrastructure projects 💡 Above-average wages, skill pathway, overtime pay ⭐ Cleaning Services and Janitorial Work Low: Basic training, minimal language needs 🔄 Low: Attention to detail, physical stamina 💡 Stable, year-round part-time/full-time work 📊 Commercial, healthcare, schools 💡 Flexible scheduling, low stress, potential for own business ⚡ Retail Sales Associate and Cashier Moderate: Customer service training 🔄 Moderate: Language skills, communication 💡 Skill development, networking, commission potential 📊 Retail chains, growing communities 💡 Language skill growth, indoor work, advancement ⭐ Healthcare Support and Personal Care Aide High: Certification and training required 🔄 High: Compassion, physical and emotional stamina 💡 Stable employment, meaningful work, PR pathway 📊 Healthcare facilities, long-term care 💡 Higher wages, strong demand, professional growth ⭐ Final Thoughts
Navigating the path to Canada can feel complex, but as this guide has shown, numerous opportunities exist for determined individuals. The key takeaway is that securing one of the many unskilled jobs in Canada with visa sponsorship is entirely achievable, even without a formal degree. From the fields of an agricultural worker to the bustling kitchens of a food service worker, or the essential roles in hotel housekeeping and construction, Canada’s economy has a genuine need for your hard work and dedication.
Remember that success in this journey is not just about finding a job; it is about strategic preparation. Each role we have explored, whether in a warehouse, a retail store, or as a personal care aide, requires a specific approach. Your ability to tailor your CV, write a compelling cover letter, and network effectively will set you apart from other applicants. Think of it like preparing for a big move from Lagos to Abuja—you need to plan your route, pack strategically, and have your documents in order.
Your Action Plan for Success
To turn this information into tangible results, focus on these critical next steps:
- Refine Your Search: Do not just apply for any job. Focus on the sectors with high demand, such as agriculture, hospitality, and healthcare support. Use the job titles and keywords discussed (e.g., "LMIA-approved farm worker," "hotel cleaner with sponsorship") on platforms like Job Bank and Indeed Canada.
- Prepare Your Documents: Ensure your passport is valid, and start gathering any relevant work experience letters or references. A well-organised application package shows professionalism and seriousness to potential employers.
- Build Your Financial Foundation: Moving to a new country involves significant costs. Start saving diligently and create a detailed budget for your visa application fees, flights, and initial settlement expenses. As you plan your move and new career, remember that developing strong financial literacy skills will be essential for managing your earnings and saving for the future in a new currency.
- Stay Persistent and Positive: The application process can be long and sometimes discouraging. You may face rejections, but do not let them stop you. Each application is a learning experience. The resilience and hustle that Nigerians are known for will be your greatest asset.
Ultimately, securing a job with visa sponsorship is more than just a work permit; it is your gateway to a new life, better opportunities, and a stable future for you and your family. The path is clear, the demand is real, and with the right strategy and perseverance, your Canadian dream is within reach.
Feeling overwhelmed by the immigration process? Get personalised guidance and connect with a community that understands your journey. Let JapaChat be your trusted companion, providing you with the expert advice and support you need to make your move to Canada a success. Visit JapaChat to start your consultation today.
