A Guide to the Canadian Work Visa Application
Thinking about moving to Canada for work from Nigeria can feel overwhelming, but plenty of Nigerians make this move successfully every year. I've seen it time and again. The key is to break the process down, and it all starts with one fundamental document: the work permit. Think of it as your official permission slip to be employed legally in Canada. Getting this right from the beginning is half the battle won.
Your Path to Working in Canada from Nigeria
Before you even dream of filling out forms, you need a clear strategy. The biggest mistake I see people make is diving in without understanding the basics. Taking a moment to grasp the core concepts will save you from common headaches and delays down the road.
Your entire application hinges on one crucial choice: which type of work permit you're applying for. Your personal circumstances will almost always lead you to one of two options.
Employer-Specific vs. Open Work Permits
The first, and most common for Nigerian professionals, is the employer-specific work permit. The name says it all—this permit ties you to a single Canadian employer. It clearly states the company's name, where you'll be working, and your exact job title. If you've already landed a job offer, this is your path.
Then there's the open work permit. This one offers more freedom, allowing you to work for almost any employer anywhere in Canada. However, it's not for everyone. These are usually reserved for specific situations, like for the spouses of international students or skilled workers in unique programs. For most people starting their journey from Nigeria, the goal is to get a job offer first, which then leads to an employer-specific permit.
To help you see the difference clearly, here’s a quick comparison:
Work Permit Types at a Glance
| Permit Type | Key Feature | Best For Applicants Who… |
|---|---|---|
| Employer-Specific | Tied to one company, location, and role. | Have a confirmed job offer from a Canadian employer. This is the most direct route for most professionals. |
| Open Work Permit | Not job-specific; allows work for most employers. | Meet specific criteria, such as being the spouse of an international student or a temporary foreign worker. |
Getting this distinction right is absolutely critical, as it determines which documents you'll need to gather.
My Two Cents: Don't waste your time applying for an open work permit unless you're absolutely certain you qualify. For 9 out of 10 applicants I've advised from Nigeria, the journey started with a solid job offer.
Of course, a huge part of this process is actually finding that job. If you're looking for practical ways to get noticed by Canadian recruiters, you should check out these strategies for using LinkedIn to find a job.
The Must-Haves: Core Eligibility Criteria
No matter which permit you apply for, Immigration, Refugees and Citizenship Canada (IRCC) has a set of non-negotiable requirements. You’ll need to convince an immigration officer of the following:
- You have genuine intentions to leave Canada once your permit expires.
- You have sufficient funds to support yourself (and any family coming with you) and to eventually return home.
- You are in good health (a medical exam may be required).
- You have a clean criminal record (a police certificate is mandatory).
- You do not pose a security risk to Canada.
This isn't just about paperwork; it's about being part of a bigger picture. Canada is actively looking for skilled people like you. Projections from Statistics Canada show a massive need for immigration to fuel the economy, with the number of temporary residents on work permits expected to rise significantly by 2041. You can dig into the full statistical projections on StatCan’s website to see for yourself. This demand means your skills are valued, making a carefully prepared application more important than ever.
Getting Your Paperwork in Order: The Definitive Document Checklist

Think of your Canadian work visa application as a puzzle. Each document is a piece, and if even one is missing or doesn't fit right, the whole picture falls apart. A successful application isn't just about ticking boxes on a checklist; it's about presenting a clear, convincing story to the visa officer.
Your goal here is to be meticulous. Let’s break down exactly what you need, moving beyond just the names of the documents to what makes them strong.
The Two Most Important Pieces from Your Employer
For most Nigerians seeking an employer-specific work permit, the journey truly begins once you have two crucial documents from your Canadian employer. These are the foundation of your application, and they have to be flawless.
- The Job Offer Letter: This isn't just a casual note confirming you got the job. It must be printed on official company letterhead and packed with specific details: your salary, your official job title and responsibilities, the company’s physical address, and all conditions of your employment. IRCC officers examine this document with a fine-tooth comb to confirm the job is legitimate.
- Labour Market Impact Assessment (LMIA): If your role isn't LMIA-exempt, your employer must secure a positive LMIA and give you a copy of the decision letter along with the LMIA number. This is powerful stuff—it’s official proof that there were no Canadians or permanent residents available for the position. Your employer should have already confirmed whether your job needs one.
Proving Who You Are: Identity and Background Checks
These documents are all about verifying your identity and ensuring you're admissible to Canada. They seem straightforward, but small mistakes here can lead to frustrating delays.
First up, your valid Nigerian international passport. Make absolutely sure it has at least one completely blank page and that its expiry date is well beyond your planned stay in Canada. You'll also need two recent, passport-sized photos that meet the strict IRCC photo specifications—don't try to use an old one.
Next, you’ll need a Nigerian Police Character Certificate. This has to be obtained from the Nigeria Police Force Criminal Investigation Department (CID). My advice? Start this process early. It can sometimes take several weeks to come through. Remember, you'll need a police certificate from every country where you've lived for six months or more since you turned 18.
Pro Tip: Begin the police certificate process the moment you decide to apply. From my experience, this is often the single document that holds up applicants the most. Letting it lag can throw your entire timeline off schedule.
Making Your Case: Skills, Experience, and Financial Stability
This is where you show the visa officer you’re not only qualified for the job but also have the means to support yourself upon arrival.
Your proof of work experience is absolutely critical. This means getting detailed reference letters from your past and current employers. They must be on official letterhead and clearly state your job duties, employment dates, and salary. Vague, generic letters are a major red flag.
To back this up, you'll need your educational documents. Gather your diplomas, degrees, and academic transcripts. If you're in a regulated field like nursing or engineering, proof of your professional licences or certifications is a must.
Finally, let's talk about proof of funds, one of the biggest hurdles for many applicants. You must provide official bank statements from the last four to six months. Officers are looking for a stable, consistent balance—not a huge, last-minute deposit that looks suspicious. For a deeper dive, our general guide on how to apply for a work visa has more tips on building a solid financial profile.
Consider adding a Letter of Explanation (LOE) to your package. This is your chance to connect the dots for the visa officer. Use it to explain any employment gaps, clarify the source of your funds, or simply make a personal case for why you’re the perfect person for this job in Canada. A thoughtfully written LOE can be the final touch that convinces them to approve a borderline application.
Mastering the IRCC Online Portal
With your documents gathered, it's time to tackle the IRCC secure portal. This is the digital gateway for your Canadian work visa application. I know government websites can feel a bit daunting, but think of this as the place where you officially present your case to the immigration officer. A methodical approach here is your best friend.
First things first, you'll need to create your secure IRCC account. This isn't just a login; it's your personal dashboard for this entire journey. You'll see two options to sign in: a GCKey or a Sign-In Partner. For pretty much everyone applying from Nigeria, the GCKey is the way to go.
- The GCKey is a unique username and password you’ll create specifically for Government of Canada online services.
- A Sign-In Partner uses login details from a Canadian bank, which won't apply to you unless you already have a bank account in Canada.
Go with the GCKey option. You'll create your account and set up some security questions. My advice? Write these details down and keep them somewhere extremely safe. Losing access to your account is a massive headache you want to avoid.
The All-Important Eligibility Questionnaire
Once you're logged in, you won't just see a generic application form. The portal is smarter than that. It starts by taking you through an interactive eligibility questionnaire. This tool is designed to pinpoint the exact immigration programme you qualify for.
The answers you provide here are absolutely crucial. Based on your nationality, age, work experience, and the details from your job offer letter, the system generates a personalised document checklist. This is fantastic because it tells you exactly what IRCC needs for your specific situation, preventing you from uploading unnecessary files or, worse, forgetting a critical one.
So many applications hit a snag right at this point. Answering a question incorrectly can lead to the wrong checklist, meaning you might waste time applying for a visa you aren't even eligible for. Slow down and double-check every single answer.
Filling Out Forms and Uploading Your Documents
Your personalised checklist will link directly to the forms you need, like the main Application for Work Permit Made Outside of Canada (IMM 1295). You’ll need to download these PDFs, fill them out on your computer, and then hit the "validate" button within the form. This generates a page with unique barcodes. Save the validated version—this is what you'll upload.
Now for the final assembly. Here are a few tips from experience to avoid technical glitches:
- File Format: Stick to PDF. While other formats like JPG or DOC are sometimes accepted, I always convert everything to PDF. It’s universal and reliable.
- File Size: Keep an eye on the 4 MB maximum size for each upload slot. If a document is too large (this often happens with scanned passports), use a free online PDF compressor to shrink it without ruining the quality.
- Clear Naming: Name your files logically. "Adekunle-Passport.pdf" and "Adekunle-JobOffer.pdf" are much better than "scan_001.pdf." It keeps you organised and drastically reduces the risk of uploading the wrong document into the wrong slot.
This infographic gives a simple overview of how the portal guides you through the process.
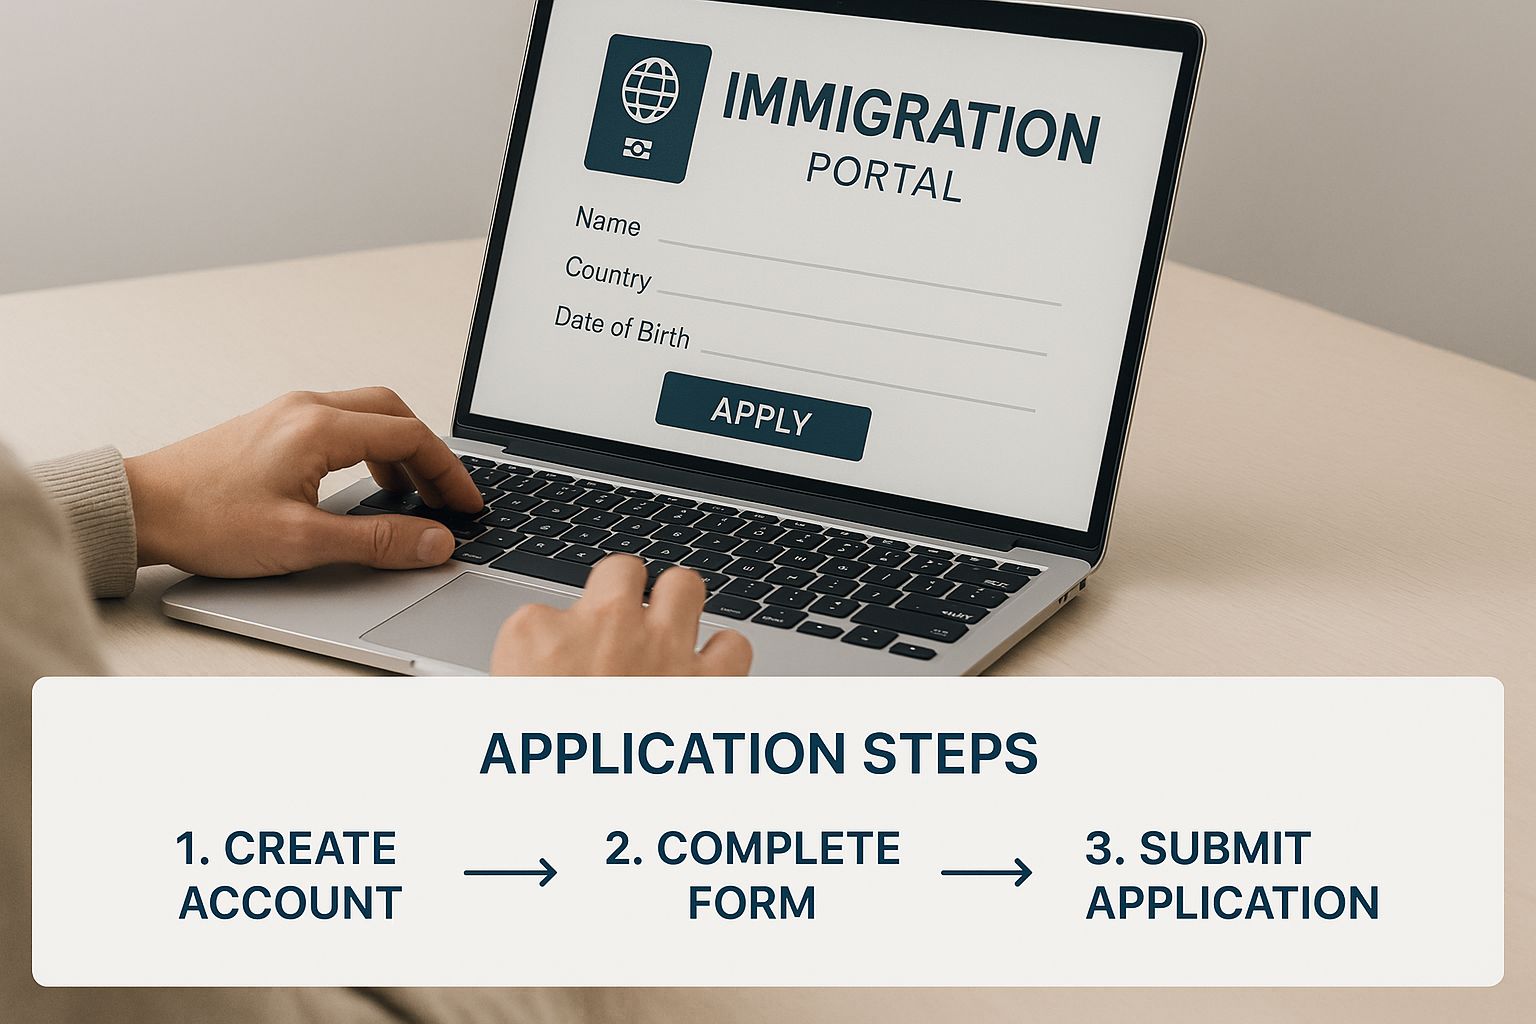
As you can see, it's a step-by-step system designed to ensure one stage is correctly done before you move to the next.
The good news is you don't have to finish everything in one go. The portal lets you save your progress and come back later. Just remember that it will time you out for security, so get into the habit of saving frequently. A clean, error-free submission is your best shot at getting a smooth and timely review.
Right, you've uploaded all your documents. Now comes the part that makes it all official: paying the fees and getting your biometrics done. Think of this as the point of no return, where you signal to IRCC that you're serious about your application. Getting this stage right is crucial for keeping things moving smoothly.
The IRCC portal will guide you directly to the payment gateway. It's a non-negotiable step; your application essentially sits in limbo until you've settled the government fees.
Getting a Handle on the Costs
So, what are you actually paying for? The costs are broken down into two distinct fees you'll handle during the online submission.
- Work Permit Processing Fee: This is the main fee IRCC charges to review your entire application. As of late 2023, you're looking at C$155 per person.
- Biometrics Fee: This covers the service of taking your fingerprints and a digital photograph. It costs C$85 for a single person or C$170 for a family of two or more people applying together.
Let’s put that into a real-world context. If you're a single professional from Nigeria applying, your total cost will be C$240 (C$155 for the permit + C$85 for biometrics). If you and your spouse are applying together, the cost would be C$480 – that’s C$155 each for processing, plus the flat C$170 family rate for biometrics.
A quick but important tip: always double-check the official IRCC website for the latest fees right before you pay. These figures can and do change.
Paying is usually straightforward. The portal takes major credit cards like Visa, Mastercard, and American Express, as well as some debit cards (Visa Debit, Debit Mastercard). Once the transaction goes through, do not close the window without downloading and saving the official receipt. This is your proof of payment, and you'll be glad you have it if any issues come up.
The Biometric Instruction Letter and Your VAC Appointment
With your payment confirmed, the system will almost instantly generate a critical document: the Biometric Instruction Letter (BIL). This is your golden ticket to the next step. You absolutely cannot book your biometrics appointment without it.
This letter will have your application number and clear instructions on how to book an appointment at a Visa Application Centre (VAC). For applicants in Nigeria, the VACs are located in Lagos and Abuja. You must book your slot online via the official VAC website for Nigeria; showing up unannounced won't work.
Heads up: Your BIL is only valid for 30 days from its issue date. Don't sit on this. If you wait too long and miss this window, your application could be refused for failing to comply. Book that appointment as soon as you get the letter.
When you go for your appointment, you’ll need to have three things with you:
- Your original, valid international passport.
- A printed copy of your Biometric Instruction Letter (BIL).
- The appointment confirmation letter you received from the VAC.
The actual biometrics collection is quick and painless. An official will scan your fingerprints and take a photo. It’s a simple identity verification step, but completing it is a major milestone.
And remember, these application fees are just one part of the financial picture. You'll also need to show you can support yourself when you land in Canada. Getting familiar with the requirements for proof of funds for Canada is a vital piece of the puzzle you should be working on.
What to Expect After You Hit 'Submit'

So, you’ve uploaded the last document, paid the fees, and finally clicked that "submit" button. Congratulations! Now comes the hard part: the waiting game. This period can feel like a complete black box, but knowing what’s happening behind the scenes can really help manage the anxiety.
The first question on everyone's mind is, "How long will this take?" Unfortunately, there's no single answer. Processing times can swing wildly depending on the number of applications in the system and the specifics of your own case. To give you some perspective, the volume is huge. Between 1 January and 31 May 2025, the Canadian government processed around 591,200 work permit applications. You can see how IRCC manages its application inventory on their official site.
Keeping Tabs On Your Application
While the official IRCC processing time calculator gives you a rough estimate, your IRCC secure account is where the real action is. This is your direct window into the process, showing you exactly where your file is at any given moment.
But those status updates can be cryptic. What does "In Progress" really mean? Getting this wrong can lead to a lot of needless worry. A little insight here makes all the difference. And if you’re still a bit fuzzy on the difference between the visa and the permit, our guide on the https://blog.japachat.com/canada-work-visa-permit/ is a great place to clear things up.
My Advice: Don't drive yourself crazy by refreshing the portal every hour. Checking once every couple of days is plenty. IRCC will send you an email if they need something from you or when a final decision has been made.
Decoding Your IRCC Application Status
Navigating the IRCC portal feels like learning a new language. To help you translate, here’s a simple guide to what each status update actually means for your application.
Decoding Your IRCC Application Status
| Status Update | What It Really Means | Your Next Action |
|---|---|---|
| Submitted | Your application has landed in the big pile. An officer hasn't opened your file yet. | Deep breaths. This is just the starting line. |
| Review of Eligibility | An officer is doing the initial check to see if you even qualify for the work permit. | Nothing to do here. This is a standard first step. |
| In Progress | This is the big, vague middle stage. It could mean anything from background checks starting to your documents being verified. | Stay patient. Keep an eye on your account for any messages requesting more info. |
| Final Decision | It's done! A decision has been made, but the portal won't immediately say "Approved" or "Refused." | Look for a new message or letter in your account. This document will have the final outcome. |
As you wait for that final decision, it’s a smart move to start thinking about the practical side of your move. Getting a head start on understanding your travel insurance options is one of those crucial steps that will save you a lot of hassle later.
Got Questions? We’ve Got Answers for Nigerian Applicants
When you’re navigating the Canadian work visa process from Nigeria, it’s completely normal for a million questions to pop into your head. The path can feel a bit different for us, and it’s smart to be prepared. Let's tackle some of the most common—and critical—questions we see from fellow Nigerians.
These aren't just generic FAQs. They come from real-world experience and seeing where applicants often get stuck.
Top Reasons for Work Visa Refusal and How to Avoid Them
Let's be honest, the biggest fear is putting in all that effort just to get a refusal. Knowing why applications get denied is the best way to build a file that gets approved. For Nigerian applicants, the rejections often circle back to a few key issues.
The number one reason? The visa officer isn't convinced you’ll leave Canada when your work permit expires. It’s a tricky concept called "dual intent." You're allowed to want to work temporarily and even hope to stay permanently later, but you must prove you have strong reasons to return to Nigeria if that doesn't happen.
Another huge one is insufficient proof of funds. It's not just about having enough money; it’s about the story your bank statements tell. A large, sudden deposit just before you apply looks very suspicious and is an easy reason for a visa officer to say no.
Finally, any doubt about the legitimacy of your job offer can sink your entire application. If your Canadian employer's documents are messy or the job doesn't seem to fit your background, the officer will question if the offer is real.
My Two Cents: Your Letter of Explanation is your secret weapon. Use it to get ahead of these issues. Don't leave it to the officer to connect the dots. Clearly explain your deep ties to Nigeria—talk about your family commitments, property you own, or even include a letter from your current boss in Nigeria outlining your career path upon return.
Can My Family Join Me in Canada?
This is a massive consideration for most people, and the good news is, yes, they often can. Canada’s immigration system is quite family-friendly. If you land a work permit for a skilled job, your immediate family can usually apply to come along.
A skilled job is one that falls into Canada's Training, Education, Experience and Responsibilities (TEER) categories 0, 1, 2, or 3. If your role is in one of these, here’s what becomes possible:
- Your Spouse or Common-Law Partner: They can often apply for an open work permit. This is a game-changer, as it lets them work for nearly any employer in Canada without needing their own job offer.
- Your Dependent Children: They can apply for study permits, allowing them to enrol in Canadian primary or secondary schools.
The smartest way to handle this is to submit everyone's applications together in one package. It makes the processing much smoother. Just remember, every family member still has to pass their own medical exams and background checks.
How Much Money Is Enough for Proof of Funds?
Ah, the million-naira question. IRCC doesn't give a specific magic number because it really depends on your situation—are you coming alone or with a family of five? But there are some solid benchmarks to work with.
As a single applicant, a safe range is to show you have access to between C$3,000 and C$5,000. This is money you need after paying for your flight and visa fees. It’s meant to cover your first few weeks of expenses—rent deposit, transport, groceries—before you get that first Canadian paycheque.
What’s even more critical than the amount is the quality of your proof. You’ll need to provide official bank statements for the last four to six months. Officers are looking for a few things:
- Consistency: Your balance should look stable or show a clear pattern of saving. A huge lump sum that appears out of nowhere is a major red flag that needs a very good explanation.
- Accessibility: The money must be liquid—cash in the bank. Property, shares, or locked-in investments don't count for this purpose.
- Ownership: The account has to be in your name. If you're getting help from a sponsor (like a parent), you must include a formal sponsorship letter and their financial statements to prove it.
What to Do If Your Application Is Rejected
Getting a refusal feels gut-wrenching, but it’s not always the end of the line. First, take a breath. The worst thing you can do is rush to reapply with the exact same documents. That's a recipe for another rejection.
Your first step is to study that refusal letter. The visa officer will list the specific reasons for their decision. This isn't just a rejection; it's your instruction manual for what to fix.
Once you understand the "why," your mission is to build a brand new, stronger application that tackles every single concern they raised.
- Was it about funds? Time to get more detailed financial documents. Maybe provide six months of statements instead of four, or add a letter carefully explaining where your savings came from.
- Were your ties to Nigeria too weak? You need to bring out the heavy hitters. Get property deeds, letters from dependent family members, or a formal letter from a Nigerian employer confirming your job is waiting for you.
- Was the job offer questioned? Get back to your Canadian employer. Make sure every detail on the offer letter is perfect and matches the LMIA information.
Only reapply once you have significant new evidence that directly addresses the previous refusal. For tricky cases, it might be worth consulting with a licensed Canadian immigration professional. They can offer a fresh perspective and help you get it right the second time around.
Planning your move to Canada from Nigeria is a big step, but you don't have to do it alone. For instant, expert answers to your unique immigration questions, let JapaChat guide you. Our AI-powered platform is designed specifically for Nigerians, providing clear, accurate information to help you plan your journey with confidence. Get started for free at JapaChat.
Leave a Reply