Category: Uncategorised
-

How to Apply for Work Permit in Canada from Nigeria
So, you’re thinking about working in Canada. That's a fantastic goal, but the first thing you need to sort out is which work permit is the right fit for you. It’s not a one-size-fits-all situation. Your entire application hinges on this initial choice, so it's crucial to get it right from the very beginning.
Essentially, you’re looking at two main doors: the employer-specific permit, which is the most common path, or the more flexible open work permit.
Getting to Grips With Canadian Work Permits

Choosing the correct application stream is more than just a box to tick; it shapes your entire journey. It determines the paperwork you'll need to gather, the specific rules you must follow, and even what your work life will look like once you land in Canada. Making a mistake here can lead to frustrating delays or even a flat-out refusal.
Let's break down these two very different pathways.
The Employer-Specific Work Permit: The Most Common Route
This is the path most people take. Just as the name implies, an employer-specific work permit links you directly to one company, in a specific location, and for a defined period. All these details—who you can work for, for how long, and where—are spelled out right on your permit.
To head down this route, your Canadian employer has some homework to do first. They typically need to give you:
- A formal job offer letter.
- Either a copy of a positive Labour Market Impact Assessment (LMIA) or an offer of employment number if the job is LMIA-exempt.
You'll hear the term LMIA a lot. It’s a document from the Canadian government (specifically, Employment and Social Development Canada) that confirms there’s a real need to hire a foreign worker because no Canadian citizen or permanent resident is available for the job. Your employer handles this part, but a positive LMIA is the golden ticket for your application.
The Open Work Permit: Flexibility for the Few
An open work permit is a different beast altogether. It isn't tied to a specific job, which means you can work for almost any employer anywhere in Canada. No LMIA needed, no pre-arranged job required. It sounds great, but it’s only available to people in very specific situations.
You might qualify for an open work permit if you, for example:
- Recently graduated from a Canadian university or college and are eligible for a Post-Graduation Work Permit (PGWP).
- Are the spouse or common-law partner of an international student or a skilled worker in Canada.
- Are part of special programmes, such as International Experience Canada.
Here’s the simplest way to think about it: Eligibility for an open work permit is about who you are (a spouse, a graduate). In contrast, eligibility for an employer-specific permit is based on a specific job offer you've received from a Canadian company.
Which Canadian Work Permit Is Right for You?
Use this quick comparison to see the key differences between employer-specific and open work permits.
Feature Employer-Specific Work Permit Open Work Permit Job Offer Required? Yes, must have a valid offer before applying. No, you can look for a job after you arrive. Employer Freedom Tied to one specific employer listed on the permit. Can work for almost any employer in Canada. LMIA Needed? Usually, unless the position is LMIA-exempt. Never. Who Is It For? Most foreign workers with a job offer. Spouses, recent graduates, participants in special programmes. Flexibility Low. Changing jobs requires a new permit. High. You can switch employers easily. Seeing the options side-by-side makes it clear how different the two paths are. Your personal circumstances will almost always point you clearly toward one or the other.
As you prepare, it's also wise to get a feel for the bigger picture. Reading a good guide to life in Canada can give you a heads-up on everything from local culture to finding a place to live.
Making the right choice between these permits lays the foundation for your entire application. While both can lead to a great career in Canada, the journey to get there is completely different. To get into the nitty-gritty, our detailed guide on https://blog.japachat.com/how-to-apply-for-work-visa/ offers even more clarity on the next steps. Aligning your situation with the correct permit is the key to a smooth and successful process.
Meeting Canada's Work Permit Eligibility Rules

Before you even dream of filling out forms, we need to talk about the absolute fundamentals: making sure you're eligible for a Canadian work permit. This isn't just about ticking boxes on a checklist. You're essentially building a case to persuade an immigration officer that you're a genuine visitor who will play by the rules.
Try to see it through their eyes. An officer's job is to assess risk. They need to be confident that you'll leave Canada when your permit expires and that you have the means to support yourself without trouble. For us applying from Nigeria, this means laying out clear, undeniable proof.
Proving You’ll Return to Nigeria
This is often the biggest hurdle. You have to convince the officer that you have strong reasons to come back home. These are what we call "ties to your home country"—the anchors that prove you aren’t just looking for a way to disappear in Canada.
So, what counts as a strong tie?
- Family: This is a big one. Having a spouse, children, or elderly parents who rely on you back in Nigeria is powerful evidence.
- Property & Assets: Owning land, a home, or a registered business shows you have significant investments you wouldn't just abandon.
- A Good Job: A letter from your current employer in Nigeria is golden. It should confirm you're on an approved leave and that your job is waiting for you when you get back.
Think about it this way: an application from a young, single person with no property and no current job might raise more red flags than someone who owns a flat in Abuja, has a family, and is officially on a sabbatical from a good job. The second person has a much more convincing story.
Showing You Have Enough Money (Proof of Funds)
You must prove you have enough cash to look after yourself—and any family coming with you—when you first land in Canada. This isn't just about showing a huge lump sum that appeared yesterday. It’s about demonstrating stable, accessible funds to cover your initial costs before that first Canadian paycheque.
While there’s no official magic number, a good rule of thumb is to have enough to cover things like your first month's rent, a security deposit, transport, and food. Having access to several thousand Canadian dollars is a solid starting point for a single person.
Here’s what visa officers want to see:
- Bank Statements: Provide at least four to six months of your official bank statements. They need to see a steady history of transactions and a consistent balance. A sudden, large deposit right before you apply looks very suspicious.
- Proof of Income: Your pay slips or an employment letter from your Nigerian job detailing your salary are excellent supporting documents.
- Sponsorship: If someone is sponsoring you, you’ll need a formal letter from them, proof of their financial stability (their bank statements), and evidence of how you're related.
Being Admissible to Canada
Finally, beyond your ties and your finances, you simply have to be admissible. This is basically a background check to make sure you don’t pose a health or security risk to the country.
To be admissible, you must:
- Be in good health (you'll likely need to do a medical exam with a panel physician).
- Have a clean criminal record.
- Not be considered a security risk.
One of the biggest pitfalls here is misrepresentation. This means providing false information or hiding something important. For example, not declaring that you were refused a visa to the UK or the US is a huge mistake. It can get your Canadian application refused and earn you a five-year ban. Be completely honest—it's non-negotiable.
Your ultimate goal is to paint a picture of a responsible, low-risk applicant. Every single document you submit should support the story that you're coming to Canada to work as planned and will respect the terms of your visa. Getting this right from the start is key to successfully navigating how to apply for a work permit in Canada.
Assembling Your Application Documents From Nigeria
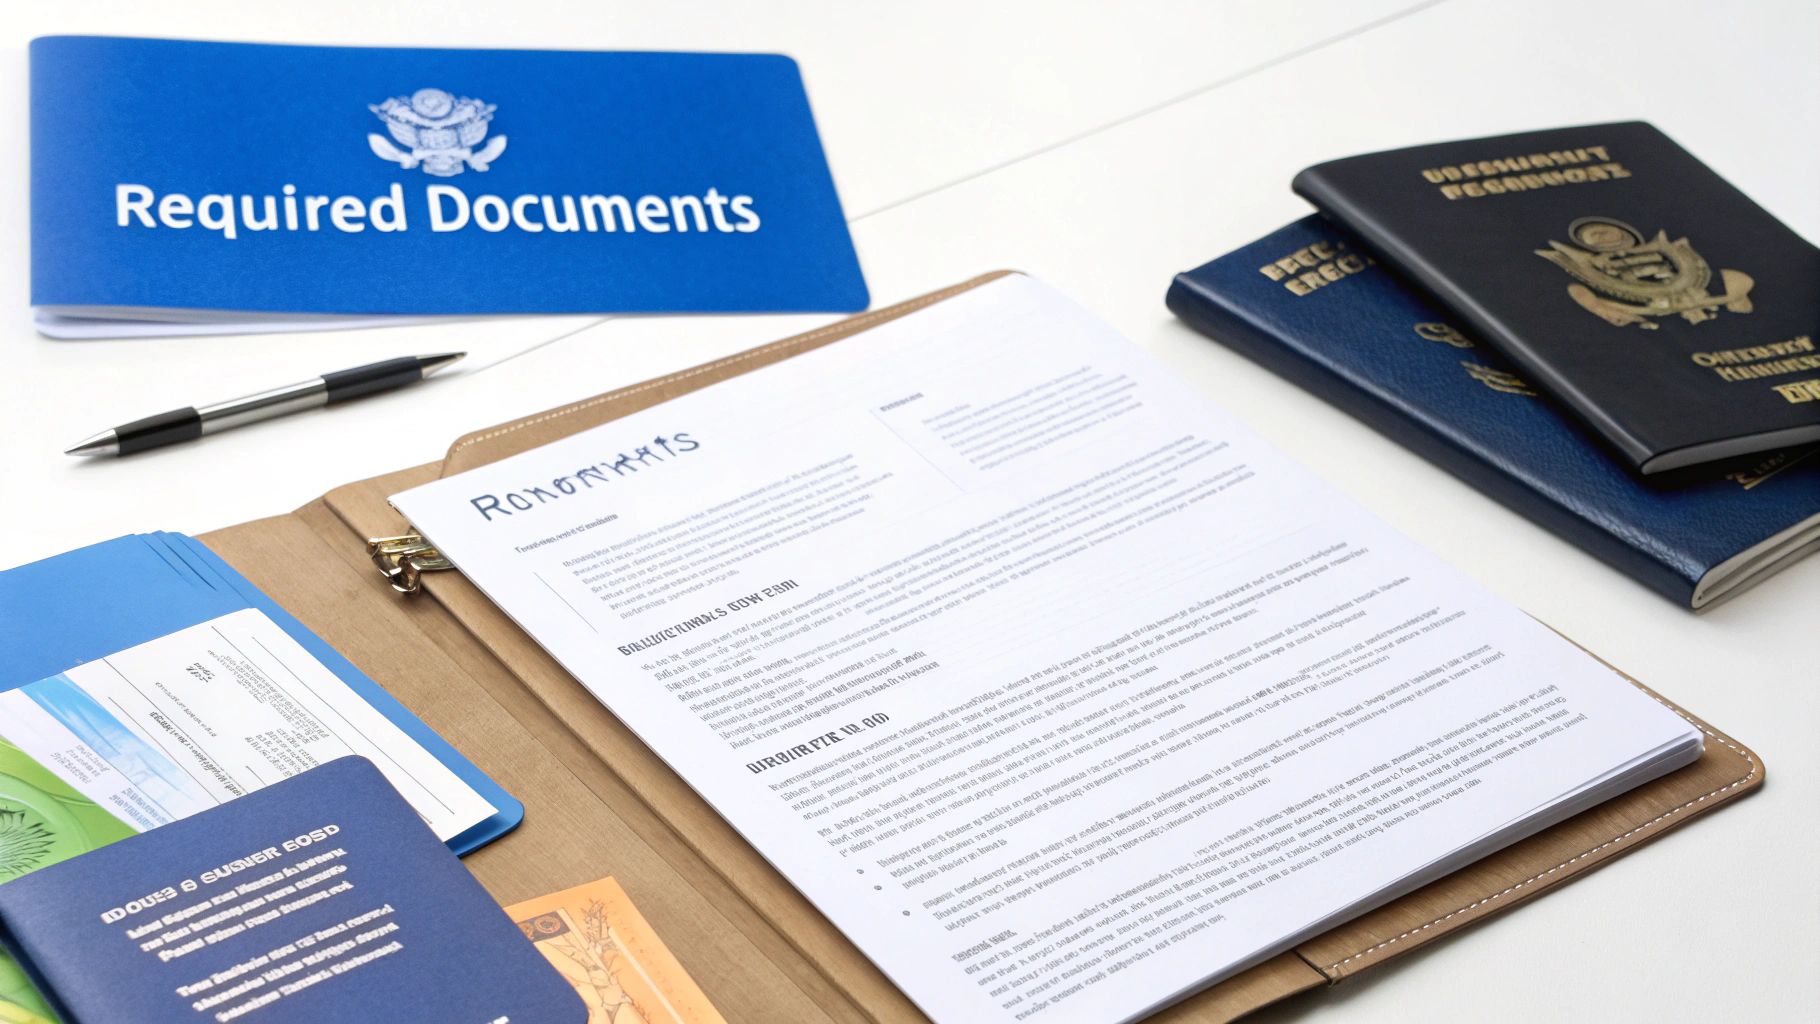
A perfectly organised application is your greatest asset in this process. Think of your documents as telling a story to the immigration officer; each piece must be solid, clear, and presented correctly. Getting this right isn't just about collecting papers—it's about building a convincing case for yourself.
This is where your attention to detail really matters. I've seen too many applications get delayed or even refused because of simple, avoidable mistakes made at this stage. Let's walk through exactly what you need, with a special focus on the requirements for applicants in Nigeria.
The Core Application Forms
Your journey into the paperwork begins with the main application forms. These are the absolute foundation of your submission, and they are non-negotiable. For a work permit application from outside Canada, you’ll be dealing with two key documents.
- Application for Work Permit Made Outside of Canada (IMM 1295): This is the big one. It’s where you’ll fill in all your personal details, your background, and the specifics of the job you plan to do in Canada.
- Family Information Form (IMM 5707): This form gives the Canadian government a picture of your immediate family—think spouse, parents, and children—whether they plan to join you in Canada or not.
Accuracy is everything here. Go over every entry and check it against your passport and other official documents. A tiny slip-up, like a misspelled name or an incorrect date of birth, can create major headaches down the line.
Essential Supporting Documents
Beyond the main forms, you'll need a stack of supporting evidence. Each document serves a specific purpose: to prove a claim you've made. Here are the critical items you'll need to gather in Nigeria.
Your Passport and Photos
First, your international passport. It must be valid for the entire time you plan to work in Canada. Make sure you have clear, colour photocopies of the bio-data page (the one with your photo and information).
Your application photos have very strict rules. Don't even think about using the same photo from your Nigerian passport. IRCC demands two recent, identical photos that meet their precise specifications for size, background, and even your facial expression. Your best bet is to find a professional photo studio that knows the requirements for a Canadian visa application.
Expert Tip: Don't try to save a few Naira by taking the photos yourself or using a cheap studio. Rejected photos are a common and completely avoidable reason for delays. Pay a professional to get it right the first time.
The Job Offer Letter
For an employer-specific work permit, this document is the heart of your application. The job offer letter needs to be on official company letterhead and packed with details, including:
- Your job title and a full description of your duties.
- Your salary and a clear breakdown of any benefits.
- The exact physical address where you'll be working.
- The start and end dates of your employment contract.
The letter must also include your employer's full contact information. It’s a formal contract that proves you have a legitimate job waiting for you.
For a deeper look into the different visa types and what they require, our overview of the Canada work visa and permit process offers some great additional context.
Proving Your Case From Nigeria
Some of the most important documents require you to deal with local authorities in Nigeria. My advice? Start these processes as early as possible. They can sometimes take much longer than you'd expect.
Police Certificates
You’ll need to provide a police clearance certificate from Nigeria. This document shows the Canadian government that you don't have a criminal record that would make you inadmissible. You can get this from the Nigeria Police Force Criminal Investigation Department (CID) at Alagbon.
Medical Examination
This isn't something your family doctor can do. You must have a medical exam with a physician specifically approved by IRCC, known as a panel physician. You can find the official list of approved doctors in Nigeria on the IRCC website. The doctor sends the results directly to Canadian immigration; you'll just get a confirmation document to include with your application.
Biometrics
Most applicants from Nigeria need to provide biometrics, which means your fingerprints and a photograph. After you submit your application and pay the fees, you will receive a Biometric Instruction Letter (BIL). You then have to book an appointment at a Visa Application Centre (VAC) in Lagos or Abuja to get this done.
Putting your documents together is a detailed but very manageable task. By understanding what each piece of paper is for and sticking to the requirements, you build a strong foundation for your journey to working in Canada.
Using the IRCC Online Application Portal
You’ve gathered all your paperwork, and now it's time to tackle the digital side of things: the Immigration, Refugees and Citizenship Canada (IRCC) online portal. This is where your hard work comes together. Getting this part right is crucial—it's not just about uploading files; it's about ensuring your application is submitted cleanly so it can be processed without delays.
Think of this as the final, critical step. Moving from a physical stack of documents to a digital submission requires careful attention to detail. Let's walk through how to navigate the portal, from creating your account to paying the fees.
Creating Your Secure IRCC Account
First things first, you'll need to create your secure online account. This account becomes your personal dashboard for everything related to your application. It’s your direct line to IRCC, where you’ll upload documents, get messages, and anxiously check for updates.
As you set up your account, you'll be asked to create security questions.
My advice: Don't just pick the first questions you see. Choose questions and answers you’ll absolutely remember but that would be impossible for someone else to guess. I always tell my clients to write them down and store them somewhere safe. You'll need them every single time you log in, and getting locked out is a headache you don't need.
Once your account is live, you’ll see the main dashboard. Take a moment to click around and get comfortable with the layout before you jump into the application itself. This is your mission control for the next few weeks.
Generating Your Personal Document Checklist
One of the best features of the portal is the eligibility questionnaire. This isn't just a simple quiz; it's a smart tool that builds a personalised document checklist just for you.
You'll answer a series of questions covering things like:
- Your nationality (Nigerian)
- Your age and family details
- The exact type of work permit you’re after (like an employer-specific one)
Once you’ve answered everything, the system gives you a unique personal reference code and a complete checklist of every form and supporting document required for your specific situation. This is brilliant because it removes all the guesswork. You know you're providing exactly what the visa officer needs to see, which is a huge step towards a successful application.
This infographic gives a great high-level view of the entire journey, from that initial eligibility check right through to getting a final decision.

As you can see, it's a clear sequence. Each step builds on the last, which really highlights why getting every single part right is so important.
Uploading Your Documents and Paying Fees
With your personalised checklist ready, it’s time to start uploading. Be meticulous here. The portal is picky about file formats (usually PDF, JPG, or DOC) and has a strict file size limit, typically 4 MB per file. If your document is too large, you’ll have to compress it—just make sure it remains clear and readable.
A Quick Word on the Letter of Explanation
You'll see an optional slot for a "Letter of Explanation." From my experience, you should always use it. This is your one chance to speak directly to the visa officer reviewing your file. You can explain a large, recent deposit into your bank account, address a gap in your employment history, or clarify any other point that might seem confusing. A clear, concise letter can make all the difference.
Finally, you’ll get to the payment page. Here, you'll need to pay both the work permit processing fee and the biometrics fee.
Fee Type Purpose How to Pay Processing Fee Covers the cost of actually assessing your application. Paid online with a credit card (Visa, MasterCard, American Express) or a debit card from a participating Canadian bank. Biometrics Fee Covers the cost of taking your fingerprints and photo. Paid at the same time as the processing fee. For applicants in Nigeria, a credit card is the most straightforward option. Double-check that your card is approved for international transactions and has enough of a limit to cover the fees, which are charged in Canadian dollars. Once the payment goes through, you'll get a receipt and, soon after, your Biometric Instruction Letter (BIL). You'll need that BIL to book your biometrics appointment at a Visa Application Centre (VAC).
Finding Opportunities in Different Canadian Regions
Your job search isn't just about finding any job; it's about finding the right job in the right place. Many people make the mistake of applying everywhere, but a smarter strategy is to focus on Canadian provinces where your skills are desperately needed. This shows immigration officers you've done your homework and are serious about contributing.
Think of Canada as a collection of unique job markets, not just one big one. The skills that are a hot commodity in Ontario's tech scene might not be what the resource-focused economies of Alberta or Saskatchewan are looking for. When an immigration officer sees your application, they're looking for a genuine need. If you're applying for a role in a region with a well-known labour shortage in your field, your application immediately becomes stronger.
Pinpointing High-Demand Regions
So, where are these opportunities? Pay close attention to the Atlantic provinces: Nova Scotia, New Brunswick, Prince Edward Island, and Newfoundland and Labrador. These regions are actively using immigration to solve critical labour shortages through programmes like the Atlantic Immigration Program.
This isn't just a general invitation; they have created specific pathways for people in fields that are crucial to their economies. Right now, there's a huge demand for professionals in healthcare, transportation, and various skilled trades across Atlantic Canada.
A targeted approach is always better. Applying for a job in a province that desperately needs your skills makes you a more attractive candidate to both employers and immigration officials. It shows you’ve done your research and are serious about contributing where you're needed most.
Evidence of Regional Growth
The numbers tell the story. These provinces are genuinely bringing in foreign talent. Just look at the growth in the non-permanent resident population, which includes people on work permits.
In a province like Nova Scotia, for instance, the number of non-permanent residents ballooned from roughly 27,967 to 53,479 between April 2022 and April 2023. This data, which you can find in Nova Scotia's official statistics, confirms that temporary work permits are a key strategy for filling jobs and growing the local economy.
These aren't just abstract opportunities; real people are getting these jobs.
While big job boards are a good start, don't forget to look at specialized platforms. If you work in a niche industry like technology, you can explore various job opportunities on boards dedicated to that sector. This helps you cut through the noise and connect directly with employers who need exactly what you offer. By aligning your job hunt with Canada's regional economic needs, you're not just applying for a job—you're positioning yourself for success.
Got Questions? You're Not Alone
The path to getting a Canadian work permit can feel like a maze, and it’s completely normal to have questions pop up. Having helped countless Nigerians through this exact process, I’ve noticed the same key concerns come up time and time again.
Getting solid answers to these questions isn't just about satisfying curiosity; it's about building a rock-solid application and avoiding simple, costly mistakes. Let's tackle some of the most frequent queries I hear from applicants just like you.
"How Much Money Is Actually Enough for Proof of Funds?"
This is the million-dollar question, isn't it? The truth is, there's no magic number set in stone by IRCC for work permit applicants. What they're looking for is a reasonable amount of settlement funds to convince the visa officer you can actually support yourself when you land in Canada.
Think about it from a practical standpoint. Before your first paycheque comes in, you’ll need cash for your first month's rent, a security deposit, groceries, and transportation. You need a buffer.
A good rule of thumb for a single person is to show access to several thousand Canadian dollars. If you’re bringing your family along, that figure needs to be substantially higher. But here’s the real secret: it’s less about the final number and more about the stability and origin of your funds.
A visa officer is trained to spot last-minute "flash funds" or large, unexplained deposits. They want to see a story in your bank statements from the last four to six months—a story of steady savings and income, not a desperate scramble to hit a target.
If you want to dig deeper into this, our comprehensive guide on demonstrating proof of funds for your Canada application offers more detailed strategies and examples.
"Can I Bring My Family with Me on a Work Permit?"
Yes, you absolutely can in many cases. Canada’s immigration system is designed to keep families together. If you secure a valid job offer in a skilled role—think NOC TEER 0, 1, 2, or 3—your spouse or common-law partner can often apply for an open work permit.
This open work permit is a massive advantage. It means your partner can work for nearly any employer in Canada, which not only gives your family a second income but also much more flexibility. Your dependent children can also come along, usually on study permits to attend school.
The trick is to include them in your initial application. You must list them as accompanying you and submit all their necessary forms and documents right from the start. And, of course, you'll need to show you have enough money to support everyone.
"What Are the Top Reasons My Application Might Be Refused?"
Knowing why others get refused is the best way to protect your own application. For Nigerian applicants, refusals often come down to a handful of recurring issues.
Here are the most common culprits:
- Weak ties to Nigeria: The visa officer wasn't convinced you’d return home after your permit expires. You need to show strong proof of what’s waiting for you back home—family, property, a business, or a job to return to.
- Shaky proof of funds: Your financial documents didn't paint a clear picture of your ability to support yourself (and your family) upon arrival.
- A messy application: This could be anything from incorrectly filled forms and missing documents to information that contradicts itself. Consistency is key.
- Doubts about the job offer: The officer might have questioned if the job offer was genuine or if the employer truly needed to hire a foreign worker.
Visa officers need to be confident in your "dual intent"—that you genuinely plan to work temporarily but will absolutely respect the rules and leave when your status ends. Every document you submit must support this idea.
"Realistically, How Long Will This Take?"
Processing times are the great unknown and can fluctuate wildly. The number of applications in the system, the country you're applying from, and the unique details of your case all play a part.
The only place to get a reliable estimate is the official IRCC website. They have a processing time calculator that gives you the most current estimates for applications from Nigeria. It’s a good idea to check it, but remember, it's just an estimate, not a promise.
Your best bet for speeding things up? Submit a perfect application from day one. Applying online is usually quicker than paper, and an application with no errors or missing pieces avoids the back-and-forth that creates frustrating delays.
"Do I Need to Look for a Job in a Specific Province?"
While you can technically work anywhere in Canada with the right permit, a strategic job search can make a huge difference. Some provinces are actively looking for skilled workers to fill major labour gaps through their Provincial Nominee Programs (PNPs).
For example, some provinces have been ramping up their immigration targets to fight labour shortages. In 2025, New Brunswick’s PNP nominations were boosted to 4,250 after business councils reported that over half of small business owners couldn't find the staff they needed. This makes it a prime target for skilled workers. You can learn more about how New Brunswick's immigration allocation increase creates opportunities on immigcanada.com.
When you apply for a job in a region with a documented need for your skills, your application becomes much more compelling. It shows the visa officer that you're not just looking for any job—you're filling a genuine economic need.
Navigating the complexities of Canadian immigration can be challenging, but you don't have to do it alone. JapaChat is Nigeria's first AI immigration expert, designed to give you instant, accurate answers to your specific questions. Plan your relocation with confidence and clarity by getting personalised guidance on visa requirements, documentation, and more. Start your journey today by signing up for free at https://japachat.com.
-
Documents Required for UK Tourist Visa: 8 Essential Tips
Planning a trip to the United Kingdom is an exciting prospect, but navigating the visa application process can feel daunting. A successful application hinges on providing the correct documentation to prove your intent and eligibility. This comprehensive guide breaks down every one of the documents required for a UK tourist visa, offering practical tips and highlighting common mistakes to avoid.
We will detail the 'why' behind each requirement, helping you present a strong and credible case to the UK visa authorities. For Nigerians planning their journey, getting this step right is crucial. Preparing a well-organised and complete application file is the first step towards a successful outcome. Let's dive into the essential checklist to get your documents in order and ensure a seamless application process. This list is your roadmap to ticking all the right boxes for UK Visas and Immigration.
1. Valid Passport
Your current passport is the cornerstone of your UK tourist visa application. This document serves as the primary proof of your identity and nationality for UK Visas and Immigration (UKVI). It must be valid for the entire duration of your planned stay in the UK.
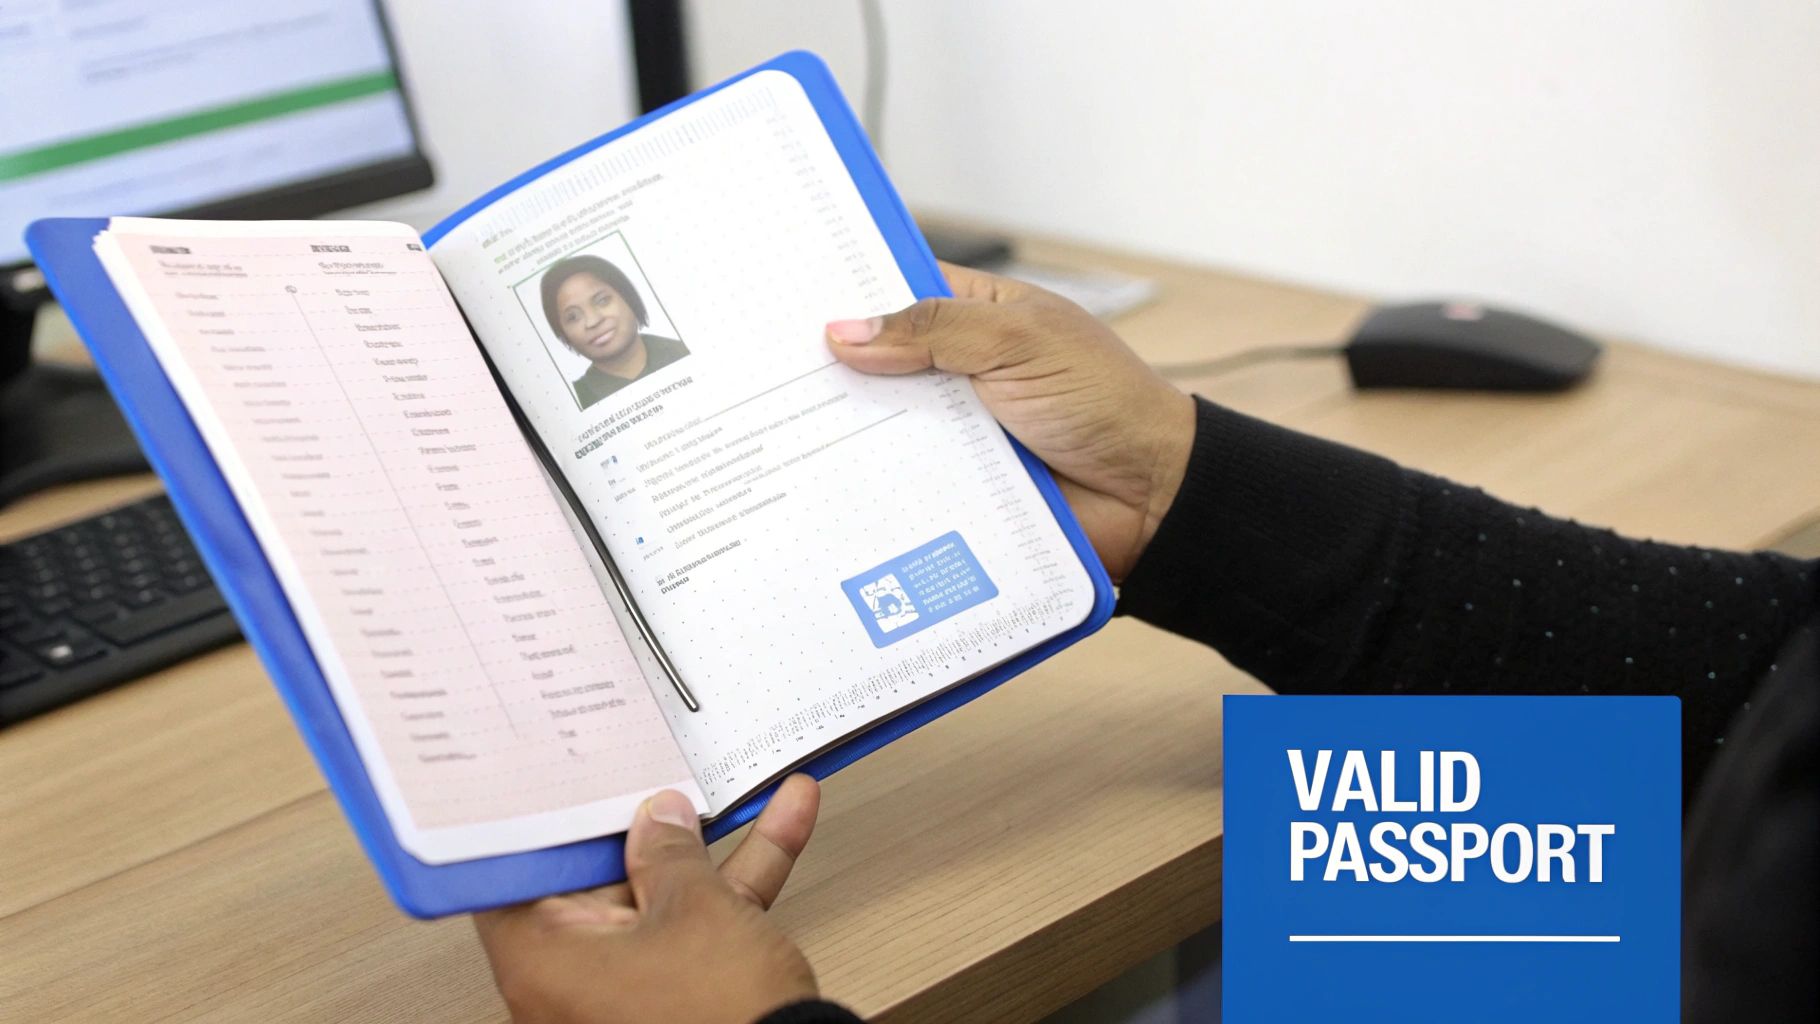
Crucially, your passport must contain at least one blank page, both sides empty, for the visa sticker. UKVI will not issue a visa if there is no space to affix it. While the official rule is validity for your trip, it is a strongly recommended best practice to have at least six months of validity remaining from your intended date of entry. This buffer prevents complications if your travel dates shift.
Key Requirements & Tips
To ensure your passport meets the strict standards, follow these actionable tips:
- Check Expiry Date: Before starting your application, check your passport's expiry date. If it's expiring within six to eight months, it is wise to renew it first. For Nigerians, you can learn more about renewing your passport online to avoid last-minute delays.
- Inspect for Damage: Carefully examine your passport for any damage, especially to the biodata page or the embedded biometric chip. A torn page or a faulty chip can lead to a rejection.
- Signature Consistency: Ensure the signature in your passport matches the signature you use on your application form and other supporting documents. Inconsistencies can raise red flags.
2. Completed Visa Application Form (VAF4A)
The VAF4A is the official online application form for the UK Standard Visitor visa, which covers tourism. This comprehensive digital form is where you will provide your personal details, travel plans, employment status, financial circumstances, and travel history. It is the narrative of your application, and its accuracy is paramount for a successful outcome.

Whether you plan to visit London for two weeks, attend a business conference, or visit relatives, this form is mandatory. It must be completed truthfully and submitted online before you can book your biometric appointment. The information you provide here will be cross-referenced with all your other supporting documents required for the UK tourist visa.
Key Requirements & Tips
To ensure your application form is filled out correctly and supports your case, follow these tips:
- Honesty and Thoroughness: Fill in every required section honestly. Omitting information or providing false details can lead to a refusal and a potential 10-year ban.
- Save Your Progress: The online form is lengthy. Use the "save and return" feature frequently to avoid losing your data due to a timeout or internet interruption. For those looking to streamline the application process, learning how to improve your typing speed can enhance your efficiency.
- Consistency is Key: Double-check that all names, dates, and figures on the form exactly match those on your passport, bank statements, and other documents. Discrepancies are a major red flag for visa officers.
- Review Before Submission: Before you hit the final submit button, carefully review every answer. It is often helpful to have someone else look it over for errors you might have missed. Once submitted, changes cannot be made.
3. Bank Statements (Last 6 Months)
Your financial standing is a critical component of your UK tourist visa application. Providing six months of recent, official bank statements is how you prove to UK Visas and Immigration (UKVI) that you can afford your trip without needing to work or access public funds. These documents must clearly demonstrate a stable financial history, sufficient funds for your travel, and regular income.

The statements must be from a recognised financial institution and reflect the account holder's name and address. For example, a salaried individual should show consistent monthly wage deposits, while a business owner's statements might show regular transfers from a business account. The goal is to paint a clear, honest picture of your financial situation, proving you have a strong reason to return to Nigeria.
Key Requirements & Tips
To present your financial evidence effectively, consider these actionable tips:
- Explain Large Transactions: If your statements show any unusually large deposits or withdrawals, provide a brief, written explanation and supporting evidence. For instance, if you sold a car, include the sales receipt. This prevents suspicion about "funds parking," where money is temporarily moved into an account to inflate the balance.
- Use an Active Account: Submit statements from your primary, active current account that shows your regular day-to-day spending and income. A dormant savings account with a large balance is less convincing than an account that reflects your real financial life.
- Ensure Official Stamps: Every single page of your bank statement must be officially stamped and signed by the bank. A printout from an online portal is often insufficient unless it can be verified by the bank. This authenticity is non-negotiable.
- Maintain a Healthy Balance: Avoid letting your account balance drop to zero or a very low amount during the six-month period. A consistent, healthy closing balance demonstrates financial stability and responsible money management.
4. Employment Letter or Business Registration
Official documentation detailing your employment or business is a critical component of the documents required for a UK tourist visa. This evidence demonstrates strong ties to your home country, assuring the visa officer that you have a stable job or business to return to. It serves as proof of your professional status and financial stability, which are key factors in the visa decision process.
For employed individuals, this is typically a formal letter from your employer. If you are self-employed or a business owner, you will need to provide official company registration documents. The goal is to present a clear picture of your professional life in Nigeria, reinforcing your intention to leave the UK after your visit.
Key Requirements & Tips
To ensure your professional documents are convincing and meet UKVI standards, follow these actionable tips:
- Request the Letter Early: Contact your HR department or direct manager well in advance to avoid last-minute rush. The letter should be printed on official company letterhead and signed by an authorised person.
- Provide Verifiable Details: Ensure the letter includes the company's full address, phone number, and email. The details must be current as UKVI may contact your employer for verification.
- Be Specific in Content: The letter must state your job title, date of employment, current salary, and confirmation that your leave for the trip has been approved for the specified dates.
- Business Owners: If self-employed, provide your Certificate of Incorporation from the Corporate Affairs Commission (CAC), tax clearance certificates, and recent business bank statements to prove your business is active and legitimate.
5. Travel Itinerary and Accommodation Proof
A detailed travel plan is a crucial document required for a UK tourist visa, as it demonstrates the genuine purpose and structured nature of your visit. UKVI needs to see that you have a clear plan, which includes where you will stay and what you intend to do. This plan reassures the entry clearance officer that you are a genuine tourist with a well-thought-out trip.
Your itinerary should logically map out your intended activities, such as a city break in London with pre-booked theatre tickets or a tour of Scotland with confirmed accommodation in the Highlands. These documents must align with the duration and purpose stated in your application form. A detailed plan adds significant credibility to your application, showing you have organised your visit responsibly.
Key Requirements & Tips
To present a convincing travel plan, consider these actionable tips:
- Book Refundable Options: Where possible, make hotel and flight reservations that are fully refundable or can be cancelled without a major penalty. This provides proof without financial risk if your visa is delayed or denied.
- Create a Day-by-Day Plan: Outline your activities for each day of your stay. Include travel times between cities, names of attractions you plan to visit, and any pre-booked tours or event tickets.
- Match Itinerary to Purpose: Ensure your planned activities align with being a tourist. A schedule packed with business meetings would be inconsistent with a tourist visa application.
- Provide Host Details: If staying with a friend or relative, you must provide a letter of invitation from them. This letter should confirm their relationship to you, their address, and their UK immigration status. Also include a copy of their passport or residence permit.
6. Travel Insurance Policy
While not always listed as a mandatory requirement, a comprehensive travel insurance policy is a highly recommended document for your UK tourist visa application. It demonstrates to the visa officer that you are a responsible traveller who is prepared for unforeseen circumstances, such as medical emergencies, trip cancellations, or lost baggage. This foresight can strengthen your application by showing you have the financial means to handle potential issues without relying on UK public funds.
Your policy must cover the entire duration of your intended stay in the United Kingdom. It should clearly state the coverage limits for medical expenses, emergency repatriation, and other benefits. A robust policy signals that you have meticulously planned your trip, which reflects positively on your overall application. For those travelling with family or friends, exploring and understanding group travel insurance can also be beneficial, offering a streamlined way to ensure everyone is protected.
Key Requirements & Tips
To ensure your travel insurance supports your visa application effectively, consider these actionable tips:
- Purchase Before Applying: Always buy your travel insurance policy before you submit your visa application. Include the policy certificate as one of your supporting documents.
- Check Coverage Details: Carefully read the policy's terms and conditions, paying close attention to exclusions, especially regarding pre-existing medical conditions. Ensure the policy explicitly covers COVID-19 related medical expenses and trip interruptions.
- Choose Reputable Providers: Opt for a well-known and reputable insurance company. A policy from a recognised provider carries more weight and ensures you receive reliable support if needed.
- Keep Documents Accessible: Once you have your visa and are travelling, keep both digital and physical copies of your insurance policy with you. You may be asked for it at the border, and you will need it to make a claim.
7. Proof of Ties to Home Country
Demonstrating strong ties to your home country is a critical part of your UK tourist visa application. These documents serve as compelling evidence to UK Visas and Immigration (UKVI) that you have significant reasons to return home after your visit and do not intend to overstay your visa. Strong ties can be familial, economic, social, or professional commitments that anchor you to your country of residence.
These ties assure the entry clearance officer of your intention to comply with UK immigration rules. For instance, providing evidence of property ownership, ongoing employment, or family responsibilities shows that your life is firmly established in your home country, making it highly likely you will return as planned. This is one of the most vital sets of documents required for a UK tourist visa.
Key Requirements & Tips
To effectively prove your strong connections to your home country, focus on providing clear and verifiable evidence:
- Compile Diverse Evidence: Do not rely on a single type of tie. Combine documents like property deeds or tenancy agreements, a letter from your employer confirming your role and approved leave, and birth certificates of dependent children. The more varied the evidence, the stronger your case.
- Demonstrate Financial Commitments: Include documents showing significant financial investments in your home country. This could be business ownership records, recent tax returns, or statements for investment portfolios that show you have a vested economic interest in returning.
- Clearly Articulate Responsibilities: If you have family or social duties, such as caring for an elderly parent or holding a key position in a community organisation, provide documentation to support this. A well-crafted letter can help explain these responsibilities; you can learn more about writing a compelling letter of intent for a visa application to strengthen your submission.
- Ensure Documents are Current: All evidence must be recent to reflect your current situation. An old employment letter or an outdated property valuation will carry less weight than documents issued within the last few months.
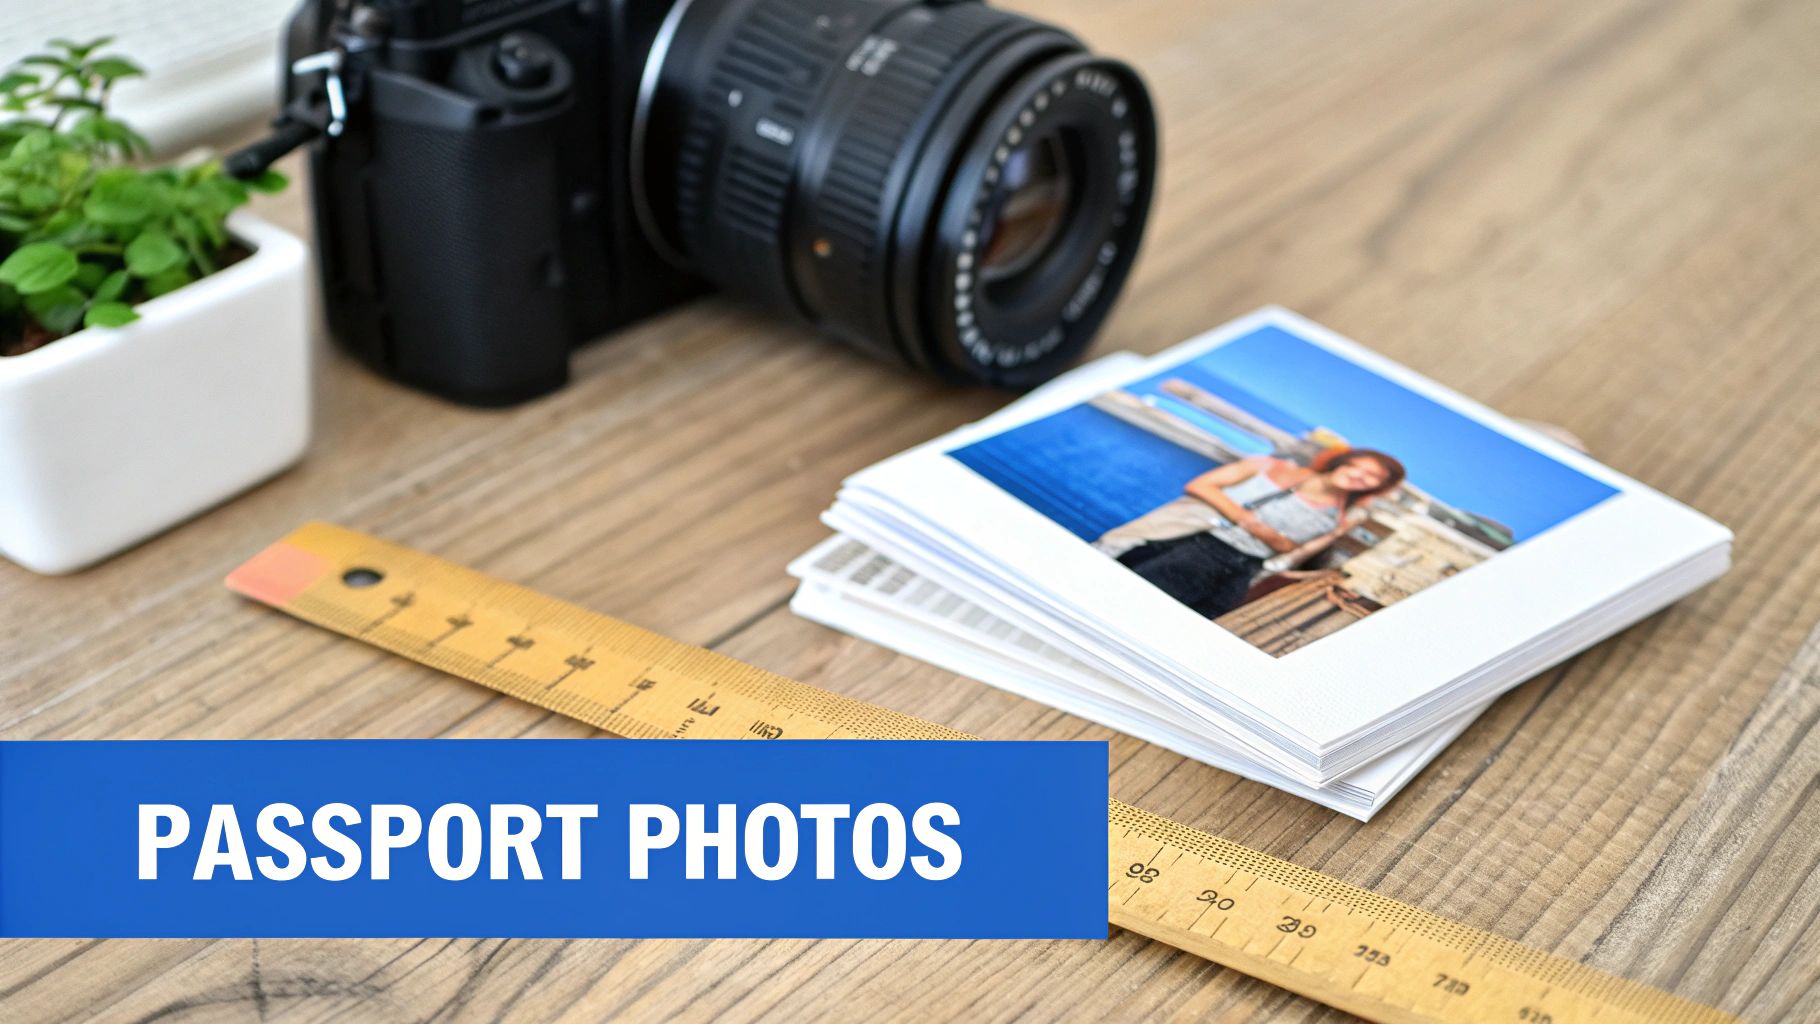
8. Passport-Size Photographs
Your application requires two recent, identical, colour photographs that strictly adhere to the UK’s visa photo specifications. These images are a critical biometric identifier used by UK Visas and Immigration (UKVI) to verify your identity against your passport and during your arrival in the UK. The photos must have been taken within the last month to accurately reflect your current appearance.
The photographs must be 45 millimetres high by 35 millimetres wide, the standard size used in UK photo booths and by professional photographers. They cannot be a cut-down version of a larger picture. Submitting photos that fail to meet the precise size, background, and quality requirements is a common and easily avoidable reason for an application delay or rejection, making it a crucial document for your UK tourist visa.
Key Requirements & Tips
To ensure your photographs are accepted without issue, follow these specific guidelines:
- Use a Professional Service: Visit a photo studio or a specialised service familiar with UK visa photo rules. Many photography shops in Nigeria explicitly offer this service. Avoid using home printers, as the paper quality and resolution may not meet the standards.
- Adhere to Background and Clothing Rules: The background must be a plain cream or light grey colour. Avoid wearing white, off-white, or cream-coloured tops, as this can cause you to blend into the background. Opt for a dark, solid colour instead.
- Maintain a Neutral Expression: You must have a neutral expression with your mouth closed. Do not smile, grin, or frown. Your eyes must be open, visible, and free from reflection or glare from glasses.
- Check the Official Guidance: Photo requirements can be updated. Always check the latest specifications on the official UK government website before taking your pictures to ensure compliance.
Key Document Checklist for UK Tourist Visa
Item Implementation Complexity 🔄 Resource Requirements ⚡ Expected Outcomes 📊 Ideal Use Cases 💡 Key Advantages ⭐ Valid Passport Moderate – renewal can be time-consuming Physical document, biometric data intact Proof of identity, nationality, travel history All visa applicants needing official ID Primary accepted international ID Completed Visa Application Form (VAF4A) Moderate – online form with multiple sections Reliable internet and digital device Accurate visa data submission and booking Standard Visitor visa applicants 24/7 access, error validation, instant confirmation Bank Statements (Last 6 Months) Low to moderate – collect official documents Official bank statements with seals Demonstrates financial capacity and stability Applicants proving funds for trip Clear financial evidence, shows stable income Employment Letter or Business Registration Moderate – official letter or certificates needed Employer/business documentation Confirms employment status and intent to return Employed or self-employed visa applicants Strong proof of ties, employment verification Travel Itinerary and Accommodation Proof Low – booking and reservation documents required Booking confirmations and reservations Shows genuine travel plans and exit intent Tourists or visitors with arranged plans Demonstrates planning, confirms trip details Travel Insurance Policy Low – purchase policy with required coverage Insurance documents covering trip duration Financial protection and preparedness Visitors wanting added security and visa requirement support Covers emergencies, shows responsibility Proof of Ties to Home Country Moderate – gather various personal/legal documents Property, family, education, business proofs Confirms strong links ensuring return Applicants with established home country ties Addresses overstaying concerns, strengthens application Passport-Size Photographs Low – recent photos meeting strict specs required Professional photo service or quality prints Current, standardized identification photos All applicants needing official photo ID Enhances application presentation, standard format Ready for Your UK Adventure? Start with a Perfect Application
Navigating the list of documents required for a UK tourist visa can feel like the first major challenge of your trip, but it is also the most crucial step towards success. Think of your application not as a collection of papers, but as a comprehensive portfolio that paints a clear and convincing picture of you as a legitimate visitor. Each document, from your meticulously organised bank statements to your detailed travel itinerary, serves a specific purpose: to demonstrate your financial stability, showcase your genuine tourist intent, and, most importantly, prove your strong ties to your home country, Nigeria.
The secret to a successful application lies in precision and honesty. A single missing document or an inconsistent detail can lead to delays or even a refusal. Therefore, it is vital to approach this process with diligence. Double-check that your passport has sufficient validity, ensure your employment letter clearly states your approved leave, and make sure your proof of ties is undeniable. By treating each requirement with the seriousness it deserves, you are not just ticking boxes; you are building a case of credibility that the visa officer can confidently approve.
Once your application is submitted, the exciting part begins: planning your actual journey. As you wait for your visa, you can start dreaming about the incredible experiences that await you. For inspiration on what to see and do, you can explore England's attractions and begin mapping out your unforgettable adventure. Mastering your document preparation is the key that unlocks the door to experiencing the UK’s rich history and vibrant culture first-hand.
Overwhelmed by the details? Get instant, personalised answers to your UK visa questions with JapaChat. Our AI-powered platform is specifically designed to guide Nigerians through the complexities of visa applications, ensuring you submit a complete and compelling package. Sign up for free at JapaChat and take the guesswork out of your journey.
-

Proof of Funds for Canada: Essential Tips & Requirements
Submitting your proof of funds for Canada is much more than just ticking a box on your application. Think of it as your financial launchpad, showing Immigration, Refugees and Citizenship Canada (IRCC) that you’re truly ready to build a new life here and can hit the ground running without immediate money worries.
Why Proof of Funds Is a Deal-Breaker

Let’s get one thing straight: showing you have the required settlement funds isn’t just another piece of paperwork. For an IRCC officer, it’s a critical sign of how well you're likely to settle in Canada. It's a safety net designed to make sure you can cover those initial, and often expensive, costs like your first month's rent, groceries, and transportation while you get on your feet.
This requirement is really about setting you up for success. Having those funds ready and available means you can focus on the important things, like finding a great job and settling into your new community, without the crushing stress of a financial crisis.
Which Immigration Programs Have This Requirement?
Whether you need to show proof of funds really boils down to the specific immigration program you’re applying through. For most of the economic immigration streams, it’s an absolute must.
You'll almost certainly need to provide proof of funds for these key programs:
- Federal Skilled Worker Program (FSWP): If you're applying through this popular Express Entry stream, showing you have the minimum settlement funds is mandatory.
- Federal Skilled Trades Program (FSTP): Just like with the FSWP, skilled trades applicants need to prove they have the financial resources to support themselves.
- Most Provincial Nominee Programs (PNPs): While the exact rules can differ from one province to another, the vast majority of PNPs will ask for settlement funds, especially if you’re coming through an Express Entry-linked stream.
The thinking behind this is pretty simple: it protects both you and the Canadian system. The government wants to see that newcomers can support themselves initially without needing to rely on social assistance. This ensures a smoother start for you and a positive contribution to the economy from the get-go.
Now, not everyone has to jump through this hoop. The biggest exception is for those applying under the Canadian Experience Class (CEC). If you have recent Canadian work experience, IRCC generally trusts that you've already proven you can integrate into the job market, so proof of funds isn't required. Similarly, applicants who already have a valid, arranged job offer in Canada are often exempt.
The logic here is all about assessing your readiness. If you've already worked in Canada or have a job lined up, you've already cleared a major settlement hurdle. You can learn more about why this financial vetting is so important by reading up on the proof of funds for Canada PR process.
Calculating How Much Money You Actually Need
Getting the proof of funds calculation right is one of the most critical parts of your application. This isn't just a number plucked out of thin air; it’s a specific amount tied directly to your family size, designed to ensure you can support yourself and your family upon arrival. The figure is based on 50% of the Low Income Cut-Off (LICO) totals—essentially, the poverty line in Canada.
One of the biggest tripwires for applicants is understanding who counts as a family member. It’s broader than you might think. Immigration, Refugees and Citizenship Canada (IRCC) includes you, your spouse or common-law partner, your dependent children, and even your spouse's dependent children.
Crucial Point: You have to include all these family members in your calculation, even if they aren’t coming to Canada with you. This is a common and costly mistake. For example, if you are a family of four but one child is staying behind to finish school, you must still show funds for a family of four.
Understanding the Official Requirements
These financial requirements are a moving target. To reflect the current cost of living, IRCC updates the required amounts every year. This makes it absolutely essential to check the official IRCC website for the latest figures right before you submit your application. What was correct six months ago might not be today.
The table below shows the minimum funds you need to have. The amount is based on the size of your family and these figures are updated annually by IRCC.
Minimum Settlement Funds Required for Express Entry
Number of Family Members Funds Required (in CAD) 1 $14,690 2 $18,288 3 $22,483 4 $27,297 5 $30,690 6 $34,917 7 $38,875 For each extra member +$3,958 Remember, these are the absolute minimums. An officer needs to be convinced you can genuinely support your family, so having a bit more than the required amount is always a good strategy.
Here's a visual breakdown to help you see how the funds scale with your family size.
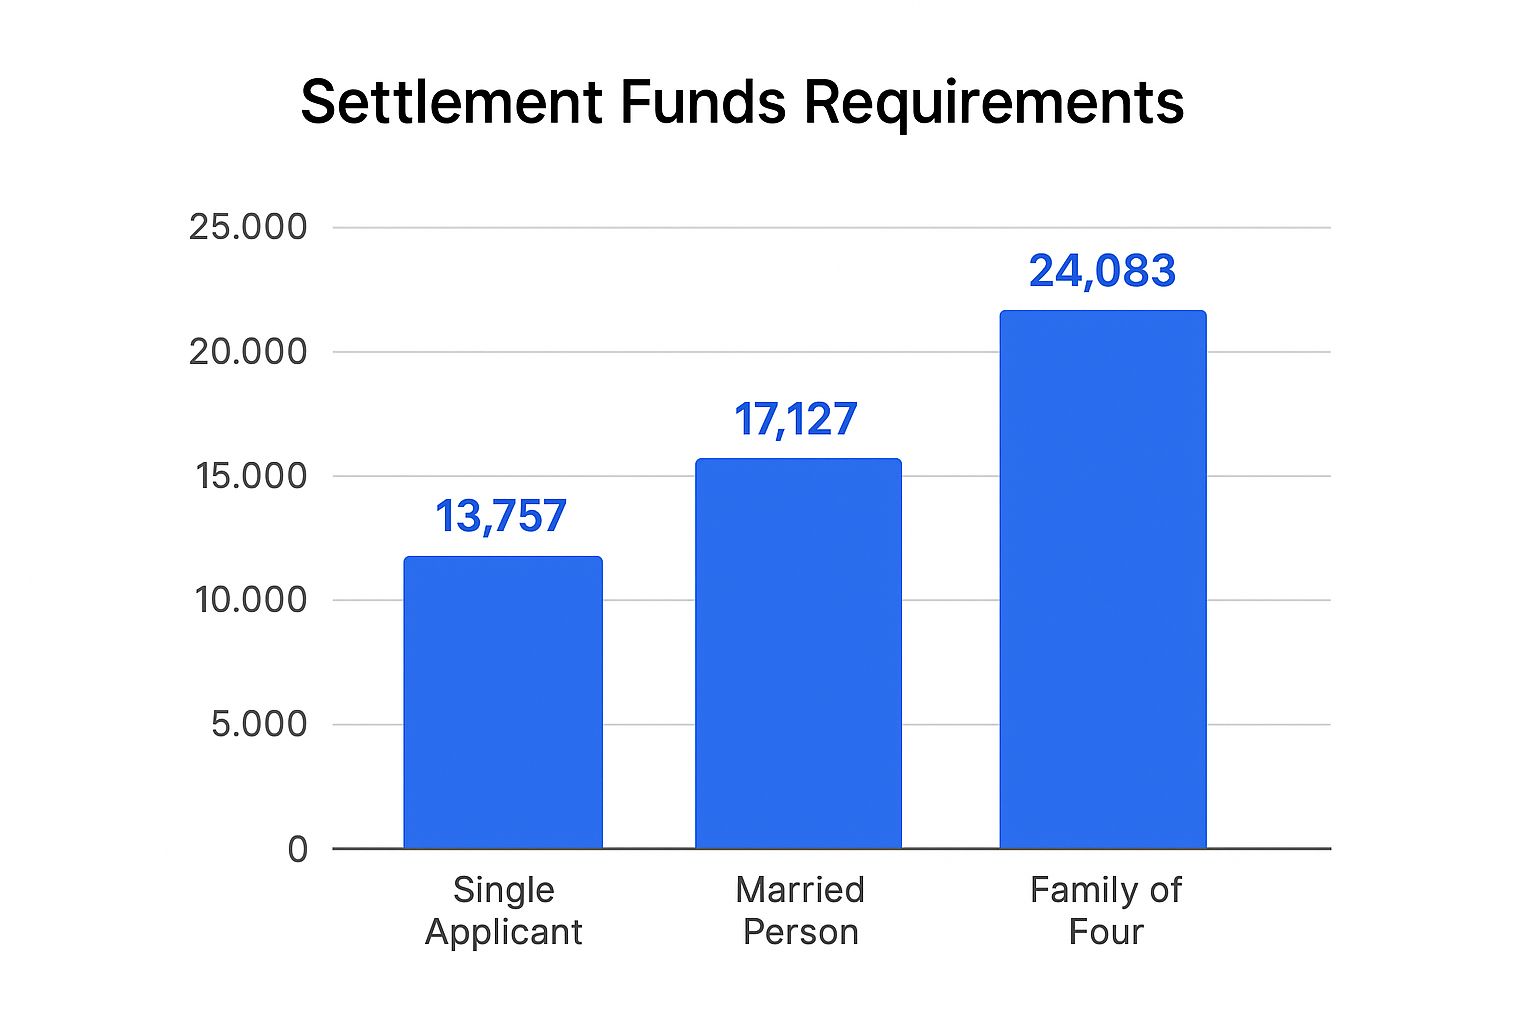
As you can see, the required amount increases significantly with each additional family member, reinforcing why an accurate calculation is so important.
Putting It All Together
Let's look at a practical example. Say we have a family of four—a primary applicant, their spouse, and two children. Even if the younger child is staying behind with grandparents for a year, IRCC considers them a family of four for settlement fund purposes. This means they need to prove they have at least $27,297 CAD ready and available.
Meeting the minimum is just one piece of the puzzle. It’s also wise to research the average salary expectations in Canada to create a realistic long-term budget. Your proof of funds gets you in the door, but smart financial planning is what will help you build a successful new life.
What Counts as Proof of Funds (and What Doesn't)

When you're preparing your https://blog.japachat.com/proof-of-funds-canada/, it's critical to understand that not all money is viewed the same way by an IRCC officer. The golden rule here is liquidity. Your funds must be readily available to you, with no strings attached.
This means you can't count assets like property or a car. The same goes for money tied up in stocks, bonds, or mutual funds—unless you've sold them off completely. The cash has to be sitting in your account, free and clear, before you can count it towards your settlement funds.
Getting the Official Bank Letter Right
A simple bank statement from an ATM won't cut it. What you need is an official letter from your bank, printed on their official letterhead. This document is your primary piece of evidence, and it needs to be flawless.
To be considered official, the letter from your bank must include:
- The financial institution's complete contact details (address, phone, and email).
- Your full name, clearly stated as the account holder.
- A comprehensive list of any outstanding debts or loans you have with them.
- The specific details for every current chequing, savings, or investment account.
For each account listed, the letter must show the account number, the date it was opened, the current balance, and—this is key—the average balance over the last six months. This six-month history is non-negotiable; it proves to the immigration officer that the money is genuinely yours and wasn't just borrowed and deposited last week to meet the minimum requirement.
A weak, generic statement just shows a snapshot in time. A strong, detailed letter tells the full story of your financial stability, leaving no room for an immigration officer to have doubts.
Acceptable vs. Unacceptable Funds: The Bottom Line
Let's be crystal clear about what works and what will get your application flagged. Borrowed money is an immediate red flag. This includes personal loans, lines of credit, or even a large "gift" from a friend or family member that looks like a loan. You have to be the undisputed owner of the funds.
So, what can you use?
- Savings Accounts: The most straightforward and common source.
- Chequing Accounts: Funds you can access on demand.
- Guaranteed Investment Certificates (GICs): Acceptable only if they are cashable or redeemable.
- Term Deposits: Like GICs, these are fine as long as you can liquidate them easily.
While your main goal is to satisfy IRCC, getting these documents in order now has other benefits. You’ll find that understanding financial requirements for rental applications in Canada is much easier when you've already done this homework. Landlords often ask for similar proof of financial stability, so you'll be one step ahead when it's time to find a place to live.
Getting Your Financial Paperwork in Order
https://www.youtube.com/embed/PDPywsQviN8
Alright, enough with the theory. Let's get down to the practical steps of pulling together your financial documents. This part of the process is all about being meticulous. Think of it as building a case for your financial stability, where every document adds another piece of solid evidence. Your goal is to be so clear and organised that the immigration officer has zero questions.
The most important piece of this puzzle is an official letter from your bank. This isn't just any printout; it has to be on the bank's official letterhead and include their full contact information. This letter is the foundation of your entire proof of funds submission.
What Your Bank Letter Absolutely Must Include
When you walk into your bank or contact your representative, you need to be specific. Don't just ask for a "proof of funds letter" and hope for the best. You'll save yourself a world of headaches and potential delays by giving them a precise checklist of what IRCC requires.
Make sure the letter explicitly states the following:
- Your full name (matching your application, of course).
- A complete list of all your current chequing and savings accounts.
- The exact account numbers for each of these accounts.
- The date each account was opened.
- The current balance in each account as of the letter's date.
- The average balance for the past 6 months for each account.
That 6-month average balance is non-negotiable. It's how the officer verifies that your funds are genuinely yours and have been stable over time—not a last-minute loan from a relative to pad your account. For a deeper dive into what makes this document so persuasive, it's worth understanding the anatomy of a strong Proof of Funds (POF) letter.
Dealing with Translations and Digital Submissions
What if your bank statements are in a language other than English or French? Simple: you'll need them professionally translated. Every document you submit must be accompanied by a certified translation, which includes the original document, the translated version, and an affidavit from the translator.
A word of advice from experience: Don't put this off. Certified translators are often booked up, and a rushed job can introduce small but critical errors that could put your entire application at risk. Start this process early.
Once your papers are sorted, it's time to prepare them for digital upload. This is where many applicants trip up. IRCC has specific guidelines, and just dumping your files with names like "Scan1.pdf" is a recipe for confusion.
Be descriptive and organised. A file name like "MainApplicant_ProofOfFunds_BankLetter_May2024.pdf" makes life much easier for the officer reviewing your file. Also, double-check that your scans are crystal clear and easy to read. These small details show you're a serious, organised applicant, which is a theme that runs through the entire application for PR in Canada process. A little bit of organisation now will save you a massive amount of stress down the line.
Common Application Mistakes You Need to Avoid

It’s a tough reality, but a simple mistake with your proof of funds for Canada can bring your entire immigration dream to a screeching halt. Even with a perfect application in every other respect, an error in your financial documents can lead to a flat-out rejection. Knowing what these common pitfalls are is the best way to steer clear of them.
One of the biggest red flags for immigration officers is a sudden, large deposit into your account right before you apply. They’re specifically trained to look for this. If your bank balance shoots up from ₦2,000,000 to ₦15,000,000 overnight without a crystal-clear, documented explanation, they will immediately suspect the money is borrowed. That’s a deal-breaker.
The Problem with Borrowed Money
Let me be clear: IRCC is incredibly strict about this. Borrowed money is not acceptable. This covers everything from a line of credit or a bank loan to an informal loan from a family member. The money has to be yours, free and clear, and ready for you to use to support your settlement in Canada.
When you use borrowed funds, you’re sending a signal to the visa officer that you lack the financial stability needed to succeed. The whole point of showing settlement funds is to prove you won’t struggle financially when you land. Borrowed money completely defeats that purpose.
Documenting Large Gifts the Right Way
So, what happens if a parent or another family member gives you a large sum of money as a genuine gift? That can be okay, but you have the responsibility to prove it’s a true gift, not a loan disguised to meet the requirement. Just having the money appear in your account isn't going to cut it.
For a gift to be accepted, you need to provide solid proof:
- A formal gift deed: This is a signed, legal letter from the person giving you the money. It must explicitly state the funds are a gift, not a loan, and that they have no expectation of you ever paying it back.
- Proof of the transaction: You need to show the complete paper trail. This means bank transfer slips, a statement from the giver's account showing the money leaving, and your bank statement showing the same amount arriving.
Without this airtight documentation, the funds will be viewed with suspicion. Remember, the burden of proof is always on you to be transparent and thorough.
A lot of applicants make the mistake of thinking a simple letter of explanation is sufficient. You really need both the formal gift deed and the transaction records to build a case that leaves no room for an officer's doubt.
Inconsistent Financial History
Another mistake I see all too often is failing to keep the required balance consistently. That six-month history rule isn't a suggestion; it's a fundamental part of the review process. An officer will look at your average balance over that entire period to confirm the funds are stable and truly belong to you.
Dipping below the required minimum, even for just a few days within those six months, can be a major problem. It suggests the funds might not be fully at your disposal. Your financial history needs to tell a consistent story of stability. As you gather your documents, remember you're not just providing a snapshot of your account today; you're building a financial narrative that supports your entire immigration goal. Getting these details right is a crucial part of creating an Express Entry profile that leads to an approval.
Common Questions We Hear About Proof of Funds
Working through the proof of funds requirement for Canada can feel a bit like navigating a maze. Just when you think you have it all figured out, a specific situation pops up and you're left wondering. Let's clear the air and tackle some of the most common questions we see from applicants.
One of the first things people ask is about getting a little help from family. Can that generous gift from your parents count towards your settlement funds? The short answer is yes, but it comes with a strict process you absolutely have to get right.
A simple bank transfer won’t cut it. For a monetary gift to be accepted, you need to treat it as a formal, documented transaction. This means getting a signed gift deed – a legal letter from your parents confirming the money is a genuine gift and not a loan they expect back. You’ll also need to show a clear paper trail, from the transaction record of the money leaving their account to it landing safely in yours. Without this, an officer is likely to view it as a loan and reject those funds.
What if I Already Have a Job Offer in Canada?
This is where things can get a little tricky, and the answer really depends on the specific immigration program you’re using. It’s a common mistake to assume a Canadian job offer automatically means you don't need to show any settlement funds. That assumption can be a costly one.
If you're applying under the Canadian Experience Class (CEC), you're generally in the clear. Your work history in Canada is seen as proof you can support yourself. However, for those in the Federal Skilled Worker Program (FSWP) or the Federal Skilled Trades Program (FSTP), the story is different. Even with a valid Canadian job offer, you’ll almost always still need to show you meet the minimum funds requirement.
Here's a real-world scenario we see often: An applicant has foreign work experience and a Canadian job offer, so they qualify for both CEC and FSWP. If an officer assesses their application and finds a small issue with their CEC eligibility, they'll pivot to assessing it under FSWP. If you haven't included your proof of funds, your application will be dead in the water right there. It's always safer to have it ready.
How Long Do I Need to Have the Money in My Account?
You’ve probably heard people mention a "six-month rule." While you won't find that exact phrase on the IRCC website, it’s a golden rule to live by. Immigration officers will want to see your financial history for at least the six months right before you apply. Why? They need to confirm the money is genuinely yours, stable, and wasn't just borrowed last-minute to tick a box.
This look-back period gives them the full picture of your financial situation. They’re looking for stability—proof that the funds have been yours over a reasonable period, not just deposited last week. Any sudden, large deposits are a huge red flag unless you back them up with solid proof, like that gift deed we talked about. Think of your bank statements as telling the story of your financial readiness to start a new life in Canada.
Planning your move abroad can be complex, but you don't have to do it alone. JapaChat is Nigeria's first AI immigration expert, designed to give you instant and accurate answers to all your questions. Get the clarity and confidence you need by signing up for free.
-
How Much Is Canada Visa Fee in Nigeria? Complete Cost Guide
So, you're planning a trip to Canada and trying to figure out the visa costs. Let's break it down so there are no surprises.
When applying from Nigeria, you're looking at two primary government fees for a standard visitor visa. First is the application fee itself, which is CAD $100. Then, you have the biometrics fee, which costs CAD $85.
Add them together, and you get a total of CAD $185 per person. With the current exchange rate, this comes out to roughly NGN 210,900.
A Quick Look at Canada Visa Fees from Nigeria

Knowing the costs upfront is the first real step in your application journey. It’s helpful to think of the fees as two separate, non-negotiable parts of the process.
The application fee covers the administrative work—it’s what you pay the Canadian government to have an officer review your file. The biometrics fee pays for collecting your fingerprints and photograph at a Visa Application Centre (VAC). This is a mandatory step for security and identity verification.
Standard Visa Costs at a Glance
To make it crystal clear, here’s a table outlining the essential, non-refundable fees for a standard temporary resident visa application from Nigeria.
Standard Canada Visa Fees for Nigerian Applicants
Fee Type Cost in CAD Estimated Cost in NGN Application Processing Fee CAD $100 ~ NGN 114,000 Biometrics Fee CAD $85 ~ NGN 96,900 Total Per Person CAD $185 ~ NGN 210,900 Just a heads-up: the Naira amounts are estimates. They can and will fluctuate with the daily exchange rate, so it’s always a good idea to check the latest conversion before making a payment.
One Crucial Point: Both the application and biometrics fees are non-refundable. This is true whether your visa is approved or denied, which is why getting your application right the first time is so important.
While this covers the basics for a visitor visa, remember that the costs for study permits or work permits are different. For a complete look at the entire process, you should check out our detailed guide on how to relocate to Canada from Nigeria.
Decoding the Two Mandatory Visa Costs
When you’re applying for a Canadian visa from Nigeria, you'll come across two main fees that are absolutely non-negotiable. It’s really important to understand what each one is for, as it helps you budget properly and keeps things from getting confusing. Think of these as the two essential pillars of your application.
First up is the application processing fee. I like to call this the 'review fee'. This money goes directly to Immigration, Refugees and Citizenship Canada (IRCC), and it pays for an officer to actually sit down and go through your entire file. It’s a non-refundable charge that covers the administrative work, regardless of whether your visa gets approved or not.
The second compulsory cost is the biometrics fee. This is all about identity and security. You pay this fee to have your fingerprints and a digital photograph taken at a designated Visa Application Centre (VAC) in Nigeria. It's a critical step that allows the Canadian government to confirm you are who you say you are and run necessary security checks.
The Breakdown of Each Fee
Keeping these two costs separate in your mind makes the whole process clearer. One payment is for the evaluation of your paperwork, and the other is for the physical collection of your personal identification data.
According to the latest figures from the Canadian government, the standard temporary resident visa fee (which covers visitor visas) is CAD $100 per person. On top of that, the biometrics fee for Nigerian applicants is CAD $85. This brings your starting total to CAD $185 for a single applicant, before any other potential costs. It's always a good idea to verify the latest fee structures directly from the Canadian government just in case.
Key Takeaway: The application processing fee pays for the review of your case, while the biometrics fee pays for the collection of your identity data. Both are non-refundable and mandatory for Nigerian applicants.
By viewing them as two distinct but required steps, you can get a solid grip on the initial financial outlay. Understanding exactly how much a Canada visa fee is in Nigeria from the get-go ensures you're ready for the first, and most important, payments on your journey.
A Look at Visa Fees: Tourism, Study, and Work
Your reason for heading to Canada is the biggest factor determining your visa application cost. A simple holiday trip has one set of fees, while applying to study or work involves a different price structure. Getting a clear handle on these differences is the first step to budgeting properly for your application.
It's a common mistake to think all Canadian visas cost the same. They don't. The purpose of your visit—whether it's for a short holiday, pursuing a degree, or starting a new job—sets the specific application fee. This fee is completely separate from the biometrics fee, which is a standard cost you'll have to pay no matter which of these visas you apply for.
Side-by-Side Cost Comparison
Let's break down the main application fees for the most popular visa types Nigerians apply for. You can think of them like different service levels; a visitor visa requires a standard review, but study and work permits need a much deeper look into your plans, qualifications, and paperwork.
The table below gives you a clear financial snapshot of what to expect for each category.
Canada Visa Application Fees by Category for Nigerians
Visa Type Application Fee (CAD) Biometrics Fee (CAD) Total Fee per Person (CAD) Visitor Visa (Tourism/Visit) $100 $85 $185 Study Permit $150 $85 $235 Work Permit $155 $85 $240 As you can see, the base application fees for work and study permits are noticeably higher than for a standard visitor visa.
Here’s a simple breakdown of the main application fees, so the differences are crystal clear:
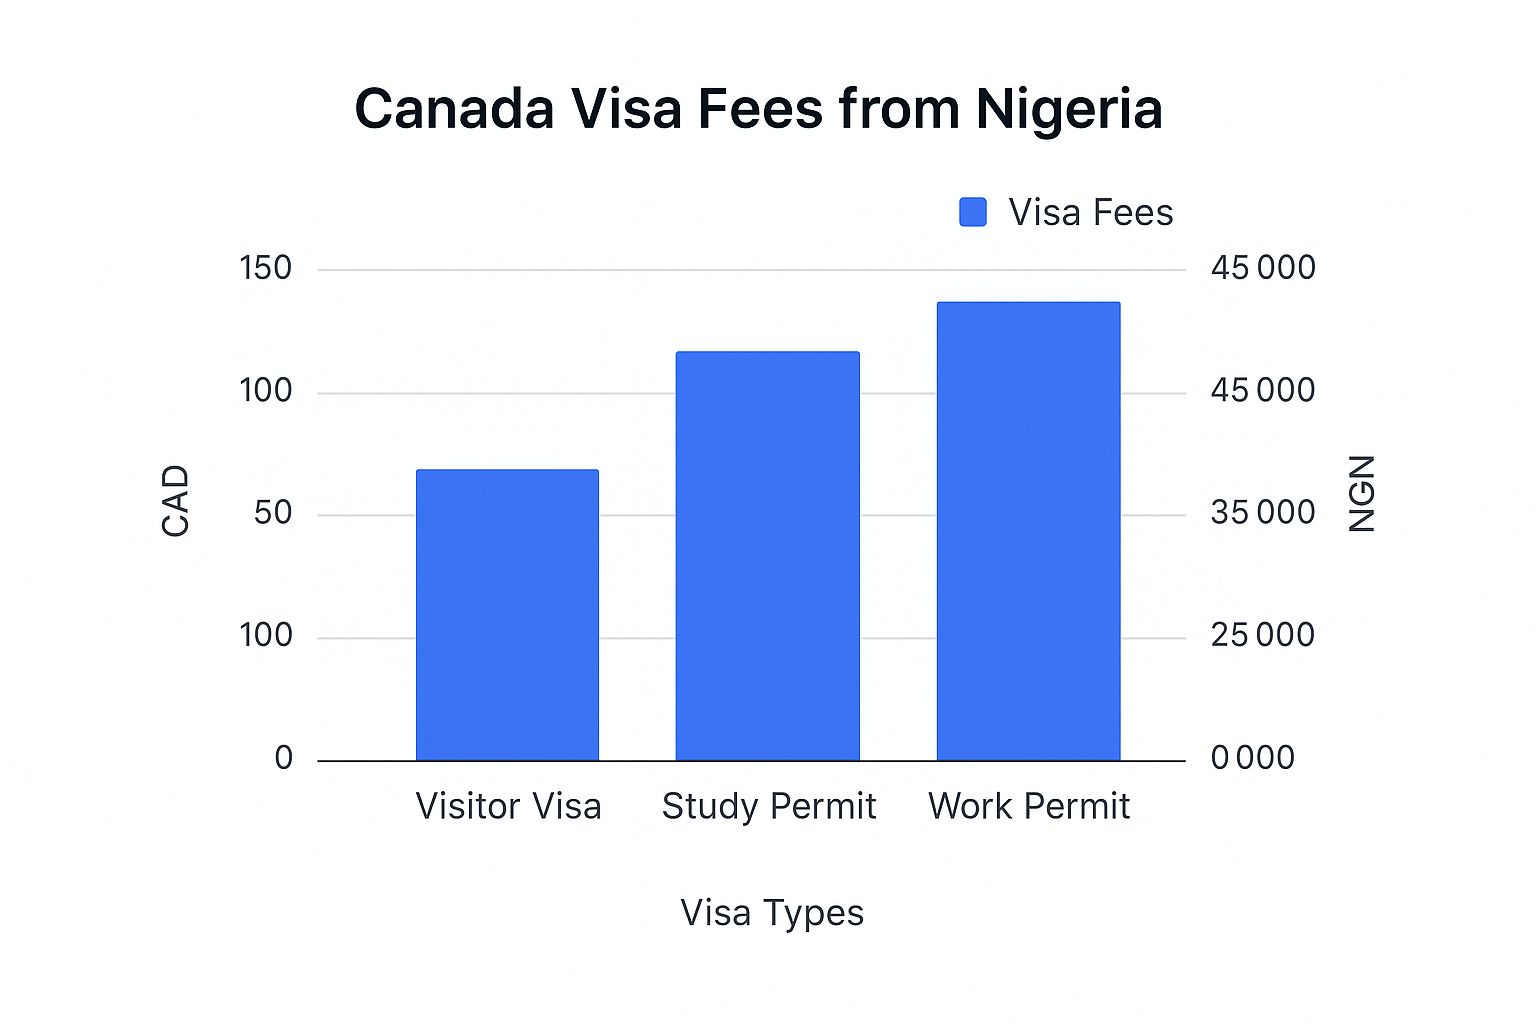
- Visitor Visa (Tourism): The application fee is CAD $100. This is your starting point if you're planning a holiday or visiting family and friends.
- Study Permit: The cost for this application goes up to CAD $150. This higher fee covers the more detailed assessment of your admission letter, financial proof, and study plan.
- Work Permit: This is the most expensive of the three, with an application fee of CAD $155. For a complete walkthrough of this process, our guide on how to apply for a work visa is a great resource.
Crucial Reminder: These figures only cover the application processing itself. Remember to add the CAD $85 biometrics fee to each total to figure out your final, upfront cost per person.
By knowing exactly which visa category fits your travel plans, you can accurately calculate your Canada visa fee and get your application started on the right foot, without any last-minute financial surprises.
How Family and Group Applications Affect Your Total Cost

Planning a family trip to Canada is exciting, but it’s easy to get confused about how the visa costs work for a group. Do you just multiply the fee by the number of people? Well, it's a bit of a "yes and no" situation, and the good news is there’s a key cost-saving measure for families.
When applying for visitor visas as a family, each person—adult or child—has to pay their own application processing fee. So, for a family of four, you'd pay four separate application fees of CAD $100 each. This part of the cost is straightforward.
But here’s where you catch a major break: the biometrics fee. Instead of everyone paying the individual CAD $85 fee, families get to take advantage of a capped rate.
Understanding the Family Biometrics Cap
The Canadian government has put a "family maximum fee" in place for biometrics. This means a family of two or more people applying for visitor visas at the same time will pay a maximum total of CAD $170 for biometrics, no matter how many of you there are.
Real-World Example: Let's say you're a family of four applying together. You'll pay $400 in application fees (4 x $100), but only $170 for biometrics, not the $340 it would have been if you paid individually. This little rule makes a huge difference in the overall cost for larger families.
This policy isn't just for families; it also applies to other groups applying for single-entry or multiple-entry visas. For instance, as of September 2024, a Nigerian attending a Canadian conference pays a CAD $100 processing fee (around NGN 114,000) and a CAD $85 biometrics fee (around NGN 96,900). If you are travelling with colleagues for the same event, the biometrics cap could apply. You can always check the latest details on these specific costs. Learn more about conference visa fees from Nigeria to Canada.
Alright, you've figured out the cost for your Canada visa application. Now comes the crucial part: paying for it without any hitches. Getting this step wrong can unfortunately stall your entire application, so let's walk through how to do it right.
The safest and most straightforward way to pay is directly on the official Immigration, Refugees and Citizenship Canada (IRCC) online portal. It's a secure system designed for this exact purpose.
You can use your Nigerian debit or credit cards, as long as they are enabled for international transactions. The most widely accepted cards are Visa and Mastercard.
How The Payment Actually Works
When you get to the payment section on the IRCC website, the fee will be shown and charged in Canadian Dollars (CAD). Don't worry about converting it yourself. Your Nigerian bank automatically handles the currency conversion, using whatever the exchange rate is on that particular day.
This is important to remember! The final amount you see debited from your account in Naira might be a little different from what you calculated earlier, simply because of daily exchange rate fluctuations.
A Few Practical Tips Before You Pay
Here’s a pro tip that can save you a lot of frustration: call your bank before you attempt the payment. Ask them to confirm two things: that your card is cleared for international online payments and what your daily spending limit is. A quick phone call can prevent the headache of a declined payment.
Alternatively, you can pay in person at a Visa Application Centre (VAC) here in Nigeria. VACs often provide other payment options, like using a POS terminal or even paying via a bank draft. However, it's always best to check with the specific VAC you plan to visit to confirm exactly which payment methods they accept.
For those of you applying for work, getting the payment right is just one piece of the puzzle. To see how this fits into the bigger picture, our detailed guide on the Canada work visa and permit process is a great resource.
Crucial Tip: Stick to official channels. Only pay on the official IRCC website or at an authorized VAC. Be very wary of third-party agents who offer to handle payments for you. This is a common tactic used in scams that could not only cost you your money but also expose your personal details.
Right, so you've got the main application fee sorted. That’s a great start, but it's really just one piece of the puzzle. Think of it like buying a ticket for a big event – the ticket gets you in the door, but you still need to budget for transport, food, and maybe some merch.
Applying for a Canadian visa from Nigeria is much the same. The official fees are what you pay to the Canadian government, but there are other necessary costs you'll pay to different organisations along the way. Planning for these upfront saves you a world of headache and last-minute panic. A solid budget covers everything, not just the headline price.
Common Additional Expenses to Plan For
Let's break down the other costs that often pop up, so you're not caught by surprise.
-
Medical Examination: For many visa types, especially longer stays, you'll need a medical exam. You can't just go to any doctor; it has to be one of IRCC's approved panel physicians in Nigeria. The cost for this can be quite significant, so it’s a major item to budget for.
-
Police Clearance Certificates: You’ll need to prove you have a clean record. This means getting a police clearance certificate, which involves a fee paid to the Nigerian Police Force.
-
Document Translation: Got a birth certificate, marriage certificate, or academic transcript that isn't in English or French? It will need to be translated by a certified professional, and that service comes at a cost.
-
VAC Service Charges: The Visa Application Centre (VAC) handles your biometrics and passport submission. While their main services are covered, they offer optional extras like courier return for your passport, SMS updates, or even assistance with filling out your forms. These all come with their own price tags.
Factoring these potential expenses into your budget from day one is your best move. It creates a financial cushion, letting you focus on putting together a perfect application instead of scrambling to find extra cash at a critical moment.
Got questions about the money side of your Canada visa application? You're not alone. Let's walk through some of the most common money-related questions Nigerian applicants ask, so you can plan your budget without any guesswork.
Is the Canada Visa Fee Refundable If My Application Is Denied?
Simply put, no. The fees you pay for processing your application and for biometrics are non-refundable, full stop.
Think of it like paying for a service. The fee covers the time and resources it takes for the Canadian government to review your file and process your data. This cost is incurred whether your application is approved or not. This is exactly why it's so important to double-check everything and submit the strongest application you possibly can—you want to make that investment count.
How Should I Handle the Fluctuating CAD to NGN Exchange Rate?
This is a smart question, as the exchange rate can be a real moving target. All the official visa fees are set in Canadian Dollars (CAD), but you'll be paying in Naira from your Nigerian bank account. Your bank does the conversion on the day you pay, using their own rate.
A Practical Tip: Before you're ready to pay, it's a good idea to check the current CAD-to-NGN rate to get a solid estimate. Just remember that the final amount debited from your account might be slightly different. The IRCC payment portal will confirm the exact CAD amount, but your bank has the final say on the exchange rate.
Do I Have to Pay for Biometrics Every Time I Apply?
Not always, and this is a great way to save a bit of money. Your biometrics—that's your fingerprints and photograph—are usually valid for a full 10 years.
If you've already given them for a visitor visa, study permit, or work permit in the past, they should still be on file. Before you pay that CAD $85 fee again, use the official IRCC status tool to check if your biometrics are still valid. A quick check could save you some cash.
-
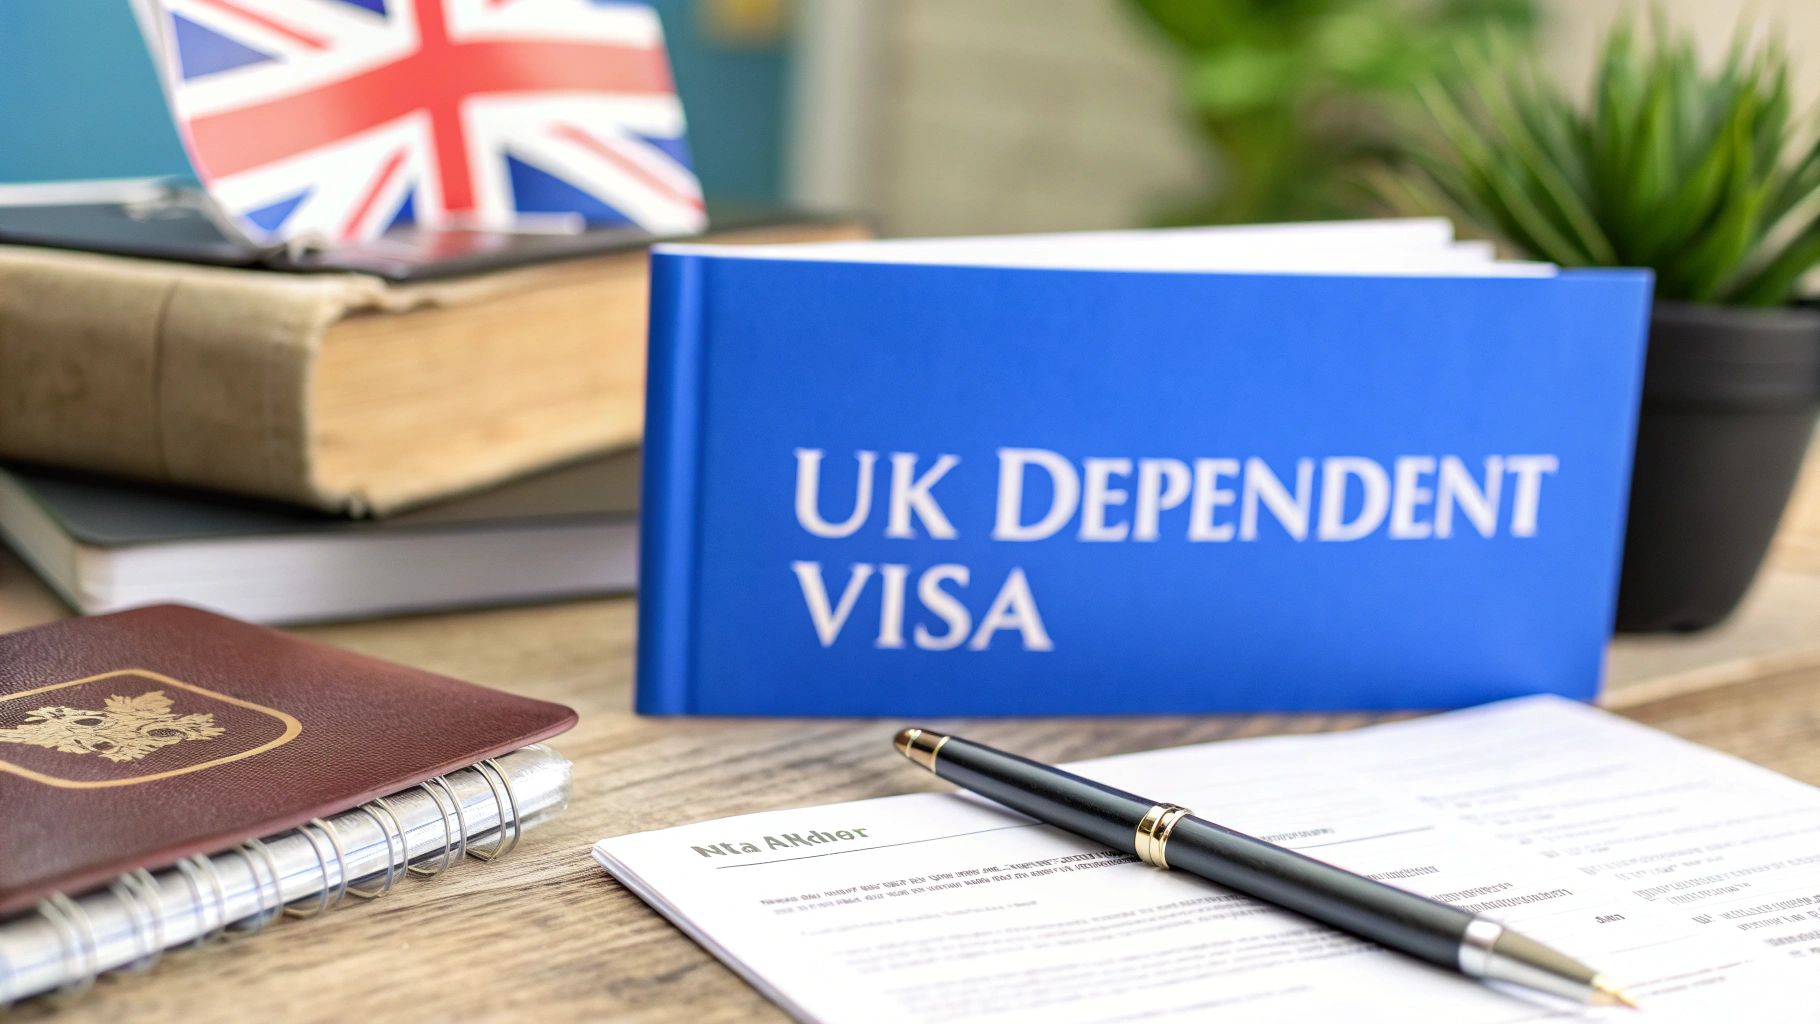
Requirements for Dependent Visa in UK: Your Complete Guide
Thinking about moving to the UK for work or study is exciting, but it's natural to wonder, "Can my family come with me?" The answer often lies in the UK Dependent Visa, a specific immigration path designed to keep families together.
Think of it as a companion visa. It's not a standalone ticket to the UK; instead, it's tethered to the main visa holder—the person with the Skilled Worker, Student, or other primary visa. Its entire purpose is to allow your closest family members to join you for the duration of your stay.

While the UK government supports the principle of family unity, it also has a strict framework to ensure it works. Every application essentially has to answer two fundamental questions for the Home Office: Is your relationship genuine? And can you support yourselves financially without relying on public funds? Get those two things right, and you're well on your way.
So, Who Actually Counts as a Dependant?
The term 'dependant' has a very specific meaning in UK immigration rules, and it doesn't cover every relative. For most visa routes, the Home Office will only consider your immediate family.
Here’s a breakdown of who typically qualifies:
- Your spouse or civil partner: This is your legally recognised partner.
- Your unmarried partner: You must be able to prove you've been in a serious relationship, living together like a married couple, for at least two years.
- Your child under the age of 18: This includes biological, adopted, or step-children who are not married or living independently.
- Your child over the age of 18: This is quite rare and usually only applies if they are already in the UK as your dependant and haven't started their own independent life.
It's important to realise that other family members, like elderly parents or siblings, don't fall under this route. They come under the 'Adult Dependant Relative' category, which has exceptionally stringent requirements and is notoriously difficult to get approved.
Dependent Categories and Key Conditions at a Glance
To make this clearer, this table gives a quick overview of the main dependent types and the core conditions they need to meet.
Dependent Type Common Age or Status Requirement Core Condition to Prove Spouse or Civil Partner Legally married or in a civil partnership Genuine and subsisting relationship Unmarried Partner In a relationship for at least 2 years Relationship akin to marriage, with evidence of cohabitation Child Under 18 Below 18 years old Not living an independent life; relationship to parent Child Over 18 Already in the UK as a dependant Continued dependency; not formed an independent family Think of this table as your starting point. The specific evidence you'll need can vary quite a bit.
The crucial thing to remember is that the exact requirements for a dependent visa in the UK are not one-size-fits-all. They shift depending on the main visa holder's category. For instance, the financial proof needed for a Skilled Worker's family is different from that required for a student's family. We'll dive into those specific details as we go through this guide.
Who Can Apply as a Dependant

Figuring out who actually qualifies as a 'dependant' is one of the first and most critical hurdles in your UK immigration journey. The Home Office has very clear, strict definitions for who makes the cut, and your entire application rides on proving your family relationships meet their standards.
Think of it like you're building a legal case for your family to be together. Every document, every piece of evidence, is another brick in that foundation. The UK government's rules are there to make sure relationships are real and ongoing, not just for show. They mainly recognise partners and children, so let’s get into the specifics of what that means.
Spouses and Civil Partners
If you're legally married to the main visa holder or are in a civil partnership, you're in a strong position to apply as a dependant. While this might seem like the most straightforward path, you'll still need to back it up with solid proof.
Your main job here is to show that your relationship is both genuine and subsisting. In plain English, this means it’s a real, living relationship, not a marriage of convenience set up to get a visa. The Home Office will want to see evidence of your shared life and commitment, going well beyond just the marriage certificate itself.
Unmarried Partners: The Two-Year Rule
What if you're not married or in a civil partnership? You can still apply as a dependant, but the rules are much more specific. To qualify, you must prove you’ve been in a relationship that's like a marriage and have been living together for at least two years right before you apply.
This two-year cohabitation rule is non-negotiable. The Home Office needs to see undeniable proof that you have shared a home and a life continuously for that period. It’s not enough to have simply been a couple for two years; the proof of living at the same address is what counts.
Key Takeaway: For unmarried partners, the focus is squarely on proving you've lived together. Any gaps in that two-year timeline, even if you were still together as a couple, can seriously complicate your application. You need consistent evidence covering the full 24 months.
Building a strong case means gathering documents that place you both at the same address over time. Think joint tenancy agreements, council tax bills in both names, or separate official letters sent to each of you at the same home.
Dependent Children Under 18
Generally, children under 18 can join their parent(s) in the UK as dependants. This covers biological children, stepchildren, and legally adopted children.
The key conditions for a child dependant are pretty clear-cut:
- They must be under 18 years old on the day the application is submitted.
- They cannot be married, in a civil partnership, or living an independent life.
- Usually, they have to apply with both parents, unless one parent has been given sole responsibility for their upbringing.
If only one parent is applying with the child, you’ll likely need a formal letter of consent from the other parent. Alternatively, you'd need to provide legal evidence showing you have sole responsibility for the child’s welfare. The system is designed to protect the child's best interests, which is a core part of the broader UK immigration framework. You can learn more by reading about the new UK immigration white paper and what every Nigerian should know.
Children Over 18 and Other Relatives
Trying to bring an adult child or another relative, like a parent, is incredibly challenging through the standard dependant route. Frankly, the chances are very slim.
A child over 18 might only qualify if they were first granted a visa as your dependant when they were under 18 and have stayed in the UK with you as a dependant ever since. They must not have started their own independent life or family.
For other family members, such as elderly parents or siblings, the correct (and extremely difficult) route is the 'Adult Dependant Relative' visa. The bar for this is set incredibly high. You must prove the relative needs long-term personal care because of age or illness—care they simply cannot get in their home country. Success rates for this visa are notoriously low, so it’s vital to be realistic about this option.
Meeting the Financial Requirements
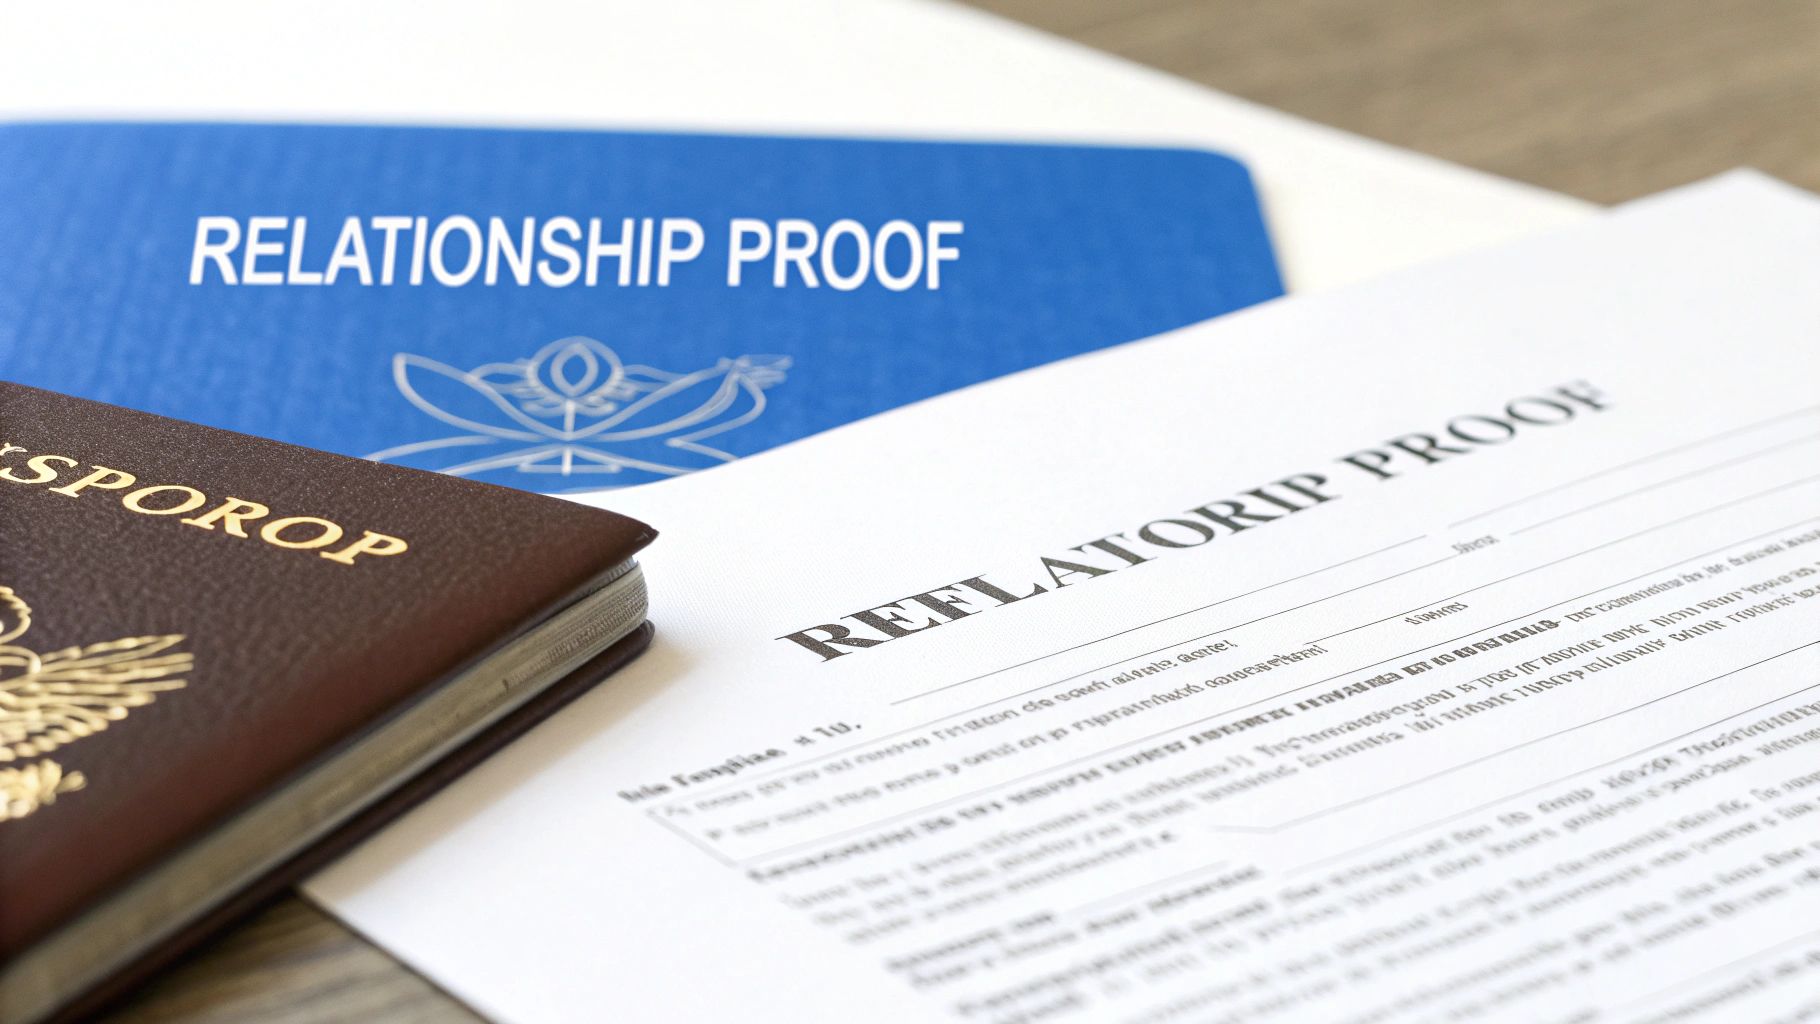
Once you’ve shown your relationship is the real deal, you’ll face the next major hurdle: the financial requirement. For many, this is the most daunting part of the entire visa process, but it’s much less intimidating once you grasp the simple logic behind it. Essentially, the UK government needs solid proof that you can support your family without relying on public funds or benefits.
Think of it as building a financial safety net for your first month in the UK. It’s a one-off check to ensure you can cover your initial living costs before the main visa holder starts drawing their regular salary. Make no mistake, meeting this requirement is a non-negotiable part of securing a dependent visa.
The specific amount you need to show, often called maintenance funds, isn't one-size-fits-all. It varies based on the main applicant's visa category. A family joining someone on a Skilled Worker visa will have a different financial target than one joining a student.
How to Calculate Your Maintenance Funds
Working out what you need is actually quite straightforward once you have the right figures for your visa route. You simply need to have a set amount of money available for each dependant you're bringing with you.
These are the typical maintenance funds you'll need to prove you have for each family member, on top of any funds the main applicant needs for themselves:
- For your partner (spouse or unmarried partner): £285
- For your first child: £315
- For each additional child: £200
Let's walk through a quick example to see it in action.
Scenario: A Skilled Worker is moving to the UK with their partner and two children.
- Funds for the Partner: £285
- Funds for the First Child: £315
- Funds for the Second Child: £200
Total required for dependants = £285 + £315 + £200 = £800
This £800 is the amount the family must have in savings, in addition to the £1,270 the main Skilled Worker applicant needs to show. So, the grand total for the entire family would be £2,070.
The Critical 28-Day Rule
Now, it’s not just about having the money; you have to prove you’ve held it consistently. This brings us to the all-important 28-day rule.
The funds you rely on for your application must have been in your bank account (or your partner's) for at least 28 consecutive days. The final day of this 28-day period must be within 31 days of when you submit your application.
This rule is the Home Office's way of verifying that the money is genuinely yours and not just a last-minute loan to tick a box. The balance in your account cannot dip below the required amount for even a single day during that 28-day window.
The focus on financial stability has intensified for a reason. Statistics show a staggering 360% surge in dependent family members joining Skilled Workers between 2021 and 2023, growing from around 55,200 to over 254,100 people. This boom, with Nigerian nationals being a significant part of this group, has prompted closer scrutiny to ensure families can stand on their own two feet from day one.
A Major Exception: The Employer Certification
What if you're struggling to pull together that much in savings? Don't panic. There's a huge exception that can wipe away the need to show personal maintenance funds entirely.
If the main applicant holds a Skilled Worker visa, their employer can certify maintenance for the whole family. If the sponsor ticks the right box on the main applicant’s Certificate of Sponsorship (CoS), confirming they will "certify maintenance" for dependants, you don’t have to provide any bank statements at all.
This is a game-changer. It means the employer is effectively guaranteeing to the Home Office that they will cover the family's costs if needed, removing the burden from you. Always check the CoS meticulously to see if the employer has provided this support. It’s one of those crucial details in the immigration maze, so staying informed on the latest policies is key. For more on this, you can check our guide to the UK immigration new rules.
Getting your financial proof in order is a methodical process. By understanding the amounts, respecting the 28-day rule, and checking for that all-important employer certification, you can tackle this stage of your application with confidence.
Gathering Your Essential Documents
Think of your UK dependent visa application as building a case. Every document you provide is a piece of evidence, and the stronger your evidence, the stronger your case. Getting this part right from the start is genuinely the best way to avoid frustrating delays or even an outright refusal.
Let's walk through your definitive checklist. We'll cover everything you'll need, from the absolute must-haves for everyone to the specific paperwork required to prove your relationship and financial standing. It’s all about being methodical and leaving no room for doubt.
Universal Must-Haves for All Dependants
First things first, there are a few core documents that every single dependant needs to provide. These are the absolute fundamentals of your application, no matter who you are.
- A current passport or other valid travel document: Make sure it has at least one completely blank page for the visa sticker and is valid for the whole time you plan to be in the UK.
- Biometric information: This is a standard part of the process where you’ll have your fingerprints scanned and a digital photo taken. This happens at a designated visa application centre after you submit your online form.
- Your Tuberculosis (TB) test results: This is only mandatory if you're applying from a country on the UK Home Office's list. You can't just go to any clinic; it must be one they have officially approved.
Without these three items, your application is a non-starter.
Proving Your Relationship The Right Way
This is where you show the Home Office that your connection to the main visa holder is real and ongoing. The exact documents you'll need will hinge on your relationship.
For spouses and civil partners, your marriage or civil partnership certificate is the star of the show. But don't stop there. You need to back it up with other evidence that proves you share a life together and that the relationship is genuine.
For unmarried partners, the goal is to prove you've been living together, in a relationship akin to marriage, for at least two years. This requires solid proof that you've both been at the same address for the entire 24-month period right before you apply.
Crucial Tip: Never rely on just one type of document to prove cohabitation. The most convincing applications build a timeline using a mix of sources. For instance, you could use a joint tenancy agreement alongside individual bank statements and utility bills that were all sent to the same address over the two-year period.
For dependent children, you’ll need to supply:
- A full birth certificate that clearly lists the names of both parents.
- Proof of your relationship to the main applicant (e.g., the parent's marriage certificate if applicable).
- A letter of consent from the parent who isn't applying, confirming they give permission for the child to travel to and live in the UK. This is a big one if one parent is staying behind.
Financial and Accommodation Evidence
As we've touched on, showing you can support yourselves without relying on public funds is non-negotiable. You’ll need to provide bank statements that satisfy the strict 28-day rule. These statements must be in the right format, showing the account holder's name, the bank's details, the statement date, and the all-important balance.
You might also be asked for proof of suitable accommodation in the UK. This could be a tenancy agreement, a property deed, or even just a letter from a landlord or the property owner confirming you have a place to stay.
Pulling all this together can feel like a mountain of paperwork, but if you take it step-by-step, it's perfectly manageable. For those applying from Nigeria, it's also wise to get familiar with the broader UK visa requirements for Nigerian citizens to ensure you're ticking every box. By carefully collecting and organising each document, you’re not just submitting an application; you're building a compelling case for a successful outcome.
Navigating the Application Process Step by Step
Alright, you’ve got all your documents in a neat pile. Now for the main event: the application itself. It can feel like you’re trying to solve a puzzle, but trust me, countless people have walked this path before you. Let’s break it down into simple, manageable stages so you can move forward with confidence, from the first click on the form to the final decision.
The whole process is quite logical. It's designed to gather your details, fees, and biometrics in an organised fashion. The key is to follow the instructions carefully and understand what’s needed at each point.
Stage 1: Completing the Online Application Form
Everything kicks off with the official online application form on the GOV.UK website. This is where you’ll put in all the personal details for the dependant and link them to the main visa holder they're joining. Take your time here. Be methodical, and double-check every single entry. A simple typo can cause frustrating delays down the line.
The form is smart; the questions it asks will change based on your previous answers. Honesty and consistency are absolutely crucial. Make sure the information you enter perfectly matches the evidence you've gathered in your documents.
Stage 2: Paying the Necessary Fees
Once you’ve submitted the online form, you’ll be taken to the payment section. This isn't just one fee; you’ll need to cover two separate, mandatory costs:
- The Visa Application Fee: This is the standard charge for processing your application. The exact amount will depend on the visa route and whether you're applying from inside or outside the UK.
- The Immigration Health Surcharge (IHS): This is a non-negotiable payment that gives dependants access to the UK’s National Health Service (NHS). The total you pay is calculated based on how long the visa will be valid.
You have to pay both of these fees online to proceed. If you don't, your application simply won't move forward. The IHS, in particular, is a common stumbling block—failing to pay the correct amount often leads to applications being put on hold.
This image lays out the core steps for getting your application submitted.
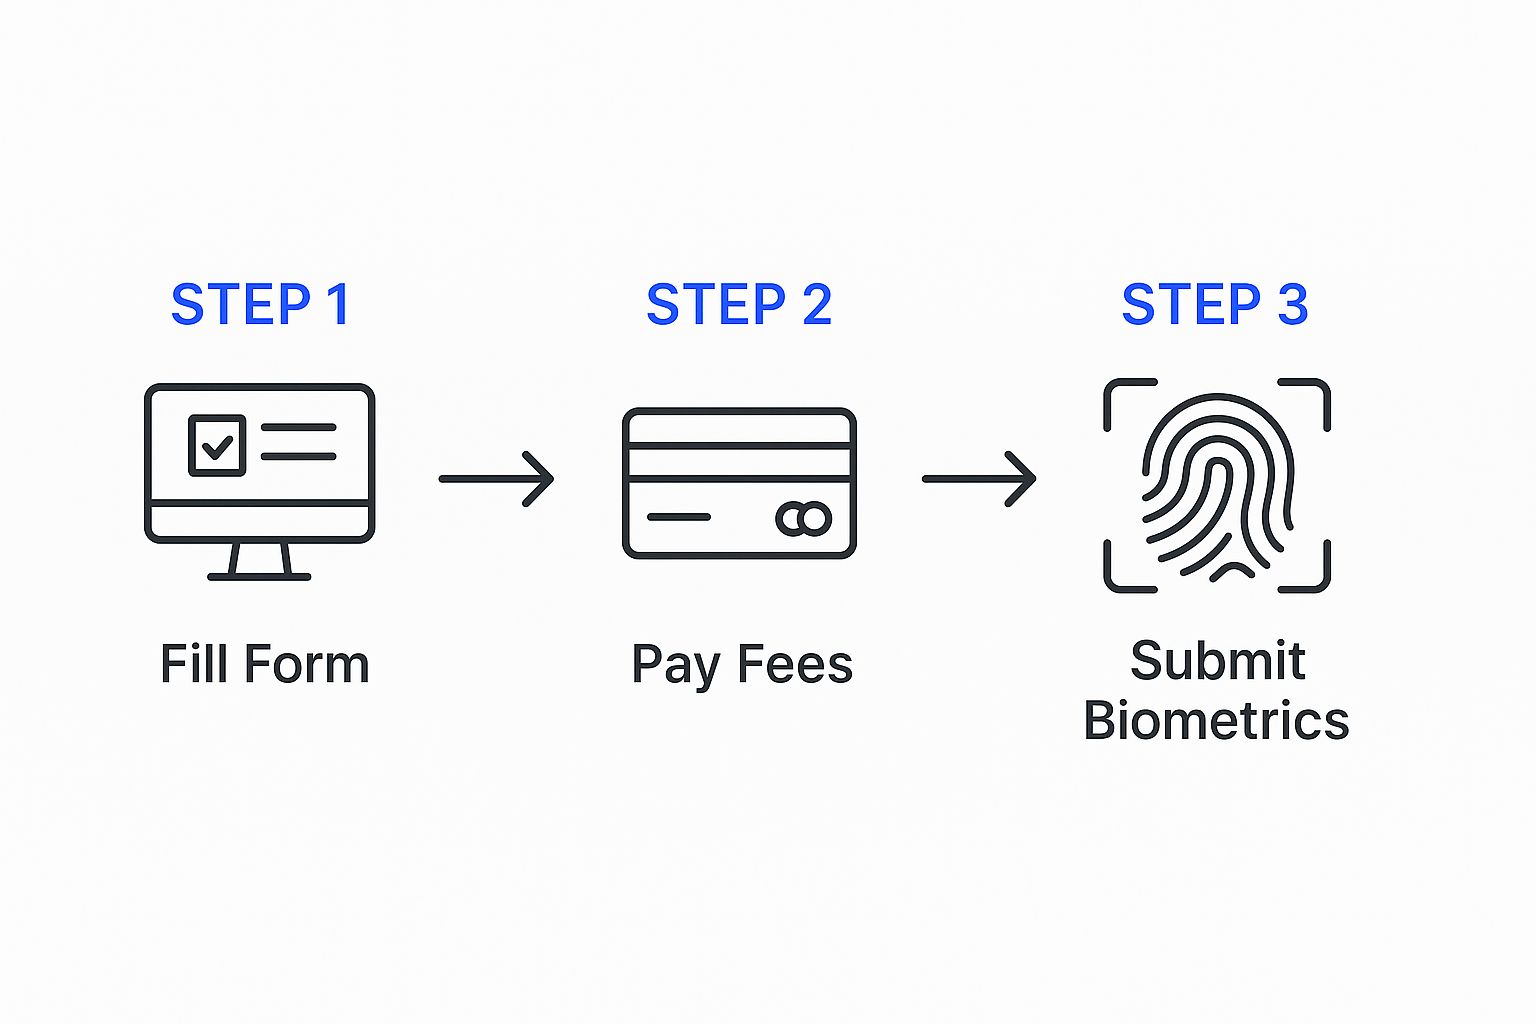
This flow—from form to fees to biometrics—is the standard procedure for nearly all UK visa applications. It creates a clear, structured pathway for everyone applying.
Stage 3: The Biometric Appointment
After you’ve paid, it's time to book an appointment at a visa application centre (VAC). This is where you’ll provide your biometrics, which is just a formal way of saying your fingerprints and a digital photograph. It’s a very straightforward but mandatory step to verify your identity.
At this appointment, you'll also hand over your supporting documents. Some centres will scan everything for you, while others will ask you to upload the documents yourself online before you arrive. Just make sure to follow the specific instructions from your chosen VAC to the letter.
Key Insight: The biometric appointment is what officially ties your identity to your application. Think of it as the final security check before your case file lands on the desk of a Home Office decision-maker for review.
Stage 4: Waiting for a Decision and Next Steps
Once your biometrics are in the system, the waiting game begins. How long you wait can vary quite a bit, depending on the visa category, where you're applying from, and how busy they are.
And they are very busy. Recent UK immigration data shows that a staggering 260,392 work dependant visas were issued in the year ending June 2024. An incredible 69% of these were for dependants of Health and Care Workers, highlighting the massive role that families, including many from Nigeria, play in supporting this vital UK sector. You can dig into these numbers yourself by exploring the latest UK visa statistics from Smith Stone Walters.
Often, you'll have the option of a standard service or a paid priority service for a quicker decision. If your application is approved, you’ll get a visa sticker (known as a vignette) in your passport, which is valid for 90 days. That’s your green light to travel. Once you arrive in the UK, you must collect your Biometric Residence Permit (BRP)—the physical card that acts as your official visa for your entire stay.
Answering Your Common Questions
The road to getting a UK dependent visa often has a few twists and turns. As you get deeper into the process, you’ll naturally start wondering about specific "what if" scenarios. It's completely normal. To give you some clarity and peace of mind, we’ve put together answers to the questions we hear most often from applicants just like you.
Think of this as your go-to guide for clearing up any confusion around big topics like work rights, application timing, and who you can actually bring with you. Let's get straight into the details that really matter.
Can My Dependant Work in the UK?
This is a huge question for families trying to map out their finances, and the answer, for the most part, is a big 'yes'. In the vast majority of cases, especially when the main visa holder is on a work route like the Skilled Worker visa, their dependant has the full right to work in the UK.
This means your partner can take on almost any job they want, whether it's full-time or part-time, and they won't need their own sponsorship. It’s a game-changer that offers incredible flexibility for your family's new life.
Really, the only major restriction is that they usually can't work as a professional sportsperson or coach. Any specific conditions will be clearly stated on their Biometric Residence Permit (BRP), but for most families, the door to employment is wide open.
What Happens if the Main Visa Is Refused?
It’s crucial to understand this point: a dependent visa is completely tied to the main applicant's visa. You can think of them as a package deal. If the main application is turned down for any reason, any linked dependent applications will be refused automatically.
In this situation, the Home Office doesn't consider the dependant’s application on its own merits. The logic is straightforward: if the person they are supposed to be 'dependent' on doesn't have a valid visa, then there's no visa for them to be dependent upon.
If this happens, the very first thing to do is carefully read the refusal letter for the main applicant. It will spell out exactly why the decision was made. From there, your options might include an administrative review if there was a clear mistake, or more likely, preparing a much stronger application that directly tackles the points raised in the refusal. This just goes to show why making sure the main applicant's case is rock-solid is the most important step of all.
Do We Have to Apply at the Same Time?
The good news is you have a lot of flexibility here, which can really help when you're planning a big move. Dependants are not forced to apply at the exact same time as the main applicant.
You've got two main choices:
- Apply Together: You can submit all applications—for the main applicant and all dependants—at the same time. This is often the simplest and most efficient way to do it.
- Apply Later: The other option is for dependants to apply at a later date to 'join' the main applicant who is already in the UK. This is a very common choice for families who need to stagger their move for work, school, or other personal reasons.
The key thing to remember is that the requirements for a dependent visa in the UK are exactly the same no matter when you apply. You will still need to provide all the same proof of your relationship and financial evidence, whether you apply together or months down the line.
Can I Bring My Parents as Dependants?
This question comes up all the time and is a source of major confusion. For most visa routes, including the popular Skilled Worker visa, the simple answer is no—you cannot bring your parents as your dependants under this category.
The rules for partners and children are in a completely different world from those for 'adult dependent relatives,' which is the official category parents would fall into. The bar for this route is set incredibly high, making it one of the most difficult UK visas to get.
To have any chance of success, you must prove that your parent or elderly relative needs a level of long-term personal care because of their age or an illness. On top of that, you have to show that this specific care is not available or affordable for them back in their home country. This is an extremely tough threshold to meet, and very few applications are successful.
It's vital to get your head around this distinction early on to avoid pouring time and money into a path with a very low chance of success. The dependent visa route is squarely focused on spouses, partners, and children.
The landscape for these family-related visas reflects tightening immigration controls. For instance, recent Home Office data for the year ending March 2025 showed that 76,000 family-related visas were granted, a slight drop from the previous year. This figure, encompassing various family categories including dependants, is influenced by policy shifts like the one in January 2024 that restricted most international students from bringing family, causing an 83% drop in student dependant visas compared to the prior year. These statistics, affecting applicants from Nigeria and elsewhere, show how critical it is to meet the specific requirements for a dependent visa in the UK for the correct category. For a deeper look into these trends, you can explore the latest UK immigration statistics from Laura Devine Immigration.
Planning your move to the UK can feel overwhelming, but you don't have to figure it all out alone. JapaChat is here to help. As Nigeria's first AI immigration expert, we provide instant, accurate answers to your questions, helping you navigate visa requirements and plan your journey with clarity. Get the reliable guidance you need by visiting JapaChat today.
-
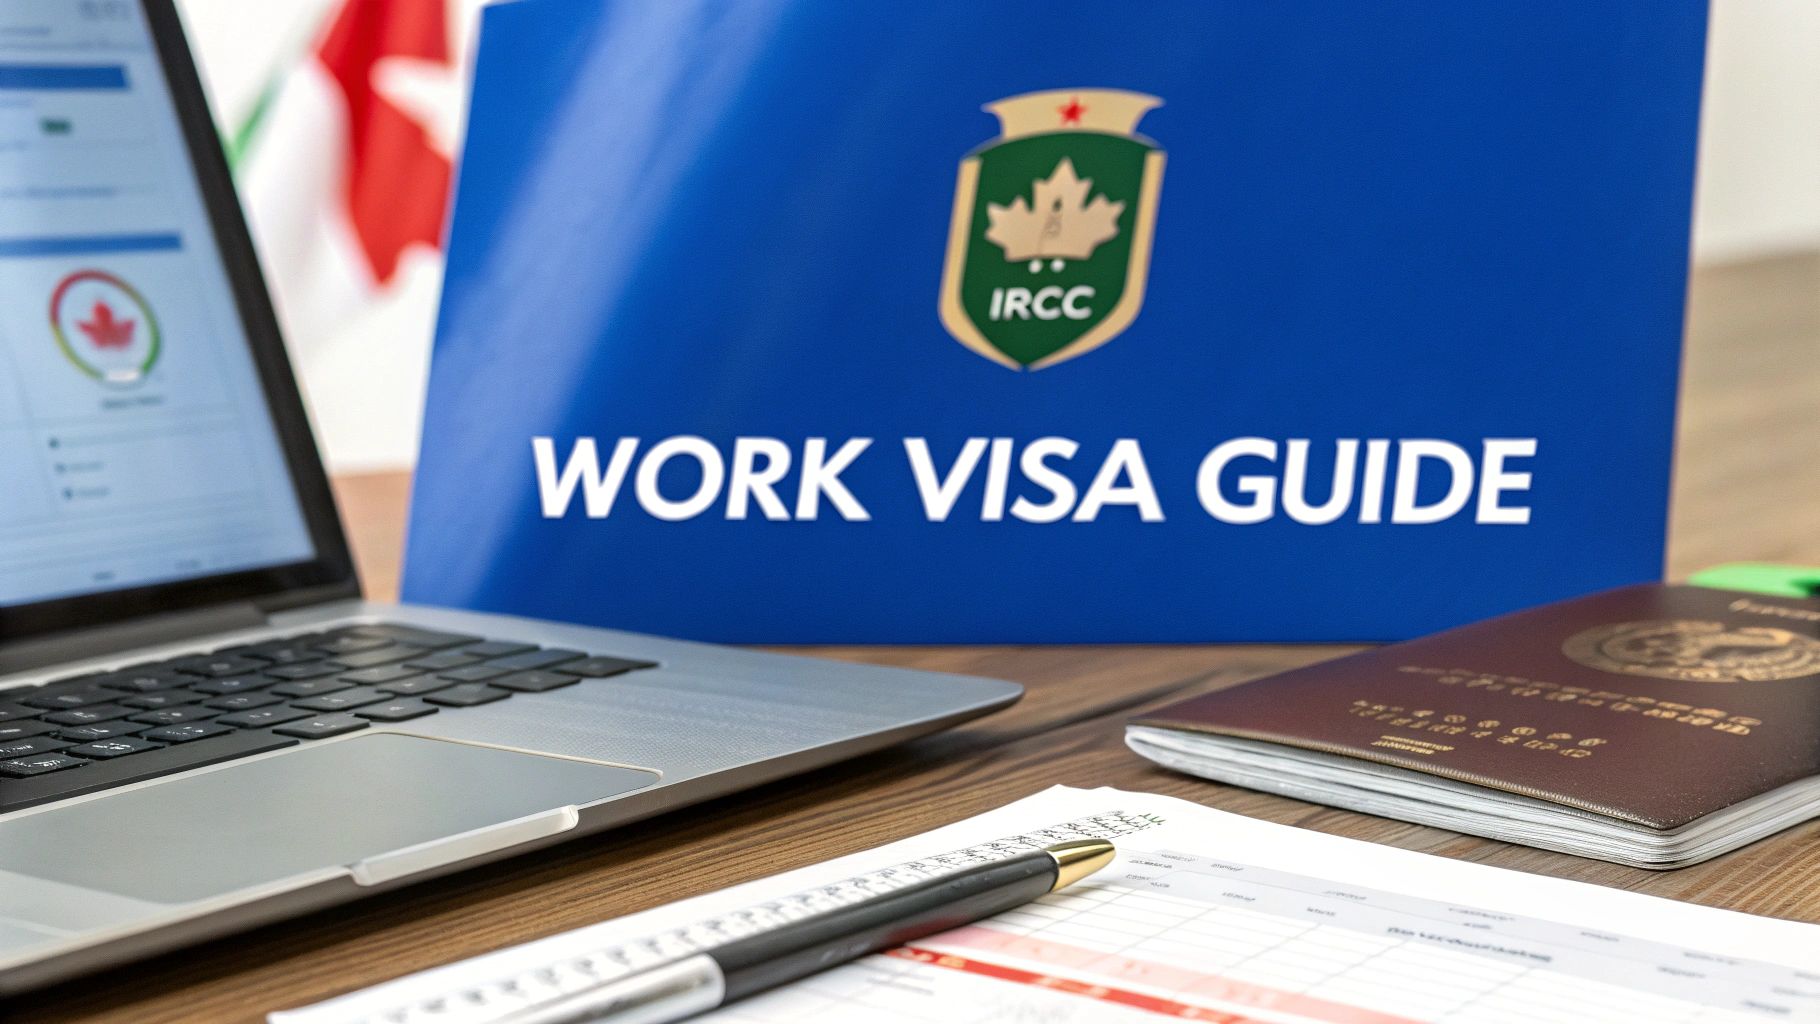
How to Apply for Work Visa in Canada: A Step-by-Step Guide
So, you're looking to work in Canada. That's a fantastic goal, but before you get lost in a sea of forms and documents, let's get one crucial thing straight. The entire process hinges on understanding what kind of work permit you need. This isn't just paperwork; it's the legal document from Immigration, Refugees and Citizenship Canada (IRCC) that allows you to work in the country.
Your journey starts with a fundamental choice, and getting it right is non-negotiable.
Understanding Canadian Work Permits
Think of a Canadian work permit as your official pass to a Canadian job. Without it, you can't legally earn a living there. The good news? Canada is actively looking for skilled professionals to fill gaps in its economy, and Nigerians are often at the top of their list.
The demand is very real. In the first quarter of 2025 alone, Canada gave the green light to 186,805 work permit applications. Nigeria consistently ranks as a top source country for these temporary workers, which shows that there are genuine opportunities waiting.
But to grab one of those spots, you need a strategy. That strategy begins and ends with the type of permit you're chasing.
Employer-Specific vs. Open Work Permits
Canada has two main types of work permits, and they are worlds apart. Picking the wrong one is a classic rookie mistake that can get your application rejected before it's even properly reviewed.
To help you figure out which path is for you, here’s a quick breakdown of the two main types of work permits available.
Quick Guide to Canadian Work Permit Types
Permit Type What It Is Who It's For Employer-Specific Work Permit This is the most common route. It ties you to one specific job, with one specific employer, in one specific location. It's not flexible. You, if you have a confirmed job offer. Your employer will usually need a positive Labour Market Impact Assessment (LMIA) to prove they need a foreign worker. Open Work Permit This gives you the freedom to work for almost any employer anywhere in Canada. It’s the holy grail of work permits, but much harder to get. Spouses/partners of some international students or skilled workers, or recent graduates from certain Canadian schools. Eligibility is very strict. Understanding the difference between these two is the first major hurdle. It determines everything that comes next.
Which Permit Is Right for You?
So, how do you decide? It really comes down to a single question: Do you already have a job offer from a Canadian company?
If you answered yes, then your path is pretty clear. You’ll be applying for an employer-specific work permit. Your new boss will be heavily involved, especially with getting that all-important LMIA document.
If you don't have a job offer, your only real shot is to see if you qualify for an open work permit. This means digging into the strict eligibility rules to see if your situation fits. For a deeper dive, our guide on the differences between a Canada work visa and a work permit can give you more clarity.
All your research and, eventually, your application will happen through the official IRCC website. Get familiar with it now.
This portal is where you'll find document checklists, create your profile, and upload everything when you're ready to apply.
Key Takeaway: Your application journey doesn't start with gathering documents. It starts with a decision. Figuring out whether you need an employer-specific or an open work permit sets the foundation for your entire application. It dictates the forms, the proof, and the process you'll follow.
Once you’ve made this crucial choice, you're no longer just dreaming about working in Canada—you have a clear, actionable plan. With this knowledge in hand, you can move forward confidently to the next stage: proving you're eligible and building a strong case for the visa officer.
First Things First: Are You Actually Eligible for a Work Permit?

Before you even think about spending a single Naira on application fees or getting your documents together, you need to be absolutely sure you tick all of Canada's eligibility boxes. Honestly, this is where most applications fall apart. It's usually not because of a missing form, but because the applicant simply couldn't convince the visa officer they were a good fit.
Think of it this way: your application is a story. Every document you submit must support the main plot point—that you're a genuine temporary worker who will follow all the rules.
The Make-or-Break Eligibility Checklist
No matter where you're from, every single person applying for a Canadian work permit has to meet a core set of universal requirements. These are the absolute non-negotiables.
- You must prove you'll leave Canada. The visa officer needs to believe you will return to Nigeria once your permit expires. This is often the biggest hurdle.
- You need to show you have enough money. This means proving you can support yourself (and any family coming with you) and afford a flight back home.
- You have to be admissible to Canada. This means being law-abiding with no criminal record. You'll almost certainly need to provide a Nigerian police clearance certificate.
- You must be in good health. You can't pose a risk to Canada's public health, and you might need a medical exam to prove it.
If you can't satisfy every single one of these points, your application is almost guaranteed to be refused. Your entire job is to provide solid, undeniable proof for each.
Proving You'll Return to Nigeria
This part is more of an art than a science. A visa officer needs to see you have strong, tangible connections to Nigeria—what we call "home ties." These ties make it believable that you'll leave Canada when your work is done. It’s not enough to just say you will; you have to show them.
So, how do you demonstrate these ties?
- Family: Do you have a spouse, children, or elderly parents in Nigeria who depend on you?
- Property: Can you provide documents showing you own a house or land in Nigeria?
- Current Job: A letter from your current Nigerian employer confirming you’re on an approved leave and are expected back is powerful proof.
- Financial Roots: Do you have significant investments or business interests back home that need your attention?
Here’s a common mistake I see: people get so excited about the opportunity in Canada that they forget to build a compelling story about their life in Nigeria. A strong application is balanced. It shows you have something meaningful to come back to.
Don't take this section lightly. Simply having a bank account in Nigeria isn't enough. You need to paint a clear picture of an established life you're invested in.
The Job Offer and the LMIA
Assuming you're applying for an employer-specific work permit—which is the case for most Nigerians—you'll need more than just the basics. The most critical piece of the puzzle is a valid job offer from a Canadian employer.
And I don't mean a casual email exchange. We're talking about a formal employment letter or a signed contract that clearly outlines your role, salary, and working conditions.
For many of these jobs, your employer also has to get a positive Labour Market Impact Assessment (LMIA). An LMIA is a document from the Canadian government that essentially says, "We've looked, and there are no Canadians or permanent residents available to do this job, so we need a foreign worker."
Getting the LMIA is your employer's responsibility. It's a whole process on their end, which usually involves advertising the job across Canada first. If your job requires an LMIA, your work permit application is a non-starter without it. This really highlights the government's focus on using temporary foreign workers to fill very specific labour gaps. In fact, data from Statistics Canada shows that while permanent resident admissions are being adjusted, the demand for temporary workers remains incredibly high, with 186,805 permits approved in the first quarter of 2025 alone. You can always explore the latest immigration trends from Statistics Canada to get a better feel for the numbers.
Once you have that valid job offer and the LMIA (if required), you've got the foundation for a really strong application. These documents, paired with your proof of eligibility, create the comprehensive package you need to answer all the tough questions a visa officer will have.
Assembling Your Application Documents
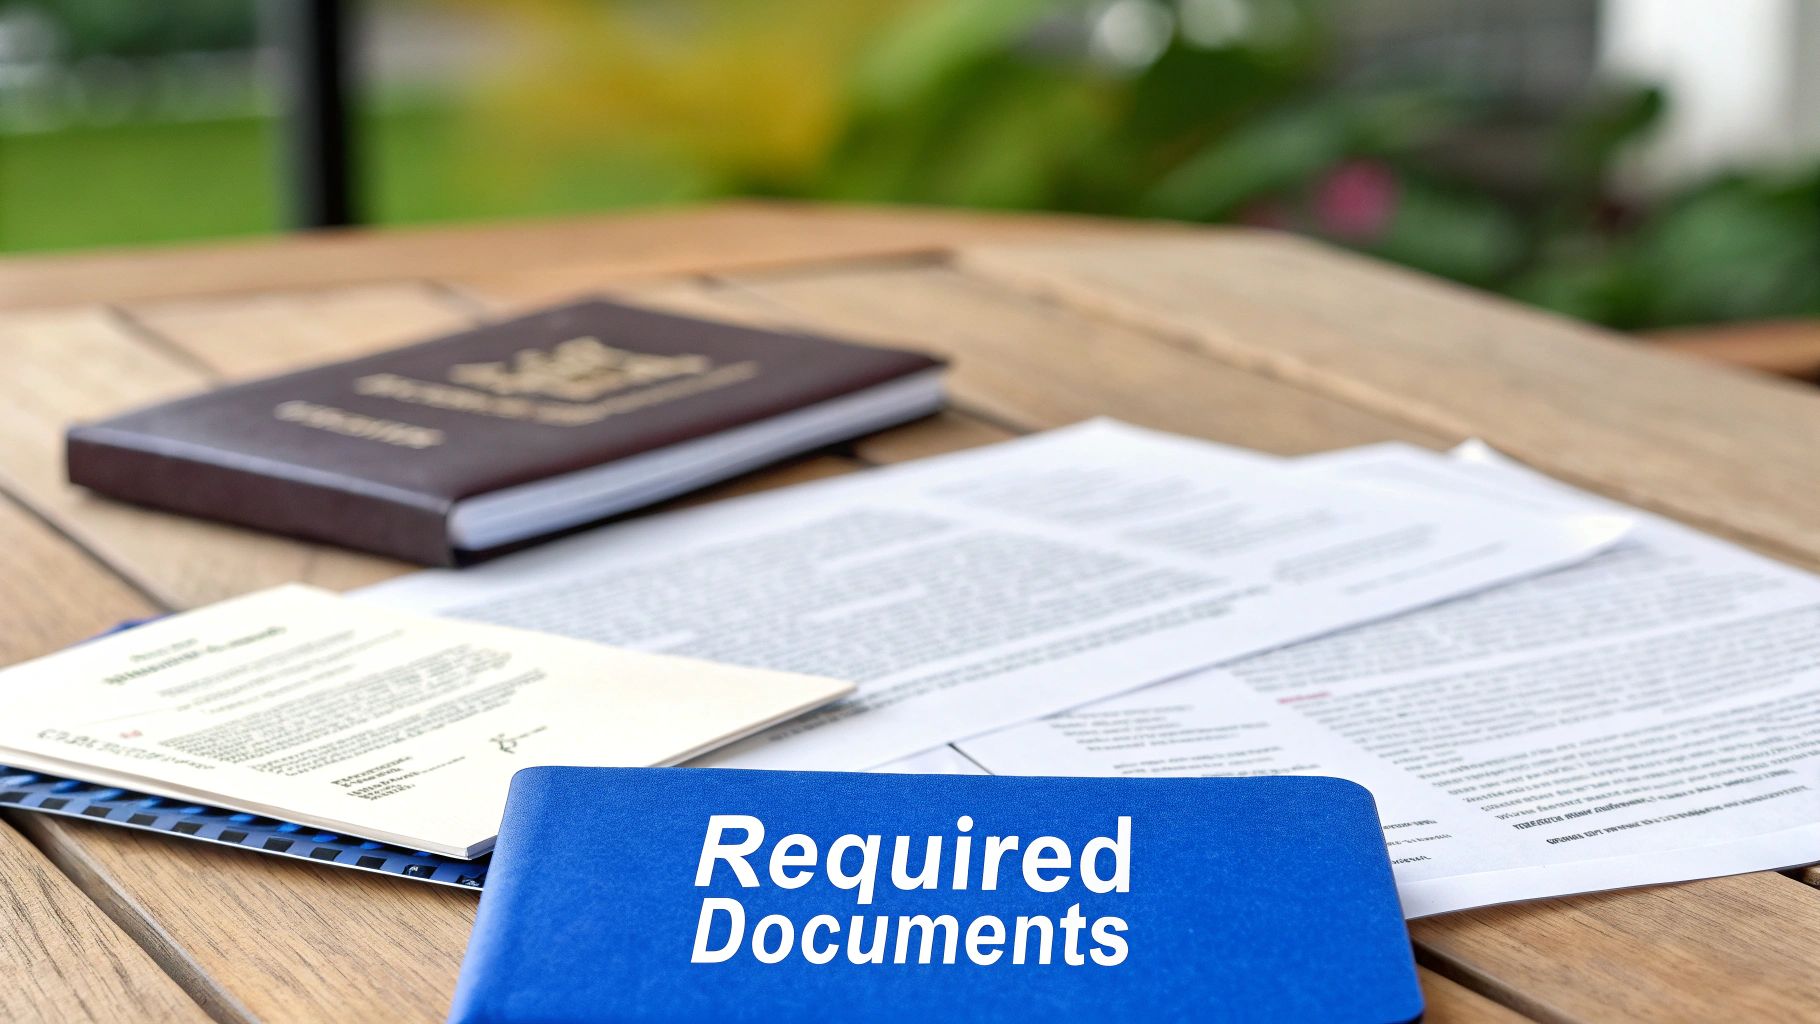
Alright, so you’ve confirmed you're eligible. Now comes the part where precision is everything. Think of your documents as the evidence you're presenting to the visa officer. A single missing paper or a poorly scanned document can cause frustrating delays or, worse, lead to a refusal.
This isn't the time to be casual. Every single document, from your passport down to your bank statements, needs to be clear, accurate, and tell a consistent story about you. Let's walk through exactly what you need to pull together for a rock-solid application.
The Non-Negotiables: Core Documents for Every Applicant
Regardless of the job you're heading to, some documents are foundational. You simply can't proceed without them.
First and foremost is your International Passport. This seems obvious, but check the expiry date. It must be valid for the entire time you plan to work in Canada. Critically, you need at least one completely blank page (not the last page) for the visa sticker.
Then there are the Digital Photos. These aren't just any headshots; they come with very strict rules for size, background colour, and even your facial expression. My advice? Don't try to DIY this with your phone. Go to a professional photo studio and specifically ask for photos that meet Canadian visa specifications.
Pro Tip: When you get your digital photos, ask the studio for a few physical copies as well; you never know when you might need them. Make sure the digital file they give you is high-resolution. A blurry photo is an easy excuse for the IRCC system to reject your upload.
Paperwork Tied to Your Job Offer
If you're applying for an employer-specific work permit, the documents from your Canadian employer are the absolute heart of your application. The most critical piece is your official Offer of Employment letter or a signed contract.
This letter needs to be detailed. It should clearly outline:
- Your specific job title and a breakdown of your duties.
- Your salary in Canadian dollars and any benefits.
- The physical address of your workplace.
- The exact start and end dates of your employment.
You'll also need the Labour Market Impact Assessment (LMIA) number if your role requires one. Your employer is responsible for getting this from Employment and Social Development Canada (ESDC) and giving it to you. You can't move forward with the application without it.
These documents are the proof that your job offer is legitimate. For a deeper dive, our guide on how to apply for a work visa provides more context on this.
Proving Who You Are: Your History and Standing
Now it's time to build a picture of yourself for the visa officer. This means providing proof of your work history, education, and your status as a law-abiding citizen.
First up, the Police Clearance Certificate. You'll get this from the Nigeria Police Force Criminal Investigation Department (CID). Get a head start on this one. From personal experience and hearing from others, this process can take a few weeks. It needs to show you have a clean record.
Next, you need to gather your Proof of Work Experience. This is more than just uploading your CV. You need official reference letters from past and present employers. A powerful reference letter is always on company letterhead and includes:
- Your job title and the dates you were employed.
- A summary of your main responsibilities.
- Your salary and the contact details of your manager or HR department.
Finally, pull together your Educational Documents. This means your degree certificates, diplomas, and academic transcripts. If you've had your credentials evaluated by an organisation like WES, be sure to include that assessment report. It adds serious credibility to your qualifications.
To help you keep track, I've put together a checklist of the most important documents and a key tip for each one, tailored specifically for applicants from Nigeria.
Document Checklist for Nigerian Applicants
Document Category Specific Item Key Tip for Nigerians Identity & Photos Valid International Passport Make sure it has at least 6 months of validity beyond your planned stay in Canada. Employment Job Offer Letter & LMIA Your job offer must be a formal, detailed letter—not a simple email confirmation. Background Police Clearance Certificate Start your application at the NPF CID headquarters in Alagbon. Don't leave this until the last minute. Experience Reference Letters The letters must be on official, branded letterhead and signed by an authorised person. Finance Proof of Funds Use 4-6 months of bank statements showing a consistent, stable balance. Avoid large, sudden deposits. Every document has a specific job to do in building a complete and believable profile for the visa officer reviewing your file. Take your time, be thorough, and you’ll dramatically boost your chances of success.
Navigating the IRCC Online Application Portal
Alright, with your documents scanned and ready to go, it's time to face the main event: the online application. The Immigration, Refugees and Citizenship Canada (IRCC) secure portal is where everything comes together. I know it can look a bit daunting at first, but if you break it down into smaller, manageable chunks, it’s not so bad.
Think of this as your official conversation with the Canadian government. The single most important thing here is to be painstakingly accurate. A single wrong date or a name that doesn't quite match your passport can throw a spanner in the works and cause major delays. So, breathe, take your time, and double-check every single entry.
Creating Your Account and Getting Started
First things first, you'll need to create your secure IRCC account. You’ll see two options: sign in with a "GCKey" or use a "Sign-In Partner." For most of us applying from Nigeria, the GCKey is the way to go. This becomes your personal key—a unique username and password—for all your interactions with IRCC.
Once you're in, the system will guide you through an online questionnaire to figure out your eligibility. It's a clever tool that asks about your nationality, age, the job offer you have, and your family situation to make sure you're applying for the right thing. If all goes well, it will confirm you're on the right track for a work permit.
The portal then generates a personal document checklist. This is your tailored list of every single form and supporting document you need to upload. It should line up with the documents you've already prepared, but pay close attention. It will often ask you to download specific forms, like the Application for Work Permit Made Outside of Canada (IMM 1295), to fill out.
Filling Out the Forms with Precision
The online forms are the heart of your application. This is where you'll input your personal details, work experience, travel history, and information about your Canadian employer. I can't stress this enough: accuracy is everything.
Here are a few tips from my experience to help you sidestep common pitfalls:
- Be Consistent: Your name must be spelled exactly the same way across every document, and it must perfectly match your passport. No variations.
- Leave No Gaps: You need to account for every single month of your personal and work history for the last ten years. Any unexplained gaps will raise questions.
- Save, Save, Save: The portal can and will time out. Get into the habit of saving your progress every few minutes to avoid the frustration of losing your work.
A classic mistake I see people make is rushing the family information form (IMM 5707). You must be thorough and list all the required family members, even if they aren't coming to Canada with you. Leaving someone out can be viewed as misrepresentation, which is a serious issue.
After you've triple-checked all the forms, you'll move on to uploading your documents. The system is picky about file sizes and formats (usually PDF, JPG, or DOC), so make sure your scans meet the requirements before you start uploading.
This image sums up the workflow pretty well.
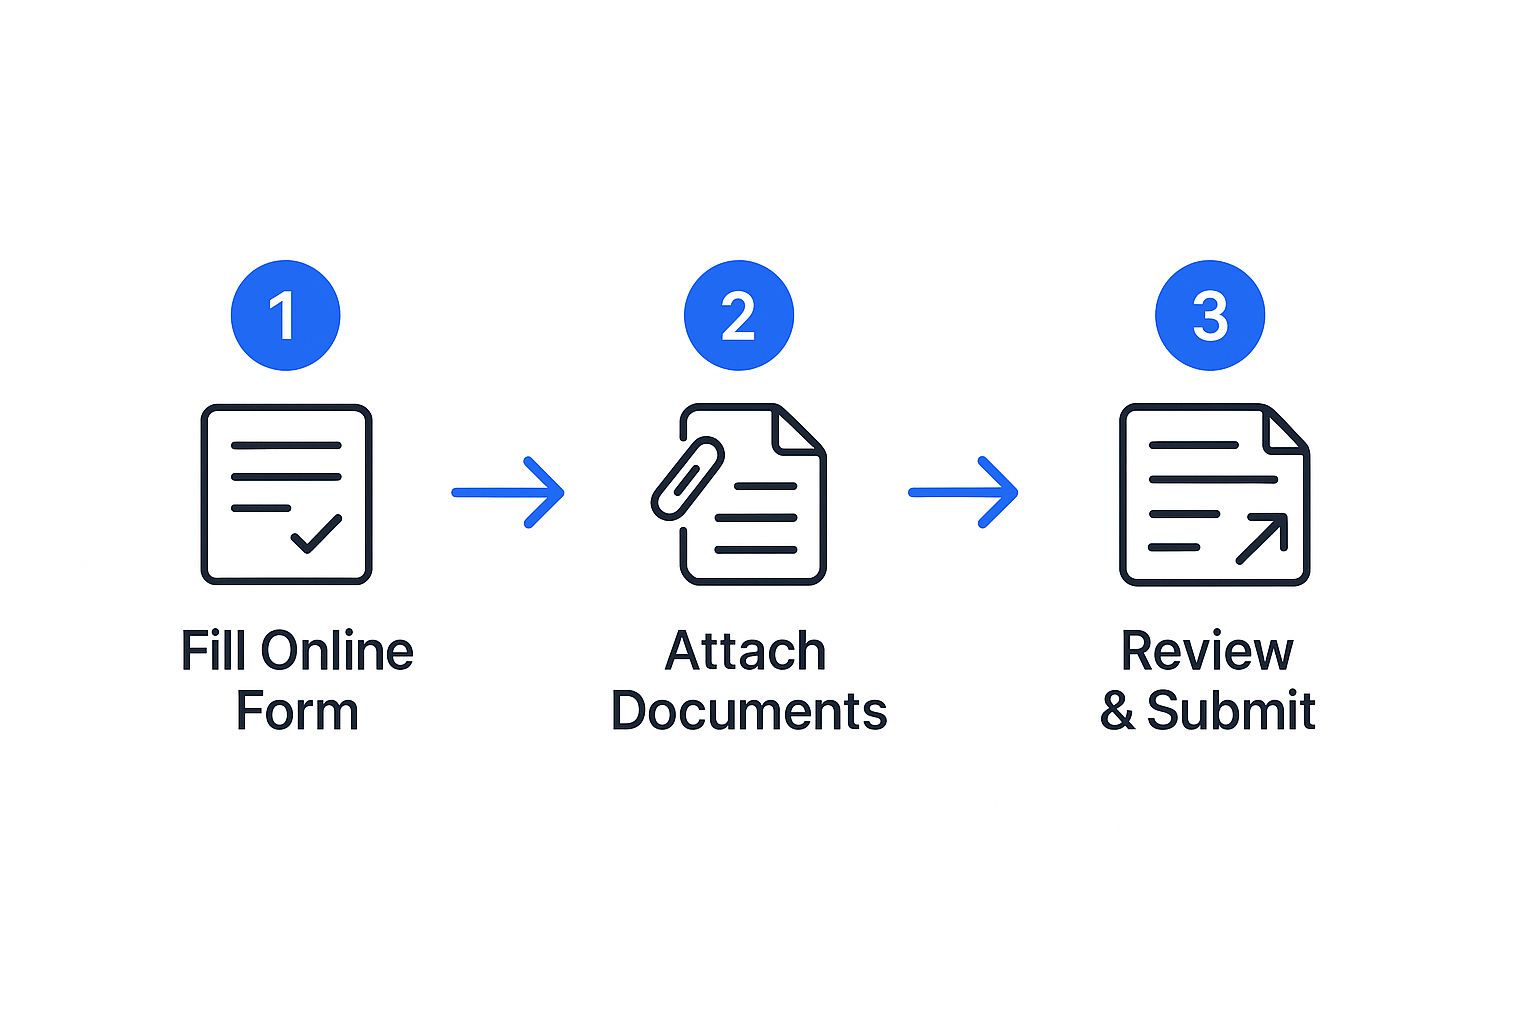
As you can see, it's a straightforward process where you have to complete each step correctly before you can move on to the next one.
The final hurdle is payment. You’ll need to settle two fees: the work permit processing fee (currently $155 CAD) and the biometrics fee ($85 CAD). You can pay this directly on the portal with a valid credit or debit card (Visa, Mastercard, or American Express are accepted).
Once your payment goes through, you get one last chance to review everything. When you're ready, take a deep breath and hit that submit button. It’s a nerve-wracking moment for sure, but if you’ve been diligent and methodical, you can feel confident that you’ve put your best foot forward.
Completing Biometrics and Tracking Your Application

So, you’ve finally hit that submit button on the IRCC portal. Take a deep breath and feel that wave of relief—you've earned it! But your journey isn't quite over yet. The next stage is a physical one: providing your biometrics.
This is a non-negotiable step for almost every Nigerian applicant. It involves giving your fingerprints and having a photograph taken, which is how the Canadian government confirms you are who you say you are. Without this, your application simply stalls.
The Biometric Instruction Letter and Your Appointment
Keep a close eye on your IRCC account after you've submitted and paid your fees. In a few days, you should receive a Biometric Instruction Letter (BIL). This is the golden ticket you need to book your appointment. You absolutely cannot schedule anything without it.
Here’s the catch: the BIL is only valid for 30 days. You have to move fast. Your appointment will be at a Visa Application Centre (VAC), and in Nigeria, your options are Lagos or Abuja.
Booking is done online through the official VAC website for Nigeria. You'll need to create an account there and then find an open time slot. My advice? Book your appointment the very same day you get your BIL. These slots fill up incredibly quickly.
What to Expect at the VAC
Walking into the VAC can feel a bit intimidating, but the process itself is surprisingly quick and very organised. The staff are professionals who do this all day, every day. The whole thing is usually done in less than 30 minutes.
Make sure you have these three things with you, no exceptions:
- Your International Passport: This is your primary ID. Don't even think about going without it.
- Your Biometric Instruction Letter (BIL): A printed copy is mandatory. They won't accept a digital version on your phone.
- Your Appointment Confirmation: Bring the email confirming your appointment date and time.
Once you're called, a staff member will use a digital scanner for your fingerprints and then take a quick digital photo. It’s a completely painless procedure.
A dose of reality: The wait after biometrics can be the toughest part. Your application status won't update right away. It's completely normal for it to look like nothing is happening for weeks, even months, while they run all the necessary background checks. Patience is key.
Tracking Your Application Status
Now, the real waiting game begins. You can (and probably will) check the progress of your application by logging into your secure IRCC account. The status updates can be a bit vague, so it helps to know what they actually mean.
Initially, it will say something like "Submitted" or "We are processing your application." A good sign is when the "Background check" status changes to "In progress" or eventually "Completed."
While this is positive movement, it's not a final approval. An immigration officer still needs to review your eligibility and make the final call. Processing times can be all over the place. The official IRCC tool gives you an estimate, but your own application could be much faster or, unfortunately, slower. This is a crucial part of learning how to apply for a work visa in Canada—managing your own expectations.
If IRCC needs anything else from you, they will message you directly through your account. It could be a request for more documents or, in very rare cases, an interview. Respond to these requests as quickly and completely as you can to keep your application moving forward.
Turning Your Work Permit into Permanent Residency
Getting that Canadian work permit is a huge win, and you should absolutely celebrate it. But for most Nigerians, it’s just the first major milestone. The ultimate goal is often permanent residency (PR), and the good news is your time working in Canada gives you a serious leg up.
Think of your work permit as more than just a job document; it's your golden ticket. The Canadian work experience you're gaining is priceless. It’s not just about the salary—it's about building a solid Canadian track record that immigration officers really value. This experience positions you perfectly for several PR pathways designed specifically for people in your shoes.
From Temporary Worker to Permanent Resident
One of the most common routes people take is the Canadian Experience Class (CEC). This is a stream within the Express Entry system, and it's practically built for skilled workers who've clocked at least one year of full-time Canadian work experience (or the part-time equivalent). The hours you put in on your work permit count directly towards this, putting you on the inside track to PR.
Don't overlook the Provincial Nominee Programs (PNPs), either. Every province has its own unique PNP streams to attract workers needed for their local economies. For instance, if you're a software developer in British Columbia or a nurse in Alberta, the province has a vested interest in keeping you. They can "nominate" you for permanent residency, which massively boosts your application.
Key Insight: My best advice? Don't wait until your work permit is about to expire to start thinking about PR. Start looking into your options as soon as you're settled in your job. Knowing the specific requirements for the CEC or your province's PNP early on helps you make smart career moves that will pay off big time later.
Canada isn't just letting this happen by chance; they are actively looking to transition skilled temporary workers into permanent residents. It’s a smart strategy to build a stable, experienced workforce. The government's own Immigration Levels Plan aims to welcome 232,150 new permanent residents through economic streams in 2025 alone. You can dig into the specifics of Canada’s immigration targets on CanadaVisa.com.
This massive number confirms that the path from work permit holder to permanent resident is not just possible—it's encouraged. It’s a well-trodden route. To get a head start, check out our in-depth guide on the Canadian permanent residency application process. Honestly, planning ahead is the single best thing you can do for your future in Canada.
A Few Common Questions We Hear All the Time
As you get closer to the finish line with your Canadian work visa application, a few nagging questions always seem to pop up. Let's tackle them head-on so you know exactly what to expect.
So, How Long Does This Actually Take From Nigeria?
This is the big one, isn't it? The honest answer is: it varies. There’s no magic number for how long a Canadian work visa application takes to process from Nigeria. It really depends on how many applications IRCC is juggling at that moment, the specifics of your own case, and whether your file was complete from day one.
While you might hear different timelines on forums or from friends, your most reliable source is the official IRCC processing times tool. I tell my clients to check it periodically to get a baseline, but treat it as an estimate, not a strict deadline. Some applications get approved surprisingly quickly, while others can take a bit longer.
Can My Family Come to Canada With Me?
Absolutely, this is a very common pathway. If you secure a valid work permit, your spouse or common-law partner can often apply for an open work permit. This is fantastic because it means they can work for almost any employer in Canada without needing a specific job offer first.
Your dependent children can also come along by applying for study permits. The key is to either include their applications with yours from the start or apply for them once your own work permit is approved. Be prepared to show solid proof that you have enough money to support everyone when you first land.
What If My Application Gets Refused?
Getting a refusal notice is tough, but it doesn’t always mean your Canadian dream is over. The first thing you need to do is figure out exactly why it was rejected. The refusal letter from IRCC gives you the general reason, but for the full picture, you should request the detailed notes made by the visa officer.
My Advice: Don't just guess what went wrong. Understanding the specific reason for refusal is everything. Was it weak proof of funds? Did they doubt your ties back home to Nigeria? Or were there questions about your job offer? Once you have the real answer, you can make a clear-headed decision to gather stronger documents and reapply with a much stronger case.
Feeling overwhelmed by the immigration process? JapaChat is Nigeria's first AI immigration expert, designed to give you instant, clear answers to your questions. Plan your journey with confidence by getting personalized guidance on visa requirements, documents, and more. Stop guessing and start planning. Try JapaChat today for free.
-
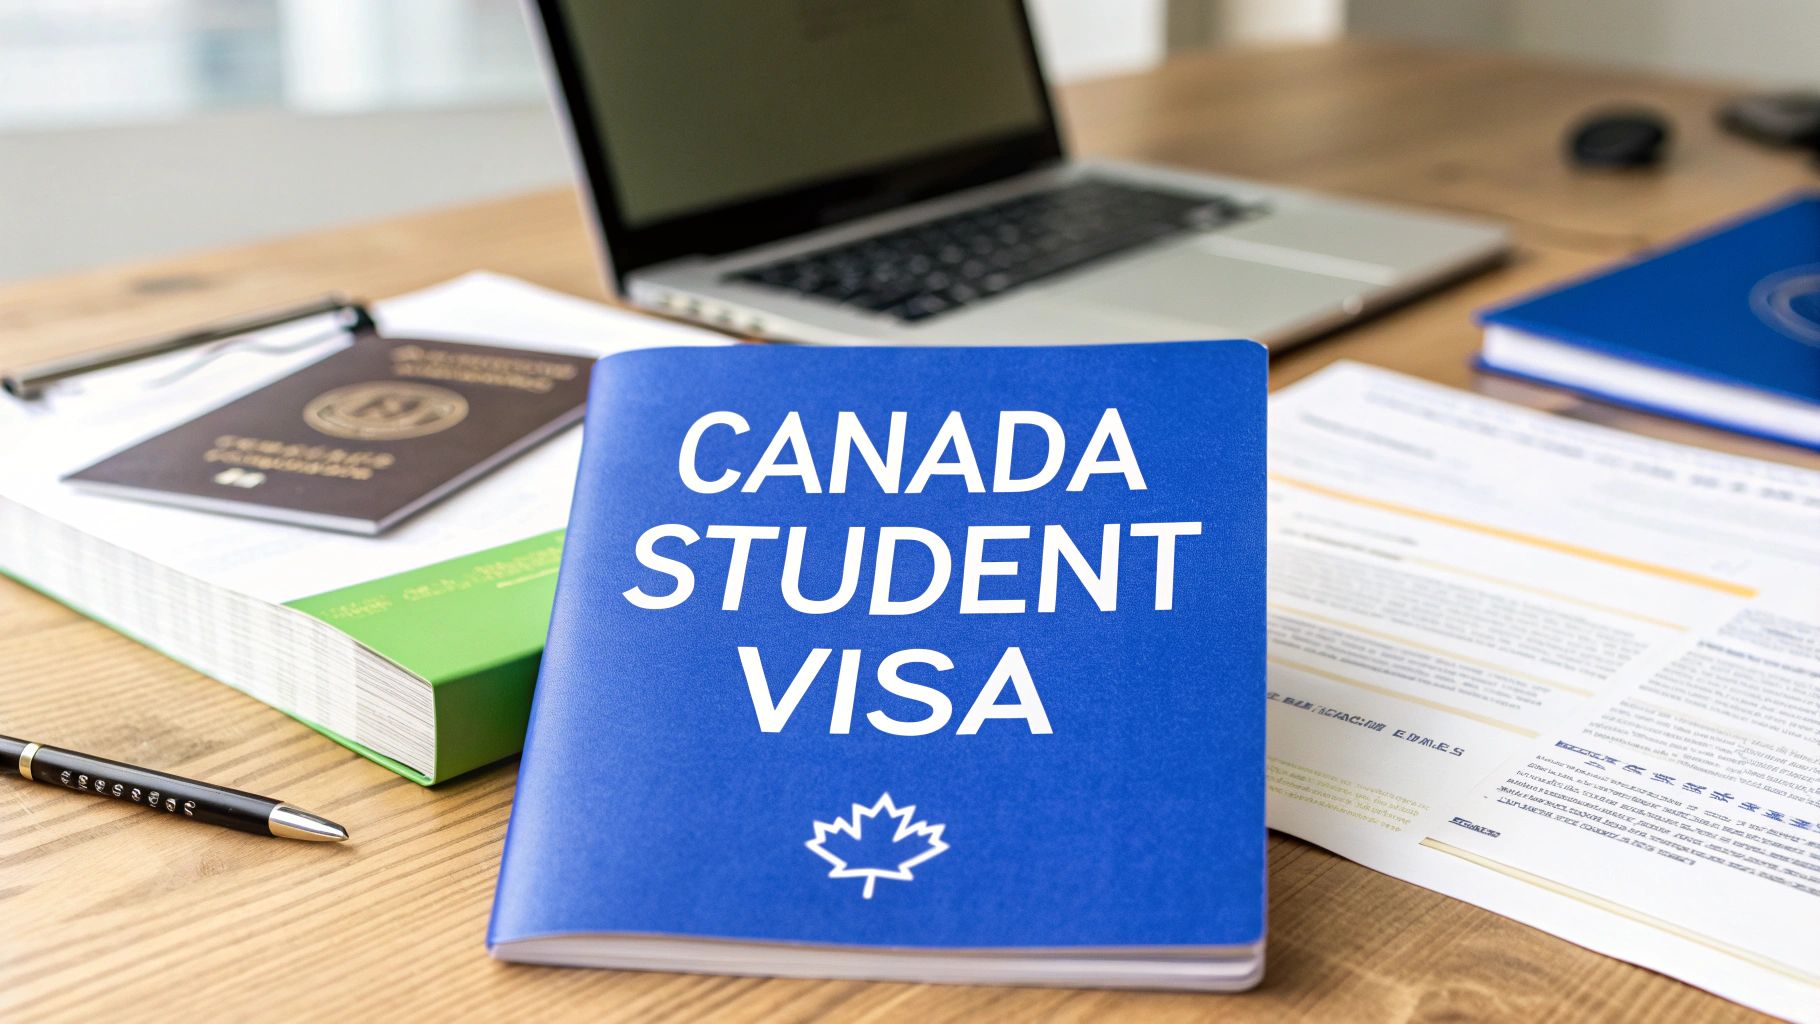
Visa Requirements for Canada Student Visa: Complete Guide
So, you've decided to study in Canada. That's a fantastic choice! But before you start packing your bags, the first major step is getting your study permit, and that means tackling the visa requirements head-on.
Think of it less like filling out a form and more like telling a story. Every document you provide helps paint a picture for the visa officer, showing them you're a serious student who is well-prepared for this new chapter.
Your Roadmap to a Canadian Study Permit
The Canadian government, through Immigration, Refugees and Citizenship Canada (IRCC), has set up a clear process. They essentially want to confirm three key things about you: that you have a legitimate reason to be in Canada (your studies), that you can support yourself financially, and that you'll respect the rules and return home when your permit expires.
Getting these three areas right is the cornerstone of a successful application.
The Core of Your Application
Your application really boils down to proving you meet these fundamental criteria. Let's break them down.
-
Academic Acceptance: First things first, you need to get into a school. Not just any school, but a Designated Learning Institution (DLI). Your official Letter of Acceptance (LOA) is the golden ticket here; without it, your application can't even start.
-
Financial Capacity: You have to show you've got the money to back up your plans. This isn't just about tuition. You must prove you can cover your living expenses, which IRCC has updated to a requirement of $20,635 for a single applicant, on top of your first year's tuition fees.
-
Provincial Approval: This is a newer, crucial step. For most students heading to college or university, you now need a Provincial Attestation Letter (PAL). It’s the province’s way of saying, "Yes, we have a spot for this student," ensuring numbers stay within the national cap.
A lot of applicants get their LOA and think the hard part is over. That’s a huge mistake. Your financial proof and your PAL are just as important. An application is a three-legged stool—if one leg is wobbly, the whole thing can collapse.
To keep you organised, let's summarise the absolute must-haves. Think of this as your initial checklist before you dive deeper into the application itself.
Quick Checklist of Core Student Visa Requirements
This table outlines the fundamental documents and conditions every applicant must meet. Getting these right from the start saves you a world of headaches later on.
Requirement Category Key Document/Proof Needed Why It's Crucial Institutional Acceptance Letter of Acceptance (LOA) Confirms you have been officially admitted to a government-approved school (DLI). Provincial Endorsement Provincial Attestation Letter (PAL) Shows the province has allocated a study spot for you under the national cap. Proof of Funds Bank Statements, GIC, Sponsor Letters Proves you can pay for tuition and living expenses without needing to work illegally. Identity Valid International Passport Your primary identification document required for travel and visa issuance. Intent to Leave Statement of Purpose (SOP) Persuades the visa officer that you will return to your home country after your studies. Once you have these foundational requirements sorted, you're in a great position to move forward. Each piece of paper plays a vital role in building your case and showing the visa officer that you're ready for your Canadian educational journey.
Proving You're Eligible for a Canadian Study Permit

Getting your Canadian study permit isn't just a matter of filling out forms. Think of it as building a case for yourself, where every single document tells a crucial part of your story. The visa officer needs to see clear proof that you've been accepted into a good school, but more importantly, they need to be convinced that you're a genuine student who plans to follow the rules and respect Canada's immigration laws.
The whole thing boils down to credibility. Your application has to paint a clear, believable picture from beginning to end. Let's break down the essential pieces you need to put together to build that convincing case.
Securing Your Spot at a Designated Learning Institution
First things first, you absolutely must be accepted into a Canadian school. But not just any school will do. It has to be a Designated Learning Institution (DLI), which is simply a school that has been officially approved by a provincial or territorial government to welcome international students.
Your official proof is the Letter of Acceptance (LOA). This document is your golden ticket—it's the foundation that the rest of your application is built on. Without a valid LOA from a DLI, your application is a non-starter.
Your LOA is much more than a simple admission notice. It’s a formal invitation from a Canadian school that tells the government you have a legitimate academic reason to be in Canada.
Before you even start worrying about bank statements or other paperwork, your very first move should be to double-check that your chosen school is on the official DLI list from Immigration, Refugees and Citizenship Canada (IRCC). Taking a minute to verify this can save you a world of trouble later on.
Showing You Plan to Return Home
This is a big one, and it's where a lot of people get tripped up. A Canadian study permit is temporary, and you have to prove to the visa officer that you fully intend to leave Canada once your permit is up. This is what's known as proving your ties to your home country.
Think of these ties as anchors. They are the connections that pull you back home and show the officer you have strong reasons to return after you've finished your studies. Strong ties can include things like:
- Family: Having a spouse, children, or elderly parents who rely on you and are staying behind.
- Property: Owning a house, land, or other significant assets back home.
- Job Prospects: Having a clear career path waiting for you in your home country—one that your Canadian degree will directly improve.
Proving this "intent to return" is critical. You can explain these ties in detail within your Statement of Purpose (SOP), drawing a direct line from your Canadian education to your future career goals back home. For Nigerians putting together their applications, getting the bigger picture on relocation can be a big help. Our guide on how to https://blog.japachat.com/relocate-to-canada-from-nigeria-3/ offers more context on building a strong case.
The New Provincial Attestation Letter Requirement
There's a new, and very important, piece of the puzzle you need to know about: the Provincial Attestation Letter (PAL). This requirement was brought in at the start of 2024. A PAL is a letter you get from the province or territory where your school is located, and it basically confirms you have a place under that province's specific cap for international students.
For most students applying for undergraduate or college programmes, this letter is now mandatory. It works as an extra layer of confirmation, making sure the number of students coming in matches what the province can actually support. You don't apply for it yourself; your DLI will guide you on getting it after you've accepted their offer. It's a key document you'll need to submit right alongside your LOA, and it makes your academic plans look even more solid.
A Big Change for 2024: Understanding the Provincial Attestation Letter
The world of Canadian student visas got a major shake-up in early 2024. If you've been researching your application, you've likely heard about a brand-new, absolutely critical document: the Provincial Attestation Letter, or PAL.
Think of it like this: your letter of acceptance from a Canadian school gets you to the front door, but the PAL is the special key that proves the province has saved a spot just for you. This new system was rolled out because Canada wants to make sure its provinces can comfortably support the international students they welcome. For most people applying for undergraduate degrees or college diplomas, getting a PAL isn't optional—it's a must-have.
This image really helps to visualise where the PAL fits in. It’s a core piece of the puzzle, right alongside your acceptance and proof of funds.
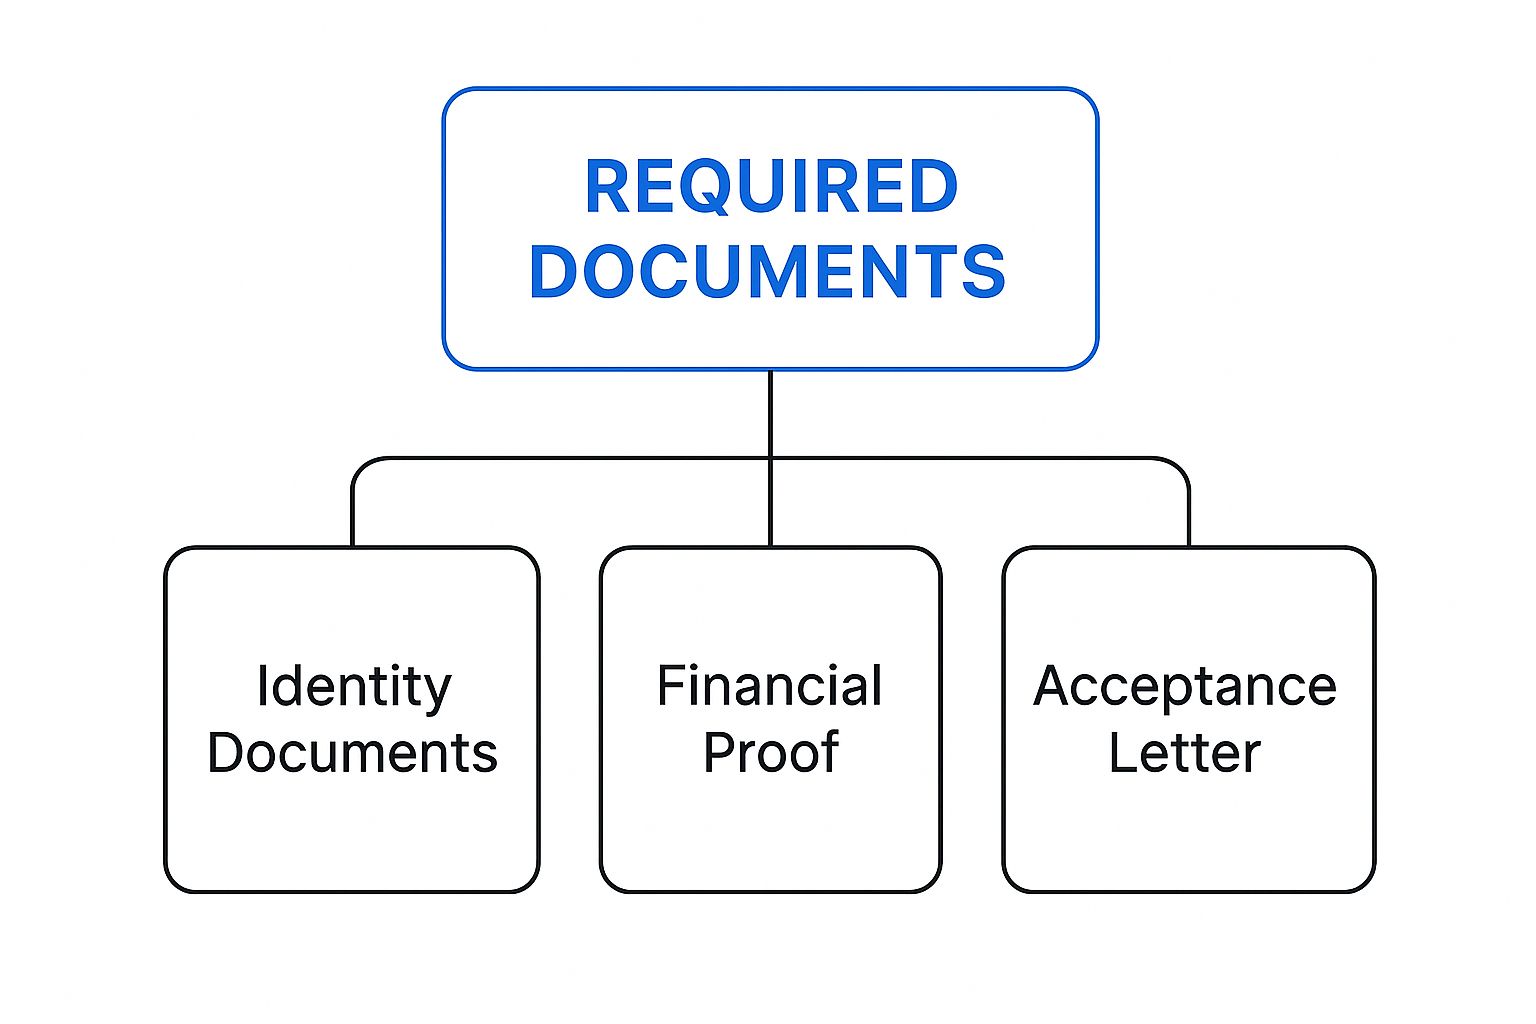
As you can see, a strong application is built on these essential pillars. The PAL now acts as a crucial bridge connecting your school's approval with the government's final green light.
Why Your Choice of Province Matters More Than Ever
Canada's new student cap isn't a one-size-fits-all number. Each province and territory gets its own specific quota, based on things like population and how many students their infrastructure can handle. This has completely changed the game, making where you apply almost as important as what you apply for.
For example, hugely popular provinces like Ontario and British Columbia saw their numbers cut, which means the competition there is now incredibly fierce. On the flip side, provinces like Newfoundland and Labrador actually got more spots, opening up new opportunities. For applicants from Nigeria, this new reality means being strategic about where you apply is non-negotiable.
"The PAL system forces applicants to think beyond just their dream school and start looking at the bigger provincial picture. A fantastic application to a school in a province with more room might just have a better shot than one in a province that's already overflowing."
It's a new layer of strategy. You have to balance your academic ambitions with the hard numbers of these provincial quotas.
How Do I Get a Provincial Attestation Letter?
Here’s the good news: you don’t have to navigate a confusing government website to get your PAL. Your school does the heavy lifting for you.
The process is refreshingly simple on your end.
- Accept Your Offer of Admission: First things first, you need to be accepted by a Designated Learning Institution (DLI) and formally accept their offer.
- Pay Your Tuition Deposit: To lock in your spot, you'll almost certainly need to pay a tuition deposit.
- Your School Takes Over: Once you've paid, the DLI will go to its provincial government and request the PAL on your behalf.
- Receive Your PAL: The school will then send the official PAL directly to you.
You must submit this letter with your study permit application. If your application requires a PAL and you don't include it, it will be returned without being processed. No exceptions.
Who Doesn't Need a PAL?
While the PAL is a huge change, it doesn't apply to everyone. It's vital to know if you're exempt to avoid any unnecessary panic. You generally do not need a PAL if you are applying for:
- A master's or doctoral (PhD) degree programme.
- Primary or secondary school (from kindergarten through to grade 12).
- A programme as a visiting or exchange student.
These groups are exempt because they aren't counted as part of the new national cap. If you're in one of these categories, your application process will look much like it did before these changes were introduced.
The PAL system has definitely added a new hurdle, especially for Nigerian students aiming for competitive undergraduate courses. Looking ahead, Canada plans to issue 437,000 study permits in 2025, which is a 10% drop from 2024, as part of its plan to manage student numbers. This has had a real impact, with provinces getting very different allocations. For instance, Newfoundland and Labrador’s allocation nearly tripled, while Ontario's was reduced. Graduate students are also now required to have a provincial attestation letter, with at least 12% of permits reserved for them, which adds another layer for those pursuing master's or PhDs in popular provinces. You can learn more about what to expect by checking out Canada's 2025 study permit forecast on ApplyBoard.
Mastering the Financial Requirements for Your Visa
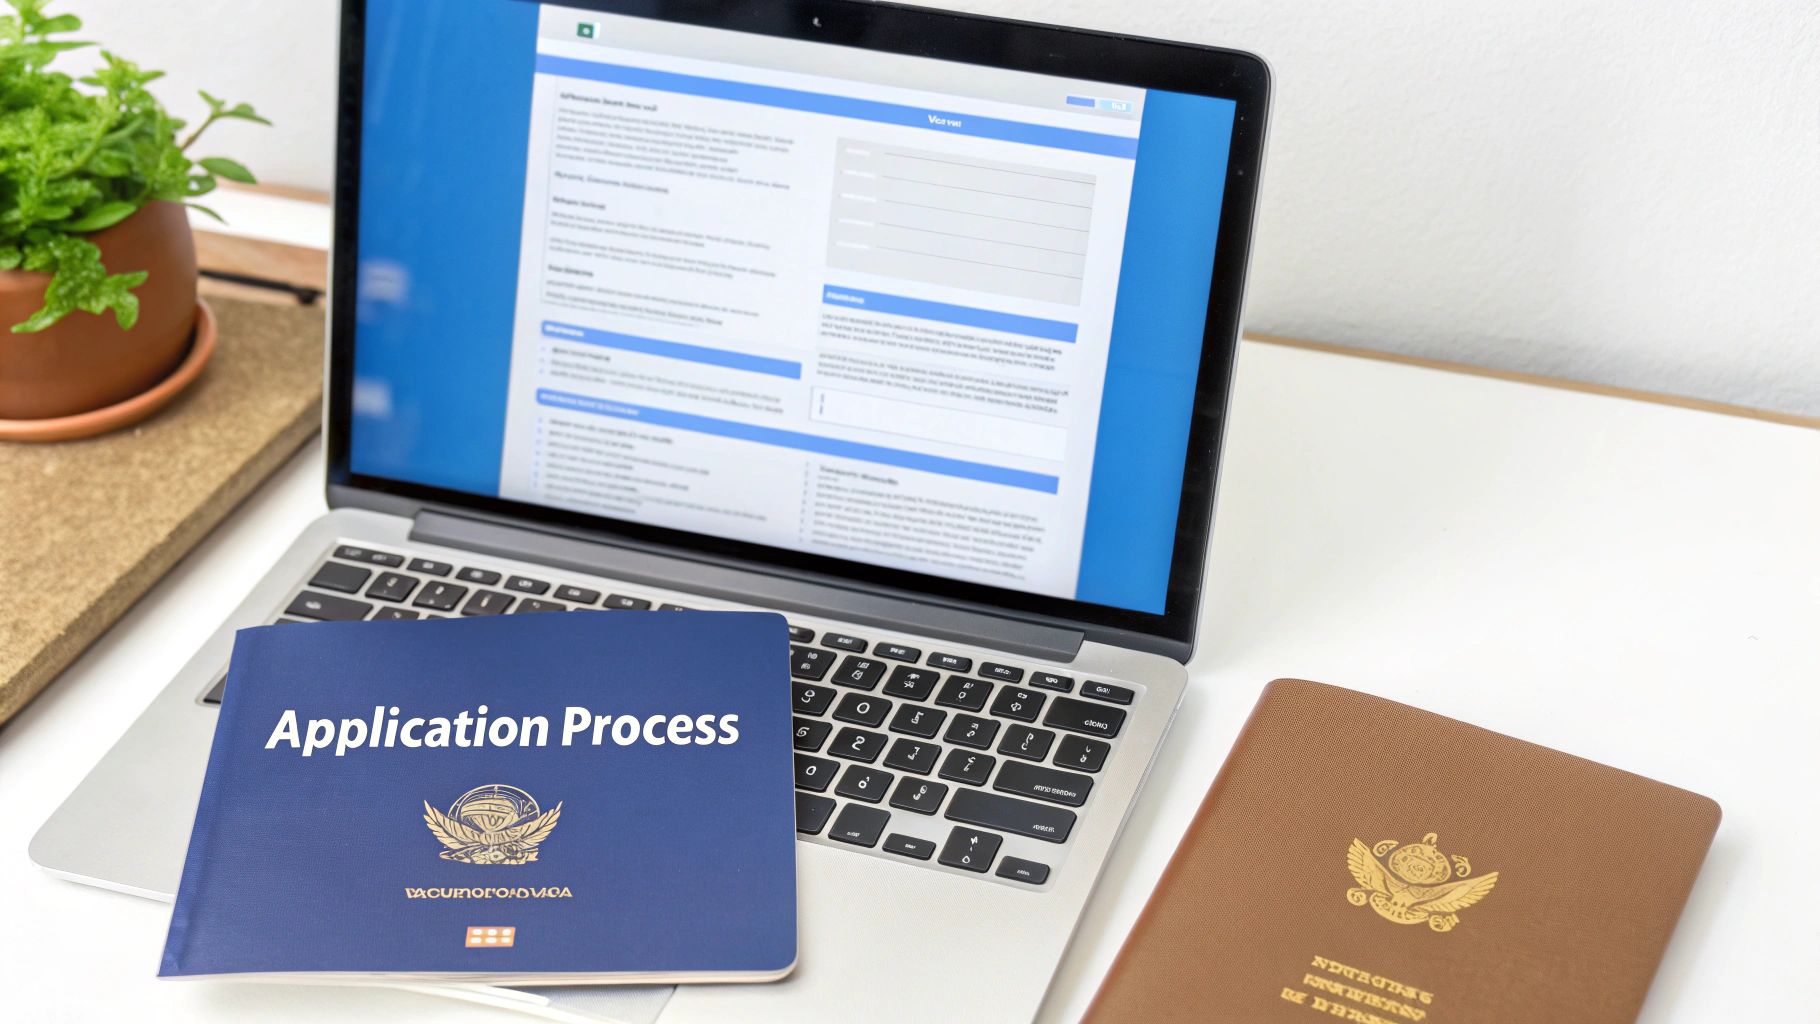
Let’s talk about money. Proving you have enough funds for your studies is more than just ticking a box; it's arguably the most critical part of your student visa application. You can have a stellar academic record and an acceptance letter from a top university, but if your financial story doesn't add up, the whole application can fall apart.
This is where so many applicants get tripped up. It’s not just about having the money. You have to present it in a way that’s crystal clear, logical, and completely trustworthy to the visa officer reviewing your file. Your mission is to paint a financial picture that leaves no room for doubt.
Understanding the New Cost-of-Living Threshold
First things first, you need to know your target number. As of 2024, Immigration, Refugees and Citizenship Canada (IRCC) raised the cost-of-living requirement quite a bit. They did this to make sure students arriving in Canada can actually afford to live here without facing major financial stress.
For a single applicant, you now have to show you have $20,635 just for your living expenses for the first year. Here's the important part: this amount is in addition to your full tuition fees for that first year.
This new threshold isn't a suggestion—it's a hard rule. Coming in even a little short of this exact amount is one of the fastest routes to a refusal. So, you absolutely must plan your finances around this specific number.
Building Your Proof of Funds Portfolio
The good news is that you don't have to show all this money from a single source. You can—and often should—combine different documents to build a strong, convincing financial portfolio. The golden rule here is transparency; every dollar needs a clear paper trail.
Here are the most common and effective ways to show your funds:
- Personal Bank Statements: You’ll need to provide official bank statements, usually covering the last four to six months. These statements need to show a consistent, stable balance that meets the requirement.
- Guaranteed Investment Certificate (GIC): This is a fantastic option, and one that visa officers really like to see. You buy a GIC from a Canadian bank for $20,635. It basically proves your living expense money is already in Canada, secure and ready for you.
- Sponsorship or Scholarship Letters: If your parents or another family member are funding your studies, you'll need their bank statements, a formal letter of sponsorship, and proof of your relationship. Similarly, an official letter confirming a scholarship award is excellent financial evidence.
For a more detailed breakdown on putting these documents together, take a look at our complete guide on how to prepare your https://blog.japachat.com/proof-of-funds-canada/.
Avoiding Common Financial Pitfalls
Visa officers have seen it all, and they are trained to spot inconsistencies. Certain financial moves can look like red flags, damaging your credibility even if you technically have the funds.
One of the biggest mistakes is a large, sudden deposit into your bank account right before you apply. This immediately makes an officer wonder where that money came from and if it's really yours to use. Every large sum needs a clear, documented history.
As you get your finances in order, it helps to understand different savings tools. For instance, you could look into the basic concepts of Certificates of Deposit, a common savings product that demonstrates financial planning and stability. By organising your money smartly and presenting it clearly, you build a powerful case that you're a responsible student who is genuinely ready to succeed in Canada.
Your Step-by-Step Guide to a Flawless Application
You’ve got your acceptance letter in hand and your financial proof sorted. Now comes the most critical part of your entire journey: putting it all together into a polished application. I know this can feel like a massive task, but if you break it down into clear, manageable steps, it becomes much less stressful and completely achievable.
Think of this section as your personal walkthrough. We'll go through gathering your documents, writing a statement that truly stands out, navigating the official online portal, and understanding what to expect after you hit 'submit'. Let's build your application, one piece at a time.
The Definitive Document Checklist
Before you even think about filling out a single form, your first job is to gather every single document you need. Honestly, one of the most common reasons an application gets delayed or even refused is because of a missing or incorrect document. It's like trying to cook a meal without all the ingredients; get everything ready first, and the rest of the process will be so much smoother.
Here’s what your essential document package must include:
- Valid Passport: Make sure your passport is valid for your entire planned stay in Canada. No exceptions.
- Letter of Acceptance (LOA): This is the official acceptance letter from your Designated Learning Institution (DLI).
- Provincial Attestation Letter (PAL): The new mandatory letter from the province that confirms your study spot (unless you're exempt).
- Proof of Financial Support: Your full financial portfolio, whether that's bank statements, a GIC certificate, or sponsorship letters.
- Statement of Purpose (SOP): A well-crafted letter that explains your academic goals and, crucially, your intention to return home.
- Medical Examination Confirmation: The document from a panel physician confirming you’ve done your medical exam, if it's required for you.
Crafting a Winning Statement of Purpose
Your Statement of Purpose (SOP) is your one chance to speak directly to the visa officer. It’s so much more than a formal letter; it's your story. This is where you connect all the dots for them, explaining why you chose this specific programme, why Canada, and most importantly, why you will return to your home country after you graduate.
A powerful SOP clearly links your Canadian education to your future career goals back home. For instance, instead of just saying you want to study business, explain how a specific marketing programme in Canada will give you the exact skills needed to land a role at a growing tech firm in Lagos. This shows real intent and a well-thought-out plan.
Your SOP is the human element of your application. It’s where a visa officer moves beyond the paperwork and gets a sense of who you are and what your ambitions are. Make it personal, clear, and convincing.
Navigating the IRCC Application Portal
Once all your documents are scanned and ready to go, it’s time to tackle the online application itself. You'll need to create an account on the official Immigration, Refugees and Citizenship Canada (IRCC) website. The process is a series of straightforward steps.
- Create Your Online Account: First, register for an account on the IRCC secure portal. This is your personal dashboard for the entire process.
- Fill Out the Application Forms: Answer every question in the digital forms completely and truthfully. Double-check every single detail—small typos can cause big delays.
- Pay the Fees: You'll need to pay two separate fees online: the application processing fee (CAD 150) and the biometrics fee (CAD 85). Keep in mind these fees are non-refundable.
- Upload Your Documents: Carefully upload all your prepared documents according to the specific checklist provided in your portal.
- Submit Your Application: Take a deep breath, give everything one final review, and then hit submit.
Shortly after submitting, you'll get instructions on how to schedule your biometrics appointment at a nearby Visa Application Centre (VAC). This is where they take your fingerprints and photograph. Making sure you understand the full scope of the Canada student visa requirement is absolutely key to a smooth submission.
What Happens After You Submit
Hitting that 'submit' button can feel a bit strange, almost like an anti-climax, but the journey isn't over. You can track your application's status through your IRCC online account. Processing times can vary a lot depending on your country and how many people are applying, so patience is key here. Once a decision is made, you'll be notified. If you're approved, you will receive instructions on how to get your passport stamped with your visa—the final green light for your Canadian adventure.
How to Overcome Common Application Hurdles

Even if you’ve meticulously prepared your student visa application, you can still run into unexpected problems. I've seen it happen many times. The best way to avoid this is to understand what those common challenges are before you apply. This lets you build a case that directly answers any questions a visa officer might have.
Many applications get rejected for the same few reasons. When you know what these red flags are, you can get ahead of them. You can turn a potential weakness into a strength, proving you're a serious applicant who has thought everything through.
Addressing Key Visa Officer Concerns
Try to think like a visa officer for a moment. Their job is essentially to assess risk. They're trained to spot anything that doesn't quite add up or casts doubt on your primary intention: to study in Canada. For many applicants, especially from Nigeria, two of the biggest hurdles are proving you have enough money and showing you have strong reasons to return home.
To get past these, your evidence needs to be crystal clear and convincing.
-
Financial Scrutiny: It's not enough to just show the minimum required amount. You need to tell a story with your bank statements. If there are any large, unusual deposits or withdrawals, explain them. A well-funded Guaranteed Investment Certificate (GIC) is also a fantastic tool because it proves your living expenses are already safely parked in a Canadian bank.
-
Proving Ties to Home: This is all about demonstrating that you have a life and responsibilities waiting for you back home. It's what convinces the officer you'll leave Canada after your studies. This could be property you own, family members you support, or a clear career path that your Canadian education will directly benefit. Your Statement of Purpose is the perfect place to connect these dots.
A visa officer is looking for a logical story. If you state your goal is to get a Canadian project management degree to help run your family's construction business back home, you're building a believable narrative that demonstrates clear intent to return.
Navigating Policy Shifts and Processing Delays
It’s important to remember that the visa requirements for a Canada student visa aren't set in stone. They change. Recently, policy updates have created new hurdles, causing approval rates to fluctuate and adding a layer of uncertainty for many students.
Nigeria, for example, has seen a pretty significant drop in study permit approvals lately. This is partly a reaction to new Canadian policies and a much stricter review process. In fact, applications from Nigeria dropped by about 35% between 2023 and 2024, and getting an approval has become tougher. Things like the new Provincial Attestation Letter (PAL) system, ongoing processing delays, and changes to post-graduation work permit rules are all playing a role. You can read a full analysis of how Canada faces international student drops on The PIE News.
Knowing about these external pressures is critical. It means your application can't just be good; it needs to be exceptional to get noticed. Always apply well before any deadlines to leave a buffer for delays, and triple-check every single document for accuracy. By preparing for these obstacles, you give yourself the best possible shot at success.
Frequently Asked Questions About Canada Student Visas
Getting into the nitty-gritty of a student visa application can feel a bit overwhelming, and it's natural to have questions pop up along the way. To clear things up, we've tackled some of the most common queries we see from aspiring students.
What Is the Difference Between a Study Permit and a Student Visa?
It’s incredibly common for people to mix these two up, but they play very different roles in your journey to study in Canada. Think of it this way: your student visa gets you to the door, while your study permit lets you stay for the party.
A study permit is the official document issued by the Canadian government that gives you the legal right to study at a Designated Learning Institution (DLI). This is the core document that confirms your status as a student in Canada.
The student visa (also known as a temporary resident visa or TRV) is the sticker or stamp in your passport that allows you to travel to and enter Canada. For citizens of certain countries, this might be an Electronic Travel Authorization (eTA) instead. The good news is you usually apply for both at once; when your study permit application gets the green light, the visa or eTA you need to enter the country is issued along with it.
Can I Work in Canada on a Student Visa?
Absolutely, and this is a major perk for many international students. If you're a full-time student at a DLI with a valid study permit, you're generally allowed to work without needing a separate work permit. Your study permit itself will state whether you’re eligible to work off-campus.
Typically, you can work up to 20 hours per week while classes are in session. This is a great way to gain valuable Canadian work experience and help cover some of your day-to-day expenses. During scheduled breaks, like your summer or winter holidays, you can usually work full-time.
It's crucial to understand that this work is meant to supplement your funds, not be your main source of income. The visa officer needs to see that you can already cover your tuition and living costs without relying on this potential job.
How Long Does It Take to Process a Canadian Student Visa?
This is the million-dollar question, and the honest answer is: it varies. A lot. Processing times can be anywhere from a few weeks to several months, depending heavily on which country you’re applying from and how many applications the local visa office is handling at that moment.
The best thing you can do is check the official Immigration, Refugees and Citizenship Canada (IRCC) website for the latest processing time estimates for your country. My best advice? Apply as early as you possibly can. This gives you a buffer against unexpected delays and helps ensure you don't miss your school's start date.
Figuring out your move to Canada can feel like a puzzle, but you don’t have to solve it alone. JapaChat is Nigeria’s AI immigration expert, built to provide instant, reliable answers to all your visa and relocation questions. Start planning your journey with the clarity and confidence you deserve. Sign up for free at JapaChat.
-
-
UK Study Visa Requirements for Nigerian Students | How to Apply
So, you're dreaming of studying in the UK? That's a fantastic goal, but let's be honest, the visa application can seem like a mountain to climb. The good news is that it's more straightforward than you might think. For Nigerian students, it really comes down to ticking three major boxes: getting a Confirmation of Acceptance for Studies (CAS) from your university, showing you have the money to pay for your course and living costs, and gathering your key personal documents.
Your Path to Studying in the UK

Your journey to a UK university campus doesn't start at the airport; it begins with the visa process. The official channel for international students is called the Student Route. Think of it less as one giant obstacle and more like a series of checkpoints. You just need to pass through each one, proving that you're a genuine student who's ready for the academic and financial demands of UK life.
This guide is designed to be your step-by-step companion, breaking down the entire process into clear, manageable chunks. My goal is to make sure you know exactly what you need to do and why it’s important.
Getting to Grips With the Points-Based System
The UK's entire immigration framework, including the Student Route, is built on a points system. To get your visa, you need to score exactly 70 points. Don't worry, this isn't like a test where you can get a partial score; it’s an all-or-nothing system, and it’s simpler than it sounds.
You earn these points by fulfilling three essential requirements:
- Confirmation of Acceptance for Studies (CAS): This is the big one. Securing a valid CAS from your chosen university (which must be a licensed student sponsor) instantly gives you 50 points.
- Financial Requirement: Proving you have enough money for your tuition and living expenses gets you another 10 points.
- English Language Requirement: Demonstrating you can speak, read, write, and understand English to the required standard adds the final 10 points.
Nail these three, and you're well on your way. For a deeper look into why so many are making this journey, it’s worth reading the insights from Nigerians in the diaspora who chose to study in the UK.
You may have heard about recent changes to UK visa policies, particularly around bringing dependents. While this did cause a dip in applications from Nigeria, numbers are recovering. Early this year, there was a 4.6% increase, with over 411,100 study visas issued. The key takeaway? Even with policy adjustments, the approval rate for strong applications is still incredibly high—between 95% and 97%.
To help you keep track of everything, here is a quick summary of what you'll need.
UK Student Visa Requirements at a Glance
This table breaks down the main things you need to secure for a successful UK study visa application.
Requirement What It Means Why It Is Important Confirmation of Acceptance for Studies (CAS) An official, electronic document from your university confirming your unconditional offer to study. This is non-negotiable and worth 50 points. It proves you are a genuine student with a place at a recognised institution. Financial Proof You must show you have enough money to cover your first year's tuition fees and living costs. This is worth 10 points and shows the UK government that you can support yourself financially without needing public funds. English Language Proficiency You must prove you can understand and communicate in English to the required level (usually a B2 level). This requirement is worth 10 points and confirms you can cope with the academic demands of a UK degree taught in English. Valid Passport & Documents You'll need a current passport and other key documents, like academic transcripts and potentially a TB test certificate. These are essential for verifying your identity, academic history, and health status as part of the application process. Getting these four areas right is the foundation of a solid application. With careful preparation, you can confidently navigate the process and turn your UK study plans into a reality.
Securing Your Unconditional Offer and CAS

Before you even touch the visa application, your first real mission is to get an unconditional offer from a UK university. This is the green light for everything that follows, and it leads directly to the most important document in this whole process: the Confirmation of Acceptance for Studies (CAS).
Think of the CAS as the university’s official stamp of approval, sent directly to the UK Home Office. It’s a special reference number that basically says, “We’ve accepted this student. They’ve met our academic standards and proven they can fund their studies.” Without a CAS, your visa application is a non-starter.
Your journey will almost always begin with a conditional offer. This is the university saying, "We like you, but…" You'll need to meet their conditions, which usually means hitting specific grades in your final exams or proving your English language proficiency. Once you’ve ticked all their boxes, your offer becomes unconditional, and the university can finally issue your CAS.
What Is a CAS and Why Is It So Important?
A CAS isn't just a random number; it's a detailed digital record that the Home Office will scrutinise. It’s a cornerstone of the requirements for study visa in UK and essentially validates your entire application.
This document contains all the crucial details about your place, including:
- Your unique CAS number
- The university's name (your official licensed sponsor)
- Full details of your course, like the title, length, and start date
- The total tuition fees for your first year or the whole course
- Any money you’ve already paid towards tuition or accommodation
It is absolutely critical that every single detail on your CAS is 100% accurate. Even a small error—a typo in your name or the wrong course title—can be grounds for a visa refusal. Don’t take that chance.
Your First Steps After Receiving Your CAS
The moment that CAS lands in your inbox, the clock starts ticking on your visa application. It's time for a pre-flight check. Read through every single detail with a fine-tooth comb.
Start by pulling up your passport and offer letter. Does your name match exactly? Are the course details what you expect? Have they correctly listed any deposit you've already paid? If you spot anything that looks even slightly off, contact your university’s admissions office immediately. Get it fixed before you submit your application.
Remember, a CAS is only valid for six months from its issue date. You also can't apply more than six months before your course starts. This timing is everything. A flawless CAS provides the 50 points you need for your visa, but only if it's correct and submitted within the right window. Taking a few extra minutes to double-check it now can save you a world of trouble later.
Meeting the Financial Requirements
Let's be honest, proving you can pay for your studies is often the most nerve-wracking part of the UK student visa process. The Home Office needs solid proof that you can cover your first year's tuition and living costs without having to work illegally or access public funds. Think of it as a financial safety net that shows them you’re genuinely ready for your new life in the UK.
The total amount you need to show is split into two main chunks: your tuition fees and your maintenance (living costs). The tuition fee part is straightforward—it’s simply the outstanding balance for your first academic year, which will be clearly stated on your CAS.
The maintenance part, however, is a little more specific. The UK Visas and Immigration (UKVI) has set fixed amounts that depend on where your university is located.
Calculating Your Living Costs
To meet the financial requirements, you need to prove you have a certain amount set aside just for living expenses. This figure changes based on your university's location because, as you can imagine, costs vary quite a bit across the country.
Here’s how it breaks down:
- Studying in London: You must show £1,334 per month for up to nine months. That comes to a total of £12,006.
- Studying outside London: The requirement is a bit lower at £1,023 per month for up to nine months, which totals £9,207.
So, the simple formula for your total required fund is: (First-Year Tuition Fees) + (Required Maintenance Fund). If you’ve already paid a deposit for your tuition or university accommodation, that amount gets subtracted from the total you need to show in your bank account.
The Critical 28-Day Rule Explained
This is a major trip-up for many applicants, so pay close attention. It’s not enough to just have the money; you have to prove you’ve held it for a specific period. The total required funds must be in your bank account (or your parent’s) for a minimum of 28 consecutive days.
The closing balance on your bank statement can’t be more than 31 days old on the day you submit your application. The timing here is absolutely crucial.
Think of it this way: the UKVI wants to see that the money is stable and truly yours, not just a lump sum you borrowed for a few days to pass the check. If your balance dips below the required amount for even a single day within that 28-day window, your application will almost certainly be refused. For applicants from Nigeria, this rule is strictly enforced, so careful planning is a must. To get a better handle on managing your savings for this, checking out a foundational guide to financial planning is a really smart move.
Using Parental or Sponsor Funds
Many students from Nigeria rely on their parents or an official sponsor for funding, and that’s completely fine. However, you’ll need to provide extra documents to prove the relationship and their consent.
If you’re using your parent’s bank statements, you must include:
- Your original birth certificate showing your parents' names.
- A signed letter from that parent confirming your relationship and giving you permission to use their funds for your UK studies.
The landscape for student visas is always shifting. In the first quarter of this year, demand for UK study visas from Nigerian applicants jumped by a massive 64% compared to last year, showing a strong desire to study in the UK despite economic hurdles. For a complete overview of all the requirements, it’s a good idea to review our comprehensive guide on the UK student visa application process.
Gathering Your Essential Documents
Let's be honest, the paperwork part of the visa process can feel like a huge mountain to climb. But getting it right is non-negotiable. A well-organised set of documents is your best bet for convincing the Home Office that you’re a genuine student, ready to start your course.
Think of it this way: every document you submit backs up a claim you’ve made in your application. One missing paper or an incorrect format can cause frustrating delays or, in the worst-case scenario, a rejection. So, let’s take this step-by-step and get it right the first time.
Your Core Document Checklist
While your personal circumstances might require a few extra papers, there's a core set of documents that almost every Nigerian student will need to provide. These are the absolute fundamentals of your application.
Here’s what you absolutely must have:
- A current international passport: This isn't just for travel. It needs to have at least one completely blank page (for the visa sticker) and be valid for your entire stay in the UK.
- Academic transcripts and certificates: These are the original documents your university used to offer you a place, as listed on your CAS. They prove you have the qualifications needed for your course.
- Two passport-sized colour photographs: Pay close attention to the rules here. They must meet the UKVI's strict guidelines on size, background colour, and even your facial expression.
Feeling overwhelmed by the list? Using a project priority matrix template can be a surprisingly helpful tool. It allows you to track what you've collected, what's still pending, and what needs your immediate attention.
Proving English Proficiency
One of the key requirements for a study visa in the UK is demonstrating a solid command of English. For most students coming from Nigeria, you have a couple of straightforward options to tick this box.
Often, a WAEC or NECO certificate showing a grade of at least C6 in English will do the trick, as long as the certificate is less than two years old. The other common route is to take a Secure English Language Test (SELT) like the IELTS for UKVI. Your university will tell you exactly what they require, and this information will be clearly stated on your CAS.
A critical document for applicants from Nigeria is a Tuberculosis (TB) test certificate. You must get tested at a UKVI-approved clinic in Nigeria. The certificate is valid for six months, so time your appointment carefully to ensure it’s still valid when you apply.
Documents for Students Under 18
If you're under 18, the UK government needs extra assurance that you'll be safe and well-cared-for. This means you have a few additional documents to provide.
The main one is a letter of consent from both of your parents or legal guardians. This letter needs to officially confirm their relationship to you, give their permission for your visa application and travel, and outline your living arrangements in the UK. Building your application package with this level of detail is your best strategy for a smooth and successful visa journey.
The Online Application and Biometrics Appointment
Alright, you've got your documents lined up and ready to go. Now for the final push: submitting the application online and attending your biometrics appointment. This is where all that hard work and preparation pay off. The very first step takes place on the official GOV.UK portal—and I can't stress this enough, it's the only place you should ever fill out your UK student visa application.
Navigating the online form is really a test of attention to detail. You'll be prompted to enter the information you've gathered from your CAS, passport, and financial statements. Take your time with this part. Double-check every single name, date, and reference number before you click 'submit'. A tiny typo here can cause massive headaches and delays down the line.
Paying the Key Fees
During the online submission process, you'll need to settle two non-negotiable fees. The first is the visa application fee itself. The second is the Immigration Health Surcharge (IHS), which is just as important.
Paying the IHS is a cornerstone of the UK student visa requirements. Think of it as your contribution to the UK's National Health Service (NHS). By paying it, you gain access to most healthcare services during your studies, putting you on the same footing as a UK resident. It's not optional; without proof of payment, your visa application simply won't be approved.
To help you visualise the groundwork needed before you even start the online form, this infographic breaks down the essential documents.
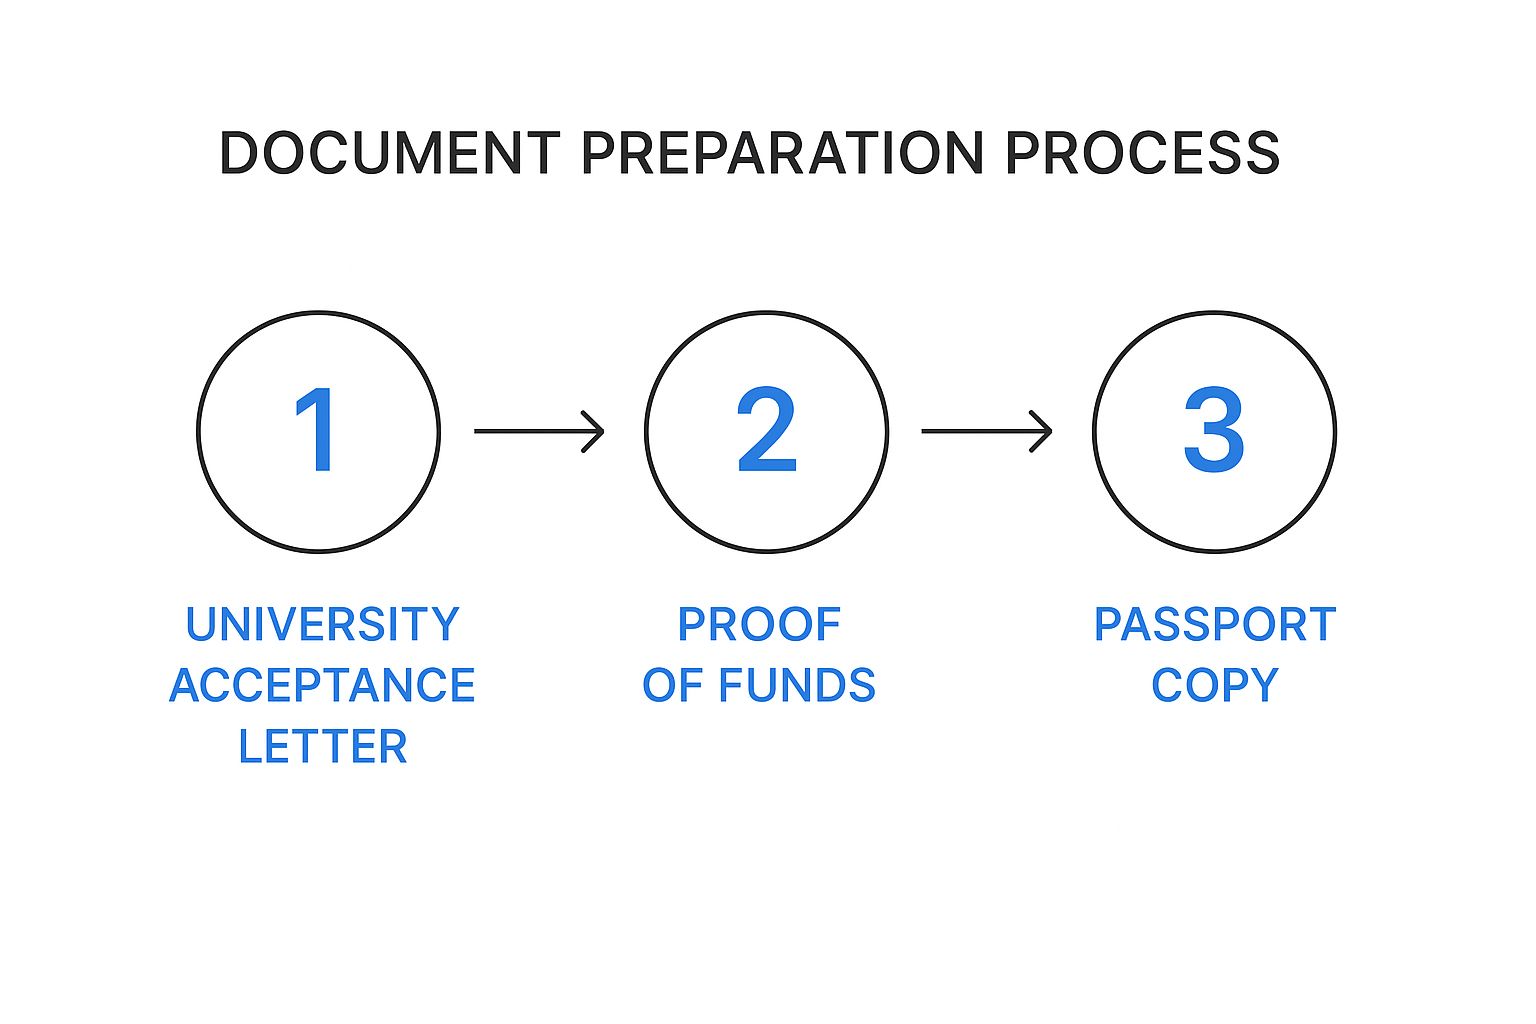
As you can see, securing that university offer, proving you have the funds, and holding a valid passport are the absolute foundations of a successful application.
Booking Your Biometrics Appointment
Once your online form is in and the fees are paid, the system will direct you to book an appointment at a Visa Application Centre (VAC) in your home country. This is the last in-person step you need to take.
So, what happens at the VAC? It’s pretty straightforward.
- They will scan your fingerprints digitally.
- They will take a digital photograph of you.
This biometric information is what the UK government uses to create your Biometric Residence Permit (BRP), which will be your official identification card once you arrive in the UK.
My advice? Show up to your appointment a little bit early. Make sure you have your passport, the appointment confirmation email, and any other specific documents the VAC asked you to bring. The whole thing is usually quick and efficient—it's designed purely to confirm your identity and capture your biometrics.
Recent changes in UK policy have certainly been felt by Nigerian applicants. While UK Home Office data initially showed a significant 68% drop in visas issued to Nigerian main applicants over a two-year period, there was a more recent 13% increase, which shows just how determined students are. The biggest shift has been the sharp drop in dependants joining students, a direct result of the new rules. You can dig into these statistics yourself on the GOV.UK website.
Nailing this final stage with confidence gets you one huge step closer to starting your UK adventure.
Your Top UK Student Visa Questions Answered
Going through the UK visa process, it's completely normal to have a ton of questions pop up. Even when you think you've got all your documents lined up, little uncertainties about timing, rules, and "what-if" scenarios can be stressful. Let’s clear the air and tackle some of the most frequent questions we get from Nigerian students.
Getting these details right will give you the confidence to push forward. Knowing the answers can help you dodge common mistakes and make the whole experience feel a lot less daunting.
How Soon Can I Apply For My Visa?
Timing is absolutely crucial with your visa application. You can officially apply up to six months before your course starts, as stated on your CAS.
My advice? Apply the moment you get that CAS from your university. Seriously. This builds in a healthy safety net for any unexpected processing delays from the Home Office. Starting early is the best way to reduce stress and make sure you have your visa ready long before you need to fly.
Can I Work in the UK While I Study?
Yes, you can absolutely work while you're studying in the UK, but you have to stick to the rules. These restrictions are there to make sure your main focus stays where it should be: on your education. After all, that's why you're getting the visa in the first place.
The hours you can work depend on what you're studying:
- Degree-Level Study: If you’re enrolled in a course at a bachelor's degree level or higher, you can generally work up to 20 hours per week during term time.
- During Vacations: Once it's an official university holiday, you're usually allowed to work full-time without that 20-hour weekly cap.
- Below Degree-Level: For foundation courses or other programmes below degree level, the rules can be much tighter. Sometimes, work isn't permitted at all, so always check the specific conditions printed on your visa.
Having the right to work is a brilliant way to get some real-world experience and earn a bit of money, but breaking these rules can lead to very serious problems with your immigration status.
Don't forget to think about life after your degree, too. The Graduate Route visa, which lets you stay and work for two years after graduating, is a massive draw for many students and is expected to continue.
What Happens if My Visa Gets Refused?
A visa refusal is tough, there's no sugar-coating it. But it doesn't automatically mean your dream of studying in the UK is over. The very first thing to do is sit down and read the refusal letter from start to finish. This letter will spell out exactly why the Entry Clearance Officer made that decision.
Understanding their reasons is everything, as it dictates what you do next. Sometimes it’s a simple mistake, like a missing document, but other times it can be more complicated. Based on the refusal reason, you typically have two main paths forward:
- Administrative Review: If you genuinely believe the Home Office made a mistake—for instance, they overlooked a document you definitely included—you can apply for an Administrative Review to have them look at it again.
- Submit a New Application: This is the more common route. If the refusal was due to things like not showing enough funds or using the wrong document format, your best bet is to start a fresh application. This time, you'll need to meticulously fix every single issue they pointed out in the refusal letter.
The rules and policies for students are always evolving. For a deeper look at recent changes, you can learn more about how the new UK immigration white paper affects students and what it could mean for your own application strategy.
Feeling overwhelmed by the immigration process? Let JapaChat be your guide. As Nigeria's first AI immigration expert, we provide instant, accurate answers to all your visa questions, helping you plan your journey with confidence. Get started for free on JapaChat.
-

Top Platforms for Jobs in Canada with Visa Sponsorship (2025)
The dream of working in Canada is a powerful one for many Nigerian professionals, but navigating the job market can be complex, especially when visa sponsorship is a requirement. The good news is that numerous Canadian employers are actively seeking international talent and are prepared to support the immigration process. The primary challenge, however, is knowing exactly where to look for these opportunities. This guide cuts through the noise and gets straight to the point.
We provide a curated list of the most effective platforms to find legitimate jobs in Canada with visa sponsorship. Think of this as your direct route to employers who are ready to hire from abroad. For each website we cover- from the government's official Job Bank to specialised platforms like Visa Jobs Canada- we will provide a clear breakdown of its features, advantages, and disadvantages.
You will find actionable insights, screenshots for easy navigation, and direct links to help streamline your job search. Our goal is to equip you with the precise tools needed to identify and apply for roles that offer the support you need. We'll also briefly touch on how you can organise your relocation journey with tools like JapaChat, ensuring your path to Canada is as smooth as possible. Let's get started.
1. Visa Jobs Canada
Visa Jobs Canada carves out a unique niche by focusing exclusively on a critical need for international applicants: verified jobs in Canada with visa sponsorship. This platform is purpose-built to eliminate the guesswork and time-consuming searches on generic job boards, where sponsorship status is often unclear. For Nigerian professionals, this specialised focus means every listing represents a genuine opportunity from an employer ready and willing to navigate the immigration process.

The platform's strength lies in its curation. Employers are often required to have a positive Labour Market Impact Assessment (LMIA) or be exempt, ensuring the roles are legitimate and ready for foreign talent. This pre-verification is a significant advantage, saving you from applying for positions where the employer is not prepared to sponsor.
Navigating Visa Jobs Canada Effectively
To maximise your success on this free-to-use platform, leverage its smart filters. You can refine your search by province, job category (like tech, healthcare, or engineering), and specific keywords. The user interface is straightforward, prioritising function over flair, which makes finding relevant roles quick and efficient.
Pro Tip: Set up job alerts for your preferred roles and locations. New positions are added regularly, and being among the first to apply can significantly increase your visibility to recruiters.
Beyond job listings, the website offers valuable resources, including resume guidance tailored to Canadian standards and links to immigration support services. These tools are invaluable for understanding the specific requirements of the Canadian job market and application process. For a deeper dive into the procedural steps, you can learn more about the work visa application process.
Key Features & Takeaways:
Feature Benefit for Nigerian Applicants Exclusive Focus Saves time by only showing jobs with confirmed visa sponsorship. Verified Listings Reduces the risk of applying to non-viable roles; many have LMIA approval. Resource Hub Provides essential guidance on Canadian-style CVs and immigration pathways. Free Access No subscription fees are required to search and apply for jobs. Ultimately, Visa Jobs Canada is a highly practical and targeted starting point for anyone serious about securing sponsored employment in Canada.
Website: https://visajobscanada.com/
2. LinkedIn
LinkedIn is more than just a professional social network; it has evolved into a powerhouse job search engine where numerous Canadian employers actively seek international talent. While not exclusively focused on immigration, its vast database and sophisticated search tools make it an indispensable resource for finding jobs in Canada with visa sponsorship. For Nigerian professionals, it offers a dual advantage: the ability to apply for roles and the opportunity to build a strategic network with Canadian recruiters and industry leaders.
The platform's primary strength is its sheer scale and the quality of its user data. Employers can see your detailed professional history, skills, and endorsements, giving them a comprehensive view of your qualifications. This transparency allows you to directly showcase your expertise and value proposition to companies that are actively hiring for roles that need your specific skill set, many of which are open to sponsorship for the right candidate.
Navigating LinkedIn Effectively
To uncover sponsorship opportunities, you must master LinkedIn's search filters. Use specific keywords like "visa sponsorship," "relocation assistance," or "LMIA" in combination with your desired job title and location (e.g., "Software Engineer visa sponsorship Toronto"). Many recruiters now use hashtags like #visasponsorship or #hiringinternationaltalent in their posts, so following these can also reveal hidden opportunities.
Pro Tip: Your LinkedIn profile is your digital CV. It must be optimised for the Canadian market. To maximise your presence on LinkedIn, understanding what makes a strong LinkedIn profile is crucial. A complete and compelling profile significantly increases your chances of being discovered by recruiters.
Beyond applying, engage with content from Canadian companies in your field, connect with their HR personnel, and join relevant professional groups. This proactive networking can provide insider information on unadvertised roles and demonstrate your genuine interest in the Canadian market. While some advanced features are part of a paid subscription, the core job search and networking functions are free.
Key Features & Takeaways:
Feature Benefit for Nigerian Applicants Advanced Search Allows for targeted searches using keywords like "visa sponsorship" to filter relevant roles. Professional Profile Acts as a dynamic CV, showcasing skills, experience, and recommendations to employers. Networking Tools Enables direct connection with recruiters and industry professionals in Canada. Extensive Database Provides access to a massive number of job listings across all major Canadian industries. LinkedIn is a fundamental tool for any serious job seeker, offering a direct path to connect with and apply to Canadian employers prepared to sponsor foreign workers.
Website: https://ca.linkedin.com/jobs/visa-sponsorship-jobs
3. Glassdoor Canada
Glassdoor Canada offers a unique, multi-faceted approach for international job seekers by combining job listings with a wealth of insider information. While not a dedicated sponsorship platform, its power lies in providing a 360-degree view of potential employers. For Nigerian professionals, this means you can not only find jobs in Canada with visa sponsorship but also research a company's culture, salary benchmarks, and interview processes before you even apply.
The platform's strength is its user-generated content. You gain access to candid reviews from current and former employees, which can reveal crucial details about whether a company has a history of hiring foreign workers. This transparency helps you identify truly supportive employers and avoid those with poor track records, making your job search more strategic.
Navigating Glassdoor Canada Effectively
To find sponsored roles, use specific search queries like "visa sponsorship" or "LMIA" in the keywords field alongside your desired job title and location. While the volume of dedicated sponsorship roles might be lower than on specialised sites, the quality of information you get on each employer is unparalleled. Dig into the "Interviews" section for a company to see if other international candidates have shared their experiences.
Pro Tip: Look for larger multinational corporations on Glassdoor. These companies often have established immigration support systems and are more likely to offer sponsorship, even if it's not explicitly stated in every job post. Their company profiles will often have extensive reviews that can give you clues.
Beyond job hunting, use Glassdoor to prepare for interviews. Reviewing company-specific interview questions shared by other users gives you a significant competitive advantage. Understanding what to expect allows you to tailor your answers and demonstrate your suitability for both the role and the company culture.
Key Features & Takeaways:
Feature Benefit for Nigerian Applicants Company Reviews Provides honest insights into company culture and work environment. Salary Data Helps you understand compensation benchmarks and negotiate a fair salary. Interview Insights Offers real interview questions and experiences from past candidates. Free Access Most features, including job searching and reviews, are available at no cost. Ultimately, Glassdoor Canada is an essential research tool that empowers you to make informed career decisions, ensuring your move to Canada is to a company that is the right fit for you.
Website: https://www.glassdoor.ca/Job/canada-visa-sponsorship-jobs-SRCH_IL.0,6_KO7,23.htm
4. Job Bank Canada
As the official job board of the Government of Canada, Job Bank is an authoritative and trustworthy resource for finding jobs in Canada with visa sponsorship. Its direct connection to federal employment and immigration systems gives it a level of credibility that commercial job boards cannot match. For Nigerian job seekers, this means access to a vast, nationwide database of opportunities directly from the source, free from third-party intermediaries.
The platform’s key differentiator is its integration with the Express Entry system and its clear labelling of employers actively seeking foreign workers. While not every listing offers sponsorship, its advanced search filters allow you to specifically target employers who have indicated they are open to hiring candidates from abroad. This official endorsement provides a significant layer of security and confidence in your job search.
Navigating Job Bank Canada Effectively
To make the most of Job Bank, it is crucial to use its filters strategically. Beyond standard role and location searches, look for the "Canadians and international candidates" filter under the "Intended Applicants" section. This simple step will immediately narrow down the results to employers who have explicitly stated their willingness to hire foreign talent. The platform is entirely free to use and does not require an account to browse or apply.
Pro Tip: Use the "Explore Careers" and "Labour Market Information" sections. This data, provided by the government, can help you identify in-demand professions and provinces with labour shortages, allowing you to tailor your job search to high-opportunity areas.
Job Bank also provides invaluable tools for career planning, including a free resume builder formatted to Canadian standards. For those considering permanent residency, an active Job Bank profile is often a required step, and you can learn more about creating an Express Entry profile to understand the connection.
Key Features & Takeaways:
Feature Benefit for Nigerian Applicants Official Government Source Provides the most reliable and verified job listings directly from the source. Sponsorship Filter Allows you to efficiently isolate jobs where employers are ready to hire foreign workers. Labour Market Data Offers strategic insights into high-demand sectors and regional economic trends. Completely Free Full access to all job listings and career planning tools without any fees or subscriptions. Job Bank Canada is an indispensable tool, serving as both a job-hunting platform and a vital resource for understanding the Canadian employment landscape.
Website: https://www.jobbank.gc.ca/
5. Indeed Canada
Indeed Canada stands as a colossal job aggregator, pulling in millions of listings from company career pages, recruitment agencies, and other job boards. While not exclusively focused on immigration, its sheer volume makes it an indispensable tool for finding jobs in Canada with visa sponsorship. For Nigerian job seekers, its powerful search engine and filtering capabilities offer a vast landscape of opportunities across every conceivable industry, from tech and healthcare to trades and agriculture.
The platform's primary advantage is its extensive database. Unlike niche sites, Indeed provides a comprehensive view of the Canadian job market. Its user-friendly interface allows you to quickly search and apply, while features like company reviews and salary estimates provide crucial context to inform your application strategy.
Navigating Indeed Canada Effectively
Success on Indeed requires a strategic approach to sift through the noise. Use specific search terms like "visa sponsorship," "work permit," or "LMIA" in quotation marks along with your desired job title. This simple trick helps narrow down the results to employers actively seeking foreign talent. The platform is free to use, making it accessible to everyone.
Pro Tip: Create a detailed profile on Indeed and upload your Canadian-formatted CV. Many employers use Indeed's resume database to proactively search for candidates, so having a complete and optimised profile increases your chances of being discovered by recruiters.
Beyond its search function, Indeed is a rich resource for career development. You can gain insights into company culture through employee reviews and prepare for interviews by researching typical salaries for your role. For a clear understanding of the permits you'll need, you can get more details on the Canada work visa process.
Key Features & Takeaways:
Feature Benefit for Nigerian Applicants Extensive Job Listings Access to the widest possible range of jobs across all sectors and provinces. Powerful Search Filters Ability to zero in on potential sponsorship opportunities despite the high volume. Company Reviews & Salary Data Provides valuable insights to evaluate employers and negotiate offers effectively. Free Access No cost to search, apply for jobs, or host your CV on the platform. While it demands more effort to filter for sponsored roles, Indeed Canada's unparalleled scope makes it a fundamental resource that should not be overlooked in your job search.
Website: https://ca.indeed.com/
6. Workopolis
Workopolis stands as a veteran in the Canadian job market, offering a broad spectrum of listings that cater to both local and international talent. While not exclusively focused on sponsorship, its deep roots in Canada mean it hosts numerous opportunities from employers familiar with the process of hiring foreign workers. For Nigerian professionals, it serves as a reliable resource for discovering potential jobs in Canada with visa sponsorship alongside valuable career development tools.
The platform distinguishes itself by integrating job searching with comprehensive career advice. This dual focus is particularly beneficial for newcomers who need to understand the nuances of the Canadian workplace culture and application standards. It provides a more holistic approach than a simple job board, preparing you not just for the application, but for a successful career transition.
Navigating Workopolis Effectively
To make the most of Workopolis, you need to be strategic with its search functions. Use specific keywords like "visa sponsorship," "LMIA," or "relocation assistance" in conjunction with your desired job title and location. The user interface is clean and user-friendly, allowing for efficient filtering and browsing.
Pro Tip: Don't just apply for jobs; dive into the "Career Resources" section. Articles on resume writing, interview preparation, and salary negotiation are tailored for the Canadian market and can give you a significant competitive edge.
Setting up email alerts is another crucial step. Given the platform's wide scope, new roles are added constantly. Instant notifications ensure you are among the first to see relevant openings from employers actively seeking to fill skill gaps with international talent, increasing your chances of getting noticed.
Key Features & Takeaways:
Feature Benefit for Nigerian Applicants Canadian Market Focus Access jobs from established Canadian companies that may be open to sponsorship. Career Resources Gain insights into Canadian workplace norms, CV formats, and interview etiquette. Email Job Alerts Stay updated on new sponsorship-friendly roles without constant manual searching. Free Access Search for jobs, apply, and use all career resources without any subscription fees. While you may need to sift through some listings to confirm sponsorship details, Workopolis remains a powerful and free tool for tapping directly into the Canadian employment landscape.
Website: https://www.workopolis.com/
7. Monster Canada
As a global giant in the online recruitment space, Monster Canada offers a vast and diverse repository of job opportunities, including a significant number of jobs in Canada with visa sponsorship. While not exclusively focused on sponsored roles like some niche platforms, its sheer volume of listings across all industries makes it an indispensable tool for Nigerian job seekers. Its powerful search engine and established reputation mean many of Canada's top employers list their vacancies here first.
The primary strength of Monster Canada lies in its comprehensive database and advanced filtering capabilities. For an international applicant, this means you can sift through thousands of roles to pinpoint those where employers have indicated a willingness to consider foreign talent or have already secured a Labour Market Impact Assessment (LMIA). The platform's scale provides access to opportunities in every province and territory, from tech hubs in Ontario to healthcare roles in British Columbia.
Navigating Monster Canada Effectively
To successfully find sponsored positions, you must be strategic with your search queries. Use specific keywords like "visa sponsorship," "LMIA," or "work permit" in conjunction with your desired job title and location. The platform allows you to upload your CV, making it visible to recruiters who are actively searching for candidates with your skill set.
Pro Tip: Create a detailed profile and upload a Canadian-formatted CV. Use Monster's application tracking feature to monitor the status of your applications and follow up where necessary. This organised approach is crucial when managing multiple applications.
Beyond job listings, Monster provides a wealth of career advice, from interview preparation tips to salary negotiation guides. These resources are designed to help you understand and adapt to the Canadian professional environment, giving you a competitive edge.
Key Features & Takeaways:
Feature Benefit for Nigerian Applicants Large Job Database Access to a wide array of roles across all sectors and provinces. Advanced Search Filters Ability to narrow down searches to find potential visa-sponsored jobs. Resume Posting Increases your visibility to Canadian recruiters actively seeking talent. Free to Use No cost to search for jobs, upload your resume, or apply for positions. While you may need to do more filtering than on a specialised site, Monster Canada’s extensive reach and robust features make it a powerful asset in your search for sponsored employment.
Website: https://www.monster.ca/
Visa Sponsorship Job Platforms Comparison
Platform Implementation Complexity 🔄 Resource Requirements ⚡ Expected Outcomes 📊 Ideal Use Cases 💡 Key Advantages ⭐ Visa Jobs Canada Medium – specialized filters and immigration resources Moderate – visa-sponsored job data and migration support High – focused visa sponsorship job listings International applicants seeking verified visa jobs in Canada Exclusive focus on visa-sponsored jobs with immigration help LinkedIn Medium – advanced search and networking features High – extensive network and premium options High – direct applications and recruiter connections Professionals aiming to network and apply broadly Large network, profile showcasing, and job variety Glassdoor Canada Low – job search plus review and salary data Low – user-generated content and company insights Medium – informed decisions with employer reviews Job seekers wanting company insights along with visa jobs Comprehensive company info and free access Job Bank Canada Low – govt-operated with advanced filters Low – free access without account Medium – official listings and labor market info Applicants needing official, reliable government job data Official source with broad sector coverage Indeed Canada Low – easy-to-use filters and job alerts Low – free, extensive job aggregation High – broad job access and visa sponsorship filtering Users seeking large job database and timely notifications User-friendly, vast listings, free access Workopolis Low – job filters with career advice Low – job listings and resource articles Medium – focused on Canadian market job listings Canadian job seekers wanting career support Canadian market focus with additional advice Monster Canada Medium – advanced search and application tracking Moderate – resume and job tracking features High – personalized recommendations and job matching Job seekers wanting career advice and efficient job search Large database, personalized job matching Start Your Canadian Career Journey with Confidence
Navigating the path to securing a job in Canada with visa sponsorship can feel complex, but it is an achievable goal with the right strategy and resources. This guide has equipped you with a curated list of powerful tools, from specialised platforms like Visa Jobs Canada to mainstream giants like LinkedIn and Indeed Canada. Each platform offers unique advantages, whether it is the government-backed credibility of Job Bank Canada or the company insights provided by Glassdoor.
The key takeaway is to move beyond generic searches. Your success hinges on strategically using the advanced filters, targeted alerts, and employer-vetting features these tools provide. By focusing your efforts on companies with a history of hiring international talent and roles designated for foreign workers, you transform a broad search into a targeted, effective campaign. This methodical approach is what separates hopeful applicants from hired professionals.
Your Actionable Next Steps
To turn these insights into job offers, you need a clear, actionable plan. Here is a step-by-step guide to structure your job search effectively:
- Organise Your Search: Do not just browse randomly. Create a spreadsheet to track applications, noting the platform used, the date applied, and any follow-up actions. This helps you stay organised and measure what is working.
- Customise Your Applications: For every role you find, tailor your CV and cover letter to match the specific job description and company values. Highlight the skills and experiences that make you the ideal candidate for that particular position. Generic applications are easily dismissed.
- Leverage Networking Features: On platforms like LinkedIn, your network is your most valuable asset. Connect with recruiters at your target companies, engage with their posts, and reach out to fellow Nigerians who have successfully made the move. Their insights can be invaluable.
Key Insight: The most successful job seekers do not just apply for jobs; they build a professional brand. Your online profiles, application materials, and networking efforts should all work together to present you as a skilled, motivated, and ideal candidate for jobs in Canada with visa sponsorship.
Remember that securing an interview is only half the battle. As an international candidate, you will likely face a video interview. It is crucial to present yourself professionally and confidently in a virtual setting. To prepare, you must learn how to ace a video interview, as mastering this format can significantly increase your chances of receiving a job offer.
Your journey to Canada is a marathon, not a sprint. It requires patience, persistence, and a proactive mindset. By combining the powerful job-seeking tools detailed in this article with a polished application strategy and strong interview preparation, you are not just hoping for an opportunity-you are creating one. Your Canadian dream is within reach, and with these resources, you are now better equipped than ever to make it a reality.
Feeling overwhelmed by the immigration process? Get instant, personalised answers to all your visa and relocation questions with JapaChat. As Nigeria's first AI immigration expert, JapaChat simplifies your journey by providing clear, reliable guidance on everything from documentation to eligibility, helping you navigate your path to Canada with confidence.
-
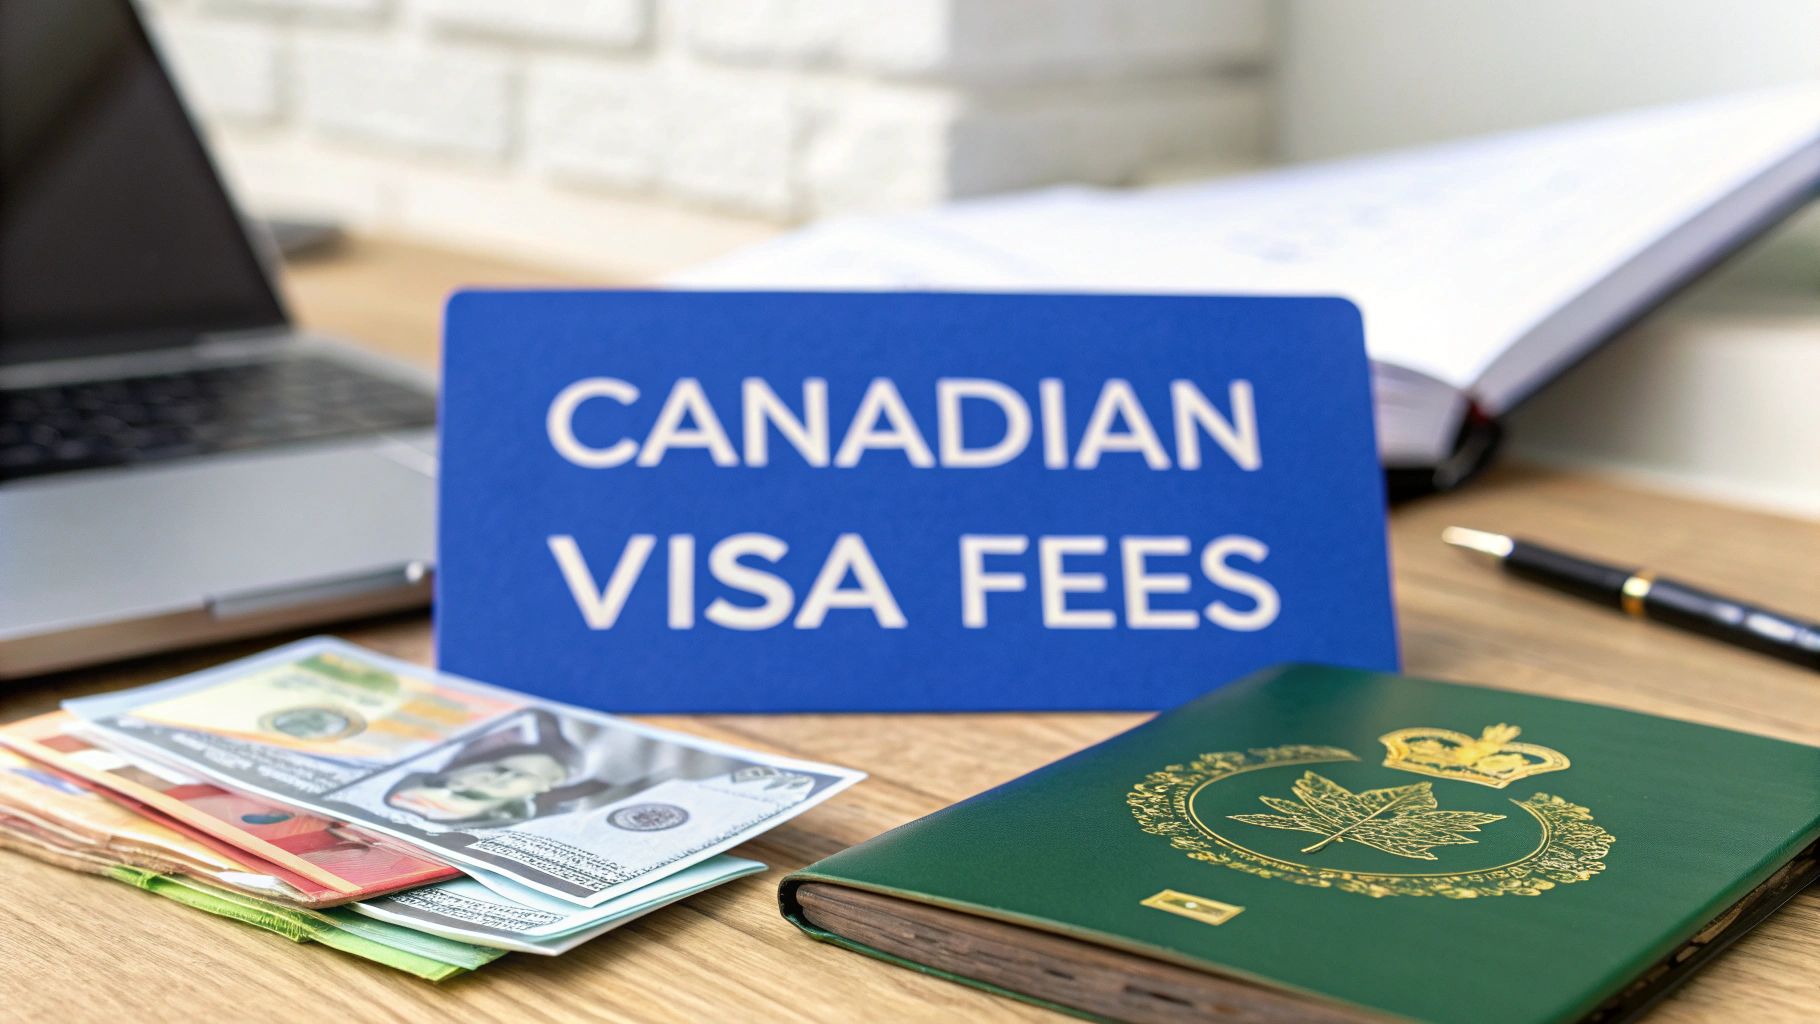
How Much Is Canadian Visa Fee in Nigeria? Full Breakdown
Figuring out the cost of a Canadian visa from Nigeria can sometimes feel like trying to solve a puzzle. Let's break it down. Essentially, you're looking at two main, non-negotiable charges to get your application started.
First, there's the application processing fee, which is CAD $100. Then, you have the biometrics fee of CAD $85. This brings your total initial cost to CAD $185. It's crucial to remember that these fees are non-refundable, regardless of your application's outcome.
Understanding the Core Visa Costs
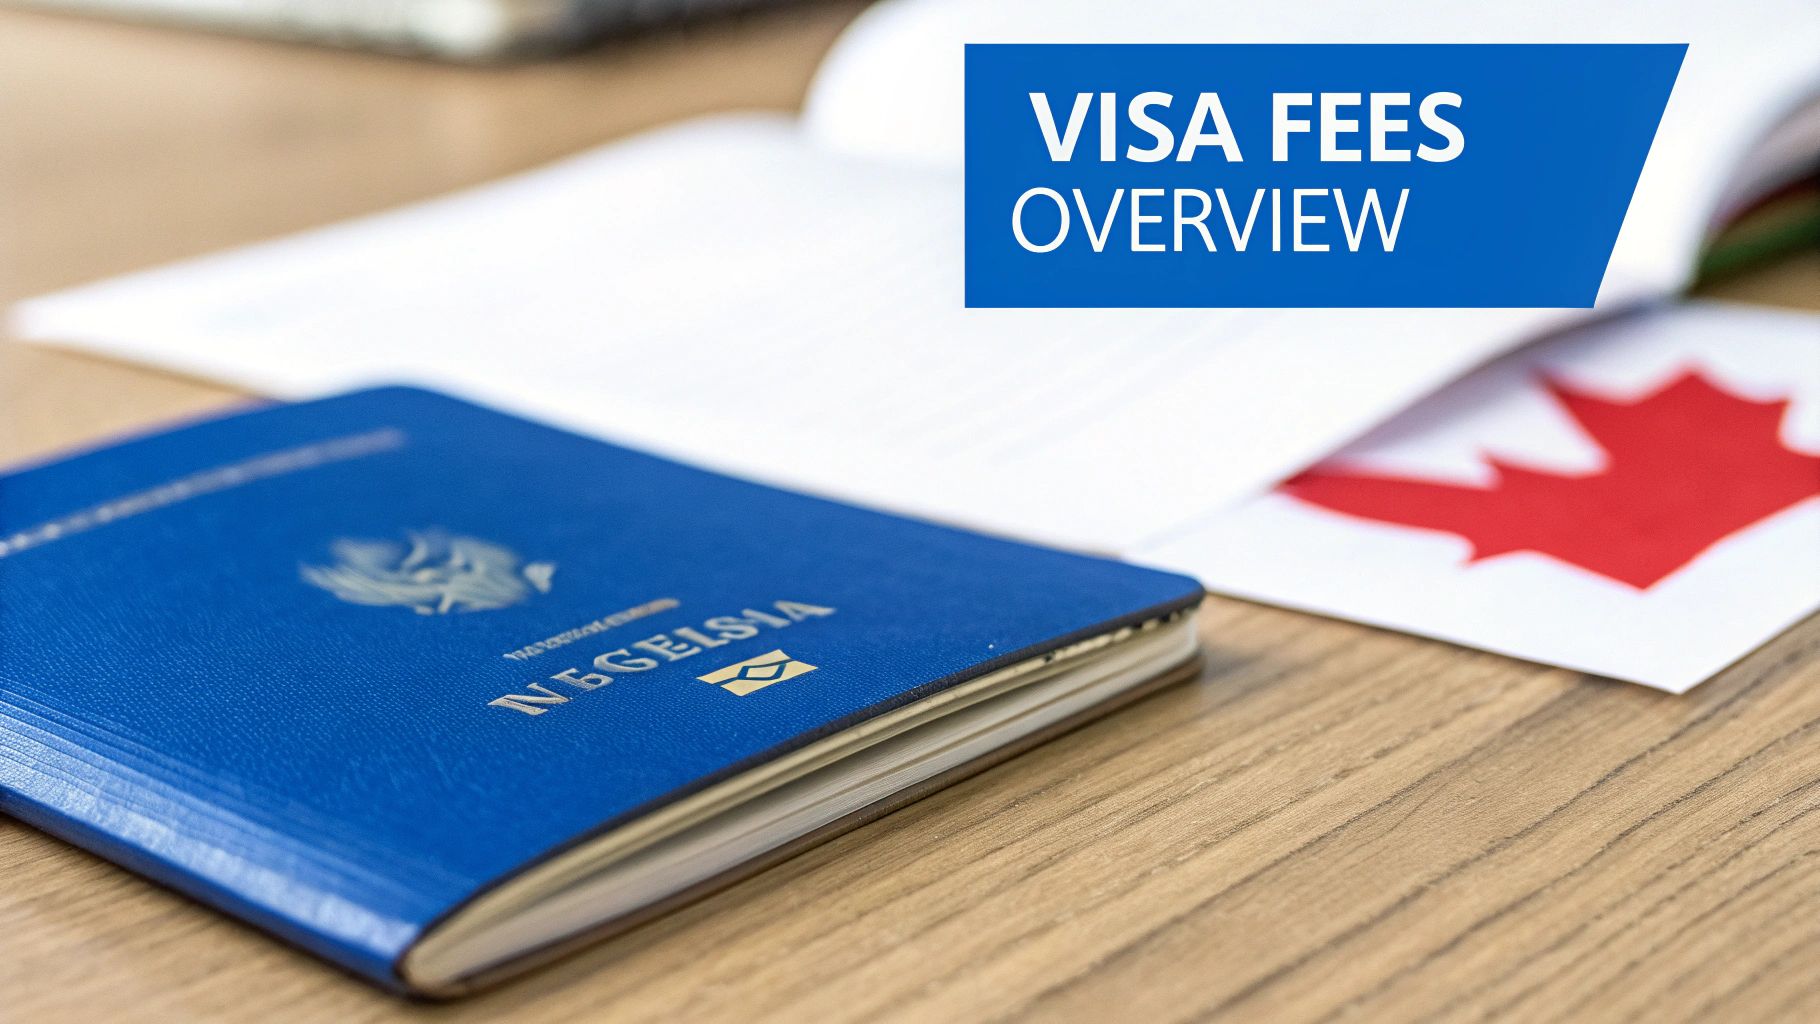
Before you get lost in the paperwork, it's wise to get a firm grip on these baseline costs. Think of them as the gate fees for your Canadian journey.
The application fee is what you pay for an immigration officer to review your case. The biometrics fee, on the other hand, covers the cost of collecting your fingerprints and photograph, which is a standard security step for applicants from Nigeria.
As of September 2024, the CAD $100 application fee works out to about NGN 71,500. The CAD $85 for biometrics is roughly NGN 61,275. This means you should budget for a total upfront cost of around NGN 132,775. Just keep in mind that this Naira figure can shift a bit depending on the daily exchange rate.
Core Canadian Visa Fees for Nigerian Applicants
To give you a clear, at-a-glance view, here is a simple table showing the primary, non-refundable fees you'll encounter for a standard Canadian visitor visa application from Nigeria.
Fee Type Cost in Canadian Dollars (CAD) Estimated Cost in Nigerian Naira (NGN) Application Processing Fee CAD $100 ~ NGN 71,500 Biometrics Fee CAD $85 ~ NGN 61,275 Total Mandatory Cost CAD $185 ~ NGN 132,775 Knowing these initial figures is the first, most practical step in planning your budget.
These costs are just one piece of the puzzle. For a complete picture of the entire journey, our guide on relocating to Canada from Nigeria offers a wider perspective, helping you see how these fees fit into your overall immigration plan.
Navigating the Different Canadian Visa Costs
It’s a common mistake to think there's a one-size-fits-all price for a Canadian visa. The truth is, the amount you'll end up paying is directly linked to why you're going to Canada in the first place. A simple visitor visa has its own fee, but other, more involved applications come with different price tags.
Think of it this way: your reason for travel—be it to study, work, or reunite with family—sets you on a specific application path. Each path has its own set of administrative hurdles for Canadian immigration officials to clear, and the fees reflect that effort.
A Look at Common Visa Categories
For example, a study permit application will set you back CAD $150. That’s a bit more than a standard visitor visa because the officials need to verify your acceptance letter from a Designated Learning Institution (DLI) and get a clear picture of your long-term intentions.
A work permit application is another step up in complexity, typically costing CAD $155 and sometimes more. This fee covers the detailed background checks required to confirm your job offer is legitimate and that your role aligns with Canada's labour market needs. If you're heading down this path, our guide on how to apply for a work visa breaks it all down.
This image gives you a quick visual breakdown of the most common visa types and what the Canadian government charges for each.
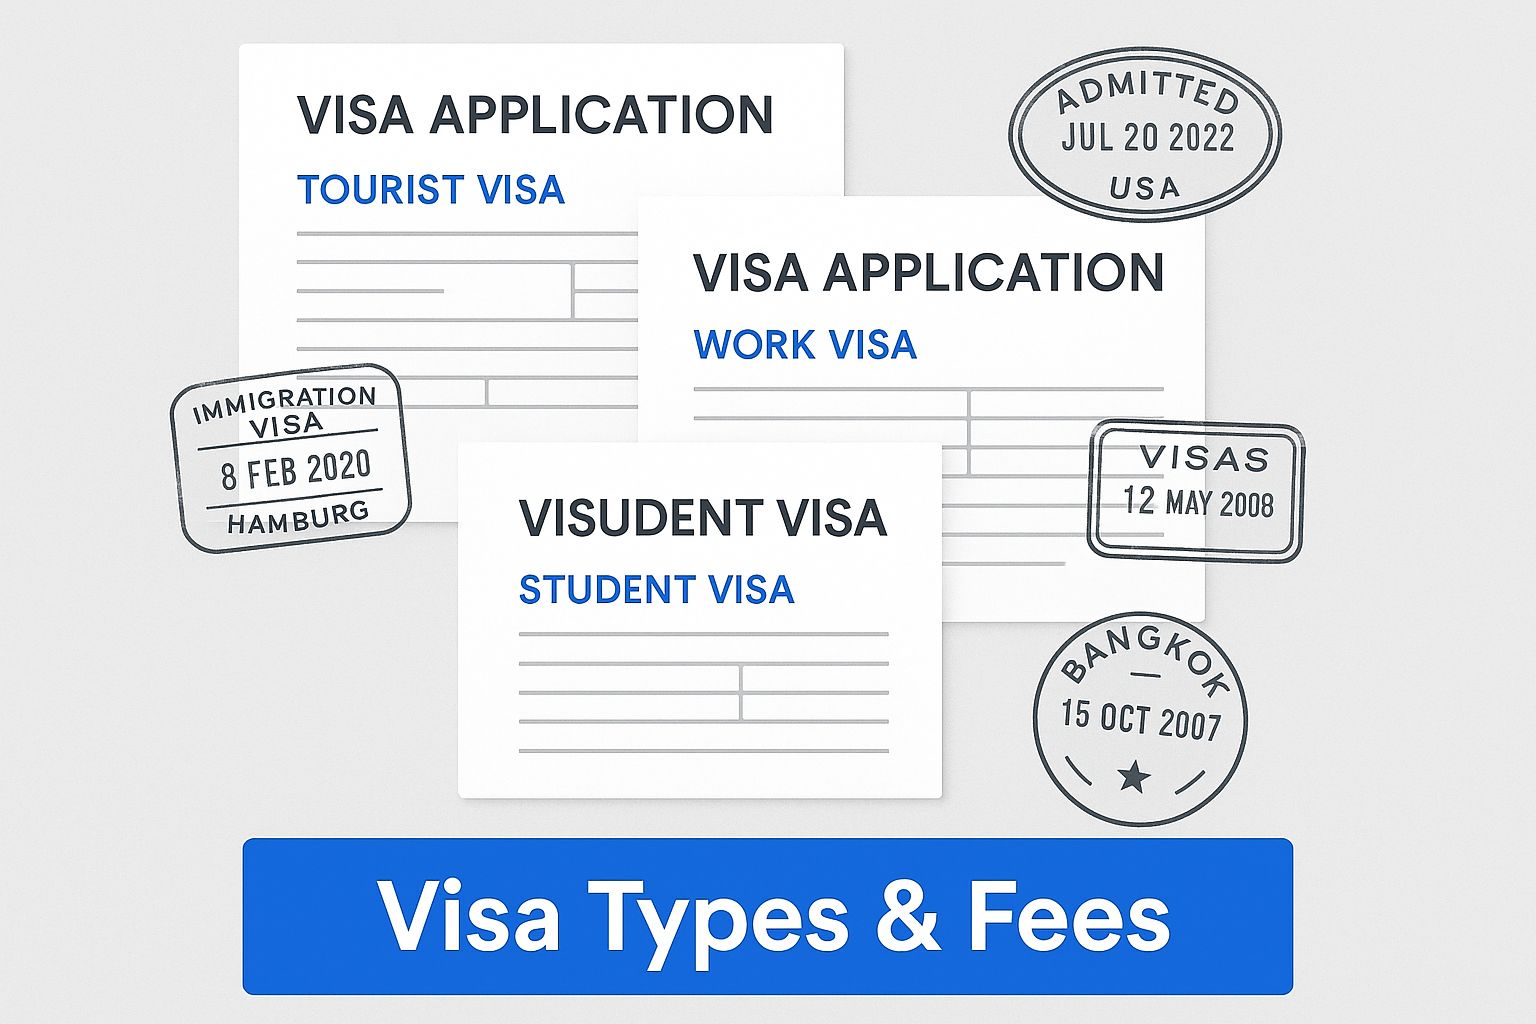
As you can see, specialised permits for working or studying naturally have higher fees than a straightforward visitor visa.
Getting these fees right from the start is absolutely critical. Paying the wrong amount is one of the fastest ways to have your application sent straight back to you. This doesn't just cause frustrating delays; it means you have to go through the whole payment process all over again.
Finally, applications for family sponsorship have their own unique fee structures, which are often higher due to the detailed work involved in verifying family ties and eligibility. To be sure about what you need, it's always a good idea to check the official entry requirements for Canada by country or territory.
By figuring out your exact visa category from day one, you can budget properly and sidestep any needless headaches.
Unpacking the Mandatory Biometrics Fee

Aside from the main application fee, there's another charge that's a mandatory part of the Canadian visa process for most Nigerians: the biometrics fee. It's a common point of confusion, but it’s really just a standard security step. This fee covers the cost of collecting your fingerprints and taking a photograph.
Think of it as Canada’s way of creating a secure digital handshake. This data helps confirm you are who you say you are, protecting both you and the Canadian system by making sure no one else can use your identity. If you're in Nigeria and applying for a visitor visa, work permit, study permit, or permanent residency, you'll need to provide your biometrics.
The cost is straightforward. For a single person, the biometrics fee is CAD $85. You'll pay this right along with your main application fee in one go.
How the Family Cap Can Save You Money
Here's a helpful tip for families. You won't have to pay that CAD $85 fee for every single person if you're applying together as a family unit—say, a couple with their children.
Instead, a family applying at the same time and place pays a maximum total of CAD $170. This can add up to a significant saving, which is always a welcome bit of news when dealing with application costs.
It's crucial to understand that this fee is for the service of collecting your biometrics, not a guarantee of visa approval. The fee is non-refundable, which really highlights how important it is to get your application right the first time.
Once you've paid, you'll get a Biometric Instruction Letter (BIL). You absolutely must bring this letter with you to your appointment at a Visa Application Centre (VAC) in Nigeria. My advice? Book that appointment as soon as you get the letter. It’s a vital step, and getting it done quickly turns a requirement into a simple, stress-free checkpoint on your path to Canada.
Alright, let's talk about the part of the process that makes everyone a little nervous: paying the fees. Getting this step right is crucial. A simple payment error can cause frustrating delays, and nobody wants that.
The only legitimate way to pay your Canadian visa fees is directly through the official Immigration, Refugees and Citizenship Canada (IRCC) online portal. Think of it as the single, secure gateway for your application. Using this portal is the only way to ensure your payment is safely received and correctly linked to your file.
This centralised system is designed to protect you. It helps you avoid the scams and unofficial "agents" that unfortunately pop up. When you're paying online and uploading sensitive documents, you'll also want to be sure your files are protected. It's always a good idea to brush up on proven PDF document security tips to keep your information safe.
Making the Payment from Nigeria
So, how does it actually work? When you get to the payment stage, the amount will be shown in Canadian Dollars (CAD). You’ll use your Nigerian debit or credit card (like a Visa or Mastercard) to pay, and your bank will automatically handle the conversion from Naira to CAD based on their exchange rate for that day.
Keep in mind that these rates change daily. The final amount you see debited from your account in Naira might be a little different from what you calculated yesterday. It's a smart move to give your bank a quick call before you make the payment. Just let them know you're about to make an international transaction to Canada. This simple heads-up can prevent their fraud detection system from blocking the payment, which could seriously disrupt your application.
One critical point to burn into your memory: all visa application fees are non-refundable. Once you pay, that's it. This really highlights how important it is to double-check, and then triple-check, every single detail of your application before you hit that submit button.
For applicants in Nigeria, all payments must be completed online. As you can find out more about on the non-refundable fee policy on the Nigerian High Commission's website, this "no refund" rule applies whether your visa is approved or not. This is why putting together a flawless, well-prepared application from the start is the best investment you can make in your journey to Canada.
Budgeting Beyond the Official Fees
It’s easy to think that once you've paid the application and biometrics fees, you're done with the spending. That's a common trap many applicants fall into. To get a real, honest picture of what your Canadian visa application will truly cost, you need to look past the main government charges. A smart budget includes all the other bits and pieces required to build an application that actually gets approved.
For instance, most people will need to gather several supporting documents, and these aren't free. You might need to get a police clearance certificate to prove you have a clean record or pay for a medical examination if Immigration, Refugees and Citizenship Canada (IRCC) asks for one. And if any of your documents are not in English or French, you'll have to pay for an official translation.
Uncovering Hidden Application Costs
Let's break down some of these other expenses you should probably plan for. Think of them as the behind-the-scenes costs of putting your application together.
Sometimes, you might need certain documents to be officially authenticated or notarised. The fees for this can vary, so it's a good idea to look into the potential costs for document notarization ahead of time.
Then there's the big one: proof of funds. Now, this isn't a fee you pay to anyone, but it's a critical part of your application. You have to prove you have enough money to cover your trip and your stay in Canada. This single factor can make or break a visa officer's decision. This usually means providing several months of bank statements or an official letter from your bank, which sometimes comes with a small fee.
Having a clear view of your total financial commitment is everything. It stops that last-minute scramble for cash and lets you confidently show the visa officer that you're financially prepared for your trip—a major plus for getting your application approved.
To help you get organised, here’s a quick look at some common extra expenses you might run into.
Checklist of Potential Additional Application Costs
This table outlines other common expenses applicants may face beyond the primary government fees.
Expense Category Description Estimated Cost Range (NGN) Medical Examination Required for certain visa types or applicants staying over six months. Done by an IRCC-approved panel physician. ₦120,000 – ₦180,000 Police Clearance A certificate from the Nigerian Police Force to prove you have no criminal record. ₦30,000 – ₦60,000 Document Translation For translating official documents (like birth certificates) into English or French by a certified translator. ₦5,000 – ₦15,000 per page Document Notarisation Having a notary public officially witness and certify copies of your documents. ₦2,000 – ₦10,000 per document Bank Statement Printing Fees charged by your bank for printing official, stamped statements for the required period. ₦1,000 – ₦5,000 Courier & Travel Costs for sending documents or travelling to the Visa Application Centre (VAC) for biometrics. Varies by location Remember, these are just estimates, but they give you a much clearer financial target to aim for.
Building a complete budget helps you see the entire journey, not just the first step. If you're thinking about a more permanent move, you'll definitely want to check out our deep dive into the full cost of relocating from Nigeria to Canada to prepare for every financial stage of your new life.
Got Questions About the Fees? We’ve Got Answers
When you're sorting out the money side of your Canadian visa application, a few questions always pop up. Getting straight answers is the best way to feel in control and sidestep those little trip-ups that can cause stress. Let’s tackle the most common things Nigerians ask about the costs.
Think of this as a quick chat to clear things up, so you can lock in your budget and submit your application without any lingering worries.
Are Canadian Visa Fees Refundable?
This is a big one, and the answer is simple: no. The money you pay to Immigration, Refugees and Citizenship Canada (IRCC)—both for the application itself and for biometrics—is non-refundable.
What you're really paying for is the service of having your application processed, not for the visa itself. It's crucial to understand this because it highlights just how important it is to get your application right the first time. If your application is refused, that money is gone, and you’ll need to pay the full amount again if you decide to reapply.
Can I Pay My Visa Fees in Nigerian Naira?
You’ll be paying from your Nigerian bank account, but the actual transaction has to be in Canadian Dollars (CAD). The official IRCC payment portal is set up to charge only in CAD.
When you use your Naira debit or credit card (like a Visa or Mastercard), your bank handles the conversion. They'll use their own exchange rate for that day to figure out the Naira equivalent.
Just a heads-up: bank exchange rates change daily and often include small foreign transaction fees. The final amount you see debited from your account in Naira might be a bit different from what a quick search on Google showed you.
How Do I Pay the Biometrics Fee?
Good news here – you don’t have to worry about making separate payments. Even though the visa fee and the biometrics fee cover different things, you pay for them together in one single transaction.
The IRCC online portal makes this really straightforward. As you go through the application process, the system automatically adds up the total cost for you. It will combine the application fee (like the CAD $100 for a visitor visa) with the biometrics fee (CAD $85) into one final amount. This way, you pay exactly what you owe without any guesswork.
Do Children Also Pay the Full Visa Fee?
Yes, every single person applying needs their own application fee paid, no matter their age. So, if you're applying for visitor visas for yourself and your child, you'll have to pay the CAD $100 processing fee for each of you.
But there’s a key difference when it comes to biometrics. Children under 14 years old don't need to give their fingerprints and photo. This means you won’t have to pay the CAD $85 biometrics fee for them, which definitely helps lower the total cost for families travelling with younger kids.
Planning your move to Canada involves many steps, and getting your questions answered quickly is key. With JapaChat, you get an AI immigration expert designed for Nigerians, providing instant, accurate answers to make your journey smoother. Start planning with confidence by visiting JapaChat today.
-
A Guide to the Federal Skilled Worker Program
So, you've set your sights on Canada. The Federal Skilled Worker Program (FSWP) is often the first, and most important, pathway for skilled professionals from around the world looking to make Canada their new home. It’s a core part of the Express Entry system and is specifically designed to invite people who have the skills and experience to hit the ground running in the Canadian economy.
Understanding Canada's Global Talent Search

Think of the Federal Skilled Worker Program as Canada's way of scouting for top talent on a global stage. It’s not just about filling random job openings; it’s a carefully structured system built to identify professionals who can truly succeed. For many ambitious Nigerians, the FSWP is the most well-established and direct route to a new life and career abroad.
This program is a cornerstone of the much larger Express Entry system. Picture Express Entry as a massive pool filled with skilled candidates from all over the world. To even get into that pool, you first need to qualify for one of the main programs, and the FSWP is a primary gateway. If you tick all its boxes, you get to create an Express Entry profile, putting you on the radar of Canadian immigration officials.
The Core Purpose of the FSWP
At its heart, the FSWP aims to bring in people who can easily and successfully join the Canadian workforce. It does this by focusing on what immigration experts call "human capital"—basically, the value of the skills, education, and experience you possess. The program isn't a lottery; it uses a clear points system to assess your potential to contribute economically.
It all boils down to a few key areas:
- Skilled Work Experience: Your professional track record in an occupation Canada recognises.
- Language Proficiency: How well you can communicate in English or French, which is critical for work and life.
- Education: Your degrees and diplomas, which usually need to be verified through an Educational Credential Assessment (ECA).
- Adaptability: Other factors that suggest you'll settle in well, like having studied or worked in Canada before, or your spouse's qualifications.
This approach ensures that newcomers are not just arriving, but are fully equipped to find good jobs and build lasting futures in Canada. It's about strengthening the economy by welcoming skilled individuals from around the world.
The Canadian government regularly updates the program to make sure it aligns with the country's economic needs. This keeps the FSWP relevant and ensures it works alongside other immigration streams, like the Provincial Nominee Programs (PNPs). For Nigerian applicants, this means you can trust that the FSWP is a stable pathway with clear, objective rules.
Getting to grips with the Federal Skilled Worker Program is the essential first step for any Nigerian professional considering this journey. It’s a transparent, merit-based system that values the skills you’ve worked so hard to build, paving the way for a successful life in Canada.
Meeting the Minimum FSWP Eligibility Requirements
Think of getting into the Federal Skilled Worker Program (FSWP) like passing through a series of checkpoints on your way to Canada. Before you even get to the points system or see how you rank against other applicants, you first have to clear these fundamental hurdles.
These are the absolute, non-negotiable benchmarks set by Immigration, Refugees and Citizenship Canada (IRCC). If you miss even one, your application stops right there. Let's walk through exactly what you need to have in place.
Your Skilled Work Experience
First things first, this program is for skilled workers. Canada has a very specific way of defining what "skilled" means, and it all comes down to their National Occupational Classification (NOC) system.
You'll need at least one year of continuous, full-time paid work experience (or the equivalent in part-time hours) from sometime in the last 10 years. Critically, this work experience must be in a job that fits into one of these TEER categories:
- TEER 0: This is for management roles, like a marketing manager or project manager.
- TEER 1: These jobs usually need a university degree. Think financial analysts or software engineers.
- TEER 2: Occupations here often require a college diploma or hands-on apprenticeship training, like a computer network technician.
- TEER 3: This category covers jobs that typically need a college diploma or specific on-the-job training, such as an administrative assistant.
Finding your TEER code isn't about matching your job title. You have to carefully compare the main duties you perform every day with the official descriptions on the NOC website. Getting this part right is absolutely vital.
Language Proficiency Is Key
Your ability to communicate effectively in English or French is a massive factor. You'll have to take an approved language test and hit a minimum score to even be considered. For English, the options are IELTS or CELPIP; for French, it's the TEF or TCF Canada.
The magic number for the FSWP is a Canadian Language Benchmark (CLB) level 7 across all four skills: reading, writing, listening, and speaking. If you score below CLB 7 in even one of these areas, you won't be eligible to apply.
While CLB 7 is the minimum to get your foot in the door, aiming much higher is a smart strategy. Better scores mean more points later on, which can make all the difference.
Education and Your ECA
You need to show that you have at least a Canadian high school diploma or an equivalent qualification. If, like most Nigerian applicants, your degree is from a university outside Canada, you’ll need to get an Educational Credential Assessment (ECA).
An ECA is a report from a specially designated organisation that confirms your foreign degree or diploma is genuine and equal to a similar Canadian credential. Without this official ECA report, your hard-earned education simply won't be recognised for the program.
Proof of Settlement Funds
Lastly, you must prove you have enough money to support yourself and your family when you first land in Canada. This is what's known as proof of funds. The amount you need is not a random figure; it’s set by the Canadian government, changes every year, and depends on how many family members are coming with you.
These funds must be yours, accessible, and not borrowed from someone else. It's Canada's way of ensuring you can cover your initial living costs without needing to rely on social assistance.
Getting Past the First Hurdle: The 67-Point FSWP Grid
So, you've checked the basic requirements and you tick all the boxes for the Federal Skilled Worker Program. Fantastic! But there's one more gate to get through before you can officially enter the Express Entry pool. This is the 67-point assessment.
Think of it as a pre-qualification round. Canada wants to be sure that the people it invites have a strong chance of succeeding economically once they land. This grid is their way of measuring that potential. You need to score at least 67 out of 100 points to pass. If you fall short, you can't create an FSWP profile. It's that simple.
This initial eligibility check is a critical first step on your journey, as the image below shows.

Making sure you meet this threshold is fundamental. It confirms you have a solid foundation before you dive deeper into the application process.
Let's break down where those points come from.
Factor 1: Language Skills (Maximum 28 points)
This is the big one, and for very good reason. You can't get a good job or feel at home if you can't communicate effectively. This factor carries the most weight on the grid.
You can grab up to 24 points for your first language (English or French) and another 4 points if you're proficient in the second. To hit the maximum, you need to score a Canadian Language Benchmark (CLB) level of 9 or higher in all four skills: speaking, listening, reading, and writing. A small jump in your language test results can make a massive difference to your overall score.
Factor 2: Education (Maximum 25 points)
Your education is a direct signal of your specialised skills. The higher your qualification, the more points you get. Crucially, any degrees, diplomas, or certificates you earned outside of Canada must be validated with an Educational Credential Assessment (ECA).
- Doctoral (PhD) level: 25 points
- Master's degree or professional degree: 23 points
- Two or more post-secondary credentials (one being 3+ years): 22 points
- Three-year or longer post-secondary credential: 21 points
A PhD gets you the full 25 points, while a Master's isn't far behind. This shows immigration officers that you bring advanced knowledge to the table.
Factor 3: Work Experience (Maximum 15 points)
Here's where you prove you can apply your skills in the real world. Points are awarded for the number of years you've worked in a skilled role (NOC TEER 0, 1, 2, or 3). The work has to be continuous, paid, and full-time (or the part-time equivalent).
Having six or more years of experience lands you the maximum 15 points. But don't worry if you don't have that much—just one year of qualifying experience gets you 9 points, which is the absolute minimum you need to be eligible in the first place.
This is your proof that you can hit the ground running in a professional setting.
Factor 4: Age (Maximum 12 points)
Let's be blunt: this system favours younger applicants. The logic is that younger workers have more years to contribute to the Canadian economy.
If you're between 18 and 35, you get the maximum 12 points. From age 36 onwards, you lose one point for every birthday. By the time you're 47, the points for age drop to zero. It's a tough reality, but something you need to factor into your calculation.
Factor 5: Arranged Employment (Maximum 10 points)
Having a valid job offer from a Canadian employer is a huge advantage. It immediately gives you 10 extra points and shows you're already in demand in the Canadian labour market. The offer must be for a full-time, non-seasonal job in a skilled occupation.
Factor 6: Adaptability (Maximum 10 points)
Finally, these 10 points are for factors that show you (and your family) are likely to settle in well. You can earn points for your spouse's language ability, your own past work or study experience in Canada, or if you have relatives already living there.
The 67-Point Grid at a Glance
To put it all together, here is a quick summary of the maximum points you can score for each factor in this initial FSWP assessment.
Federal Skilled Worker Program 67-Point Grid Summary
Selection Factor Maximum Points Language Skills 28 Education 25 Work Experience 15 Age 12 Arranged Employment 10 Adaptability 10 Total Available Points 100 Remember, your goal is to score at least 67 points on this grid.
Scoring 67 or more is your key to unlocking the door to the Express Entry pool. Once you're inside, you'll be ranked against other candidates using a different, more detailed system—the Comprehensive Ranking System (CRS). To understand all the stages involved, take a look at our complete guide on the application for PR in Canada.
Alright, you’ve done the hard work and confirmed you meet the 67-point pass mark for the Federal Skilled Worker Program. What's next? It's time to enter the main arena: the Express Entry system.
Think of it this way: passing the 67-point grid was like qualifying for the tournament. Now, you’re in the championship league, competing against other skilled professionals from all over the world. Your success from this point on isn't about meeting a minimum score, but about how high you can rank with a new score—the Comprehensive Ranking System (CRS) score.
Your Step-by-Step Guide to the Express Entry Application
Creating Your Express Entry Profile
First things first, you need to create your online Express Entry profile on the official Immigration, Refugees and Citizenship Canada (IRCC) website. This is where all the information you’ve carefully gathered—your age, education, work experience, and language scores—comes into play.
You're not just filling out a form; you're building your official case to Canada. The details you enter will be used to calculate that all-important CRS score, which is what determines your rank in the pool. For a detailed walkthrough, our guide on creating an Express Entry profile will take you through it step-by-step.
A word of advice from experience: be meticulously honest and accurate. Even an accidental mistake can be seen as misrepresentation, which could get you banned from applying for years. Double-check every single date and detail before you submit.
Understanding the CRS Score and the Pool
Once your profile is submitted, you’re officially in the Express Entry pool and will be given a CRS score out of a possible 1,200 points. This scoring system is much more detailed than the 67-point grid. It looks at your core skills, your experience, your spouse or partner’s qualifications, and other factors that can give you a real boost, like a provincial nomination.
Think of the Express Entry pool as a virtual waiting room for a very popular event. The candidates with the highest CRS scores are right at the front of the queue, while those with lower scores are further back. Your job is to get your score as high as you can to move up the line.
Periodically, IRCC holds "draws" from this pool. They set a cut-off score and invite everyone above it to apply for permanent residence. This is the Invitation to Apply (ITA) you’ve been working towards. The score needed changes with every draw, based on Canada’s immigration needs at that time.
After You Receive an Invitation to Apply (ITA)
Getting that ITA is a huge moment—celebrate it! But then, get straight to work, because the clock starts ticking immediately. You have a strict 60-day deadline to submit a complete and fully documented application for permanent residence. This is exactly why having all your documents ready before you even get an ITA is a game-changing strategy.
You'll need to upload high-quality digital copies of everything. Trust me, procrastination is your worst enemy at this stage.
Document Checklist After Receiving an ITA
Here’s a general list of what you’ll need. For Nigerian applicants, some of these have specific requirements, so pay close attention.
- Valid Passport: Copies of the biodata pages for you and any family member coming with you.
- Proof of Funds: Recent bank statements or official letters from your bank showing you have the required settlement funds.
- Police Certificates: You'll need a Police Clearance Certificate from Nigeria. If you've lived in any other country for six months or longer since you turned 18, you'll need one from there too.
- Medical Examination: You and your family must complete a medical exam with an IRCC-approved panel physician in Nigeria.
- Birth Certificates: For you and any dependents joining you.
- Photographs: Digital photos that meet IRCC's very specific requirements for size and background.
The Federal Skilled Worker Program has long been a primary route for skilled professionals to move to Canada, and this has shaped the country's demographics. Data shows that skilled worker categories often follow certain trends. For example, men have historically made up a larger portion of skilled trades admissions, and the vast majority of all applicants are in their prime working years, between 20 and 29. As one of the top source countries, Nigerian applicants often fit this profile, bringing a young, vibrant, and skilled workforce to Canada. You can explore more of these immigrant demographic trends on StatCan.
Strategies to Increase Your CRS Score

Getting into the Express Entry pool is just the first step. Once you’re in, the game changes entirely. It's no longer about just meeting the minimum requirements; it’s a competition where you need to outrank other skilled candidates from around the world. Your Comprehensive Ranking System (CRS) score is what determines your place in the queue, and a higher score is what gets you that coveted Invitation to Apply (ITA).
Think of your first CRS score as your starting line, not the finish line. There are very real, practical steps you can take to push that number higher. Many successful applicants didn't have a winning score right away—they worked on it, piece by piece.
This is where you get strategic. We'll walk through the most effective ways to boost your profile and turn a good score into a great one.
Go Beyond the Minimum on Language Tests
Your language test result is one of the most powerful tools you have for boosting your CRS score. Yes, a Canadian Language Benchmark (CLB) 7 is the minimum for the Federal Skilled Worker Program, but the real points are waiting for those who aim higher. Hitting a CLB 9 or above can unlock a serious number of points.
Even a single-band improvement—say, moving your reading score from a CLB 8 to a CLB 9—can have a ripple effect. It doesn't just add points for language ability; it also boosts your "skill transferability" score. Don't be shy about retaking your IELTS or CELPIP test after some focused preparation.
A common mistake is to treat the language test as a one-time task. See it as an opportunity. A few extra weeks of dedicated study could be the difference between waiting in the pool for another year and getting your invitation.
Strengthen Your Education and Experience
Your professional background offers more chances to score points. If you have degrees or diplomas beyond your main one, make sure you get an Educational Credential Assessment (ECA) for all of them.
-
Secure a Second Credential: An ECA for a second diploma or certificate can add valuable points. For instance, if you have a Bachelor's degree and a one-year postgraduate diploma, assessing both will give you more points than just assessing the degree.
-
Gain More Work Experience: Are you close to clocking another full year of skilled work? It might be worth waiting a bit before submitting your profile. The jump from two years of experience to three, for example, adds a nice chunk of points.
Canada’s immigration system is built to attract people with proven skills. In fact, among male principal applicants aged 25 to 74, a staggering 88% were skilled workers. Nigerian immigrants are a huge part of this, bringing in-demand professional and trade skills that help them settle in quickly. You can read more about the labour market profiles of skilled immigrants entering Canada on StatCan.
The French Language Advantage
Here’s a tip that many overlook: learning French, even to a basic level, is a huge advantage right now. Canada is serious about its bilingual identity, and the government is rewarding candidates with French skills with extra points.
You don't have to be fluent. If you can achieve a modest NCLC 7 in all four French skills (listening, speaking, reading, and writing) and you already have a CLB 5 or higher in English, you could get up to 50 additional CRS points. This is an absolute game-changer that can launch your profile past thousands of other applicants.
The Ultimate Boost: A Provincial Nomination
Looking for the single biggest jump you can make to your score? It’s a provincial nomination. Securing a nomination through a Provincial Nominee Program (PNP) automatically adds a massive 600 points to your CRS score.
With that many points, you are virtually guaranteed an ITA in the very next draw. To get a nomination, you'll need to apply directly to a province whose PNP streams match your work experience and skills. Keep a close eye on the immigration websites for provinces like Ontario, Alberta, and Saskatchewan to find opportunities that fit your profile.
By focusing on these key areas, you can take control of your score. To see how these changes could impact your standing, it’s a good idea to play around with the numbers. You can estimate your points with our user-friendly Express Entry calculator to see what’s possible and plan your next move.
Common Questions About the FSWP Process
As you dive into the Federal Skilled Worker Program, it’s completely normal to have questions. You're dealing with different steps, multiple scoring systems, and what can feel like an eternity of waiting. Getting clear answers is the best way to keep your application on track and manage your own expectations.
This section tackles some of the most common questions we hear from Nigerian applicants. We’ll break things down with simple, direct explanations to clear up any confusion and help you move forward with confidence.
What Is the Difference Between the 67-Point Grid and the CRS Score?
This is easily one of the biggest points of confusion, but understanding the difference is vital. The best way to think about it is like two separate hurdles you have to clear to win the race.
The 67-point grid is your entry ticket. It’s the very first test you face to prove you’re even eligible for the Federal Skilled Worker Program. This grid scores you on six core factors: your language skills, education, work experience, age, whether you have a job offer, and your adaptability. If you don’t score at least 67 out of 100 points here, your journey stops before it even begins. It's a straight pass-or-fail qualifier.
Once you’ve successfully passed the 67-point mark, you can create a profile and enter the Express Entry pool. This is where the Comprehensive Ranking System (CRS) takes over.
Think of it like this: the 67-point grid is the qualifying round in a talent show. You have to impress the judges just to make it to the main competition. The CRS score, on the other hand, is your performance in the grand finale, where you’re ranked against every other qualified contestant.
The CRS is a far more detailed ranking system that scores you out of 1,200 points. It looks at your core factors again but also adds points for skill transferability and other big advantages, like a provincial nomination or having a sibling in Canada. Your CRS score decides your rank in the Express Entry pool, and only the candidates with the highest scores get that coveted Invitation to Apply (ITA).
What If My CRS Score Is Too Low for an ITA?
Seeing a CRS score that’s lower than the latest draw cutoff can feel like a punch to the gut, but it's far from the end of the road. Your Express Entry profile stays active in the pool for a full 12 months, giving you plenty of time to improve your rank. Many successful immigrants didn’t get an ITA on their first try; they worked on their profile to make it stronger.
Don't just sit back and hope the cutoff score drops. Now is the time to be proactive.
Actionable Steps to Boost a Low CRS Score
- Smash Your Language Tests: This is often the quickest and most impactful way to add points. Hitting a Canadian Language Benchmark (CLB) level of 9 or higher can make a huge difference to your score.
- Gain More Work Experience: If you’re getting close to finishing another full year of skilled work, stick with it! Your score will get a nice bump once you hit that milestone.
- Assess Another Credential: Do you have another degree, diploma, or professional certificate? Getting an Educational Credential Assessment (ECA) for it can add more precious points to your total.
- Think About French: Canada is actively looking for French-speaking immigrants. Even a basic or intermediate level of French can add up to 50 bonus points to your CRS score.
- Explore Provincial Nominee Programs (PNPs): This is the ultimate game-changer. Getting a nomination from a province adds a massive 600 points to your score, which all but guarantees you’ll get an ITA. Research which provinces are searching for professionals with your skills.
The biggest mistake you can make is losing hope. The system is built to reward people who keep improving.
How Long Does the Process Take After I Get an ITA?
Receiving your Invitation to Apply (ITA) is a huge achievement! But it also kicks off the final, document-heavy stage of your application. Once that ITA lands in your account, a 60-day clock starts ticking. You have exactly that long to submit your complete permanent residence application and all your supporting documents.
After you’ve submitted everything, Immigration, Refugees and Citizenship Canada (IRCC) gets to work. Their official service standard for processing most Express Entry applications is six months. This six-month timer starts from the day they receive your complete application, not from the day you got the ITA.
It’s important to remember that this is a target, not a promise. Processing times can change based on a few things:
- Application Completeness: Any missing documents or mistakes will cause delays or could even get your application sent back to you.
- Case Complexity: Some applications are just simpler than others. If your case needs extra checks (like verifying work experience from several different companies), it might take a bit longer.
- IRCC’s Workload: The number of applications IRCC is dealing with at any given time can affect how quickly they can process yours.
The best advice is to be incredibly organised. Start gathering your documents—like police certificates and proof of funds—long before you even expect to get an ITA. This way, you can submit a perfect application the moment you’re invited, giving you the best shot at the fastest possible processing time.
Can I Apply to the FSWP Without a Job Offer?
Yes, absolutely! This is one of the best features of the Federal Skilled Worker Program and a major reason it’s so popular around the world. The FSWP does not require you to have a job offer from a Canadian employer to be eligible.
The program is built to select people based on their "human capital"—things like your age, education, work experience, and language skills. The idea is that if you have a strong profile in these areas, you have a great chance of finding a good job and settling successfully into the Canadian economy on your own.
That said, having a valid job offer gives you a serious competitive edge. It can add either 50 or 200 extra points to your CRS score, depending on the job’s skill level. A job offer also gives you 10 points on the initial 67-point eligibility grid. So, while it’s not required, looking for work in Canada while your profile is in the pool is a smart move.
For anyone wanting to get a head start on their job search, knowing how to build a resume for the Canadian market is critical. You can find expert tips for creating a winning CV with ATS optimization to help you get noticed by Canadian recruiters.
At the end of the day, the Federal Skilled Worker Program remains one of the most direct paths for skilled professionals, allowing you to qualify based on your own merit without needing a job lined up in advance.
Ready to take the guesswork out of your immigration journey? JapaChat is Nigeria’s first AI immigration expert, designed to give you instant, accurate answers to all your questions. Stop relying on confusing information and start planning your move with confidence. Sign up for free today and get the clarity you need. Visit us at https://japachat.com.
-
8 Incredible Benefits of Canadian PR for Nigerians in 2025
Embarking on the journey from Nigeria to Canada is more than just a change of scenery; it's a strategic move towards a future filled with stability, opportunity, and an enhanced quality of life. For many Nigerians, securing Canadian Permanent Residency (PR) is the ultimate goal, acting as the key that unlocks a world of possibilities. But what, specifically, are the advantages that make this path so sought after? This isn't just about moving abroad; it's about gaining access to a framework designed for success, from world-class public services to a dynamic and welcoming job market.
This article will break down the eight most significant benefits of Canadian PR, providing a detailed roadmap for Nigerians considering this life-changing step. We will go beyond surface-level perks, offering practical insights that illustrate how PR status can profoundly impact your economic, social, and personal well-being. Becoming a permanent resident means you're not just a visitor; you are welcomed into the very fabric of the nation, with the chance to build a life within its active communities and contribute to its growth. From accessing universal healthcare to enjoying robust employment rights, we will explore each benefit in detail, giving you the clear, actionable information needed for your immigration journey.
1. Pathway to Canadian Citizenship: The Ultimate Goal
While permanent residency (PR) unlocks most of the day-to-day benefits of living in Canada, achieving citizenship is the ultimate form of security and integration. This is arguably one of the most significant long-term benefits of Canadian PR, as it provides a direct, structured route to becoming a full Canadian citizen. Unlike PR status, which requires you to meet residency obligations to maintain it, citizenship is permanent.

It grants you the right to vote in federal, provincial, and municipal elections, and even run for political office. For many Nigerians, this transition from resident to citizen symbolises the final step in their immigration journey, solidifying their place in Canadian society.
How to Secure Citizenship
The path is clear: you must be physically present in Canada for at least 1,095 days (three years) during the five years right before you apply. You also need to have filed your taxes, pass a citizenship test, and prove your language skills in English or French.
A practical example is a Nigerian tech entrepreneur who, after becoming a citizen, can travel to a last-minute conference in the United States or Europe without visa worries, using one of the world's most powerful passports to grow their business globally.
Actionable Tips for Aspiring Citizens
- Track Your Presence: From the day you land, use the official IRCC physical presence calculator to log your days in Canada. This avoids any miscalculation when it’s time to apply.
- Keep Meticulous Records: Maintain a detailed travel log with all entry and exit stamps, boarding passes, and e-tickets. This documentation is crucial evidence for your application.
- Prepare Early: Start studying for the citizenship test at least a year before you are eligible. The official 'Discover Canada' guide is the only resource you need.
By planning ahead, the process of turning your PR into citizenship becomes a manageable and rewarding milestone. If you are just starting this process, you can explore the intricacies of the Canadian permanent residency application to build a strong foundation for your future citizenship.
2. Universal Healthcare Access: A Foundation of Security
One of the most immediate and impactful benefits of Canadian PR is gaining access to the country's universal, publicly funded healthcare system. For many newcomers, especially those from countries where quality healthcare is tied to expensive private insurance, this provides immense financial relief and peace of mind. Permanent residents are entitled to a provincial health card, which covers most essential medical services, from doctor visits and emergency room care to hospital stays and surgical procedures.

This system ensures that your family's health and well-being are not compromised by your financial situation. It allows you to seek medical attention when needed without the fear of accumulating massive debt, a common reality in many other Western nations.
How Provincial Healthcare Works
Once you become a permanent resident, you can apply for a health insurance card in your province or territory of residence. While the core services are similar across Canada, coverage details for things like prescription drugs, dental care, and physiotherapy can vary by province. This system is funded through taxes, meaning you do not pay direct premiums or co-pays for most insured medical services.
For example, a Nigerian family arriving in Ontario can access world-class paediatric care for their children, including routine check-ups and vaccinations, without any direct cost. This contrasts sharply with a system like that in the U.S., where a family could easily spend upwards of $20,000 annually on insurance premiums and out-of-pocket expenses for similar coverage.
Actionable Tips for New Residents
- Apply Immediately: Upon arrival, make applying for your provincial health card a top priority. In most provinces, like British Columbia and Ontario, there is a three-month waiting period before coverage begins.
- Secure Interim Insurance: To protect yourself during the waiting period, it is crucial to purchase private health insurance. This temporary coverage will handle any medical emergencies that may arise before your public plan activates.
- Find a Family Doctor: As soon as you are settled, start the process of finding and registering with a family doctor. Having a primary care physician is key to managing your long-term health and navigating the healthcare system effectively.
3. World-Class Education System Access
For many Nigerian families, securing a high-quality education for their children is a top priority, and this is a key area where the benefits of Canadian PR truly shine. As a permanent resident, you and your dependents gain access to Canada's globally respected education system at a fraction of the cost faced by international students. Your children can attend public primary and secondary schools for free, receiving an education that consistently ranks among the best in the world.

When it comes to post-secondary education, the savings are staggering. Permanent residents pay domestic tuition fees, which can be three to five times lower than international rates. This difference can save a family over $150,000 throughout a single child’s university degree, making higher education far more accessible.
How to Leverage Educational Benefits
Access begins the moment you become a permanent resident. An international student from India who transitions to PR status, for example, could see their annual tuition fees drop from $30,000 to just $6,000, an 80% reduction. Similarly, newcomer children can thrive in specialised programmes like French immersion in Quebec. For families planning to settle there, understanding the local system is crucial, and a helpful guide to secondary school admission exams in Quebec can ease the transition.
Actionable Tips for Newcomer Families
- Research Provincial Systems: Education is managed provincially, so a school system in Alberta will differ from one in Ontario. Research the curriculum, school rankings, and special programmes in your target province before you arrive.
- Apply for Aid Early: As a permanent resident, you are eligible for government student loans, grants, and scholarships. Application deadlines are strict, so start the process as soon as you have your PR confirmation.
- Explore Co-op Programmes: Many Canadian colleges and universities offer cooperative (co-op) education programmes. These integrate paid work terms into your studies, providing invaluable Canadian work experience and professional connections.
By strategically planning your educational path, you can maximise one of the most powerful advantages of your new status. If affordability is a major concern, you can explore some of the cheapest universities for international students in Canada to get a sense of the cost landscape even before your PR is finalised.
4. Comprehensive Social Safety Net
One of the most immediate and tangible benefits of Canadian PR is gaining access to Canada's robust social safety net. This system is designed to provide financial stability and support during major life events, ensuring residents do not fall into severe hardship due to job loss, illness, or while raising a family. For many Nigerians, this level of state-sponsored support offers unprecedented peace of mind.

This safety net includes Employment Insurance (EI), the Canada Child Benefit (CCB), parental leave benefits, and the Canada Pension Plan (CPP). It acts as a crucial buffer, allowing you to focus on your career and family without the constant fear of financial instability, which is a significant advantage over systems in many other countries.
How to Leverage Social Benefits
Once you become a permanent resident and start working, you contribute to these programmes through payroll deductions, making you eligible for their benefits. The system is designed to be accessible and supportive. You must file your taxes annually, even if you have no income, to qualify for certain credits and benefits like the CCB.
For example, a Nigerian family with two young children could receive over $10,000 annually, tax-free, through the Canada Child Benefit, significantly easing the cost of raising a family. Similarly, a tech professional facing a temporary layoff could receive EI payments, covering their essential expenses while they search for a new role.
Actionable Tips for Newcomers
- Get Your SIN Immediately: Apply for your Social Insurance Number (SIN) as soon as you land. It is essential for employment and accessing any government programmes or benefits.
- Understand EI Eligibility: Familiarise yourself with the Employment Insurance eligibility requirements in your province. The number of insurable hours needed to qualify can vary based on your region's unemployment rate.
- File Taxes Annually: To receive the CCB and other credits like the GST/HST credit, you and your spouse or common-law partner must file your tax returns every year, even if you had no income.
- Contribute to Your Future: Understand your contributions to the Canada Pension Plan (CPP). These contributions directly impact the amount you will receive in retirement, providing a secure financial future.
5. Freedom of Movement and Travel
One of the most liberating benefits of Canadian PR is the unrestricted freedom to move, live, and work anywhere across Canada’s vast and diverse landscape. Unlike temporary work permits that often tie you to a specific employer or province, permanent residency grants you the liberty to choose your home based on career opportunities, lifestyle preferences, or family connections without bureaucratic hurdles.
This internal mobility means you are not locked into one location. You can pursue a job offer in a bustling city like Toronto, relocate to the scenic coasts of British Columbia, or embrace the unique culture of Quebec, all while maintaining your PR status. This flexibility is crucial for career growth and personal fulfilment, allowing you to adapt to changing economic climates or personal circumstances with ease.
How to Maximise Your Mobility
Once you are a permanent resident, you can change your address, province, or job without needing to inform or seek permission from immigration authorities. The key is simply to continue meeting the residency obligation, which requires you to be physically in Canada for at least 730 days over five years.
For example, an oil and gas professional from Nigeria, initially settling in Alberta, can seamlessly accept a new project in Newfoundland and Labrador without any immigration paperwork. Similarly, a tech professional can choose to work remotely for a Vancouver-based company while living in a more affordable city in the Maritimes, optimising both their career and quality of life.
Actionable Tips for Relocating within Canada
- Understand Provincial Obligations: If you gained PR through a Provincial Nominee Program (PNP), you have an obligation to demonstrate an intent to reside in that province. While you can move later, fulfil your initial commitment to avoid future complications.
- Plan for Tax Implications: Moving between provinces can affect your provincial income tax rates and access to certain credits. Research the tax structure of your new province beforehand.
- Keep Your PR Card Current: Always ensure your PR card is valid, especially if you plan to travel internationally. Apply for renewal well before it expires to avoid travel disruptions.
To fully capitalise on the complete freedom of movement and career mobility afforded by Canadian PR, exploring AI-powered professional networking tips can significantly boost your integration into the Canadian job market.
6. Robust Employment Rights and Protection
One of the most immediate and impactful benefits of Canadian PR is gaining access to the same employment rights and legal protections as Canadian citizens. This means you are shielded by comprehensive labour laws governing minimum wage, working hours, workplace safety, and paid leave. This legal equality ensures you cannot be exploited and provides a stable, secure foundation for building your career in Canada.
Unlike temporary foreign workers who are often tied to a single employer, permanent residents have the freedom to change jobs, negotiate salaries, and pursue opportunities in any province without jeopardising their status. This security allows Nigerian professionals to seek fair treatment and career growth on an equal footing with their Canadian counterparts, ensuring their skills and contributions are properly valued.
How to Leverage Your Employment Rights
These protections are not just theoretical; they are enforced by provincial and federal labour boards. You have the right to a safe work environment, to be paid for all hours worked, and to join a trade union. These rights are fundamental to the Canadian work culture and provide a safety net that fosters professional confidence and security.
For example, a Nigerian IT consultant who becomes a permanent resident can confidently join a professional union. This membership gives them access to collective bargaining benefits like better pay, enhanced health insurance, and professional development funds, which might have been inaccessible as a temporary worker. Similarly, if an employer refuses to pay for overtime, the worker can file a claim with their provincial Ministry of Labour and have the issue legally resolved.
Actionable Tips for Workplace Protection
- Know Your Provincial Standards: Each province has its own Employment Standards Act. Upon arrival, familiarise yourself with the specific rules for your province regarding overtime, holiday pay, and termination notice.
- Document Everything: Keep detailed records of your hours, pay stubs, employment contract, and any workplace communications, especially if you face an issue. This documentation is critical if you need to file a complaint.
- Consider Union Membership: In many industries like construction, healthcare, and education, unions provide powerful advocacy and additional layers of protection. Research if a union is relevant to your profession.
By understanding and asserting these rights, you can ensure your transition into the Canadian workforce is both successful and fair. While PR grants you these rights, understanding the initial steps to work legally is also key; you can find more information about the initial stages of the Canadian work permit application process to see how the journey begins.
7. Business and Investment Opportunities
For many entrepreneurial Nigerians, one of the most compelling benefits of Canadian PR is the freedom to build and own a business. Permanent residency removes the significant restrictions placed on temporary residents, opening up a world of entrepreneurship, investment, and business ownership. This status grants you access to business loans, government grants, and the stability needed to establish long-term commercial relationships.
Unlike a work permit holder who is tied to a specific employer, a permanent resident can launch a startup, buy a franchise, or invest in existing Canadian companies with far greater ease. This freedom allows you to directly contribute to and profit from Canada's stable and growing economy, transforming your professional ambitions into tangible assets.
How to Seize Business Opportunities
The Canadian government actively encourages immigrant entrepreneurship through various support systems. As a permanent resident, you are eligible to apply for financing and mentorship programs designed to help new businesses succeed. You can register a corporation, hire staff, and operate your business in any province, just like a Canadian citizen.
A practical example is a Nigerian immigrant with a background in logistics who uses their PR status to access a $50,000 government-backed startup loan. With this capital, they launch a local delivery service in Calgary, creating jobs and building a successful enterprise without the legal hurdles they would have faced as a temporary resident.
Actionable Tips for Aspiring Entrepreneurs
- Research Support Programmes: Before launching, thoroughly investigate federal and provincial government support programmes for new businesses, such as those offered by the Business Development Bank of Canada (BDC).
- Network Locally: Join your local Chamber of Commerce and attend industry meetups. Building a strong professional network is crucial for finding partners, clients, and mentors.
- Understand Tax Obligations: Consult with a Canadian accountant early on to understand the tax implications of business ownership, including GST/HST registration and corporate tax filings.
By leveraging your PR status, you can move beyond being an employee and become a business owner, creating wealth and a lasting legacy in your new home.
8. Family Reunification and Sponsorship Rights
One of the most profound benefits of Canadian PR is the ability to reunite with your loved ones. Canada’s commitment to family reunification allows permanent residents to sponsor eligible relatives to join them, transforming a solitary immigration journey into a shared family experience. This right helps newcomers build a strong support network, which is crucial for emotional well-being and successful integration into a new country.
This benefit allows you to bring your spouse or common-law partner, dependent children, parents, and even grandparents to Canada. For many Nigerians, this means not having to choose between a new life abroad and staying close to family. It ensures that the core family unit remains intact, providing a stable foundation from which to build your new life in Canada.
How to Sponsor Your Family
To sponsor a family member, you must be a permanent resident living in Canada, be at least 18 years old, and prove you can meet the basic financial needs of the person you are sponsoring. You must sign an undertaking, which is a promise to financially support your relative for a specific period. This period ranges from three years for a spouse to 20 years for parents and grandparents.
A common example is a Nigerian software engineer who, after settling in Toronto with PR, successfully sponsors her spouse and two children. They join her within a year, allowing the family to grow together in their new home, with the spouse also receiving an open work permit to continue their career. Another scenario is an established immigrant bringing their elderly parents to Canada through the Parents and Grandparents Program (PGP), providing them with care and companionship in their later years.
Actionable Tips for a Smooth Sponsorship Process
- Start Early and Meet Income Thresholds: Begin the sponsorship application process as soon as you are eligible. Consistently meet the required Low Income Cut-Off (LICO) for your family size to prove your financial stability.
- Prepare a Flawless Documentation Package: Gather all required documents meticulously. This includes proof of relationship, financial records, and completed forms. Any missing information can cause significant delays.
- Consider the Super Visa: While waiting for parent or grandparent PR processing, the Super Visa is an excellent temporary option. It allows them to visit you in Canada for up to five years at a time, keeping the family connected during the wait.
8 Key Benefits of Canadian PR Comparison
Aspect Pathway to Canadian Citizenship ⭐🔄📊💡 Universal Healthcare Access ⚡📊💡 World-Class Education System Access ⭐📊💡 Comprehensive Social Safety Net 📊💡 Freedom of Movement and Travel ⚡🔄💡 Robust Employment Rights and Protection ⭐📊💡 Business and Investment Opportunities ⚡📊💡 Family Reunification and Sponsorship Rights 📊💡 Implementation Complexity 🔄 Moderate – requires residency, language, knowledge test Low – automatic after 3-month wait Moderate – application for aid, program research Moderate – tax filing, benefit applications required Low – maintain residency obligations and renew PR card Moderate – understand labor laws and licensing Moderate – business licensing and funding applications Moderate – sponsorship process and income requirements Resource Requirements ⚡ Time investment (12+ months), language skills Minimal – health card application, private interim insurance Financial planning, application for loans/grants Documentation, tax filings, contributions to programs Documentation for residency tracking Legal knowledge, possible professional credentials Capital, business plans, networking Income proof, documentation, application fees Expected Outcomes ⭐📊 Citizenship with voting, passport, travel freedoms Comprehensive medical coverage, cost savings Access to affordable education, scholarships Financial security during life changes Mobility within Canada and easier international travel Employment rights, workplace protections Business ownership, funding access Family unity with sponsored members becoming PR Ideal Use Cases 💡 Long-term settlers seeking full integration and political rights Residents/families needing cost-effective healthcare Students and families pursuing education Those requiring financial support during unemployment or family Individuals needing geographic and job flexibility Workers seeking job security and legal protections Entrepreneurs and investors Immigrants aiming for family reunification Key Advantages ⭐💡 Visa-free travel, full political participation, security Cost savings, no premiums, mental health inclusion Significant tuition savings, bilingual programs Parental leave, child benefits, retirement pensions Full residency mobility, family sponsorship options Equal labor protections, union rights Government grants, tax benefits Keeps families together, supports cultural preservation Key Limitations 🔄 Language/test requirements, wait times Waiting periods, limited dental/vision coverage Competition for programs, language adaptation Bureaucratic applications, income thresholds for benefits Must maintain residency, some visa needs remain Some gov’t jobs require citizenship, credential recognition issues Licensing requirements, capital needed Long processing, financial responsibilities Your Next Chapter: Turning Canadian PR Benefits into Reality
Embarking on the journey to secure Canadian Permanent Residency is more than an immigration process; it's a strategic move towards a future defined by stability, opportunity, and enhanced quality of life. We've explored the incredible advantages that await, from the long-term security of a clear pathway to Canadian citizenship to the immediate peace of mind offered by universal healthcare. Each benefit of Canadian PR is a building block for a new life, designed to help you and your family not just settle, but truly flourish.
The power of these benefits lies in how they interconnect. Access to a world-class education system at domestic tuition fees empowers your children or your own professional development, while a robust job market with strong employment protections ensures you can build a meaningful career without fear of exploitation. This professional stability is further supported by a comprehensive social safety net, providing a cushion during life's unexpected turns.
From Aspiration to Actionable Plan
Understanding these advantages is the first step. The next, more critical step is turning this knowledge into an actionable strategy. The real value isn't just knowing you can access these perks; it's about proactively planning how you will leverage them from the moment you land. For many Nigerians, this means transforming an abstract dream into a concrete, step-by-step plan.
Consider these key takeaways as your starting point:
- Financial Planning: Factor in the long-term savings from public healthcare and subsidised education when creating your settlement budget. This financial freedom can accelerate your ability to invest or start a business.
- Career Strategy: Research your industry's landscape in Canada before you arrive. Knowing your rights and the opportunities available allows you to negotiate better terms and integrate into the workforce more swiftly.
- Family Goals: The ability to sponsor family members is a cornerstone of the Canadian immigration system. Understand the requirements early on to begin the reunification process as soon as you are eligible, strengthening your support network.
Ultimately, mastering the details of the Canadian PR process is what unlocks this future. The benefits of Canadian PR are not simply handed out; they are earned through diligence, preparation, and a clear understanding of the requirements. This journey, while complex, is entirely navigable with the right resources. By embracing the process with confidence and clarity, you are not just relocating; you are laying the foundation for a legacy of prosperity and well-being for generations to come. Your new chapter in Canada is waiting to be written.
Navigating the complexities of immigration applications can be overwhelming, but you don't have to do it alone. Get instant, accurate, and personalised guidance for your Canadian PR journey with JapaChat, the AI-powered immigration expert. Start simplifying your path to Canada today by visiting JapaChat.