Category: Uncategorised
-
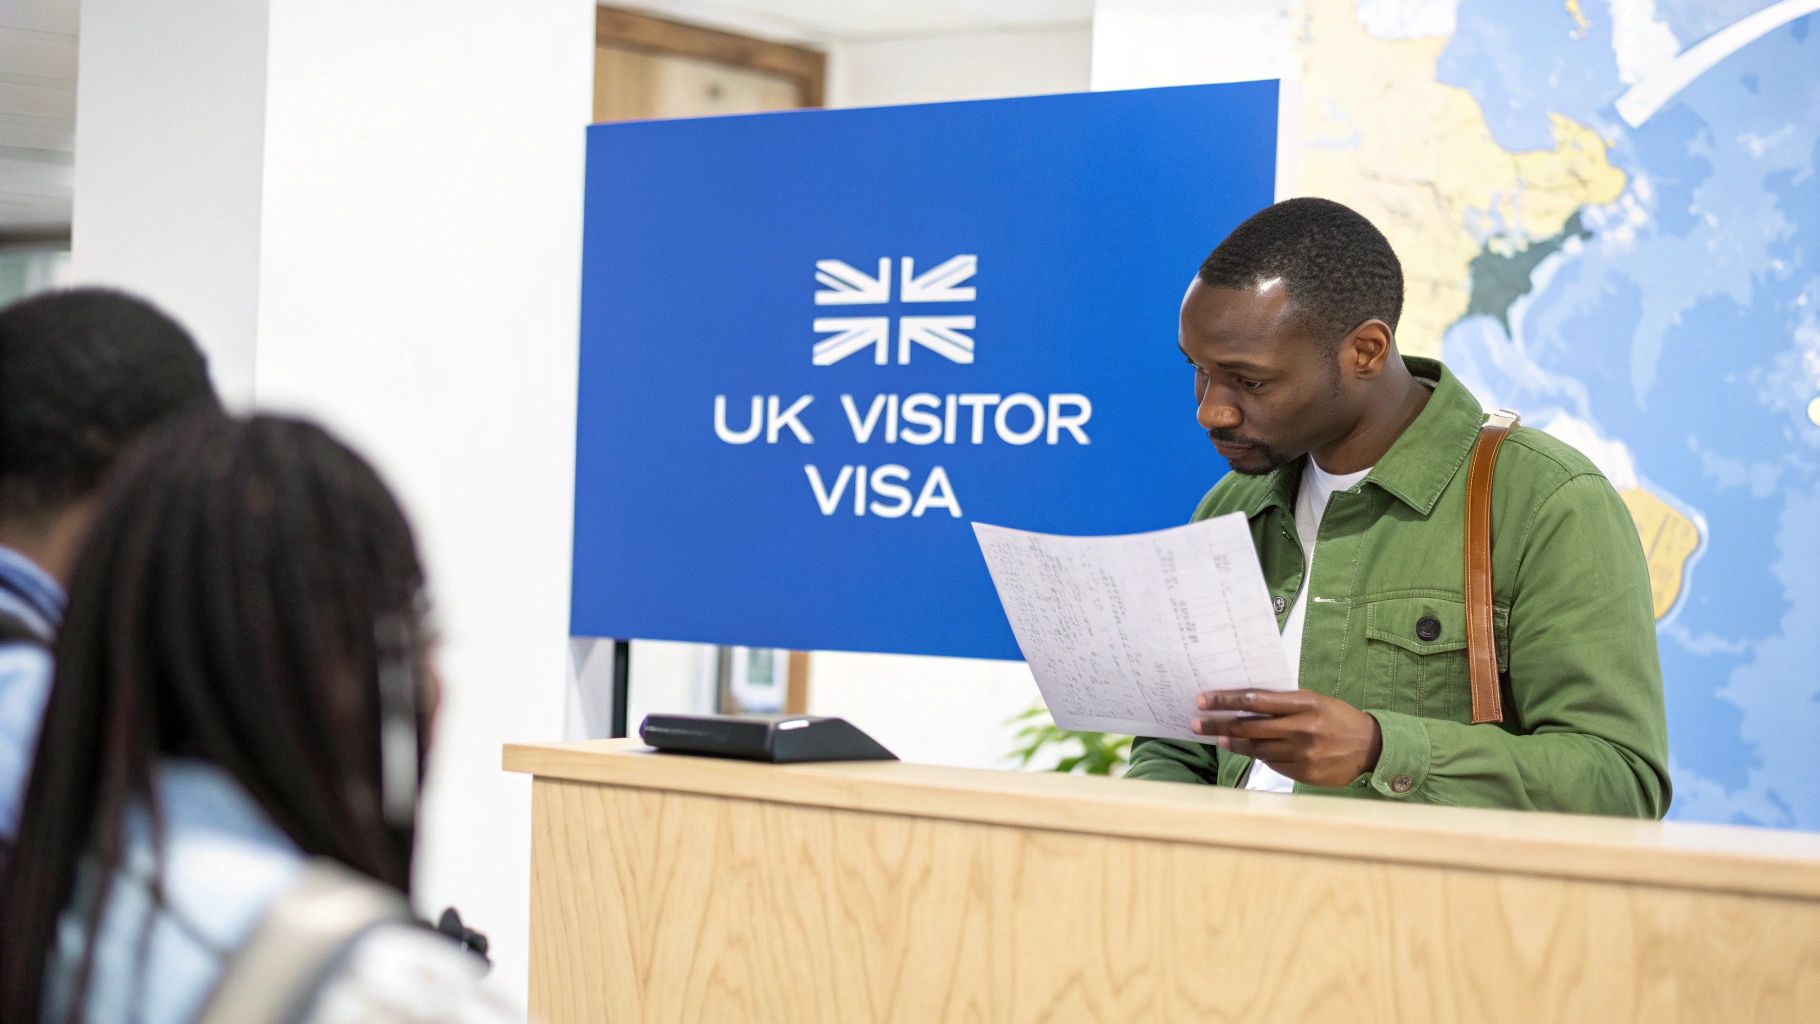
Apply for a Visitor Visa UK from Nigeria | Complete Guide
A visitor visa for the UK is your ticket to explore the country for a holiday, visit family and friends, or handle certain short-term business matters. For us Nigerians, getting that approval boils down to one thing: convincing the UK Home Office that you have every reason to return home and can comfortably pay for your entire trip without needing to work or dip into public funds.
Your UK Visitor Visa Application at a Glance
Applying for a UK visitor visa from Nigeria can feel daunting, but it's really not as complicated as it seems once you know what the visa officers are looking for. The whole process is about building trust. You need to show them two key things: that your reasons for visiting are genuine and that you have the money to back it up.
Think of your application as telling a story—the story of your trip—and every document you provide is a piece of evidence that makes your story believable.
You’re certainly not the only one going through this. In the year ending June 2024, Nigerians were granted a huge number of visitor visas, making up 5% of the total issued globally. While countries like India (25%) and China (24%) had higher numbers, this shows that thousands of our fellow Nigerians get their visas approved every single year.
The Foundation of a Strong Application
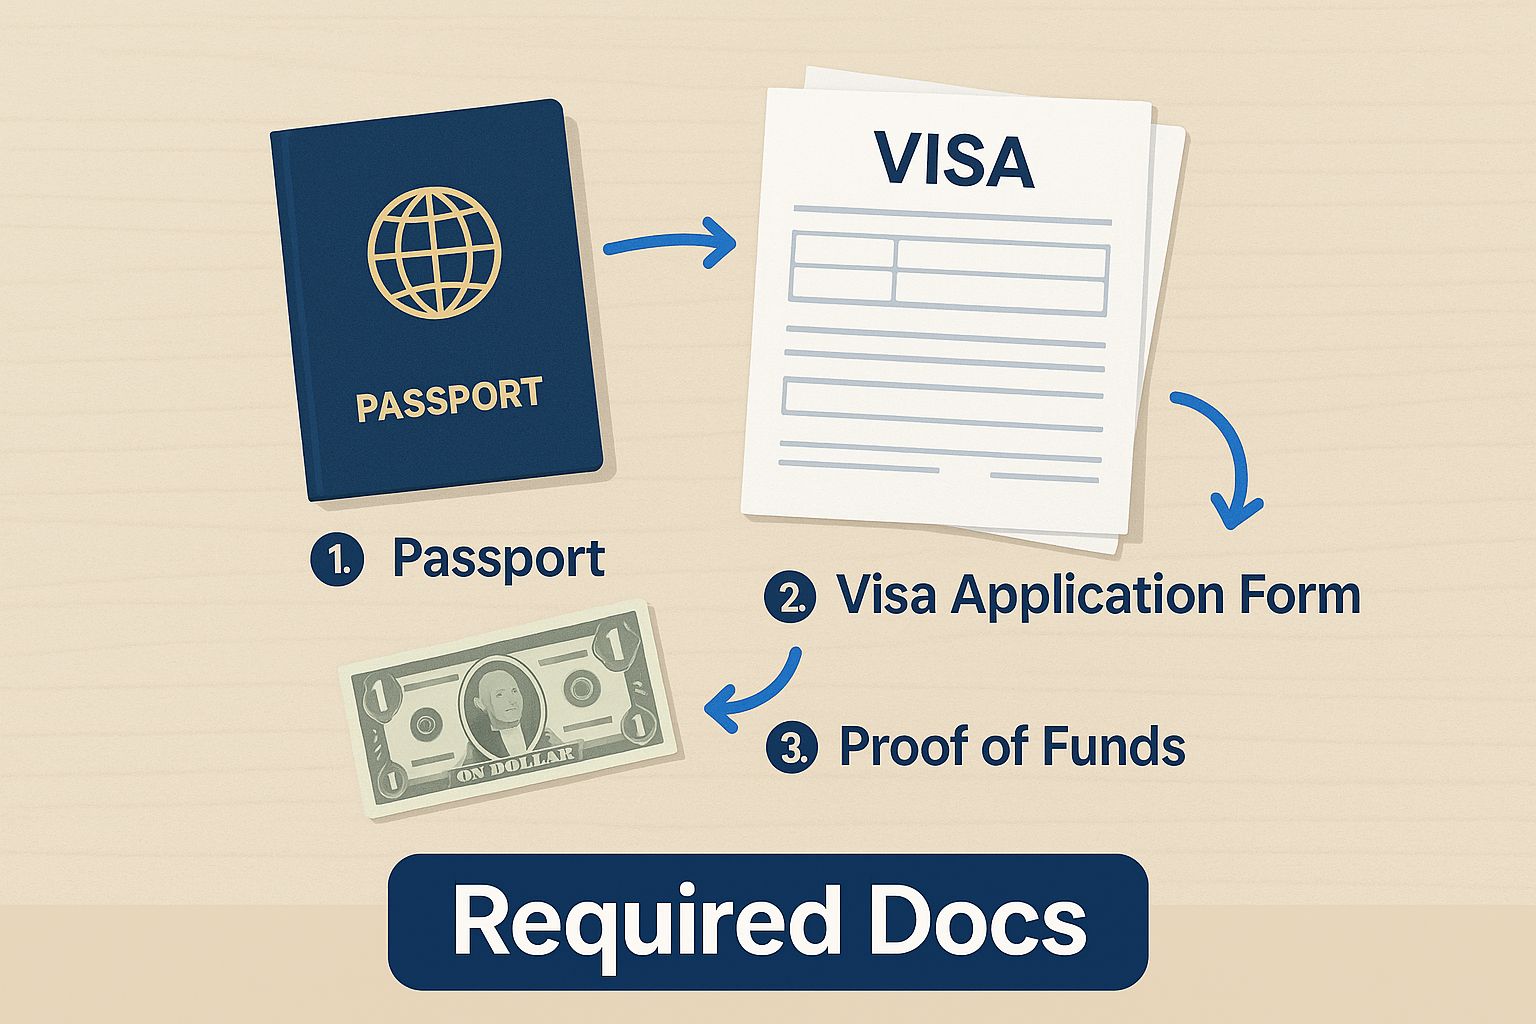
So, what does a winning application look like? It stands firmly on three pillars: a clear purpose for your travel, solid proof of sufficient funds, and convincing evidence of your strong ties to Nigeria. Each part needs to be backed up with proper documentation. A simple flight reservation isn't enough; you need a logical itinerary that makes sense for the length and purpose of your visit.
Before you get too deep into gathering documents, your first stop should be the official UK government portal. This is where you'll eventually submit everything.
This GOV.UK page is your rulebook. It tells you exactly what you can and can't do with a Standard Visitor visa. It's vital to read through it carefully to make sure your planned activities are all above board.
To give you a clearer picture, let's break down what the Home Office is really looking for.
Key Pillars of a Successful UK Visitor Visa Application
This table summarises the essential components you must address for a strong visa application from Nigeria.
Application Pillar What It Means for Nigerian Applicants Crucial Evidence to Provide Clear Travel Purpose Your reason for visiting must be genuine and well-defined. They need to see a logical plan. Detailed itinerary, hotel bookings, invitation letters from family/friends, conference registration. Sufficient Funds You must prove you can afford the entire trip (flights, accommodation, spending) without working in the UK. Bank statements (6 months), payslips, letter from employer, evidence of savings or sponsorship. Strong Ties to Nigeria This is about showing you have compelling reasons to return home after your visit. Proof of employment, property ownership documents, evidence of family ties (spouse, children), business registration. Focusing on these three areas and providing consistent evidence for each is the secret to a successful application.
Assembling Your Complete Application Package
Your application isn't just one form; it's a comprehensive package that tells your story. The goal is to gather all the documents that support this narrative, leaving no room for doubt.
From my experience, the most persuasive applications are those where every piece of evidence connects and tells a clear, consistent story. A well-organised, straightforward application is always more convincing than a flashy one filled with unexplained bank deposits or vague plans.
As you get your plans in order, don't forget the practicalities. Getting good insurance cover is non-negotiable for a stress-free trip. Looking into the best travel insurance plans is a smart move to ensure you’re protected. This guide will now walk you through building your case, step-by-step, to make your application as compelling as possible.
Building Your Nigerian Document Checklist

Think of your documents as the evidence that backs up your entire story. They are the concrete proof that supports every claim you make on your application form. For Nigerians applying for a visitor visa to the UK, gathering the right paperwork isn't just a box-ticking exercise; it's about building a rock-solid, convincing case.
The aim here is simple: leave no room for doubt in the visa officer's mind. Every single document should reinforce your travel plans, your financial stability, and, most importantly, your solid reasons for returning to Nigeria. A well-organised file immediately signals that you're a serious and credible applicant.
Crafting a Compelling Letter of Introduction
Your introduction letter is your one chance to speak directly to the decision-maker. It’s your personal pitch, explaining the "why" behind your trip in a way that the application form can't. You need to keep it professional, clear, and straight to the point.
State your purpose clearly right from the start. Are you visiting for tourism, seeing your sibling in Manchester, or attending a short business conference in London? Briefly lay out your itinerary and explain exactly how the trip will be funded. This letter is your opening statement, and it sets the tone for all the documents that follow.
Demonstrating Strong Financial Standing
Let me be blunt: your bank statements tell a story, and a visa officer is trained to read it. They want to see a healthy, consistent financial history—not a huge, unexplained lump sum that magically appeared in your account last week. This practice, known as 'funds parking,' is one of the biggest red flags and a common reason for refusal.
To paint a clear and trustworthy financial picture, here’s what you need:
- Six months of personal bank statements: These must show your regular income, like your salary, and a stable closing balance that can comfortably cover your proposed travel expenses.
- Payslips: You'll need corresponding payslips for the same six-month period to cross-reference the salary credits hitting your bank account.
- A letter from your employer: This is non-negotiable if you're employed. The letter should confirm your job title, annual salary, the date you started, and explicitly state that you have approved leave for your trip and are expected back at work on a specific date.
A very common mistake I see is when an applicant gets a large "loan" from a friend or family member just before applying. This immediately raises suspicion about who really owns the money. It's far more convincing to show a modest but consistent account balance that is clearly and legitimately yours.
Proving Your Unbreakable Ties to Nigeria
This is, without a doubt, the most critical part of your application. The visa officer's primary concern is whether you will leave the UK at the end of your visit. You must convince them that you have significant, compelling reasons to return home. Your life in Nigeria is the anchor.
Here’s how you can demonstrate these strong ties:
- Employment or Business: For employees, that employer letter is your key piece of evidence. If you run your own business, you'll need your Corporate Affairs Commission (CAC) registration documents, business bank statements, and maybe even some invoices to show ongoing trade.
- Family Commitments: Are you married? Do you have children? Including your marriage and birth certificates shows you have deep family roots and responsibilities waiting for you back in Nigeria.
- Property Ownership: If you own land or a house, this is powerful proof. Providing a deed of assignment, a certificate of occupancy, or other official property documents shows you are established and invested in Nigeria.
For a deeper dive, our guide on UK visa requirements for Nigerian citizens gives a fantastic overview of all the requirements.
Ultimately, the more evidence you provide showing a stable, established life in Nigeria, the stronger your application for a visitor visa to the UK will be.
Tackling the Online Form and Biometrics Appointment
Think of the official GOV.UK online application form as your first formal conversation with a UK Visas and Immigration (UKVI) decision-maker. This is where you lay out your entire case. It’s not just about filling in blanks; it's about making sure your story is clear, consistent, and, above all, completely honest.
Every question on that form—from your personal details and financial standing to your travel history and UK plans—is designed for a reason. You need to be meticulous here. The details you provide must mirror the evidence in your supporting documents perfectly. A tiny discrepancy can raise a red flag. For instance, people often get tripped up on the travel history section. Don't guess. List every single international trip accurately, because believe me, UKVI has ways of checking.
Filling Out the Form Like a Pro
When you get to the part about your trip itinerary, be specific. You don't need a minute-by-minute schedule, but you do need to be clear. State your intended travel dates, where you’ll be staying, and what you plan to do.
- Visiting family? Provide their exact address and contact information.
- Just a tourist? List the main cities or attractions you want to see.
Honesty is everything. If you’ve ever been refused a visa for any country, you must declare it. Explain what happened briefly and truthfully. Trying to hide a refusal is seen as deception, and that’s a one-way ticket to another refusal, this time for a much more serious reason.
Once you’ve reviewed every single answer (and then checked it again!), you’ll submit the form and pay the visa fee online. This officially starts the clock on your visitor visa UK application. Right after payment, the system will prompt you to book your biometrics appointment.
This is the point where having all your documents ready really pays off. It makes the whole process feel much less frantic.
Having these items sorted before you even open the application form is one of my top tips for a stress-free experience.
What to Expect at Your Biometrics Appointment in Nigeria
This appointment is a mandatory step where you’ll visit a Visa Application Centre (VAC) in Nigeria, usually run by a company like TLScontact. The appointment itself is very routine and doesn't take long.
Key takeaway: The staff at the VAC are administrative workers, not visa officers. They can’t influence the outcome of your application. Their role is simply to collect your passport and capture your biometrics. Be courteous, follow their instructions, and have your papers in order.
Here’s what happens during the appointment:
- You’ll submit your current passport and the printed confirmation of your online application.
- Your fingerprints will be scanned.
- A digital photograph of you will be taken.
This biometric data is a core part of the UK's visa security system. In fact, you can see how important this is by looking at official statistics. Data often shows that application trends from Nigeria are watched closely and shift based on UK immigration policy changes. Family visits and tourist applications are often intertwined, and you can even read more about these official visa application trends on the UK government's website.
After your biometrics are taken, your file is complete. It gets sent electronically to a UKVI decision-making centre, and the waiting game begins.
Proving Your Finances and Strong Ties to Nigeria
This part of your application is where the rubber meets the road. Honestly, this is where most applications fall apart. A UK visa officer needs to be 100% certain about two things: first, that you can comfortably afford your trip, and second, that you have solid reasons to come back to Nigeria. It’s not just about showing a fat bank account; it's about painting a clear picture of a stable life you have no intention of leaving behind.
Think of yourself as a storyteller. Your documents are your evidence, and they need to tell a convincing story. The plot? A responsible individual with deep roots in Nigeria is taking a temporary, well-deserved trip to the UK and will definitely be returning home.
Showing You Have Unbreakable Ties to Home
Your connection to Nigeria is the bedrock of your application. You need to prove, with hard evidence, that you have commitments and responsibilities waiting for you back home. General claims won't cut it. You need proof.
Here’s what solid proof of home ties actually looks like:
- Your Job is a Major Anchor: A letter from your employer is gold. It shouldn't just be a simple note. It needs to state your role, how much you earn, when you started, and crucially, confirm your approved leave dates and the exact date you're expected to resume work.
- Running a Business? Prove It's Real: If you're a business owner, you have to show that your business is a real, breathing entity that needs you. Get your Corporate Affairs Commission (CAC) documents in order, provide your business bank statements for the past six months, and throw in recent invoices or your tax clearance certificate for good measure.
- Family is Everything: Your family commitments are a powerful tie. If you're married, include your marriage certificate. Have children? Their birth certificates are non-negotiable. This shows you have people who depend on you right here in Nigeria.
- Property Ownership Speaks Volumes: Owning land or a house is a massive statement. Documents like a Deed of Assignment or Certificate of Occupancy show you have significant assets and investments in Nigeria that you wouldn't just walk away from.
A few years back, I helped a schoolteacher with her application. She didn't just submit her employment letter. We included a personal letter from her headteacher approving the holiday, mentioning how valued she was. We even added a few photos of her with her students. It created a powerful, personal story of her commitment that a simple document couldn't convey. That's the level of detail that gets you approved.
Getting Your Financial Proof Right
This is critical. Your financial documents need to be crystal clear and straightforward. The visa officer wants to see that the money for your trip is genuinely yours, earned over time, and that this trip won't leave you financially ruined. The amount of money you have is only half the story; where it came from is what they really dig into.
A classic mistake that gets applications thrown out is 'funds parking'. This is when someone suddenly dumps a large amount of cash into their account just before applying. It’s the biggest red flag you can wave.
Instead, build a story of financial consistency. Your six-month bank statements should show a clear pattern: your salary coming in regularly and a stable balance being maintained. Every single salary payment on your payslips must match an entry in your bank statement. If you have any large, out-of-the-ordinary deposits, you absolutely must explain them. Got a cash gift? Provide a signed gift deed. Sold a car? Show the proof of sale.
Trust me on this: a smaller, stable bank balance with a clean, logical history is far more convincing than a huge balance that appeared out of nowhere. Your financial story has to make perfect sense.
Navigating Common Pitfalls: Why UK Visitor Visas Get Refused
I’ve seen it time and time again: perfectly genuine applicants from Nigeria getting that dreaded refusal letter. Why? Not because of some grand deception, but because of small, entirely avoidable mistakes. These aren't complex legal hurdles; they're often simple slip-ups in how you present your story.
Let’s get straight to the point. A visa officer’s job is to look for two things: credibility and consistency. Any detail that feels off, contradicts another document, or just doesn't add up creates doubt. And in the world of visa applications, doubt almost always leads to a refusal. Think of this section as your pre-flight check, helping you spot these common traps before your application ever leaves your hands.
Inconsistent Information: The Easiest Way to Get a "No"
This is probably the quickest route to a refusal. When the details don't match across your documents, alarm bells start ringing for the visa officer.
Imagine your application form states your monthly salary is ₦300,000, but a close look at your bank statements shows deposits closer to ₦280,000 each month. It might seem like a small difference to you, but to them, it’s a crack in your story.
The same logic applies to your travel dates. Your heartfelt letter of introduction might talk about a two-week holiday, but your flight reservation shows a three-week stay. This creates confusion and forces the officer to question which piece of information is the truth.
My advice? Before you hit 'submit', lay everything out. Put your application form, employer's letter, bank statements, and any other supporting documents side-by-side. Go through them with a fine-tooth comb and ensure every name, date, and figure aligns perfectly. In this game, consistency is everything.
Funds Parking: The Red Flag of Sudden Money
This one is a huge—and very common—misstep. We call it 'funds parking': a large, unusual sum of money suddenly lands in your bank account right before you apply for the visa. Often, it's a well-meaning family member or friend trying to "help" you meet the financial requirement.
To a visa officer, this is a massive red flag. They see it as money that isn't genuinely yours for your trip and will likely disappear the moment a visa is granted.
They are trained to spot these kinds of financial gymnastics. Honestly, they would much rather see a smaller, stable bank balance that clearly shows your salary coming in and your savings slowly building up over months. It tells a much more believable story than a huge, unexplained lump sum.
If you do have a large, legitimate deposit—say, from selling a car or a piece of land—you absolutely must explain it. Don't just hope they won't notice. You need to provide solid proof, like the deed of sale. If it was a gift, you'll need a formal gift deed from the person who gave you the money, explaining where their funds came from. Trying to hide this is a risky strategy that can be seen as deception. For a deeper dive into how serious this can be, it's crucial to understand the consequences of visa application misrepresentation.
A Vague Itinerary and Weak Purpose of Visit
Simply stating you want to "visit the UK for tourism" is far too generic. A vague plan makes it seem like you haven't put much real thought into your trip, which can make your intentions as a genuine tourist seem weak. Why the UK, specifically? What do you actually plan to do when you get there?
Your application needs to paint a clear, logical, and believable picture of your proposed visit.
Here’s a practical tip: draft a simple day-by-day plan. It doesn’t have to be a rigid, minute-by-minute schedule, but it must be realistic.
- For tourism: Mention specific plans like "Days 1-3: Exploring London (visiting the Tower of London, Buckingham Palace, and a West End show)."
- For family visits: Clearly state who you are visiting (e.g., "my sister, Mrs. Adeola Okoro"), your relationship, and what you intend to do together ("attend my nephew's graduation ceremony at the University of Manchester and spend time with her family").
This level of detail transforms your application from a generic request into a credible plan from a genuine visitor.
To help you put this all together, here’s a breakdown of common refusal reasons and the smart strategies you can use to build a much stronger case.
Common Refusal Reasons vs Strong Application Strategies
Common Refusal Reason What the Visa Officer is Thinking Your Proactive Strategy Weak Financial Profile / "Funds Parking" "This money doesn't look like it's genuinely theirs. It was likely borrowed just for the application." Provide 6 months of bank statements showing a consistent income and savings pattern. Explain any large, unusual deposits with supporting evidence (e.g., gift deed, proof of asset sale). Inconsistent Information "The salary on the form is different from the bank deposits. The travel dates don't match. Which part of this story is true?" Cross-check every single document for consistency. Names, dates, and financial figures must align perfectly across your application form, letters, and bank statements. No Strong Ties to Nigeria "What reason does this applicant have to return to Nigeria? They have a low salary, no property, and no dependents." Provide strong evidence of your home ties: a letter from your employer, proof of property ownership, evidence of family responsibilities (marriage/birth certificates), etc. Vague Travel Plans "Saying 'tourism' isn't a plan. It sounds like they haven't researched their trip, which makes me doubt their true intentions." Create a believable, day-by-day itinerary. Include hotel bookings, flight reservations, and mention specific sights you plan to see or events you'll attend. Thinking like a visa officer is the key. By anticipating their concerns and addressing them head-on with clear, consistent, and well-documented evidence, you dramatically increase your chances of a successful application.
Your UK Visa Questions Answered

Even after you've dotted every 'i' and crossed every 't' on your application, it's natural to have a few nagging questions. Let's tackle some of the most common queries we get from Nigerian applicants. Getting these sorted will help you submit your application feeling sure and confident.
How Much Money Is Enough for a UK Visitor Visa from Nigeria?
This is the big one, isn't it? But here’s the truth: there is no magic number. Visa officers aren't looking for a specific figure in your bank account. What they want to see is proof that you can genuinely afford your trip—flights, accommodation, daily spending—without it looking like you're clearing out your life savings.
The real key is consistency. The money in your account needs to make sense with your declared income. A sudden, massive deposit just before you apply is one of the biggest red flags you can raise.
A modest but stable bank balance showing your regular salary coming in is much more convincing than a huge, unexplained lump sum. It's all about credibility, not just the closing balance.
Can I Apply for a UK Visa if I Have Been Refused Before?
Yes, you absolutely can. A past refusal isn't a life sentence, but you can't just ignore it and hope for the best. The most critical thing you must do is get a hold of your refusal letter from UKVI and read it carefully. The reasons for the decision will be spelled out for you.
Your new application needs to tackle those specific points head-on. For instance, if the refusal mentioned weak financial ties, your new application must be packed with stronger, clearer evidence. Show the Entry Clearance Officer that you’ve taken their feedback seriously and fixed the issues.
What Is the Standard Processing Time in Nigeria?
Typically, you should expect to wait around three weeks (or 15 working days) after your biometrics appointment at the visa application centre. But please, treat this as a guideline, not a guarantee.
Things can slow down considerably during peak travel periods like summer and Christmas, or if your case needs extra scrutiny for any reason. If you're in a rush, you can often pay for a priority service to get a decision in about five working days. Always check the official GOV.UK website for the most current processing times before you finalise your travel dates. It's also smart to stay updated on any new UK immigration rules that might come into play.
Do I Need to Show My Old, Expired Passports?
If you have them, yes! It's a fantastic idea to include your old passports. This is especially true if they contain visas from previous trips, not just to the UK but to places like the USA, Canada, or Schengen countries.
This helps you build a strong travel history. It shows the visa officer that you're a genuine traveller who plays by the rules and has a track record of returning home. It’s a simple but powerful way to add a layer of credibility to your story.
-
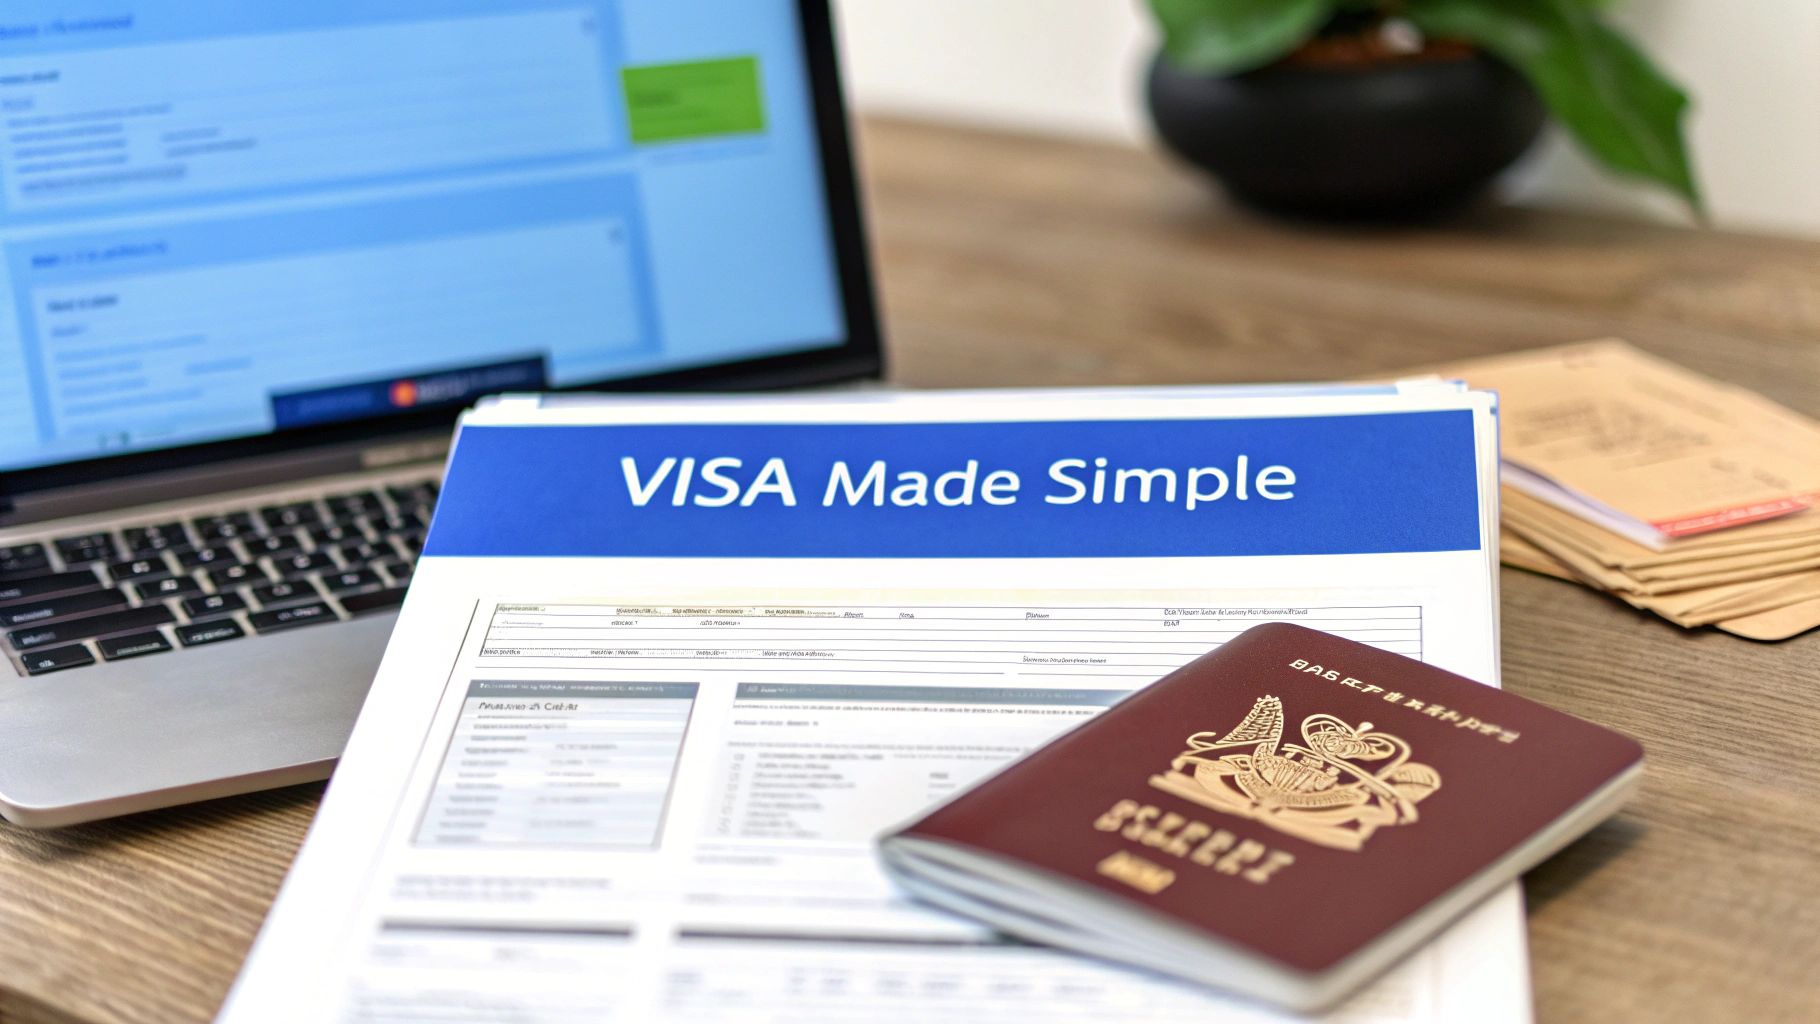
UK Job Visa Requirements Simplified
Getting a UK job visa usually boils down to meeting the Skilled Worker visa requirements. At its core, this means you need a sponsored job offer from a licensed UK employer, you must be paid a certain minimum salary, and you have to prove you can speak English. It’s like a checklist—tick these three main boxes, and you’re well on your way.
Understanding the UK Job Visa Landscape

Trying to figure out the UK's immigration system can feel like learning a new language, full of specific jargon and intricate rules. But once you grasp the basic principles, the whole process becomes a lot less daunting. The system is set up to welcome professionals who can genuinely contribute to the UK economy, with the Skilled Worker visa serving as the primary route for most international talent.
Imagine the visa system as a series of gates. To get through each one, you need the right key. For the majority of people looking for work, these "keys" are a combination of a solid job offer, the right skills for the role, and a good command of English. This setup helps ensure that people coming to work in the UK are a great match for the country's job market.
The Points-Based System Explained
The UK job visa requirements are built around a points-based system. It sounds more complicated than it is; it's really just a straightforward way for the government to score your application and see if you qualify. You need to score 70 points in total. Some of these points are mandatory (non-negotiable), while others are "tradeable," which gives you a bit of flexibility.
Here's a quick look at the main visa routes to give you an idea of the landscape.
Key UK Work Visas at a Glance
This table offers a snapshot of the most common work visas, helping you see where you might fit in.
Visa Type Primary Purpose Essential Prerequisite Skilled Worker Visa For professionals with a job offer in an eligible skilled role. A Certificate of Sponsorship (CoS) from a Home Office-licensed employer. Health and Care Worker Visa A dedicated route for qualified doctors, nurses, and other health professionals. A job offer from the NHS, an NHS supplier, or in adult social care. Global Talent Visa For recognised or potential leaders in academia, research, arts, or digital technology. An endorsement from an approved body in your specific field. These visas are more popular than ever. The Home Office originally estimated it would grant about 360,000 Skilled Worker visas in the three years after 2020. In reality, they granted 931,000—more than two and a half times what they predicted.
Getting Ready For Your Move
Understanding the visa process is a huge step, but it's just one piece of the puzzle. While this guide focuses on the visa itself, anyone planning a big move will find broader guides on preparing for your move abroad really useful.
The secret to a successful application is realising the visa isn't just a piece of paper. It's a testament to the professional value you bring to the UK. This means preparing meticulously, from landing your sponsorship to gathering every last bit of evidence.
It's also worth remembering that the UK immigration landscape changes. You have to stay on top of any new rules that could impact your application. For a complete summary of the latest updates, take a look at our guide on the https://blog.japachat.com/uk-immigration-new-rules/. Having this foundational knowledge gives you a clear roadmap, helping you move forward with confidence toward your career goals in the UK.
The Four Pillars of Skilled Worker Visa Eligibility

When it comes to getting a Skilled Worker visa, your application rests on four key pillars. Think of it like building a house – if any one of the foundations is weak, the whole structure could come tumbling down. A successful application is one that firmly proves you meet every single one of these core UK job visa requirements.
Getting these essentials right from the very beginning is the secret to a much smoother process. Let's walk through each one so you can build a rock-solid case for your visa.
Pillar 1: Your Certificate of Sponsorship
The first, and arguably most important, pillar is your Certificate of Sponsorship (CoS). This isn't a paper document you hold in your hand; it's a unique digital reference number. Your UK employer, who must be licensed by the Home Office to sponsor international workers, is the one who provides you with it.
Think of the CoS as your golden ticket. It's the official confirmation to the Home Office that you have a genuine job offer from a legitimate, approved company. Without this number, you can't even start your application. It’s the key that unlocks the entire visa journey.
Pillar 2: An Eligible Job Offer
It's not enough to just have any job offer. The role itself has to meet a specific skill level set by the UK government. There's an official list of eligible occupations, and each one has its own four-digit code. Your job has to be on that list.
Generally, these are roles that require qualifications at least equivalent to A-levels (or a Nigerian equivalent, like the West African Senior School Certificate). This is how the government ensures the visa route attracts professionals who are filling specific gaps in the UK workforce.
Key Insight: The job title your employer gives you isn't what matters most to the Home Office. They'll look at the actual duties and responsibilities of your role to see if they match the official description for that occupation code.
For example, a job called "Marketing Executive" might fit perfectly under the "Marketing Associate Professionals" code. However, a role as a "Shop Assistant" almost certainly wouldn't meet the required skill level. Understanding this difference is absolutely crucial.
Pillar 3: The Minimum Salary Threshold
The third pillar is all about money. You need to show that your salary meets a minimum threshold, proving you'll be making a solid economic contribution. This is one of the most important UK job visa requirements and one where many people get tripped up.
Your salary will be checked against three main figures, and you must meet whichever one is the highest:
- The general salary threshold, which is currently £38,700 per year.
- The specific "going rate" for your job's occupation code.
- A minimum hourly rate of £15.88.
Let's say the general threshold is £38,700, but the official going rate for your specific job is £42,000. Your salary must be at least £42,000. For a closer look at how these rules affect applicants from Nigeria, have a read of our UK visa requirements for Nigerian citizens guide.
Pillar 4: English Language Proficiency
Finally, you have to prove you can communicate well in English. This is the fourth and final pillar holding up your application. The good news is that there are a few different ways you can tick this box.
How to Prove Your English Skills
- Citizenship: You're a citizen of a majority English-speaking country (like the USA, Australia, or Canada).
- English-Taught Degree: You have a degree (Bachelor's, Master's, or PhD) that was taught in English. If you earned it outside the UK, you'll likely need a confirmation from a service called Ecctis.
- Language Test: You pass a Secure English Language Test (SELT) from an approved provider, hitting at least a B1 level in reading, writing, speaking, and listening.
- UK School Qualification: You already have a GCSE, A level, or Scottish Higher in English from your time studying in the UK.
Nailing all four of these pillars is non-negotiable. If you can confidently show you have a valid CoS, an eligible job, a qualifying salary, and the right English skills, you're laying the best possible foundation for a successful visa application.
Cracking the Code: The 70-Point System
At the heart of the Skilled Worker visa process is a points-based system. It might sound a bit like a game, but it's really a straightforward checklist. To get your visa, you need to score 70 points – no more, no less. Think of it as hitting a specific target; getting extra points doesn't help, but falling even one point short means your application won't succeed.
The system is split into two main chunks: 50 foundational, non-negotiable points and another 20 "tradeable" points where you have some flexibility. Getting to grips with how to secure all 70 is your key to a successful application.
The 50 Mandatory Points: Your Foundation
First things first, let's talk about the essentials. These 50 points are the bedrock of your application. You can't swap them or make up for them in other areas. They prove you meet the core criteria for a skilled job in the UK.
You’ll lock in these foundational points by proving three things:
- You have a job offer from a Home Office-approved sponsor (20 points).
- The job is at an appropriate skill level (generally equivalent to A-levels) (20 points).
- You meet the B1 English language requirement (10 points).
Nail these three, and you're already at 50 points. This part is black and white; without these, an application is a non-starter. The real strategy kicks in when you need to find the final 20 points.
Finding Your Final 20 Tradeable Points
This is where the system offers a bit of wiggle room. To get from 50 to the magic number of 70, you need to earn another 20 points from a list of what the Home Office calls "tradeable" characteristics. For most people, it all comes down to salary.
The most direct route is to have a salary that's both at least £38,700 per year and the going rate for your specific occupation. If your salary hits this benchmark, you get your 20 points. Simple as that.
But what if your salary doesn't quite reach that level? This is where the "tradeable" options come in handy.
For instance, if your job is on the Immigration Salary List (a government list of roles with staff shortages), the salary threshold drops. You could secure your 20 points with a salary of at least £30,960. It’s always worth checking if your job is on this list, as it’s a game-changer for many applicants.
Other paths to getting those 20 points include:
- Holding a relevant PhD: If you have a PhD in a field directly related to your job, you can earn 20 points with a salary as low as £34,830.
- Being a "new entrant": This category is for those under 26 or recent graduates. New entrants can meet the requirement with a salary of at least £30,960.
To make it crystal clear, here’s a breakdown of how the points add up.
How to Score Points for a Skilled Worker Visa
This table shows exactly how you can accumulate the necessary 70 points, separating the mandatory requirements from the flexible, tradeable ones.
Characteristic Points Awarded Is it Tradeable? Job offer from an approved sponsor 20 No (Mandatory) Job at the appropriate skill level 20 No (Mandatory) English language skills at B1 level 10 No (Mandatory) Salary of £38,700 or the going rate (whichever is higher) 20 Yes Salary of at least £34,830 (and 90% of the going rate) for a relevant PhD 20 Yes Job on the Immigration Salary List with a salary of at least £30,960 20 Yes "New Entrant" to the labour market with a salary of at least £30,960 20 Yes As you can see, you must secure the first 50 points. After that, you just need to meet one of the tradeable criteria to get the final 20 points you need.
Once you’ve submitted your application, the waiting begins. This image gives you a rough idea of processing times for different visa routes.
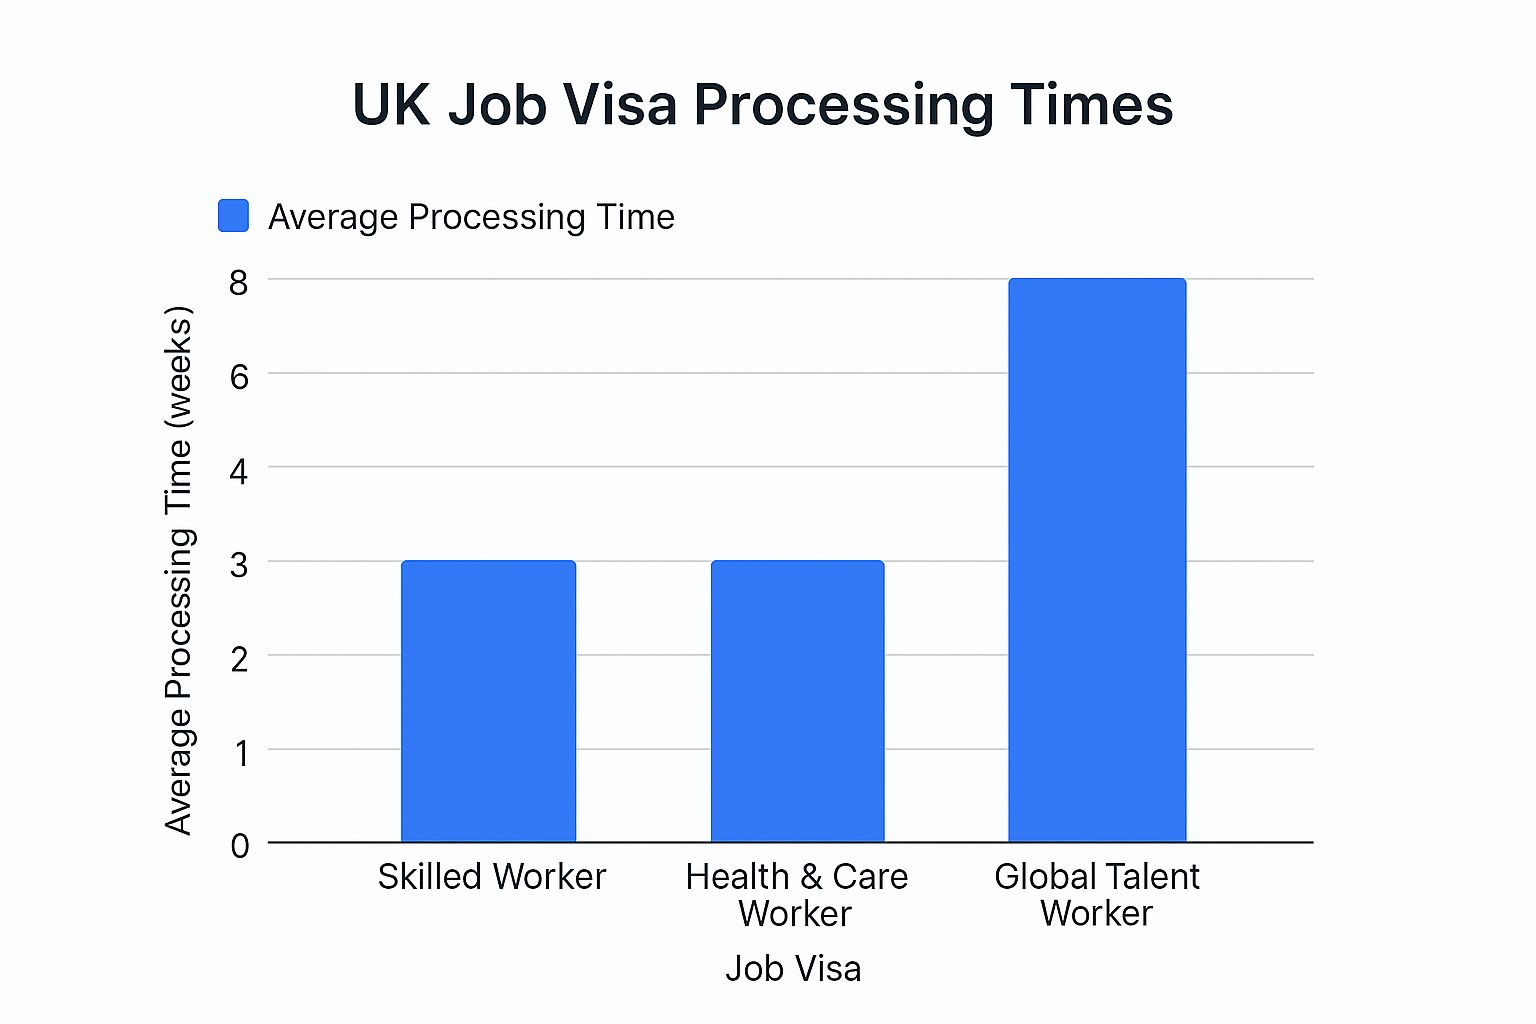
As the data shows, the Skilled Worker and Health & Care Worker routes are often processed more quickly than some other categories like the Global Talent visa.
It's interesting to note how the UK's immigration focus has evolved. According to the government's own analysis, the number of visas issued for roles considered lower-skilled nearly doubled between 2022 and 2023, jumping from 16,200 to 27,900. This reflects a clear shift in the country's recruitment needs.
Your Essential Document and Fee Checklist
Getting a visa application right comes down to one thing: organisation. Think of yourself as the project manager for your own move to the UK. Getting your paperwork and finances in perfect order is your most critical task. A messy submission can easily lead to frustrating delays or even an outright refusal, so your attention to detail here really matters.
This checklist will walk you through every document and fee you'll encounter. We'll break down exactly what you need to gather, from your passport to your professional qualifications, so nothing gets missed.
Core Application Documents
First things first, let's gather the absolute essentials. These documents are the bedrock of your Skilled Worker visa application. Without them, you simply can't move forward.
Here’s the must-have paperwork you need to have on hand:
- A current passport or other valid travel document with at least one blank page for the visa vignette.
- Your Certificate of Sponsorship (CoS) reference number. This is a unique code your employer gives you once they’ve officially offered you the job.
- Proof of your English language ability, which might be a valid SELT exam certificate or a degree certificate if your course was taught in English.
- Your job title and annual salary, which must perfectly match the details on your CoS.
- Your job’s four-digit occupation code, provided by your employer.
- The name of your employer and their sponsor licence number. You’ll also find this on your CoS.
Having these items ready and organised makes filling out the online application form a much smoother experience.
Proving You Can Support Yourself
Beyond the core documents, you'll need to show the Home Office you can cover your living costs when you first arrive in the UK, before that first paycheque lands.
This means you must have at least £1,270 in your bank account. Critically, these funds need to have been in your account for a solid 28 consecutive days, ending within 31 days of your application date. This is what’s known as the “maintenance funds” requirement.
There is, however, one big exception. Your employer can tick a box on your CoS to certify they will "maintain and accommodate" you for your first month. If they do this, you don't need to provide your personal bank statements as proof of funds.
Expert Tip: Always, always double-check your Certificate of Sponsorship before you apply. If your employer has agreed to cover your maintenance, make sure that specific box is ticked. A simple admin error here can cause a world of trouble for your application.
Understanding the Application Costs
Budgeting for your move is a huge part of meeting the UK job visa requirements. The visa costs are significant and come in three distinct parts. It's vital to account for all of them to avoid any nasty financial surprises down the line.
The main fees you’ll need to prepare for are:
- The Visa Application Fee: This is the base cost for processing your application. It changes depending on how long your visa is for (up to three years or more) and whether you apply from inside or outside the UK.
- The Immigration Health Surcharge (IHS): This mandatory fee gives you access to the UK's National Health Service (NHS). It’s currently £1,035 per person, per year of your visa, and you have to pay the entire amount upfront.
- Biometric Appointment Fee: You'll need to attend an appointment at a visa centre to have your photo and fingerprints taken, and this service usually comes with a small fee.
These costs can add up fast, especially if you’re bringing your family. For a complete breakdown, you can learn more about the full UK work visa cost in our dedicated article. Being financially prepared is every bit as important as having the right documents.
Right, you've got your documents in order and you know you're eligible. Now for the main event: the application itself. It can seem like a mountain to climb, but if you take it one step at a time, you'll find it's perfectly manageable.
Think of it as assembling a piece of flat-pack furniture. If you follow the instructions carefully, you’ll end up with a solid result. Rush it, and you’ll be left with a wobbly mess and a pile of leftover screws. We’ll walk through each part of the process, so you know exactly what to expect.
Step 1: Nailing the Online Application Form
Everything starts on the official GOV.UK website. This is where you'll fill out the application form. Accuracy here is non-negotiable. Even a tiny mistake can cause major delays.
My best advice? Sit down with all your documents next to you. Double- and triple-check that every detail you enter—your name, passport number, and especially your Certificate of Sponsorship (CoS) number—is an exact match to what's on paper. Don't rush. Read every question properly. This is your one chance to present a clear, error-free case to the Home Office.
Step 2: Paying the Fees
After you hit 'submit' on the form, you'll be taken to the payment page. Here, you need to settle two key costs: the visa application fee and the Immigration Health Surcharge (IHS).
It’s crucial to remember that the IHS is a mandatory payment that gives you access to the NHS for the duration of your visa. You’ll pay both fees together online with a debit or credit card. Make sure you have enough funds ready and check with your bank about any transaction limits to avoid a declined payment, which can bring your entire application to a screeching halt.
Step 3: Uploading Your Supporting Documents
Once the payment is confirmed, you'll get a link to upload digital copies of your documents. This is where all that prep work really pays off.
You'll need to scan each document clearly. I always recommend saving them with simple, logical names like "Passport.pdf" or "Degree_Certificate.pdf". It just makes things easier for everyone.
A Word of Advice: Blurry scans or confusingly named files are a real headache for the person reviewing your case and can seriously slow things down. Make sure every single page is crystal clear and that you upload each file into the correct category on the portal. A bit of digital tidiness makes a huge difference.
Step 4: Your Biometrics Appointment
The last active step for you is booking an appointment at a visa application centre (VAC). This is where they take your fingerprints and a digital photo. This biometric data is a fundamental part of the UK job visa requirements, as it’s used to create your Biometric Residence Permit (BRP) card once you're approved.
After you've uploaded your documents, the system will guide you to the VAC's booking website. Just pick a date and time that suits you. Don't forget to bring your original passport and a printout of your appointment confirmation on the day.
So, How Long Does it All Take?
Once your biometrics are submitted, the waiting game begins. For a standard Skilled Worker visa application from outside the UK, you can typically expect a decision in about three weeks.
However, this isn't set in stone. Processing times can be affected by the sheer volume of applications in the system. For instance, government data shows applications for Health and Care Worker visas shot up from 4,100 in February 2022 to a staggering 18,300 in August 2023. Spikes like that can create backlogs. You can actually read the full government report on monthly visa applications to get a feel for current trends.
If you’re in a hurry—perhaps your job has a strict start date—you can usually pay extra for a priority service. This can cut the waiting time down to just a handful of working days and is often well worth the investment for peace of mind.
Answering Your Top UK Job Visa Questions
Even with all the information in front of you, it’s natural to have a few lingering questions about getting a UK job visa. Let's walk through some of the most common ones we hear from people just like you, so you can move forward with total clarity.
Can I Bring My Family With Me?
For most people on a Skilled Worker visa, the answer is a resounding yes. You can usually bring your partner (whether you're married, in a civil partnership, or have been living together for at least two years) and your children under 18.
Just remember, each family member needs their own application and has to pay their own visa fee and Immigration Health Surcharge. You'll also need to show you have enough money to support them, unless your UK employer has agreed to cover this for you.
A word of caution: The rules can and do change. Recently, for instance, the government stopped new Health and Care Worker visa holders from bringing dependants. Always, always double-check the latest official guidance for your specific visa before making any plans.
What Happens if My Visa Application Is Refused?
Getting a refusal notice is tough, but it doesn't automatically mean your UK dream is over. The Home Office will send you a letter that spells out exactly why they made that decision. What you do next depends entirely on those reasons.
Sometimes, it's a simple mistake, like forgetting a document. In that case, you can often just fix the error and reapply. If you feel the Home Office made a mistake in assessing your application, you might be able to ask for an ‘Administrative Review’, which is basically asking them to check their own work. A full-blown appeal is rare and only possible in specific situations. The key is to read that refusal letter very carefully – it holds the key to your next move.
How Long Can I Stay and Can I Settle Permanently?
Your initial Skilled Worker visa can be valid for up to five years. The good news is that you can apply to extend it as many times as you like, as long as you still meet all the requirements for your job and visa type.
After living and working in the UK for five continuous years on this visa, you can apply for what's known as Indefinite Leave to Remain (ILR), or settlement. This is a huge milestone. ILR frees you from immigration time limits, allowing you to live and work in the UK permanently. To get there, you'll need to pass the ‘Life in the UK’ test and meet certain income requirements, among other things. For many, achieving ILR is the final step towards building a permanent life in the United Kingdom.
Planning your move to the UK can feel overwhelming, but you don't have to do it alone. JapaChat is Nigeria’s first AI immigration expert, designed to give you instant, accurate answers to your specific questions. Get the clarity you need to plan your journey with confidence. Sign up for free on JapaChat and start making your dream a reality.
-
Your Guide to the UK Student Visa Process
Getting your UK student visa is a journey, and honestly, it starts way before you ever see an application form. It’s a process that demands careful planning—from landing that university offer and sorting out your finances to gathering a very specific pile of documents. Only then can you even think about starting the online application.
What to Expect from the UK Student Visa Journey
The idea of studying in the UK is thrilling, but let's be real: the visa application can feel like a massive, confusing puzzle. With recent policy changes from the UK government, being prepared isn't just a good idea—it's absolutely essential. This guide is your reality check, designed to set clear expectations for what's coming.
The best way to tackle this is to see it as a series of milestones, not one giant task. Each step logically follows the last, starting from the excitement of getting your acceptance letter all the way to that moment of relief when your passport comes back with the visa inside. Thinking of it this way makes the whole thing feel much more manageable.
The Current Landscape for Nigerian Students
For Nigerian students, the ambition to study in the UK is as strong as ever, even with some new hurdles. The recent restrictions on bringing dependants for most master's students, for instance, have forced many to rethink their plans. It means your application has to be laser-focused on you as the student.
Despite these changes, the interest hasn't just held steady; it's grown. In the first quarter of this year, Nigerian applications for a UK student visa shot up by a staggering 64% compared to the same period last year. You can find more details on this trend in UK student demand reports. This shows an incredible determination from students, even when facing economic pressures and new rules.
Being part of this huge wave of applicants is motivating, but it also means there's no room for mistakes. Your application needs to be perfect to get noticed.
Key Takeaway: If there's one piece of advice I can give, it's this: be meticulous. Every single document, date, and detail is scrutinised. The Home Office doesn't offer much flexibility for errors, so being organised isn't just helpful—it's the key to success.
Key Milestones in the Visa Process
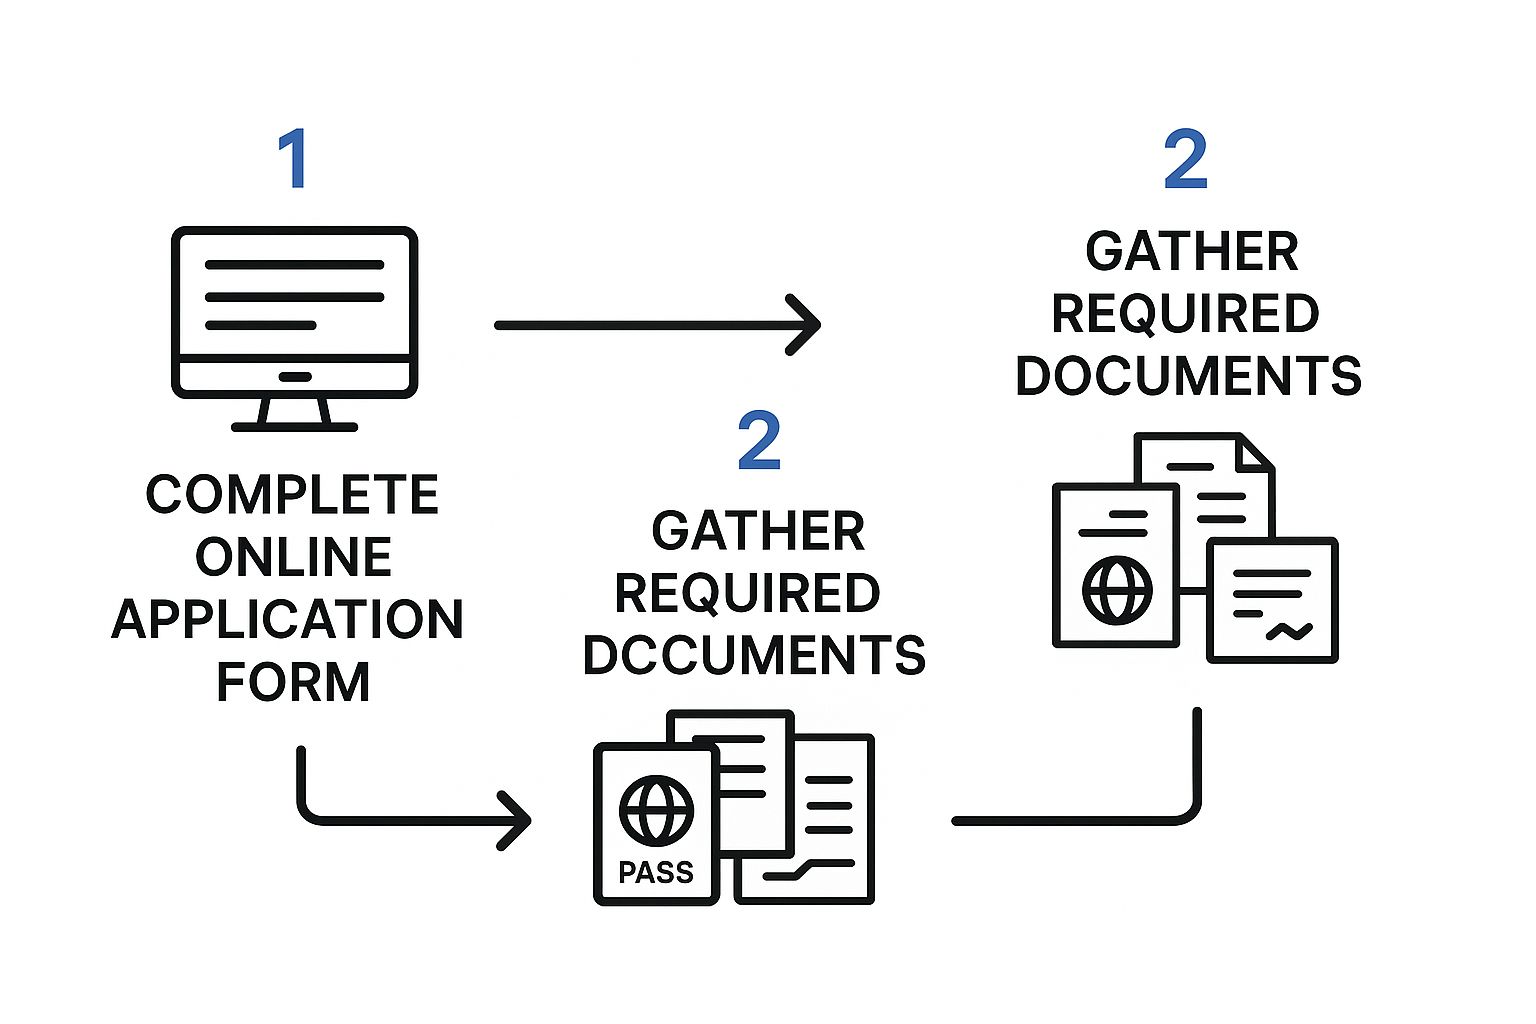
The UK student visa process is more than just an online form. It's a sequence of critical steps, and you have to get each one right. Here’s a simple breakdown of the main stages you'll go through:
- Securing Your University Offer: This is square one. Without an unconditional offer from a university that's a licensed student sponsor, you simply can't move forward.
- Receiving Your CAS: After you've accepted a firm offer and met all the conditions, your university will give you a Confirmation of Acceptance for Studies (CAS). This is a unique reference number, and it’s your golden ticket for the visa application.
- Sorting Out Your Finances: You need to prove you have the funds to cover your first year of tuition fees plus your living costs. The crucial part? This money must have been in your (or your sponsor's) bank account for at least 28 consecutive days before you apply.
- Completing the Online Application: This is where you'll enter all your personal details, your CAS number, and pay both the visa application fee and the Immigration Health Surcharge (IHS).
- Attending Your Biometrics Appointment: Once you've submitted your application online, you’ll have to go to a visa application centre in person to have your fingerprints and a photograph taken.
- The Waiting Game: This is the final and often most nerve-wracking part—waiting for UK Visas and Immigration (UKVI) to make a decision and send your passport back.
Going into this with a clear roadmap makes all the difference. When you know what's required at each stage, you can move from one milestone to the next with confidence, and that dramatically increases your chances of getting that visa.
Getting Your CAS and Proving You’re Eligible
Before you even touch the official UK visa application form, two things need to be sorted. First, you need to get your hands on a Confirmation of Acceptance for Studies (CAS). Think of this as the master key to your application; without it, the door to a UK student visa remains firmly shut.
Your CAS is essentially a unique reference number that your university provides once you’ve met all their academic and financial conditions and formally accepted their unconditional offer. It’s their way of telling the Home Office, "Yes, we’ve vetted this student, and they have a legitimate place to study with us." It’s the very foundation of your visa application.
Understanding the Points-Based System
The UK student visa works on a points-based system, which sounds more intimidating than it is. You need to score exactly 70 points to be successful. It’s not a test where you can get partial marks; it's a simple checklist where you either meet the criteria or you don't.
Here’s the breakdown of how you get those crucial points:
- Confirmation of Acceptance for Studies (50 points): This is the big one. Simply having that valid CAS from your university (a licensed student sponsor) bags you these points automatically.
- Financial Requirement (10 points): You have to prove you have enough money to pay for your course fees and your living expenses. This is a massive hurdle for many, so getting your documents perfect here is non-negotiable.
- English Language Requirement (10 points): You need to show you can understand and communicate in English to the level required for your course.
Nailing all three sections is the only way to get your visa. There’s no wiggle room.
From University Offer to Getting Your CAS
The time between accepting your place and getting your CAS can feel like you're stuck in limbo, but there's a lot happening behind the scenes. Your university is doing its final checks to make sure you’re a genuine student before they put their name on the line for you with the Home Office.
Usually, they’ll ask you to pay a deposit towards your tuition fees before issuing the CAS. This shows you’re serious. For instance, on a £16,000 tuition fee, a university might request a deposit of £2,000 to £4,000. The good news is that once paid, this amount is listed on your CAS, which reduces the total amount you need to show in your bank account for the visa application.
One of the most common pitfalls I see is students underestimating how long this process takes. Don't leave it to the last minute. Accept your offer, pay your deposit as soon as you're asked, and stay in regular contact with the admissions office.
Once the university is satisfied and your deposit is confirmed, they'll generate your CAS and email it to you. That email contains your unique CAS number and a summary of your course details. The moment it lands in your inbox, you’re officially ready to start the visa application.
A Note for Nigerian Applicants
The world of student immigration is always changing, and it’s so important for Nigerian applicants to keep up. While recent data showed a global surge in student visa applications by nearly 30%, the situation for Nigerian students has become more complex due to new UK policies, like the ban on bringing dependants. Knowing about these shifts is crucial.
Being aware of the current rules helps you build a stronger application that anticipates potential issues. For a complete rundown of everything you'll need, have a look at our detailed guide covering the latest UK student visa requirements.
Proving Your English Language Skills
Meeting the English language requirement is how you'll secure those final 10 points. For most degree-level studies, you'll need to demonstrate your ability at the B2 level of the Common European Framework of Reference for Languages (CEFR).
There are a few ways to tick this box:
- Take a Secure English Language Test (SELT): This is the most common path. Approved tests include IELTS for UKVI or Pearson PTE Academic UKVI.
- Rely on Previous Study: If you already have a degree from a majority English-speaking country (though this doesn’t include Canada), it can often be used as proof.
- Use a UK Qualification: A GCSE or A-Level in English from a UK school also works.
Your university will state exactly what they need in your offer letter. If a test is required, book it early, as test centres can get busy. Your CAS will ultimately confirm how you met the English language requirement, which is what the visa officer will check.
Getting Your Paperwork in Order: A Guide to Your UK Student Visa Documents

A successful UK student visa application is built on solid proof. This is where your careful preparation really shines. It's not just about ticking off a list; it's about understanding the why behind each document and ensuring every detail is perfect. The Home Office doesn't guess your intentions—your documents do the talking for you.
Think of it like building a case. Each piece of paper, from your passport to your bank statements, must be clear, correctly formatted, and tell a consistent story. Let's walk through exactly what you need, covering the absolute essentials and the specific documents that catch so many applicants out.
The Non-Negotiables: Your Passport and CAS
First things first, let's talk about the absolute basics. Your current passport or other valid travel document is the cornerstone of your application. It must have at least one completely blank page for the visa sticker (called a vignette) and needs to be valid for your entire planned stay in the UK. A good tip? If you have an old passport showing previous travel, it’s often smart to include a copy.
Next up is your Confirmation of Acceptance for Studies (CAS) number. As we've discussed, this isn't a physical letter but a unique reference number you'll get from your university via email. You'll receive a CAS statement outlining all the details. Your job is to check it obsessively. Make sure your name, date of birth, course title, and tuition fees are 100% correct. If you find a single mistake, contact your university's admissions team immediately to get it fixed before you submit anything.
I've seen applications refused for something as simple as a typo in a name on the CAS. Don't assume the university got it right. Be your own final proof-reader—it could save you a world of trouble.
Proving You Have the Funds
This is, hands down, the area where applications most often fall apart. The financial evidence rules are incredibly strict, with zero flexibility. You must prove you have enough money to cover two things:
- Your first year's tuition fees (the exact figure will be on your CAS).
- Your living costs for up to nine months. The Home Office sets this at £1,334 per month for London or £1,023 per month for courses outside London.
The golden rule here is that the total amount must have been held in your bank account (or your parent's/legal guardian's) for a minimum of 28 consecutive days. The statement you provide must be dated within 31 days of when you submit your online application. There are no exceptions to this.
Documents for Special Situations
Depending on your circumstances, you might need a few extra documents. Getting these sorted early will save you a massive headache later on.
- Tuberculosis (TB) Test Certificate: As an applicant from Nigeria, you are required to get a TB test. This isn't just any clinic; it must be one from the Home Office's list of approved test centres. The certificate is only valid for six months, so plan your test timing carefully.
- Academic Technology Approval Scheme (ATAS) Certificate: If you're enrolling in a postgraduate course in certain science and technology fields (like advanced engineering, physics, or AI), you'll likely need an ATAS certificate. Your offer letter will state this clearly. The ATAS application is free but can take several weeks to process, so apply for it the moment you know you need one.
- Parental Consent: For applicants who are 16 or 17 years old, you must provide a letter of consent from your parents or legal guardians. You'll also need to include proof of your relationship, such as your original birth certificate.
To help you keep track, here’s a quick-reference table of the most critical documents you’ll need to gather.
Essential UK Student Visa Document Checklist
Putting together your document portfolio requires precision. This table breaks down the core items, what to look for, and the common pitfalls to avoid.
Document Key Requirement/Format Critical Note Passport Must be current, valid, and have at least one blank page. Double-check the expiry date. If it’s due to expire during your course, it's best to renew it before you apply for the visa. Financial Evidence Bank statements or a formal letter from your bank proving funds were held for a consecutive 28-day period. The final date on the statement must be within 31 days of your application submission. The 28-day rule is iron-clad. TB Test Certificate Required for residents of Nigeria. Must be from a Home Office-approved clinic. The certificate is only valid for 6 months. Booking your test too early can lead to it expiring before you apply. Original Academic Certificates The qualifications listed on your CAS (e.g., your degree certificate, transcript, WAEC results). You’ll need the original physical copies. You may be asked to show them at your biometrics appointment, so keep them safe. English Language Test Your IELTS for UKVI or another approved Secure English Language Test (SELT) certificate, if your university requires it. Ensure your test is the specific "for UKVI" version if needed. Standard academic tests are often not accepted for visa purposes. Treat this process with the seriousness it deserves. Create a physical folder and a corresponding digital one on your computer. As you secure each document, check it off your list. This level of organisation is what separates a smooth, successful application from a stressful, uncertain one.
Navigating the Online Application and Fees
This is it. After all that work gathering your documents, it’s time to tackle the official GOV.UK online portal. Think of this as more than just filling in a form; you're presenting your case to the Home Office, and every detail matters.
The online application is your formal request for a UK student visa. Every field, from your personal details to your study plans, has to be spot-on. I’ve seen applications get held up for weeks over simple mistakes like a mistyped passport number or a wrong date. So, my best advice is to take it slow. Have your documents right beside you and double-check every single entry.
Starting the Online Form
Your journey begins on the official GOV.UK website. The first thing you'll do is create an account. This is a lifesaver because it lets you save your progress and come back later. Don’t feel you have to get it all done in one go.
The form will walk you through a series of questions about who you are, your CAS number, where you’ve travelled, and your family. Honesty is non-negotiable here. If you've ever had a visa refused for any country, you absolutely must declare it. Trying to hide something like that is a critical error and could sink your entire application.
Here’s a simple visual to keep the main stages in mind.
It’s a straightforward path from filling out the form to gathering your documents and hitting submit, but each step needs your full attention to keep things moving smoothly.
It's worth noting that the landscape has been changing. Recent UK Home Office data reveals a shift, with Nigeria now fourth in the number of sponsored study visas granted, sitting behind India, China, and Pakistan. This comes after a 14% drop in total study visas issued globally and a massive 84% decrease in dependant visa applications from Nigeria, thanks to new government rules. What this tells us is that the focus is now squarely on the individual student.
Understanding the Financial Commitments
When you get to the end of the form, you’ll need to make two key payments online. As long as you’ve planned for them, there won’t be any last-minute surprises.
- The Visa Application Fee: This is the standard cost for processing your student visa application. Right now, it’s £490 if you’re applying from outside the UK.
- The Immigration Health Surcharge (IHS): This is a compulsory fee that gives you access to the UK's National Health Service (NHS). You have to pay this for the entire length of your visa, all at once.
The IHS can be a significant cost, so you need to budget for it accurately. The current rate is £776 per year of your visa's duration. For example, if you're on a three-year degree, your visa will probably be valid for a little longer, perhaps three years and four months. You'll be charged the IHS for that entire period. The good news is the online form has a built-in calculator that does the maths for you based on your course dates.
A quick tip from experience: Have your debit or credit card ready before you get to the payment page. The system takes most major cards, but make sure you have enough funds and that your bank has cleared your card for international payments. A failed transaction can sometimes cause the system to glitch.
Finalising and Submitting Your Application
Once you've filled everything out and paid the fees, the system will let you download a copy of your application form and a document checklist. Print both of these right away. You’ll need to take them with you, along with your original documents, to your biometrics appointment.
Clicking that ‘submit’ button is a huge milestone. You've officially navigated the portal, provided your information, and paid your dues. For a broader look at the entire process, you can also check out our detailed guide on how to apply for a student visa. Next up is booking that appointment at a Visa Application Centre to give your fingerprints and have your photo taken.
Preparing for Your Biometrics Appointment
Once you’ve hit ‘submit’ on the online form and paid the fees, you’ll reach the next major hurdle: your biometrics appointment. This is a non-negotiable step where you'll visit a Visa Application Centre (VAC) to have your photo and fingerprints taken. It’s the final piece of the puzzle before your application is formally sent off to UK Visas and Immigration (UKVI) for a decision.
As soon as you submit your online application, the system will prompt you to book this appointment. My advice? Don't put it off. Appointment slots, especially during the peak season from July to September, get snapped up incredibly quickly. Booking straight away ensures your application keeps moving forward without any frustrating delays.
Booking Your Slot and Choosing a Service Level
When you go to book, you'll be presented with a few service options, and honestly, it can be a bit confusing. It’s really important to know what you’re paying for, as your choice has a direct impact on how long you’ll be waiting for that all-important decision.
- Standard Service: This is the default. Officially, the processing time is around three weeks. In reality, during busy periods, it can take longer.
- Priority Visa (PV): For an extra fee, this service aims to get you a decision within five working days. It’s a great option if your course start date is looming or if you just want to shorten that anxious waiting period.
- Super Priority Visa (SPV): This is the speediest option, usually promising a decision by the end of the next working day. The cost is substantial, so it’s typically reserved for genuine emergencies.
Keep in mind that the availability of these premium services can change depending on your location and the time of year. Have a good think about your course start date and your own peace of mind. If your flight needs to be in less than a month, paying for a priority service is often a smart investment.
What to Expect on the Day
Walking into the VAC can feel a little intimidating, but knowing the drill makes it a much smoother experience. Aim to get there about 15-20 minutes before your scheduled time. Arriving any earlier is usually pointless, as they likely won't let you in. You'll pass through a security check and then wait to be called to a counter to hand over your documents.
The staff at the VAC are collectors of information, not decision-makers. Their job is to check your paperwork is all there, take your digital photo, and scan all ten of your fingerprints. A quick tip: make sure your fingertips are clear of any cuts or decorations like henna, as this can mess with the scanner.
Here’s a simple piece of advice I always give people: dress reasonably well. There’s no strict dress code, but the photo they take will be on your Biometric Residence Permit (BRP) for years to come. Think of it like a photo for a new passport or driving licence.
Organising Your Documents for the Appointment
Trust me, you don’t want to be that person frantically digging through a messy pile of papers. Being organised is key. Get a simple folder and arrange your documents in a logical order before you leave home.
Here’s a practical stacking order that always works well:
- Your appointment confirmation printout on top.
- The printed copy of your full application form.
- Your current passport, plus any old ones you mentioned in the application.
- The original copies of all supporting documents, such as your academic certificates, TB test results, and the financial evidence you’ve prepared.
Having everything in order just makes the process quicker and less stressful for everyone involved. And remember, the UK immigration rules can and do change, particularly around dependants, so make sure your knowledge is up-to-date. This kind of diligence marks you out as a serious, organised applicant.
Once your biometrics are captured and your documents are accepted (either physically or by being scanned), your application is officially on its way to the UKVI. Now, the waiting game begins. You’ll be given a receipt—hang onto this, as you'll need it for tracking your application and eventually collecting your passport.
Your Top UK Student Visa Questions, Answered
Let's face it, even when you think you've got everything sorted, the UK student visa process can throw a few curveballs. It’s completely normal to have nagging questions. Getting them answered clearly is the best way to keep your stress levels down and your application moving forward.
I’ve pulled together the most common and urgent questions I get from applicants, with the straight-up, practical advice you need to navigate these tricky spots.
How Do I Actually Prove I Have Enough Money?
This is the big one. It's the number one reason I see for visa refusals, and the Home Office is incredibly strict here. You must prove you have enough cash to cover your first year of tuition fees plus your living expenses.
The magic numbers are £1,334 per month for London and £1,023 per month outside London, calculated for a maximum of nine months.
The real trap, though, is the timing. That money must sit untouched in your account (or your parent's/legal guardian's account) for a solid, unbroken 28 consecutive days. I’ve seen applications fail because the balance dipped for just one day. It’s an automatic refusal, no exceptions.
Expert Tip: The Home Office only cares about the closing balance on your final bank statement. Make sure this statement is dated no more than 31 days before you hit 'submit' on your online application. Check your dates, then check them again.
What Are the Real Rules for Working on a Student Visa?
Yes, you can work, but you need to be very careful. If you’re studying a degree-level course at a recognised university, you can typically work up to 20 hours per week during term time. When the university is on an official holiday break, like over Christmas or summer, you're free to work full-time.
But be warned: if your course is below degree level, the rules are often much tighter. You might be limited to just 10 hours a week, or sometimes you can't work at all.
Your Biometric Residence Permit (BRP), which you'll get after you land in the UK, spells out your work conditions in black and white. Never, ever go over these hours. It's a serious breach of your visa conditions and can jeopardise your entire stay in the UK.
What Should I Do If My Visa Is Refused?
First things first: breathe. Don’t panic. You'll get a formal refusal letter that explains exactly why the decision was made. Your first job is to read that document, word for word, several times.
- Was it their mistake? If you believe the caseworker made a clear error—maybe they missed a document you definitely included—you can apply for an Administrative Review. This isn't a fresh appeal; it’s simply a request for them to double-check their work for mistakes.
- Was it your mistake? If the refusal was because of an error on your part, the only way forward is a completely new application. You’ll have to fix every single issue mentioned in the refusal letter.
Your university's international student advisor is your lifeline here. Speak to them immediately before you do anything else.
Can My Family Still Join Me in the UK?
This is where things have changed dramatically, and it's a huge factor for many Nigerian applicants. The rules have become much, much tighter.
Right now, only students enrolled in postgraduate research programmes (like a PhD or another research-based higher degree) can bring dependants—meaning a spouse, partner, or children under 18—with them to the UK.
If you are studying a taught Master's, an undergraduate degree, or any other course, you can no longer bring your family with you on a dependant visa. Research has shown that visa applications from Nigerian students dropped by nearly 70% in the first half of 2024, a direct result of this policy change.
Always check the latest official guidance on the GOV.UK website yourself, as this rule is enforced without any exceptions.
Feeling the pressure of the visa process? JapaChat can help. As Nigeria's first AI immigration expert, we give you instant, accurate answers to all your urgent questions, so you can plan your move with confidence. Get personalised checklists and expert guidance to avoid making expensive mistakes. Sign up for free and start your journey with a trusted partner at JapaChat.
-

Top 10 Canada Main Cities for Nigerian Relocators in 2025
Planning your 'Japa' journey to Canada involves one of the biggest decisions you will make: which city will you call home? The vast Canadian landscape is dotted with diverse urban centres, each offering unique opportunities and lifestyles. For Nigerians, understanding the nuances of these cities-from job markets and cost of living to community support and specific immigration pathways-is critical for a successful relocation. This guide moves beyond generic advice to provide a detailed breakdown of the top Canada main cities.
We will explore the economic drivers, cultural fabric, and practical realities of each location. Our goal is to offer tailored insights to help you make an informed choice that aligns with your career aspirations and personal goals. From the bustling tech hubs of Toronto and Vancouver to the affordable, family-friendly communities in the Prairies and Atlantic Canada, we analyse what each city offers you.
A smooth transition also depends on managing logistics effectively. Preparing your application often requires extensive paperwork, and knowing how to handle cross-border communications, like sending documents to or from Nigeria, is a crucial part of the process. Let's find the perfect Canadian city for your new beginning.
1. Toronto, Ontario
As Canada's largest metropolis and undisputed economic engine, Toronto stands as a top destination among the country's main cities. This vibrant, multicultural hub is the financial and cultural heart of the nation, boasting a city population of over 2.9 million and a Greater Toronto Area (GTA) population exceeding 6.4 million. For Nigerian professionals, its appeal lies in a robust economy driven by finance, technology, and a thriving film industry.
Life and Opportunities
The city's core, centred around the Financial District, hosts Canada's major banks and corporate headquarters, offering significant employment opportunities. Beyond work, Toronto is a mosaic of diverse neighbourhoods, from the bohemian Kensington Market to the trendy Queen Street West, each providing a unique living experience. However, the high demand makes housing a key consideration.
For a quick overview, here are some key statistics about Toronto.
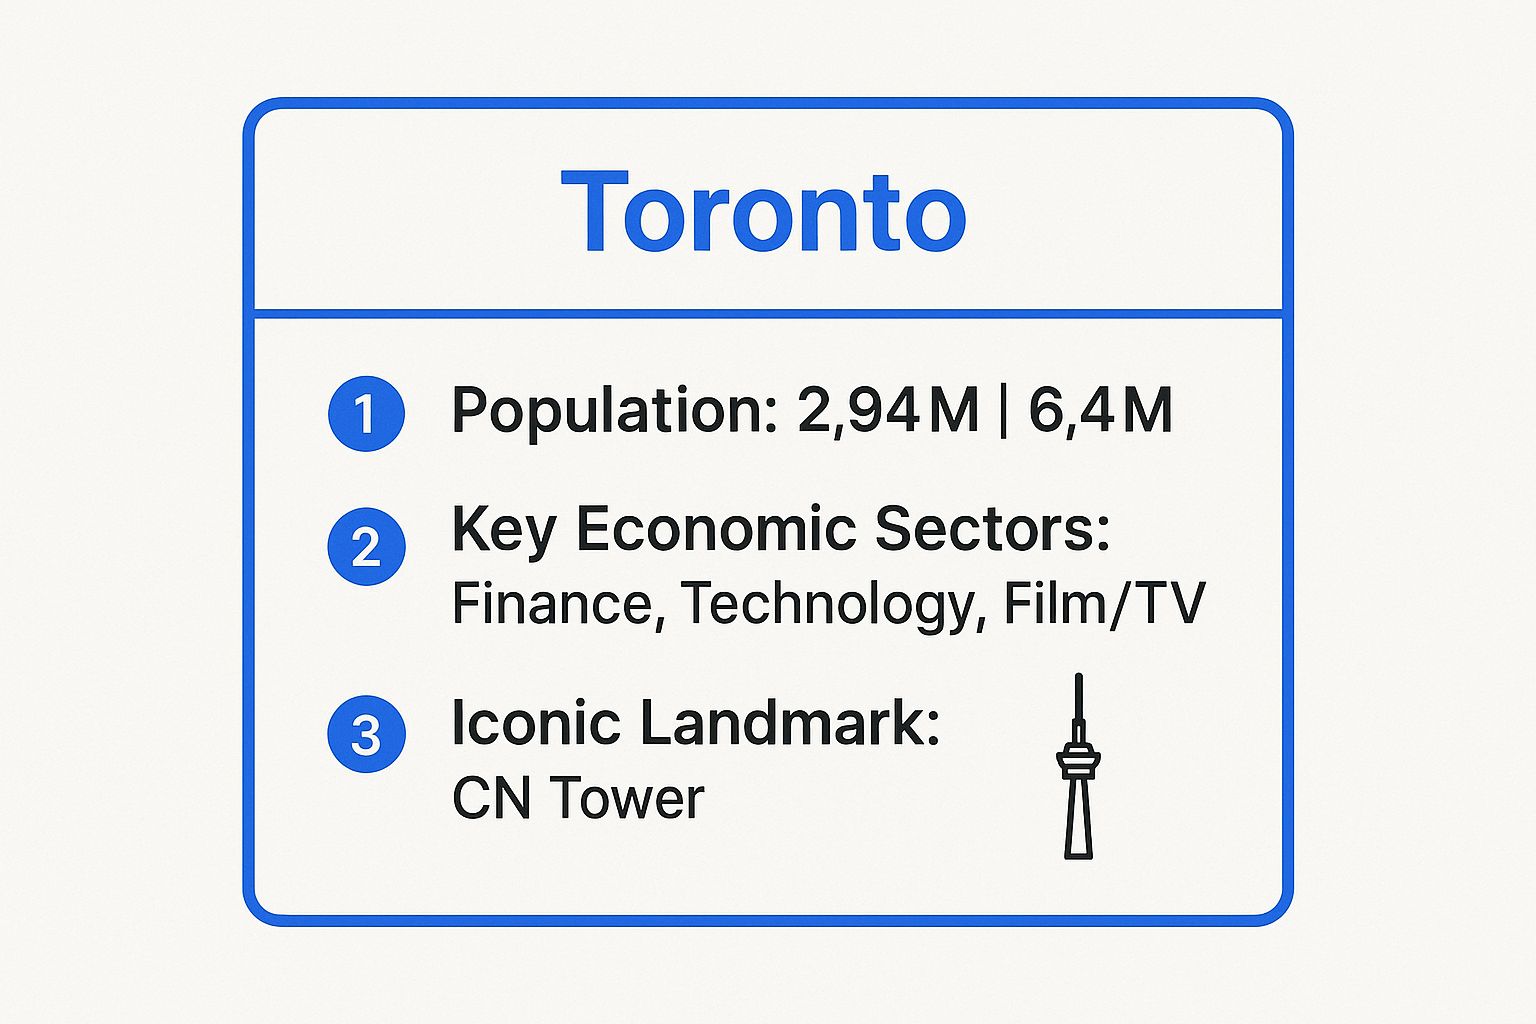
The data highlights Toronto's immense scale and economic diversity, reinforcing its status as a global city brimming with opportunity.
Practical Advice for Newcomers
To manage the high cost of living, many newcomers explore more affordable housing in well-connected suburbs like Mississauga, Brampton, or Markham. Mastering the public transit system (TTC) is essential for downtown commuting. For those aiming to immigrate directly to the province, exploring provincial nominee programs is a strategic move. You can find detailed information by reading more about the Ontario Immigrant Nominee Program (OINP).
2. Montreal, Quebec
As Quebec's largest city, Montreal is a vibrant cultural powerhouse and stands out among Canada's main cities for its unique bilingual character. It blends European charm with North American energy, offering a distinct experience. The city has a population of over 1.7 million, with its metropolitan area home to more than 4.2 million people. For Nigerian professionals, its appeal is rooted in its creative industries, aerospace, and tech sectors, coupled with a more affordable cost of living compared to other major urban centres.

Life and Opportunities
Montreal is a global hub for industries like aerospace, with major players like Bombardier, and video game development, led by giants such as Ubisoft. The city's creative spirit is also evident in the world-renowned Cirque du Soleil. Its diverse neighbourhoods, like the artistic Plateau or the historic Old Montreal, offer varied lifestyles. The lower cost of rent and living expenses is a significant advantage for newcomers.
For a clearer picture, here are some key statistics about Montreal.
The data underscores Montreal's position as a dynamic, creative, and more affordable alternative for professionals seeking opportunity in one of Canada's most unique cities.
Practical Advice for Newcomers
To fully integrate and maximise job prospects, learning at least basic French is highly recommended. The city's efficient STM metro system makes commuting easy, so exploring neighbourhoods outside the immediate city centre is a practical housing strategy. Take advantage of the numerous free outdoor festivals in the summer to connect with the local culture. For immigration, Quebec has its own distinct system, and understanding the Quebec Skilled Worker Program is crucial for a successful move.
3. Vancouver, British Columbia
Nestled between majestic mountains and the Pacific Ocean, Vancouver is renowned for its breathtaking natural beauty and status as one of the world's most liveable cities. As Canada's gateway to Asia, its bustling port is the nation's largest, fuelling a dynamic economy centred on trade, technology, and a world-class film industry often dubbed "Hollywood North." For Nigerian professionals, particularly in tech and logistics, Vancouver offers a unique blend of sophisticated urban life and unparalleled outdoor recreation.

Life and Opportunities
Vancouver's economy is robust, with a burgeoning tech sector and significant opportunities in international trade and green energy. The city's lifestyle is active and health-conscious, with residents enjoying easy access to hiking, skiing, and water sports. Neighbourhoods like Kitsilano offer a relaxed, beach-side vibe, while the historic Gastown district provides a vibrant urban experience. While the cost of living is high, the quality of life is often considered a worthy trade-off.
The city's commitment to sustainability and innovation makes it an attractive destination for forward-thinking professionals and families.
Practical Advice for Newcomers
To navigate the housing market, consider exploring well-connected suburbs like Burnaby or Richmond, which offer more affordable options and diverse communities. Investing in quality rain gear is essential for the famously wet season. Mastering the TransLink system, including the SkyTrain, is key for efficient travel. Immigrants should investigate opportunities through the British Columbia Provincial Nominee Program (BC PNP), which targets skilled workers and entrepreneurs.
4. Calgary, Alberta
Known as the heart of Canada's energy sector, Calgary is a dynamic prairie city that masterfully blends Western hospitality with cosmopolitan amenities. This makes it a compelling choice among Canada main cities. As the nation's fourth-largest city, it serves as a major business centre, particularly for professionals in engineering, geoscience, and finance, with a metropolitan population of over 1.6 million. Its famous entrepreneurial spirit and proximity to the stunning Rocky Mountains offer a unique balance of work and lifestyle.
Life and Opportunities
Calgary's economy is historically anchored by major energy companies like Suncor and Canadian Natural Resources, but it is rapidly diversifying into tech, logistics, and creative industries. The redeveloped East Village and the Stephen Avenue pedestrian mall showcase the city's modern urban core. Unlike other large Canadian cities, Alberta has no provincial sales tax, which can increase disposable income. The city’s welcoming nature is famously on display during the annual Calgary Stampede, a massive festival celebrating its Western heritage.
Practical Advice for Newcomers
Networking within the energy and technology sectors is crucial for securing employment. For a more affordable lifestyle with excellent amenities, consider suburbs like Airdrie or Cochrane. The city’s weather is famously unpredictable, so dressing in layers is essential year-round. Taking advantage of the city's proximity to Banff and Jasper National Parks for weekend trips is a major perk of living here. To streamline your move, you can get more information about the Alberta Advantage Immigration Program (AAIP).
5. Ottawa, Ontario
As Canada's national capital, Ottawa serves as the political and administrative heart of the nation. This bilingual city, situated on the border of Ontario and Quebec, offers a unique blend of government stability and a burgeoning tech sector. With a city population of just over 1 million and a metropolitan area of nearly 1.5 million, Ottawa presents a balanced, high-quality lifestyle, making it one of Canada's most liveable main cities.

Life and Opportunities
Ottawa's economy is anchored by the federal public service, providing stable and well-paying employment. Alongside government, the city has a booming technology industry, nicknamed "Silicon Valley North," with major players like Shopify headquartered there. This dual economic engine creates diverse career paths for Nigerian professionals, particularly in public administration, IT, and research. The city is renowned for its family-friendly atmosphere, excellent schools, and abundant green space, including the famous Rideau Canal.
For a quick overview, here are some key statistics about Ottawa.
The data underscores Ottawa's position as a stable, prosperous city with a high quality of life, driven by its government and technology sectors.
Practical Advice for Newcomers
To enhance job prospects, especially in the federal government, gaining proficiency in French is a significant advantage. The cost of living is more manageable than in Toronto or Vancouver, but securing housing in central neighbourhoods like The Glebe or Centretown can be competitive. Exploring adjacent communities in Gatineau, Quebec, offers even more affordable housing options, though it involves navigating inter-provincial taxes and services. Familiarising yourself with the OC Transpo public transit system is key for getting around the city efficiently.
6. Edmonton, Alberta
Known as Canada's "Festival City," Edmonton is the capital of Alberta and a major economic hub for the province's energy sector. Its reputation as the "Gateway to the North" highlights its strategic importance in servicing northern Alberta and Canada's territories. With a metropolitan population of over 1.5 million, Edmonton offers a unique blend of urban dynamism and natural beauty, making it one of the most affordable and family-friendly main cities in Canada.
Life and Opportunities
Edmonton's economy is strongly anchored in the oil and gas industry, but it has diversified into technology, health sciences, and public administration. The city is home to the University of Alberta, a leading research institution, which fuels a vibrant innovation ecosystem. Newcomers will appreciate the relatively low cost of living compared to other major Canadian cities, especially regarding housing. The city’s extensive river valley park system, the largest in North America, provides unparalleled recreational opportunities right at your doorstep.
Practical Advice for Newcomers
Investing in high-quality winter clothing is non-negotiable to comfortably manage the cold, dry winters. Exploring family-friendly neighbourhoods like Strathcona or Oliver offers a great mix of amenities and community feel. For immigration, understanding the specific streams tied to Alberta's economic needs is crucial. You can get more information about provincial pathways by researching the Alberta Advantage Immigration Program (AAIP). Attending the city's numerous summer festivals, like the Folk Fest or Fringe Festival, is an excellent way to integrate into the local culture.
7. Winnipeg, Manitoba
Situated at the geographic centre of Canada, Winnipeg is the capital of Manitoba and a key economic and transportation hub for the prairie region. This city offers a unique blend of affordability, cultural richness, and big-city amenities, making it an attractive option among Canada's main cities. With a city population of around 750,000 and a metropolitan population over 830,000, it provides a welcoming, community-focused environment.
Life and Opportunities
Winnipeg's economy is diverse, with strong sectors in aerospace, manufacturing, agriculture, and finance. This economic stability, combined with one of the most affordable housing markets in the country, presents a significant advantage for newcomers. The city boasts a vibrant arts scene, visible in the historic Exchange District, and cultural landmarks like the Canadian Museum for Human Rights. Iconic neighbourhoods like the trendy Osborne Village offer unique living experiences without the extreme costs of larger cities.
Practical Advice for Newcomers
To make the most of life in Winnipeg, embracing its distinct four seasons is key, from enjoying summer festivals to participating in winter activities like skating on the river trail. The public transit system, Winnipeg Transit, is the primary mode of transportation for those without a vehicle. For Nigerian professionals considering this welcoming city, understanding the province's immigration streams is crucial. You can find essential details by reading more about the Manitoba Provincial Nominee Program (MPNP).
8. Quebec City, Quebec
As the capital of its province and a UNESCO World Heritage site, Quebec City is a jewel among Canada's main cities. Its fortified walls, cobblestone streets, and distinctly European charm offer a unique living experience rooted in over 400 years of history. For Nigerians drawn to a city that blends North American opportunity with continental European culture, Quebec City serves as the political and administrative centre of French Canada, presenting specialised career paths.
Life and Opportunities
The city's economy is heavily anchored by the public sector, with the provincial government being the largest employer. This creates stable opportunities in public administration, defence, and services. Tourism, culture, and technology are also growing sectors. The city is renowned for its exceptional quality of life, safety, and relative affordability compared to other major Canadian centres, especially regarding housing. The necessity of French, however, is a critical factor for professional success and social integration.
Practical Advice for Newcomers
Mastering French is non-negotiable for anyone looking to build a life and career here; start learning before you arrive. Embrace the city's unique culture by visiting historic sites like the Petit Champlain district and participating in major events like the world-famous Winter Carnival (Carnaval de Québec). For immigration, the Quebec Skilled Worker Program is the primary pathway, operating independently from the federal Express Entry system and prioritising French language proficiency.
9. Hamilton, Ontario
Nestled on the western edge of the Greater Toronto Area, Hamilton is rapidly transforming from its industrial roots into a dynamic urban centre. Long known as 'The Hammer' or 'Steel City', it now offers an appealing mix of affordability, a burgeoning arts scene, and stunning natural landscapes. This revitalisation makes Hamilton one of the most intriguing of Canada's main cities for newcomers seeking a balance between urban opportunity and a lower cost of living, all while remaining close to Toronto.
Life and Opportunities
Hamilton's economy is diversifying beyond its manufacturing legacy, with significant growth in healthcare and life sciences, anchored by institutions like McMaster University. This creates opportunities for professionals in medicine, research, and education. The city's charm is amplified by its vibrant cultural districts, such as the James Street North arts scene, and historic sites like Dundurn Castle. Its location on the Niagara Escarpment provides residents with access to over 100 waterfalls, including Webster's and Tew's Falls, offering unparalleled recreational activities.
Practical Advice for Newcomers
For those considering the Greater Toronto Area, Hamilton presents a more affordable housing market. Commuting to Toronto is straightforward via the GO Train service, making it a practical alternative. When house-hunting, look into up-and-coming neighbourhoods like Crown Point or the established Westdale area near the university for good value. Exploring the city’s extensive trail systems and waterfalls is a must for fully appreciating the unique quality of life Hamilton offers. As it's in Ontario, prospective immigrants should also research the Ontario Immigrant Nominee Program (OINP) for dedicated immigration pathways.
10. Halifax, Nova Scotia
As Atlantic Canada's economic and cultural epicentre, Halifax offers a unique blend of maritime charm and modern urban living. This major port city, built around one of the world's largest natural harbours, serves as a gateway to the Maritimes. For Nigerian professionals seeking a balanced lifestyle, its growing economy, friendly community, and coastal beauty make it a compelling choice among Canada's main cities. The city has a population of over 480,000 in its metropolitan area.
Life and Opportunities
Halifax's economy is strongly anchored in the public sector, with major military and government offices, but it also has a burgeoning tech and startup scene. The city’s vibrant student population, thanks to institutions like Dalhousie University, injects energy into its cultural landscape, from the Neptune Theatre to the Halifax Pop Explosion music festival. While smaller than other metropolises, its close-knit community can be a major advantage for networking.
Practical Advice for Newcomers
Newcomers should explore the city’s historic waterfront, home to the Halifax Seaport Farmers' Market and the Maritime Museum of the Atlantic. To integrate, take advantage of the many university cultural events and network within the local business community. While housing is more affordable than in larger cities, securing accommodation before arrival is wise. For immigration, the Nova Scotia Nominee Program (NSNP) offers specific streams for skilled workers, making it a key pathway to consider.
Key Attributes Comparison of Canadas Top 10 Cities
City 🔄 Implementation Complexity ⚡ Resource Requirements 📊 Expected Outcomes 💡 Ideal Use Cases ⭐ Key Advantages Toronto, Ontario Large, complex urban system with extensive transit High living cost and housing demand Strong economic growth, diverse job market Finance, tech, film production, multicultural hubs Financial hub, cultural diversity, transit system Montreal, Quebec Bilingual environment, historic and modern mix Moderate cost of living, language skills needed Thriving arts, tech, aerospace sectors Bilingual business, festivals, tech, aerospace Rich culture, festivals, lower housing cost Vancouver, BC Coastal city with environmental and transport needs Very high housing costs, environmentally focused High quality of life, strong Asia-Pacific ties Pacific trade, outdoor lifestyle, film industry Natural beauty, outdoor activities, trade gateway Calgary, Alberta Moderate complexity; energy sector reliant No provincial sales tax; volatile economy High incomes, energy sector prominence Energy, finance, outdoor recreation No sales tax, proximity to Rockies, strong job market Ottawa, Ontario Government-centered with tech growth Stable public sector; bilingual requirements Stable employment, cultural and political hub Government, technology, education Political capital, tech corridor, stable jobs Edmonton, Alberta Festival city with strategic northern access Lower living cost; oil-dependent economy Growing festivals, energy jobs, outdoor access Energy, government, education, festivals Affordable, cultural events, northern gateway Winnipeg, Manitoba Moderate complexity; transportation and logistics hub Very affordable cost of living Community focus, growing tech, cultural vibrancy Logistics, arts, affordable living Low cost, central location, diverse culture Quebec City, Quebec Historic preservation, French-language focus Lower costs; French language essential Tourism, government jobs, cultural preservation Government, tourism, culture European atmosphere, heritage, safety Hamilton, Ontario Industrial legacy transitioning to tech and healthcare Affordable housing, limited transit Growing arts and tech sectors, commuting options Affordable GTA alternative, industry revival Affordable living, natural scenery, emerging arts Halifax, Nova Scotia Maritime port city with historic and cultural assets Affordable living, limited job market Cultural growth, student population Port economy, education, cultural tourism Maritime culture, affordable living, growing tech Making Your Final Choice and Taking the Next Step
We have journeyed across the vast expanse of Canada, from the Pacific shores of Vancouver to the Atlantic coast of Halifax. This exploration of Canada main cities has showcased the unique tapestry of opportunities available to prospective Nigerian immigrants. Each city presents a distinct proposition: Toronto, the bustling economic powerhouse; Montreal, a bastion of European charm and culture; and Calgary, a hub of youthful energy and corporate ambition.
The "best" city is not a universal title but a deeply personal one. Your ideal destination hinges on a careful evaluation of your individual circumstances. The right choice is the one that aligns with your professional aspirations, financial realities, lifestyle preferences, and long-term family goals. Reflect on what matters most to you. Is it the affordability and community feel of a city like Winnipeg, or the political and technological pulse of the nation's capital, Ottawa?
A Framework for Your Decision
Making a life-altering decision requires a structured approach. To move from exploring to deciding, consider these critical factors as a final checklist:
- Career Alignment: Which city has the strongest demand for your profession? Review the economic profiles we discussed for cities like Edmonton (industrial trades) or Hamilton (advanced manufacturing and healthcare) and cross-reference them with current job market data.
- Cost of Living vs. Earning Potential: Don't just look at salary figures. Analyse them against housing costs, taxes, and daily expenses. A higher salary in Vancouver might not stretch as far as a moderate one in Quebec City due to the stark difference in living costs.
- Immigration Pathways: Your chosen city directly impacts your immigration strategy. The Provincial Nominee Program (PNP) is a powerful tool. A city like Halifax, for instance, benefits from the Atlantic Immigration Program, offering a more direct route for qualified candidates. Research the specific PNP streams for your target province thoroughly.
- Lifestyle and Community: Envision your life outside of work. Do you crave the vibrant, multicultural festivals of Montreal or the quiet, natural beauty surrounding Vancouver? Look for community groups, religious centres, and Nigerian associations in your potential new home to ease your transition.
Putting Your Plan into Action
Once you have narrowed down your options to one or two cities, the real work begins. Your immediate focus should be on two parallel tracks: securing your legal status and preparing for your professional integration. For many, this means landing a job offer, which is often a critical component of economic immigration streams. After choosing your ideal Canadian city, a crucial next step for many newcomers is securing employment. You can find valuable strategies on how to effectively use LinkedIn for your job search, a vital tool for connecting with Canadian employers.
Key Insight: Your Canadian dream is a project with two main pillars: successful immigration and successful integration. Neglecting one for the other can lead to significant challenges. A well-prepared professional profile is just as important as a perfectly completed immigration application.
Choosing your city is a monumental step, but it is the first of many. By grounding your decision in research, self-reflection, and strategic planning, you are not just picking a place on a map. You are laying the foundation for a prosperous and fulfilling new chapter in one of the world's most welcoming nations.
Navigating the complexities of Express Entry, Provincial Nominee Programs, and study permits for your chosen city can be daunting. Get instant, personalised answers to your specific immigration questions with JapaChat. Our AI-powered platform is designed to provide clear, accurate guidance, helping you build a strong application and move to Canada with confidence.
-
9 Visa Free Countries for Nigerians to Explore in 2025
Dreaming of international travel without the headache of complex visa applications? For many Nigerians, the thought of visa interviews, extensive paperwork, and long waiting times can be a significant barrier. However, your green passport holds more power than you might realise. A surprising number of countries across the globe welcome Nigerian citizens visa-free, opening up a world of stunning beaches, vibrant cultures, and unique adventures. This guide is your definitive resource for exploring these destinations.
We will move beyond just listing names and provide detailed, actionable insights. You will discover the specific stay durations, essential entry conditions, and practical tips to ensure your journey is smooth and successful. Understanding the visa free countries for Nigerians is the first step towards planning your next holiday, business trip, or short-term exploration. Whether you're a tourist seeking a new experience, a digital nomad looking for a temporary base, or an investor scouting opportunities, this information is invaluable. This comprehensive listicle will equip you with the knowledge needed to make your travel dreams a reality, hassle-free.
1. Barbados
Barbados stands out as one of the most welcoming Caribbean destinations for Nigerian citizens, offering an attractive visa-free stay for up to 90 days. As an English-speaking nation with strong historical ties and a stable economy, it presents a seamless travel experience. This island is not just a tourist paradise with stunning beaches; it's also a dynamic hub for business and education within the Caribbean Community (CARICOM).
Why Choose Barbados?
The appeal of Barbados extends beyond its beautiful coastline. For Nigerian entrepreneurs, it serves as a strategic gateway to the Caribbean market. Its well-regarded University of the West Indies at the Cave Hill campus attracts students from across the globe, including Nigeria. Furthermore, progressive policies like the "Barbados Welcome Stamp" make it an appealing destination for digital nomads seeking a long-term tropical base.
Entry Requirements and Tips
While a visa is not required, travellers must meet standard entry conditions. Always ensure your passport is valid for at least six months beyond your intended departure date. Immigration officials will also require proof of a return or onward ticket, confirmed accommodation, and evidence of sufficient funds to cover your stay. For the best weather, consider planning your trip during the dry season, which typically runs from December to April.
Here is a quick reference summary of key facts for your travel planning.

This combination of a generous 90-day stay and English as the official language makes Barbados one of the most accessible visa-free countries for Nigerians. For a truly stress-free holiday, you might explore the various all-inclusive resorts in Barbados to handle all your accommodation and dining needs.
2. Dominica
Often called the 'Nature Island of the Caribbean,' Dominica welcomes Nigerian citizens for a visa-free stay of up to 90 days. This English-speaking nation is an unspoiled paradise, renowned for its lush mountainous rainforests, numerous rivers, and volcanic hot springs. Its unique landscape makes it a prime destination for ecotourism, adventure travel, and those seeking a tranquil escape from bustling city life.

Why Choose Dominica?
Dominica's appeal lies in its commitment to preserving its natural wonders. It is a haven for Nigerian nature enthusiasts wanting to hike to the Boiling Lake in Morne Trois Pitons National Park, a UNESCO World Heritage site, or for researchers studying its diverse marine life and resident sperm whale populations. Additionally, the country offers one of the world's most reputable citizenship by investment programmes, attracting Nigerian investors looking for greater global mobility and a second passport.
Entry Requirements and Tips
Although a visa is not required, travellers from Nigeria must present a passport valid for at least six months from their entry date. You will also need to show immigration officers proof of a return ticket and evidence of sufficient funds for your stay. To make the most of your adventure, pack waterproof clothing and sturdy hiking shoes. Given its popularity, it's wise to book accommodations in advance, especially during the peak season from February to May. Hiring local guides is highly recommended for safely navigating the island's many trails.
Dominica is one of the most exciting visa free countries for Nigerians who love nature and adventure. To explore other accessible destinations, you can learn more about the Nigerian passport visa-free countries list.
3. Haiti
Haiti extends a warm welcome to Nigerian citizens, offering visa-free entry for a period of up to 90 days. As the world's first independent black republic, Haiti holds immense historical and cultural significance, particularly for those tracing Afro-Caribbean heritage. Despite facing well-documented challenges, the nation presents a unique opportunity for deep cultural immersion, historical exploration, and meaningful engagement.

Why Choose Haiti?
Haiti’s appeal lies in its profound cultural and historical wealth, making it a compelling destination for specific travellers. For Nigerian academics or cultural researchers, it is a living library for studying the roots of Vodou and its parallels with traditional African religions. The country also provides a unique landscape for artists and musicians seeking authentic cultural exchanges, as well as for humanitarian workers contributing to international NGOs on the ground.
Entry Requirements and Tips
While a visa is not required, travellers must present a Nigerian passport valid for at least six months from their arrival date. Proof of a return or onward flight ticket and sufficient funds for your stay are also necessary. Given the current complexities, it is crucial to stay updated on the security situation through official travel advisories. Engaging reputable, vetted tour operators is highly recommended for safety and a more structured experience. Learning a few basic phrases in French or Haitian Creole can significantly enhance your interactions with locals. This combination of visa-free access and profound cultural connection makes Haiti a noteworthy destination for Nigerian travellers with specific interests.
4. Saint Kitts and Nevis
This twin-island nation in the West Indies offers Nigerian citizens an impressive visa-free stay for up to 90 days. Saint Kitts and Nevis is renowned for its stunning natural beauty, combining mountainous rainforests with pristine beaches. As a member of the Commonwealth and CARICOM, it offers a secure and stable environment for both tourists and business professionals, making it one of the more exclusive visa-free countries for Nigerians.
Why Choose Saint Kitts and Nevis?
The islands are a premier destination for luxury travel, boasting world-class resorts and exclusive experiences. Beyond tourism, Saint Kitts and Nevis is globally recognised for its long-standing Citizenship by Investment programme, which has attracted Nigerian investors seeking a second passport and greater global mobility. The nation’s strong financial services sector also presents unique opportunities for business networking and investment, particularly for those in wealth management and international finance.
Entry Requirements and Tips
While a visa is not needed for a 90-day stay, travellers must present a Nigerian passport valid for at least six months upon arrival. You will also need to show proof of a return or onward ticket and evidence of sufficient funds to cover your expenses. To experience both islands, use the reliable ferry services that connect them. Given its status as a luxury destination, it is wise to budget generously for accommodation and dining, and booking premium resorts well in advance is highly recommended.
5. Vanuatu
Vanuatu, a breathtaking Pacific island nation, offers Nigerian passport holders a visa-free stay for up to 30 days upon arrival. This stunning archipelago, comprising 83 islands, is an adventurer's paradise, renowned for its easily accessible active volcanoes, pristine coral reefs, and rich, ancient Melanesian culture. It presents a unique and unforgettable travel experience far from the beaten path.
Why Choose Vanuatu?
Beyond its raw natural beauty, Vanuatu is an intriguing destination for both thrill-seekers and those with an eye on global opportunities. Nigerian adventure tourists are drawn to the thrill of hiking up to the rim of Mount Yasur, one of the world's most active volcanoes. Divers flock here to explore world-famous sites like the SS President Coolidge wreck. Additionally, the country is well-known for its investment programmes, offering a gateway to the Pacific region.
Entry Requirements and Tips
While you don't need a visa, you must present a Nigerian passport valid for at least six months from your entry date. Officials will also require proof of a return or onward ticket and sufficient funds for your stay. Flights can be long and costly, so book well in advance. Pack light, breathable clothing for the tropical climate, but also include sturdy shoes for outdoor activities. Always respect local traditions, known as "kastom," to ensure a smooth and respectful visit.
To get a better sense of Vanuatu's incredible landscapes, watch this short video.
Its combination of unique culture and adventure makes Vanuatu one of the most exciting visa-free countries for Nigerians seeking an extraordinary escape. For those interested in the broader opportunities the country offers, you can learn more about citizenship through investment in Vanuatu.
6. Cook Islands
The Cook Islands, a stunning archipelago in the heart of the South Pacific, offers Nigerian passport holders a visa-free stay for up to 31 days. This self-governing nation, in free association with New Zealand, is comprised of 15 islands renowned for their unspoiled natural beauty, vibrant Polynesian culture, and a strong commitment to sustainable tourism. It provides a unique and tranquil escape far from the hustle of mainstream tourist destinations.
Why Choose the Cook Islands?
The primary allure of the Cook Islands lies in its authentic and immersive cultural experiences. Nigerian eco-tourists will appreciate the nation's focus on conservation, with protected marine parks and community-led sustainability initiatives. For adventure seekers, the islands offer diverse activities, from snorkelling in the crystal-clear Aitutaki Lagoon to hiking across the lush, rugged interior of Rarotonga. It is an ideal destination for those seeking a genuine connection with nature and local traditions.
Entry Requirements and Tips
Although a visa is not needed for a 31-day stay, you must present a passport valid for at least six months beyond your planned departure date. Immigration authorities will also ask for proof of a return or onward ticket and confirmation of pre-booked accommodation. As flights can be infrequent, it is crucial to plan your itinerary well in advance. To make the most of your trip, consider island-hopping between Rarotonga and Aitutaki, but remember to respect local customs and marine conservation rules by using reef-safe sunscreen. This destination remains one of the more exotic visa-free countries for Nigerians seeking a true South Pacific adventure.
7. Fiji
Fiji offers one of the most generous visa policies for Nigerian citizens, granting an impressive visa-free stay for up to 120 days (4 months). This South Pacific archipelago is celebrated for its pristine beaches, vibrant coral reefs, and the world-renowned 'Bula' spirit of hospitality. Its stunning natural beauty and welcoming culture make it an exceptional destination for an extended getaway.
Why Choose Fiji?
The extensive 120-day stay makes Fiji an ideal location for more than just a brief holiday. It’s a perfect spot for Nigerian digital nomads seeking a long-term tropical base to work remotely while exploring the Pacific. Families can plan extended vacations without the pressure of a short visa window, fully immersing themselves in island life at one of the many world-class resorts. The friendly atmosphere and English as an official language also make it a comfortable environment for business travellers exploring opportunities in the Oceania region.
Entry Requirements and Tips
While a visa is not required, travellers must present a passport valid for at least six months from their intended departure date. You will also need to show proof of a return or onward ticket, confirmed accommodation details, and sufficient funds for your stay. To make the most of your trip, take full advantage of the generous allowance to island-hop and experience the diversity between islands like Viti Levu and the Mamanuca Islands. Visiting during the dry season, from May to October, is highly recommended for the best weather.
8. Micronesia (Federated States)
The Federated States of Micronesia offers a unique visa-free entry for Nigerian passport holders for a period of up to 30 days. Located in the vast expanse of the Western Pacific Ocean, this nation is composed of four island states: Yap, Chuuk, Pohnpei, and Kosrae. Each state boasts its own distinct culture, traditions, and attractions, making it a truly off-the-beaten-path destination for adventurous Nigerian travellers.
Why Choose Micronesia?
Micronesia's primary draw is its pristine natural environment and rich history. For Nigerian scuba diving enthusiasts, Chuuk Lagoon is legendary, offering unparalleled wreck diving opportunities among sunken WWII fleets. History buffs can explore significant battle sites, while those seeking cultural immersion will find a warm welcome and a chance to experience ancient Micronesian traditions. This destination is ideal for travellers looking for a genuine escape, far from mainstream tourist trails.
Entry Requirements and Tips
While no visa is needed for a 30-day stay, all travellers must present a passport valid for at least 120 days beyond their entry date. You will also need to show proof of a return or onward ticket and sufficient funds for your trip. Due to its remote location, flight schedules are limited and can be expensive, so planning and booking well in advance is crucial. It is also wise to pack essential supplies and medications, as availability can be limited on the islands.
Micronesia offers an incredible experience for those prepared for the journey. While it presents a different kind of opportunity compared to more common destinations, its unique appeal is undeniable. For those exploring various international pathways, understanding different country requirements is key, whether it's for a short visit or considering options like how to relocate to Canada from Nigeria.
9. Palau
Palau offers Nigerian passport holders a unique visa-free entry for up to 30 days, opening the door to one of the world's most spectacular marine wonders. This Pacific island nation is a paradise for divers and eco-tourists, celebrated globally for its pristine coral reefs, iconic Jellyfish Lake, and robust commitment to environmental preservation. Its status as an underwater marvel makes it a bucket-list destination for adventurous travellers.
Why Choose Palau?
The primary draw for Palau is its unparalleled natural beauty and world-class diving opportunities. For Nigerian divers, marine biologists, or eco-tourists, it offers a chance to experience some of the most biodiverse waters on the planet. The country's strong conservation policies, including the Palau Pledge which visitors must sign, ensure that its environment remains protected, offering an authentic and sustainable travel experience unlike any other.
Entry Requirements and Tips
While a visa is not required for a 30-day stay, you must hold a passport valid for at least six months from your arrival date. Be prepared to show a return ticket and evidence of sufficient funds for your stay. Given Palau’s remote location, flights can be long and costly, so it's wise to plan a stay long enough to justify the travel expense. Also, be aware of the "Pristine Paradise Environmental Fee" (PPEF), which is typically included in your flight ticket price. Booking dive operators and accommodations well in advance is highly recommended, especially during peak seasons.
Visa-Free Access Comparison for 9 Countries
Destination Implementation Complexity 🔄 Resource Requirements ⚡ Expected Outcomes 📊 Ideal Use Cases 💡 Key Advantages ⭐ Barbados Low – simple visa-free entry Moderate – higher living costs Strong tourism experience, business-friendly Tourism, business hub, digital nomads Visa-free 90 days, stable government, good healthcare Dominica Low – straightforward visa-free entry Moderate – limited luxury infrastructure Eco-tourism, nature exploration Eco-tourism, citizenship by investment Visa-free 90 days, UNESCO sites, low crime Haiti Moderate – safety and language barriers Low to Moderate – affordable but limited facilities Cultural immersion, humanitarian work Cultural research, volunteer work Visa-free 90 days, rich Afro-Caribbean culture Saint Kitts and Nevis Low – visa-free with business formalities High – very expensive destination Luxury tourism, investment opportunities Luxury travel, citizenship by investment Visa-free 90 days, tax-friendly, luxury resorts Vanuatu Moderate – remote location adds complexity High – costly and limited transport options Adventure tourism, cultural experiences Adventure tourists, divers, investors Visa-free 30 days, active volcanoes, diving Cook Islands Moderate – remote, limited flight connections High – expensive travel and accommodations Authentic Polynesian culture, sustainable tourism Eco-tourism, authentic cultural experience Visa-free 31 days, pristine lagoons, sustainable focus Fiji Low – easy visa-free entry with long duration Moderate to High – costly flights but good infrastructure Extended tourism, business, family holidays Long-stay tourism, digital nomads, families Visa-free 120 days, excellent hospitality, good healthcare Micronesia (Federated States) Moderate – remote, limited connections High – expensive to reach, basic facilities WWII history, diving, isolated cultural exposure Specialized diving, history tourism Visa-free 30 days, top wreck diving, low tourist density Palau Moderate – remote, limited flights, environmental fees High – expensive destination and fees Premier diving, environmental conservation Diving experts, eco-tourists Visa-free 30 days, Jellyfish Lake, strong conservation From Dream to Destination: Planning Your Next Visa-Free Trip
The world feels significantly more accessible when you realise that your Nigerian passport is a key to unlocking incredible destinations without the often-tedious visa application process. From the vibrant, sun-drenched beaches of Barbados and Dominica in the Caribbean to the serene, untouched beauty of Fiji and Vanuatu in the Pacific, a world of adventure awaits. We have journeyed through a curated list of countries where your green passport grants you entry, showcasing that international travel is not a distant dream but a present possibility.
This guide has aimed to do more than just list names; it provides a foundational blueprint for your travels. The core takeaway is that while the phrase "visa-free" simplifies one major hurdle, it doesn't eliminate the need for diligent preparation. Being a savvy traveller means understanding the specific entry requirements that remain.
Your Pre-Flight Checklist for Success
Before you even think about booking that flight, internalise this mantra: preparation prevents problems. While the countries we've explored, including Saint Kitts and Nevis, Haiti, and Micronesia, welcome Nigerians, they do so with expectations. To ensure a smooth entry and an enjoyable stay, always have the following in order:
- Passport Validity: Ensure your passport has at least six months of validity from your intended departure date. This is a non-negotiable standard for most international travel.
- Sufficient Funds: Be prepared to show proof of financial capacity for your stay. This can be in the form of recent bank statements or a credit card with an adequate limit.
- Onward/Return Ticket: This is crucial. Immigration officials need assurance that you intend to leave their country at the end of your authorised stay.
- Accommodation Proof: Have confirmed hotel bookings or a letter of invitation if you are staying with friends or family.
Key Insight: Visa-free access is a privilege, not a blank cheque. Approaching immigration with a well-organised folder containing all necessary documents demonstrates that you are a genuine tourist and a responsible traveller.
Beyond the Holiday: Thinking Long-Term
Exploring these visa free countries for Nigerians might ignite a desire for something more permanent, whether it's for study, work, or relocation. This is where the journey transitions from a simple holiday plan to a complex life decision. Each country has its own distinct and intricate immigration laws for long-term stays, which can be overwhelming to navigate alone.
Moreover, truly immersing yourself in a new culture goes beyond just being there; it involves connecting with its people. As you plan your visa-free adventures, mastering the art of communication can greatly enhance your experience. Consider exploring resources on how to speak with locals and make authentic connections to build meaningful relationships wherever you go. This skill will prove invaluable, turning a simple trip into a rich, unforgettable journey. Your ability to connect authentically is what transforms a destination from a place you visit into a place you truly experience.
Navigating the complexities of visas, long-term stays, and relocation requires precise, up-to-date information. Don't leave your future to chance or outdated online forums; get instant, AI-powered answers tailored to your unique situation with JapaChat. For clear, reliable guidance on all your immigration questions, sign up for free at JapaChat and take the first confident step towards your goals abroad.
-
How Much Is Canada Visa from Nigeria? Complete Cost Guide
When you start planning your journey to Canada, one of the first questions on your mind is probably, "So, how much is this visa going to cost me?"
The quick answer is that a standard visitor visa application fee is CAD 100, and a study permit costs CAD 150. But honestly, that’s just the tip of the iceberg. Those figures are only the starting point for your budget.
A Financial Snapshot of Your Canada Visa Application
Think of your visa application budget like planning for a big event. You have the main ticket price—the government application fee—but there are several other necessary costs you simply can't overlook. Getting a clear financial picture from day one helps you avoid nasty surprises and keeps your application process on track.
It's also important to remember that for Nigerian applicants, all the official fees are charged in Canadian Dollars (CAD). This means the final amount you'll pay in Naira (NGN) will change depending on the exchange rate on the day you pay.
Breaking Down the Base Costs
First up, you have the main application processing fee. This is the core cost, and it changes based on why you're going to Canada. A visitor visa for a holiday has one price, while a study permit for school or a work permit for a job each have their own specific fees.
On top of that, most applicants from Nigeria will also have to pay a biometrics fee. This covers the cost of getting your fingerprints and a photograph taken at a Visa Application Centre (VAC). Just think of it as a security measure—a unique digital signature that connects you directly and securely to your application.
This handy chart gives you a quick visual comparison of the main government fees for the most common visa types.
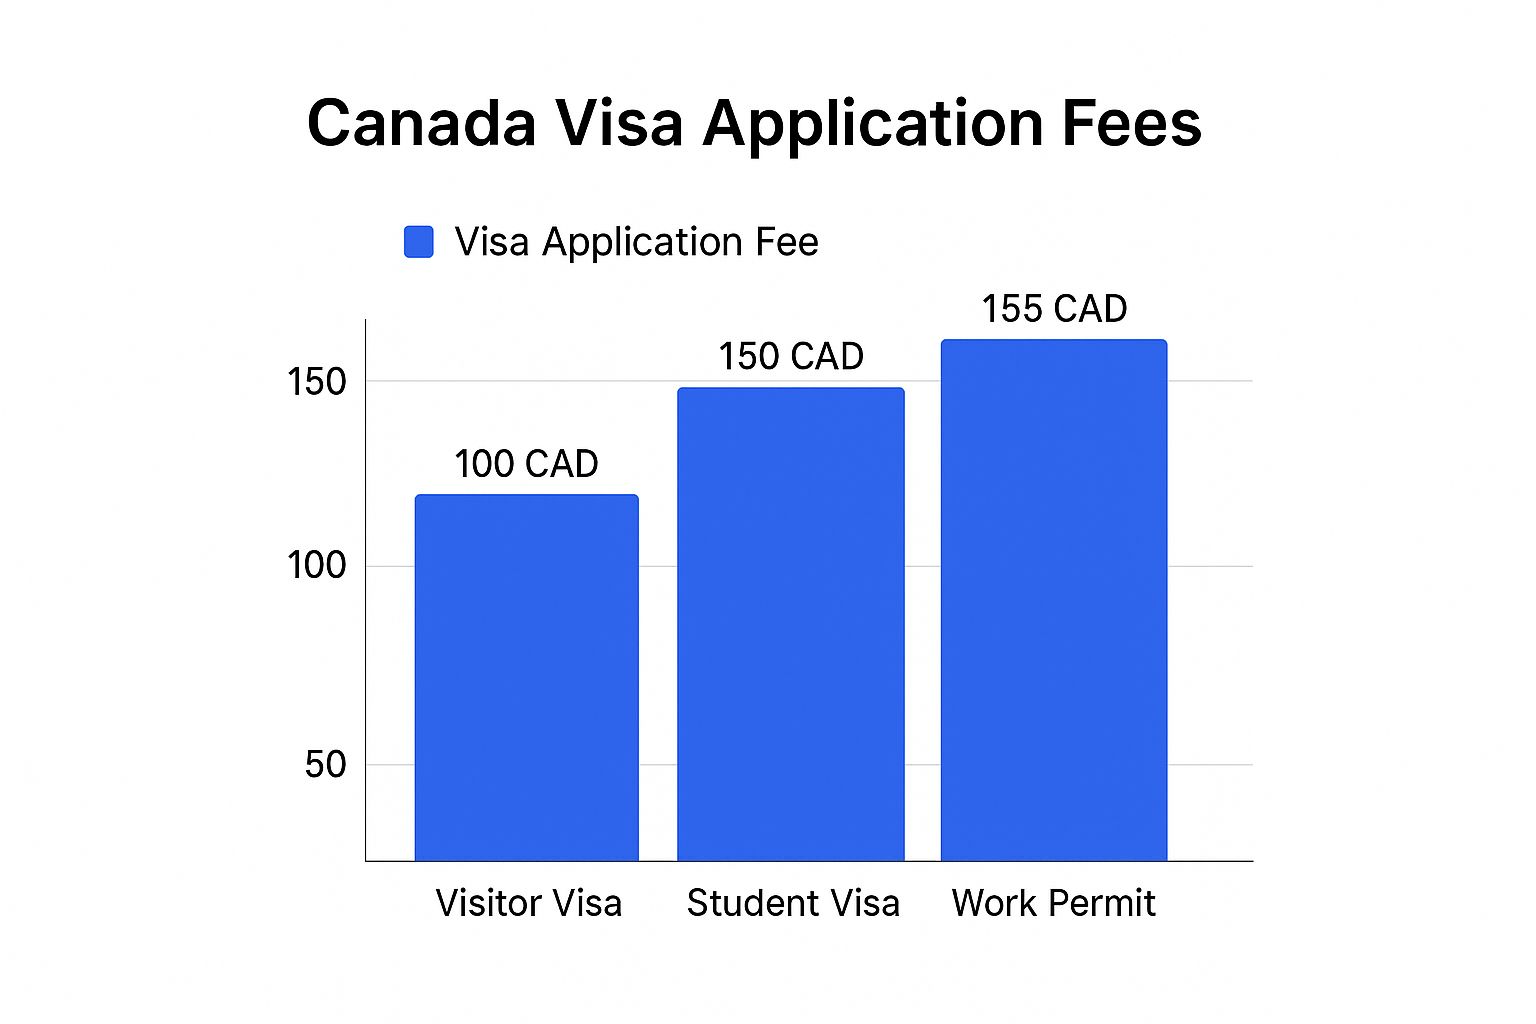
As you can see, the base fees for work and study permits are a bit higher than what you'd pay for a standard visitor visa.
Let’s put all this into a simple table so you can see the numbers at a glance.
Canada Visa Application Fees for Nigerians (in CAD)
This table provides a quick overview of the standard government fees for the most common visa types. Remember, these are just the base costs before you factor in other potential expenses.
Visa Category Application Fee (CAD) Biometrics Fee (per person, CAD) Estimated Total (CAD) Visitor Visa (single applicant) 100 85 185 Study Permit (single applicant) 150 85 235 Work Permit (single applicant) 155 85 240 This table shows how the numbers add up. The total government-mandated cost is a combination of the application fee for your specific visa and the standard biometrics fee.
Understanding the Full Picture
So, to break it down for Nigerian applicants: a visitor visa application costs CAD 100, a study permit is CAD 150, and a work permit is CAD 155.
Once you add the mandatory biometrics fee of CAD 85 per person, your initial cost for a single application will land somewhere between CAD 185 and CAD 240. You can discover more insights about these visa fees and how they apply specifically to your situation. This initial total covers the core government expenses, but you'll still need to budget for other things like medical exams or police clearance certificates down the line.
Breaking Down the Costs: Temporary Visas for Visitors and Students

For most Nigerians, the dream of going to Canada starts with a temporary visa. This could be for a much-needed holiday, pursuing a degree, or a temporary work contract. But these applications aren't all priced the same—and for good reason. Before you even ask "how much is a Canada visa?", it's helpful to understand what your money is actually paying for.
Think of it this way: a visitor visa is like buying a ticket to a weekend festival. It’s for a specific, short-term purpose. A study permit, however, is more like paying tuition for a full academic year. It gives you access to an institution for a longer period and comes with different rules and, naturally, a higher cost.
Visitor vs. Study Permit Fees
When you pay the visitor visa fee, you're essentially paying for the Canadian government to review your application for a short stay. It's perfect for tourism, visiting family, or attending a quick business conference.
The study permit fee is different. It covers the more detailed assessment required to approve you as an international student. This permit allows you to live in Canada for the entire length of your programme and often lets you work part-time. The higher fee is a direct reflection of the more complex processing and the longer-term privileges you're granted.
The bottom line: The price you pay is tied directly to how long you plan to stay and what you plan to do in Canada. The government's processing effort and the rights that come with the permit are what determine the final cost.
What if You Need to Stay Longer or Your Status Expires?
Life happens. Sometimes plans change and you need more time in Canada. In a worse scenario, you might accidentally let your status expire. Canada has specific processes and fees for these situations, and it's smart to know what they are upfront.
- Extending your stay: Already in Canada as a visitor but want to stay longer? You'll need to apply for what's called a 'visitor record', which has its own processing fee.
- Restoring your status: If you overstay your visa, don't panic. You have a 90-day window to apply to restore your status. Be warned, though—this is much more expensive than a simple extension and approval isn't guaranteed.
It’s crucial to factor these potential costs into your overall budget.
Keep in mind that the Canadian government adjusts these fees from time to time. For example, new fee increases for temporary residents are set to take effect on 1 December 2024, which will impact many applicants from Nigeria.
To give you an idea, before this change, the fee to restore your status as a visitor was CAD 229. For students and workers, it was CAD 379 and CAD 384, respectively. This just goes to show how vital it is to check for the most current fees before you submit anything. You can read more about the upcoming fee adjustments to stay ahead of the changes.
The Investment in Permanent Residence
For many Nigerians, moving from a temporary visa to permanent residence (PR) is the ultimate goal. This is where the question "how much is a Canada visa?" changes entirely. We're no longer talking about a short-term fee, but a real investment in your future.
Think of it this way: a visitor or study visa is like renting an apartment. It serves a purpose for a set period. Applying for permanent residence, however, is like putting a down payment on a house. The upfront cost is higher, but it’s the key to unlocking long-term stability, security, and a host of benefits in Canada.
Core Permanent Residence Fees
When you start your PR journey, especially through popular routes for skilled workers like Express Entry, you’ll run into two main government fees. It's crucial to understand that these are completely separate from any temporary visa costs you might have paid before.
-
Application Processing Fee: This is the non-refundable fee you pay for Immigration, Refugees and Citizenship Canada (IRCC) to actually review your entire application. It covers all the administrative work of going through your documents, checking your eligibility, and assessing your profile.
-
Right of Permanent Residence Fee (RPRF): This is a different fee you pay only after your application has been approved. Consider it the final step that officially seals your new status. The great thing is, if your application isn't successful for some reason, this fee is refunded.
Getting a clear picture of these two costs is your first step to creating a realistic budget for your PR dream. For a complete walkthrough of the process itself, our guide on the Canada permanent residence application is a great resource.
Key Insight: The RPRF is only paid upon success. This separates the cost of applying from the cost of actually becoming a permanent resident, making the initial financial risk slightly lower.
What Does Permanent Residence Cost?
The total fees for economic immigration streams like Express Entry definitely show the higher financial commitment needed for PR status. For a single person applying, the total government fee is CAD 1,525.
This amount breaks down into a CAD 950 processing fee and a CAD 575 Right of Permanent Residence Fee. This figure reflects the incredible value that comes with PR, including access to Canada’s universal healthcare and social systems. You can always verify the latest costs on the official fee structure on the Canadian government's website.
Of course, most Nigerian professionals don’t make this move alone. If you're bringing your spouse or children, you'll need to factor in their fees as well. Planning for these combined costs from the very beginning is vital for ensuring your family’s journey to becoming permanent residents is as smooth and stress-free as possible.
Understanding the Biometrics Fee

On top of the main application fees, there's another cost that catches many Nigerian applicants by surprise: the biometrics fee. It's a non-negotiable step for most, but once you understand what it’s for, it becomes just another box to tick on your journey to Canada.
Think of your biometrics—your electronic fingerprints and a digital photo—as your personal security signature. This unique identifier links you directly and securely to your application. It’s a crucial tool Canada uses to protect its immigration system, and it’s why most visa applicants need to do it.
Who Needs to Give Biometrics and What's the Cost?
If you're a Nigerian applying for a visitor visa, study permit, work permit, or even permanent residence, you'll almost certainly need to provide your biometrics. The fee is standard, but the total amount depends on whether you're applying solo or with your family.
Here’s the breakdown:
- For an individual applicant: You’ll pay CAD 85.
- For a family applying together: The total fee is capped at CAD 170.
This family cap is a real money-saver and a key detail to factor into your budget. For instance, a family of four wouldn't pay CAD 340 (4 x 85). Instead, you pay the flat CAD 170 for everyone. It’s a small detail that makes a big difference in your total costs.
Where to Get It Done and How Long It Lasts
You can't just walk into any photo studio for this. You must book an appointment and give your biometrics at an official Visa Application Centre (VAC) in Nigeria. These are the only centres authorised by the Canadian government to collect this sensitive information.
Here’s the best part: once you've given your biometrics, they remain valid for 10 years. This is a huge plus. If you provide them for a visitor visa application today, you won't need to repeat the process or pay the fee again if you decide to apply for a study permit two or three years down the line. It's a one-and-done task for the next decade.
The Hidden Costs: What Else You'll Pay For Beyond the Application Fee
Let's be clear: the official government fees you see on the IRCC website are just the starting point. They're not the final bill. When you ask, "how much is a Canada visa?", it's easy to focus only on that main number and get caught off guard by other expenses down the road.
Think of it like buying a car. The sticker price is what gets your attention, but you still have to budget for insurance, registration, and fuel to actually drive it. Your Canada application works the same way. The government fee gets your application in the door, but you need to pay for several other essential services to get it across the finish line.
These "hidden costs" are paid to different organisations, not the Canadian government, but they are just as crucial. Ignoring them can bring your entire application to a halt.
Common Third-Party Expenses for Nigerian Applicants
So, what are these extra costs? Here’s a rundown of the most common ones you should expect and plan for from the very beginning.
-
Medical Examination: For most Nigerians, a medical exam is mandatory. You must visit an IRCC-approved panel physician in Nigeria to get this done. The exam is to make sure you meet Canada's health standards, and it's a non-negotiable cost.
-
Police Clearance Certificates: Canada needs to know you don't have a serious criminal record. You'll have to get a police certificate from Nigeria, plus from any other country where you’ve lived for six months or more since turning 18. Each country charges its own fee for this.
-
Language Tests (IELTS or CELPIP): If you're applying for permanent residency (like Express Entry) or certain study and work permits, proving your English skills is a must. This means booking and paying for a standardised test like IELTS, which comes with a significant fee.
-
Educational Credential Assessment (ECA): For skilled worker programs, you need to prove your Nigerian degrees or diplomas are equivalent to Canadian ones. You'll pay a designated organisation, like WES, to assess your credentials and produce an official report.
It's also important to remember that these costs are completely separate from the settlement funds you need to have in your bank account. To get a handle on that specific requirement, our guide on the proof of funds for Canada breaks it all down for you.
To help you budget accurately, let's put all these potential expenses into a clear checklist.
Checklist of Additional Application Expenses
Here's a quick look at the third-party services you might need to pay for. Having a solid financial plan that includes these items will save you a lot of stress.
Expense Item Why You Might Need It Estimated Cost Range (NGN/CAD) Commonly Required For Medical Exam To prove you meet Canada's health admissibility requirements. NGN 150,000 – 250,000 / CAD $250 – $400+ All PR; most temporary visas over 6 months. Police Certificates To show you have no disqualifying criminal record. Varies by country. NGN 20,000 – 60,000 per cert. All PR; some temporary visa applications. Language Test (IELTS/CELPIP) To demonstrate English or French language proficiency. NGN 150,000 – 250,000 / CAD $300 – $400+ Express Entry, most economic PR paths, some study/work permits. Educational Credential Assessment (ECA) To verify your foreign education is equal to Canadian standards. NGN 150,000 – 250,000+ / CAD $240 – $400+ Express Entry (FSW), some PNP streams. Biometrics Fingerprints and photo taken at a Visa Application Centre (VAC). CAD $85 (individual) or CAD $170 (family) Most temporary and permanent resident applications. Budgeting for these items alongside your main application fee and proof of funds is the smartest way to ensure a smooth and financially sound application journey. Don't let these extras become last-minute surprises
How to Pay Your Canada Visa Fees in Nigeria

Alright, so you've tallied up all the costs for your Canada visa application. The next big hurdle? Actually getting the payment from Nigeria to Canada. It can feel like a complicated final step, but trust me, it’s quite manageable once you know the ropes.
The most popular and direct route is paying online via the secure IRCC portal right when you submit your application. It’s designed to be fast and efficient. The catch, however, is that paying in Canadian Dollars (CAD) from Nigeria can sometimes throw a spanner in the works.
Why? Many Nigerian bank cards come with strict daily or monthly limits on international transactions. If your total visa fee is more than your bank's limit, the payment will simply fail. A quick call to your bank beforehand to check your card's international spending limit can save you a world of stress.
Overcoming Payment Hurdles
If your card gets declined, don't panic. It happens more often than you think. Here are a few practical workarounds to get your payment across the finish line:
- Try a different card: Often, the problem isn't your fault but a glitch with a specific bank's system. Simply trying a debit or credit card from another Nigerian bank can do the trick.
- Use a domiciliary account: Got a domiciliary account? The card linked to it (usually in USD, EUR, or GBP) often has higher limits and fewer restrictions for international payments. This is a solid option.
- Pay in person: If online methods are proving stubborn, you can always pay your fees directly at a Visa Application Centre (VAC) here in Nigeria. It's a reliable backup plan.
Crucial Tip: Always remember that the final amount you are charged in Nigerian Naira (NGN) will be based on the exchange rate at the very moment you pay. Rates fluctuate daily, so it’s smart to have a little extra in your account to cover any unexpected shifts.
Managing Your Payment Strategy
Picking the right payment method isn't just about convenience; it’s about preventing delays. A failed payment can halt your entire application, whether you're going for a temporary work permit or permanent residency. For those on the employment path, our guide on how to apply for a work visa has more specific details.
By preparing for common issues like bank limits and unpredictable exchange rates, you can tackle this final financial step with confidence. It ensures your Canadian dream stays firmly on track without any last-minute hitches.
Got More Questions? Here Are Some Common Ones About Canada Visa Costs
It’s completely normal to have a few more questions rattling around your head after looking at all these numbers. The financial side of a Canadian visa application can be a bit tricky, so let’s clear up some of the most common queries we see from Nigerians.
Is My Money Gone if My Visa Is Refused?
This is the big one, isn't it? The straightforward answer is that the main application processing fees are not refundable. Think of it this way: you’re paying for the time and expertise of an immigration officer to thoroughly review your case. That work is done whether the final answer is yes or no.
But there’s one important exception. The Right of Permanent Residence Fee (RPRF) is a different story. You only pay this fee after your application has been approved in principle, so if things don't work out in the end, you’ll get this specific fee back.
Do I Have to Pay the Same Fees for My Kids?
For the most part, yes. When it comes to temporary residence applications like visitor visas or study permits, a child pays the same processing fee as an adult. There's no discount there.
Where you'll see a significant saving is with the biometrics fee. An individual pays CAD 85, but an entire family applying at the same time will only pay a maximum of CAD 170. That’s a huge relief for families with several children, as it stops the costs from multiplying.
Do These Fees Change Often?
They do. The Canadian government doesn't keep the fees set in stone forever; they review and adjust them periodically to keep up with the real costs of processing applications. For instance, we saw fee increases announced for December 2024.
Expert Tip: Don't rely on old blog posts or what a friend paid last year. Just before you submit your application, always, always double-check the official IRCC fee list. This simple step can save you from a major headache.
Do I Pay Everything in One Go?
Usually, yes. When you're applying online, the system is set up for you to pay both the application processing fee and the biometrics fee together. It’s a single, combined transaction that you complete right at the end to officially submit your file.
Feeling more confident about the costs is a great first step, but the Canadian immigration journey has many moving parts. If you're looking for instant, reliable answers tailored to your situation, JapaChat is Nigeria's AI immigration expert, designed to help. You can get clear information on everything from document checklists to visa pathways. Start planning your journey with a trusted co-pilot today. Get your free account at https://japachat.com.
-
UK Education Visa Requirements a Complete Guide
So, you're ready to start your study adventure in the UK? That's fantastic. But before you can dive into lectures and campus life, there's one essential hurdle to clear: securing your student visa. Think of it as your official ticket to entry. The whole process boils down to a few key things: proving you have a confirmed place at a licensed university, showing you can pay for your course and living costs, and meeting the required English language standards.
This guide is designed to be your step-by-step manual, breaking down what can feel like a complicated process into manageable parts.
Your UK Study Journey Starts Here
Applying for a UK student visa is a bit like planning a major trip. You wouldn't just show up at the airport without a ticket, a passport, or a place to stay, would you? Your visa application needs that same level of careful planning. For Nigerian students, this is a well-worn path, but knowing the specific signposts and potential bumps in the road is crucial for a smooth journey.
The good news is that the UK system is built on points. It's not a mystery box where you just cross your fingers and hope for the best. You need to earn a set number of points across specific categories to be successful, which makes it a very clear and predictable process once you know what's required.
The Pillars of Your Application
Your application is basically built on three solid pillars. If one of them is weak, the whole thing can wobble. Let's look at them:
-
University Sponsorship: This is more than just an offer letter. It’s a formal sponsorship from your university, officially recorded in a document called the Confirmation of Acceptance for Studies (CAS). It’s the cornerstone of your application.
-
Financial Proof: This is a big one. You absolutely must demonstrate that you have the money to cover your first year's tuition fees plus a specific amount for living costs. The rules around this are very strict, so it pays to get it right.
-
Genuine Intent: The UK Visas and Immigration (UKVI) team needs to be confident that you are a genuine student whose primary reason for coming to the UK is to study, and that you intend to return home after your course.
The best way to approach this is to see your application not as one massive, intimidating task, but as a series of smaller, achievable steps. Every single document, from your CAS letter to your bank statements, is a vital piece of the puzzle that gets you closer to your goal.
To help you get started, here's a quick look at the core components we'll be diving into. Consider this your packing list before you start the real work of putting your application together.
Core Components of Your UK Student Visa Application
This table summarises the essential pillars of a successful application. Getting these three things right is 90% of the battle.
Requirement What You Need Its Purpose in Your Application Confirmation (CAS) A unique reference number from your university. Officially proves you have a place on a course. Financial Evidence Bank statements showing funds for tuition and living. Demonstrates you can support yourself financially. English Language An approved test score or qualification exemption. Confirms your ability to study in English. Nailing these three elements is the foundation of a strong application. In the next sections, we'll break down each one in much more detail so you know exactly what to do.
The Role Of Your CAS Letter

Think of the Confirmation of Acceptance for Studies (CAS) as the single most important document in your visa journey. It’s far more than just an offer letter from your university; it’s your official, electronic hall pass that confirms a UK institution is sponsoring your studies.
Without a CAS, your visa application simply can't move forward. It holds the unique reference number that unlocks the GOV.UK application portal, serving as the cornerstone of your entire case. It's the official signal to UK Visas and Immigration (UKVI) that a licensed sponsor has vouched for you and offered you a place on a full-time course.
What Your CAS Contains
Your CAS isn't just a random number. It's a detailed digital file that contains all the key information UKVI needs to review your application. It’s a snapshot of your academic placement and stands as one of the most critical parts of the entire process.
Here’s a look at the details packed into your CAS statement:
- Your unique CAS reference number: The key you’ll plug into the application form.
- Your personal details: This must match your passport, including your full name and passport number.
- The university's sponsor licence number: Proof they are a Home Office-approved sponsor.
- Full course details: The exact title, academic level, and the official start and end dates of your programme.
- First-year tuition fees: The total cost for your first year of study.
- Any fees already paid: This shows any deposits you've paid for tuition or university accommodation, which gets deducted from the total funds you need to prove.
After you've firmly accepted your university offer and paid any necessary deposit, the university will generate your CAS. You can usually expect to receive it around 3-4 months before your course is due to begin.
Be mindful of two critical deadlines: you must apply for your visa within 6 months of receiving the CAS, and the CAS cannot have been used in a previous, refused visa application.
Checking Your CAS For Accuracy
While errors on a CAS are uncommon, they can be disastrous, leading to long delays or even an outright visa refusal. The moment you receive your CAS statement, your first job is to scrutinise every single detail.
Pull out your passport and original offer letter and compare them line by line. Is your name spelled perfectly? Is your date of birth correct? Do the course details align with what you accepted? If you spot even a tiny mistake, contact your university's admissions team right away to get it fixed before you apply.
Getting these details right is a simple but vital step. For a deeper dive into how this fits into the bigger picture, check out our complete guide on UK student visa requirements.
Proving You Can Fund Your Studies
Getting this part right is absolutely crucial. The UK Home Office needs to see, without a shadow of a doubt, that you have the money to pay for your course and support yourself while you’re here. This isn’t a soft suggestion; it’s a non-negotiable rule.
Think of it as your financial boarding pass. Without it, your application simply won't get off the ground. They need to be certain you won’t need to rely on public funds, allowing you to focus entirely on your studies.
The Financial Formula Unpacked
So, how much money do you actually need? Thankfully, it’s not a random figure. The UK Visas and Immigration (UKVI) office uses a clear formula: your first year of tuition fees plus a set amount for your living costs (often called 'maintenance funds').
The tuition fee part is simple. It's the full amount for your first academic year, which will be stated clearly on your Confirmation of Acceptance for Studies (CAS). If you’ve already paid a portion of this fee or a deposit for university-managed accommodation, that amount will be subtracted from the total you need to show.
Your living costs, however, are a bit different. They depend entirely on where in the UK you’ll be studying. The Home Office has two separate rates to reflect the real-world difference in living expenses.
London vs. Outside London Living Costs
It’s no secret that living in the capital is more expensive, and the visa requirements reflect this reality. The UKVI sets a specific monthly amount you need to have available for each month of your course, up to a maximum of nine months.
- Studying in London: You must show £1,334 per month.
- Studying Outside London: You must show £1,023 per month.
Let's break that down. If your course is nine months or longer, you'll need to show a total of £12,006 for living costs in London (£1,334 x 9) or £9,207 if you're studying anywhere else (£1,023 x 9). If your course is shorter than nine months, you just multiply the monthly figure by the exact length of your course.
The most common pitfall we see is a simple miscalculation. Always, always double-check your maths. Add your first year's tuition to the correct nine-month maintenance fund to get your magic number. This is the absolute minimum you must have in your account.
The Critical 28-Day Rule
Once you know the exact amount, there's another crucial time-based rule you have to follow: the 28-day rule. You must prove that the total required funds have been in your bank account (or your parent's/sponsor's account) for at least 28 consecutive days.
What’s more, the closing balance on the bank statement you provide cannot be more than 31 days old on the day you submit your online application. During that 28-day period, the balance cannot drop below the required amount—not even for a single day. A dip, even for just a few hours, will almost certainly lead to a visa refusal.
Financial Evidence Examples
Let's put this into practice with a couple of real-world scenarios:
Scenario 1: Master's in Manchester
- Tuition: £18,000
- Living Costs (Outside London): £9,207
- Total Funds Needed: £27,207
Scenario 2: Bachelor's in London
- Tuition: £22,000
- Living Costs (In London): £12,006
- Total Funds Needed: £34,006
As you can see, the final figure changes quite a bit based on your university's location and your course fees. It’s always a good idea to explore all your funding avenues. To show you're financially prepared, it helps to be familiar with all types of aid; resources on understanding student funding options can give you a much better perspective.
For a more detailed breakdown especially for Nigerian applicants, you can find extra tips in our comprehensive overview of the student visa requirements for UK students. Remember, solid financial preparation is the single best thing you can do for a successful application.
Getting Your Paperwork in Order

Think of your UK student visa application as building a house. Each document is a crucial brick, and if one is missing or faulty, the whole structure could be unsteady. Getting your paperwork perfectly organised from the start is the single best thing you can do to ensure a smooth, successful application. It removes any doubt and shows the visa officer you're a serious, well-prepared candidate.
This section is your blueprint. We’ll walk through every single document you need, from the absolute essentials to the ones required for specific situations, making sure you understand the UK education visa requirements inside and out.
The Must-Have Documents
Before you even think about starting the online form, you need to gather and scan a few non-negotiable items. These are the core documents every single student applicant needs.
-
A Current Passport: This is your primary ID. It must be valid for the entire time you plan to be in the UK and have at least one completely blank page for the visa sticker. No exceptions.
-
Confirmation of Acceptance for Studies (CAS): This isn't a physical letter you wait for in the post. Your university will send you a unique reference number. This CAS number is your golden ticket – it’s the Home Office’s proof that a licensed sponsor has offered you a place on a course.
-
Proof of Your Qualifications: You'll need the original certificates or transcripts for the qualifications your university used to offer you a place (the ones listed on your CAS). This is how you prove you have the academic chops for your chosen course.
A quick but vital note: if any of these documents aren't in English, you must get them translated. This can't be a quick job by a friend; it has to be a certified translation from a professional, and you must submit it alongside the original document.
Health and Security Clearances
Beyond your academic life, the UK government needs to know you meet certain health and security standards. Overlooking these can result in a swift and disappointing refusal.
For applicants from Nigeria, a tuberculosis (TB) test certificate is an absolute must. You have to get this test done at a Home Office-approved clinic in Nigeria. These certificates are only valid for six months, so timing is everything. Plan your test so the certificate is still valid when you submit your visa application.
Expert Tip: Don't just book a test at any clinic. The Home Office keeps a strict list of approved centres. Always double-check your chosen clinic against the official list on the GOV.UK website before making an appointment. A test from an unapproved clinic is worthless for your application.
Another vital piece of paper for some students is the ATAS certificate.
Do I Need an ATAS Certificate?
If you're planning to study a postgraduate course in certain sensitive subjects—think advanced physics, specific engineering disciplines, or materials science—you will likely need an Academic Technology Approval Scheme (ATAS) certificate.
Don't worry, you won't have to guess. Your university will clearly state in your offer letter if an ATAS certificate is required for your course. This certificate is essentially a security clearance from the UK’s Foreign, Commonwealth & Development Office. You must apply for and receive your ATAS certificate before you can submit your main visa application, and it can take several weeks to process, so apply early!
To help you keep track, here is a simple checklist of the documents we've discussed.
UK Student Visa Application Checklist
Pulling together your documents can feel overwhelming, but a checklist makes it manageable. Use this table to track your progress and ensure you have everything you need before you hit 'submit'.
Document Key Details and Requirements Check When Complete Passport Must be current, valid for your full stay, and have a blank page. ☐ CAS The unique reference number provided by your university. ☐ Academic Proof The certificates/transcripts listed on your CAS. ☐ TB Test Certificate Mandatory for Nigerian applicants; must be from a Home Office-approved clinic. ☐ ATAS Certificate Required only for specific postgraduate science and technology courses. ☐ Taking the time to methodically collect and review these documents is the most important preparatory step you can take. A well-organised application is a strong application.
The Online Application and Biometrics Process
Right, you’ve gathered your documents and your funds are sorted. Now for the main event: tackling the official online application and booking your biometrics appointment. This is the part where all your hard work and preparation truly pay off.
The whole thing kicks off on the GOV.UK website. Be warned, the form is quite long, but it’s laid out logically. It will walk you through everything from your personal details and CAS information to your travel history. My best advice? Take it slow. A simple mistake here can lead to frustrating delays down the line.
Navigating the Online Form
Think of the online form as the digital heart of your application. Every single question is there for a reason—to check if you meet the specific UK education visa requirements. Keep your passport, CAS statement, and financial paperwork handy while you work through it.
It's crucial to answer every question honestly and make sure your answers match up across the board. If a question feels a bit tricky, read it again. The system is built to spot inconsistencies, so the details you provide must align perfectly with your supporting documents.
Since you'll be uploading some very personal documents, it’s worth knowing how to share files securely. This gives you peace of mind that your data is protected during the submission process.
If there’s one mistake I see applicants make time and time again, it’s rushing the form. Block out a couple of hours, free from distractions, to get it done properly. Read over every entry before clicking 'next'—it's a simple habit that will save you a world of pain later.
After you've filled everything in and submitted the form, you'll need to pay two important fees.
Paying the Visa Fee and Health Surcharge
Before you can book that all-important biometrics appointment, you have to settle two fees online:
- The Visa Application Fee: This is the standard charge for processing your application. As of early 2024, this costs £490 for a Student visa application made from outside the UK.
- The Immigration Health Surcharge (IHS): This is a mandatory fee that grants you access to the UK's National Health Service (NHS). It’s currently £776 per year of your visa, and you have to pay for the entire length of your course upfront.
So, for a three-year undergraduate degree, your IHS payment would be a hefty £2,328 (£776 x 3). Don't worry about calculating it yourself; the online system figures out the exact amount based on your course dates. Once paid, you'll get a confirmation email, which is your green light to book the final step.
Your Biometrics Appointment in Nigeria
The last piece of the puzzle is the biometrics appointment. This is a quick visit where you'll have your photograph and fingerprints taken electronically. In Nigeria, these appointments are handled at a Visa Application Centre (VAC), which is usually operated by TLScontact.
The online application will guide you to the TLScontact website to book a slot at a centre, likely in Lagos or Abuja. When you go, make sure you bring these items:
- Your current passport
- The first page of your printed visa application form
- Your appointment confirmation email
The appointment itself is very straightforward. A member of staff will scan your fingerprints and take a digital photo. This data is then securely passed on to UK Visas and Immigration (UKVI) and linked to your application. With that done, your application is officially in the queue for a decision.
This image breaks down how the financial side of your application adds up.
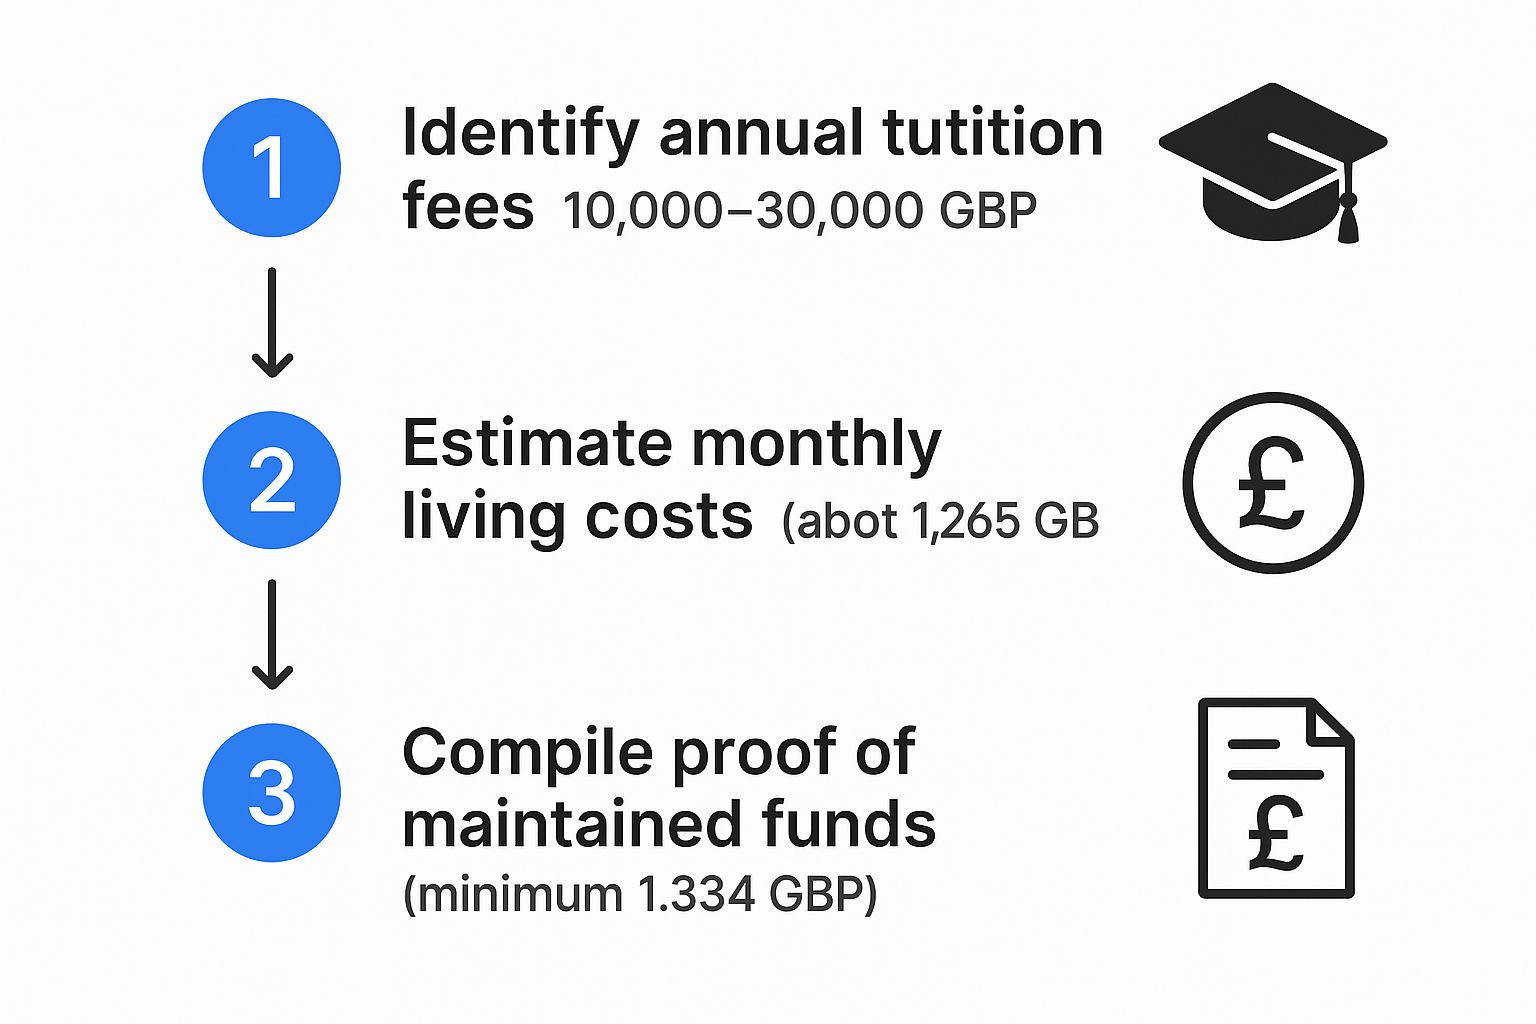
As you can see, it clearly shows how your tuition fees and living costs are combined to create the total amount of money you need to show for a successful application.
What to Expect After You Apply

You’ve submitted your online form and given your biometrics. Now comes the hard part: the wait. This period can feel like the most anxious stretch of the whole journey, but understanding what’s going on behind the scenes can make it a little more bearable. Your application is now in the hands of a UK Visas and Immigration (UKVI) Entry Clearance Officer, who will make the final decision.
Officially, the standard processing time for a UK Student visa application from Nigeria is about three weeks, which translates to 15 working days. It's crucial to remember this is just a guideline, not a guarantee. The actual timeline can shift depending on how busy they are, if your case has any complex elements, or if UKVI needs to ask you for more information.
Speeding Up the Process and Handling Delays
If your course start date is looming and you're short on time, you’re not out of options. Most Visa Application Centres (VACs) in Nigeria offer a Priority Visa service. By paying an extra fee, your application gets moved to the front of the queue, and you can expect a decision in as little as five working days. Some centres even offer a Super Priority service for a decision by the next working day.
Of course, things can also go the other way. Delays do happen, and they’re often for predictable reasons:
- Documents that are incomplete or filled out incorrectly.
- The need for a credibility interview to verify your student status.
- A complicated personal immigration history.
If there’s any issue, UKVI will get in touch. This is exactly why it’s so important to double-check that your contact details are correct and to keep a close eye on your email—including the spam folder—after you’ve applied.
The Credibility Interview: A Potential Call
In some cases, a UKVI officer might want to chat with you directly. This is called a credibility interview, and it’s nothing to be afraid of. It's usually a brief phone call designed to confirm you are a genuine student whose main reason for coming to the UK is to study.
They'll likely ask about your course, why you chose that particular university, how you’re funding your education, and what your plans are after you graduate. The key is to be honest, clear, and consistent.
Think of the credibility interview not as a test, but as a conversation to verify your intentions. Before the call, take a few minutes to review your CAS and personal statement. Answering confidently and aligning your responses with your application is the best way to pass with flying colours.
Understanding the Final Decision
Once a decision is made, you'll be notified to come and collect your passport from the VAC. This is the moment of truth, and there are two possible outcomes.
If Your Visa Is Granted:
Congratulations! Inside your passport, you’ll find a 90-day entry visa sticker, often called a vignette. You must use this to travel to the UK within that 90-day window. Once you arrive, you’ll need to collect your Biometric Residence Permit (BRP). This card is your actual visa for the full length of your course, and your decision letter will tell you where and when to pick it up.If Your Visa Is Refused:
Receiving a refusal is disheartening, but don't panic. You will get a letter explaining exactly why the decision was made. Read it carefully. If you think the officer made a mistake based on the documents you provided, you might be able to request an Administrative Review. Staying informed about the latest UK immigration new rules can also help you understand the context behind a refusal.Despite the challenges, there's a lot of good news for Nigerian students. In the first quarter of 2025, the number of study visas issued to Nigerians shot up by 84% compared to the previous year. Even better, the grant rate soared to an impressive 96%. This shows that with careful preparation, Nigerian applicants are successfully navigating the requirements and achieving their study goals.
Answering Your Top Visa Questions
Once your application is in, a whole new set of questions usually pops up. It's one thing to get the visa, but it's another to understand what life with it actually looks like. Can you get a part-time job? What happens after you toss your graduation cap in the air? Can you bring your partner or children along for the journey?
Let's cut through the confusion. These details are just as critical as your initial application because they shape your day-to-day life in the UK and what your future might hold after your studies.
Can I Work While I'm Studying?
Yes, you can, but there are strict rules you absolutely must follow. The UK government allows Student visa holders to work, but how much depends entirely on the type of course you're enrolled in.
- Studying for a degree? If you're in a full-time, degree-level course (or higher) at a recognised university, you can generally work up to 20 hours per week during term time.
- Below degree level? For courses like foundation programmes, the limit is usually tighter, often just 10 hours per week.
- What about holidays? During official university holidays, like the long summer break or Christmas, you're free to work full-time.
A word of warning: stick to these hours religiously. Working even one hour over your permitted limit is a serious breach of your visa conditions. It could put your right to stay in the UK at risk. The first thing you should do when you get your Biometric Residence Permit (BRP) is check the working conditions printed on it.
What Is the Graduate Route All About?
Think of the Graduate Route as a golden ticket for post-study work. It’s a fantastic scheme that lets you stay in the UK to work—or look for work—for a period after you've successfully earned your UK degree. You don't need a job offer to apply, which gives you incredible flexibility.
This route lets you test the waters of the UK job market, gain priceless work experience, and even dip your toes into entrepreneurship. It's designed to be a bridge between your student life and a professional career in the UK.
The Graduate Route is a massive draw for international students. It offers a two-year post-study work visa for Bachelor's and Master's graduates and a three-year visa for those with a PhD. It’s a clear runway to put your hard-earned skills to use right away.
It's not all smooth sailing, though. Recent research has shown that many graduates struggle to find roles. A government evaluation revealed that a staggering 75% of people on the Graduate Route found job hunting difficult, partly because some employers are wary of hiring someone on a shorter-term visa.
Can I Bring My Family With Me?
This is where things have changed dramatically. As of January 2024, the government has tightened the rules on bringing dependants (your partner or children) to the UK.
It used to be that most postgraduate students could bring their families. Now, that privilege is reserved almost exclusively for students on high-level postgraduate research programmes, like a PhD or another doctorate-level course. If you're coming for a taught Master's or an undergraduate degree, you can no longer bring your family with you on your Student visa.
There's a small exception for children born in the UK while you're here on your visa, but for planning purposes, you should assume you won't be able to bring family unless you're on a designated research programme.
Does the Graduate Visa Lead to Settlement?
This is a common misconception. The Graduate Route is a temporary visa, and the time you spend on it does not count towards Indefinite Leave to Remain (ILR), which is permanent settlement.
So, what's the point? It gives you the time and breathing room to find an employer willing to sponsor you for a long-term work visa, like the Skilled Worker visa. If you successfully switch to a route like that, the clock towards settlement starts ticking. Typically, you need five years on an eligible visa path to apply for ILR.
Think of the Graduate visa not as the destination, but as a crucial stepping stone that gets you in the door and gives you the opportunity to secure a more permanent future in the UK.
Feeling overwhelmed by the UK immigration process? Let JapaChat be your guide. As Nigeria’s first AI immigration expert, we provide instant, accurate answers to all your visa questions, helping you plan your journey with clarity and confidence. Avoid misinformation and costly mistakes by getting personalised advice tailored to your unique situation. Sign up for free and join over 10,000 Nigerians who are making their international dreams a reality. Start your journey today at JapaChat.
-
-
Canada Student Visa Rules for Nigerians Simplified
If you're planning to study in Canada, you’ve probably heard whispers about some major changes to the student visa process. It's true—the Canadian government has recently updated its policies, introducing a national cap on study permits and a new required document called the Provincial Attestation Letter (PAL).
These aren't just minor tweaks; they're significant shifts designed to manage the number of international students and make sure provinces can adequately support them. Getting a firm grip on this new reality is the absolute first step to building a strong and successful application from Nigeria.
Your Guide to the New Canada Student Visa Rules
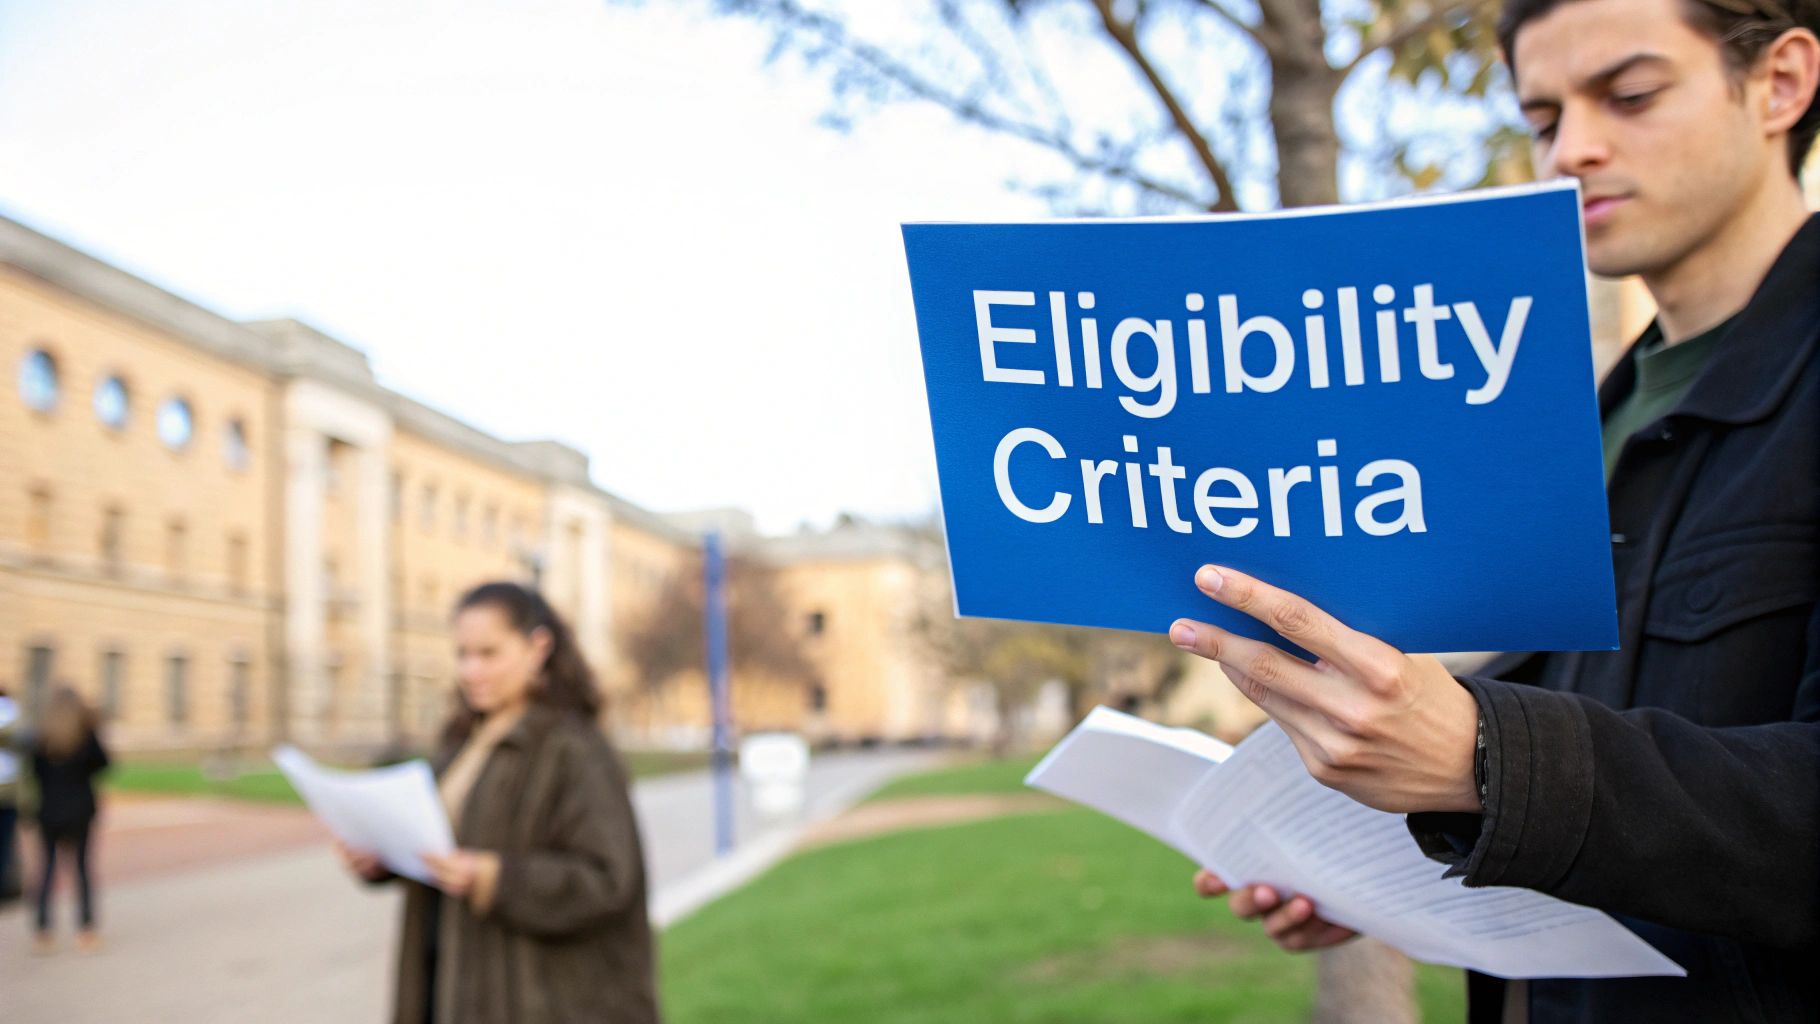
Trying to navigate the path to studying in Canada from Nigeria can feel a bit overwhelming, especially with all the recent policy updates. Let's break it all down. Think of this guide as your personal roadmap, starting with the most important question: what exactly has changed?
Simply put, the Canadian government has put new regulations in place to create a better balance between the number of international students arriving and the country's ability to provide housing and essential services. For Nigerian applicants, this means the process has become more competitive and requires an even sharper eye for detail. Two updates, in particular, will shape your application journey.
Understanding the Study Permit Cap
The biggest headline-grabber is the introduction of a national cap on new study permits. For 2025, Canada has set this cap at 437,000 approved study permits, which is a 10% reduction from the previous year. The goal here is to relieve some of the pressure on housing, healthcare, and other services in cities that are popular with students.
What does this mean for you? Well, it directly impacts how many students each province can welcome. Popular destinations like Ontario and British Columbia, for instance, have seen significant cuts to their allocations. On the other hand, provinces like Newfoundland and Labrador actually received more spots to encourage students to consider a wider range of locations across Canada. This is a crucial strategic point to remember when you're choosing your Designated Learning Institution (DLI).
The Provincial Attestation Letter (PAL)
Along with the cap, there's a new mandatory document for most study permit applications: the Provincial Attestation Letter, or PAL.
Think of the PAL as a golden ticket from the province. It's their official confirmation that you have a guaranteed spot within their yearly limit. Without it, your application won't even be processed.
This new rule adds an important step to your timeline. First, you need your Letter of Acceptance (LOA) from your school. Then, the school itself will guide you through the process of getting the PAL from the provincial government. It’s a critical piece of the puzzle. As you get all your paperwork in order, it's also wise to get some general advice for students traveling abroad to prepare for life beyond the visa application.
Navigating these new rules might seem daunting, but they send a clear message: Canada is focused on sustainable growth and ensuring every international student has a positive and supportive experience. The key changes are summarised in the table below.
Key Changes to Canada Student Visa Rules at a Glance
Policy Change What It Means for Nigerian Applicants Who Is Affected National Study Permit Cap Increased competition for fewer spots. Your choice of province is now more strategic than ever. Most undergraduate and college-level international students. Provincial Attestation Letter (PAL) A mandatory new document you must obtain after getting your Letter of Acceptance (LOA). Most undergraduate and college-level international students. Cost-of-Living Requirement The required proof of funds has more than doubled to ensure students can afford to live in Canada. All study permit applicants. Post-Graduation Work Permit (PGWP) Rules Students in public-private partnership college programmes are no longer eligible for a PGWP. Students graduating from curriculum licensing arrangement programmes. While the rules are certainly stricter, a well-researched, strategic application still has a very strong chance of success. The national cap and the PAL system are now the cornerstones of the process, so understanding them inside and out is your best bet.
So, Are You Eligible? Let's Check the Boxes for Nigerian Students

Before you even think about application forms or booking a biometrics appointment, the first crucial step is to honestly check if you meet the core requirements set by Immigration, Refugees and Citizenship Canada (IRCC). Think of these as the non-negotiable foundations of your application.
Getting this part right from the start is everything. A small mistake or a weak point in your eligibility can lead to a swift refusal, which is a frustrating waste of your time, effort, and money. Let's break down exactly what IRCC needs to see.
The First Hurdle: Your Letter of Acceptance
Your entire student visa journey begins with one essential document: a Letter of Acceptance (LOA). But it can’t be from just any school. It must be from a Designated Learning Institution (DLI), which is a school officially approved by a Canadian province or territory to welcome international students.
This LOA isn't just a simple admission offer; it's the official key that unlocks the door to your study permit application. Without a valid LOA from a registered DLI, your application is a non-starter.
Remember, your school is also your partner in getting the new mandatory Provincial Attestation Letter (PAL). This makes choosing the right DLI and building a good relationship with them more important than ever.
The Big One: Proving You Can Afford It
Let's be honest—this is often the make-or-break part of the application for most Nigerian students. You must provide solid proof that you have enough money to pay for your first full year of tuition and cover your living expenses for that year.
It's a classic mistake to underestimate the cost of living or think the financial proof is just a guideline. It’s a strict requirement. The visa officer needs to be 100% confident that you won’t struggle financially or have to rely on working illegally to get by.
So, how do you actually prove it? You’ll need clear, verifiable evidence. Common options include:
- Bank Statements: You'll need official statements from your bank (or a sponsor's bank) that show a stable financial history over several months. A large, unexplained deposit right before you apply is a huge red flag and should be avoided.
- Guaranteed Investment Certificate (GIC): This is a very popular and trusted method. Buying a GIC from a participating Canadian bank shows you have your living expenses locked in and ready to go.
- Proof of a Student Loan: An official loan approval letter from a recognised financial institution is solid proof of funds.
- Scholarship or Funding Letters: If you’ve earned a scholarship, the official letter detailing the amount and duration is excellent evidence to include.
Showing You’ll Return Home: Your Ties to Nigeria
This is one of the most misunderstood Canada student visa rules. You must convince the visa officer that you plan to leave Canada once your studies are complete. This is what they call demonstrating "ties to your home country."
Your application needs to paint a clear picture: you are going to Canada for a specific educational goal, and your long-term future is back in Nigeria. This is a story you'll tell primarily through your Statement of Purpose (SOP).
Here’s how you can build a strong case for your intent to return:
- Family: Emphasise your close family relationships in Nigeria—parents, a spouse, children, or dependent siblings.
- Career Prospects: Clearly explain how your Canadian degree or diploma will get you a specific, high-demand job in Nigeria. Be specific about the roles or industries.
- Property and Assets: If you or your family own a business, land, or other significant property in Nigeria, these are powerful anchors that tie you to your home country.
Failing to convince the officer on this point is one of the leading reasons for study permit refusals. Your goal is to show that your trip to Canada is a temporary, strategic step to build a better future for yourself in Nigeria.
Assembling Your Application Documents
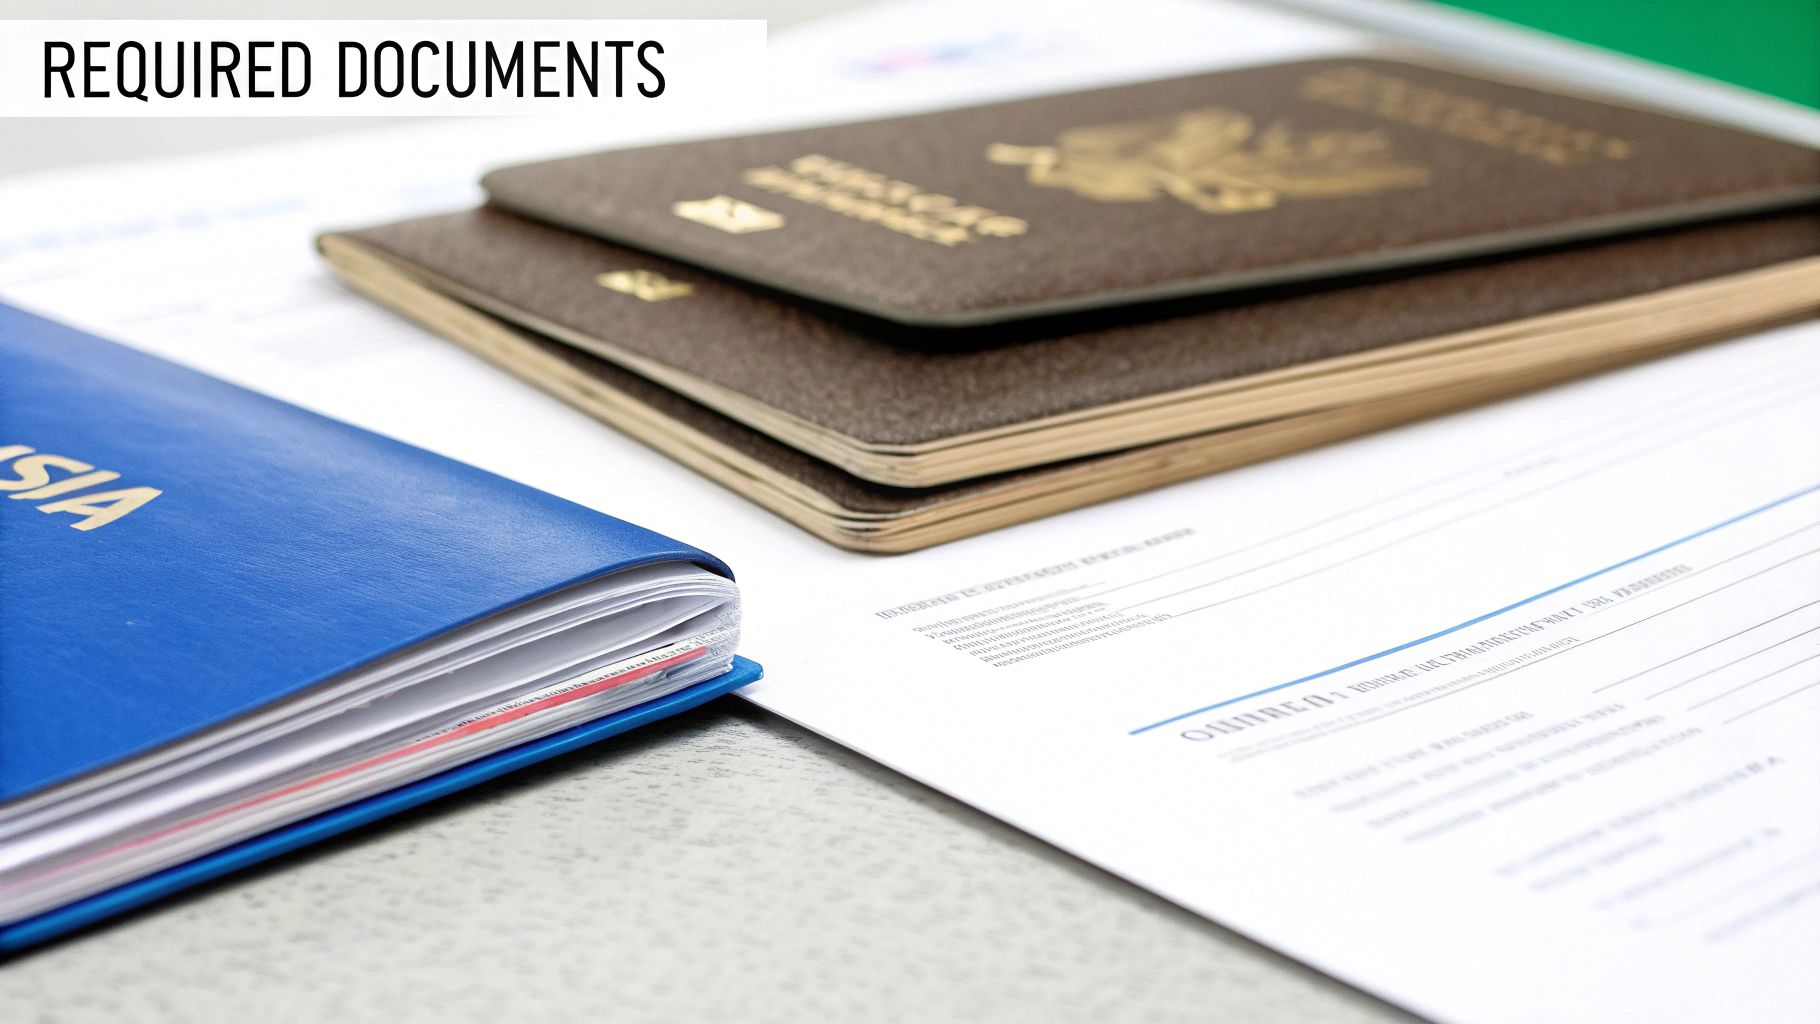
Putting together your student visa application is a bit like building a case to present to a judge. Every document you submit is a piece of evidence, and your goal is to make your case so strong that the visa officer has every reason to say "yes". It's a meticulous process, but getting it right from the start is non-negotiable.
This breakdown is your go-to checklist for every single document you, as a Nigerian applicant, will need. I can't stress this enough: even one missing paper can lead to serious delays or, worse, an outright refusal. Attention to detail is everything here.
The Core Document Checklist
Before you even think about filling out the application forms, your first job is to get your key documents in order. Having these ready will make the whole journey feel a lot less frantic. Think of these as your foundational papers.
- Valid Nigerian Passport: This is your absolute starting point. Your passport must be valid for your entire study period in Canada. To be safe, make sure it has at least six months of validity beyond the date you plan to leave Canada.
- Letter of Acceptance (LOA): This is the official golden ticket from your Designated Learning Institution (DLI). It’s the proof that a Canadian school has accepted you.
- Proof of Financial Support: You have to show, in black and white, that you can pay for your tuition and cover your living costs. This means providing clear bank statements, a Guaranteed Investment Certificate (GIC), or official proof of a student loan.
Once you have these three big ones sorted, you're in a great position to tackle the rest of the application package.
Understanding the Provincial Attestation Letter (PAL)
A major change recently rolled out for the Canada student visa rules is the need for a Provincial Attestation Letter (PAL). For most study permit applications coming from Nigeria now, this document is absolutely mandatory.
Think of the PAL as an official nod from the province where your school is. It confirms you have a guaranteed spot within that province's student quota. If you apply without a PAL, IRCC will simply return your application without processing it.
So, where do you get it? Your school handles this. Once they've sent you an LOA and you've paid your tuition deposit, the DLI will tell you exactly how to request the PAL from the provincial government. Don't even start your study permit application until you have this letter.
Crafting a Powerful Statement of Purpose
Your Statement of Purpose (SOP), or Letter of Intent, is easily the most personal part of your application. It’s your one chance to speak directly to the visa officer, to tell them who you are beyond the forms and certificates. This isn’t just a formality; it’s your main pitch.
A convincing SOP should clearly answer these questions:
- Why Canada? Be specific. Don’t just say it's a good country. Talk about its global reputation in your field of study, its multicultural society, or specific research facilities you want to access.
- Why this school and this programme? Show you've done your homework. What makes this particular DLI and course the perfect fit for you? Mention renowned professors, unique course modules, or industry connections.
- What are your goals? Connect your Canadian education to your future career back in Nigeria. What specific job do you want? What industry will you work in? Give them a clear picture of your plan.
- What are your ties to Nigeria? This is crucial. You must convince the officer you have strong reasons to return home. This could be family commitments, property you own, or even a pre-arranged job offer waiting for you.
A well-written SOP helps the visa officer connect the dots, building a story that shows you're a genuine student with a solid plan. For more tips on getting this right, you can explore the full Canada student visa requirements to help you polish your approach.
Finalising Your Document Package
With your main documents, PAL, and SOP drafted, a couple of final steps remain to complete your package. This usually involves biometrics and, for some, a medical check-up.
- Biometrics: Most Nigerian applicants need to provide their fingerprints and a photo. You'll get a Biometric Instruction Letter (BIL) after you submit your application online and pay the fees.
- Medical Examination: In some situations, you might be required to do an upfront medical exam. This has to be done by a panel physician specifically approved by IRCC.
By gathering all these documents systematically, you're setting yourself up for a complete and persuasive application that ticks all of Canada's current immigration boxes.
The Step-by-Step Study Permit Application Process
Alright, you’ve gathered your documents and confirmed you're eligible. Now for the main event: actually applying for your Canadian study permit. I often tell my clients to think of it like cooking a big, important meal. Getting your documents ready was like doing all your food prep. Now, you’re ready to actually start cooking.
The very first thing you need to decide is how you'll submit everything. You have two main routes, and your choice depends on what you're most comfortable with.
Online Application vs. Visa Application Centre (VAC)
The most popular and, frankly, the most efficient method is applying online directly through the official Immigration, Refugees, and Citizenship Canada (IRCC) website. This puts you in the driver's seat. You upload everything yourself and get updates straight from the source, which usually means faster communication.
Your other option is to go through a Visa Application Centre (VAC) here in Nigeria. A VAC will help you submit a paper-based application and is also where you'll get your biometrics done. This is a good choice if you're not confident with online forms or just prefer having someone to guide you in person.
Here’s a quick breakdown to help you pick a path:
Feature Online Application Visa Application Centre (VAC) Speed Generally quicker for both processing and getting updates. Paper applications can have delays from courier times and manual handling. Convenience Apply from anywhere you have an internet connection. You need to physically visit a centre, which are in Lagos or Abuja. Control You are directly responsible for uploading and managing your documents. VAC staff handle your papers, which adds an extra step to the process. Support It's a self-guided journey using IRCC's online resources. Offers paid, in-person assistance if you need it. For most people who are comfortable using a computer, the online route is the clear winner. It removes the middleman and gets your application into the IRCC system instantly.
Filling Out the Forms and Paying Fees
Once you've chosen your method, it's time to tackle the application forms. Be meticulous here. I can't stress this enough – even a tiny mistake or a single missed field can cause major delays or even get your application returned. Take your time, read every question carefully, and double-check all your answers.
After the forms are complete, you’ll need to pay the fees. This typically involves two separate costs:
- Application Fee: This is the standard charge to process your study permit. The current fee is CAD $150.
- Biometrics Fee: Nearly all Nigerian applicants need to provide fingerprints and a photo. This costs CAD $85 for an individual.
Remember, these fees are non-refundable. If your application is rejected because it was incomplete or inaccurate, you won't get this money back. It's a good incentive to get everything right the first time!
Booking Your Biometrics Appointment
As soon as you submit your application and pay your fees online, IRCC will send you a Biometric Instruction Letter (BIL). This letter is your golden ticket to book an appointment at a VAC for your fingerprints and photograph.
Do not delay this step. As soon as that BIL lands in your inbox, book your biometrics appointment. Slots at the VACs can get filled up for weeks in advance, and waiting to book will directly hold up your entire application.
The infographic below gives you a sense of the average timeline after you've submitted everything, including your biometrics.
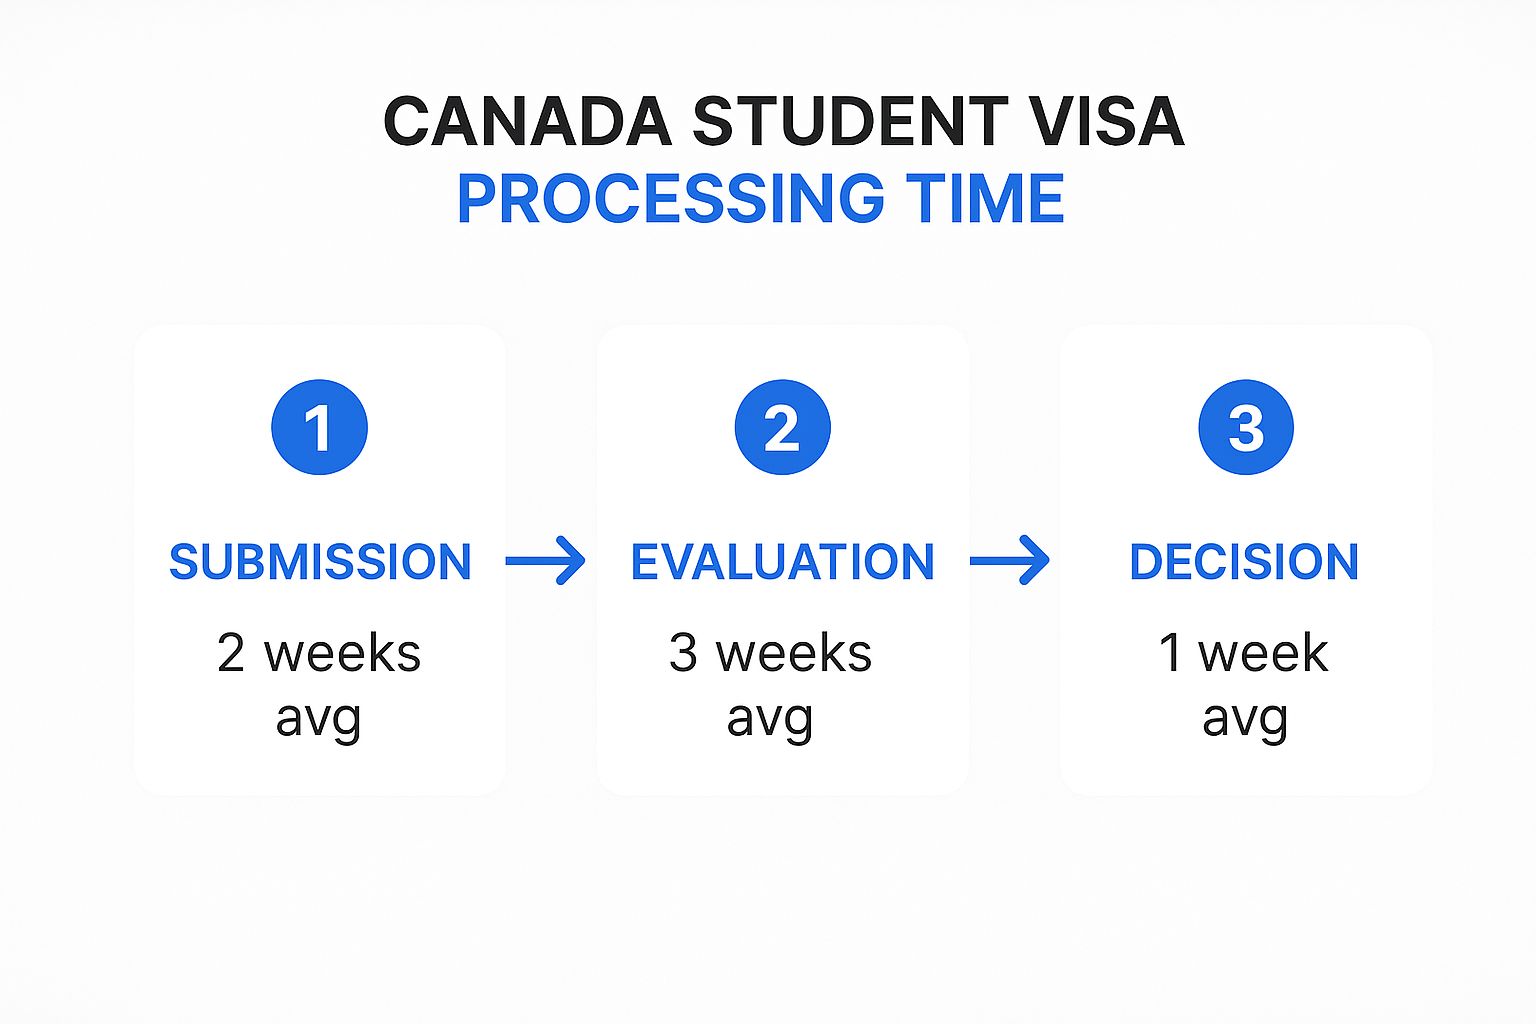
As you can see, the real waiting game begins during the evaluation stage. This is why a perfectly prepared application is so important—it avoids giving the visa officer any reason for extra questions or delays. It's also worth noting that the process is changing. Since the 2024 study permit cap was announced, the number of new international students arriving has fallen by about 40%. Projections for 2025 suggest this trend will continue as Canada focuses more on applicants already in the country. You can dive deeper into this shift by reading this detailed analysis of student mobility trends.
How Recent Policy Changes Affect Nigerian Applicants
If you're a Nigerian student with your sights set on Canada, you need to know that the game has changed. The Canadian government has rolled out some major policy updates that are directly impacting how, and how many, international students can come to the country.
The biggest headline is the new national cap on study permits. In simple terms, Canada is putting a limit on the number of new international students it will accept. This was done to ease the pressure on housing and other resources. For you, this means one thing: the competition just got a lot tougher.
This isn't just speculation; the numbers tell the story. In the first quarter of 2024, there was a significant drop in new study permits issued. For students from Nigeria, the decline was especially steep—a staggering 29% fall compared to the previous year. You can get more details by exploring the full data on the Q1 study permit drop.
Navigating the New Competitive Environment
So, what does this mean for your application strategy? With fewer spots up for grabs, especially in popular provinces like Ontario and British Columbia, you can no longer just apply to a big-name university in Toronto and hope for the best. You've got to be more strategic.
The new Canada student visa rules have hit provinces like Ontario the hardest, giving them far fewer student slots to fill. This means a well-prepared application to a university in a less popular province, like Manitoba or Saskatchewan, could actually have a higher chance of success. It’s all about playing the numbers game smartly.
Your choice of province is no longer just a preference—it’s a core part of your application strategy. Don’t put all your eggs in one basket. Applying to schools in different provinces, especially those with more available spots, can dramatically increase your odds.
You're not just applying to a school anymore; you're competing for a limited provincial spot. To get a full picture of the entire journey, our guide on how to relocate to Canada from Nigeria provides a step-by-step plan that can help you navigate this new landscape.
What This Means for Your Application
In this tougher climate, you need to do more than just meet the requirements. You need an application that is absolutely perfect and tells a compelling story.
- Flawless Documentation: Think of your application as a final exam with no room for error. Every single document must be accurate, complete, and submitted exactly as required.
- A Powerful Statement of Purpose: Your SOP is your chance to shine. It must clearly explain why you chose your specific course and, just as importantly, why you chose that particular province. If you're applying to a school in a less-common province, you need to sell it. Explain how it aligns perfectly with your academic and career ambitions.
- Strong Ties to Nigeria: Proving you intend to return home after your studies is more critical than ever. You have to make a convincing case to the visa officer.
Your goal is to build such a strong, well-researched application that it cuts through the noise of the increased competition. Show the visa officer you understand the new rules and have built a thoughtful strategy around them. It proves you’re a serious candidate.
Staying Legal: How to Keep Your Student Status in Canada
Getting your study permit and landing in Canada is a huge win, but the journey doesn't stop there. Think of your student status as an ongoing agreement you have with the Canadian government. To keep your side of the bargain, you need to stick to the Canada student visa rules diligently.
Failing to follow these rules isn't a small mistake—it can lead to your study permit being cancelled and even ruin your chances of getting a Post-Graduation Work Permit (PGWP) later. Knowing what's expected of you from the very beginning is the key to a stress-free and successful time in Canada.
You're Here to Study, So Study!
This might sound obvious, but the number one rule is that you must stay enrolled and actively pursue your studies at your Designated Learning Institution (DLI). This means you can't just take a long, unapproved break from your programme whenever you feel like it.
Your main reason for being in Canada is to be a student, and Immigration, Refugees and Citizenship Canada (IRCC) needs to see that you're making real progress towards finishing your degree or diploma. If you stop showing up for classes or drop out completely, you've broken the terms of your study permit. It’s that simple.
The Rules on Working While You Study
One of the best perks of being an international student is the ability to work and gain some Canadian experience. It’s a fantastic opportunity, but it comes with very strict limits you absolutely have to follow.
- When school is in session: You can work a maximum of 20 hours per week off-campus.
- During scheduled school breaks: You're free to work full-time during official holidays, like the summer or winter breaks listed on your school's academic calendar.
Never, ever work more than the 20-hour weekly limit while your classes are ongoing. This is a major violation and can get you into serious trouble, making it nearly impossible to get other permits or visas in the future.
Staying on the right side of the law also means you have to keep meeting all the other conditions of your study permit. This includes being a full-time student both before you start working and after your work period ends.
When Plans Change: Extending Your Permit or Switching Schools
Life is unpredictable. Sometimes your programme might take a bit longer than you originally thought. If that happens, you must apply to extend your study permit before your current one expires. If you let it expire, you'll be considered "out of status," which creates a whole new set of problems.
Likewise, if you decide to change your DLI, you have a responsibility to notify Immigration, Refugees and Citizenship Canada (IRCC) about the switch. Simply changing schools without telling IRCC is another way to violate your permit conditions.
Part of staying in good standing also means proving you can still support yourself financially. For a good refresher on this, check out our detailed guide on the proof of funds requirements for Canada. Following these rules carefully is the best way to protect your status now and your opportunities in Canada for the future.
Frequently Asked Questions
Let's tackle some of the most common questions we get from Nigerian students. Getting these details right can make all the difference, so we've broken down the answers to give you the clarity you need to move forward with your application confidently.
How Much Money Do I Need for Proof of Funds?
This is the big one, isn't it? It’s probably the most frequent question we hear. As of 2024, the rules have become much stricter. If you’re applying to study anywhere in Canada outside of Quebec, you must prove you have enough money to cover your full first year of tuition, plus an additional CAD $20,635 for living expenses.
Think of it like this: if your tuition for the year is CAD $18,000, you’ll need to show a total of CAD $38,635 ($18,000 for tuition + $20,635 for living costs). This isn't just a suggestion; it's a hard rule. The best way to prove this is with clean, verifiable bank statements showing a consistent history or, even better, a Guaranteed Investment Certificate (GIC) from a Canadian bank.
Can a Previous Visa Refusal Affect My New Application?
A past refusal isn't the end of the road, but it does mean your next application will be under a microscope. It’s absolutely critical that you figure out exactly why you were rejected the first time. The visa officer's notes are your roadmap here—they tell you precisely which areas of your application were weak.
You must be 100% upfront about any previous refusals. Trying to hide it is a serious mistake called misrepresentation, and it will lead to another refusal and could get you banned from applying to Canada for several years.
Your job now is to directly fix the issues from the last attempt. For example, if the refusal was due to weak "ties to home country," your new application needs to be packed with solid proof of your connections to Nigeria—think family responsibilities, property ownership, or a clear career path waiting for you back home.
What Are the Biggest Mistakes to Avoid?
Beyond typos and missing signatures, a few major blunders can completely derail an otherwise strong application. Knowing what they are ahead of time is half the battle.
Here are three of the most common—and critical—mistakes we see:
- A Vague Statement of Purpose: Your SOP can't just be a generic letter. It needs to tell a compelling story that connects your chosen course in Canada directly to your career ambitions back in Nigeria. Be specific.
- Inconsistent Financial Documents: Visa officers are trained to spot red flags. A large sum of money suddenly appearing in your account right before you apply looks suspicious. They want to see a stable, legitimate financial history.
- Ignoring the "Ties to Home Country" Requirement: This is a deal-breaker. You have to actively convince the visa officer that you have strong reasons to return to Nigeria when your studies are done. This isn’t something you can gloss over.
Planning your move abroad can feel overwhelming, but you don’t have to figure it all out on your own. JapaChat is Nigeria’s AI immigration expert, built to give you instant, reliable answers to all your questions. Get the clarity and confidence you need by visiting JapaChat today.
-
UK Visa Processing Time in Nigeria Explained
So, you’ve submitted your UK visa application from Nigeria. What now? The waiting game begins, and it can be one of the most nerve-wracking parts of the process.
The official benchmark for most standard applications from Nigeria is 3 weeks, which translates to 15 working days. However, this is just a starting point. Depending on the visa you're applying for and whether you opt for a faster service, you could get a decision in as little as one day or find yourself waiting up to 24 weeks.
Understanding UK Visa Timelines from Nigeria
Waiting for a visa decision can feel like your life is on hold. To get a realistic idea of what to expect, think of the UK visa system like different lanes at a busy toll plaza. There’s the standard lane, a faster priority lane, and a super-fast express lane. Each has its own cost and speed, and the one you pick determines how quickly you get to the other side.
Knowing these official timelines is your first step to planning properly. UK Visas and Immigration (UKVI) has set service level agreements (SLAs) to give applicants a predictable timeframe. These aren't just random numbers; they're the targets that visa decision-making centres work hard to meet.
Standard vs. Expedited Services
For most non-settlement visas, like those for visiting family or a short course, the standard processing time is the default. But if you’re in a hurry, you can often pay extra to speed things up.
- Standard Service: This is the baseline option with the longest wait. It's a good fit if you're not on a tight schedule and have planned your trip well in advance.
- Priority Service (PV): This cuts the wait down significantly, usually to around 5 working days. It’s a very popular choice for people who need to travel for work or other urgent reasons.
- Super Priority Service (SPV): This is the Usain Bolt of visa services, promising a decision by the end of the next working day. It comes with a hefty price tag and is best reserved for true emergencies.
It’s really important to remember that these faster services aren't always on offer. Their availability can change depending on how busy the Visa Application Centres (VACs) in Nigeria are and what UKVI's global processing capacity looks like at any given time.
A common mistake people make is thinking that paying for a priority service guarantees a visa. It doesn't. It only guarantees a faster decision—and that decision could still be a refusal. The strength and quality of your application are what truly matter.
Let's look at the official numbers from the UK Home Office. For most non-settlement applications from Nigeria, UKVI’s goal is to process:
- 90% within 3 weeks
- 98% within 6 weeks
- 100% within 12 weeks
For more complicated settlement applications, the targets are understandably longer. They aim to decide 98.5% within 12 weeks, with the rest being completed within 24 weeks. This system is designed to manage expectations, but real-world times can still shift. You can explore these official standards to see exactly what they mean for applicants in Nigeria.
What Factors Influence Your Visa Processing Time?
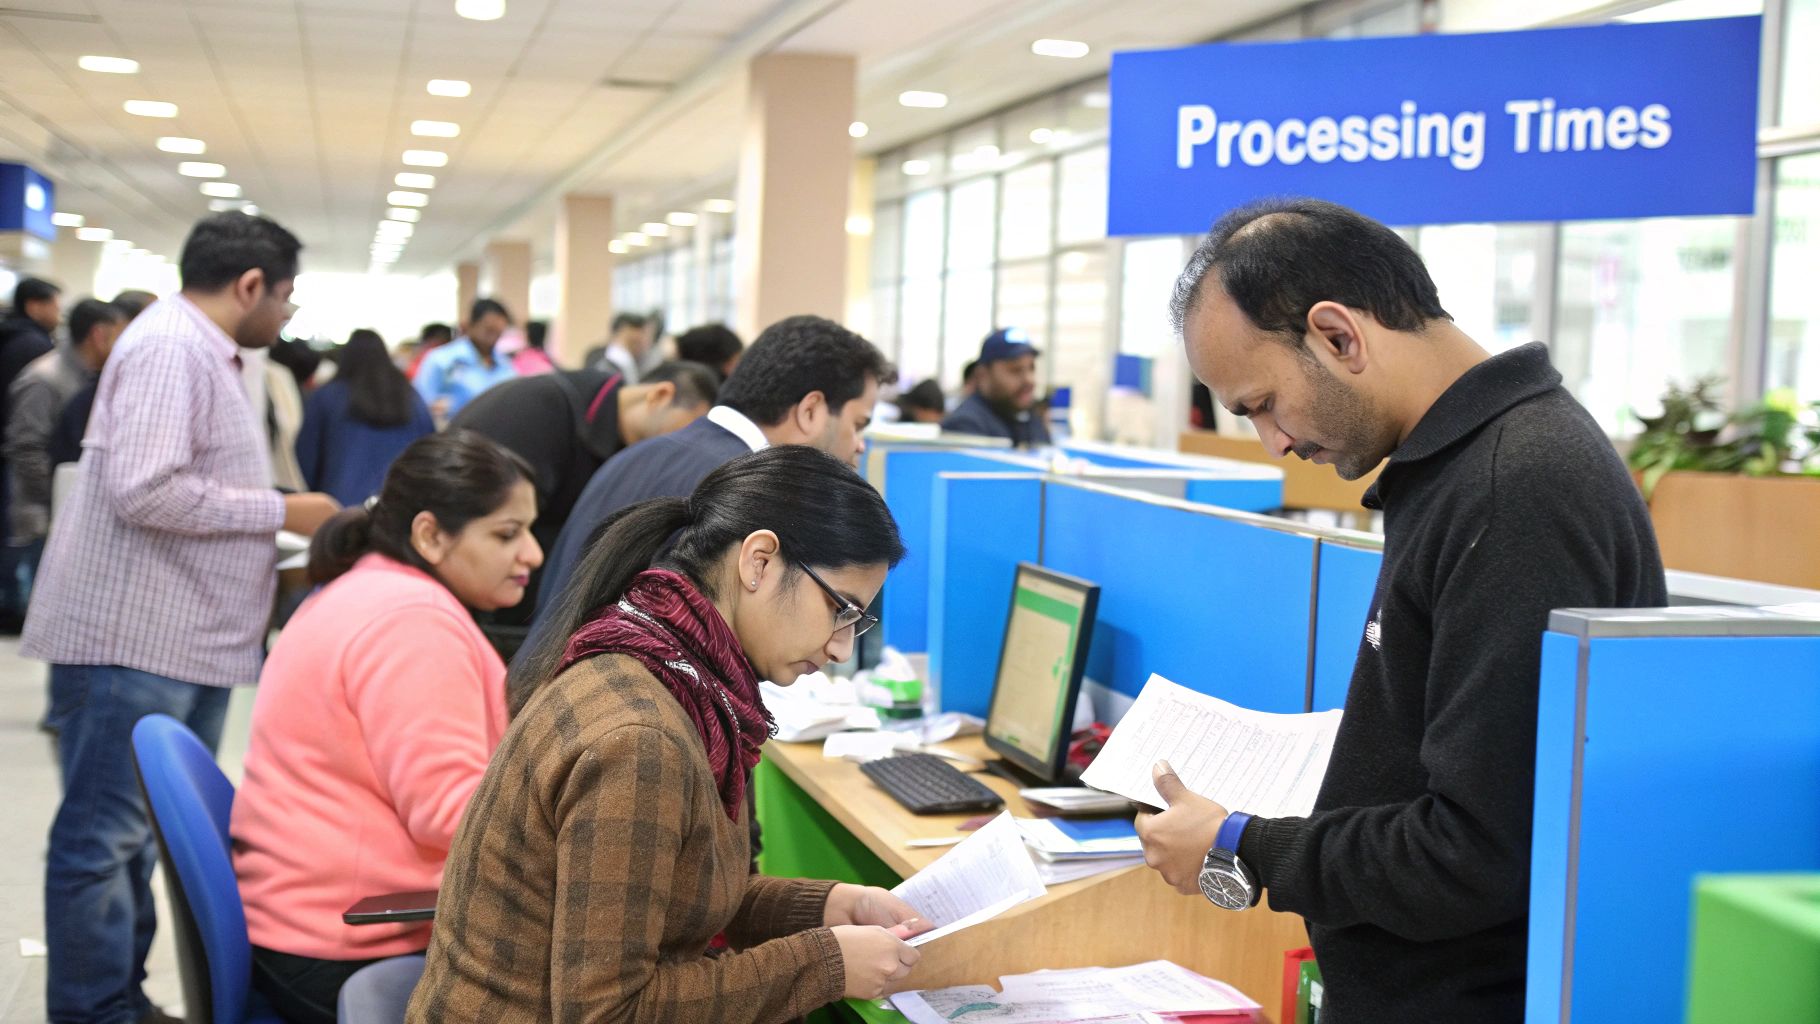
Ever wondered why one person gets their visa decision in a few weeks, while another is left waiting for months? It’s a common frustration, but the truth is, UK visa processing time isn’t a fixed number. It’s a dynamic process influenced by several key factors that can either speed things up or slow them right down.
Think of your application as a file landing on a decision-maker's desk. A neat, simple file is quick to review and clear. A messy, complicated one with missing pages? That one gets put aside for later. Understanding what makes a file "simple" or "complicated" is the first step to managing your own expectations.
The Type of Visa You Are Applying For
This is the biggest piece of the puzzle. Different visas require vastly different levels of scrutiny from the Home Office, and that directly impacts how long they take. A short-term visa is a much simpler affair than an application for permanent settlement.
- Visitor Visas: These are usually the quickest. The checks are relatively straightforward, focusing on whether you genuinely intend to visit and then return home.
- Student Visas: These are also processed quite efficiently, especially before a new academic year. The UK government has a clear interest in getting international students into the country on time.
- Work Visas: These take a bit longer. Officials need to verify your Certificate of Sponsorship (CoS) and check your employer’s credentials, which adds extra steps to the process.
- Settlement Visas: These are the most complex by far. If you're applying as a spouse or family member, expect the longest wait times. Caseworkers must perform deep dives into your relationship, financial situation, and long-term plans.
Your application is essentially a case file. A simple case file takes less time to read and approve than a thick, complex one filled with extensive evidence that needs cross-referencing.
The Accuracy and Completeness of Your Application
Here’s where you have the most control. A perfect, mistake-free application can sail through the system. Any errors or missing documents act like roadblocks, forcing a caseworker to hit the brakes, ask for more information, and delay the final decision.
Common mistakes that will grind your application to a halt include:
- Missing Documents: Forgetting to upload a crucial bank statement, a letter of invitation, or your TB certificate is a guaranteed delay.
- Incorrect Information: Even a simple typo in your passport number or an error in your employment history can raise a red flag and trigger extra checks.
- Poor Quality Scans: If your supporting documents are blurry, cut off, or unreadable, UKVI can't verify them and will have to ask you to resubmit.
The goal is to submit an application that leaves no room for questions. It pays to double, and even triple-check every single detail before you hit that submit button.
The Time of Year You Apply
Just like any large organisation, UK Visas and Immigration (UKVI) has its peak seasons. If you apply during these incredibly busy periods, you can expect longer waits, even if your application is flawless. For applicants from Nigeria, these are the times to be aware of:
- Summer (June-August): This is a very popular time for holiday travel and family visits, leading to a surge in applications.
- Pre-Academic Season (July-September): A huge wave of student visa applications comes in right before the start of the new school year.
If your timeline allows, try applying during the quieter months like October, November, February, or March. When there are fewer applications in the queue, yours is more likely to get a caseworker's attention sooner. Immigration policies are also constantly changing, which can affect processing. Staying informed is key; you can read about the new UK immigration white paper and what every Nigerian should know to keep up to date.
How Global Events Create Local Delays

It’s a frustrating reality for so many Nigerian applicants: a crisis unfolding thousands of miles away can suddenly throw your visa plans into chaos. The UK visa processing time you were counting on can stretch out without warning, not because of anything you did wrong, but due to a much larger, global domino effect.
Think of UK Visas and Immigration (UKVI) as a single, global operation with a limited number of staff. When a major international event hits—like a conflict or a natural disaster that creates a flood of refugee applications—UKVI has to shift its people and resources to handle those urgent humanitarian cases first.
This sudden pivot inevitably creates a backlog. It's like a major motorway suddenly having three of its four lanes shut down for emergency services. The regular traffic, which in this case includes visa applications from places like Nigeria, doesn't just stop; it slows to an absolute crawl. The whole system gets congested, and standard timelines go out the window.
The Ripple Effect on Nigerian Applicants
When UKVI diverts its resources, the shockwaves are felt directly at the Visa Application Centres (VACs) in Lagos and Abuja. One of the first things to go is usually the priority and super-priority visa services. These paid services, which normally promise a quick decision, get suspended because the staff needed to fast-track them have been reassigned to the emergency.
This leaves everyone—whether you're applying for a work, study, or family visa—stuck in the standard processing queue. And that queue is now longer and moving much more sluggishly. A wait that should have been three weeks can easily turn into six weeks or more, causing chaos for travel dates, job start times, and university enrolment.
We saw this exact scenario play out during a major slowdown in 2022. Historically, a lot of the ups and downs in UK visa processing times for Nigeria can be traced back to these kinds of geopolitical pressures. From mid-March 2022, UKVI temporarily paused all priority services for work, study, and family routes. The official reason was the urgent need to prioritise applications from Ukrainian refugees, which created a massive backlog for Nigerian applicants and pushed standard processing times far beyond the usual three weeks.
Why Delays Are Rarely Personal
It’s so important to understand this wider context. When your visa decision is taking forever, it’s natural to worry that you’ve made a mistake or that your application is under extra scrutiny. While that's always a possibility, widespread delays hitting lots of people at the same time are almost always a symptom of external pressures on the UKVI system.
The key thing to remember is that these delays aren't a personal judgement on your application. They are systemic problems caused by the UK Home Office reacting to a global crisis. Your file is simply caught in a queue that’s been disrupted by things completely out of your control.
This is why applying as early as you possibly can is non-negotiable. Building in a buffer of several extra weeks, or even a couple of months if you can, gives you a crucial safety net against these unforeseen global events. On top of that, immigration policies are always changing, so keeping up with the latest information is essential. Understanding the new UK immigration rules will help you prepare a much stronger application.
Knowing that these delays are a real possibility helps you set realistic expectations. It can shift your mindset from one of anxiety to one of smart, strategic planning, giving you the clarity to manage the long wait.
Processing Timelines for Different Visa Types
It's a common misconception that all UK visa applications are processed at the same speed. The truth is, the uk visa processing time can be worlds apart depending on which route you're taking. A straightforward visitor visa application simply doesn't get the same microscopic examination as one for settling permanently with a spouse.
Knowing these differences is the first step to managing your expectations and planning your journey without unnecessary stress. Let’s break down the typical timelines for the visa categories most popular with Nigerian applicants.
Visitor and Student Visas
For many Nigerians, a trip to the UK starts with either a visitor or student visa. These are usually the quickest to get a decision on because the criteria are quite direct.
-
Standard Visitor Visa: Planning a holiday, visiting family, or attending a short business conference? You'll be applying for this. The standard turnaround is typically around 3 weeks (15 working days). The main focus here is proving you intend to visit temporarily and will return home, which makes the assessment relatively fast.
-
Student Visa: If you've secured a place at a UK university and have your Confirmation of Acceptance for Studies (CAS), you're in a strong position. UK Visas and Immigration (UKVI) also aims to process these within 3 weeks, especially as they know students need to arrive for their term dates.
For both of these, you can often pay for the Priority Visa (PV) service to get a decision in just 5 working days. A word of caution, though: this service can be suspended without warning during peak times, so always check if it's available when you submit your application.
Work Visas
Work visa applications, like the Skilled Worker route, have a few more layers. UKVI isn't just looking at you; they're also verifying your UK-based employer. This extra step naturally adds a bit of time to the process.
The official standard processing time for a work visa submitted from Nigeria is also around 3 weeks. However, because of the extra checks on your Certificate of Sponsorship (CoS) and your employer, these applications are more likely to face slight delays if any questions arise. The 5-day priority service is a popular choice here, especially for people who need to start their new job on a tight schedule.
Settlement Visas
This is where you need to settle in for a long wait. Settlement visas—for joining a spouse, partner, or family member in the UK—are by far the most complex and have the longest processing times.
Think of it like this: a visitor visa application is like a quick security check at an airport gate, but a settlement application is a full, in-depth background investigation. The amount of evidence needed is far greater, and so is the time required to scrutinise every detail.
The standard timeline for settlement applications can be up to 24 weeks (6 months). While many people get a decision sooner, it's crucial to be prepared to wait the full six months. A priority service is sometimes offered for this route, aiming for a decision within 6 weeks, but it comes at a significant extra cost and isn't always available.
Comparative UK Visa Timelines for Nigerian Applicants
To give you a clearer picture, this table compares the typical processing times for the main visa categories when applying from Nigeria. It helps you see at a glance what to expect from both standard and priority services.
Visa Type Typical Standard Timeline Typical Priority Timeline Key Considerations Standard Visitor Visa 3 Weeks (15 working days) 5 Working Days Relatively quick, but priority service availability can fluctuate during peak travel seasons. Student Visa 3 Weeks (15 working days) 5 Working Days Generally reliable, especially if you apply well before the September intake rush. Work Visa 3 Weeks (15 working days) 5 Working Days Can be subject to delays if there are queries about your sponsor or Certificate of Sponsorship (CoS). Settlement (Family) Visa Up to 24 Weeks (6 months) 6 Weeks (when available) The longest and most complex process. The priority service is expensive and not always an option. Plan for the full wait. Remember, these are standard service-level agreements. Real-world events can and do impact these timelines. For instance, in early 2022, standard processing was a brisk 15 working days, but this stretched to 6 weeks after UKVI redirected resources to handle applications from Ukrainian nationals. It’s a powerful reminder of how global events can affect local queues. You can find more details on how these times have shifted for overseas applicants by reading updates on SmithStoneWalters.com.
The image below illustrates the typical response times you can expect when trying to track your application through different channels.
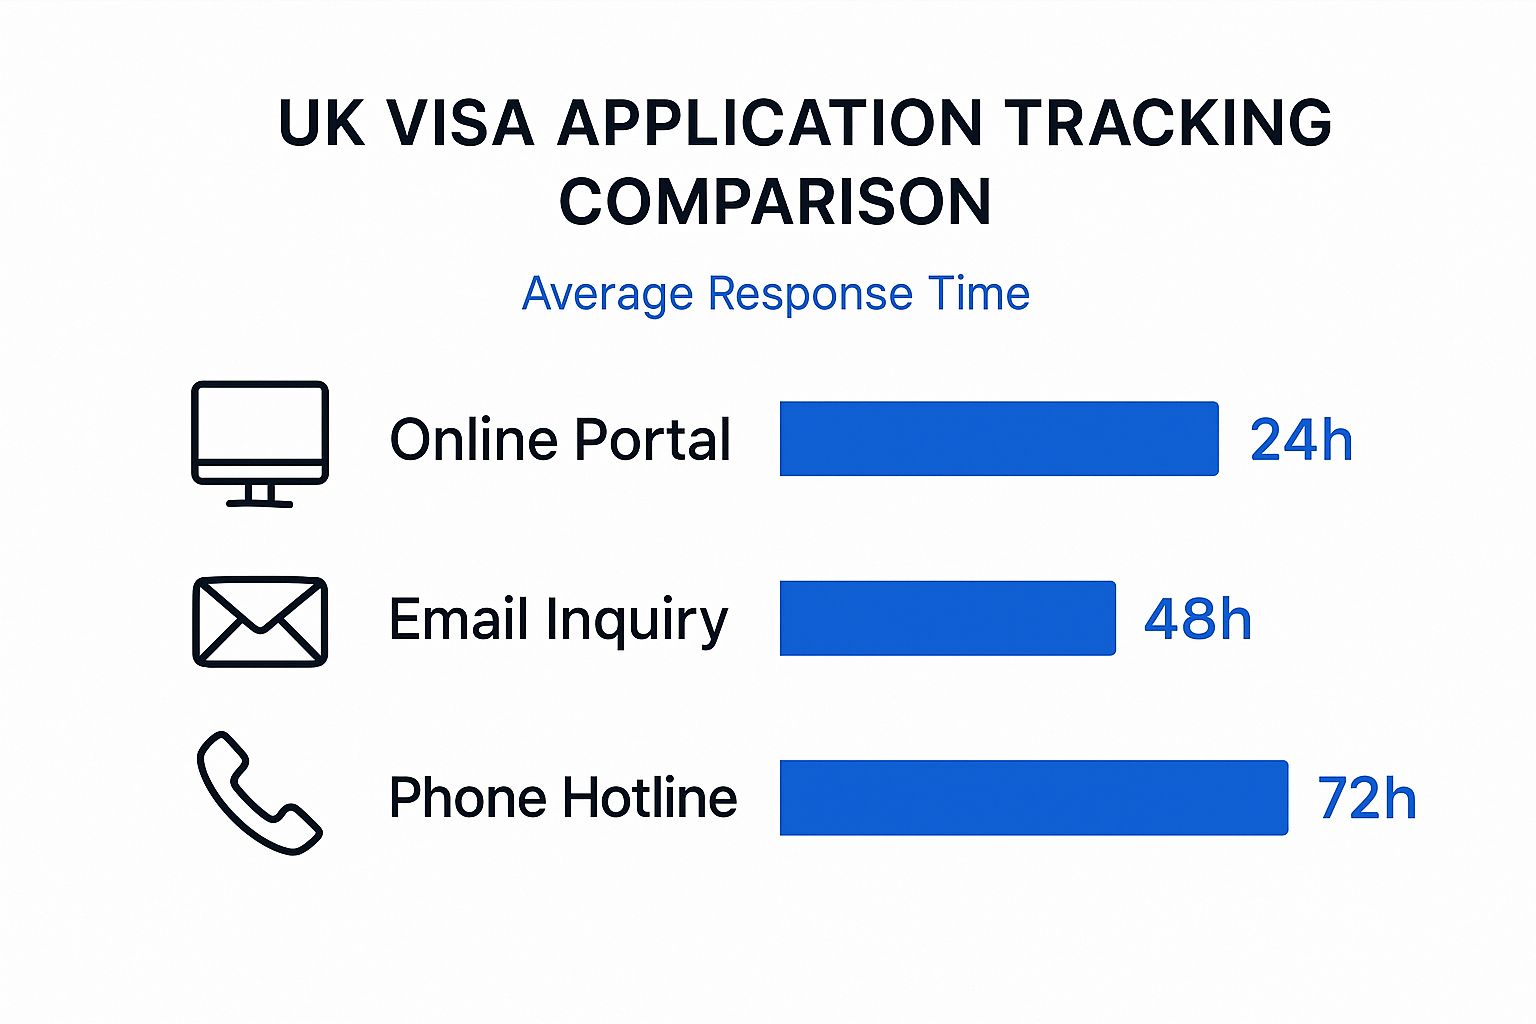
As you can see, checking the online portal is your fastest bet for an update, whereas trying to get through on the phone will likely involve the longest wait.
How to Track Your Application and Handle Delays

Let’s be honest, the waiting period after you’ve submitted your UK visa application can be nerve-racking. You've poured so much effort into getting everything right, and now you're just waiting. But you don't have to be completely in the dark. There are official channels to check on your application's progress and a clear game plan for when things take longer than expected.
After you’ve been to a Visa Application Centre (VAC), like TLScontact in Nigeria, your application is on its way to UK Visas and Immigration (UKVI) for the final decision. It's important to remember that the VAC is your primary point of contact for tracking, not UKVI. You should get a couple of key email updates: one when your application lands at the decision-making centre, and another when your passport is back at the VAC, ready for you.
For a more direct look, you can always log into the online portal of the commercial partner you used (like TLScontact). This is often the fastest way to spot any status changes. If you want to dig deeper into the various tracking tools available, our guide on visa application tracking is a great resource.
Navigating Delays Beyond Standard Timelines
So, what do you do when the standard 3, 6, or even 24 weeks have come and gone with no word? This is where a lot of people start to worry, but it’s crucial to have a strategy. Bombarding UKVI with calls and emails before the standard time is up won’t speed things along; in fact, it can just create more of a backlog.
Once you are officially past the service level agreement for your specific visa, however, it’s perfectly reasonable to follow up. Your first move should be to use UKVI's paid enquiry service. You can do this by email or over the phone.
- Paid Email Enquiry: This is usually the best approach. It gives you a written record of your conversation and lets you lay out all your application details without any confusion.
- Paid Phone Call: This is another option, but you should be ready for potential hold times. Make sure you have all your application details handy, especially your GWF number.
When you reach out to UKVI, think of it less as a complaint and more as a formal request for an update or an escalation. Be polite and to the point. Always include your full name, date of birth, nationality, and your unique GWF (Government Web Form) reference number.
When and How to Escalate Your Case
Escalating your application should really be your last resort. It's a step you take only when the delay is significant and unreasonable, and you've heard nothing from UKVI. Essentially, escalating means you're formally asking for your case to get a nudge because it's fallen far outside the normal timeframe.
Before you jump to escalation, make sure you can tick these boxes:
- You are well past the standard processing time. For a standard visitor visa, this means you've waited much longer than the advertised 3 or 6 weeks.
- You have already made a paid enquiry and either got no response or just a generic, unhelpful reply.
- There are compelling or compassionate reasons for needing a decision, like a non-negotiable job start date or an urgent family situation.
If you meet these criteria, you can file a formal complaint using the official UKVI complaints procedure on the GOV.UK website. This is a much more serious step that triggers an internal review of your case. Just remember, this is for service problems like extreme delays, not for trying to appeal a visa refusal. Knowing these steps gives you a clear plan, which can make the long wait a little less stressful.
Your Top Questions About UK Visa Processing in Nigeria
Even when you think you have a handle on the timelines, the waiting period for a UK visa decision can be a stressful time, filled with nagging questions and uncertainty. It’s a common experience for Nigerian applicants, and it's easy for myths and misunderstandings to take root while you wait.
In this section, we're tackling the most frequent and pressing questions we hear directly from applicants in Nigeria. We've gathered these to address the common pain points and give you clear, straightforward answers. Think of this as your practical guide to cutting through the noise, so you can navigate the post-submission wait with more confidence and a lot less anxiety.
Can I Pay to Speed Up My Application After I've Already Submitted It?
This is a question we see all the time, and the answer is a firm no. Once your application and biometrics are submitted at the Visa Application Centre (VAC), you cannot upgrade to a priority or super-priority service.
The service you choose—whether standard, priority, or super-priority—is locked in right at the start. Your application is immediately sorted into a specific processing queue based on that initial choice. A good way to think about it is like ordering something online; you can't switch from standard delivery to next-day express after the parcel has already left the warehouse.
This makes your choice at the VAC absolutely crucial. You have to weigh your travel needs against your budget before you finalise your submission. If you suspect you might need a quick decision, it's vital to select and pay for the appropriate priority service from the get-go, assuming it’s available for your visa type.
What Does It Mean When My Application Is 'Not Straightforward'?
Getting an email from UKVI that says your application is "not straightforward" can definitely be worrying, but it's not a sign of an impending refusal. It simply means your application needs some extra checks and won't be processed within the standard uk visa processing time.
Think of it as the system flagging your file and saying, "Hang on, we need to take a closer look at this one."
Several things can trigger this. The most common reasons include:
- Document Verification: UKVI might need to contact your bank, employer, or the university that issued your Confirmation of Acceptance for Studies (CAS) just to confirm your documents are legitimate.
- Interview Request: Sometimes, a caseworker may want to speak with you directly to get clarity on certain parts of your application.
- Past Immigration Issues: If you've had a previous visa refusal for the UK or even another country, your application will automatically get a more detailed review.
- Inconsistencies: Even minor discrepancies in the information you've provided can lead to extra checks.
The "not straightforward" email is a signal for patience, not panic. The best thing you can do is wait for UKVI to get in touch. They will contact you directly if they need anything else from you.
Does It Matter If I Apply from Lagos or Abuja?
The specific Visa Application Centre (VAC) you use in Nigeria—be it in Lagos, Abuja, or anywhere else—has zero impact on the actual decision-making time. All applications, no matter where they're submitted, are scanned and sent electronically to the same UKVI decision-making hubs.
The processing timeline is all about UKVI’s internal queues and how many caseworkers are available, not the physical VAC location. The VACs in Lagos and Abuja are like different post office branches; they both send your letters to the same central sorting facility for processing.
However, your choice of VAC can have an indirect effect on your overall timeline. Appointment availability can differ quite a bit between centres. One location might have open slots next week, while another could be booked solid for a month. This affects how quickly you can submit your application, but once it's in the system, it joins the same queue as everyone else's.
Will a Previous UK Visa Refusal Make My New Application Slower?
Yes, almost certainly. Having a previous refusal on your record will extend the uk visa processing time for your new application. It automatically flags your case as "not straightforward" because the caseworker is required to do a much more thorough review.
The official looking at your file won't just assess your new documents in isolation. They will pull up your entire immigration history, including the old application file and the specific notes explaining why it was refused. Their job is to be convinced that you have completely fixed the problems that caused the first rejection.
For instance, if your previous visa was refused because of concerns about your finances, the caseworker will now scrutinise your bank statements and proof of funds with extra care. This deep-dive re-examination simply takes more time.
While it doesn't mean a predictable delay of a set number of weeks, you should definitely plan for a longer wait. It's also critical that you are completely upfront about the past refusal in your new application. Clearly explain how your circumstances have changed and back it up with solid evidence. Trying to hide a refusal is a huge mistake that can result in a lengthy ban.
Planning your journey abroad can feel overwhelming, but you don't have to do it alone. JapaChat is Nigeria's AI immigration expert, designed to give you instant and accurate answers to your most pressing questions. From visa requirements to travel logistics, our platform provides guidance built for the unique challenges Nigerian applicants face. Get started for free and join over 10,000 Nigerians who are planning their move with clarity and confidence. Start your journey with JapaChat today.
-
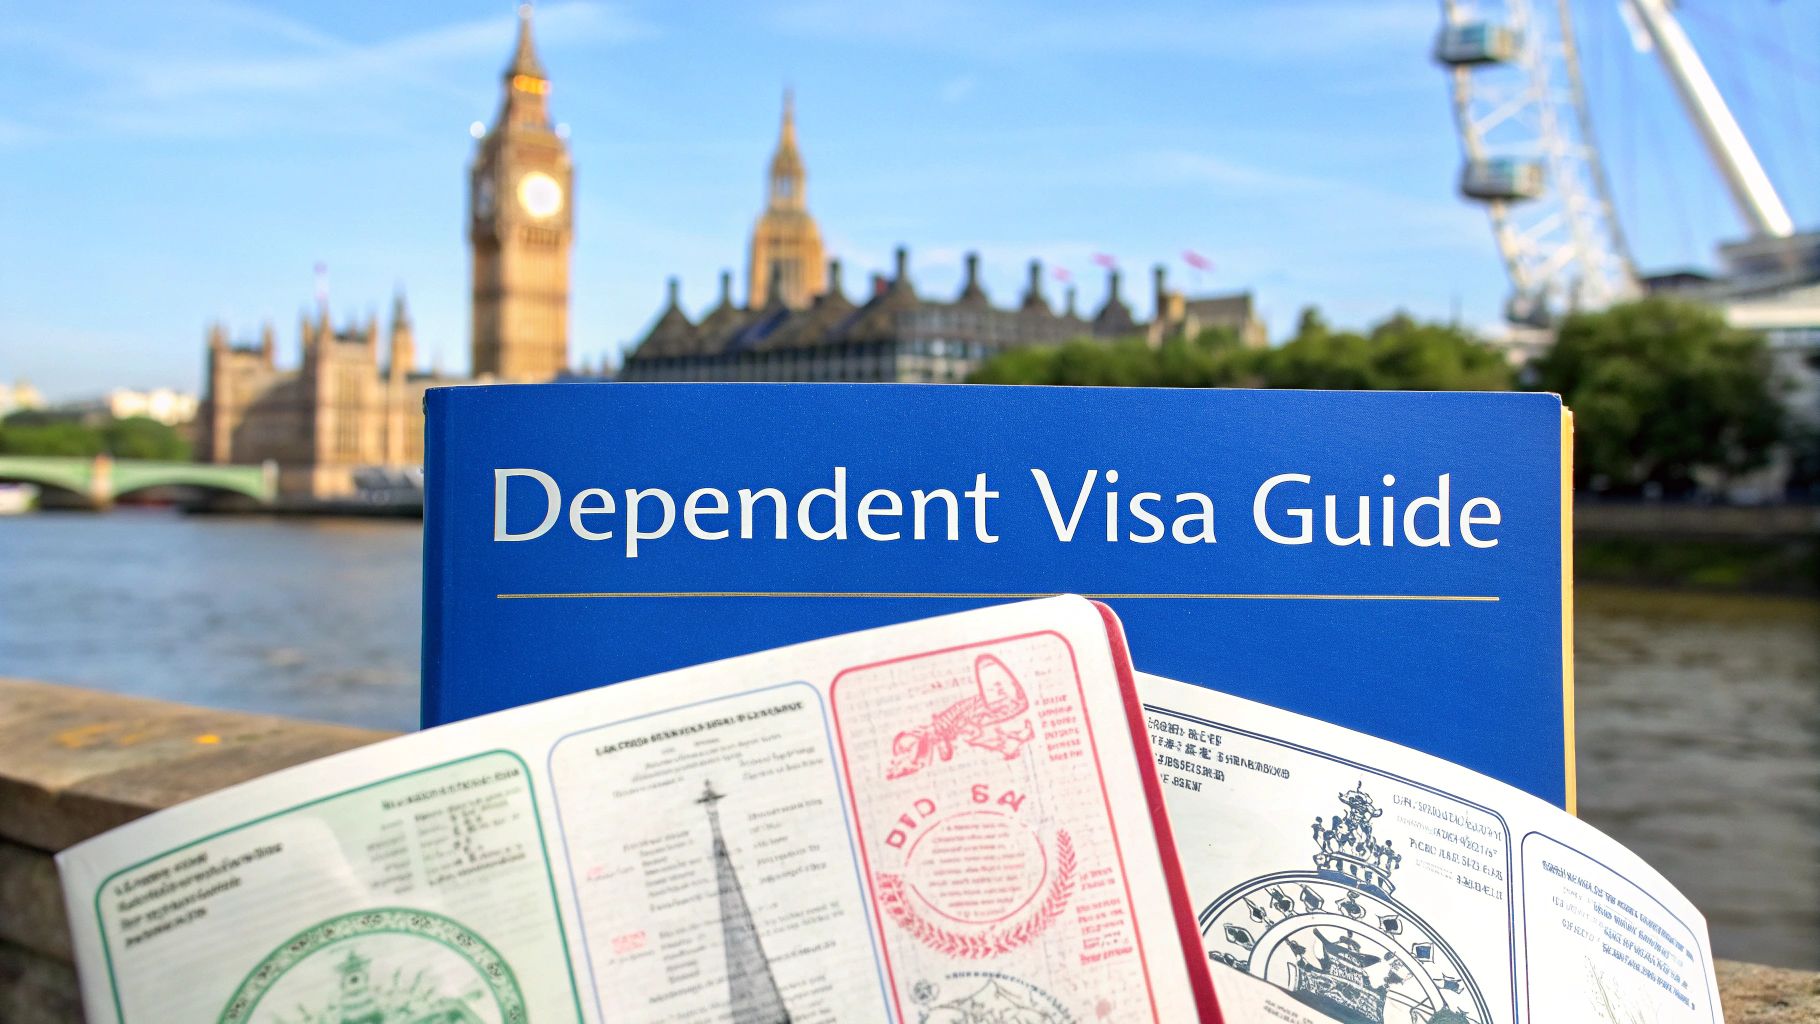
Dependent Visa UK Requirements: Your Essential Guide
Think of a UK Dependent Visa as a linked ticket. It’s not a standalone pass to enter the UK; instead, it allows you to join someone who already holds a primary visa, like a work or study visa. This connection is the most important thing to understand – your right to be in the UK is completely tied to the main visa holder.
The entire system is designed with a simple goal in mind: keeping families together.
Understanding the UK Dependent Visa
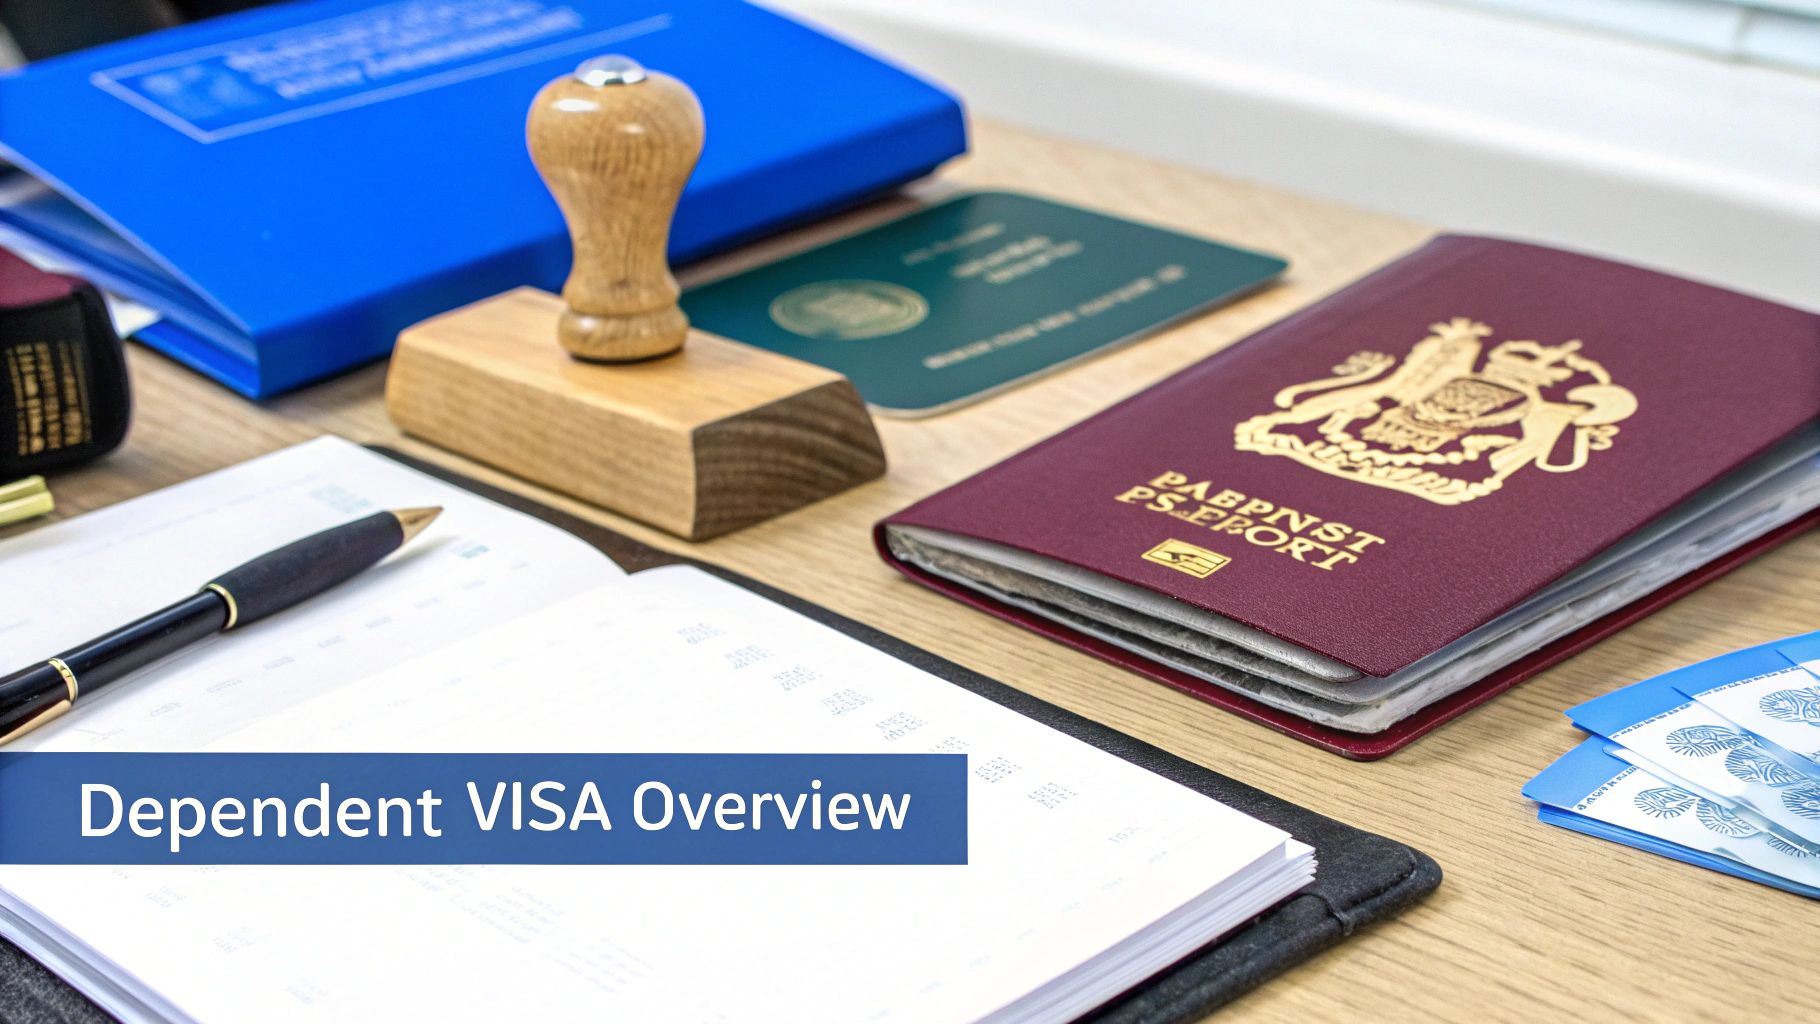
Imagine the UK's immigration system as a collection of different routes. The Dependent Visa isn't a route in itself but rather a path that branches off from another, primary one. For example, if the main applicant has a Skilled Worker visa, their family members join them on that specific path.
This principle underpins all dependent visa UK requirements. Your journey, from the initial application right through to potentially settling in the UK, will directly mirror the person you're joining. If their visa is granted for three years, yours will be too. If they have to leave the UK, your permission to stay generally ends as well.
Who Counts as a Dependent?
The UK Home Office is quite specific about who qualifies as a 'dependent'. It’s the first and most critical hurdle you'll face. Broadly, dependents fall into two clear categories:
- Partners: This can be a spouse, a civil partner, or an unmarried partner. For unmarried partners, you must prove you've been in a genuine relationship, like living together, for at least two years.
- Children: This typically refers to your biological or adopted children who are under the age of 18 when you first apply.
Key Visa Categories That Allow Dependents
Not every person with a UK visa can bring their family along. The ability to sponsor dependents is tied to specific visa routes, and the rules have changed quite a bit recently.
The main visa types that currently permit you to bring dependents are:
- Work Visas: Popular routes like the Skilled Worker and Health and Care Worker visas are key examples.
- Study Visas: This has become much more restricted. Now, it's mainly available for students enrolled in specific postgraduate research programmes, such as a PhD.
- Other Routes: Certain other pathways, like the Global Talent or UK Ancestry visa, also include provisions for family members.
The most important thing to remember is that a dependent's status is never independent. It's a linked permission that only exists as long as the main applicant’s visa is valid. Getting your head around this relationship is the first step to a successful application.
Who Can Apply as a Dependent?
Before you even think about gathering documents, the first crucial step is figuring out if your family members are actually eligible to join you. The Home Office has very specific rules about who qualifies as a ‘dependent’, and it’s not as simple as just being related. Think of it like a guest list for a wedding – you have to be on the list to get in.
The rules mainly cover two groups: your partner and your children. Getting this part right from the start is absolutely essential. A simple mistake here can bring your entire application to a grinding halt, so understanding the dependent visa UK requirements is non-negotiable.
What Counts as a 'Partner'?
In the eyes of the Home Office, 'partner' is a legal term, not a casual one. For your relationship to be recognised for a dependent visa, it needs to fit neatly into one of three official categories.
You must be the main visa holder's:
- Spouse (legally married)
- Civil partner (in a formal, legally recognised civil partnership)
- Unmarried partner
The 'unmarried partner' route is the one that requires the most proof. You'll need to show that you've been in a relationship that’s like a marriage or civil partnership for at least two years straight before applying. This isn't just about marking time on a calendar; it's about proving you've built a life together.
The Home Office needs to be completely convinced that your relationship is ‘genuine and subsisting’. This means they'll be looking for solid proof, like shared bank accounts, tenancy agreements in both your names, and other evidence showing a real commitment to a future together. Just saying you've been together for two years won't be enough.
Are Your Children Eligible?
For children, the criteria are just as strict. Their eligibility hinges on their age and how much they rely on you, the main visa holder.
Generally, a child will qualify if they are:
- Under 18 years old when the first application is submitted.
- Not living an independent life – meaning they aren't married, in a civil partnership, or financially supporting themselves.
If your child is over 16, you’ll need to provide more compelling evidence to show they are still financially dependent on you and not living on their own. For children who are over 18 but were granted a dependent visa before their 18th birthday, they can usually extend their stay, as long as they can prove they still aren't living an independent life.
Which Visa Holders Can Bring Family?
This is a critical point: not everyone with a UK visa can bring their family. Recent UK immigration rule changes have tightened these rights considerably, especially for students. For example, new regulations now only allow student dependents to come with individuals on specific postgraduate research programmes, like a PhD.
This particular change has had a huge effect. In the first six months after it came into force, the number of dependent visas granted to students plummeted by a massive 80% compared to the year before. To put that in perspective, in the year ending June 2024, the total number of sponsored study visas for main applicants dropped by 13%, with the biggest fall seen among non-PhD students who used to be able to bring family. You can read more about the impact of these visa changes on davidsonmorris.com.
Right now, the most common visa routes that still allow you to bring dependents are:
- Skilled Worker Visa
- Health and Care Worker Visa
- Global Talent Visa
Always double-check that the main applicant’s visa route actually permits dependents before you spend any time or money on an application.
Meeting the Financial and Accommodation Rules
Let's talk about two of the biggest hurdles in any UK dependent visa application: money and housing. Getting these right is absolutely crucial. The Home Office needs solid proof that the main applicant and their family can stand on their own two feet financially, without needing to access public funds. Honestly, this is where many applications fall apart, so it pays to be meticulous here.
Think of the financial requirement – often called ‘maintenance funds’ – as your family’s financial safety net. It’s not a fee you pay to the government. Instead, it’s a specific amount of savings you must have sitting in a bank account, ready to cover your family's living costs when they arrive.
Required Maintenance Funds per Dependent
The exact amount you need to show depends on the main visa holder's route. This money is in addition to any funds the main applicant has to prove for their own visa.
Main Applicant's Visa Route Required Funds per Dependent Notes Skilled Worker £285 for a partner This is the most common requirement. £315 for the first child £200 for each additional child Student £845 per month (up to 9 months) for London Calculated per dependent. £680 per month (up to 9 months) for outside London Calculated per dependent. Global Talent £630 per dependent The amount is the same for partners and children. It’s not enough to just have the money. You must prove the funds have been in an accessible bank account for at least 28 consecutive days before you submit the application. This is the Home Office's way of verifying that the money is genuinely yours and wasn’t just deposited for the sake of the application. Proper financial planning is key for long-term success as an expat; this helpful guide to financial planning for expats offers some great insights.
Proving You Have a Suitable Place to Live
Alongside the bank statements, you need to show you have a proper home lined up for your family in the UK. The Home Office wants to see that your accommodation is adequate and won’t be overcrowded by UK standards. It’s also a check to ensure you won’t be relying on public housing assistance.
Your accommodation must be owned or exclusively occupied by your family. This means you can't propose living arrangements that would be considered overcrowded under UK housing laws.
So, how do you prove it? You’ll need documents like:
- A tenancy agreement with all family members listed.
- A letter from your landlord giving your family permission to live in the property.
- The property deeds if you are a homeowner in the UK.
The Ever-Changing Financial Goalposts
One of the toughest parts of this process is that the financial rules can and do change, sometimes dramatically. We saw this unfold recently. In December 2023, when the UK government announced a huge hike in the minimum income threshold for family visas, it caused a massive rush. Visa applications shot up from 7,500 to 12,700 by April 2024 as people scrambled to get in under the old, lower financial rules.
Once the new, much higher income requirements took effect, the numbers told a clear story. Applications plummeted to just 6,900 in May 2024, showing just how much more difficult it has become to meet these demands.
If you’re applying from Nigeria, it’s vital to stay on top of all the specific rules. For a complete rundown, have a look at our detailed guide on https://blog.japachat.com/uk-visa-requirements-for-nigerian-citizens/.
Gathering Your Essential Application Documents
Let's talk about paperwork. A successful application is really built on the strength of your documents. Think of it like building a house – if your foundations are weak or missing, the whole thing is likely to crumble. This section is your blueprint, designed to help you gather everything you need and avoid those common pitfalls that can unfortunately lead to a refusal.
Honestly, incomplete or incorrect documents are one of the biggest reasons applications get rejected. This is why being meticulous here is so important. For those of us who aren't lawyers, navigating the official requirements can feel a bit overwhelming. Getting a handle on skills like contract review for non-lawyers can actually give you a good mindset for checking your own paperwork with a critical eye.

Core Document Categories
To make this manageable, let’s break down the evidence into logical groups. Remember, every document you provide must be valid and meet the specific formatting rules the Home Office lays out.
-
Identity and Travel Documents: First things first, you'll need a current passport or other valid travel ID for every single person applying. A key detail is that it must have at least one blank page for the visa sticker.
-
Proof of Relationship: This is where you demonstrate your genuine connection to the main visa holder. If you're applying as a partner, you’ll need your marriage or civil partnership certificate. For children, a full birth certificate showing both parents' names is essential.
Financial and Living Proof
Once you’ve proven who you are and how you’re related, the focus shifts to showing you can be financially supported and have a proper place to live. The Home Office examines these documents very, very closely.
You will need:
- Financial Evidence: This usually means bank statements showing you've held the required amount of money for at least 28 consecutive days. If the main applicant's A-rated sponsor has agreed to cover your costs, you’ll need an official letter from them stating this.
- Accommodation Proof: You need to show you have somewhere suitable to live. This could be a tenancy agreement, property deeds, or a formal letter from a landlord confirming there’s enough space for your whole family.
One crucial point: if any of your documents aren't in English or Welsh, they must come with a certified translation. This isn't just a simple translation; it has to be done by a professional and include their credentials, the date, and a statement confirming its accuracy.
Other Essential Submissions
Finally, there are a few other bits and pieces you might need, depending on your personal situation and where you're applying from.
For applicants from Nigeria, a Tuberculosis (TB) test certificate is a non-negotiable requirement. You must get this from a clinic specifically approved by the Home Office if you plan to stay in the UK for more than six months. Always double-check the specific rules for your visa category to make sure you haven't missed a country-specific requirement like this.
Navigating the Dependant Visa Application Process
https://www.youtube.com/embed/Ft7wDsd1l20
Once you've gathered all your paperwork, it's time to dive into the application itself. This is where your preparation becomes a formal request to the UK Home Office. Think of it as a series of clear, manageable steps that, if you follow them carefully, will guide you smoothly towards a decision.
The whole thing kicks off online. Your application is tied directly to the main visa holder's, so the form you fill out will reflect that connection. You'll need to find the specific online form that matches the main applicant's visa type. This is a crucial detail—using the wrong form can cause serious, frustrating delays.
Submitting and Paying for Your Application
After you’ve meticulously filled out the online form, you'll hit the payment stage. This isn’t a single fee, but two separate, non-negotiable charges you have to cover before you can move on.
You'll need to pay for:
- The Visa Application Fee: This is the core cost for processing your dependant visa application. The exact amount will vary based on the main visa route and how long the visa will be valid.
- The Immigration Health Surcharge (IHS): This is a mandatory fee that grants you access to the UK's National Health Service (NHS) during your stay. It's calculated based on the length of the visa you're applying for.
You must pay both of these online to unlock the next step in the process. For a deeper understanding of how government policies shape these requirements, check out our guide on the new UK immigration white paper and what every Nigerian should know.
The Biometric Appointment
With the fees settled, your next task is to book an appointment at a visa application centre. This is for your biometrics—a standard and unavoidable part of nearly every UK visa application.
At this appointment, you will have your fingerprints scanned and a digital photograph taken. This is a security and identity verification step that is mandatory for every applicant, including children.
Make sure you bring your passport and a copy of your appointment confirmation letter to the centre. The staff there will walk you through what to do. It’s a straightforward process that’s usually over and done with quite quickly.
Final Document Submission
The last hurdle is submitting all your supporting documents. The exact method for this depends on the specific visa application centre you've chosen. Many centres now ask you to upload digital copies of your documents to an online portal before your biometric appointment.
On the other hand, some centres offer a document scanning service. You simply bring your original papers with you to the appointment, and they scan everything for you. Always double-check the instructions for your specific centre to avoid any mix-ups. Once your documents are submitted and your biometrics are taken, your application is officially in the hands of the Home Office for a decision.
Understanding Visa Costs and Processing Times
When you’re planning to bring family to the UK, it’s crucial to get a handle on two things: how much it will cost and how long it will take. This isn't just about filling out forms; it involves real money and often, a lot of waiting. Getting your head around these figures and timelines is a fundamental part of meeting the dependent visa UK requirements.
The two major costs you absolutely have to budget for are the application fee and the Immigration Health Surcharge (IHS). The IHS is a mandatory fee that gives your family member access to the National Health Service (NHS) while they're in the UK. One tough pill to swallow is that both of these fees are non-refundable. If your application is refused, you don't get that money back, which is why getting everything right the first time is so important.
Breakdown of Key Costs and Timelines
So, what are we actually talking about in terms of money and time? The fees are set by the Home Office and do change, sometimes with little notice, but here’s a general idea of what to expect.
Typical UK Dependent Visa Costs
Here is a straightforward overview of the main fees you'll encounter. Remember, these are just estimates and can be updated by the Home Office at any time.
Fee Type Cost (Inside UK) Cost (Outside UK) Notes Application Fee Varies by visa Varies by visa The cost is linked to the main applicant’s visa type and duration. IHS (per year) £1,035 (adult) £1,035 (adult) This must be paid for the full length of the visa at the time of application. Priority Service Varies Varies An optional fee to get a faster decision, usually within 5 working days. These figures show that the costs can add up quickly, especially the IHS, which you have to pay upfront for the entire duration of the visa.
When it comes to waiting for a decision, standard processing times can feel like an eternity. If you're applying from outside the UK, you're typically looking at around 3 weeks. For applications made from within the UK, the wait can stretch up to 8 weeks.
After submitting your application, the biometric appointment is the next critical step. This is where you'll provide your fingerprints and a photograph.
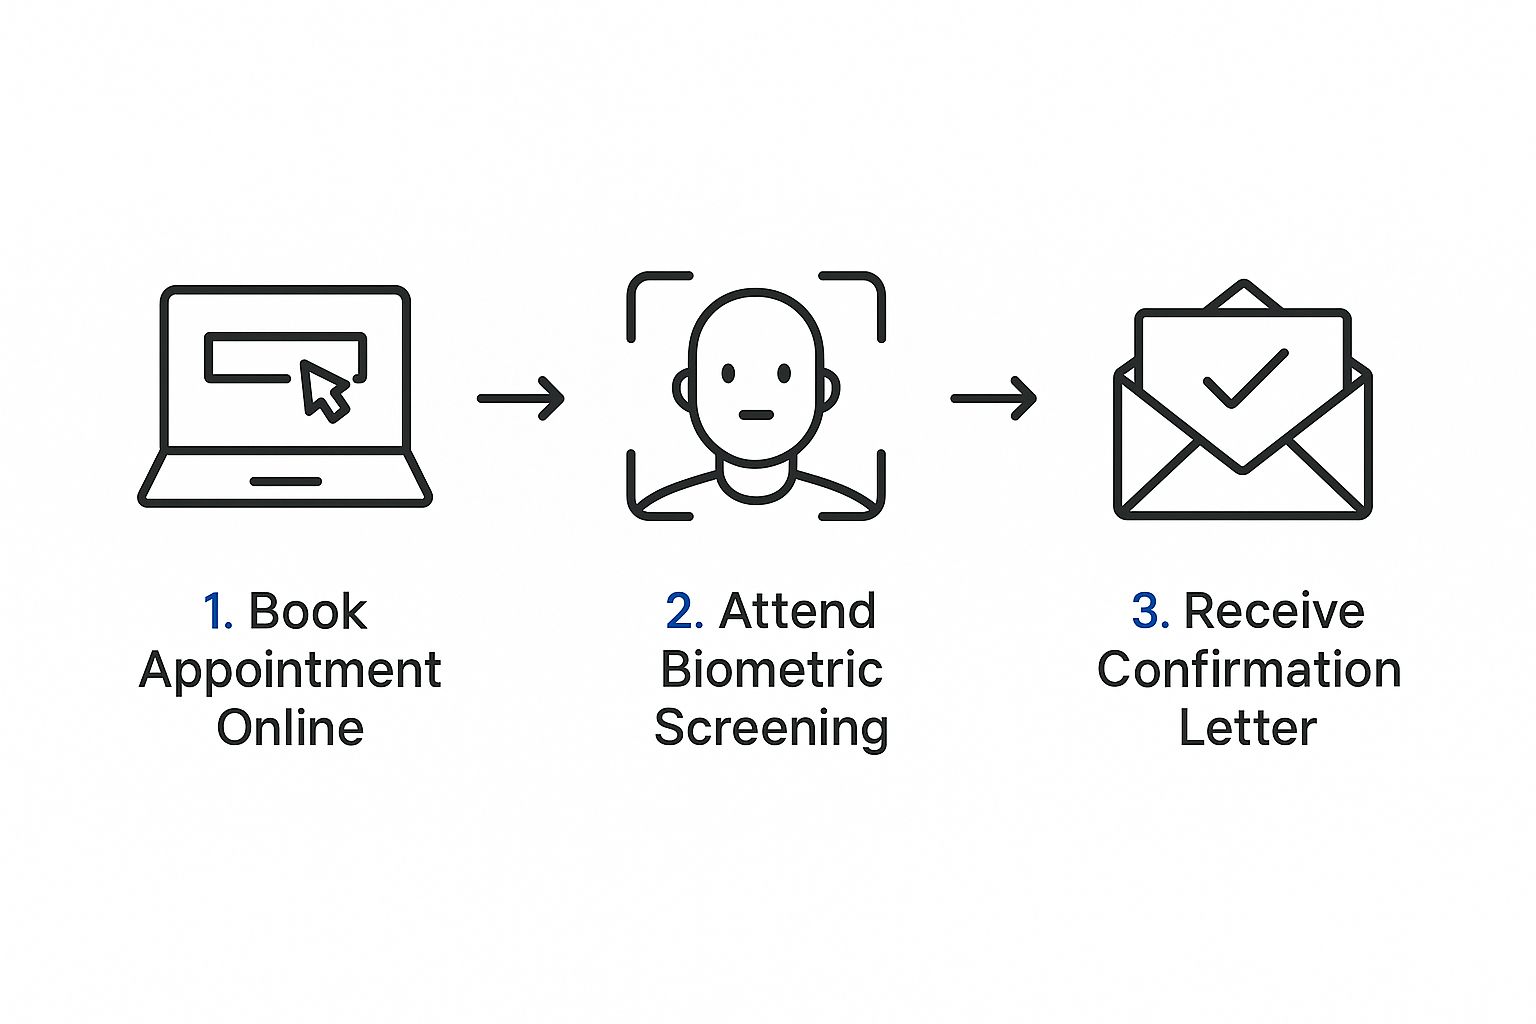
As you can see, the process is straightforward: book your appointment online, attend the screening, and wait for confirmation. It's a simple sequence, but getting it right is essential to keep your application moving without any hitches.
The goalposts for UK immigration are always moving, and recent changes have had a huge impact on families. For instance, after new rules were introduced, the number of dependents arriving on Health and Care Worker visas plummeted. In 2023/24, 229,700 dependents were granted visas on this route. The following year, after the rules were tightened, that number fell by a shocking 76% to just 54,100.
This dramatic drop shows just how tough the environment has become. Now, more than ever, a perfect, error-free application isn't just a goal—it's a necessity. A single mistake could mean a refusal, forcing you to start from scratch and pay all those non-refundable fees all over again. To give yourself the best possible chance, you need to stay on top of the latest changes and learn more about the UK immigration new rules and what they mean for your family.
Got Questions About UK Dependent Visas? We've Got Answers
It's only natural to have a lot of questions when you're digging into the specifics of a UK dependent visa. Your situation is unique, and you need answers that apply to you. Let's tackle some of the most common questions people ask to help clear things up.
Getting these details right is a huge part of making your application process as smooth as possible.
Can I Switch to a Dependent Visa from Inside the UK?
Yes, for the most part, you absolutely can. If you're already in the UK on a different type of visa, you can usually apply to switch over to a dependent visa without having to leave the country.
There’s one major exception, though: you can't switch if you're currently in the UK as a visitor or on a short-term student visa. For everyone else, as long as you meet all the eligibility criteria, the key is to submit your application before your current visa runs out. This keeps your stay legal while you wait for the Home Office to make a decision.
What Happens if the Main Visa Holder Leaves the UK?
This is a really important one to understand. Your dependent visa is completely linked to the main applicant’s visa. Think of it like a plus-one invitation to a party; if the main guest decides to go home, the plus-one can't stay.
If the main visa holder’s permission to stay is cut short or they decide to leave the UK for good, your dependent visa will also be curtailed. Typically, the Home Office will give you 60 days to either leave the UK or find another visa route you qualify for in your own right.
Are There Any Work Restrictions for Dependents?
The freedom to work is one of the best things about being a dependent in the UK. For most people, you can work for nearly any employer, become self-employed, or even start a business. You won't need to find a company to sponsor you.
However, there are a couple of small but firm restrictions to keep in mind:
- You are not allowed to work as a professional sportsperson or a sports coach.
- Working as a doctor or dentist in training is also prohibited, unless you meet very specific criteria.
When you receive your Biometric Residence Permit (BRP), always double-check the conditions printed on it. That's your official guide to what you can and can't do in the UK.
Planning a life in the UK feels like a huge puzzle, but you don’t have to solve it all by yourself. JapaChat is Nigeria's first AI immigration expert, built to give you quick, reliable answers to all your visa questions. Find the clarity you need to move forward with confidence. Start your free chat at JapaChat.com.
-
Documents Required for UK Visa: Your 2025 Checklist
Embarking on a UK visa application can feel like navigating a complex maze, where a single missing paper can lead to frustrating delays or even an outright refusal. The success of your application hinges almost entirely on the quality, accuracy, and completeness of your supporting evidence. Submitting a well-organised and thorough set of documents demonstrates your eligibility and credibility to the Home Office, making their decision-making process smoother and more favourable for you.
This guide is designed to be your definitive checklist. We will break down every critical piece of paperwork you will need, from your passport and financial statements to specific documents for work or study visas. We'll detail what each document must prove and offer practical tips on how to prepare them correctly. Understanding the full list of documents required for a UK visa is the first and most crucial step toward turning your UK ambitions into a reality. By following this comprehensive list, you can approach your application with confidence, ensuring you have presented the strongest possible case for approval. Let's get started on organising your path to the UK.
1. Valid Passport
Your passport is the cornerstone of your UK visa application. It is the primary, non-negotiable form of identification that proves your nationality and your right to travel. Without a valid travel document that meets specific UK Visas and Immigration (UKVI) standards, your application will be automatically rejected. It's the first document officials will check, and its details must be perfect.
Key Passport Requirements
The UKVI has strict criteria for the passport you submit as part of the documents required for a UK visa. It must be in good condition, without any significant damage, especially to the biodata page.
- Validity: Your passport must be valid for the entire duration of your intended stay in the UK. Crucially, for most visa types, it must have at least six months of validity remaining from your planned date of entry.
- Blank Pages: It must contain at least one blank page for the visa vignette (sticker) to be placed. This page needs to be blank on both sides.
- Previous Passports: If you have held previous passports, you may need to submit them, especially if they contain prior travel history to the UK or other countries. This helps establish your travel record.
Why It's Critical
Think of your passport as the foundation of your application house; if it has cracks, the whole structure is compromised. For instance, a student visa applicant from Nigeria must present a passport that covers their full course length, while a Skilled Worker visa holder needs a document with enough validity to accommodate their work contract and potential extensions.
Pro Tip: Before starting your visa application, the very first step should be to inspect your passport. Check the expiry date, count the blank pages, and assess its physical condition. Addressing any issues here first will save you from a costly and stressful refusal later on.
To avoid last-minute panic, check your passport's expiration date at least eight months before your intended travel. If it’s nearing expiry, initiate the renewal process immediately. Always keep high-quality photocopies of your passport's biodata page and any pages with existing visas or stamps in a separate, safe location. This can be invaluable if your passport is lost or stolen.
2. Visa Application Form (VAF)
The Visa Application Form (VAF) is the digital heart of your UK visa submission. It is a comprehensive online questionnaire where you provide the UK Visas and Immigration (UKVI) with detailed information about your personal circumstances, financial stability, travel history, and reasons for visiting the UK. This form is non-negotiable, and its accurate completion is fundamental; any errors or inconsistencies can lead to significant delays or an outright refusal of your application.
Key VAF Requirements
The specific VAF you need to complete depends entirely on your visa category. It is crucial to select the correct form from the official GOV.UK website to ensure you provide the right information. Using the wrong form will result in an invalid application.
- Correct Form Selection: You must identify and use the VAF that corresponds to your visa route. For instance, a standard visitor might use one form, while a spouse or student will use a different, more detailed version.
- Accurate Information: All details entered, from your name and date of birth to your financial declarations, must be 100% accurate and match the information in your supporting documents.
- Submission Confirmation: After completing and submitting the form online, you must print the confirmation page or the full application. You will need to take this to your visa application centre appointment.
Why It's Critical
The VAF is your direct communication with the UKVI decision-maker. It frames your entire case, telling them who you are and why you should be granted entry. For a Nigerian professional applying for a Skilled Worker visa, this form details their sponsor, qualifications, and ability to meet the role's requirements. For a family visit, it outlines the relationship to the UK host and the purpose of the trip. The information provided here forms the basis for the ECO’s (Entry Clearance Officer) assessment.
Pro Tip: Never rush filling out your VAF. Use the "save and continue later" feature. Before starting, gather all necessary information, including passport details, travel dates, UK address, and financial records. This organised approach prevents mistakes made under pressure.
Always double-check every single entry before you submit. A simple typo in your date of birth or passport number can cause serious issues. As you prepare your application, it's also wise to stay updated on any policy changes; you can find helpful resources to understand the latest UK immigration rules to ensure your application is compliant.
3. Financial Documents
After your identity is confirmed, your financial standing is the next most scrutinized aspect of your UK visa application. Financial documents are crucial because they prove to UK Visas and Immigration (UKVI) that you can support yourself (and any dependants) during your stay without relying on public funds. These documents serve as tangible evidence of your financial stability and, in some cases, your strong ties to your home country, reinforcing your intention to return.
Key Financial Document Requirements
The specific financial evidence required varies significantly depending on the visa category. However, the underlying principle is the same: you must demonstrate access to a certain level of funds. These are essential documents required for a UK visa.
- Bank Statements: You must provide official bank statements covering a specific period, typically the 28 days immediately preceding your application. These must show the required funds have been consistently held in your account.
- Payslips and Employment Letter: For work-related visas, recent payslips (usually for the last six months) and a letter from your employer detailing your salary and employment are often required.
- Sponsorship Letters: If another person or an organisation is funding your trip, you must submit a formal letter of sponsorship. This letter should detail the nature and extent of the financial support and be accompanied by the sponsor's own financial documents.
Why They're Critical
Your financial evidence tells a story about your life and intentions. For a Nigerian student applying for a Student visa, this means showing at least £1,334 per month for living costs in London. For a family applying for a Visit visa, it means proving they have sufficient funds, often estimated around £95 per person per day, to cover their holiday without working illegally. A sudden, large, and unexplained deposit into your account just before applying is a major red flag for visa officers, as it can suggest borrowed funds intended to deceive the system.
This infographic summarises the minimum maintenance funds for some popular visa routes.
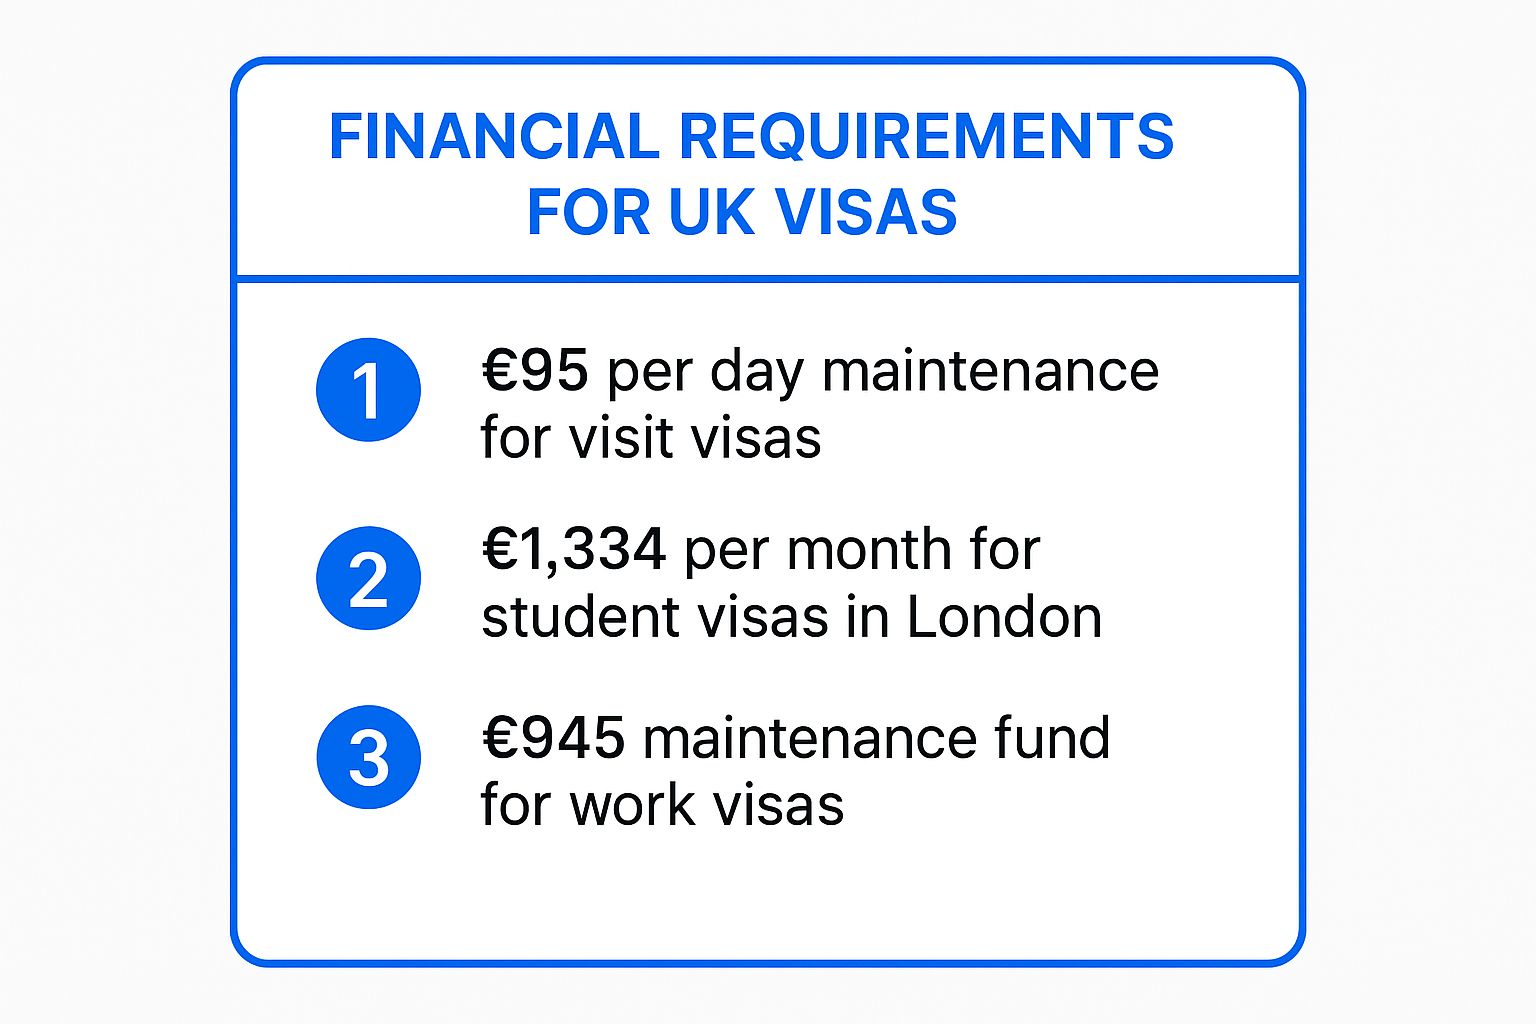
As the data shows, the financial threshold differs greatly, highlighting the need to check the specific requirements for your visa category carefully.
Pro Tip: Begin organising your finances at least two months before you plan to apply. Avoid making large cash deposits that you cannot explain with documentation like a property sale agreement or a gift deed. If any documents are not in English or Welsh, you must provide certified translations.
The concept of proving your financial capacity is a standard immigration requirement globally. While the rules are specific to the UK, you can learn more about how another popular destination handles it by reading about proof of funds for Canada. This provides a broader perspective on the importance of financial documentation in global mobility.
4. Biometric Information
Your biometric information, which includes your fingerprints and a digital photograph, is a mandatory part of the UK visa application process. This data is collected to verify your identity and is stored securely in UK databases, forming a unique digital profile that links you to your visa. For nearly every applicant, this step is non-negotiable and serves as a critical security measure for UK border control.
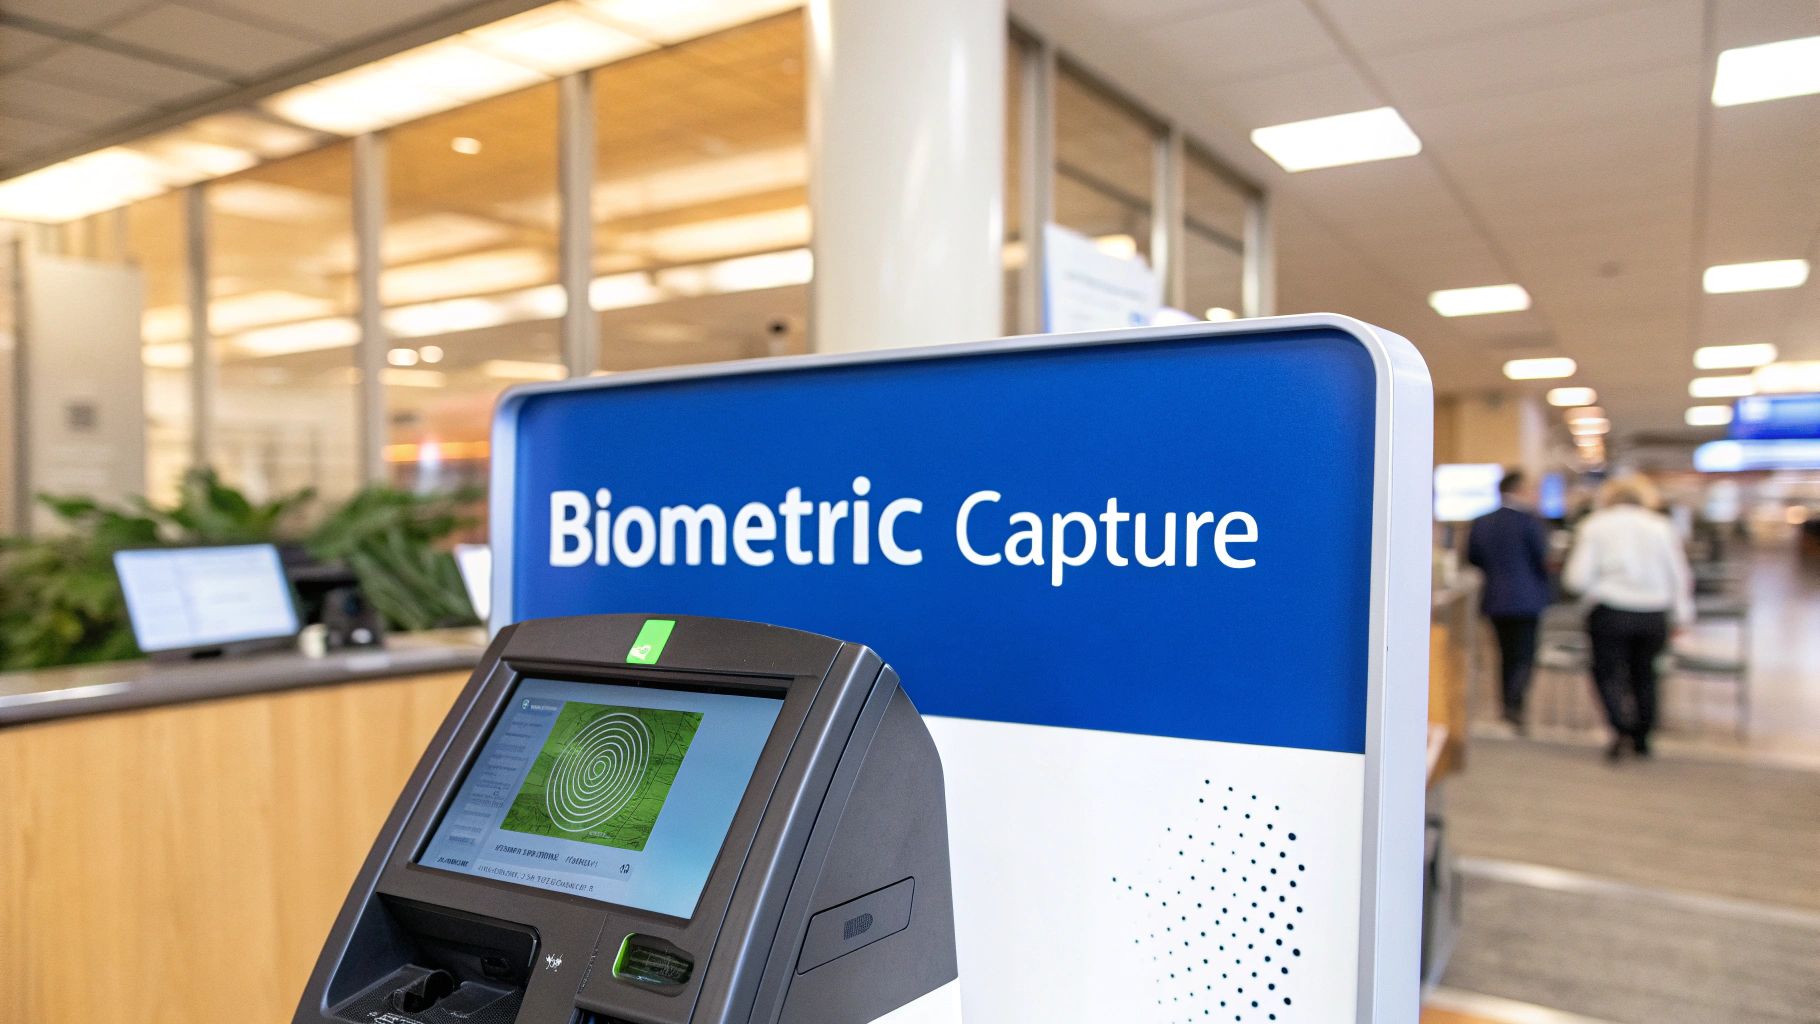
Key Biometric Requirements
The collection of your biometrics is a formal appointment at a designated Visa Application Centre (VAC). The process is straightforward but requires careful attention to detail to avoid delays. These details form a core part of the documents required for a UK visa.
- Appointment: You must book an appointment at a VAC (like those in Lagos or Abuja) after submitting your online application and paying the fees.
- Data Collection: At the centre, officials will scan all ten of your fingerprints electronically and take a full-face digital photograph without glasses or head coverings (unless for religious or medical reasons).
- Identity Verification: You must bring your passport and a copy of your appointment confirmation letter to the VAC to prove your identity before your biometrics are taken.
Why It's Critical
Submitting your biometric data is what officially moves your application from a pending online form to an active case being reviewed by UK Visas and Immigration (UKVI). Without this step, your application cannot be processed. For example, a family applying for visitor visas must schedule individual appointments for each member, including children, ensuring everyone’s data is captured correctly.
Pro Tip: Book your biometric appointment the moment you complete your online visa application. Slots can fill up quickly, especially during peak travel seasons, and any delay in your appointment will directly delay your visa decision.
To ensure a smooth process, make sure your hands are clean and free from any temporary markings like henna or cuts, as this can affect the quality of the fingerprint scan. Arrive at the VAC at least 15-20 minutes before your scheduled time to clear security and complete any preliminary paperwork. This preparation helps prevent unnecessary stress and potential rescheduling.
5. Travel Itinerary and Accommodation Proof
Your travel itinerary and proof of accommodation serve as a roadmap of your intended visit, demonstrating to UK Visas and Immigration (UKVI) that you are a genuine visitor with a clear, well-organised plan. These documents substantiate the purpose of your trip, whether for tourism, business, or visiting family, and are crucial for proving you do not intend to overstay your visa. A well-prepared itinerary is a key part of the documents required for a UK visa.

Key Itinerary and Accommodation Requirements
UKVI scrutinises these documents to ensure your plans are realistic and match the visa category you have applied for. A detailed and credible plan significantly strengthens your application.
- Detailed Itinerary: This should outline your day-to-day activities in the UK. For a business trip, this could include conference registrations and meeting schedules. For tourism, it might involve bookings for tours or entry tickets to attractions.
- Flight Bookings: You should provide evidence of your return flight reservations. This is powerful proof of your intention to leave the UK at the end of your visit. It is advisable to book flights that can be cancelled or rescheduled.
- Accommodation Proof: This can be in the form of confirmed hotel bookings for the duration of your stay. If you are staying with friends or family, you must provide a formal invitation letter from them, along with proof of their UK immigration status and evidence that they can accommodate you (e.g., a tenancy agreement).
Why It's Critical
A vague or non-existent plan can be a major red flag for visa officers, suggesting a lack of genuine intent. For example, a Nigerian applying for a Standard Visitor Visa for a two-week holiday should present hotel confirmations in cities like London and Edinburgh and perhaps a train ticket booking between them. This shows a thought-out, genuine tourist plan.
Pro Tip: Always book fully refundable hotels and flights until your visa is approved. This minimises financial risk if your application is delayed or, in a worst-case scenario, refused. Your itinerary should be plausible and align with the funds you've declared.
Create a simple document that lists your daily plans, including addresses and booking confirmation numbers. If you are attending an academic conference, ensure the dates on your itinerary, invitation letter, and accommodation bookings all align perfectly. Consistency across all your submitted documents is absolutely essential for a successful application.
6. Educational Credentials and Certificates
For many visa routes, particularly the Student visa and certain work visas, your academic background is a primary factor in the decision-making process. Educational credentials serve as proof of your qualifications, language ability, and suitability for the course or role you are pursuing in the UK. Submitting the correct, officially recognised documents is non-negotiable for a successful application.
Key Credential Requirements
The specific educational documents required for a UK visa vary significantly based on your application type. These documents must be genuine, verifiable, and presented in the correct format.
- Academic Certificates: This includes your degree certificate, diplomas, and official academic transcripts showing the subjects you studied and the grades you received.
- English Language Proficiency: Most applicants from non-majority English-speaking countries like Nigeria must prove their language skills. This is typically done with a certificate from a Secure English Language Test (SELT), such as IELTS for UKVI, with scores meeting the required level for your visa.
- ATAS Certificate: If you plan to study or research certain sensitive subjects in science and technology at a postgraduate level, you will need an Academic Technology Approval Scheme (ATAS) certificate before you can apply for your visa.
- Confirmation of Acceptance for Studies (CAS): For students, the CAS is a unique reference number provided by your UK educational institution. It confirms you have an unconditional offer for a course.
Why It's Critical
Your educational documents validate the very basis of your application. An Indian student applying for a master's degree in business must provide not only their bachelor's degree certificate but also an IELTS for UKVI certificate showing a minimum of 6.5 overall. Similarly, a Nigerian engineer applying for a Skilled Worker visa may need their degree assessed by a body like UK ENIC (formerly UK NARIC) to prove it is equivalent to a UK qualification.
Pro Tip: Always request official transcripts directly from your university, as photocopies are often insufficient. For documents not in English, you must provide a certified translation from a reputable service. Check that your English test is still valid (usually for two years) before you pay your visa fee.
Start the process for any necessary credential evaluations or ATAS applications well in advance, as they can take several weeks. Keep both digital and physical copies of all your certificates and test results. For student applicants, your CAS number is the key that unlocks your visa application, so ensure all details on it are correct before you proceed.
7. Employment and Business Documents
Your professional standing and financial stability are crucial elements of your UK visa application, particularly for work, business, or even some visitor visas. Employment and business documents serve as concrete proof of your current professional status, income, and ties to your home country, assuring UK Visas and Immigration (UKVI) of your intentions and your ability to support yourself. These documents are non-negotiable for applications tied to professional activities.
Key Employment and Business Requirements
The specific documents you need will vary based on your visa type, but they all aim to validate your professional profile. For Nigerians applying for a UK visa, these documents required for a UK visa must be official and verifiable.
- Employment Letter: If you are employed, you must provide a letter from your employer on official company letterhead. This should state your position, salary, start date, and confirm that you are permitted leave for your trip (for visitor visas) or that you are sponsored (for work visas).
- Business Registration: For self-employed individuals or business owners, you must submit your company's registration documents (e.g., CAC registration in Nigeria), tax returns, and business bank statements.
- Sponsorship Documents: For a Skilled Worker visa, the most vital document is your Certificate of Sponsorship (CoS) from a UK-based, licensed employer.
- Professional Licenses: If your profession requires it, like a healthcare professional needing GMC registration, you must provide proof of your valid licence to practise.
Why It's Critical
These documents form the backbone of your application's credibility. For a software engineer from Lagos applying for a Skilled Worker visa, the CoS is the gateway to the application. Similarly, a business owner from Abuja attending a trade conference must provide business registration documents to legitimise their purpose of visit. Neglecting this evidence can lead to a swift refusal based on questionable intentions or financial instability.
Pro Tip: Ensure any letter from your employer is recently dated, signed by an authorised person, and includes the company's contact details. For business owners, organising your financial and registration documents well in advance demonstrates professionalism and readiness.
Your employment letter acts as a formal declaration of your professional ties, which can be as important as financial evidence. A well-written document can also function similarly to a letter of intent, clearly outlining your role and relationship with your employer or business. For more insights on framing such correspondence, you can learn more about crafting a letter of intent for a visa application.
8. Health and Medical Documentation
Your health status is a critical factor in your UK visa application, directly impacting public health and the National Health Service (NHS). The UK government requires specific medical documentation to ensure that applicants do not pose a health risk to the country and are adequately covered for any potential medical needs. These are non-negotiable documents required for a UK visa, particularly for those planning a longer stay.
Key Medical Requirements
The specific health documents you need depend heavily on your country of origin, the length of your intended stay, and your visa category. Honesty and accuracy are paramount when dealing with these requirements.
- Tuberculosis (TB) Test Certificate: If you are from Nigeria and applying for a visa to stay in the UK for more than six months, you must provide a TB test certificate from a UKVI-approved clinic. The test must be taken before you submit your application.
- Proof of Health Surcharge Payment: Most visa applicants coming to the UK for more than six months must pay the Immigration Health Surcharge (IHS). Your payment confirmation is a crucial part of your application.
- Vaccination Records: While not universally required for all visas, certain applicants, especially those in healthcare roles, may need to provide proof of vaccinations as part of an occupational health screening.
Why It's Critical
Failing to meet the health requirements can lead to an immediate refusal. For instance, a student from Nigeria applying for a master's degree must present a valid TB test certificate. Without it, their application is incomplete and will be rejected. Similarly, a doctor applying for a Health and Care Worker visa must meet specific occupational health standards to practise in the UK.
Pro Tip: Schedule your TB test well in advance of your visa application submission. Certificates are only valid for six months, so timing is crucial. Always use a clinic listed on the UK government's approved list for Nigeria, as tests from unapproved centres will not be accepted.
Ensure you declare any pre-existing medical conditions honestly on your application form. Hiding a condition can be considered deception and may lead to a visa refusal and a potential ban on future applications. Keep digital and physical copies of your TB test certificate and IHS payment receipt safe with your other important documents.
Essential Document Comparison for UK Visa Applications
Item Implementation Complexity 🔄 Resource Requirements ⚡ Expected Outcomes 📊 Ideal Use Cases 💡 Key Advantages ⭐ Valid Passport Low – straightforward but strict criteria Moderate – obtaining/renewing can be time-consuming Essential ID proof; enables travel authorization All visa categories Universal acceptance; biometric security Visa Application Form (VAF) Medium – online forms with various categories Moderate – internet, detailed info collection Error-checked, real-time tracked applications All visa applications with specific form types Digital submission; built-in validation Financial Documents High – extensive documentation and verification High – gathering bank statements, sponsor docs Proves financial stability and intent Visitor, student, work visas Reduces refusal risk; shows financial capacity Biometric Information Medium – requires biometric appointment Moderate – biometric fee, appointment scheduling Enhanced security; faster processing All UK visas requiring biometrics Fraud prevention; streamlined future applications Travel Itinerary & Accommodation Proof Medium – requires advance bookings and documentation Moderate – booking costs and travel insurance Demonstrates genuine travel intent & planned stay Tourist, business, family visit visas Supports visa duration; shows planned departure Educational Credentials & Certificates Medium – document gathering and translations Moderate – obtaining transcripts, language tests Confirms qualifications and genuine student intent Student, skilled worker, settlement visas Proves education; language proficiency Employment and Business Documents Medium-High – requires employer/business cooperation Moderate-High – employer letters, licenses Establishes professional credibility and income Work visas, business-related applications Shows stable employment; sponsor compliance Health and Medical Documentation Medium – requires medical tests and insurance Moderate – medical exam fees and insurance costs Ensures health safety and coverage during stay Long-term visas, healthcare workers, students Public health safety; required for approvals Bringing It All Together: Your Next Steps to the UK
Navigating the UK visa application process can feel like assembling a complex puzzle, where every piece must fit perfectly. As we have explored, the journey involves more than just filling out a form; it requires meticulous preparation, attention to detail, and a thorough understanding of what the UK Visas and Immigration (UKVI) expects. From your valid passport serving as your primary identity document to the detailed financial statements that prove your stability, each item on our list plays a vital role in painting a clear picture of your eligibility and intentions.
Key Takeaways for a Successful Application
Let’s quickly recap the crucial points. The strength of your application lies in the quality and organisation of your supporting evidence. Simply having the documents required for a UK visa is not enough; they must be authentic, current, and correctly formatted.
- Financial Proof is Paramount: Underestimating the importance of your financial documents is a common pitfall. Ensure your bank statements are consistent and cover the required period, clearly showing you meet the specific financial threshold for your visa category without any last-minute, unexplained large deposits.
- Tell a Coherent Story: Your documents should work together to tell a cohesive story. Your travel itinerary, proof of accommodation, and letter of invitation (if applicable) should align with the purpose of your visit stated in your Visa Application Form (VAF). Any inconsistencies can raise red flags.
- Digital Submission Best Practices: With the shift to online submissions, the technical quality of your digital files is crucial. Scans must be clear, legible, and within the specified file size limits. Illegible documents are often treated as if they were never submitted. To ensure your digital documents meet submission requirements without losing quality, you might benefit from learning about strategies for smarter file compression.
Your Actionable Next Steps
With this comprehensive checklist in hand, your path forward is clearer. Begin by creating a personalised checklist based on your specific visa route, whether it is for study, work, or tourism. Methodically gather each document, double-checking expiry dates, names, and other details for accuracy. Organise your files, both physical and digital, in a logical manner that makes them easy for a UKVI official to review.
Ultimately, mastering this process is your first significant step towards achieving your UK ambitions. A well-prepared application not only increases your chances of approval but also sets a positive tone for your entire journey. It demonstrates your commitment, organisation, and respect for the UK's immigration regulations. Taking the time to get it right now saves you from the potential stress, cost, and disappointment of a refusal. Your UK dream is within reach, and it starts with this foundational step.
Feeling overwhelmed by the sheer volume of documents and nuanced requirements? Get personalised, AI-powered guidance for your UK visa journey with JapaChat. Visit JapaChat to simplify your application process and get real-time answers to your most pressing immigration questions.
-
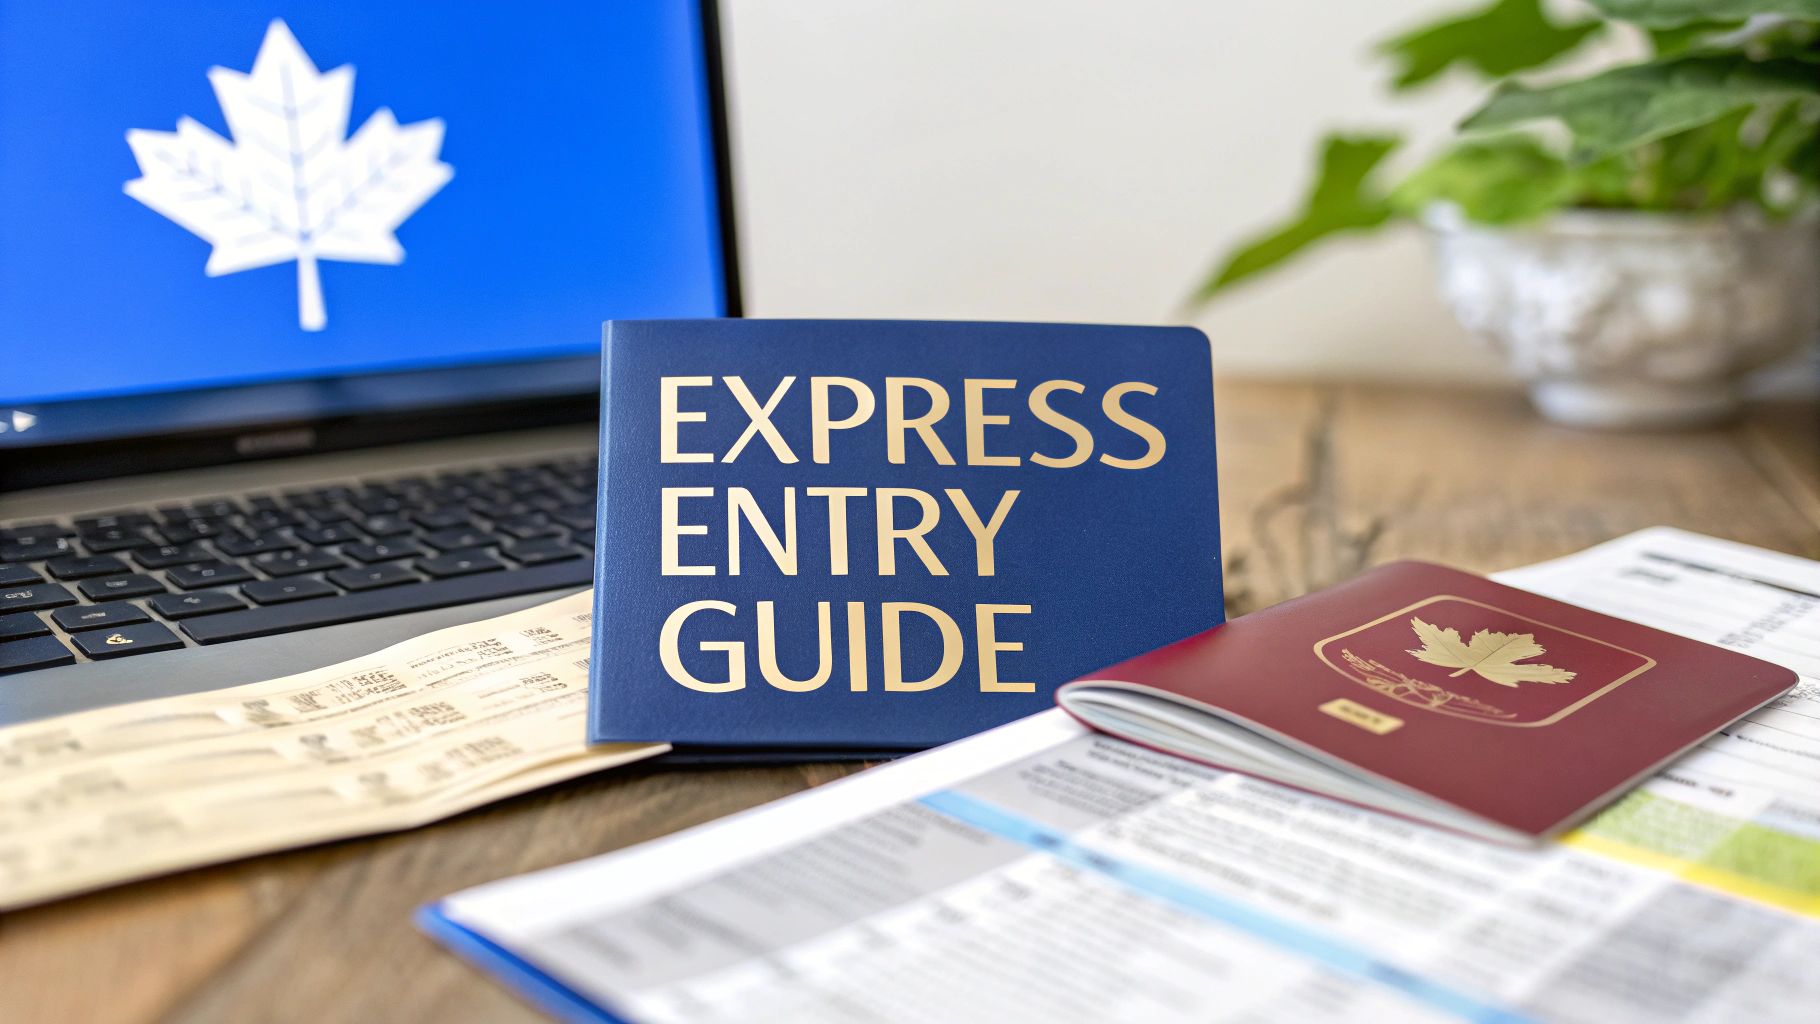
Creating Express Entry Profile from Nigeria | Easy Guide
Alright, let's get down to business. Creating your Express Entry profile is where the rubber meets the road on your journey to Canadian permanent residency. This isn't just another online form; it’s your professional resume submitted directly to the Canadian government, making a case for why you're a great fit for the country.
Your digital profile is what showcases your skills, education, work experience, and language abilities. Think of it as your entry ticket into a highly competitive pool of talented people from all over the world, all aiming for the same goal.
Your First Real Step To Canadian Residency
For anyone in Nigeria dreaming of a life in Canada, the Express Entry system is your starting point. But don't just jump in and start filling things out. You need a strategy. This system is how Canada manages applications from skilled workers, and you need to position yourself perfectly to get noticed.
The system handles three main federal immigration programmes:
- Federal Skilled Worker Program (FSWP): This is the go-to pathway for most skilled Nigerian professionals who have valuable work experience from back home.
- Federal Skilled Trades Program (FSTP): This one is for people with qualifications in specific skilled trades, like electricians or welders.
- Canadian Experience Class (CEC): This is for those who are a step ahead and have already gained skilled work experience inside Canada.
For the vast majority of us applying from Nigeria, the Federal Skilled Worker Program (FSWP) is the one that matters most. Before you even get to the profile creation stage, you have to prove you're eligible for this programme.
Clearing The First Hurdle: FSWP Minimum Requirements
This initial eligibility check is a critical, non-negotiable step. It's the gatekeeper. Passing it means you have the foundational skills and experience Canada is actively looking for. If you don't meet these minimums, you simply cannot enter the Express Entry pool. It’s that black and white.
Let’s quickly break down the core requirements for the Federal Skilled Worker Program. This table summarises what you absolutely must have in place before you begin.
FSWP Eligibility Checklist for Nigerian Applicants
Requirement What You Need Key Tip for Nigerians Skilled Work Experience At least 1 continuous year of paid, full-time work (or part-time equivalent) in the last 10 years. The job must be in TEER 0, 1, 2, or 3 of the NOC. Your work experience letter must be detailed and match your chosen NOC. Get this from your employer early on. Language Ability A minimum score of Canadian Language Benchmark (CLB) 7 in all four sections of an approved English test (IELTS or CELPIP). Don't underestimate the IELTS. Practice extensively. A higher score here can significantly boost your overall points later. Education A Canadian diploma/degree or an Educational Credential Assessment (ECA) report for your Nigerian qualifications from an approved body like WES. Start your WES evaluation immediately. It can take several months to get your transcripts from Nigerian universities and for WES to process them. The 67-Point Grid You must score at least 67 out of 100 points on the FSWP selection grid, which assesses age, language, experience, etc. Use the official IRCC calculator to check your score. Be honest with yourself—this is a pass-or-fail test. Getting these four things in order is your first major milestone. Without them, you can't move forward.
Key Takeaway: The 67-point grid is purely a pass/fail test. It determines if you are eligible to create a profile. It is completely different from the CRS score, which later decides if you are competitive enough to get an invitation.
Understanding The Comprehensive Ranking System (CRS)
Once you’ve passed the 67-point test and successfully created your profile, you'll be assigned a score out of 1,200 points. This is your Comprehensive Ranking System (CRS) score.
This score is what ranks you against every other candidate in the Express Entry pool. Unlike the 67-point grid, the CRS is a fierce competition where every single point counts. For a more detailed look at the entire journey, our guide on the Canadian permanent residency application is a great resource.
Ultimately, a higher CRS score dramatically increases your chances of receiving an Invitation to Apply (ITA) for permanent residence in one of the regular draws held by the Canadian government.
Assembling Your Application Documents

Before you even touch the IRCC portal to create your Express Entry profile, there's some serious homework to do. Getting your documents in order first isn't just a good idea; it's the bedrock of your entire application. I've seen too many strong candidates stumble at this stage because of simple, avoidable mistakes.
Think of it like cooking a pot of jollof rice. You wouldn’t start frying the onions without having your tomatoes, peppers, and rice all washed and ready to go. Jumping into the profile creation process with half-ready documents is a recipe for pure frustration and, worse, could make you ineligible later on.
The Non-Negotiable Document Checklist
Let's talk about the absolute essentials. You cannot, and should not, attempt to enter the Express Entry pool without these three items finalised and in your hands. They are the pillars that hold up your eligibility and your entire profile.
-
International Passport: Take a look at your passport right now. Is it valid? Does it have at least two years left before it expires? Applying with a passport that's about to expire is a classic rookie mistake that can create major headaches if you get an Invitation to Apply (ITA).
-
Language Test Results: You need your official Test Report Form (TRF) from either IELTS (General Training) or CELPIP. This isn't optional. Without the scores from this test, you can't even get into the pool, as they're crucial for meeting the Federal Skilled Worker Program (FSWP) 67-point pass mark and for your CRS score.
-
Educational Credential Assessment (ECA) Report: That final, completed ECA report from an approved body like World Education Services (WES) must be physically or digitally in your possession. Just having a WES application "in progress" won't cut it. You need the final report and its reference number to move forward.
A word of advice specifically for my fellow Nigerians: Chasing transcripts from your university and then waiting for WES to do their thing can take months. Honestly, sometimes it feels like forever. Start this particular process long before you even dream of creating your profile. Trust me, it will save you a world of stress.
Proving Your Work Experience
This is where the real work begins and where many applications from Nigeria hit a snag. Proving your work experience to IRCC's standard requires meticulous detail. A simple "To Whom It May Concern" letter confirming you worked somewhere just won't do.
Your primary evidence is your reference letter from each employer. It's not just a letter; it's a detailed account of your professional life. Make sure each one is on official company letterhead and contains:
- Your full name
- The company's full contact details (address, phone number, official email)
- The signature of your direct manager or an HR officer
- Your exact job title and the dates you worked there
- A detailed breakdown of your main responsibilities and duties
- Your annual salary and any other benefits
- The number of hours worked per week (e.g., 40 hours/week)
Here's the most critical part: the duties you list must line up with the lead statement and main duties for the National Occupational Classification (NOC) code you've chosen. If there’s a mismatch, a visa officer will spot it immediately. For example, if your Nigerian job title was "Business Analyst" but your actual tasks were all about managing project timelines and budgets, you should align your reference letter's duties with the "Project Manager" NOC code.
While you're putting these professional documents together, it’s a smart move to get your resume in shape for the Canadian job market. Many Canadian companies use software to screen CVs, so you'll want to optimise your resume with ATS checker tools to make sure it gets past the bots and into human hands.
Gathering Your Supporting Personal Documents
You won't need these just to get into the Express Entry pool, but you will absolutely need them once you get an ITA. Gathering them now means you won't be scrambling against the clock later. Think of it as being prepared for the good news.
Key Supporting Documents to Get Ready:
- Birth Certificate: A clear, easy-to-read copy.
- Marriage Certificate: This is essential if you're applying with your spouse.
- Proof of Funds: This isn't just a bank statement. You'll need official, signed letters from your bank(s) detailing your account history and confirming that the funds are yours, available, and not tied up in debt.
By methodically gathering all these documents before you start, you're setting yourself up for a much calmer, more successful application journey. This early effort is what separates a smooth process from a stressful one.
Getting Your Profile Set Up on the IRCC Portal
Alright, with your documents in hand, it's time to move from preparation to action. This is where your Canadian journey truly begins to take shape online. You’ll be working exclusively on the official Immigration, Refugees and Citizenship Canada (IRCC) secure portal. This is the one and only place to create your Express Entry profile, so be sure you're on the correct government website.
Your first step is to create a secure account. For most of us coming from Nigeria, this means setting up a GCKey. Just think of it as your unique digital key—a username and password combination that unlocks access to Government of Canada services, including your immigration application.
The IRCC website has a straightforward process for creating your GCKey. You'll pick a username, create a password, and answer a few security questions. Let me give you a piece of advice born from experience: write these details down. Store them somewhere incredibly safe, like a password manager or a secure physical location. Losing your GCKey details can lead to some serious headaches and delays you really don't need.
The Final Check: Using the Eligibility Tool
Before IRCC lets you build your profile, they have one final checkpoint. You'll need to use their "Come to Canada" tool. It's essentially an online questionnaire that double-checks your eligibility based on the details you provide about your age, education, language scores, and work experience.
This part is absolutely vital. Once you complete the questionnaire and are confirmed as eligible, the system will generate a personal reference code. This code is your golden ticket. It connects your eligibility results directly to the profile you’re about to build, and you can't move forward without it.
This is the main portal page you'll get very familiar with. It's where you'll either sign in with your GCKey or register for a new one.
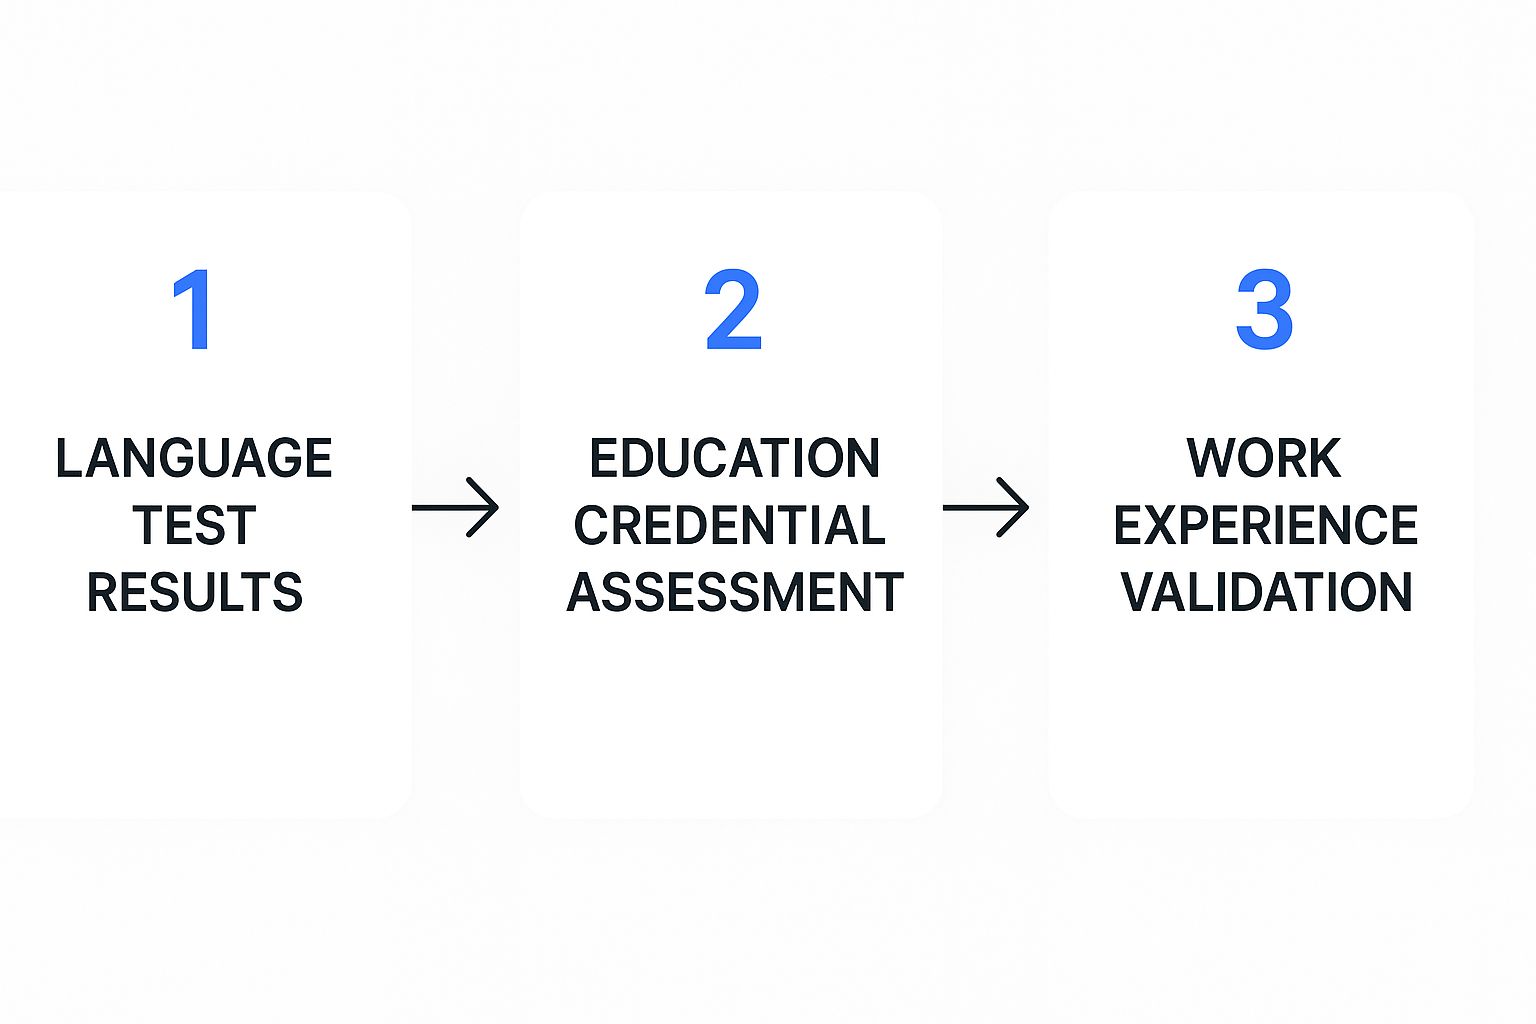
This simple-looking page is the gateway to your entire application, so it's your first real step on the portal.
Filling Out the Different Profile Sections
After you've entered your personal reference code, the system will take you to the profile builder. The online form is smartly divided into several modules or sections. You're meant to fill it out step-by-step, but the good news is you can save your progress and come back to it. You have 60 days from the day you start to finish and submit your profile.
Here are the main sections you’ll work through:
- Personal Details: This is for your basic identity, contact info, and passport details.
- Education History: You’ll input the details straight from your ECA report here.
- Work History: Time to list your skilled work experience and match it to your chosen NOC codes.
- Language Proficiency: Enter your scores directly from your IELTS or CELPIP test result form.
- Canadian Connections: This section is for any relatives in Canada or if you have prior Canadian education or work experience.
I can't stress this enough: accuracy is everything. Go back and double-check every single date, the spelling of every name, and every reference number. What looks like a tiny typo to you could be flagged as an inconsistency by an immigration officer.
A Crucial Reminder: Be completely honest. This is the most important asset you have in this process. Trying to inflate your work experience or provide misleading information can be flagged as misrepresentation. This is a very serious offence in Canadian immigration law and can result in a five-year ban from applying for any Canadian visa. It's just not worth the risk.
Navigating Common Sticking Points
Let's walk through a common situation. Imagine you worked as an "Account Manager" in Lagos for three years. On paper, that’s your title. But in reality, your day-to-day duties involved deep financial analysis and reporting, which perfectly matches the "Financial Analyst" (NOC 11101) code. When creating your Express Entry profile, you must use the NOC code that reflects your actual duties, not just your job title.
The work history section is often where people get tripped up. You have to be precise when calculating your hours. In Canada, full-time work is defined as 30 hours per week. If you worked 40 hours a week for one year, that counts as one year of full-time experience. But if you worked part-time at 20 hours per week, you would need 18 months to get the equivalent of one full year of experience (30 hours/week x 52 weeks = 1560 hours).
This visual flow shows how all your foundational data must be finalised before you can properly fill out these sections.
Your profile is only ever as strong as the verified documents you have to back it up.
It’s a similar story in the education section. Make sure the "Name of Degree" you type into the profile is the exact Canadian equivalency shown on your ECA report. If your WES report says "Bachelor's degree (four years)," you must select that specific option from the dropdown menu, not just write "B.Sc. in Biochemistry." This careful alignment is what ensures you get the correct CRS points for your education.
For more hands-on tips, you can check out our full guide on creating an Express Entry profile, which gets into even more of these details. The key is to take your time, be meticulous, and build a profile that truly and accurately reflects the fantastic skills you have to offer.
Getting to Grips with the Express Entry Pool
Alright, so you've done the hard work and your profile is submitted. What happens next? Your profile doesn't just go into some quiet queue. It lands in the Express Entry pool, which is basically a massive, constantly shifting group of ambitious people from all over the world, all hoping for the same thing.
This is the point where the process stops being about just you and becomes a competition. From here on out, everything comes down to one thing: your Comprehensive Ranking System (CRS) score. That number is king. It decides where you stand in the pool and, ultimately, if you're good enough to get that coveted Invitation to Apply (ITA). It's not a 'first-come, first-served' line; it's a live ranking where your position can move up or down every single day.
The Hard Truth About CRS Score Distribution
Look, having a "good" score is all relative. It only matters how your score stacks up against everyone else's in the pool at that exact moment. To keep your expectations in check and build a smart strategy, you have to look at the real numbers.
The data paints a very clear picture of just how competitive this is. For instance, a look at the pool in mid-2025 showed there were 250,082 profiles all competing for an invitation. The biggest group of candidates, a whopping 53,684 people, had scores between 351 and 400. This tells you that the middle range is incredibly crowded.
What about the top? A tiny handful of people—just 28 profiles—had scores over 600. That shows you how rare those super-high scores really are. You can dig into these numbers yourself and see the composition of the Express Entry pool on CIC News.
The lesson here is simple: just being eligible to enter the pool is not the goal. You need a score that can actually beat the cutoff in the official draws.
The Different Kinds of Draws You Need to Know
Immigration, Refugees and Citizenship Canada (IRCC) doesn't just invite the highest scores from the top down. They have specific needs for Canada's economy, and they use different types of draws to meet them. This is crucial because it directly affects who gets an invitation.
-
General Draws: Think of these as the standard, all-inclusive draws. IRCC sends invitations to the highest-scoring people in the pool, no matter which programme they applied through (FSWP, CEC, or FSTP). The cutoff score in these draws is a pure reflection of who has the highest points at that time.
-
Program-Specific Draws: Sometimes, IRCC needs to fill quotas for a particular programme. They might hold a draw that only invites people eligible for the Federal Skilled Worker Program or, quite often, candidates who have a Provincial Nominee Program (PNP) nomination. A PNP-specific draw is a game-changer because those candidates have an extra 600 points added to their score.
-
Category-Based Draws: This is the newer, more targeted approach that has really shaken things up. Instead of just focusing on the highest CRS score, these draws invite people with specific professional backgrounds or skills that are in high demand in Canada.
Key Takeaway: Category-based selection is a massive deal. It means even if your overall CRS score isn't at the very top, you could still get an ITA if your work experience or language skills match what Canada is looking for right now.
These special categories can include things like:
- French-language proficiency: Inviting strong French speakers to support Francophone communities.
- Work experience in key sectors: Targeting people with experience in high-demand fields like healthcare, skilled trades (plumbing, carpentry), tech, or agriculture.
Understanding these different draw types is a core part of a good Express Entry strategy. It helps you see that there isn't just one path to getting an invitation. You can move from just passively waiting for a high score to actively positioning your profile to get noticed in a specific category-based draw. The pool is always changing, and your strategy needs to be just as flexible.
How to Actively Boost Your CRS Score
Submitting your profile is a huge milestone, but it's really the starting line, not the finish. The real work begins now. You’re in a pool with thousands of other talented candidates, and passively waiting is not a strategy. The key to moving from the middle of the pack to the front of the line is actively working to boost your Comprehensive Ranking System (CRS) score.
This is the part of the journey where you take control. Every single point you can gain pushes you closer to that life-changing Invitation to Apply (ITA). Think of your current score as a baseline—a foundation you can build upon with targeted effort and smart decisions.
Revisit Your Core Strengths
The quickest wins often come from improving the foundational elements of your profile. Before you get into the more complex strategies, start by optimising what you already have.
One of the most powerful levers you can pull is your language score. The difference between a Canadian Language Benchmark (CLB) 8 and a CLB 9 is significant, adding a substantial number of points. If your IELTS results were good but not great, seriously consider retaking the test. A few more weeks of dedicated practice could be the single most effective thing you do for your score.
Similarly, take a hard look at your work experience. Have you gained another year of skilled work since you first created your profile? Make sure you update your profile immediately. That extra year adds valuable points that could make all the difference.
The Power of Provincial Nomination
Without a doubt, the single biggest boost you can get is a Provincial Nominee Program (PNP) nomination. If a Canadian province nominates you through an Express Entry-aligned stream, you receive an extra 600 CRS points. This is a massive advantage that virtually guarantees you an ITA in the next draw.
Each province has its own PNP with various streams designed to attract workers with specific skills. Your mission is to become a researcher.
- Ontario (OINP): Often targets tech workers, French speakers, and those in skilled trades.
- Saskatchewan (SINP): Has a popular "In-Demand Occupations" list that doesn't always require a job offer.
- Alberta (AAIP): Frequently looks for candidates with ties to the province or those in specific sectors like healthcare and technology.
- Nova Scotia & New Brunswick: Have streams that sometimes open for candidates with specific work experience, even without a job offer.
The competition is fierce, and the pool reflects this. By late June 2025, the Express Entry pool had grown to 256,754 candidates. More revealingly, the number of profiles in the top score bracket (601-1200 points) shot up to 471—a huge jump from just 28 in mid-May. This highlights how many people are successfully using strategies like PNPs to dramatically improve their scores.
Pro Tip: Don't just wait for a province to find you. Actively check provincial websites, create expressions of interest where possible, and tailor your profile to align with the needs of a specific province. For example, if you are a software engineer, highlight this prominently to attract attention from tech-focused streams.
Securing a Canadian Job Offer
While not always mandatory, securing a valid job offer from a Canadian employer can add between 50 and 200 points to your CRS score. This is a significant advantage that can make a huge difference.
Start by networking on platforms like LinkedIn and tailoring your CV to Canadian standards. While a strong profile on the IRCC portal is essential, enhancing your CRS score might also involve securing a job offer, for which you may consider exploring professional resume writing services tailored to the Canadian market. They can help you craft a document that resonates with Canadian recruiters.
Other Avenues for Points
Don't overlook other potential point sources. If you have a spouse or common-law partner, their language skills and education can also contribute to your total score if they take the language tests and get an ECA.
Could you pursue another educational credential? A second degree or diploma can add more points. While this is a longer-term strategy, it could be a worthwhile investment if your score is stalled. You can play around with different scenarios to see how these changes would affect your score by using a reliable https://blog.japachat.com/express-entry-calculator/ to model potential improvements.
Common Questions from Nigerian Applicants
When you're deep in the process of creating your Express Entry profile, certain questions always seem to pop up. For Nigerian applicants, getting these right is crucial—it can be the difference between a smooth application and a major headache. Let’s tackle some of the most common ones I hear all the time.
A big one I see people ask is whether they can create more than one profile. The answer to this is a hard no. Creating multiple Express Entry profiles is a serious violation of IRCC rules. Don't do it. It can get you flagged and even banned from the system.
If something changes in your life – maybe you get married, finish a Master's degree, or hit a new milestone in your work experience – the right move is to update your single, existing profile. Never, ever create a new one to reflect these updates.
Keeping Your Key Documents in Order
"What if my passport or IELTS is about to expire?" This is a massive point of concern, and for good reason. These documents are the bedrock of your profile.
If either your passport or your language test results expire while you're in the pool, your profile will instantly become ineligible. That's it. You're out.
It's completely up to you to stay on top of these dates. You must renew your passport or retake your language test before they expire and update your profile with the new details immediately. This is the only way to stay in the pool and be considered for an Invitation to Apply (ITA).
A Key Takeaway: The IRCC system is automated. It won't send you a friendly reminder that your documents are about to expire. If you're serious about this journey, proactively managing your document validity isn't just a good idea—it's essential.
Nailing the Proof of Funds
Another area that trips people up is the "proof of funds" requirement. The amount you need to show isn't just a random number; it's tied directly to the size of your family. This includes you, your spouse or partner, and any dependent children, even if they aren't coming with you.
IRCC updates these settlement fund figures from time to time to keep up with the cost of living. You’ll need to prove you have access to these funds through official, signed letters from your bank showing your account balances over the past six months. It can't be borrowed money, and you absolutely must check the latest required amounts on the official Government of Canada website before you hit submit.
Planning your move abroad can be full of questions and uncertainty. Get instant, reliable answers tailored for your journey with JapaChat, Nigeria's first AI immigration expert. Start planning with confidence by visiting JapaChat today.