Documents Required for Canada Work Permit | The Ultimate Guide for Nigerians

When it comes to securing a Canada work permit, your success hinges on one thing above all else: your documentation. The absolute non-negotiables are your valid Nigerian passport, an official job offer letter, and, if required for your role, a Labour Market Impact Assessment (LMIA). Getting these core documents right from the very beginning is the single most critical step you'll take on your "japa" journey.
Your Essential Canada Work Permit Document Checklist
Embarking on the journey to work in Canada can feel overwhelming, but it all starts with methodically gathering the right paperwork. For applicants from Nigeria, a clear, organised checklist isn't just a nice-to-have—it's essential for avoiding the common mistakes that cause long delays or outright rejections. Think of this guide as your roadmap, breaking down every single document you'll need to submit.
This visual gives a high-level overview of the key requirements, typical processing times, and initial fees for a Canadian work permit application filed from Nigeria.
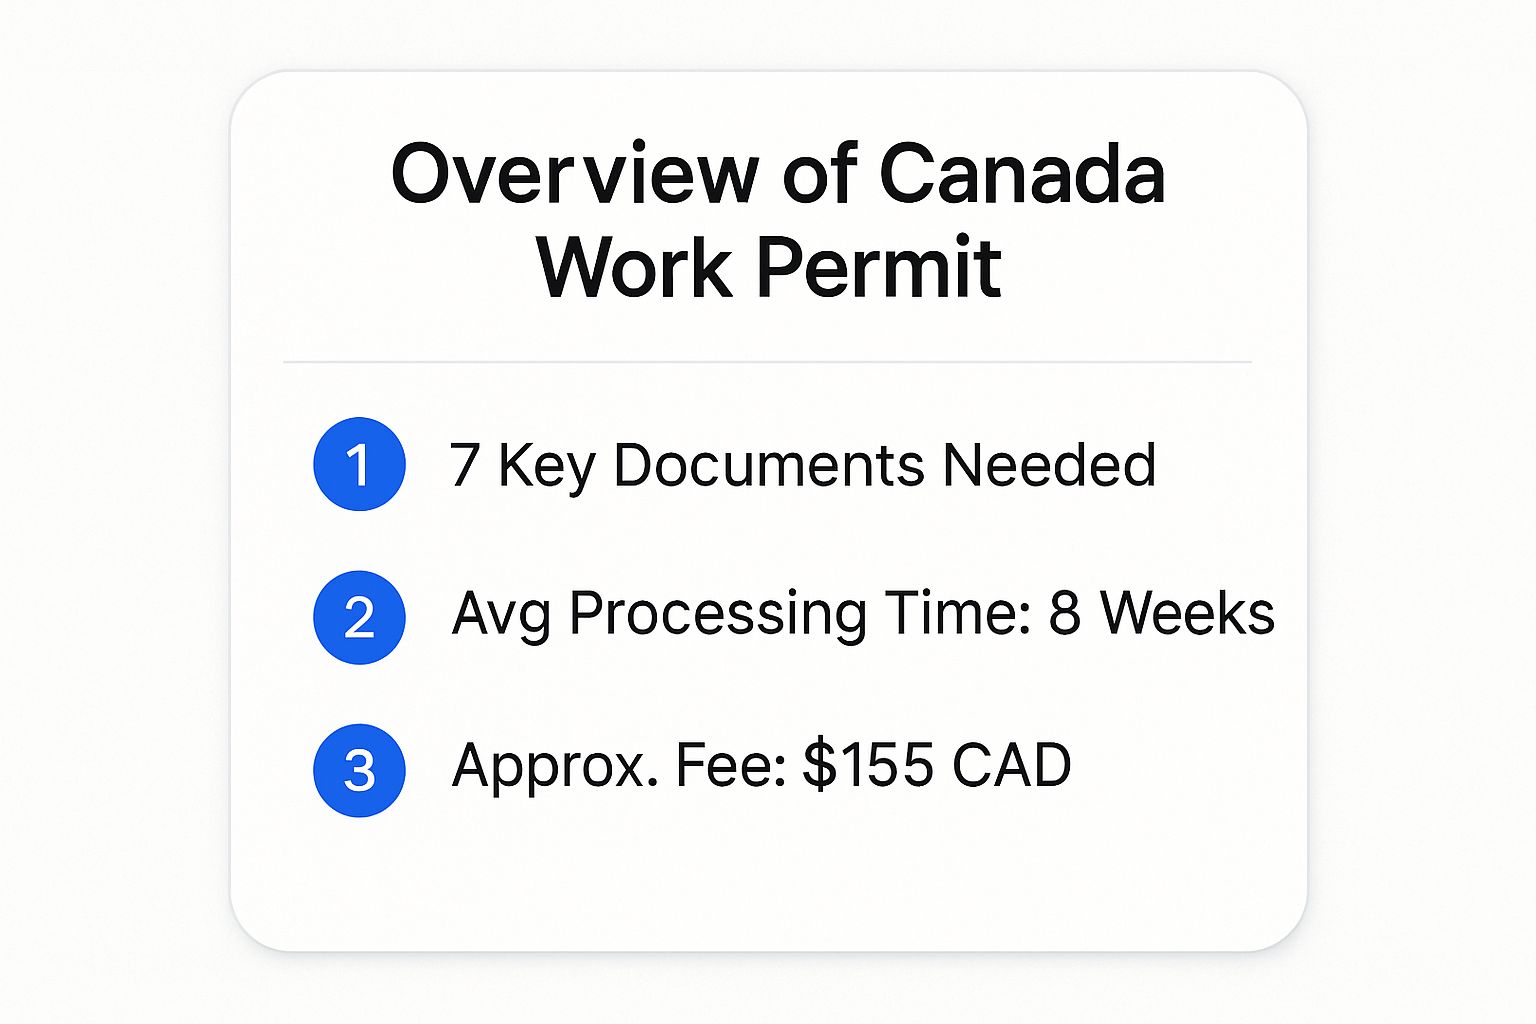
As you can see, understanding the number of documents, the average timeline, and the initial costs helps you plan properly and set realistic expectations for the process ahead.
Why This Checklist is Crucial for Nigerians
The Canadian immigration system is incredibly detailed, and every document requested serves a distinct purpose. For instance, your job offer letter is concrete proof of employment, while your proof of funds demonstrates you can support yourself when you first arrive in Canada, before that first paycheque comes in.
Nigeria is consistently one of the top source countries for temporary workers heading to Canada. In fact, Immigration, Refugees and Citizenship Canada (IRCC) issues over 360,000 permits each year across all its programmes. With such a high volume of applications, you can be sure that yours will be scrutinised for completeness.
Missing a single detail—like a reference letter that doesn't follow the proper format or a large, unexplained bank deposit—can bring your application to a grinding halt. You can learn more about Canada's immigration targets and current trends by reviewing the official immigration levels plans on CanadaVisa.com.
To help you get started, here is a quick summary of the main document categories you'll need to prepare for.
Quick-Reference Document Checklist
| Document Category | Key Documents Included | Purpose |
|---|---|---|
| Identity & Civil Status | Passport, Birth Certificate, Marriage/Divorce Certificates, Photos | To prove who you are, your nationality, and your family status. |
| Employment-Related | Job Offer Letter, LMIA (if applicable), Employment Contract, CV | To confirm you have a legitimate job offer and meet the role's requirements. |
| Financial Support | Bank Statements, Pay Slips, Letter of Financial Support | To show you can cover your living expenses upon arrival in Canada. |
| Background Checks | Police Clearance Certificates, Medical Examination | To ensure you are admissible to Canada on health and security grounds. |
| Application Forms | IMM 1295, Family Information Form, Use of a Representative | The official IRCC forms required to formally submit your application. |
This table provides a bird's-eye view, but the following sections will dive deep into each item, explaining exactly what's needed and how to present it correctly.
Gathering Your Core Personal Identification Documents
Before you even touch the job offer letter or proof of funds, the entire process kicks off with one fundamental thing: proving who you are. Think of these first documents as the foundation of your application. Getting them wrong can bring everything to a halt before you've even started. For Nigerian applicants, making sure these personal identification documents are perfectly in order is the first, most crucial step.

This image really drives home the point. Having your main travel and ID documents organised and ready is the absolute cornerstone of a successful work permit application.
Your Nigerian International Passport
This is it—the single most important document in your entire application package. Your Nigerian international passport absolutely must be valid for the whole time you plan to be in Canada.
Let's say your job offer is for two years, but your passport expires in one. Don't risk it. You need to renew your passport before you apply to avoid any headaches or potential rejections down the line.
When you scan your passport, you're not just scanning one page. The immigration officer needs to see a full picture. You must provide clear, high-quality colour scans of:
- The biodata page: This is the main page with your picture and personal information.
- All stamped pages: Seriously, every single one. Scan any page that has a visa, an entry stamp, or an exit stamp from any country you've ever travelled to.
Essential Supporting Identity Documents
Your passport is the star, but it needs a supporting cast. You'll need other official documents to back up your identity and civil status. These aren't optional; they help the visa officer build a complete and verifiable profile.
For almost every applicant from Nigeria, this means providing:
- Birth Certificate: This must be a copy of the certificate issued by the National Population Commission (NPC). An attestation of birth from a hospital or a local government declaration of age usually won't cut it.
- NIMC Slip or National ID Card: Including a clear copy of your National Identification Number (NIN) slip or the permanent ID card gives your application another strong layer of verification.
Crucial Tip: Triple-check that your names and date of birth are exactly the same across every single document—your passport, birth certificate, NIMC slip, and your job offer. Even a tiny spelling mistake can trigger major delays or raise red flags.
Meeting the Strict Passport Photograph Specifications
Finally, don't overlook the passport photos. It sounds like a small detail, but Immigration, Refugees and Citizenship Canada (IRCC) has very precise rules. The wrong kind of photo is a surprisingly common reason for an application to be sent back.
Your photos must be:
- Taken within the last six months.
- Exactly 50 mm x 70 mm in size.
- Shot against a plain white background.
- Your facial expression must be neutral—no smiling or frowning.
The best advice? Go to a professional photo studio in Lagos or Abuja and tell them you need photos for a "Canadian visa application." They'll know the exact specifications.
Securing Your Employer-Specific Employment Documents
Once your personal identification is in order, the next set of documents you'll need comes directly from your Canadian employer. Think of these as the backbone of your entire application; they're the official proof that you have a legitimate job offer in Canada.
Without these specific papers, your application simply won't move forward. This is the stage where you directly link your professional skills to a genuine Canadian employment opportunity.

These employer-provided documents are essentially your formal ticket into the Canadian workforce. It’s absolutely critical that every single detail is correct and complete.
Your Official Job Offer Letter
The job offer letter is much more than a simple "you're hired" note. It's a formal, legal document that has to meet very specific criteria set by Immigration, Refugees and Citizenship Canada (IRCC). It must be on official company letterhead and signed by someone with the authority to hire, like an HR manager or director.
For Nigerians exploring the various types of Canadian work visas, a comprehensive and detailed job offer is non-negotiable.
Your letter needs to include several key pieces of information to be valid:
- Your Full Name and the Employer’s Details: This means the company's full legal name, physical address, phone number, and official website.
- Your Job Title and NOC Code: Your National Occupational Classification (NOC) code is crucial and must accurately match the duties you'll be performing.
- Detailed Job Responsibilities: Don't settle for a vague description. If you’re a software developer, for instance, it should specify programming languages, project management duties, and the types of projects you'll work on.
- Salary and Benefits: The letter must state your annual salary in Canadian dollars. It should also outline any benefits, such as extended health insurance, dental coverage, or pension plan contributions.
- Employment Duration: Is the role permanent and ongoing, or is it a fixed-term contract? If it's a contract, the start and end dates must be clearly stated.
Understanding the LMIA and Offer of Employment Number
For most of the work permit pathways open to Nigerians, your employer will need to secure a Labour Market Impact Assessment (LMIA). An LMIA is a document issued by the Canadian government confirming that your employer has permission to hire a foreign national. Essentially, it proves that there was no Canadian citizen or permanent resident available to fill the position.
Key Insight: The LMIA application process is handled entirely by your employer. Once they get an approval, they will receive a positive LMIA confirmation letter which includes a unique number. You absolutely must get this number from your employer, as you’ll need to include it in your work permit application. It’s your golden ticket showing the job offer is legitimate and has been vetted by the government.
But that's not all. Your employer also has to submit the details of your job offer through the official IRCC Employer Portal. This action generates a unique Offer of Employment number, which always starts with the letter 'A' followed by a series of digits. You are required to input this exact number on your main application form (the IMM 1295). This number electronically links your application to the offer your employer submitted, creating a verifiable and seamless connection for the visa officer.
Right, so you’ve handled the basics – your identity is sorted, and you've shown the job offer is legit. Now comes the part where you prove you’re actually the right person for that job. This is where you connect the dots for the visa officer, showing them exactly how your skills and experience line up with the role they see on paper.
For applicants from Nigeria, this means laying out your professional history in a way that’s crystal clear and easy to verify.
Proving Your Work Experience with Strong Reference Letters
Your work history is best shown through detailed reference letters. I can't stress this enough: these aren't just quick notes confirming you worked somewhere. Think of them as official, powerful testimonials that tell the story of your professional contributions.
A vague or poorly prepared reference letter can sink an application by creating doubt. To make sure that doesn't happen, every letter from a previous Nigerian employer needs to be on official company letterhead and packed with specific, verifiable details.
For a letter to be taken seriously, it absolutely must include:
- Your Full Name and the Job Title you held.
- Precise Dates of Employment: Give them the exact start and end dates, like 15 May 2018 to 20 August 2022.
- A Detailed Breakdown of Your Responsibilities: This is the most important part. Don't just say "Software Developer." List the programming languages you mastered, the specific projects you led, and your key achievements. Make sure these duties directly reflect the responsibilities listed in the NOC code tied to your job offer.
- Your Annual Salary and any Benefits.
- Your Supervisor’s Full Contact Details: This must include the name, title, official email, and phone number of the person who signed the letter.
A Real-World Nigerian Example: Imagine a reference letter from a tech company in Lagos for a Product Manager role. A strong letter would mention things like "managed the 'Shyp' logistics app," "grew the user base from 5,000 to 50,000," and "implemented Agile development cycles." That level of detail makes your experience real and undeniable.
Showcasing Your Educational Credentials
Next up is your education. For most applications, a clean, scanned copy of your degree certificate from your Nigerian university (say, the University of Ibadan or ABU Zaria) will do the trick.
However, if you're in a regulated profession—think engineering, nursing, or pharmacy—a simple degree certificate won't cut it. Canada needs to be sure your Nigerian qualification is on par with its Canadian equivalent. This is where an Educational Credential Assessment (ECA) comes in.
An ECA is an official report from a designated Canadian organisation that evaluates and verifies your foreign credentials. For Nigerians, the go-to organisation is almost always World Education Services (WES). If the NOC code for your job requires an ECA, it's non-negotiable.
The process involves having your university send your academic transcripts directly to WES for assessment. My advice? Start this immediately. The back-and-forth with Nigerian universities and WES can take weeks, sometimes even months, so it’s one of the first things you should get moving on.
Demonstrating Your Financial Capacity and Support
Let's talk about proof of funds. For many Nigerian applicants, this part of the process causes a lot of stress, but it really doesn't need to. Think of it this way: you're simply showing the visa officer that you have enough money to take care of yourself when you first arrive in Canada, before you start earning a salary.
The main document you'll need for this is your personal bank statement. And no, a one-page summary from the bank won't cut it. You need to provide a proper, detailed history of your account.
What Visa Officers Look For
Visa officers are experts at spotting anything that looks out of place. They're looking for a steady financial history, not a huge lump sum of cash that magically appeared in your account last week. This is a classic red flag, and unfortunately, a common mistake for applicants from Nigeria.
- Statement History: You'll need to submit bank statements that cover the last four to six months. This gives them a clear picture of your financial habits.
- Stable Balance: They want to see that the funds have been sitting in your account for a while. A consistent balance shows that the money is genuinely yours and readily available.
- No Sudden Large Deposits: A large, unexplained deposit right before you apply is a major cause for concern. For example, if your account balance is usually around ₦1 million and then ₦5 million suddenly shows up a week before you apply, you absolutely must explain where it came from.
Explaining Large or Unusual Transactions
If you do have a large deposit from a recent transaction, don't panic and definitely don't try to hide it. Honesty is the best policy here. You need to write a straightforward Letter of Explanation to go with your bank statements.
For instance, maybe you sold a car or a plot of land to gather the funds. Your letter should state this plainly. More importantly, you must back it up with evidence, like the deed of sale or vehicle transfer documents. This proves the money is legitimate and came from a verifiable source.
Trust me, failing to explain a large transaction is one of the fastest routes to a visa refusal. For a more detailed walkthrough, take a look at our comprehensive guide on presenting your proof of funds for Canada to make sure you tick every box.
While your bank statement is the most important financial document, you can strengthen your application with other supporting evidence. These can include:
- Pay slips from your current job in Nigeria.
- An official letter from your employer confirming your position and salary.
- Proof of other assets like investments or property (but remember, cash in the bank is always the primary focus).
Medical Exams and Biometrics: The Nigerian Process
When applying for a Canada work permit from Nigeria, you'll need to clear two major hurdles: the medical exam and the biometrics appointment. Think of these as non-negotiable checks that confirm you meet Canada’s health and security requirements. Getting these done right and on time is absolutely critical to avoid stalling your application.

I always advise applicants to complete an upfront medical examination. This simply means you get the medical check done before submitting your work permit application. You can't just visit your regular family doctor for this; it has to be with a physician specifically approved by IRCC. You’ll find these panel physicians in major cities like Lagos, Abuja, and Port Harcourt.
Tackling the Biometrics Appointment
Biometrics are handled a bit differently. You first need to submit your application and pay all the associated fees. Only then will you receive a Biometric Instruction Letter (BIL) in your IRCC secure account. Don’t even think about booking your appointment until you have this letter in hand.
With your BIL, you can then schedule an appointment at a Visa Application Centre (VAC) in Nigeria, with the main centres being in Lagos and Abuja. At the appointment, they’ll simply take your fingerprints and a photograph. It's a straightforward process.
Here’s the key takeaway and a common mistake I see people make: You can do your medicals before you apply, but you must wait for the official instruction letter after you apply to do your biometrics. Getting this sequence wrong is a classic, preventable delay for many Nigerian applicants.
Appointment slots for both medicals and biometrics can fill up weeks in advance, so it’s wise to act fast once you have the necessary documents. Remember, IRCC won't start processing your application in earnest until they have both your medical results and your biometrics on file.
Common Mistakes Nigerian Applicants Make and How to Avoid Them
Beyond the core list of required documents, certain papers can really boost your application by proving your deep connections to Nigeria. Think of it this way: you need to show the visa officer you have strong reasons to return home. A police clearance certificate, for example, is a powerful way to demonstrate good character and that you're admissible to Canada.
It's also a smart move to include proof of strong family ties. This could be anything from marriage certificates and your children's birth certificates to evidence that you're the primary caregiver for elderly parents. While not always officially mandatory, these documents help paint a picture of a life you are committed to returning to, which can make all the difference for a Nigerian applicant.
Top Errors That Can Sink Your Application
Knowing what to do is important, but knowing what not to do can be a lifesaver. So many rejections for Canadian work permits come down to small, completely avoidable mistakes. Let's look at the most common blunders we see from Nigerian applicants so you can steer clear of them.
- Badly Scanned Documents: This is a big one. If your submitted documents are blurry, cut-off, or scanned at a weird angle, they'll likely be rejected. Every single page has to be perfectly clear, upright, and easy to read.
- Leaving Blank Spaces on Forms: Never leave a field empty on your IMM forms. If a question doesn't apply to you, simply write "Not Applicable" or "N/A." An empty space looks like an oversight.
- Unexplained Large Deposits: We've touched on this before, but it bears repeating. A sudden, large lump sum appearing in your bank account without a clear source is a massive red flag for visa officers. Always, always include a detailed Letter of Explanation with proof.
- Inconsistent Personal Information: Your name, date of birth, and other key details must match exactly across every document you submit. Even a tiny typo can create serious delays or even a refusal.
Expert Advice: A surprisingly common and easily fixed error is messing up the file format or size when uploading to the IRCC portal. Before you hit submit, double-check that your files are in the right format (usually PDF) and that each one is under the 4 MB size limit.
To help you get this right, I've put together a table that breaks down these frequent slip-ups and shows you exactly how to sidestep them.
Common Mistakes and How to Avoid Them
This table is a quick reference for the most frequent errors we see in work permit applications from Nigeria. Use it as a final checklist to ensure you're not falling into these common traps.
| Common Mistake | Why It's a Problem | How to Avoid It |
|---|---|---|
| Blurry Passport Scans | The visa officer cannot verify your identity or travel history, which often leads to an automatic refusal. | Use a good quality scanner or a reliable scanning app on your phone. Always review every single file before you upload it to the portal. |
| Unexplained Bank Deposits | It raises serious suspicion about the source of your funds (a practice known as "funds parking") and your true financial stability. | Always provide a detailed Letter of Explanation. Attach solid proof of where the money came from, like a car sale receipt or a property sale agreement. |
| Incomplete Employment History | Gaps or missing jobs in your timeline can make the visa officer doubt your work experience and your overall honesty. | List your complete work history for the last 10 years, even if a particular job doesn't seem relevant. Be sure to explain any gaps (e.g., "Studying for Master's Degree," "Unemployed"). |
Getting these details right from the start saves you time, money, and the frustration of a potential refusal. A careful, well-prepared application always stands out.
Common Questions About Your Canada Work Permit Documents
When you're pulling together your work permit application, it's natural for questions to pop up. Many Nigerian applicants find themselves asking the same things, especially when it comes to the finer details required by IRCC. Let's tackle some of the most frequent ones I hear.
One of the biggest concerns is always about money. How much is truly enough for proof of funds when you're applying from Nigeria?
Immigration, Refugees and Citizenship Canada (IRCC) needs to see that you can take care of yourself before you get that first Canadian paycheque. Think of it as a financial safety net.
As a general rule, having at least ₦3 million (which is about CAD 5,000) in your bank account is a solid starting point. This isn't just about having the money on the day you apply; IRCC wants to see that this amount has been stable in your account for the last four to six months. Remember, this figure changes based on your family size, so always double-check the official IRCC table for the most accurate requirement.
Another common stumbling block is the job offer letter. What happens if it's missing key information?
If your letter doesn't include details like the National Occupational Classification (NOC) code or a clear salary breakdown, you need to ask your employer for a revised version immediately. Don't submit an incomplete letter.
Your employer must provide a letter on official company letterhead that clearly states:
- Their full legal name and address
- Your specific job title and the corresponding NOC code
- Your annual salary listed in Canadian dollars
Submitting an application without these details is a surefire way to get it returned, causing unnecessary delays.
As a seasoned immigration consultant in Abuja once told me, “A precise job offer letter reduces processing delays by up to 20%.” It’s that important.
More Common Document Questions
Here are a few more specific questions I get all the time, with straightforward answers.
-
Can I use my land valuation documents as proof of finances?
No, you can't use a land valuation in place of cash in the bank. IRCC is very clear that they need to see fully liquid assets—money you can access immediately. Property documents are great as supplemental proof of your financial stability, but they don’t replace the need for bank funds. -
What makes a police clearance certificate valid?
You need to get a certificate directly from the Nigeria Police Force, and it must be less than six months old at the time of your application. Critically, it has to confirm you have no criminal record. -
Is an affidavit okay if I can't find my birth certificate?
Unfortunately, no. IRCC does not accept affidavits as a substitute for an official birth certificate. Your best bet is to get a certified true copy from the National Population Commission. -
How should I explain a large, recent deposit in my account?
Transparency is key here. Write a brief Letter of Explanation detailing where the money came from and include supporting evidence, like sale receipts or investment statements. This shows the visa officer you have nothing to hide.
Keep this section handy; it can be a quick reference point whenever you feel stuck.
Key Takeaways
Getting every document right according to IRCC's standards is the single best thing you can do to speed up your application and boost your chances of approval.
Take the time to double-check every name, date, and code across all your files. Consistency is crucial.
If you need personalised help with the unique aspects of your application from Nigeria, a tool like JapaChat can offer instant expert guidance on every document detail.
Ready for clear, accurate answers anytime? Try JapaChat for expert advice.
Leave a Reply