How to Apply for Canadian Visitor Visa from Nigeria | Simple Guide
So, you're planning a trip to Canada from Nigeria. It’s a fantastic goal, but getting the visa requires some serious preparation. The whole process boils down to proving a few key things to Immigration, Refugees and Citizenship Canada (IRCC): that you have a legitimate reason to visit, you can afford your trip, and most importantly, you have every intention of returning to Nigeria.
Let's be clear: convincing a Canadian visa officer that you'll leave at the end of your authorised stay is the single most important part of your application.
Getting Started: The Canadian Visa Journey for Nigerians
Whether you’re aiming to visit family in Toronto, attend a business conference in Calgary, or just see the sights, it all begins with a strong visa application. For Nigerians, this isn't just a box-ticking exercise; it's about building a solid, believable case for yourself.
First things first, you need to be sure about who needs a visitor visa for Canada. As a Nigerian passport holder, there’s no grey area—a visitor visa, officially called a Temporary Resident Visa (TRV), is mandatory.
The Core of a Successful Application
Every piece of paper you submit must tell a consistent story: your visit is temporary. You need to show the visa officer you have strong reasons to come back home. Let’s face it, applications from Nigeria are looked at very closely, so your preparation has to be top-notch.
From my experience, you should zero in on these three pillars right from the start:
- A Clear Purpose for Your Visit: Are you a tourist? Visiting your sister? Attending a trade show? Your reason needs to be crystal clear and backed up with real evidence, like a detailed travel plan or an official invitation letter.
- Solid Financial Proof: This isn't just about showing a fat bank account. It’s about demonstrating a stable financial picture over time. The visa officer wants to see that you can comfortably pay for your trip without any temptation to work illegally in Canada.
- Strong Ties to Nigeria: This is often the make-or-break factor. You have to prove you have compelling reasons to return—think stable employment, family commitments, property ownership, or an established business.
Here's a common mistake I see all the time: people get a sudden "loan" from a friend to pump up their bank balance right before applying. Visa officers are trained to spot these large, unexplained deposits. They are far more impressed by a consistent history of income and savings.
Do You Need a Tourist, Family, or Business Visa?
While it’s all under the same "visitor visa" umbrella, the specifics of your trip will shape the documents you need. For example:
- Tourism: You’ll need a day-by-day itinerary, proof of hotel bookings, and sometimes flight reservations.
- Visiting Family or Friends: A powerful, detailed letter of invitation from your host in Canada is non-negotiable.
- Business: You’ll need a formal invitation from the Canadian company, plus documents proving your own business credentials in Nigeria.
Getting these fundamentals right lays the groundwork for a much stronger application. Now, let’s look at exactly what you'll need.
Canadian Visitor Visa Key Requirements for Nigerians
To make things easier, here's a quick summary of the essential documents and what they mean for a Nigerian applicant. Think of this as your starting checklist.
| Requirement | What It Means for a Nigerian Applicant | Example Document |
|---|---|---|
| Proof of Identity | A valid Nigerian international passport with at least one blank page and a validity that covers your intended stay. | Your current Nigerian Passport Bio-Data Page. |
| Financial Support | Evidence you can cover all your expenses. This is about showing a stable financial history, not just a one-time large deposit. | Bank statements for the last 6 months showing consistent income (e.g., your salary). |
| Purpose of Visit | Clear, documented reason for your trip. Your story must be logical and consistent across all documents. | For tourism, a detailed itinerary; for a family visit, a Letter of Invitation. |
| Ties to Nigeria | The most critical part. Proof that you have strong reasons to return home after your visit. | Employment letter, proof of property ownership (C of O), or family ties (marriage certificate). |
| Application Forms | Correctly and completely filled-out official IRCC forms. No mistakes or omissions. | IMM 5257 (Application for Visitor Visa). |
Having these core documents in order is the first major step. A well-prepared file shows the visa officer that you are a serious, organised, and genuine applicant.
Proving Strong Ties to Nigeria for Visa Success

Let's get straight to the point: this is the make-or-break part of your application. If there's one area where Nigerian applications get the most scrutiny, it’s in proving you have strong, undeniable reasons to come back home. You have to paint a picture for the Canadian visa officer of a life in Nigeria so compelling that leaving it behind for good is simply unthinkable.
You need to get into their mindset. A visa officer is trained to assume everyone is a potential immigrant until proven otherwise. Your job is to overwhelm that assumption with so much concrete evidence that they can only conclude one thing: your trip is temporary.
The reality on the ground is tough. Getting a Canadian visitor visa has become much harder, with refusal rates for Nigerians being quite high. For us, the biggest hurdle is, and always has been, proving our deep roots in Nigeria and showing we have every intention of returning.
This means every piece of evidence you submit has to be specific, well-organised, and powerful.
Your Professional Life as an Anchor
Whether you're a banker in Lagos, a tech bro in Abuja, or running your own business in Port Harcourt, your job is your primary anchor to Nigeria. Just saying you're employed isn't enough. You have to prove it with documents that leave no room for doubt.
For Employees:
Your number one tool is a solid Letter of Employment. This can't be a lazy, one-line note. A strong letter, printed on official company letterhead, needs to cover all the bases:
- Your full name and your specific job title.
- The date you started working there and your annual salary.
- A clear statement confirming your leave has been approved for the exact dates of your trip.
- An explicit sentence stating you are expected back at your desk on a specific date.
- Your manager’s direct contact information for any verification.
Back this up with your last six months of payslips and your work ID card. Together, these documents show a stable, ongoing career that you wouldn’t just walk away from.
For Business Owners:
If you're your own boss, your proof has to be even more watertight. The stability of your business is a direct reflection of your own stability.
- CAC Documents: Get your Certificate of Incorporation and other registration papers ready. This is non-negotiable proof that your business is legitimate.
- Business Bank Statements: Just like your personal account, these need to show consistent business activity over the last six months.
- Tax Clearance Certificate: This is a golden ticket. It shows you’re a responsible business owner who meets their obligations to the Nigerian government.
Financial Stability Is More Than a Bank Balance
Honestly, a visa officer cares less about the total amount in your account and more about how it got there. Your bank statements need to tell a clear, consistent story. A huge, unexplained lump sum that appears right before you apply is the biggest red flag you can raise and a classic reason for refusal.
The goal is to show a steady build-up of funds from a legitimate source, like your salary or business income. Six months of stamped bank statements showing your monthly salary coming in and your savings growing is far more convincing than a fat balance that appeared out of nowhere.
Key Takeaway: The story your money tells is what matters. A consistent salary of ₦500,000 a month building up to a stable balance of ₦4 million is much stronger than an account that magically jumps from ₦200,000 to ₦5 million a week before your application.
Family and Community: The Ties That Bind
Don't ever underestimate the power of your social and family connections. These are the non-financial ties that root you firmly in Nigeria.
- Immediate Family: If you're married or have kids, provide your marriage and birth certificates. These documents clearly show you have dependents and responsibilities waiting for you back home. If you're looking after elderly parents, a doctor's letter or an affidavit of dependency can add serious weight to your application.
- Community Involvement: Are you an active member of your church or mosque? Do you belong to a professional body like the Nigerian Bar Association or a local rotary club? A letter from a leader in one of these groups can speak volumes about your character and how embedded you are in your local community.
Assets and Investments: Proof You’re Building a Future in Nigeria
Owning property or having significant investments is a powerful statement. It shows you're not just living for today; you're building a long-term future right here in Nigeria. These are things people don't just abandon.
Pull together clean, legible copies of:
- Property Deeds or Landed Documents: If you own a house or land, the official Certificate of Occupancy (C of O) or deeds registered in your name are crucial.
- Vehicle Ownership Documents: While not as strong as property, it adds another layer to the overall picture.
- Investment Statements: Proof of stocks, mutual funds, or other financial investments demonstrates you're actively growing your wealth in Nigeria.
All of these pieces come together in your letter of intent, where you explain why you want to visit Canada. Our guide on how to write a compelling letter of intent for a visa application can give you the structure you need. Ultimately, you’re trying to build an undeniable profile of a person with a stable, fulfilling, and promising life in Nigeria who is just looking to take a well-deserved trip abroad.
Your Nigerian Document Checklist for the Canada Visa
Once you've established your strong ties to Nigeria, it’s time to gather the documents that will make up the heart of your application. Think of yourself as building a case file for the visa officer. Every single piece of paper needs to be crystal clear, perfectly legible, and serve a specific purpose. A missing document or a blurry copy can create needless doubt and slow everything down.
This isn't just a box-ticking exercise. It's about presenting a professional, organised, and easy-to-understand story of who you are and why you plan to visit Canada. Let’s break down exactly what you’ll need, paying close attention to the areas where Nigerian applicants are often scrutinised the most.
This infographic gives you a bird's-eye view of the document gathering process, from your personal ID to the evidence backing up your trip.
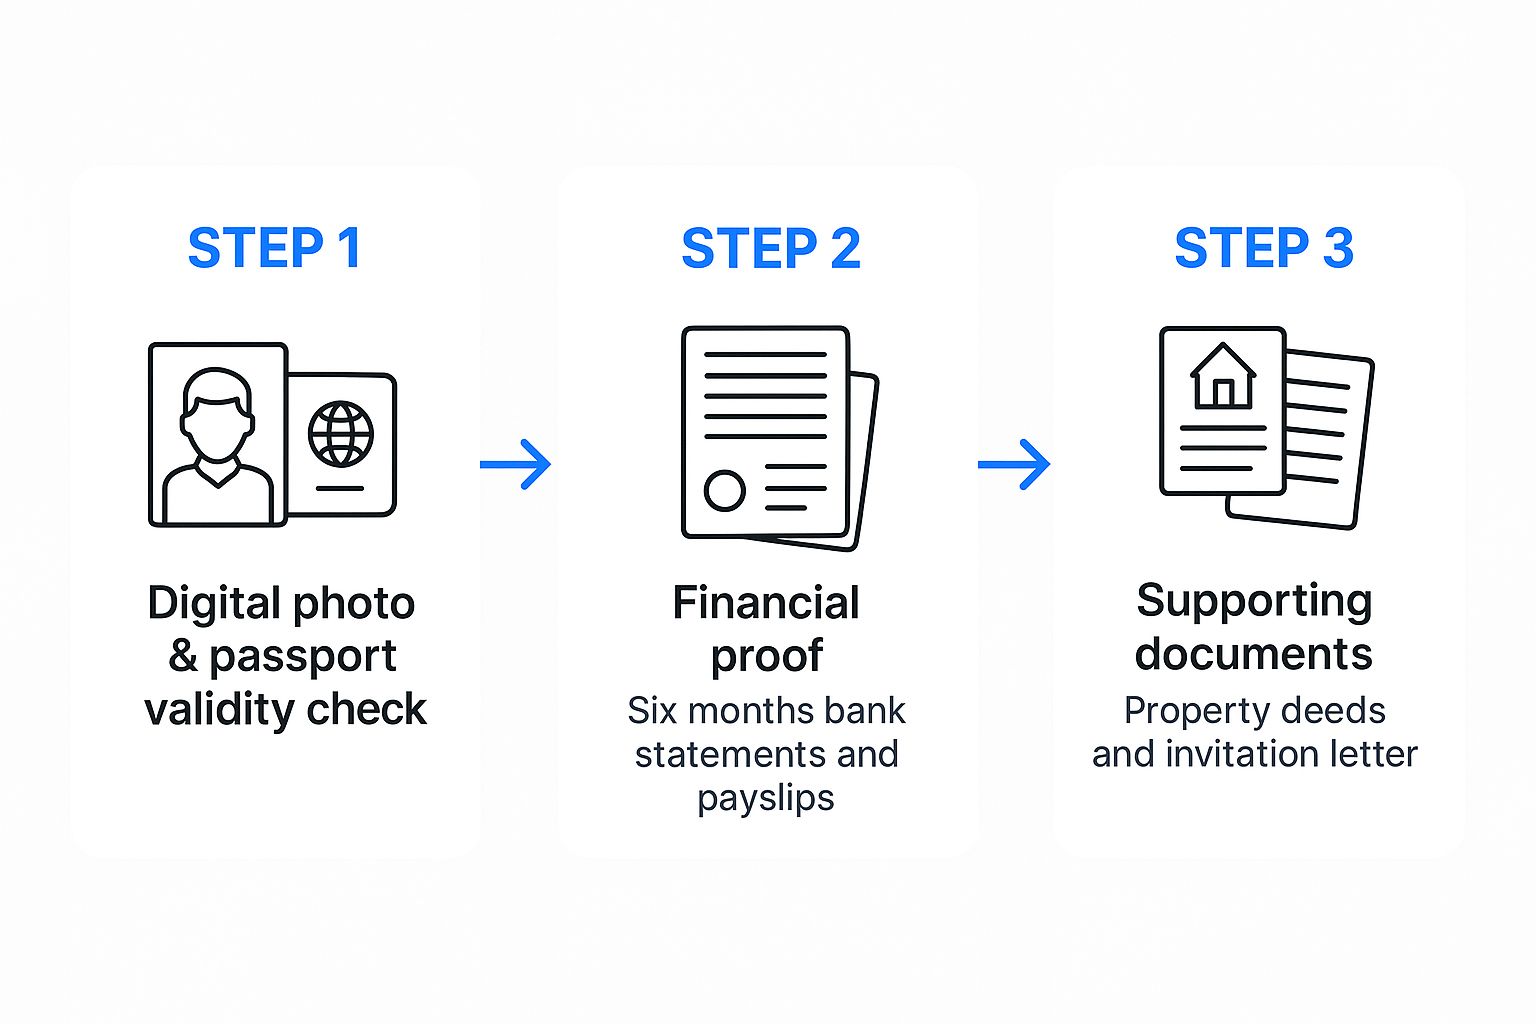
As you can see, the flow is logical. It starts with proving who you are, moves on to showing you can fund your trip, and ends with the evidence that supports your travel purpose and confirms you'll be coming back home.
Core Identity and Travel Documents
These are the absolute non-negotiables. Getting these fundamentals wrong is the fastest way to have your application returned without even being properly reviewed.
- Your Nigerian International Passport: This is your primary ID. Before you do anything else, check that it has at least six months of validity left after the date you plan to leave Canada. You’ll also need at least one completely blank page (not the last page) for the visa sticker. You must submit a high-quality, colour copy of the bio-data page—the one with your photo and personal details.
- A Recent Digital Photograph: Canada is extremely particular about this. You can't just reuse your passport photo. It must be a recent digital picture (taken within the last six months) against a plain white background. You need to be looking straight at the camera with a neutral expression. No smiling!
- Proof of Previous Travel (If You Have It): Got any old passports with visas or stamps from places like the UK, USA, or Schengen countries? Make clean copies of those pages. This is powerful stuff—it shows a track record of you respecting other countries' immigration laws.
Proving Your Financial Capacity
After home ties, this is arguably the most critical part of your application. The goal isn't just to show you have money, but to prove you have a stable and legitimate financial life.
You’ll need to provide six months of bank statements from your main personal account. But how you present them matters immensely.
First, don't just print them off your banking app. Walk into your bank branch and ask them to print, stamp, and sign every single page. This makes the document official in the eyes of the visa officer.
Second, the numbers need to tell a logical story. The statement should show a consistent pattern, like your monthly salary coming in or regular payments from your business. A huge, unexplained lump sum of millions of Naira dropped into your account right before applying is a massive red flag and a classic reason for visa refusal.
Finally, your bank statement doesn't stand alone. You need to show where that money comes from.
- If you're an employee: Provide your official payslips from the last six months.
- If you own a business: Include copies of your business's CAC registration documents, your most recent tax clearance certificate, and the business's own bank statements.
To help you get this right, here’s a quick guide on what to do and what to avoid when presenting your financial documents.
Financial Documents Do's and Don'ts for Nigerian Applicants
| Action | Do This (Correct Approach) | Don't Do This (Common Mistake) |
|---|---|---|
| Bank Statements | Provide 6 months of statements, officially stamped and signed by your bank on every page. | Submitting an unstamped online printout or just a letter of account balance. |
| Source of Funds | Include payslips, employment letter, or business CAC documents to explain the income. | Having a large, unexplained deposit just before applying (e.g., "borrowed funds"). |
| Consistency | Ensure the inflow/outflow aligns with your stated salary or business activities. | Showing erratic transactions that don't match your job or business profile. |
| Sponsorship | If sponsored, include the sponsor’s bank statements, job letter, and a formal affidavit of support. | Simply stating "my uncle will pay for my trip" with no supporting financial proof from the uncle. |
Submitting a simple closing balance letter from your bank is practically useless. A visa officer needs to see the full six-month transaction history to get a real picture of your financial stability.
Key Supporting Documents
These are the documents that add extra weight and credibility to your application. They answer the "why" and "how" of your trip and reinforce your promise to return to Nigeria. While we're focused on Canada here, understanding the principles of general travel document preparation can give you a better overall perspective.
- Letter of Invitation (If Visiting Someone): If you're visiting family or friends, they need to write a detailed invitation letter. It should include their full name and address, proof of their status in Canada (like a copy of their passport or permanent resident card), and details on how they might support you during your stay.
- Approved Leave Letter (For Employees): This is a must. Get a formal letter from your HR department on company letterhead. It needs to confirm that your leave for your specific travel dates has been approved, state your job title and salary, and explicitly mention your expected return-to-work date.
- A Detailed Travel Itinerary: Don’t just write, "Visiting Toronto for two weeks." Show them you’ve actually planned your trip. Create a simple day-by-day plan. For example: "Day 1-3: Arrive in Toronto, explore CN Tower and Ripley's Aquarium. Day 4: Day trip to Niagara Falls." You should also include hotel reservations (book ones with free cancellation) and a flight itinerary (this is a reservation, not a purchased ticket).
- Proof of Assets: This is a powerful way to demonstrate strong ties to Nigeria. Gather clear copies of any property deeds, land documents, or car ownership papers that are registered in your name.
Diving Into the IRCC Online Application Portal
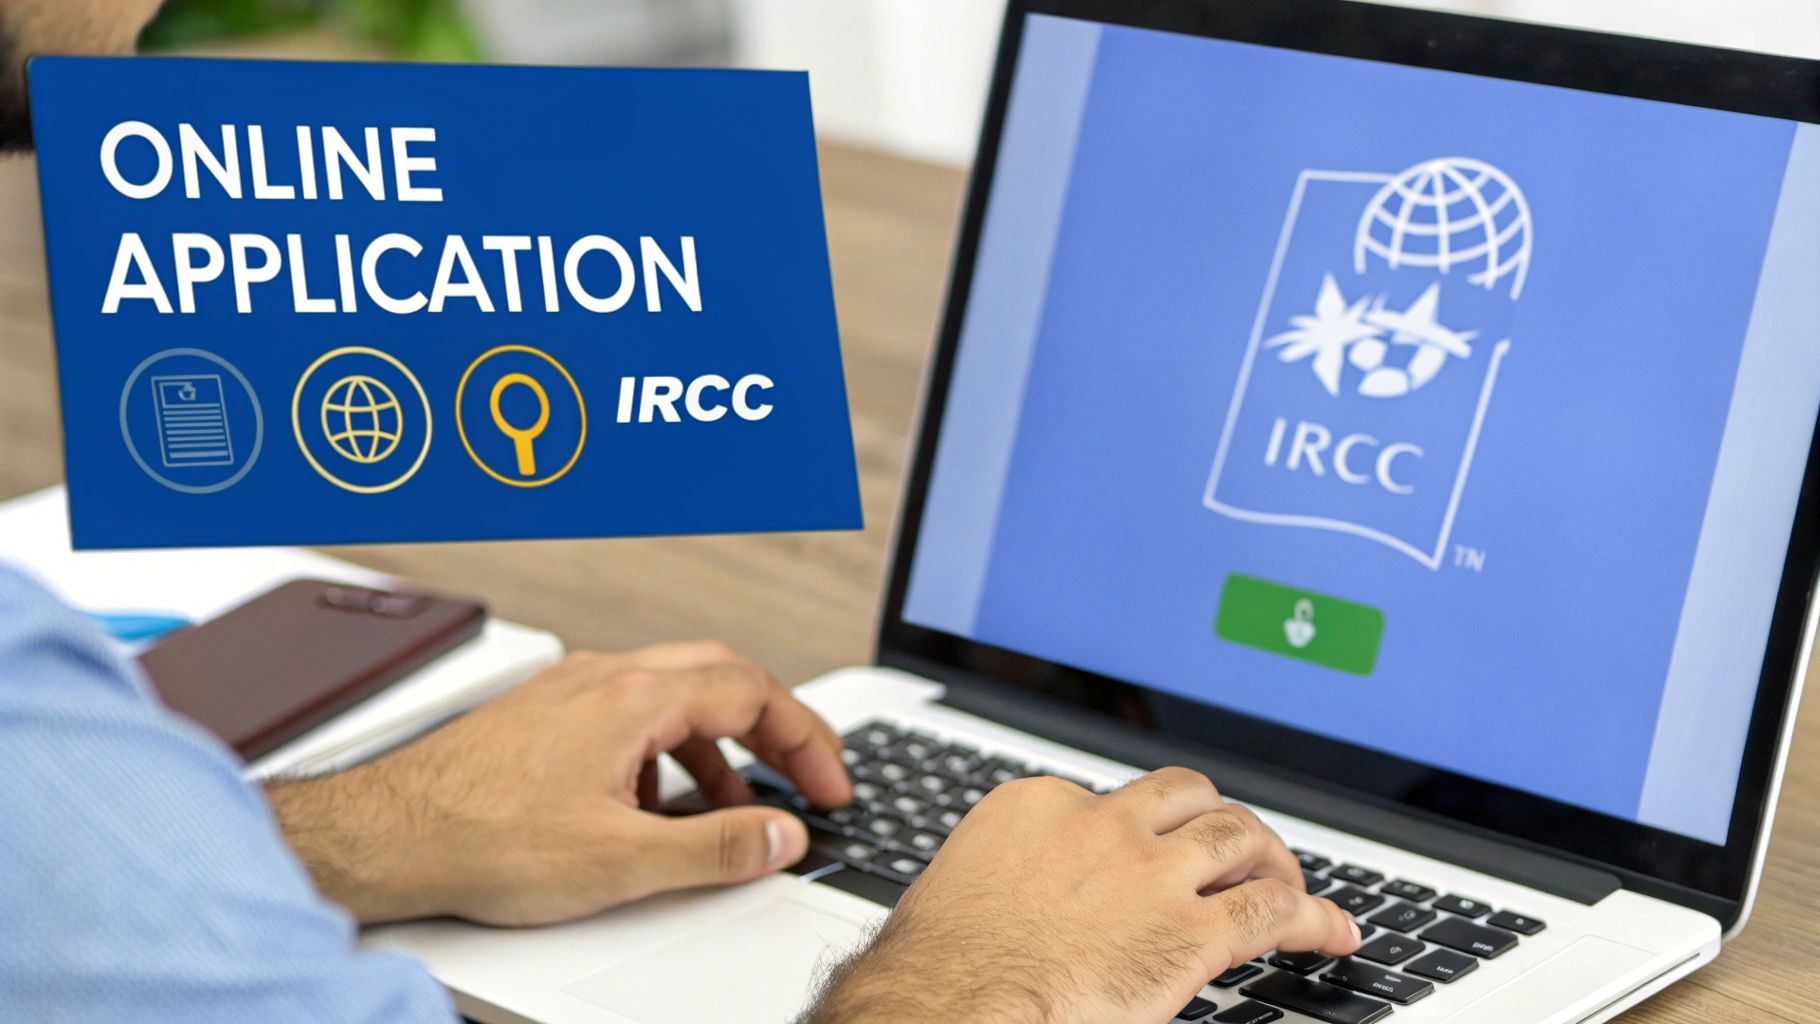
Alright, you’ve gathered and scanned your documents. Now it’s time to tackle the official IRCC online application portal. It can look a bit intimidating at first, but I promise it's more straightforward than it seems once you get the hang of it.
This is where all your preparation pays off. Applying online is really the only way to go these days—it's faster, you can upload documents instantly, and you get updates directly to your account. Your first step is to create a secure online account. You'll see two options: GCKey or Sign-In Partner. For nearly everyone applying from Nigeria, GCKey is the correct choice.
Setting Up Your GCKey Account
Think of your GCKey as your unique digital key to Canada’s immigration system. It's a specific username and password that keeps your application safe and private.
Getting it set up is simple:
- Head to the official IRCC website and find the option to "Sign in or create an account."
- From there, choose the "GCKey" button.
- Click "Sign Up" and just follow the on-screen instructions. You'll create a username, a password, and a few security questions.
My Personal Advice: Please, write down your GCKey username, password, and the answers to your security questions. Keep them somewhere safe but accessible. I've heard too many stories of people getting locked out and having a massive headache trying to regain access just to check their application status. A password manager or even a dedicated notebook works wonders.
Once you’re in, you’ll land on your main dashboard. This is your command centre for starting the actual visa application.
The All-Important Eligibility Questionnaire
Before you get to the main forms, the system will walk you through an eligibility questionnaire. It asks basic questions about your nationality, age, why you want to visit, your family ties, and your financial standing. Honesty and consistency here are absolutely critical. Your answers must match the story your documents tell.
For instance, when the system asks for the main purpose of your visit, don't guess. If your strongest document is an invitation from your sister, select "Visit family." If you've built a detailed tourist itinerary and booked hotels, "Tourism" is your answer.
Based on what you input, the portal generates a personal document checklist code. This code is gold. It creates a personalised application package for you, showing every single form and document you're required to upload.
Filling Out the Application Forms—No Mistakes!
The big one you'll face is the Application for Visitor Visa (IMM 5257). Go through this form slowly and double-check everything. A tiny typo or a missed detail can cause unnecessary delays.
A section that often catches Nigerian applicants out is "Travel History." You need to be meticulous here. List every international trip you've taken in the past 10 years. That short trip to Ghana or Benin Republic? It counts. Don’t leave anything out, and make sure you have the corresponding visa copies and entry/exit stamps to back it up. A blank travel history when you’ve clearly travelled before is a major red flag for visa officers.
Another crucial part is the "Purpose of Visit." Be detailed but straight to the point. Give a clear, concise summary of your plans that perfectly aligns with your itinerary or invitation letter.
Uploading Documents and Paying the Fees
After the forms, you’ll land on the document upload page. You'll see a specific slot for every item on your checklist. This is where file preparation matters.
- File Format: Stick to the accepted formats, which are usually PDF, JPG, or PNG. I find PDF is best for multi-page documents like bank statements.
- File Size: Be mindful of the 4 MB maximum size per file. If your bank statement is a huge file, use a free online tool to compress it before uploading.
Finally, payment. The portal will calculate your total fees, which include the application fee (CAN$100) and the biometrics fee (CAN$85). You'll pay directly online with a Visa or MasterCard.
From my experience, most Nigerian Naira-denominated bank cards work, but sometimes they get declined. Don’t panic if this happens. First, call your bank to confirm that international online payments are enabled on your card. If it still fails, simply try another card. Once the payment goes through, you’re ready to hit that final "Submit" button. Congratulations
Getting Your Biometrics Done at the VAC in Nigeria
So, you've submitted your application and paid the fees. What’s next? You’ll need to keep a close eye on your IRCC account for a very important document: the Biometric Instruction Letter (BIL). This is the official go-ahead you need for the final preliminary step.
Think of the BIL as your green light from IRCC. It confirms they have your application and now need your fingerprints and a photo. The letter is typically valid for just 30 days, so you really can't afford to sit on it. Your application is basically on hold until this is done. It’s a mandatory step for almost all Nigerian applicants, specifically anyone between 14 and 79 years old.
Booking Your Slot in Lagos or Abuja
With your BIL in hand, it's time to book an appointment at a Visa Application Centre (VAC). In Nigeria, your choices are Lagos or Abuja. A critical point here: you absolutely must book your appointment online through the official VAC website. Walk-ins are not an option.
These appointment slots are like gold dust—they get snapped up incredibly fast. My best advice is to book your appointment the very same day you receive your BIL. Don't delay.
When you go for your appointment, you’ll need to have three things with you, no exceptions:
- Your original Nigerian International Passport (not a copy).
- A printed copy of your Biometric Instruction Letter (BIL).
- Proof that you have an appointment, like the confirmation email.
A bit of practical advice from experience: plan to get to the VAC at least 15-20 minutes before your scheduled time. These centres are always buzzing with people. Arriving early saves you from the stress of security checks and queues. If you’re late, you risk losing your slot and having to start the booking process all over again.
What Happens on the Day
The biometrics process itself is surprisingly quick. First, a staff member will verify your passport, BIL, and appointment confirmation. After that, you'll be called in to have a digital photo taken and your fingerprints scanned. It’s all done electronically.
The staff are there simply to collect your data, not to grill you about your travel plans, so don't worry about being quizzed. Their role is purely administrative. Once you’re done, they’ll give you a stamped receipt. Hold onto this receipt—it’s your proof that you’ve completed this crucial stage.
Here’s something many people get wrong: the official processing time for your visa doesn't start when you submit the online form. The clock only starts ticking after your biometrics are in the system. Given the current pressure on Canada's visa system and the significant backlogs from high-demand countries like Nigeria, it’s wise to be patient. You can get a better sense of the situation by reading up on IRCC's processing challenges and backlogs.
The Waiting Game: Tracking Your Application and What Comes Next
So, you’ve done your biometrics. This is often the hardest part – the waiting. Your application is in the hands of an IRCC officer, and it's completely normal to feel a bit on edge. Knowing what happens now can make the wait a little more bearable.
Your GCKey account is your main window into the process. Keep an eye on it. You won't see updates every day, but any change is a good sign that your file is moving along. For a deep dive into what each status update really means, we've put together a complete guide on how to stay on top of visa application tracking.
Making Sense of the IRCC Status Updates
The messages in your IRCC account can be a bit cryptic. Here’s a quick translation of what you'll likely see:
- Application Received: This is just the system saying, "We've got it." Your journey has officially begun.
- Biometrics Completed: This usually pops up a few days after your VAC appointment. It means your fingerprints and photo are successfully linked to your file.
- Medical Results Received: If you had to do an upfront medical exam, this confirms IRCC has received the report from the panel physician.
- Background Check: This is where the real work happens, and it's often the longest stage. An officer is now going through your documents with a fine-tooth comb, verifying everything you submitted.
Let's be realistic for a moment. IRCC is currently dealing with a huge number of applications worldwide. Because of this, applications from countries like Nigeria are under a microscope, which can stretch out the processing times. They are looking at every single detail very, very carefully.
The Final Decision: What to Expect
Eventually, your application status will change one last time. It's the moment of truth, and it can go one of three ways.
Whatever the outcome, the absolute key is to stay calm. A decision—good or bad—gives you a clear direction. A level head is your best asset for figuring out what to do next.
If it's an approval, fantastic news! You'll receive an "Original Passport Request" (OPR) letter in your account. This is the official instruction to submit your passport to the VAC in Lagos or Abuja so they can place the visa inside.
If the application is refused, you'll get a letter explaining exactly why. Read the officer's notes carefully. They will highlight the specific issues, whether it was proof of funds, weak home ties, or something else. This feedback is gold; it’s your guide to building a much stronger application if you choose to reapply.
Your Top Questions Answered: Canadian Visa Tips for Nigerians
Going through the Canadian visitor visa process from Nigeria often brings up a ton of questions. Let's tackle some of the most common ones I hear from applicants, with some straight-up, practical advice.
How Much "Show Money" Is Actually Enough?
This is the big one, isn't it? While there’s no official figure from IRCC, a good rule of thumb is to have a stable balance of at least ₦3 million to ₦5 million for a standard two-week visit.
But here's the real secret: it’s not just about the final number. Stability is what the visa officers are looking for. A bank statement that shows a consistent flow of money, like your salary coming in and your savings growing over time, is far more convincing than a huge lump sum that just appeared last week.
Think about it from their perspective. That ₦10 million you borrowed from your cousin looks suspicious. It screams, "This isn't my money, and I might not have the funds to actually travel." Your bank history should tell a clear story of your financial life.
A visa officer is trying to answer one question: can you genuinely afford this trip without needing to work illegally in Canada? Consistent savings from a legitimate source will always beat a large, unexplained deposit.
I Got Refused. Can I Try Again?
Yes, you can, and many people do successfully. A refusal is a setback, not a permanent ban.
The most important thing is not to rush and reapply with the exact same documents. Take a deep breath and carefully read the refusal letter. The visa officer will tell you exactly why they weren't convinced.
Your next application needs to directly fix those problems. If they questioned your financial standing, you need to provide stronger proof of funds and more consistent bank statements. If they doubted you'd return to Nigeria, you need to show even stronger ties to home—like a stable job, property, or family commitments. Just resubmitting without making significant changes is a recipe for another refusal.
Should I Pay for My Flight Ticket Before I Apply?
Absolutely not. In fact, IRCC specifically warns against this. Don't book any flights or make other non-refundable travel plans until you have the visa stamped in your passport. It's a massive financial risk.
So, what should you do? Get a detailed flight itinerary or reservation from a travel agent. This document shows your intended travel dates and flight path without you having to pay the full amount upfront. Combine this with hotel bookings that have a free cancellation policy. This shows you have a solid plan without putting your money on the line.
Still feeling a bit stuck? The immigration process can be a maze, but you don't have to navigate it on your own. For quick, clear answers to your specific questions, check out JapaChat. It's designed to help you plan your journey with confidence. Get the support you need at https://japachat.com.
Leave a Reply