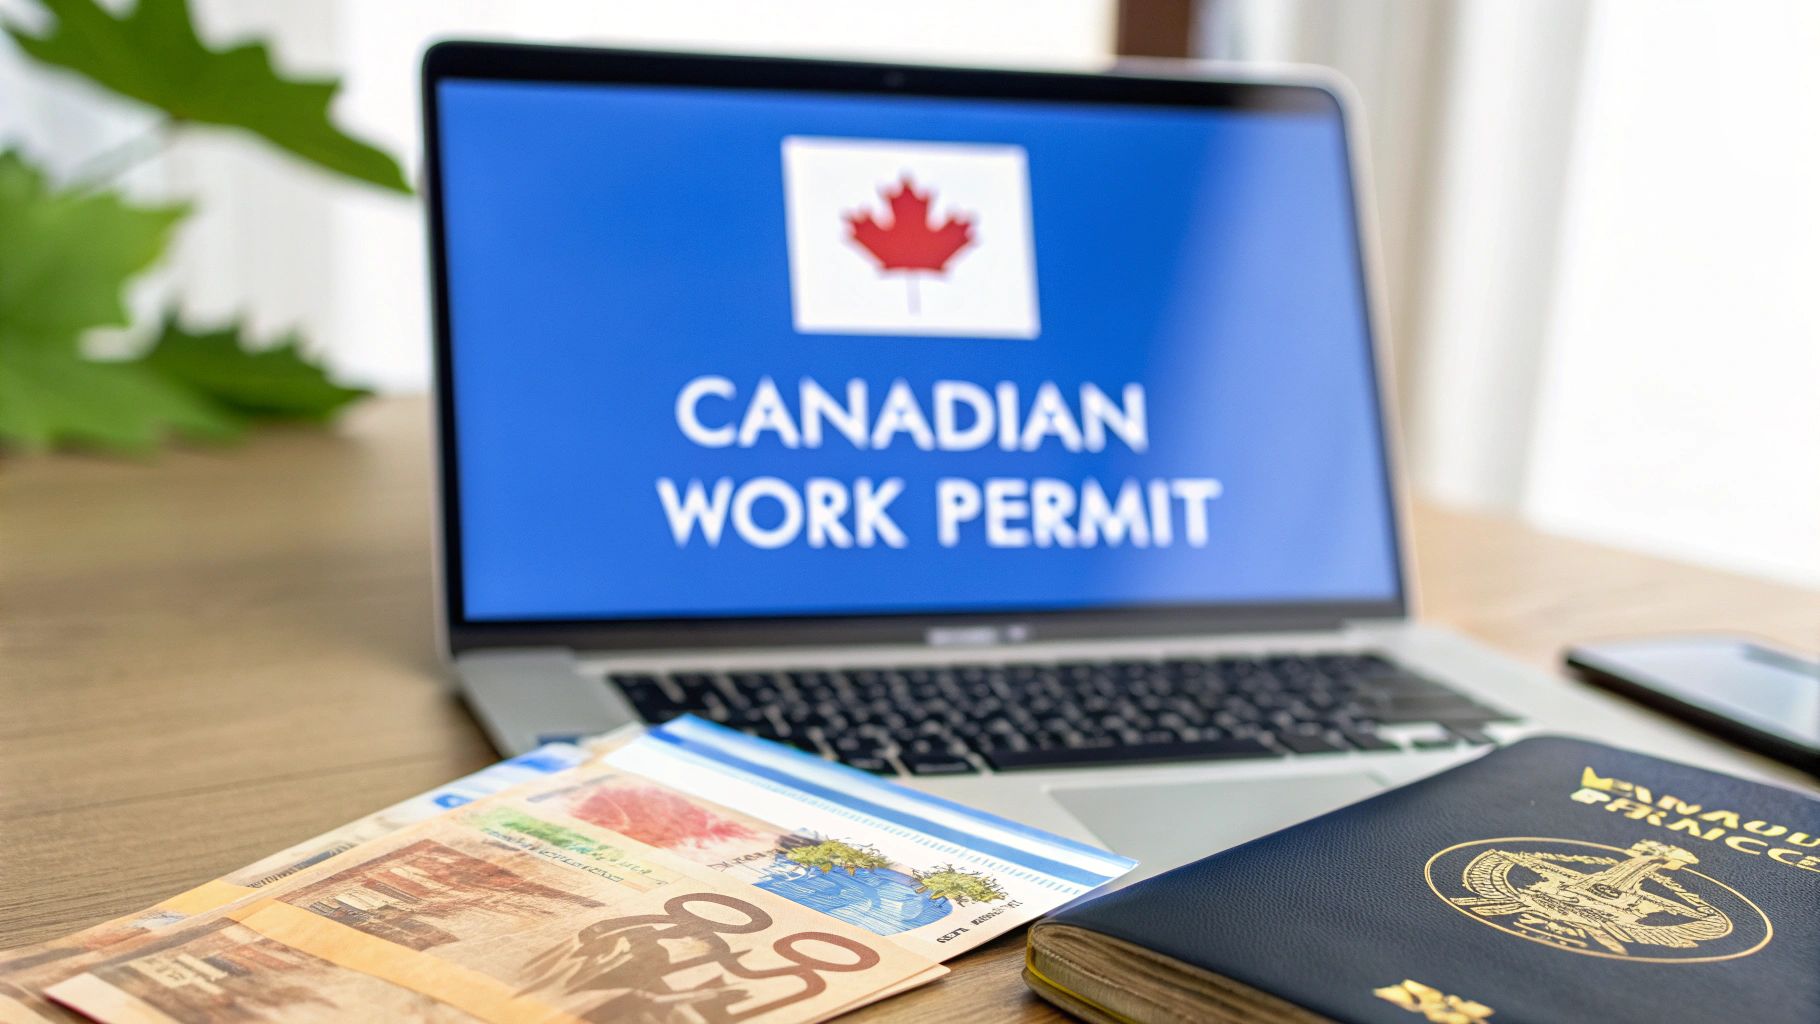
How to Apply for a Canadian Work Permit from Nigeria: A Practical Guide
Thinking about making the big move to Canada for work? It's a popular path for many Nigerians, and for good reason. The key is landing a valid job offer from a Canadian employer, getting all your documents in order (like your international passport and proof of funds from your Nigerian bank account), and then navigating the application on the official Immigration, Refugees and Citizenship Canada (IRCC) portal. A successful application is all about being thorough and honest, proving you tick all the right boxes.
Your Guide to Working in Canada

If you've been dreaming of building your career in Canada, you're definitely not alone. It’s a top choice for Nigerians looking for new opportunities, but the process can feel overwhelming with all the information out there. That’s why I've put this guide together—to cut through the official jargon and give you a clear, practical roadmap for the work permit application, specifically from a Nigerian perspective.
We’re going to break down everything you actually need to know. We'll cover everything from figuring out if you're even eligible to getting the right documents together, like securing that crucial job offer and showing your proof of funds from your Naira bank account correctly.
Why This Guide Is for You
This isn't just another checklist you'll find online. I'm going to walk you through the entire application on the IRCC portal, step-by-step, just like I would with a client here in Nigeria. The idea is to give you the confidence to submit an application that stands the best possible chance of success. Think of this as a realistic look at the journey ahead, including how long things might take and what to expect along the way.
That Canadian dream is absolutely within reach, but it demands careful preparation. A well-put-together application that clearly shows why you qualify and what your intentions are is your strongest asset.
Understanding Your Chances of Success
It helps to know where you stand. In early 2025, Immigration, Refugees and Citizenship Canada (IRCC) reported a nationwide approval rate of 69% for work permit applications. That tells you most people who prepare properly get approved.
Even better, certain streams like the Temporary Foreign Worker Program (TFWP) had approval rates as high as 92%, which shows just how much demand there is in specific industries. Digging into the full report on recent Canadian immigration data can give you a feel for current trends.
My goal here is to give you the details you need to be part of that success statistic. For a more general look at moving, you might also want to check out our detailed guide on how to relocate to Canada from Nigeria.
Finding Your Correct Work Permit Path
Before you even think about filling out a form, the very first step—and honestly, the most important one—is figuring out which Canadian work permit is actually meant for you. Getting this wrong from the start is a common mistake that leads to automatic refusal, costing you both time and money.
For most people applying from Nigeria, it boils down to two main pathways: the employer-specific work permit and the open work permit.
Think of an employer-specific work permit as a direct invitation to a specific role. It’s tied to one job, one company, and one location. This is the most common route for Nigerians who have already secured a job offer from a Canadian business.
An open work permit, on the other hand, is like a golden ticket. It gives you the freedom to work for nearly any employer, anywhere in Canada. But, as you can imagine, these aren't just handed out. Eligibility is tight.
The Employer-Specific Permit Explained
This is the path most Nigerians will find themselves on. Let’s say you’re a talented software developer in Abuja, and a tech startup in Toronto offers you a position. That company will typically need to get a Labour Market Impact Assessment (LMIA). This is a document that proves they tried to find a Canadian for the job first but couldn't.
Your work permit is then directly linked to that specific job offer and LMIA.
Your permit will clearly state:
- The exact name of the employer you're allowed to work for.
- Your specific job title and responsibilities.
- The city or region where you must work.
Want to switch jobs? You'll have to apply for an entirely new work permit. It's a structured path to Canada, but it comes with less freedom once you're here.
Understanding the Open Work Permit
An open work permit offers incredible flexibility, but you have to qualify under very specific circumstances. It’s not something you can just apply for because you’d prefer the freedom.
For an applicant from Nigeria, a common scenario is when your spouse or partner is already in Canada as a skilled worker or as an international student. For instance, if your husband is studying for his PhD at the University of Waterloo, you might be eligible for an open work permit to support the family while he studies.
Another key route is the Post-Graduation Work Permit (PGWP), which is available to international students who graduate from an eligible Canadian institution. This allows them to gain valuable Canadian work experience.
The key difference is simple: one permit ties you to a job offer, while the other gives you the freedom to find a job after you arrive. Choosing the right one is the foundation of your application.
Employer-Specific vs Open Work Permit: Which Is for You?
Making the right choice between these two permits is crucial for your application's success. This table breaks down the key differences to help you see which one aligns with your personal situation.
| Feature | Employer-Specific Work Permit | Open Work Permit |
|---|---|---|
| Main Requirement | A valid job offer from a Canadian employer with an LMIA (or LMIA-exemption). | Must meet strict eligibility, e.g., spouse of a student/worker, post-graduate. |
| Flexibility | Low. You are tied to one employer, one role, and one location. | High. You can work for almost any employer anywhere in Canada. |
| Who It's For | Professionals who have already secured a job in Canada from Nigeria. | Spouses/partners of certain permit holders, recent Canadian graduates. |
| Application Process | Your employer is heavily involved, especially in securing the LMIA. | Primarily an individual application based on your or your partner's status. |
Ultimately, your personal circumstances—whether you have a job offer or a spouse in Canada—will dictate your path.
Core Eligibility for Nigerian Applicants
No matter which permit you apply for, every Nigerian applicant must convince the visa officer of a few non-negotiable points.
You absolutely must prove that you:
- Will leave Canada when your permit expires. This is all about proving your "ties to home." You need to show strong connections to Nigeria—like family you support, property you own, a business, or a job to return to—that give you a reason to come back.
- Have enough money to support yourself. You’ll need to provide bank statements from your Nigerian bank account to show you can cover your initial expenses in Canada before you start earning a salary.
- Are admissible to Canada. This is a background check. You must be in good health (a medical exam may be required) and have no serious criminal history (a police clearance certificate is mandatory).
This simple graphic helps visualise the documents you'll need based on your situation.
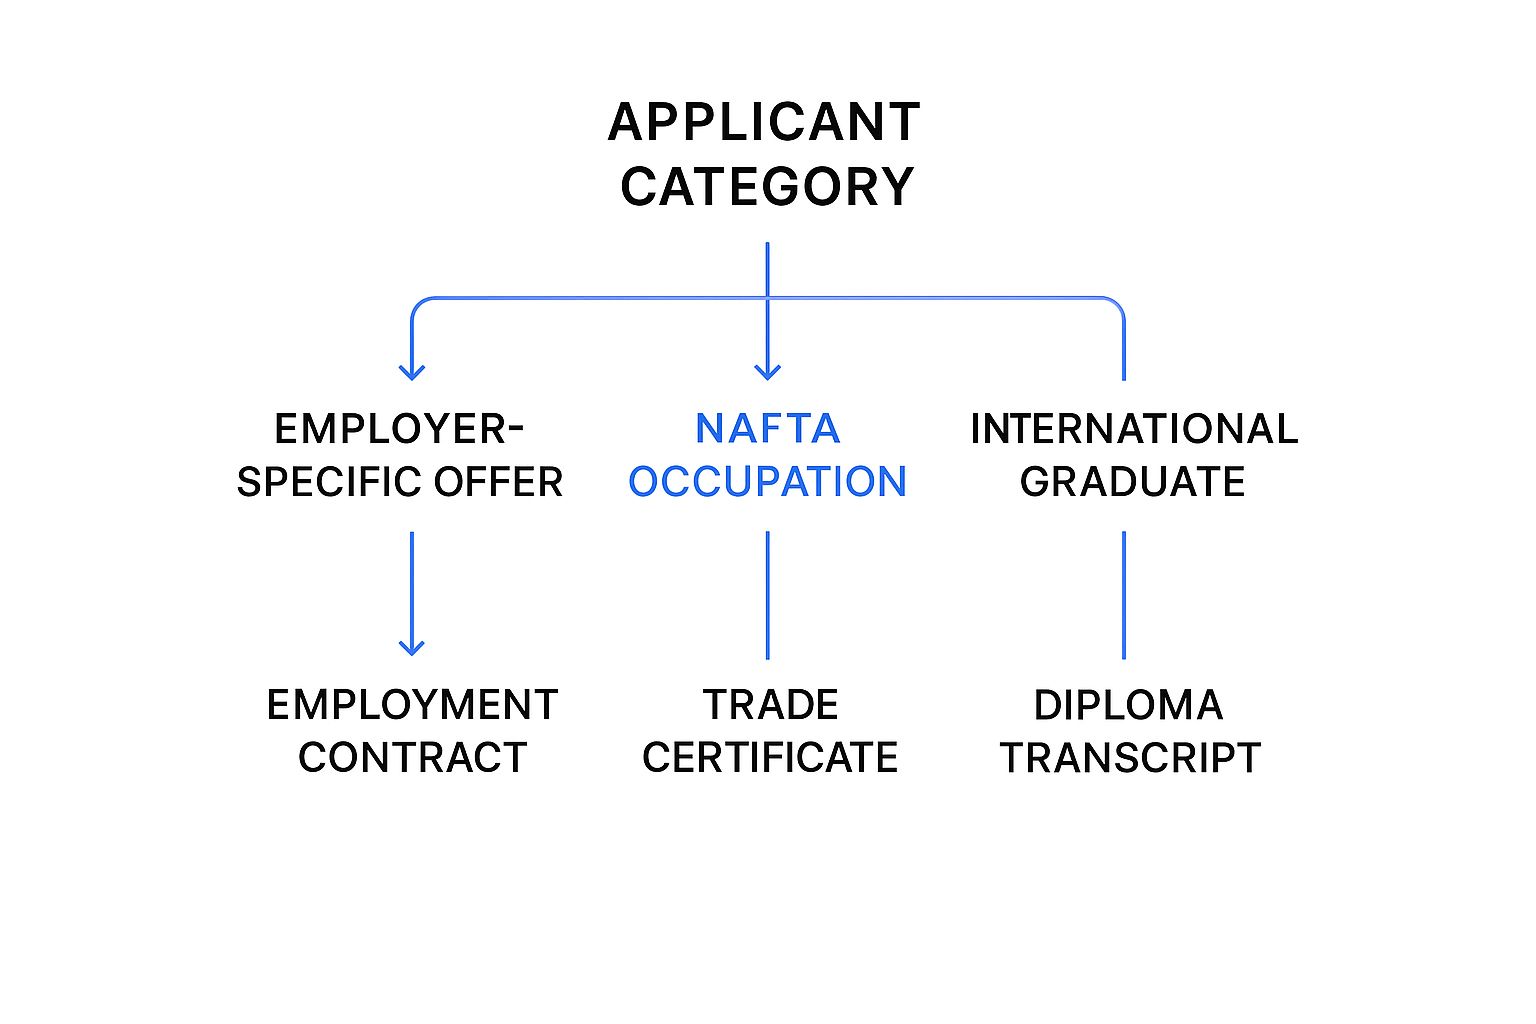
As you can see, the required paperwork changes based on your specific pathway. An employment contract is central to one application, while a graduation certificate is key for another.
While these are the main routes, it's worth noting that the world of work is changing. For those with careers that allow them to work from anywhere, it might be useful to learn about digital nomad visa requirements as a potential alternative.
Your Nigerian Document Checklist

Getting your Canadian work permit isn't about luck; it's about being incredibly organised. Think of your documents as the very foundation of your application. A single missing paper or a bank statement that raises more questions than it answers can derail the whole thing. It’s critical to get this part right.
For anyone applying from Nigeria, this means gathering a specific set of documents that paint a clear and convincing picture for the visa officer. It’s not just a checklist—it’s about presenting your professional and personal life in a way that aligns perfectly with Canada's immigration rules.
The Core Documents You Can't Do Without
No matter which work permit you're aiming for, some documents are simply non-negotiable. These are the absolute must-haves that form the heart of your application package.
Here’s what every Nigerian applicant needs to pull together first:
- Your International Passport: This seems obvious, but the small details matter immensely. Your passport has to be valid for your entire planned stay in Canada. Double-check that it has at least one completely blank page (not the last page) for the visa stamp.
- Proof of Educational Qualifications: You need to prove you're qualified for the job. This means gathering your WAEC certificate, university degree, and official transcripts. If you have any professional certifications relevant to your field, include those too.
- Offer of Employment: This is the formal job offer letter from your Canadian employer. It must be on official company letterhead and clearly state your job title, salary, main responsibilities, and all the terms of your employment.
- Labour Market Impact Assessment (LMIA): If your job isn’t LMIA-exempt, you’ll need a copy of the positive LMIA confirmation. Your employer gets this from Employment and Social Development Canada (ESDC) and will send it to you.
These core documents are your proof of identity, your qualifications, and the legitimacy of the job waiting for you.
Proving Your Financial Stability
This is, without a doubt, one of the most scrutinised parts of any application from Nigeria. The visa officer must be completely convinced that you can support yourself financially when you first land in Canada, well before you get your first salary.
It’s not just about having a certain amount of money in your Naira bank account. What they’re really looking for is a stable financial history. A huge, unexplained lump sum that suddenly appears in your account a week before you apply is a massive red flag.
Expert Tip: Your bank statements should tell a story of consistent income and savings. I always advise clients to provide statements for the last 4 to 6 months. This demonstrates a reliable financial situation that an officer can trust.
To get this right, submit your official bank statements and think about writing a short letter to explain the source of any large, unusual deposits (like the sale of a car or a gift from family). It's also wise to show how you've budgeted for initial costs like your first month's rent and transport. For a really deep dive on this, check out our guide on preparing your proof of funds for Canada.
Showing You’re Admissible to Canada
Canada needs assurance that you'll be a law-abiding resident. To do this, you have to prove you have a clean record and are in good health.
You’ll need to get a Police Clearance Certificate from the Nigeria Police Force Criminal Investigation Department (CID) at Alagbon, Ikoyi in Lagos, or from the Central Criminal Registry in Abuja. This certificate confirms you don’t have a criminal record. My advice? Apply for this early, as the processing time can sometimes be unpredictable.
In some situations, you might also need a medical examination by an IRCC-approved doctor in Nigeria. You don't have to do this upfront; you will be officially notified if it's required after you've submitted your application.
The Biometrics Appointment
Every applicant from Nigeria between the ages of 14 and 79 must provide their biometrics—that means fingerprints and a photograph. This is a mandatory step.
After you pay your application fees online, you'll receive a Biometric Instruction Letter (BIL). With this letter, you have to book an appointment at one of the official Visa Application Centres (VACs) in Nigeria, located in either Lagos or Abuja.
This step is absolutely crucial; your application simply won't be processed without it.
Finally, never underestimate the power of a good Letter of Explanation. While it's not always a required document, it's your one chance to speak directly to the visa officer. Use it to explain any gaps in your work history, clarify a complex financial situation, or simply tie your entire application together into a compelling story.
Getting to Grips with the IRCC Online Portal
Alright, this is where the rubber meets the road. All your preparation leads to the Immigration, Refugees and Citizenship Canada (IRCC) online portal. For anyone applying from Nigeria, this is your one and only gateway. It’s a powerful tool, but let's be honest, it can feel a bit clunky and confusing at times. I’ll walk you through it so you can navigate it like a pro.
Think of the portal as your personal, digital file cabinet with the Canadian government. It’s where you'll answer key questions, upload every single document we've discussed, handle your fees, and later on, anxiously check your application status. Getting comfortable here is non-negotiable.
The whole thing is digital, which is mostly good news—it’s faster and you get a clear trail of your progress. The downside? A tiny technical mistake, like uploading a file in the wrong format or one that's too big, can bring things to a screeching halt.
First Things First: Setting Up Your Secure IRCC Account
Before you can do anything else, you need to create your secure IRCC account. This is your private dashboard for the entire process. It’s pretty straightforward, but you really need to focus on the details.
You'll see two options to sign in: GCKey or Sign-In Partner. The Sign-In Partner option is for folks who already have a Canadian bank account, so for you, it’s all about the GCKey.
- So, what’s a GCKey? It’s just a fancy name for the unique username and password you’ll create. Treat this login info like it’s for your bank account—keep it safe, and don’t share it with anyone.
- Don't forget the Security Questions: During setup, you'll be prompted to create several security questions. These are your lifeline if you ever forget your password. My advice? Choose questions and answers you'll remember without a doubt. Write them down and tuck them away somewhere safe.
Once that’s done, you're officially in. Now you're ready to tackle the application itself, starting with a crucial questionnaire.
The Smart Questionnaire That Builds Your Checklist
Once inside the portal, you won't find a one-size-fits-all list of forms. Instead, you’ll be guided through an online questionnaire. It will ask about everything from your nationality and age to the specifics of your Canadian job offer and your family situation.
Being meticulous here is absolutely critical. Why? Because your answers directly feed into the system, which then generates a personalised document checklist just for you. This is easily one of the portal’s best features.
For instance, if you indicate that your job offer is LMIA-based, the checklist will automatically create a spot for you to upload the LMIA document. If you mention you’re bringing your spouse along, it will add placeholders for their passport, photos, and other required forms. It customises the entire application to your specific circumstances.
Take a deep breath and go through this questionnaire slowly. One wrong click—saying you don't have family in Canada when you do, for example—can lead to the wrong checklist. That’s a classic recipe for an incomplete application and an almost certain refusal. Double-check every single answer.
Uploading Your Documents The Right Way
After the questionnaire, your personalised checklist appears, complete with an "Upload File" button next to each item. This is showtime for all those documents you’ve carefully prepared.
Here are a few practical tips I’ve seen trip up too many Nigerian applicants:
- File Format is King: Stick to PDF. Seriously. It’s the most reliable format and what IRCC expects for most documents. For your photo, a JPEG is fine.
- Watch Your File Size: There’s a 4 MB limit for each file you upload. If your scanned police certificate is 5 MB, the system will reject it. Use a free online PDF compressor to shrink it down without making it unreadable.
- Name Your Files Sensibly: Please, don’t upload files named "IMG_2024_001.pdf" or "Scan1.pdf." It's confusing for you and doesn't look professional. A clean, clear naming system works best. I always recommend this format: ‘Surname-FirstName-DocumentName.pdf’. For example:
Okoro-Chinedu-InternationalPassport.pdfOkoro-Chinedu-ProofOfFunds.pdfOkoro-Chinedu-JobOfferLetter.pdf
This small bit of organisation immediately signals to the visa officer that you’re a thorough and serious candidate.
Paying Your Application Fees
The last hurdle before you can submit is paying the application fees. This happens right inside the portal, and you’ll need a credit or debit card.
For applicants in Nigeria, this can sometimes be a frustrating step. You must use a MasterCard or Visa that has been explicitly enabled for international online transactions. Many standard Nigerian bank cards are not set up for this by default. I strongly suggest you call your bank before you get to this stage and confirm your card will work for a payment in Canadian dollars.
If a payment fails, don't panic. The first thing to do is check with your bank. Often, they can lift a temporary restriction. If that doesn't work, trying a different card from another bank often solves the issue. Once the payment is successful, you'll get an official receipt—save a PDF copy immediately.
After that, all that’s left is to take one final look over everything and hit that "Submit" button.
So, What Happens After You Hit ‘Submit’?

You’ve finally submitted your Canadian work permit application. Go on, take a deep breath—that’s a huge milestone ticked off the list! Now comes what many people find to be the hardest part: the wait. It can be a nervy time, but understanding the process can really help manage the anxiety.
Your application is officially out of your hands and is now sitting in a queue, waiting for an IRCC officer to review it. Patience is key here.
Keeping Tabs on Your Application’s Progress
Your first instinct will be to check, check, and check again. The best place to do this is the same IRCC portal you used to apply. I recommend logging into your secure account periodically to see if there are any new messages or status updates.
It’s important to remember that processing times aren't set in stone. For applicants from Nigeria, these timelines can fluctuate wildly depending on how many applications IRCC is dealing with and the specifics of your own file. Try not to panic if you hear about someone else’s application moving faster. Every single case is assessed on its own merits.
Expert Tip: The waiting period is completely normal. Resist the urge to compare your application journey to others on social media or forums. Instead, use this time to get organised for any potential requests that might come your way from IRCC.
For a deeper dive into managing this stage, our guide on effective visa application tracking has some great tips for staying in the loop without the stress.
When IRCC Asks for More Information
Don't be alarmed if you get a message from IRCC asking for more information. This happens all the time and it’s not a bad sign. It just means the visa officer needs a bit more detail to finalise their decision.
Common requests include:
- Extra Documents: They might want an updated proof of funds, a clearer copy of a specific document, or further clarification on your job offer.
- A Medical Exam: This is almost a given if you'll be working in healthcare or a related field, or if you’re staying longer than six months. You'll be instructed to see an IRCC-approved panel physician in Nigeria.
- An Interview: This is less frequent for work permit applications, but it can happen if the officer has questions that are best answered in person.
If you get a request, move quickly. You'll be given a firm deadline, usually 30 days. Gather what they need, double-check it, and upload it through your portal. A swift, complete response shows the officer you’re organised and serious about your application.
The Email You've Been Waiting For: The POE Letter
Eventually, an email will land in your inbox with your Port of Entry (POE) Letter of Introduction. This is it—the confirmation that your application has been approved. It’s not the work permit itself, but it’s the document that gets you one.
You must present this POE letter to the border officer (CBSA) when you land at an airport in Canada. The officer will look it over, maybe ask a few final questions, and then print and issue your official work permit.
Make sure you print a physical copy of this letter and keep it with your passport in your carry-on bag. Whatever you do, do not pack it in your checked luggage!
The demand for skilled workers in Canada remains strong. In the first half of 2025, for instance, Canada issued around 105,195 work permits. Programs like the Temporary Foreign Worker Program (TFWP) have historically seen approval rates as high as 92%. A solid, well-prepared application truly stands a great chance of success.
Burning Questions from Nigerian Applicants
When you're navigating the Canadian work permit process, you'll find that the official rules are one thing, and the unwritten expectations are another. I get it. Let’s dive into some of the most pressing questions I hear from fellow Nigerians, so you can sidestep the common mistakes that trip people up.
How Much "Show Money" Is Enough for My Nigerian Bank Account?
This is easily the most common question, and there’s no single magic number. The Canadian government doesn't publish a fixed amount you need to have. Instead, the focus is on proving you can stand on your own two feet for the first few months in Canada before you start getting paid.
Put yourself in the visa officer’s shoes: they need assurance you won’t become a financial burden. A solid rule of thumb is to show enough funds to cover at least 3 to 6 months of living expenses. For a single applicant, having the equivalent of CAD $5,000 to $10,000 in your Naira account is a very safe bet.
But here’s the crucial part: the history of those funds matters more than the final balance. A huge sum of money mysteriously landing in your account right before you apply is a massive red flag for visa officers.
To make a convincing case, provide 4 to 6 months of your full bank statements. This shows financial stability over time. I also strongly advise including a short note in your letter of explanation that converts your closing Naira balance to Canadian dollars at the current exchange rate—it just makes the officer's job easier.
Can I Bring My Family Along on a Work Permit?
Yes, you absolutely can! This is one of the best parts about working in Canada. You can bring your immediate family with you, but you have to plan for it from the very beginning.
If you’ve landed a skilled job (under Canada's NOC TEER 0, 1, 2, or 3), your spouse or common-law partner can often apply for an open work permit. This is a game-changer because it allows them to work for nearly any employer in Canada, giving your family a vital second income.
Your dependent children can come too, and they can typically enrol in Canada’s excellent primary and secondary schools without needing their own separate study permit.
A few key things to remember:
- It's best to submit all your family's applications at the same time as your own.
- Your proof of funds must be enough to support everyone, not just yourself.
- Each person needs their own completed forms and must meet Canada’s admissibility requirements.
What Are the Top Reasons Nigerians Get Refused?
A refusal is tough, but understanding why they happen is the best way to avoid one. For Nigerian applicants, refusals often come down to a few critical areas.
The most frequent reason is failing to convince the visa officer you have strong ties to Nigeria and will return home when your permit expires. You need to show concrete proof of your connections—things like family you care for, property you own, or a business waiting for you.
Other common reasons for a "no" include:
- Weak Proof of Funds: It’s not just about the amount. An unstable financial history or large, unexplained deposits can sink an application.
- Job Offer Doubts: The officer might not be convinced the job offer is genuine or that you’re truly qualified for that specific role.
- Inadmissibility: This can stem from a previous visa refusal to any country, a criminal record, or certain health conditions.
Your Letter of Explanation is your most powerful tool. Use it to tell your story, address these potential weak spots head-on, and leave no room for doubt.
Do I Really Need to Hire an Agent?
The short answer is no. You don't need an agent, consultant, or lawyer to apply. The official IRCC website has all the guides and forms you need, and thousands of Nigerians successfully apply on their own every single year.
However, if your situation is complex—maybe you have a previous visa refusal or an unusual employment history—getting advice from a licensed Canadian immigration professional could be a smart move.
Be extremely careful of unlicensed "agents" in Nigeria who make big promises. Before paying anyone, verify that they are in good standing with the College of Immigration and Citizenship Consultants (CICC). This is the only official regulatory body in Canada. A bad agent can give you advice that not only leads to a refusal but can also damage your chances for future applications.
Ready to start planning your move with confidence? At JapaChat, we provide the AI-powered tools and up-to-date information you need to make your Canadian dream a reality. Get instant answers to your immigration questions and build a clear roadmap for your journey. Explore your options today at https://japachat.com.
Leave a Reply