How to Apply for a Work Permit in Canada: A Nigerian’s Ultimate Guide
Applying for a Canadian work permit from Nigeria is a multi-step journey. It starts with a valid job offer and then moves into gathering the right documents and navigating the Immigration, Refugees and Citizenship Canada (IRCC) portal. The path you take really depends on whether your job offer needs a Labour Market Impact Assessment (LMIA) and which type of permit—Employer-Specific or Open—is right for your situation.
Understanding Your Canadian Work Permit Options

Before you start dreaming of life in Toronto or Calgary, it's crucial to know that not all Canadian work permits are the same. Your personal circumstances, the job you’ve been offered, and even your spouse's status in Canada will point you toward the correct application path.
The two main categories you'll come across are:
- Employer-Specific Work Permit: This is the most common route for Nigerians. As the name suggests, it ties you to working for one specific employer, in a designated location, for a defined period. If a tech company in Waterloo offers you a position as a software developer, this is the permit you'll be applying for.
- Open Work Permit: This one offers incredible flexibility, letting you work for nearly any employer anywhere in Canada. However, qualifying for it is much tougher. Usually, you become eligible through a specific connection—for instance, being the spouse of an international student or a skilled worker already in Canada.
Which Canadian Work Permit is Right for You?
Here’s a quick comparison of the two main work permit types to help you decide your path.
| Feature | Employer-Specific Permit | Open Work Permit |
|---|---|---|
| Employer Restriction | Tied to one specific employer. | Can work for almost any employer in Canada. |
| Job Location | Limited to the location specified in the job offer. | No location restriction; you can work anywhere. |
| Common Requirement | Usually requires a Labour Market Impact Assessment (LMIA). | LMIA is not required. |
| Who It's For | Most foreign workers with a specific job offer from Nigeria. | Spouses of certain visa holders, post-graduate students, and others. |
| Flexibility to Change Jobs | Low. Changing jobs means applying for a new work permit. | High. You can switch employers without a new application. |
Choosing the right permit is the first major step. Your job offer will usually dictate which one you need, but knowing the difference helps you understand your limitations and opportunities once you arrive.
What is an LMIA, Really?
For many Nigerian applicants, the term Labour Market Impact Assessment (LMIA) sounds complicated, but the idea is quite simple. An LMIA is a document a Canadian employer might need to get before they can hire you.
Essentially, the employer has to prove to the Canadian government that there were no Canadian citizens or permanent residents available to fill the position. It’s the government’s way of ensuring the local job market is protected. If your job offer letter includes a positive LMIA number, it means your employer has already cleared this significant hurdle, which makes your application process much more straightforward.
Recent Changes You Should Know About
Canadian immigration rules are not set in stone; they change based on the country's economic needs. It's worth noting that in the first half of a recent year, Canada issued 302,280 International Mobility Program (IMP) work permits. This was a notable drop of about 26% from the 410,825 issued during the same time the previous year.
This shift indicates that the government is tightening its controls, which can affect applicants from countries like Nigeria. To get a better sense of these trends, you can discover more insights about these immigration changes and what they could mean for your application.
Key Takeaway: Grasping the difference between an employer-specific and an open work permit, and understanding the role of the LMIA, is your first and most critical task. This knowledge helps you focus your job search and ensures you start preparing the correct application right from the get-go.
Your Essential Document Checklist for Nigerians
Getting your documents in order is arguably the most critical part of your work permit application. A single missing paper or an incorrectly formatted letter can lead to frustrating delays or even an outright refusal. This isn't just about ticking boxes; it's about building a solid, credible case for the Canadian visa officer reviewing your file.
Think of this section as your personal guide, built from experience and tailored to the specific requirements Nigerian applicants face.
Core Personal Documents
Let's start with the absolute basics. Every application hinges on these, so make sure they are current and you have high-quality digital copies ready to go.
- Valid Passport: Your Nigerian international passport is non-negotiable. The first thing you should do is check the expiry date. It absolutely must be valid for the entire length of your planned stay in Canada. If it's even close to expiring, renew it before you start anything else.
- Passport-Sized Photographs: You’ll need two recent photos, and they must meet IRCC's very specific standards for size, background colour, and even your facial expression. Don't try to use an old picture; just go get new ones taken at a proper studio. It's not worth the risk.
Proving Your Professional Value
Next up, you have to show that you're the right person for the job. This goes way beyond just showing them your NYSC certificate.
Educational Credential Assessment (ECA)
Getting an ECA is a smart, proactive move that seriously strengthens your application. An ECA report from a designated organisation like WES (World Education Services) officially validates your Nigerian degree or diploma, showing it's equivalent to a Canadian one. Trust me, start this process early. It can easily take a few months to get the report back.
Employer Reference Letters
These are incredibly important. A simple letter saying "this person worked here" just won't cut it. Your reference letters need to be detailed and structured correctly. They should always be on official company letterhead and must include:
- Your specific job title and a detailed list of your duties.
- The exact dates you were employed.
- Your salary and any benefits.
- The direct contact information of your manager or the HR department.
Pro Tip: When listing your duties, make sure they align closely with the lead statement and main duties described in the National Occupational Classification (NOC) code for your job. This is a detail that visa officers specifically look for—it shows you understand the role in a Canadian context.
Demonstrating Financial Stability
For many Nigerian applicants, proof of funds is where applications get heavily scrutinised. You have to convince the visa officer that you can support yourself when you first arrive in Canada, before you even get your first paycheck.
This means providing clear bank statements going back several months. A large, unexplained deposit dropped into your account right before applying is a major red flag. Be ready to explain the source of all your funds with supporting documents, like pay slips from your job in Lagos, an official letter from your employer, or even property sale documents.
For a much deeper dive into getting this right, you might find our detailed guide on how to prepare your proof of funds for Canada really helpful.
Essential Nigerian-Specific Requirements
Finally, there are a couple of documents required specifically because you're applying from Nigeria. Don't overlook these.
Police Clearance Certificate
You will need to get a Police Character Certificate from the Nigeria Police Force Criminal Investigation Department (CID). This isn't something you can get overnight, so plan ahead and start the process well in advance.
Medical Examination
You can't just go to your local clinic for this one. The medical exam must be done by a panel physician in Nigeria who has been officially approved by IRCC. You can find the list of these approved doctors in cities like Lagos and Abuja right on the official IRCC website. The results are only valid for 12 months, so timing is key. You don't want to do it too early, but you also don't want to be scrambling at the last minute.
Finding a Job and Securing an LMIA in Canada
Getting your documents ready is a huge step, but the real game-changer is landing a valid Canadian job offer. For most Nigerians, this is the key that unlocks the entire work permit process. The thing is, finding Canadian employers who are open to hiring from overseas can feel like an impossible task.
The secret isn't to just spam out hundreds of applications. It's about changing your approach and positioning yourself as the perfect international hire. Your CV is the very first impression a Canadian recruiter will have, so it absolutely must meet their expectations.
This means you’ll need to adapt your CV to the standard Canadian format, which is quite different from what we typically use in Nigeria. You'll need to leave out things like your photo, date of birth, state of origin, and marital status. To learn how to create a CV that will get you noticed, check out our detailed guide on the international CV format.
Why the LMIA is a Big Deal for Employers
The Labour Market Impact Assessment (LMIA) is usually the biggest roadblock. Think about it from the employer's perspective: they have to prove to the Canadian government that they couldn't find a Canadian or permanent resident to do the job before they can hire you. This process involves advertising the job for a set period and paying a hefty application fee.
It's no surprise that many employers would rather hire someone who's already in Canada. Your mission is to make the extra effort and cost of hiring you completely worthwhile. You do this by tailoring every single application to show exactly how your unique skills solve their specific problems. You have to make yourself an irresistible candidate.
A powerful, well-crafted application that speaks directly to the job's requirements can convince an employer that you are the one-of-a-kind talent they’ve been searching for, making the LMIA process a smart investment for them.
Target Your Job Search Like a Pro
You'll have much more success if you focus your search on industries and provinces that are crying out for foreign workers. Don't waste your time and energy applying for roles in markets that are already flooded with local talent. Go where the real opportunities are.
Many provinces have specific needs and use their Provincial Nominee Programs (PNPs) to fill those gaps. These programs can often be a much faster route to securing a work permit and even permanent residency.
For instance, Nova Scotia often targets professionals in healthcare (like nurses), social assistance, and construction to meet urgent local labour shortages. While New Brunswick recently paused its Atlantic Immigration Program (AIP), it was given 1,500 extra spots for its PNP, which shows a clear and ongoing demand for skilled workers. This kind of targeted approach creates a direct pathway for Nigerian professionals. You can discover more insights about Nova Scotia's priorities on their official site.
Practical Tips for Your Job Hunt
Simply applying for jobs isn't enough. You need to be proactive and start building connections.
- Make Your LinkedIn Profile Shine: Think of it as your professional billboard. It needs a sharp, professional photo, a compelling summary, and skills that match Canadian job descriptions. Join Canadian industry groups and start contributing to conversations.
- Use the Right Job Boards: Stick to platforms that are popular in Canada, like Indeed Canada, Job Bank, and Eluta.ca. A great tip is to use filters to search for jobs that specifically mention "LMIA available" or are open to hiring temporary foreign workers.
- Network the Smart Way: Find Nigerians who are already working in your field in Canada and connect with them. Their advice and potential referrals are pure gold. Instead of just asking for a job, ask them about their journey and for advice.
By being strategic and focusing your efforts where they count, you can dramatically boost your chances of getting that life-changing job offer. For more great tips, you can find valuable insights on job search strategies and career advice by exploring their resources.
Getting to Grips with the IRCC Online Application Portal
This is where the rubber meets the road. The official Immigration, Refugees and Citizenship Canada (IRCC) online portal is where you'll bring your application together. It's designed to be user-friendly, but let's be honest, it can feel a little intimidating the first time you log in. Think of it like an open-book exam after weeks of studying (gathering your documents). The keys to success? Precision and complete honesty.
First things first, you need to create a secure IRCC account. This isn't just a one-time thing; it becomes your personal dashboard for the entire journey, from submission to getting updates from the Canadian government.
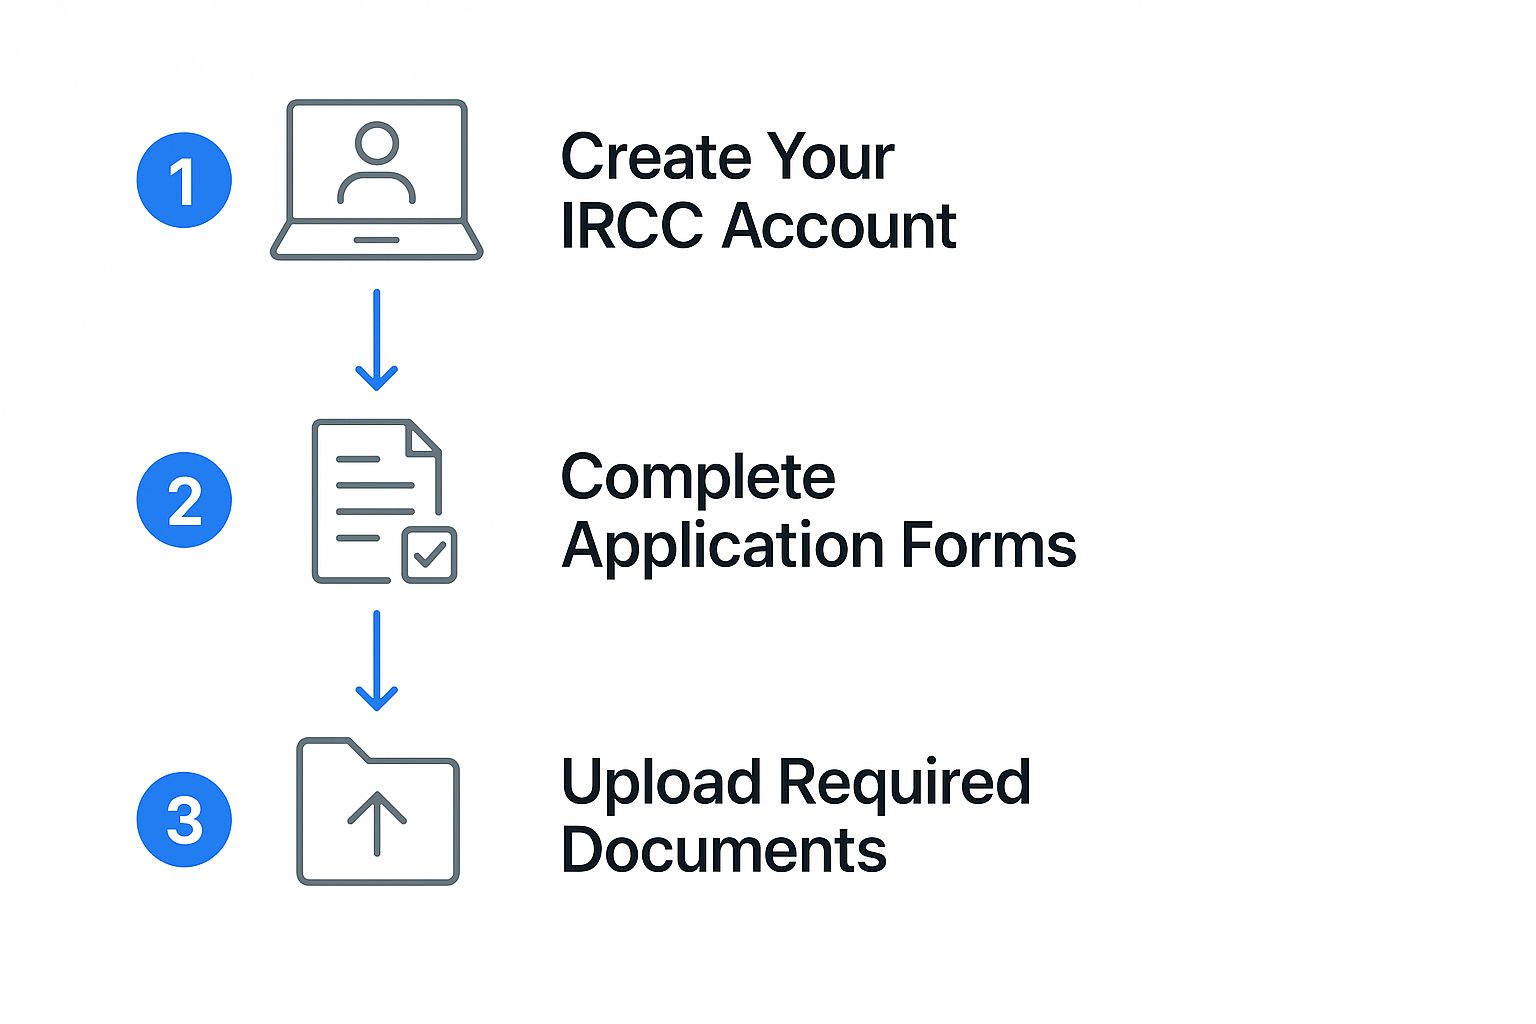
As you can see, you can sign in with a GCKey or a Sign-In Partner. For almost everyone applying from Nigeria, the GCKey is the way to go. It’s simply a unique username and password that you create for yourself to access government services.
Filling Out Your Application Forms
Once you're logged in, the system walks you through a series of online forms. This is where you'll input all your personal details, your entire work history, and the specifics of your Canadian job offer. Be meticulous here. Every single question needs a truthful answer, and that answer must perfectly match what’s in your supporting documents. A tiny mismatch, like getting a date wrong on a reference letter, can be a red flag for a sharp-eyed visa officer.
As you fill out the forms, the portal cleverly generates a personalised document checklist just for you. This is a brilliant feature because it tells you exactly what you need to upload based on your unique situation.
A Word of Advice from Experience: Hit that "save" button often! The portal can, and will, time you out. The last thing you want is to lose an hour of painstaking data entry. Take your time, double-check every single field, and only move on when you're 100% sure everything is correct.
Nailing the Make-or-Break Questions
From my experience, two sections cause the most anxiety for Nigerian applicants and receive the most scrutiny from visa officers: 'purpose of travel' and 'ties to home country'. Why? Because the officer needs to be completely convinced that you intend to leave Canada when your work permit expires.
Here’s how to handle them:
- Purpose of Travel: Be direct and professional. State clearly that your purpose is to work temporarily for your named Canadian employer in the specific role you were hired for. It’s also a good idea to mention the valuable skills you expect to gain and how they fit into your long-term career plans back in Nigeria. No vague, wishy-washy answers.
- Ties to Home Country: This is where you prove you have compelling reasons to return. Don't just say you have family; provide evidence of your responsibilities to a spouse, children, or elderly parents. Do you own property or land in Nigeria? Do you have a business or significant investments? These are the strong, tangible ties they want to see.
Finalising and Submitting Your Application
Once you’ve filled everything out and uploaded all your documents—making sure they're in the right format, usually PDF—it’s time to pay. You’ll need to settle both the work permit application fee, which is C$155, and the biometrics fee of C$85. This is all done online with a credit or debit card (like a UBA Dollar Prepaid Card, for example).
After your payment is confirmed, you can take a deep breath and hit that final 'submit' button. You'll get an automated confirmation in your IRCC account almost instantly. Within about 24 hours, you should receive a very important document: the Biometric Instruction Letter (BIL). This letter is your official invitation to the next critical phase of the process.
So You've Submitted Your Application… Now What?

Hitting that submit button feels amazing, doesn't it? Take a moment to breathe, but don't get too comfortable just yet. The next crucial step is just around the corner. Within about 24 hours, you should see a Biometric Instruction Letter (BIL) pop up in your IRCC account. This is your green light for the biometrics phase.
Once that letter is in hand, you need to book an appointment at a Visa Application Centre (VAC). In Nigeria, the main ones are in Lagos and Abuja. Don't make the mistake of just walking in – appointments are mandatory and slots get snapped up fast. My advice? Book it the same day you get your BIL.
Your Biometrics Appointment
The appointment itself is pretty quick and painless. They’ll take your fingerprints and snap a photo to verify your identity. Just make sure you come prepared.
On the day, you’ll absolutely need these three things:
- Your original Nigerian international passport.
- A printed copy of your Biometric Instruction Letter (BIL).
- The letter confirming your appointment.
The Waiting Game: Tracking and What to Expect
With your biometrics done, the real waiting begins. This is often the hardest part of the process. Processing times can be long and unpredictable, so it's a good idea to check the official IRCC website for the latest estimates for Nigerian applicants to manage your expectations.
You can follow along with your application’s progress through your secure IRCC account. If you're wondering what all the different status updates mean, we have a guide that breaks it all down. You can learn more about how to track your visa application status to make sense of the jargon.
A Quick Tip from Experience: Don't be alarmed if IRCC requests more information. It happens all the time. A visa officer might ask for an extra document or clarification on something you submitted. The key is to respond quickly and provide exactly what they're asking for. Delays here can really slow things down.
It's also interesting to see how labour demands across Canada affect these applications. In one recent year, Canada welcomed a massive 483,595 permanent residents. A surprising 8.2% of them went to Atlantic Canada, with provinces like New Brunswick and Nova Scotia seeing a huge influx. These numbers often signal where the jobs are and, consequently, where work permits are being processed to meet local needs. You can dig deeper into these regional immigration trends to get a better sense of the landscape.
Common Questions from Nigerian Applicants
Going through the Canadian work permit process from Nigeria, you're bound to have a ton of questions. It's totally normal. Let's break down some of the most frequent concerns I hear from applicants, so you can feel more confident about your own application.
How Much Money is "Enough" for Proof of Funds?
This is probably the number one question on everyone's mind. The truth? There's no single magic number that guarantees approval. What Immigration, Refugees and Citizenship Canada (IRCC) really wants to see is that you can comfortably handle your initial costs without struggling. Think about your flight ticket, a deposit for an apartment, and enough cash to live on until you get that first Canadian paycheque.
More important than the final balance is the history of your funds. A large, unexplained deposit right before you apply is one of the biggest red flags for a visa officer. You need to show them the money's story.
- Bank Statements: You'll need to provide statements covering the last four to six months. Don't just submit the final page.
- Supporting Proof: Back up your statements. Include recent payslips, a letter from your employer confirming your salary, or even official documents from a property sale. Anything that explains where the money came from is crucial.
Think of it this way: the visa officer is piecing together your financial story. A steady pattern of income and savings over several months looks far more reliable than a sudden lump sum from an unknown source. Your job is to give them a clear, believable paper trail.
Can My Family Come to Canada With Me?
Absolutely. This is a huge relief for many, and the Canadian system is quite family-friendly. If you’ve landed a job offer in a skilled role (specifically, what's known as NOC TEER 0, 1, 2, or 3), you can typically bring your immediate family along.
Your spouse or common-law partner can often apply for an open work permit. This is a fantastic advantage, as it means they can work for almost any employer in Canada, giving your family more financial flexibility. Your dependent children can also come with you on study permits, allowing them to enrol in Canadian schools. It's often best to submit everyone's applications together to be processed as a family unit.
What are the Main Reasons Nigerians Get Refused?
Knowing why others get denied is the best way to strengthen your own application. For applicants from Nigeria, visa officers tend to focus on a few specific areas.
A major one is weak "ties to your home country." You have to convince the officer that you have strong reasons to return to Nigeria after your work permit expires. This isn't just about saying you'll come back; you need to prove it. Evidence could include property you own, significant family responsibilities (like being the primary caregiver for ageing parents), or a clear career path you plan to resume in Nigeria.
Other common deal-breakers are insufficient proof of funds or, just as often, funds that are poorly documented. Finally, make sure every single document is complete and tells the same story. Any inconsistencies, even small ones, can damage your credibility and lead to a refusal.
Ready to start your immigration journey with expert guidance? JapaChat is Nigeria's AI-powered immigration expert, designed to give you instant, accurate answers for your move. Sign up for free and get the clarity you need at https://japachat.com.
Leave a Reply