How to Get a Canadian Work Permit from Nigeria: The Real-Life Guide
So, you want to work in Canada? It's a fantastic goal. The dream of earning in dollars, building global experience, and maybe even giving your kids a different future is a powerful motivator for many of us in Nigeria. But let's be honest, the "japa" process can look confusing and intimidating from the outside.
This guide is here to cut through the noise. I'll give you a clear, practical roadmap designed specifically for your journey from Nigeria to a Canadian workplace, using examples you can actually relate to.
First things first, you need to understand that not all work permits are the same. Canada has two main types, and figuring out which one applies to you is the most important first step.
Understanding the Two Main Work Permit Types
Your entire application strategy depends on which of these two categories you fit into.
For example, if you're a software developer in Lagos and you've just landed a job offer from a tech firm in Toronto, you'll be going for an employer-specific work permit. This permit ties you to that specific company. You can't just arrive and decide to work for someone else.
On the other hand, imagine your spouse is already in Canada on a study permit at the University of Manitoba. In that case, you might be eligible for an open work permit, which gives you incredible flexibility to work for almost any employer in the country, from a bank in Calgary to a startup in Vancouver.
The most common route for Nigerians is the employer-specific work permit. This path nearly always requires your Canadian employer to get a document called a Labour Market Impact Assessment (LMIA) first. An LMIA is proof that they tried, but couldn't find a Canadian or permanent resident to fill the job.
This difference is critical because it dictates who starts the process. For an employer-specific permit, everything begins with the Canadian employer. Without that genuine job offer backed by an LMIA, your application is a non-starter.
This is a key reason why Canada's immigration strategy is so focused on filling labour gaps. In 2024, Canada set ambitious targets for new permanent residents, with a huge chunk coming through economic streams tied to work permits. This isn't slowing down. The official Immigration Levels Plan aims to welcome around 230,000 workers annually through various programmes between 2025 and 2027.
Picking the right path from the get-go will save you a world of time, money, and stress.
Choosing Your Canadian Work Permit Stream
To make it even clearer, here's a quick comparison to help you identify the best route from Nigeria.
| Permit Type | Key Requirement | Best For Nigerians Who… |
|---|---|---|
| Employer-Specific Work Permit | A valid job offer with a positive Labour Market Impact Assessment (LMIA). | Have already secured a job with a specific Canadian company that is willing to support their application. This is the main "japa" route for skilled professionals. |
| Open Work Permit | Must meet specific eligibility criteria, often related to a spouse's status in Canada (e.g., student, skilled worker). | Are spouses or partners of international students or temporary foreign workers already in Canada. It's a way to join your partner and also be able to work. |
Understanding this distinction is your foundational step. Once you know which permit you're aiming for, you can start gathering the right documents and building a strong application.
Meeting Canada’s Eligibility Criteria

Before you spend one Naira on application fees or even start dreaming of Toronto winters, let's get real about what it takes to qualify. The first, most critical step is making sure you meet Canada's core eligibility criteria. This isn't just a simple checklist; it's about building a convincing case for a Canadian visa officer.
You have to put yourself in their shoes. They are looking for solid proof of two main things: first, that you're qualified and admissible, and second, that you will leave Canada when your work permit expires. Honestly, that second point is where many Nigerian applications hit a wall and face intense scrutiny.
The Non-Negotiable Basics
Alright, let's break down the absolute must-haves. If you don't have these sorted, your application is dead on arrival.
- A Valid Nigerian Passport: Your passport needs at least one blank page and must be valid for your entire planned stay. If it's expiring within a year or so, do yourself a favour and renew it before you apply.
- Proof of Financial Support: You must show you have enough money to support yourself (and any family coming with you) when you land in Canada. We'll dig deeper into this later, but it’s a make-or-break requirement.
- Good Health: You cannot have a health condition that could pose a danger to public health or put a major strain on Canada's health services.
- A Clean Criminal Record: You have to be "admissible" to Canada. This means no serious criminal history that could make you a security risk.
These are the foundational pillars. Get them right. But the real art—and where many Nigerians stumble—is proving the next, more subjective part of the application.
Proving Your Intent to Return to Nigeria (Your "Ties to Home")
This is it. The single most important part of your application. You have to convince the visa officer that your ties to Nigeria are so strong that you will pack your bags and come home when your work permit is done. They are trained to sniff out applicants who look like they might overstay.
So, how do you prove it? You need to build a powerful case with tangible evidence. Think about it: what truly anchors you to Nigeria?
A visa officer once told an immigration consultant that they don't just look for what you have in Nigeria, but why you would come back for it. A job offer in Canada is a strong pull factor; your ties to home must be an equally strong "pull back" factor.
Here are some real-world examples of how to demonstrate these ties:
- Family Responsibilities: Are you the primary caregiver for your ageing parents in your village? Is your spouse or are your children staying behind in Nigeria? Back this up with birth certificates and a clear, heartfelt letter explaining your family situation.
- Property Ownership: Do you own a plot of land in Ibeju-Lekki or a house in Abuja? This is a massive anchor. Include the title deeds, survey plans, or any proof of ownership you have.
- A Stable Career: Show them you have a great job to come back to. One of the most persuasive documents you can have is a letter from your current employer in Nigeria (say, a bank on Victoria Island), granting you a leave of absence and confirming your position will be waiting for you.
- Financial Investments: Do you have a registered business or significant investments in Nigeria? Provide your CAC documents, business bank statements, or investment portfolio statements from a company like Stanbic IBTC.
Meeting Health and Character Requirements
Canada doesn't play when it comes to health and security. For applicants from Nigeria, this means you will almost certainly need to tick two very important boxes.
1. Upfront Medical Examination: Don't wait for IRCC to request this. Be proactive. Book and complete an "upfront" medical exam with a panel physician approved by the Canadian government. You'll find designated clinics in major cities like Lagos and Abuja. Getting this done early shows you're serious and can prevent major delays in your application.
2. Police Clearance Certificate (PCC): You'll need this certificate to prove your clean criminal record. You can get it from the Nigeria Police Force Criminal Investigation Department (CID). My advice? Start this process as soon as possible, as getting things done through official channels in Nigeria can sometimes take a bit of time.
Ultimately, Canadian work permits fall into two main categories: employer-specific work permits, which usually need a Labour Market Impact Assessment (LMIA), and open work permits, which give you the freedom to work for almost any employer. Knowing which one you’re aiming for is key, and it all starts with mastering these eligibility rules.
For those thinking about the long game, remember that Canadian work experience can be a powerful stepping stone to permanent residence. If that's on your radar, you might find our guide on creating an Express Entry profile useful for future planning.
Getting Your Documents Right: The Nigerian Checklist

Let's be honest—this is the part of the application that trips most people up. Getting your documents in order is a game of details, where one small mistake can lead to a long delay or even a heartbreaking refusal.
For us Nigerians, just downloading the generic checklist from the IRCC website isn't enough. You have to think like a visa officer. You need to present your documents in a way that tells a clear, believable story about who you are and why you're a great candidate.
Think of it as putting together a puzzle. Each document is a piece. Your job is to assemble them so perfectly that the visa officer sees a complete picture of a genuine, qualified applicant with every reason to be approved. This means going beyond the basics and anticipating the questions they might have about your specific situation in Nigeria.
First Things First: The Documents from Your Canadian Employer
Before you even start digging out your own paperwork, there are a few critical documents you need from your employer in Canada. These are the foundation of your entire application for an employer-specific work permit. Without them, you simply can't move forward.
- The Official Job Offer Letter: This can't be a casual email. It must be a formal document on the company’s letterhead, properly signed. It needs to clearly state your job title, detailed duties (which must match the National Occupational Classification – NOC code), your salary in Canadian dollars, and where you'll be working.
- Labour Market Impact Assessment (LMIA): For most jobs, your employer will need a positive LMIA. This is the government's permission slip, proving they're authorised to hire a foreign worker because no Canadian could fill the role. You'll get a copy with a unique LMIA number that you absolutely need for your application.
- Offer of Employment Number: This is a big one. Your employer has to pay a compliance fee and submit your job offer through the official IRCC Employer Portal. Once they do, they'll receive an "Offer of Employment" number (it always starts with the letter 'A' followed by seven digits). You must include this number in your application form.
Make sure you have all three of these in hand before you spend a single Naira on the rest of your documents.
Proving Your Finances: The “Proof of Funds” Hurdle
This is where so many Nigerian applications fall apart. The visa officer isn't just looking to see if you have enough money to survive before your first paycheck. More importantly, they're scrutinizing where that money came from.
A sudden, massive deposit into your bank account right before you apply is the biggest red flag you can raise. Imagine your account has a steady balance of around ₦800,000 for months, and then a week before you print your statement, ₦5,000,000 magically appears. The visa officer will almost certainly assume it's borrowed money, and that's a quick way to get a refusal.
It’s not about the final balance; it’s about the story your bank history tells. A consistent pattern of saving, even if it’s a smaller amount over time, is far more convincing than a huge, unexplained last-minute lump sum.
To build a strong case, provide your personal bank statements for the last four to six months. Make sure the statement clearly shows your name, address, and every transaction.
If you received a large sum as a gift (maybe from a parent), you must back it up. Include a sworn affidavit or a formal gift deed from the person who gave you the money. They should also provide their own bank statements to prove they had the financial capacity to give you that gift in the first place.
This table breaks down the most essential documents with some specific advice for Nigerian applicants.
Essential Documents with Nigerian-Specific Tips
| Document | Key Details to Include | Nigerian-Specific Tip |
|---|---|---|
| Passport | Bio-data page and all pages with visas or stamps. Must be valid for your intended stay. | Ensure your passport has at least two blank pages. If you have a new passport, include copies of old ones to show your travel history. |
| Bank Statements | 4-6 months of statements showing a consistent history of funds. | Avoid "Miracle Money." If you have a large deposit, explain it with a gift deed, property sale agreement, or other proof. |
| Police Clearance | From the Nigerian Police Force Criminal Investigation Department (CID). | Apply for this early! It can take several weeks. You'll need one for every country you've lived in for 6+ months since you turned 18. |
| Proof of Ties | Property deeds, car ownership, letters from Nigerian employers, family photos. | This is crucial for proving you'll return. Include your spouse's employment letter, children's school enrollment letters—anything that ties you to home. |
| Medical Exam | Upfront medical exam confirmation from an IRCC-approved panel physician. | Do this before you submit. It speeds things up. You'll submit the information sheet from the clinic with your application. |
Gathering these documents with care will make your application much stronger and show the visa officer you're a serious, well-prepared applicant.
Backing Up Your Professional and Educational History
You need to prove you have the qualifications for the job you’ve been offered. Simply listing your degrees and past jobs isn't enough; you need to provide evidence.
- Educational Credential Assessment (ECA): While not always mandatory for a work permit, I highly recommend getting an ECA. It’s a report that shows your Nigerian degree (from UNILAG, for example) is equivalent to a Canadian one. Using a recognized organisation like World Education Services (WES) is your best bet. This process can take a few months, so start it as soon as possible.
- Reference Letters: Don't just list your past employers; get detailed reference letters from them. These should be on company letterhead and clearly state your job title, dates of employment, and your key responsibilities. This is how you verify the work experience you've claimed.
Your Secret Weapon: The Letter of Explanation
This is your single best chance to speak directly to the visa officer and tell your story. A well-crafted Letter of Explanation (LOE) connects all the dots in your application and can proactively address any potential red flags.
Use your LOE to:
- Clearly explain your strong ties to Nigeria (family, property, business).
- Justify any large or unusual transactions in your bank statements (e.g., "The ₦2 million deposited on May 5th was from the sale of my Toyota Camry, as shown in the attached sales agreement").
- State your intention to respect the rules and leave Canada when your permit expires.
- Draw a clear line connecting your past experience in Nigeria to the job you've been offered in Canada.
This letter turns your application from a stack of papers into a human story. Keep it professional, factual, and to the point.
For a broader look at the entire process, you can explore our detailed guide on https://blog.japachat.com/how-to-apply-for-work-visa/. Putting in the effort on your documents now will massively improve your chances of success.
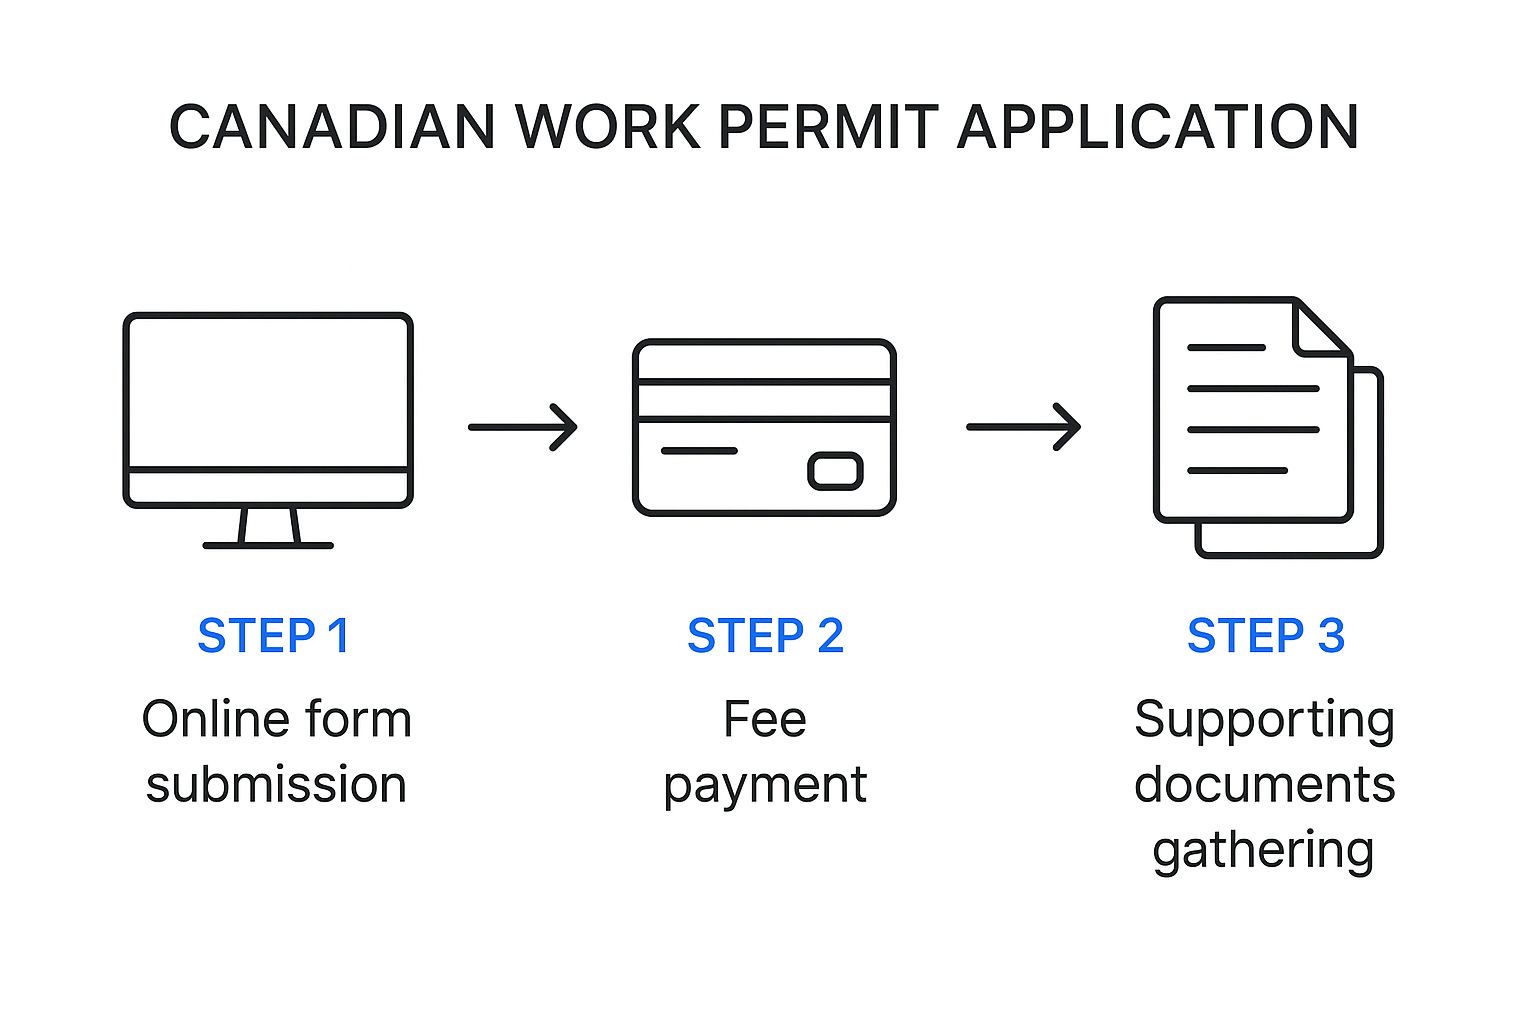
Navigating the IRCC Online Portal
You’ve gathered all your documents, scanned them perfectly, and now it's time to tackle the final stage: the Immigration, Refugees and Citizenship Canada (IRCC) online portal. For many Nigerians, this is where things can feel a little overwhelming. But don't worry—with a bit of guidance, you'll get through it smoothly.
This is where you'll create a secure account, complete the main application form (IMM 1295), and upload all the evidence you’ve worked so hard to prepare. The key is to make the visa officer's job as easy as possible with a clean, organised, and error-free submission.
Creating Your Secure IRCC Account
First things first, you need an online account. This will be your personal dashboard for this application and any others you might make in the future with IRCC.
When you get to the IRCC sign-in page, you'll see a couple of options.
For most people applying from Nigeria, the GCKey is the way to go. This is simply a unique username and password you create just for Government of Canada services. The "Sign-In Partner" option is for those with Canadian banking credentials, which won't apply here.
A Quick Word of Advice: When you set up your security questions, choose answers that are impossible for you to forget but hard for anyone else to guess. I can't stress this enough: write them down and keep them somewhere safe. Getting locked out of your IRCC account is a massive headache and can cause serious delays.
Once you’re in, the system will walk you through a questionnaire. This helps determine your eligibility and generates a personalised document checklist just for you. This is where you'll start uploading your files.
Filling Out the IMM 1295 Form
The IMM 1295, or the Application for Work Permit Made Outside of Canada, is the heart and soul of your application. You'll need to download this PDF, fill it out on your computer using Adobe Reader, and then upload it back to the portal.
Pay very close attention to every single field. A common slip-up is providing information that contradicts your other documents. For example, if your offer letter clearly states your job is in Calgary, but you mistakenly write Toronto on the form, that’s a huge red flag for a visa officer.
After you've filled everything in, you must click the "Validate" button at the top or bottom of the form. This action generates several barcode pages at the end of the document. If you don't see these barcodes, something is wrong. Save this final, validated version of the PDF for uploading.
Uploading Your Documents the Right Way
This is where all your earlier organisation pays off. IRCC has strict file requirements, typically a 4 MB limit per file. If your scanned passport or bank statement is too large, you'll need to compress it. There are plenty of free online tools that can do this without making the document unreadable.
More importantly, name your files clearly. Imagine you're the visa officer. A file named "IMG_2024_SCAN.pdf" means nothing. A clear naming convention makes their life easier and shows you're a serious, organised applicant.
- Do this:
Okoro_Chinedu_Passport.pdf - Do this:
Okoro_Chinedu_ProofOfFunds_AccessBank.pdf - Don't do this:
doc1.pdf
It’s a simple step, but it speaks volumes about your attention to detail.
The Biometrics Process in Nigeria
Once you hit 'submit' and pay the fees, you're almost there, but not quite. The next critical step is giving your biometrics (your fingerprints and a photo).
- Pay the Fee: You must pay the $85 CAD biometrics fee at the same time as your main application fee. It's not optional.
- Get Your BIL: Usually within 24 hours of submitting your application, a Biometric Instruction Letter (BIL) will appear in your IRCC account. You absolutely need this letter to book your appointment.
- Book Your Appointment: With your BIL in hand, you can now book an appointment at a Visa Application Centre (VAC). In Nigeria, the main centres are in Lagos and Abuja. You must have a confirmed appointment; you can't just walk in.
After your biometrics are done, your application is officially in the queue for a decision. It's a waiting game from here, but you've done your part.
After You Submit Your Application
You’ve done it. You’ve uploaded every single document, triple-checked the IMM 1295 form, paid the fees, and finally clicked that ‘submit’ button. A huge wave of relief probably washed over you, followed almost immediately by a new, nagging question: what happens now?
This waiting period can be the most nerve-wracking part of the entire journey. It's easy to start second-guessing every detail. But let's get practical. Your application has entered a queue, and an IRCC officer will get to it. This won't happen overnight, so here's what you should be doing while you wait.
Keeping Track of Your Application
From this point on, your IRCC secure account is your best friend. Seriously. This is the only place official communication will appear, so get into the habit of logging in regularly. You'll see the status of your application change from "submitted" to "under review" and, eventually, to a final decision.
It's also a good idea to keep an eye on the official processing times. IRCC has a handy tool on their website that gives you a rough idea of how long applications from Nigeria are taking.
Here’s your game plan for staying informed:
- Check Processing Times: Head over to the official IRCC website and find their processing time calculator. Select "Temporary residence (visiting, studying, working)," then "Work permit (from outside Canada)," and finally "Nigeria." This gives you the most current estimate.
- Monitor Your IRCC Account: This is non-negotiable. Any request for more information, biometrics updates, or a final decision will be posted here. I'd suggest setting a reminder to check it at least once a week.
A Quick Reality Check: Don't panic if your application sails past the estimated processing time. Those times are just an average, not a guarantee. Delays can happen for all sorts of reasons—a high volume of applications, the specific details of your file, or even just administrative backlogs.
Responding to IRCC Requests
Sometimes, the visa officer reviewing your file needs a bit more information to make a decision. Don't see this as a bad sign! In fact, it’s a golden opportunity to clarify things and strengthen your case. You might get a request for a clearer bank statement, a more detailed job reference letter, or even an invitation for an interview.
If this happens, act quickly but carefully.
- Read the Request Meticulously: Understand exactly what they're asking for. Don't just skim it.
- Respect the Deadline: IRCC will give you a firm deadline to submit the requested information. Whatever you do, don't miss it.
- Be Honest and Direct: If you're called for an interview, be ready to answer questions about your job offer, your work experience, and your ties to Nigeria. Keep your answers clear and to the point.
For a deeper dive into what to expect with different types of Canadian visas, check out our comprehensive guide on the Canada work visa and permit process.
Your Work Permit: A Stepping Stone to Something Bigger
While you wait, it’s a great time to start thinking about the long-term possibilities. For many Nigerians, a Canadian work permit isn't just about a temporary job—it's the first major step toward a new life.
The skilled work experience you gain in Canada is incredibly valuable and can open a direct path to permanent residency (PR). This isn't an accident; Canada's immigration system is specifically designed to favour people who have already proven they can contribute to the Canadian labour market.
This is where programs like the Canadian Experience Class (CEC), which operates under the Express Entry system, come into play. After working in a skilled job in Canada for at least one year, you may become eligible to apply for permanent residency. It’s a clear, deliberate pathway.
Canada provides multiple routes to convert a temporary work permit into permanent residency, showing the government's strategy of using temporary skilled workers to fuel long-term economic growth. Statistics from recent years show that over 60% of work permit holders from key countries go on to apply for PR within five years. You can find more insights on Canada's immigration plans on canadavisa.com.
Keeping this future potential in mind can make the waiting period feel a lot more hopeful. Your journey doesn’t end with the work permit; in many ways, it’s just beginning.
Staying Safe: How to Spot Scams and Avoid a Visa Refusal
The dream of working in Canada is a powerful one, but this also means many Nigerians become targets for fraudsters. Protecting yourself is every bit as important as getting your documents in order. The path to a Canadian work permit is paved with details, and it’s these very details that scammers exploit and visa officers examine with a fine-toothed comb.
Let's be blunt: if a job offer sounds too good to be true, it almost certainly is. A classic scam involves a fake Canadian company dangling a fantastic job in front of you, but then asking for a fee to secure the job offer, the LMIA, or for "processing."
The Golden Rule: A legitimate Canadian employer will never ask you to pay for a job offer or an LMIA. The employer is legally responsible for these costs. If someone is asking you for money upfront for the job itself, that's a massive red flag. Walk away.
How to Know if a Job Offer Is Real
So, how can you separate a genuine opportunity from a scam? You need to do your own detective work on the company.
- Check Their Digital Footprint: Does the company have a professional website? Are they active on platforms like LinkedIn? Look for real Canadian addresses and phone numbers you can verify.
- Do Some Digging: Search the company's name on Google along with terms like "scam," "fraud," or "reviews" to see if other people have reported problems.
- Remember the Golden Rule: I’ll say it again—never, ever pay for the job offer itself.
Another major risk is the rise of unlicensed "ghost" consultants here in Nigeria who promise guaranteed visas for a huge fee. They are notorious for disappearing the moment you pay them. Stick with accredited professionals: either a Regulated Canadian Immigration Consultant (RCIC) or a Canadian lawyer.
Why Genuine Applications Sometimes Get Refused
Beyond outright scams, many honest applications are unfortunately refused because of simple, preventable mistakes. The visa officer reviewing your file needs to be 100% convinced of your story and your intentions.
One of the most common reasons for refusal is failing to convince the officer that you'll return to Nigeria after your work permit expires. You have to show strong ties to home—things like property, family responsibilities, or a good career path to return to.
Another frequent mistake is submitting inconsistent information. For example, if your CV states you managed a team of five, but your reference letter says it was three, this kind of discrepancy destroys the officer's trust in your application.
This is especially important now, as Canada is constantly tweaking its immigration strategy. The International Mobility Program (IMP), for instance, has expanded, creating more opportunities for LMIA-exempt work permits. In fact, the IMP was responsible for 285,750 temporary worker admissions in 2024 alone. While this opens more doors, it doesn't mean they've lowered the standards. You can read more about Canada's future immigration plans on canadavisa.com.
Ultimately, your entire application needs to tell a story that is clear, consistent, and completely believable.
A Few Common Questions Answered
Let's tackle some of the most common questions I hear from Nigerians who are starting the Canadian work permit journey. Getting these right from the start can save you a lot of headaches.
How Much Money Do I Really Need for Proof of Funds?
There isn't a fixed, official amount, but a good rule of thumb is to show you have enough to land on your feet before you start getting paid. I usually advise clients to aim for at least CAD $3,000 to $5,000, on top of what you've budgeted for your flight. In Naira, that's roughly ₦3 to ₦5 million, depending on the exchange rate.
But here’s the inside scoop: the history of that money is far more important than the final closing balance. A sudden, large deposit from nowhere just before you apply is one of the biggest red flags for visa officers.
A consistent savings history over the last four to six months looks much stronger than a lump sum that just appeared. It shows the officer that the money is genuinely yours and wasn't just loaned to you to pad your account for the application.
Can I Bring My Family Along on My Work Permit?
Yes, and this is a huge draw for many Nigerian professionals. In most cases, you can bring your immediate family with you.
If you've secured a job in a skilled position (NOC TEER 0, 1, 2, or 3), your spouse or partner can often get an open work permit. This is fantastic because it means they can work for almost any employer in Canada without needing a separate job offer. Your children can also come along and attend school as if they were Canadian residents.
My advice? Apply for their permits at the same time as your own. It just makes the whole process smoother and more coordinated.
What’s the Real Processing Time for a Work Permit from Nigeria?
This is the million-naira question, and the honest answer is: it constantly changes. The timeline depends almost entirely on how many applications IRCC is dealing with at any given time.
There’s only one reliable source for this. You must always check the official IRCC processing times tool on their website for the latest estimate. Because these timelines can stretch out, it’s absolutely crucial to get your application submitted as early as possible before you plan to travel.
Feeling a bit lost in the details? Let JapaChat help clear things up. You can get instant, AI-powered answers to your specific immigration questions, all tailored for your situation in Nigeria. Start planning with more confidence by signing up for free at JapaChat.
Leave a Reply