US Study Visa Requirements Made Simple
Navigating the US student visa process can feel overwhelming, but it boils down to proving three key things. You need to show that you're a genuine student, that you can afford your education, and that you intend to come back home to Nigeria after you finish your studies.
Your Roadmap to a US Student Visa
Think of the US student visa process less like a maze and more like a journey with a clear map. At its heart, the process is all about verification. The US government wants to be sure you're coming for the right reasons – to study – and that you have the resources and the firm intention to follow the rules.
This guide will serve as your blueprint. Before we get into the nitty-gritty of specific forms and interview questions, it’s vital to grasp the main documents and principles that shape your application. Each piece of evidence works together to paint a clear picture of who you are, what you want to study, and what you plan to do afterwards.
The Cornerstones of Your Application
Your visa application stands on three pillars. If any one of them is weak, the whole structure could collapse. You need to build each one with solid, convincing proof.
-
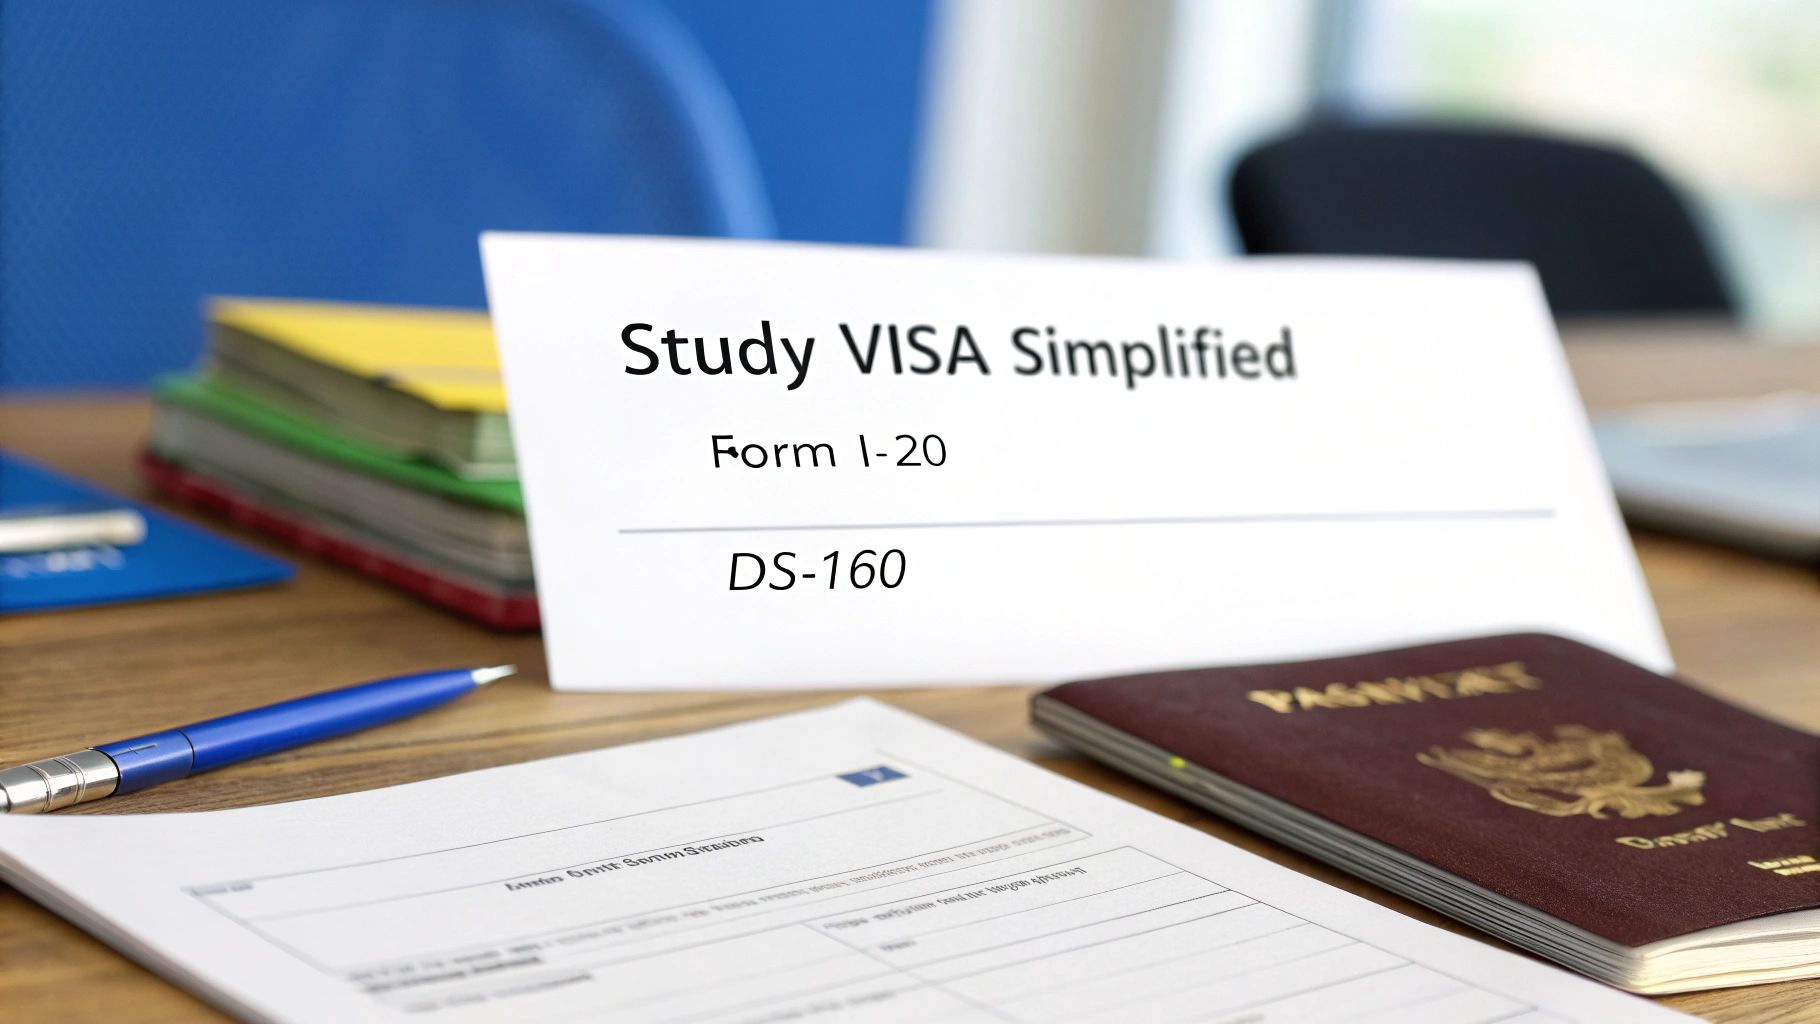
Academic Legitimacy: This is the easiest part to prove. Your acceptance letter from a school certified by the Student and Exchange Visitor Program (SEVP) is your proof. The school will then issue your Form I-20, which is one of the most important documents you'll have at this stage.
-
Financial Capacity: You must show undeniable proof that you or your sponsor can comfortably cover the entire cost of your first year of study. This isn't just tuition; it includes all the living expenses and fees listed on your Form I-20.
-
Non-Immigrant Intent: This is often the trickiest part because it's subjective. You have to convince the consular officer that you have strong ties to Nigeria that will pull you back home. These ties can be family, property, a business, or even a good job offer waiting for you.
Your main goal is to present a case that is clear, consistent, and believable. Every single document, from your I-20 to your bank statements, must support the same story: you are a serious student with a clear plan for your future in Nigeria.
The desire for a US education is as strong as ever among Nigerian students. In the 2024 fiscal year, the US has continued to see a steady stream of F-1 visa applications from Nigeria, which is part of a larger trend across Africa. This high demand means the competition is stiff. You can learn more about these international student trends and see why a perfectly prepared application is no longer just an advantage—it's a necessity.
Let's break down these core requirements into a simple table to see how everything connects.
US Student Visa Requirements at a Glance
This table summarises what you need to prepare for your F-1 visa application. It connects each requirement to the specific document you'll use as proof and explains what that proof tells the consular officer.
| Requirement Category | Key Document/Proof | What It Demonstrates |
|---|---|---|
| Academic Legitimacy | Form I-20 and University Acceptance Letter | You are a genuine student accepted into a legitimate, government-approved academic programme. |
| Financial Capacity | Bank Statements, Scholarship Letters, Sponsor's Financials | You or your sponsor have the liquid funds to cover your tuition, fees, and living costs for at least the first year. |
| Non-Immigrant Intent | Property Deeds, Family Documents, Job Offers, Business Registration | You have significant economic, family, and social ties to Nigeria that create a strong incentive for you to return after graduation. |
Seeing it all laid out like this helps to clarify the story you need to tell. Each document isn't just a piece of paper; it's a chapter in your story, and together, they must create a compelling narrative of a responsible, ambitious student who plans to use their US education to build a future back home.
Choosing the Right Visa for Your US Studies
This is it—the first big decision on your journey to studying in the US. Picking the correct visa isn't just a box-ticking exercise; it's the foundation of your entire application. I’ve seen many applicants get an immediate rejection simply because they applied for the wrong visa type, a mistake that costs both time and money. Think of it like booking a flight: you wouldn't use a ticket for a domestic flight to travel internationally.
To satisfy the official US study visa requirements, your choice of visa must perfectly match the course you plan to study. There are three main options you’ll encounter: the F-1, the M-1, and the J-1. They all let you study in America, but that's where the similarities end. Each has its own rules, purpose, and limitations.
The F-1 Visa for Academic Studies
The F-1 visa is the one most people think of when they hear "student visa." It's by far the most common one, designed specifically for students heading to the US for full-time academic programmes at accredited institutions—think colleges, universities, or even high schools. If you have an acceptance letter for a Bachelor's, Master's, or PhD, the F-1 is almost certainly your ticket.
This visa is built for a long-term academic commitment. One of its biggest advantages is the flexibility it offers for things like on-campus jobs and the chance to get real-world work experience after you graduate through Optional Practical Training (OPT). For most students from Nigeria aiming for a traditional university degree, the F-1 is the standard path.
The M-1 Visa for Vocational Training
The M-1 visa is a different kettle of fish. It's not for academic degrees but for vocational or non-academic training. This is your visa if you're going for hands-on, practical skills.
So, what kind of courses fall under the M-1? Here are a few examples:
- Culinary arts and cooking schools
- Flight training schools
- Cosmetology or beauty programmes
- Technical courses like auto mechanics
Be aware that the M-1 visa comes with tighter restrictions. You generally can't work while you study, and your stay is tied directly to the length of your training programme, plus a short grace period. It’s designed for a very specific, time-limited educational goal.
The J-1 Visa for Exchange Programmes
Finally, we have the J-1 visa, which is in a category of its own. The core idea behind the J-1 is cultural and educational exchange, not just study. Its purpose is to foster the sharing of knowledge and skills across borders.
The J-1 visa isn’t just for students. It covers a wide range of people, including scholars, trainees, and interns participating in an approved exchange visitor programme. This could be anyone from a university research scholar to a medical intern or even an au pair.
The critical difference here is that you must be part of a programme sponsored by a designated organisation, not just accepted by a school. To get a fuller picture of the immigration landscape, it’s always a good idea to familiarise yourself with the general https://blog.japachat.com/us-visa-requirements/ that apply to everyone. This background knowledge gives you valuable context for your own application.
Getting the choice right between the F-1, M-1, and J-1 is absolutely crucial. Before you even think about starting your DS-160 form, carefully review your admission letter and programme details. This one simple check ensures you start your application on the right foot.
A Step-by-Step Guide to the Visa Application Process
Feeling a bit lost in the maze of visa paperwork? It's a common feeling, but don't let it overwhelm you. The US study visa application isn't one giant hurdle; think of it as a series of smaller, manageable steps. By tackling them one at a time, what seems like a mountain of work becomes a simple, straightforward checklist.
This guide is your roadmap. We’ll walk you through every key stage, from the moment you get that exciting acceptance letter right up to your visa interview.
Step 1: Secure Your Form I-20
Before anything else, you need that acceptance letter. But it can't be from just any school—it has to be from an institution certified by the Student and Exchange Visitor Program (SEVP). This certification is the US government's way of saying the school is a legitimate place for international students.
Once you’re in and you've paid any required enrolment deposit, the school's Designated School Official (DSO) will issue a critical document: the Form I-20, also known as the "Certificate of Eligibility for Nonimmigrant Student Status." This isn't just another piece of paper. It's the foundation of your entire F-1 or M-1 visa application, containing your unique SEVIS ID number, your course details, and the estimated cost of your studies.
Step 2: Pay the I-901 SEVIS Fee
With your Form I-20 in hand, the next task is to pay the I-901 SEVIS Fee. This fee is essential because it funds the very system (SEVP) that keeps track of international students in the US. It's a separate, mandatory cost from the visa application fee itself.
You literally cannot book your visa interview without proof of this payment. When you pay, make sure you use the exact SEVIS ID from your Form I-20. Once paid, print the receipt immediately. You’ll need to bring it to your interview.
The infographic below shows how your eligibility leads right up to these initial steps.
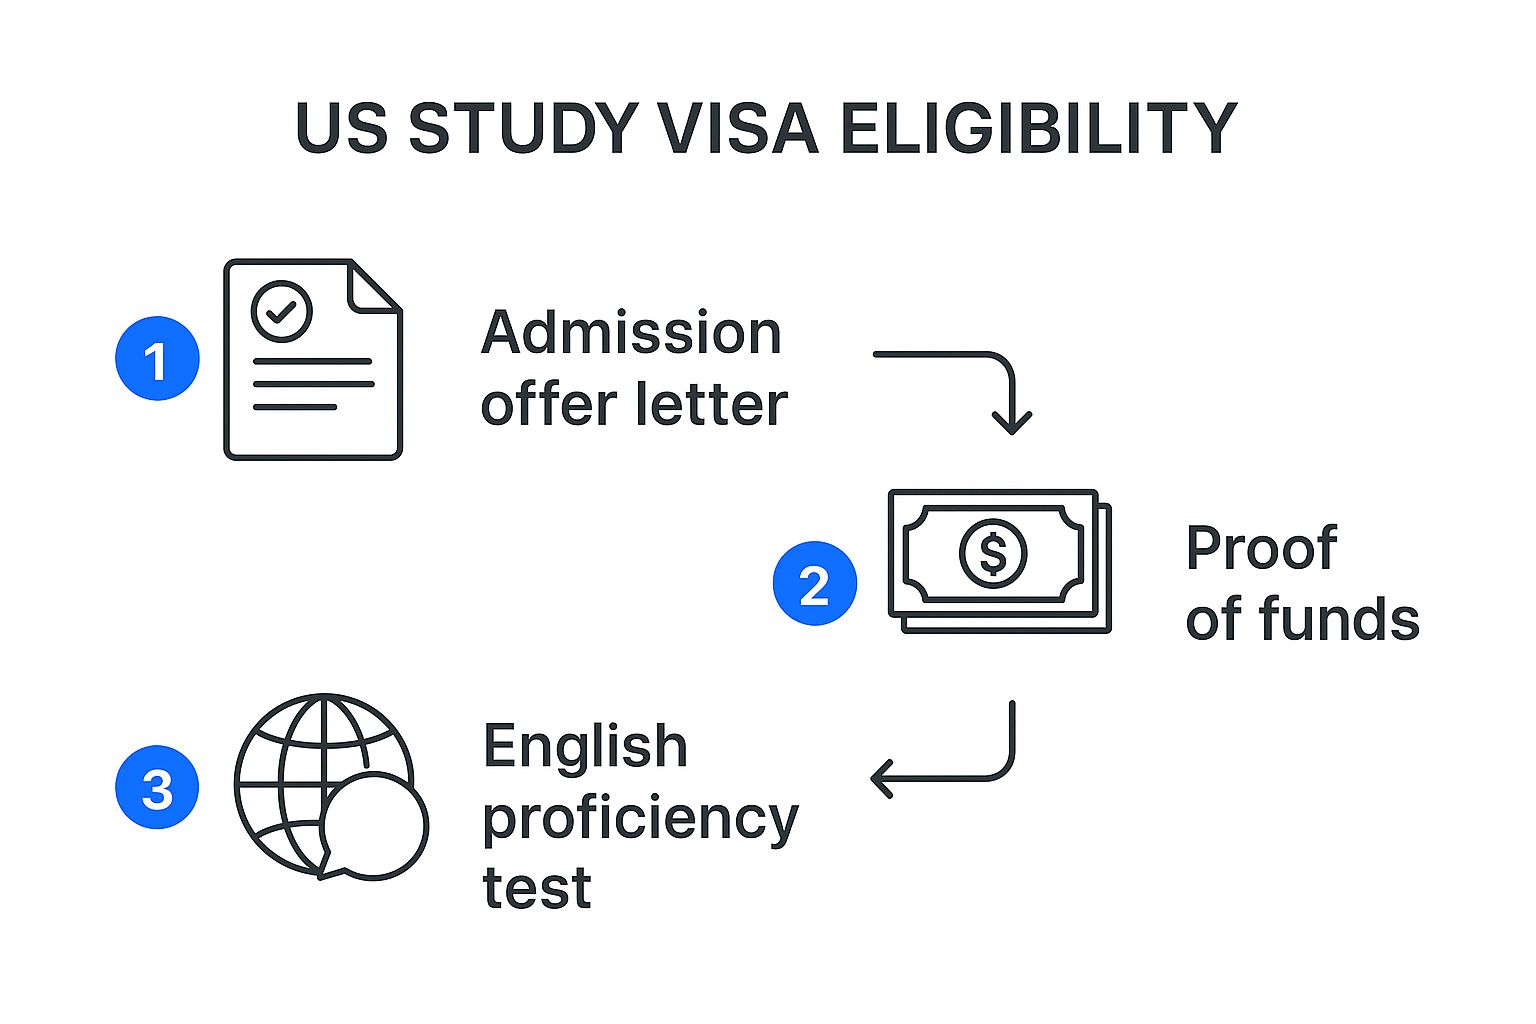
As you can see, getting accepted, proving you have the funds, and demonstrating English proficiency are the building blocks that allow you to start the formal application process we're discussing now.
Step 3: Complete the DS-160 Form
Now for the main event: the DS-160, Online Nonimmigrant Visa Application. This is a detailed online form where you'll provide your personal, educational, and professional history. The two most important things here are accuracy and honesty. Every detail matters.
Pro Tip: Take your time with this form. A small inconsistency between your DS-160 and your interview answers can raise a major red flag for the consular officer. Save your progress often and triple-check everything before you hit submit.
After submitting the DS-160, you'll get a confirmation page with a barcode. Print this page out! You absolutely must have it for your visa appointment.
Step 4: Schedule and Prepare for Your Interview
Once you've submitted the DS-160 and paid the separate visa application fee (often called the MRV fee), you can finally schedule your interview. For applicants in Nigeria, this is done through the official US Embassy and Consulate appointment service website. These appointments, especially during peak seasons, get snapped up fast. My advice? Book it as soon as you're able.
The last stretch is all about gathering your documents and getting ready for the interview itself. This is your moment to bring everything together and present a clear, convincing case.
Here’s a quick checklist to help you prepare:
- Get Your Documents in Order: Neatly arrange everything in a folder. This means your passport, Form I-20, DS-160 confirmation page, all fee receipts, financial statements, and academic transcripts.
- Know Your Story: Be prepared to clearly explain why you chose this specific university and course, how you plan to fund your education, and what you intend to do after you graduate.
- Practise Makes Perfect: Rehearse your answers to common interview questions. The goal is to sound clear, confident, and genuine. You need to convince the officer of your "non-immigrant intent"—that you have strong ties to Nigeria and fully intend to return home.
By following these steps methodically, you’ll not only demystify the process but also build a strong, organised application that meets the tough US study visa requirements.
Getting Your Documents in Order
When you walk into that interview, your folder of documents is your most powerful ally. It’s not just a pile of paper; it’s the proof that backs up your entire story. A neat, complete, and well-organised set of documents tells the consular officer you’re serious, prepared, and exactly the kind of student they’re looking for.
Think of it this way: every single document, from your passport to your bank statements, needs to work together. They must all support your primary goal, which is to prove you're a genuine student with the financial backing to study in the US and strong reasons to return to Nigeria afterwards.
The Must-Have Documents
Let's start with the absolute essentials. These are the documents you simply cannot show up without. If any of these are missing, your application will come to a screeching halt before it even begins.
- Your International Passport: It must be valid for at least six months after your planned stay in the US. No exceptions.
- Form I-20: This is the golden ticket from your school. Double-check that all your personal information is correct and make sure you’ve signed it.
- DS-160 Confirmation Page: After you fill out the online application, you’ll get a confirmation page with a barcode. Print it out. It's your entry pass for the appointment.
- Visa Fee Payment Receipt: This is your proof of payment for the visa application fee (the MRV fee).
- I-901 SEVIS Fee Receipt: You also need to show that you've paid the separate SEVIS I-901 fee. Keep this receipt safe.
- Passport Photographs: Bring two recent, identical colour photos. They must meet the specific US visa photo requirements, which is usually 2×2 inches with a plain white background.
Keep these core documents at the very front of your folder. The officer will ask for them first, so have them ready to go.
Showing You’re Academically Ready
Next, you need to prove you’re not just going to the US for fun—you're a capable student ready for a rigorous academic programme. These documents confirm your educational history and show you have what it takes to succeed.
Your academic file should contain:
- Original Transcripts and Certificates: Gather the official transcripts, mark sheets, and degree certificates from every school you've attended, including secondary school and any university.
- Standardised Test Scores: If your university asked for them, bring your original score reports for tests like the TOEFL, IELTS, GRE, GMAT, or SAT.
- University Acceptance Letter: While your I-20 is the official certificate of eligibility, it's always a good idea to bring your original admission letter as well.
Think of this section as your academic history in a nutshell. It tells the officer, "I am not just accepted; I am qualified and ready for this academic challenge."
Proving You Can Afford It
This is where the consular officer will pay very close attention. You must prove, beyond a shadow of a doubt, that you or your sponsor can cover the full cost of your first year of tuition, fees, and living expenses. This amount is listed right on your I-20, and your financial story needs to be crystal clear and believable.
Come prepared with a well-organised set of financial documents. These might include:
- Bank Statements: Bring at least six months of recent, original bank statements. These can be from your personal account or your sponsor's.
- Affidavit of Support: If someone else is paying for your education, you'll need a formal letter from them. It should state their relationship to you and confirm their commitment to covering all your costs.
- Sponsor's Proof of Income: This could be their pay slips, a letter from their employer, or if they own a business, their business registration documents and tax receipts.
- Proof of Assets: Documents showing property ownership (like deeds) or investment portfolios can add weight to your application by demonstrating overall financial stability.
- Scholarship or Loan Letters: If you've been awarded a scholarship, grant, or an educational loan, you must bring the official letter that details the award.
A word of caution: a large, unexplained sum of money deposited into an account right before your interview is a major red flag. The officer is looking for a history of stable, legitimate funds. A strong and transparent financial profile gives them the confidence they need to stamp your visa.
Succeeding in Your High-Stakes Visa Interview
After all the weeks, sometimes months, of gathering documents and filling out forms, everything boils down to a single conversation. This chat, often lasting just a few minutes, is usually the most stressful part of meeting the US study visa requirements. This is your chance to show the consular officer who you are and, crucially, to prove your non-immigrant intent.
It helps to think of the interview less like an interrogation and more like a final handshake. The officer has seen your paperwork; now they want to meet the person behind it. How you carry yourself—your confidence, how clearly you speak, and the consistency of your story—is just as vital as the documents you’re holding. Your mission is simple: convince them you are a legitimate student who plans to return to Nigeria after finishing your degree.
Understanding the Consular Officer's Goal
A consular officer’s job is rooted in one thing: upholding US immigration law. When it comes to student visas, this means they’ve been trained to screen for one primary factor—your intention to go back home. They must be completely satisfied that you have strong ties to Nigeria that will pull you back after graduation.
Every single question, whether it’s about your choice of university or what your parents do for a living, is a piece of a larger puzzle. They’re checking to see if your verbal answers line up perfectly with your documents and your DS-160 form. Any little inconsistency can feel like a red flag to them.
The current global atmosphere has also tightened scrutiny. For instance, recent shifts in US immigration policies have made some international students more cautious. While the US is still a top destination, the numbers show a trend of careful consideration. The total number of international visitors to the US dropped by 11.6% year-on-year in March 2025, a reflection of this environment. For Nigerian applicants, this may mean a more thorough interview, making your preparation more important than ever. You can discover more about how global trends are shaping US immigration.
Answering Key Questions with Confidence
No two interviews are exactly the same, but the themes are nearly always consistent. Your ability to give answers that are clear, to the point, and honest is absolutely critical. Sounding like you’ve memorised a script can often hurt more than it helps.
Here are the main topics you should be ready to talk about:
- Your Study Plans: Why this school? Why this specific degree? You need to be able to explain how this qualification is the perfect stepping stone for your future career back in Nigeria.
- Your Financial Situation: Who is paying for this? Be ready to confidently explain where the money is coming from, whether it’s your family, a sponsor, or a hard-won scholarship.
- Your Ties to Nigeria: This is the big one. You have to paint a clear picture of your strong economic and social connections to home.
The secret isn't just to list your ties but to bring them to life. Instead of just saying, "My family is in Nigeria," try explaining your role. For example, mention being the eldest child with family responsibilities or having a specific role in a family business you plan to return to.
To be fully prepared, you should review a variety of potential questions and get comfortable with your answers. Our guide on common US visa interview questions and answers for Nigerian students is a great resource to help you build the confidence you need.
Making a Professional Impression
In a situation this important, first impressions are everything. The way you dress and act says a lot about your respect for the process before you even utter a single word.
Professional Attire and Conduct
| Do's | Don'ts |
|---|---|
| Dress Professionally: Treat it like a job interview. Business casual is always a safe choice—a neat shirt, smart trousers or a skirt, and clean shoes. | Don't Overdress or Underdress: Avoid flashy outfits, too much jewellery, or super casual clothes like t-shirts and ripped jeans. |
| Be Punctual: Get to the embassy or consulate with time to spare, but don’t try to enter before your appointment slot. | Don't Bring Prohibited Items: Leave all electronics, big bags, and anything sharp at home or in your car. They are not allowed inside. |
| Speak Clearly and Politely: Greet the officer with a smile, make eye contact, and answer their questions directly and respectfully. | Don't Argue or Get Defensive: If a question throws you off, just stay calm. Answer as honestly as you can without letting your emotions take over. |
Ultimately, succeeding in your interview comes down to presenting yourself as a credible, consistent, and confident applicant. When you understand what the officer is looking for and prepare yourself thoroughly, you can turn this final hurdle into your moment to shine.
How to Avoid Common Visa Application Mistakes

Let's talk about getting ahead of the curve. One of the smartest things you can do is learn from the mistakes others have made. Simply ticking off the US study visa requirements on a checklist isn't always enough to secure an approval. You also have to navigate the common tripwires that have led to disappointment for so many applicants before you.
Think of your application as a story you're telling the consular officer. Every single document, every answer you give, has to be a consistent part of that story. A lot of rejections are handed out for issues that are completely avoidable, like mismatched information or weak proof of funds. By understanding where others have stumbled, you can give your own application a much stronger chance of success.
The Most Common Application Pitfalls
Even one small error can be enough to raise a red flag and put your whole application in jeopardy. Consular officers are trained to spot inconsistencies, so your goal is to present a case that's airtight. Here are some of the most frequent missteps Nigerian students make:
- Inconsistent Information: This is a classic. Imagine you list your uncle as your sponsor on the DS-160 form, but in the interview, you mention your father is paying. That contradiction creates immediate doubt and damages your credibility.
- Weak Financial Proof: It’s not just about having the money; it’s about where it came from. A huge sum of money that suddenly appears in your bank account right before your application will look suspicious. Officers need to see a stable financial history, not a last-minute scramble.
- Vague Post-Graduation Plans: When the officer asks what you plan to do after your studies, "I'm not sure yet" is one of the worst possible answers. It signals you may not have strong reasons to come back to Nigeria, which is a major concern for them.
Your job is to leave no room for doubt in the consular officer’s mind. A well-prepared application answers their questions before they even have to ask them, building a solid foundation of trust from the start.
Make no mistake, getting a student visa is tougher than ever. The US student visa denial rate climbed to a 10-year high of 41% in the 2023-2024 fiscal year. A decade ago, that number was just 16%. This statistic shows just how much scrutiny Nigerian applicants are under, especially regarding financial stability and the intention to return home.
Proving Your Ties to Nigeria
This brings us to what is arguably the single most important part of your application: proving non-immigrant intent. The consular officer has to be completely convinced that you have strong ties to Nigeria that will pull you back home after you finish your degree. If you can't prove this, your chances of rejection are very high.
So, how do you build a convincing case? You need to show them concrete proof of your connections back home.
- Family Responsibilities: Do you have a spouse, children, or elderly parents who depend on you and will be staying in Nigeria? Provide documents to prove it.
- Economic Ties: This is powerful. Show evidence of property you own, a business you run, or better yet, a firm job offer waiting for you when you return.
- Social Connections: Demonstrate that you are an established part of your community with deep roots that you wouldn't want to sever.
Every piece of evidence you provide adds another layer to your argument, painting a clear picture that your US education is a tool to build a better future in Nigeria, not an escape route. To get more specific strategies, check out our deep dive into the top reasons for visa rejection and how to prevent them.
Common Questions About the US Student Visa
It’s completely normal to have a few lingering questions as you get closer to your visa interview and travel dates. Let's tackle some of the most common ones we hear from Nigerian students.
How Do I Prove I Have Enough Money?
Think of your financial proof as telling the consular officer a convincing story about your ability to pay for your education. You need to show that you can comfortably cover the total cost for your first year of study, an amount you’ll find listed on your Form I-20.
The best evidence includes:
- Personal Bank Statements: These are strongest when they show a stable, healthy balance over the last several months. A sudden large deposit right before your interview can look suspicious.
- Sponsor's Financial Documents: If someone else is paying, you'll need their bank statements and a signed Affidavit of Support form. This officially confirms their commitment to funding your education.
- Official Award Letters: For any scholarships, grants, or loans, you must have an official letter from the awarding institution that clearly states the amount.
What they're really looking for is proof that the funds are liquid and readily available—not just borrowed and parked in an account for the interview.
Can I Get a Job in the US with My F-1 Visa?
The rules around working on an F-1 visa are very strict, so it’s crucial to understand them. For your first academic year, you are generally not allowed to work off-campus at all. The only exception is for severe, unexpected economic hardship, and even then, you need special permission from U.S. Citizenship and Immigration Services (USCIS).
Your work options are quite specific:
- On-Campus Work: You can work at your university, but only for up to 20 hours per week while school is in session.
- Practical Training: Programmes like Curricular Practical Training (CPT) and Optional Practical Training (OPT) are designed for work experience in your field of study. However, these have separate application processes and strict eligibility rules.
My Visa Was Approved! What’s Next?
Congratulations! Getting that approval is a huge milestone. Your passport will be returned to you with the US visa stamped inside. Now, it’s time to focus on your travel plans.
First, double-check that you’ve paid the SEVIS I-901 fee and have the receipt handy. You can fly into the United States up to 30 days before the start date written on your I-20, but not a day earlier.
A critical travel tip: Keep all your essential documents in your carry-on bag, never in your checked luggage. You will need to present your passport, visa, Form I-20, and SEVIS fee receipt to the immigration officer at the US port of entry.
Planning your move to the US involves countless questions. Get instant, reliable answers from JapaChat, Nigeria's AI immigration expert. We provide clear guidance on visa requirements and travel preparations, helping you avoid mistakes and plan your journey with confidence. Start your journey today at https://japachat.com.
Leave a Reply