Visa Requirements for Canada Student Visa: Complete Guide
So, you've decided to study in Canada. That's a fantastic choice! But before you start packing your bags, the first major step is getting your study permit, and that means tackling the visa requirements head-on.
Think of it less like filling out a form and more like telling a story. Every document you provide helps paint a picture for the visa officer, showing them you're a serious student who is well-prepared for this new chapter.
Your Roadmap to a Canadian Study Permit
The Canadian government, through Immigration, Refugees and Citizenship Canada (IRCC), has set up a clear process. They essentially want to confirm three key things about you: that you have a legitimate reason to be in Canada (your studies), that you can support yourself financially, and that you'll respect the rules and return home when your permit expires.
Getting these three areas right is the cornerstone of a successful application.
The Core of Your Application
Your application really boils down to proving you meet these fundamental criteria. Let's break them down.
-
Academic Acceptance: First things first, you need to get into a school. Not just any school, but a Designated Learning Institution (DLI). Your official Letter of Acceptance (LOA) is the golden ticket here; without it, your application can't even start.
-
Financial Capacity: You have to show you've got the money to back up your plans. This isn't just about tuition. You must prove you can cover your living expenses, which IRCC has updated to a requirement of $20,635 for a single applicant, on top of your first year's tuition fees.
-
Provincial Approval: This is a newer, crucial step. For most students heading to college or university, you now need a Provincial Attestation Letter (PAL). It’s the province’s way of saying, "Yes, we have a spot for this student," ensuring numbers stay within the national cap.
A lot of applicants get their LOA and think the hard part is over. That’s a huge mistake. Your financial proof and your PAL are just as important. An application is a three-legged stool—if one leg is wobbly, the whole thing can collapse.
To keep you organised, let's summarise the absolute must-haves. Think of this as your initial checklist before you dive deeper into the application itself.
Quick Checklist of Core Student Visa Requirements
This table outlines the fundamental documents and conditions every applicant must meet. Getting these right from the start saves you a world of headaches later on.
| Requirement Category | Key Document/Proof Needed | Why It's Crucial |
|---|---|---|
| Institutional Acceptance | Letter of Acceptance (LOA) | Confirms you have been officially admitted to a government-approved school (DLI). |
| Provincial Endorsement | Provincial Attestation Letter (PAL) | Shows the province has allocated a study spot for you under the national cap. |
| Proof of Funds | Bank Statements, GIC, Sponsor Letters | Proves you can pay for tuition and living expenses without needing to work illegally. |
| Identity | Valid International Passport | Your primary identification document required for travel and visa issuance. |
| Intent to Leave | Statement of Purpose (SOP) | Persuades the visa officer that you will return to your home country after your studies. |
Once you have these foundational requirements sorted, you're in a great position to move forward. Each piece of paper plays a vital role in building your case and showing the visa officer that you're ready for your Canadian educational journey.
Proving You're Eligible for a Canadian Study Permit

Getting your Canadian study permit isn't just a matter of filling out forms. Think of it as building a case for yourself, where every single document tells a crucial part of your story. The visa officer needs to see clear proof that you've been accepted into a good school, but more importantly, they need to be convinced that you're a genuine student who plans to follow the rules and respect Canada's immigration laws.
The whole thing boils down to credibility. Your application has to paint a clear, believable picture from beginning to end. Let's break down the essential pieces you need to put together to build that convincing case.
Securing Your Spot at a Designated Learning Institution
First things first, you absolutely must be accepted into a Canadian school. But not just any school will do. It has to be a Designated Learning Institution (DLI), which is simply a school that has been officially approved by a provincial or territorial government to welcome international students.
Your official proof is the Letter of Acceptance (LOA). This document is your golden ticket—it's the foundation that the rest of your application is built on. Without a valid LOA from a DLI, your application is a non-starter.
Your LOA is much more than a simple admission notice. It’s a formal invitation from a Canadian school that tells the government you have a legitimate academic reason to be in Canada.
Before you even start worrying about bank statements or other paperwork, your very first move should be to double-check that your chosen school is on the official DLI list from Immigration, Refugees and Citizenship Canada (IRCC). Taking a minute to verify this can save you a world of trouble later on.
Showing You Plan to Return Home
This is a big one, and it's where a lot of people get tripped up. A Canadian study permit is temporary, and you have to prove to the visa officer that you fully intend to leave Canada once your permit is up. This is what's known as proving your ties to your home country.
Think of these ties as anchors. They are the connections that pull you back home and show the officer you have strong reasons to return after you've finished your studies. Strong ties can include things like:
- Family: Having a spouse, children, or elderly parents who rely on you and are staying behind.
- Property: Owning a house, land, or other significant assets back home.
- Job Prospects: Having a clear career path waiting for you in your home country—one that your Canadian degree will directly improve.
Proving this "intent to return" is critical. You can explain these ties in detail within your Statement of Purpose (SOP), drawing a direct line from your Canadian education to your future career goals back home. For Nigerians putting together their applications, getting the bigger picture on relocation can be a big help. Our guide on how to https://blog.japachat.com/relocate-to-canada-from-nigeria-3/ offers more context on building a strong case.
The New Provincial Attestation Letter Requirement
There's a new, and very important, piece of the puzzle you need to know about: the Provincial Attestation Letter (PAL). This requirement was brought in at the start of 2024. A PAL is a letter you get from the province or territory where your school is located, and it basically confirms you have a place under that province's specific cap for international students.
For most students applying for undergraduate or college programmes, this letter is now mandatory. It works as an extra layer of confirmation, making sure the number of students coming in matches what the province can actually support. You don't apply for it yourself; your DLI will guide you on getting it after you've accepted their offer. It's a key document you'll need to submit right alongside your LOA, and it makes your academic plans look even more solid.
A Big Change for 2024: Understanding the Provincial Attestation Letter
The world of Canadian student visas got a major shake-up in early 2024. If you've been researching your application, you've likely heard about a brand-new, absolutely critical document: the Provincial Attestation Letter, or PAL.
Think of it like this: your letter of acceptance from a Canadian school gets you to the front door, but the PAL is the special key that proves the province has saved a spot just for you. This new system was rolled out because Canada wants to make sure its provinces can comfortably support the international students they welcome. For most people applying for undergraduate degrees or college diplomas, getting a PAL isn't optional—it's a must-have.
This image really helps to visualise where the PAL fits in. It’s a core piece of the puzzle, right alongside your acceptance and proof of funds.
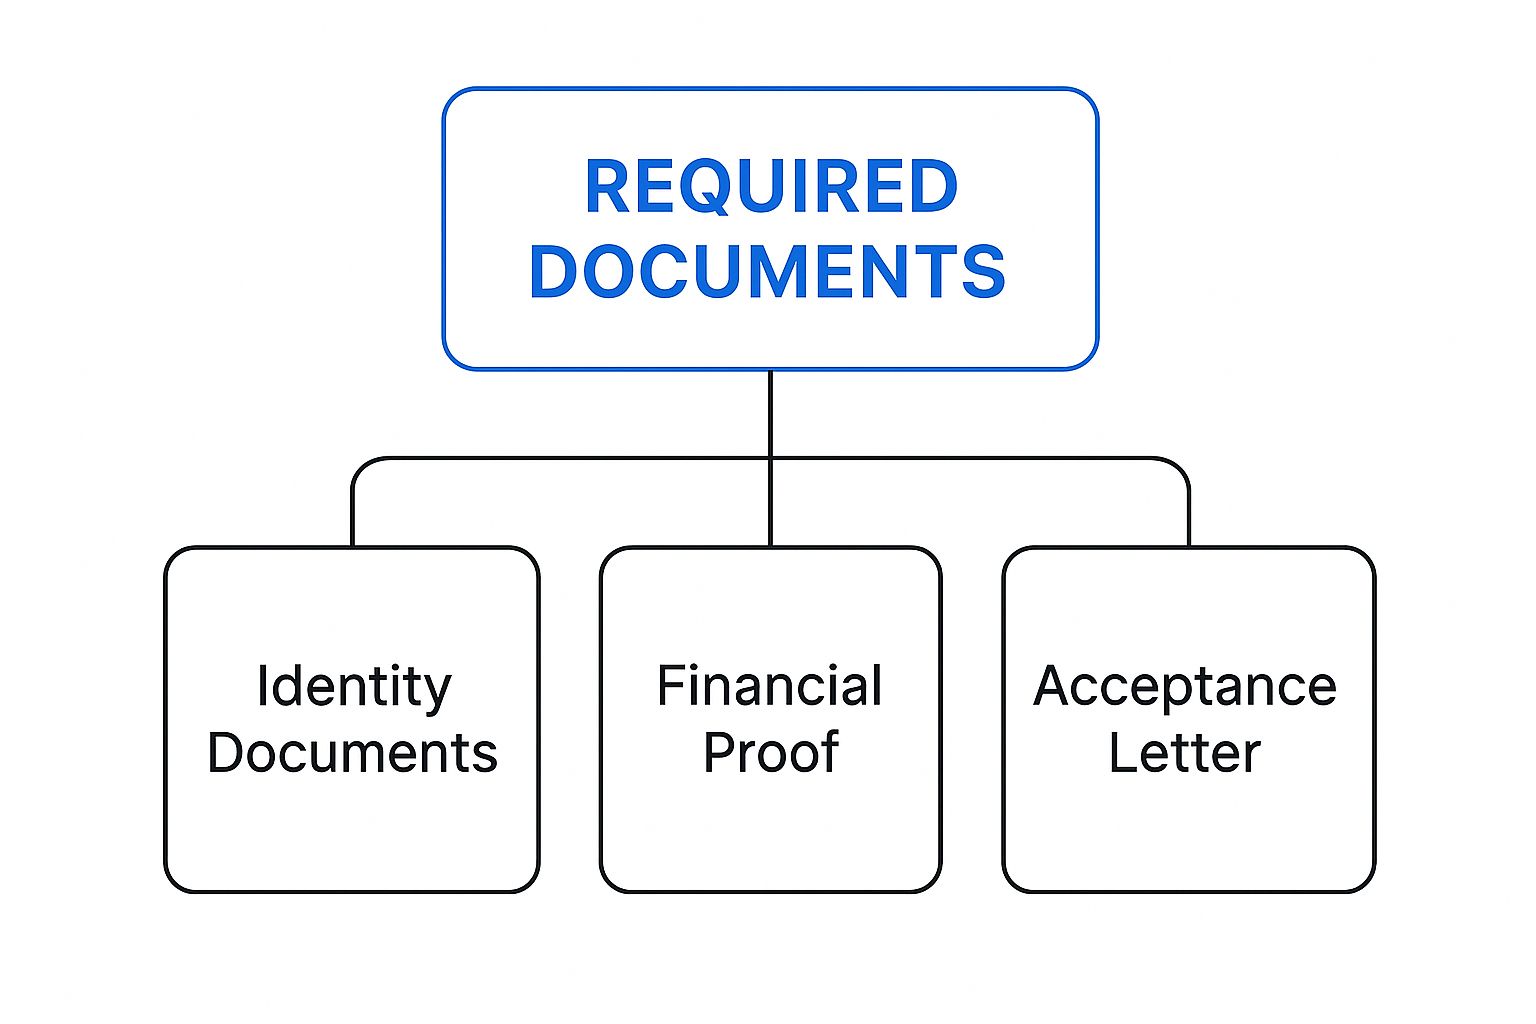
As you can see, a strong application is built on these essential pillars. The PAL now acts as a crucial bridge connecting your school's approval with the government's final green light.
Why Your Choice of Province Matters More Than Ever
Canada's new student cap isn't a one-size-fits-all number. Each province and territory gets its own specific quota, based on things like population and how many students their infrastructure can handle. This has completely changed the game, making where you apply almost as important as what you apply for.
For example, hugely popular provinces like Ontario and British Columbia saw their numbers cut, which means the competition there is now incredibly fierce. On the flip side, provinces like Newfoundland and Labrador actually got more spots, opening up new opportunities. For applicants from Nigeria, this new reality means being strategic about where you apply is non-negotiable.
"The PAL system forces applicants to think beyond just their dream school and start looking at the bigger provincial picture. A fantastic application to a school in a province with more room might just have a better shot than one in a province that's already overflowing."
It's a new layer of strategy. You have to balance your academic ambitions with the hard numbers of these provincial quotas.
How Do I Get a Provincial Attestation Letter?
Here’s the good news: you don’t have to navigate a confusing government website to get your PAL. Your school does the heavy lifting for you.
The process is refreshingly simple on your end.
- Accept Your Offer of Admission: First things first, you need to be accepted by a Designated Learning Institution (DLI) and formally accept their offer.
- Pay Your Tuition Deposit: To lock in your spot, you'll almost certainly need to pay a tuition deposit.
- Your School Takes Over: Once you've paid, the DLI will go to its provincial government and request the PAL on your behalf.
- Receive Your PAL: The school will then send the official PAL directly to you.
You must submit this letter with your study permit application. If your application requires a PAL and you don't include it, it will be returned without being processed. No exceptions.
Who Doesn't Need a PAL?
While the PAL is a huge change, it doesn't apply to everyone. It's vital to know if you're exempt to avoid any unnecessary panic. You generally do not need a PAL if you are applying for:
- A master's or doctoral (PhD) degree programme.
- Primary or secondary school (from kindergarten through to grade 12).
- A programme as a visiting or exchange student.
These groups are exempt because they aren't counted as part of the new national cap. If you're in one of these categories, your application process will look much like it did before these changes were introduced.
The PAL system has definitely added a new hurdle, especially for Nigerian students aiming for competitive undergraduate courses. Looking ahead, Canada plans to issue 437,000 study permits in 2025, which is a 10% drop from 2024, as part of its plan to manage student numbers. This has had a real impact, with provinces getting very different allocations. For instance, Newfoundland and Labrador’s allocation nearly tripled, while Ontario's was reduced. Graduate students are also now required to have a provincial attestation letter, with at least 12% of permits reserved for them, which adds another layer for those pursuing master's or PhDs in popular provinces. You can learn more about what to expect by checking out Canada's 2025 study permit forecast on ApplyBoard.
Mastering the Financial Requirements for Your Visa
Let’s talk about money. Proving you have enough funds for your studies is more than just ticking a box; it's arguably the most critical part of your student visa application. You can have a stellar academic record and an acceptance letter from a top university, but if your financial story doesn't add up, the whole application can fall apart.
This is where so many applicants get tripped up. It’s not just about having the money. You have to present it in a way that’s crystal clear, logical, and completely trustworthy to the visa officer reviewing your file. Your mission is to paint a financial picture that leaves no room for doubt.
Understanding the New Cost-of-Living Threshold
First things first, you need to know your target number. As of 2024, Immigration, Refugees and Citizenship Canada (IRCC) raised the cost-of-living requirement quite a bit. They did this to make sure students arriving in Canada can actually afford to live here without facing major financial stress.
For a single applicant, you now have to show you have $20,635 just for your living expenses for the first year. Here's the important part: this amount is in addition to your full tuition fees for that first year.
This new threshold isn't a suggestion—it's a hard rule. Coming in even a little short of this exact amount is one of the fastest routes to a refusal. So, you absolutely must plan your finances around this specific number.
Building Your Proof of Funds Portfolio
The good news is that you don't have to show all this money from a single source. You can—and often should—combine different documents to build a strong, convincing financial portfolio. The golden rule here is transparency; every dollar needs a clear paper trail.
Here are the most common and effective ways to show your funds:
- Personal Bank Statements: You’ll need to provide official bank statements, usually covering the last four to six months. These statements need to show a consistent, stable balance that meets the requirement.
- Guaranteed Investment Certificate (GIC): This is a fantastic option, and one that visa officers really like to see. You buy a GIC from a Canadian bank for $20,635. It basically proves your living expense money is already in Canada, secure and ready for you.
- Sponsorship or Scholarship Letters: If your parents or another family member are funding your studies, you'll need their bank statements, a formal letter of sponsorship, and proof of your relationship. Similarly, an official letter confirming a scholarship award is excellent financial evidence.
For a more detailed breakdown on putting these documents together, take a look at our complete guide on how to prepare your https://blog.japachat.com/proof-of-funds-canada/.
Avoiding Common Financial Pitfalls
Visa officers have seen it all, and they are trained to spot inconsistencies. Certain financial moves can look like red flags, damaging your credibility even if you technically have the funds.
One of the biggest mistakes is a large, sudden deposit into your bank account right before you apply. This immediately makes an officer wonder where that money came from and if it's really yours to use. Every large sum needs a clear, documented history.
As you get your finances in order, it helps to understand different savings tools. For instance, you could look into the basic concepts of Certificates of Deposit, a common savings product that demonstrates financial planning and stability. By organising your money smartly and presenting it clearly, you build a powerful case that you're a responsible student who is genuinely ready to succeed in Canada.
Your Step-by-Step Guide to a Flawless Application
You’ve got your acceptance letter in hand and your financial proof sorted. Now comes the most critical part of your entire journey: putting it all together into a polished application. I know this can feel like a massive task, but if you break it down into clear, manageable steps, it becomes much less stressful and completely achievable.
Think of this section as your personal walkthrough. We'll go through gathering your documents, writing a statement that truly stands out, navigating the official online portal, and understanding what to expect after you hit 'submit'. Let's build your application, one piece at a time.
The Definitive Document Checklist
Before you even think about filling out a single form, your first job is to gather every single document you need. Honestly, one of the most common reasons an application gets delayed or even refused is because of a missing or incorrect document. It's like trying to cook a meal without all the ingredients; get everything ready first, and the rest of the process will be so much smoother.
Here’s what your essential document package must include:
- Valid Passport: Make sure your passport is valid for your entire planned stay in Canada. No exceptions.
- Letter of Acceptance (LOA): This is the official acceptance letter from your Designated Learning Institution (DLI).
- Provincial Attestation Letter (PAL): The new mandatory letter from the province that confirms your study spot (unless you're exempt).
- Proof of Financial Support: Your full financial portfolio, whether that's bank statements, a GIC certificate, or sponsorship letters.
- Statement of Purpose (SOP): A well-crafted letter that explains your academic goals and, crucially, your intention to return home.
- Medical Examination Confirmation: The document from a panel physician confirming you’ve done your medical exam, if it's required for you.
Crafting a Winning Statement of Purpose
Your Statement of Purpose (SOP) is your one chance to speak directly to the visa officer. It’s so much more than a formal letter; it's your story. This is where you connect all the dots for them, explaining why you chose this specific programme, why Canada, and most importantly, why you will return to your home country after you graduate.
A powerful SOP clearly links your Canadian education to your future career goals back home. For instance, instead of just saying you want to study business, explain how a specific marketing programme in Canada will give you the exact skills needed to land a role at a growing tech firm in Lagos. This shows real intent and a well-thought-out plan.
Your SOP is the human element of your application. It’s where a visa officer moves beyond the paperwork and gets a sense of who you are and what your ambitions are. Make it personal, clear, and convincing.
Navigating the IRCC Application Portal
Once all your documents are scanned and ready to go, it’s time to tackle the online application itself. You'll need to create an account on the official Immigration, Refugees and Citizenship Canada (IRCC) website. The process is a series of straightforward steps.
- Create Your Online Account: First, register for an account on the IRCC secure portal. This is your personal dashboard for the entire process.
- Fill Out the Application Forms: Answer every question in the digital forms completely and truthfully. Double-check every single detail—small typos can cause big delays.
- Pay the Fees: You'll need to pay two separate fees online: the application processing fee (CAD 150) and the biometrics fee (CAD 85). Keep in mind these fees are non-refundable.
- Upload Your Documents: Carefully upload all your prepared documents according to the specific checklist provided in your portal.
- Submit Your Application: Take a deep breath, give everything one final review, and then hit submit.
Shortly after submitting, you'll get instructions on how to schedule your biometrics appointment at a nearby Visa Application Centre (VAC). This is where they take your fingerprints and photograph. Making sure you understand the full scope of the Canada student visa requirement is absolutely key to a smooth submission.
What Happens After You Submit
Hitting that 'submit' button can feel a bit strange, almost like an anti-climax, but the journey isn't over. You can track your application's status through your IRCC online account. Processing times can vary a lot depending on your country and how many people are applying, so patience is key here. Once a decision is made, you'll be notified. If you're approved, you will receive instructions on how to get your passport stamped with your visa—the final green light for your Canadian adventure.
How to Overcome Common Application Hurdles
Even if you’ve meticulously prepared your student visa application, you can still run into unexpected problems. I've seen it happen many times. The best way to avoid this is to understand what those common challenges are before you apply. This lets you build a case that directly answers any questions a visa officer might have.
Many applications get rejected for the same few reasons. When you know what these red flags are, you can get ahead of them. You can turn a potential weakness into a strength, proving you're a serious applicant who has thought everything through.
Addressing Key Visa Officer Concerns
Try to think like a visa officer for a moment. Their job is essentially to assess risk. They're trained to spot anything that doesn't quite add up or casts doubt on your primary intention: to study in Canada. For many applicants, especially from Nigeria, two of the biggest hurdles are proving you have enough money and showing you have strong reasons to return home.
To get past these, your evidence needs to be crystal clear and convincing.
-
Financial Scrutiny: It's not enough to just show the minimum required amount. You need to tell a story with your bank statements. If there are any large, unusual deposits or withdrawals, explain them. A well-funded Guaranteed Investment Certificate (GIC) is also a fantastic tool because it proves your living expenses are already safely parked in a Canadian bank.
-
Proving Ties to Home: This is all about demonstrating that you have a life and responsibilities waiting for you back home. It's what convinces the officer you'll leave Canada after your studies. This could be property you own, family members you support, or a clear career path that your Canadian education will directly benefit. Your Statement of Purpose is the perfect place to connect these dots.
A visa officer is looking for a logical story. If you state your goal is to get a Canadian project management degree to help run your family's construction business back home, you're building a believable narrative that demonstrates clear intent to return.
Navigating Policy Shifts and Processing Delays
It’s important to remember that the visa requirements for a Canada student visa aren't set in stone. They change. Recently, policy updates have created new hurdles, causing approval rates to fluctuate and adding a layer of uncertainty for many students.
Nigeria, for example, has seen a pretty significant drop in study permit approvals lately. This is partly a reaction to new Canadian policies and a much stricter review process. In fact, applications from Nigeria dropped by about 35% between 2023 and 2024, and getting an approval has become tougher. Things like the new Provincial Attestation Letter (PAL) system, ongoing processing delays, and changes to post-graduation work permit rules are all playing a role. You can read a full analysis of how Canada faces international student drops on The PIE News.
Knowing about these external pressures is critical. It means your application can't just be good; it needs to be exceptional to get noticed. Always apply well before any deadlines to leave a buffer for delays, and triple-check every single document for accuracy. By preparing for these obstacles, you give yourself the best possible shot at success.
Frequently Asked Questions About Canada Student Visas
Getting into the nitty-gritty of a student visa application can feel a bit overwhelming, and it's natural to have questions pop up along the way. To clear things up, we've tackled some of the most common queries we see from aspiring students.
What Is the Difference Between a Study Permit and a Student Visa?
It’s incredibly common for people to mix these two up, but they play very different roles in your journey to study in Canada. Think of it this way: your student visa gets you to the door, while your study permit lets you stay for the party.
A study permit is the official document issued by the Canadian government that gives you the legal right to study at a Designated Learning Institution (DLI). This is the core document that confirms your status as a student in Canada.
The student visa (also known as a temporary resident visa or TRV) is the sticker or stamp in your passport that allows you to travel to and enter Canada. For citizens of certain countries, this might be an Electronic Travel Authorization (eTA) instead. The good news is you usually apply for both at once; when your study permit application gets the green light, the visa or eTA you need to enter the country is issued along with it.
Can I Work in Canada on a Student Visa?
Absolutely, and this is a major perk for many international students. If you're a full-time student at a DLI with a valid study permit, you're generally allowed to work without needing a separate work permit. Your study permit itself will state whether you’re eligible to work off-campus.
Typically, you can work up to 20 hours per week while classes are in session. This is a great way to gain valuable Canadian work experience and help cover some of your day-to-day expenses. During scheduled breaks, like your summer or winter holidays, you can usually work full-time.
It's crucial to understand that this work is meant to supplement your funds, not be your main source of income. The visa officer needs to see that you can already cover your tuition and living costs without relying on this potential job.
How Long Does It Take to Process a Canadian Student Visa?
This is the million-dollar question, and the honest answer is: it varies. A lot. Processing times can be anywhere from a few weeks to several months, depending heavily on which country you’re applying from and how many applications the local visa office is handling at that moment.
The best thing you can do is check the official Immigration, Refugees and Citizenship Canada (IRCC) website for the latest processing time estimates for your country. My best advice? Apply as early as you possibly can. This gives you a buffer against unexpected delays and helps ensure you don't miss your school's start date.
Figuring out your move to Canada can feel like a puzzle, but you don’t have to solve it alone. JapaChat is Nigeria’s AI immigration expert, built to provide instant, reliable answers to all your visa and relocation questions. Start planning your journey with the clarity and confidence you deserve. Sign up for free at JapaChat.
Leave a Reply